

Unlocking Flavor: The Art and Science of Sous Vide Cooking
Sous vide transforms ordinary ingredients into reliably excellent dishes by controlling temperature precisely and consistently. Experienced cooks use this method to hit exact doneness and maintain moisture, texture, and flavor across the entire protein.
- Unlocking Flavor: The Art and Science of Sous Vide Cooking
- Mastering Temperature Precision for Perfect Texture and Taste
- Prep, Yield, Time and Difficulty
- Ingredients
- Step-by-Step Instructions
- Chef’s Notes and Practical Tips
- Serving Suggestions
- Nutrition and Yield
- Techniques for Infusing Flavors Deeply and Uniformly
- Essential Equipment and Food Safety Practices
- Q&A
- What exactly is sous vide cooking?
- Why is it considered both an art and a science?
- How does sous vide unlock flavors that conventional cooking can’t?
- Can tough cuts become tender with sous vide?
- What do beginners need to start?
- Closing Notes
- Precision matters: small temperature changes produce predictable texture shifts.
- Vacuum contact: seals allow aromatics to penetrate proteins efficiently.
- Finish for flavor: a quick sear delivers Maillard reaction complexity.
Mastering Temperature Precision for Perfect Texture and Taste
Temperature sets the outcome in sous vide cooking; it defines texture more than time alone. For example, a steak held at 129°F (54°C) becomes evenly medium-rare from edge to edge with no overcooked band.
Therefore, invest in a reliable immersion circulator with stable PID control and accurate calibration. This approach reduces variability, so you reproduce results every time and build skill quickly.
Prep, Yield, Time and Difficulty
Plan your schedule around the cook time and finishing step: most steaks need 1 to 4 hours depending on thickness and desired tenderness. Prep time stays short; seasoning and bagging take about 15 minutes for a standard portion.
This recipe serves four and rates as medium difficulty because it combines low-temperature technique and a high-heat finish. However, step-by-step execution keeps the process accessible to committed home cooks.
Ingredients
Use quality inputs for predictable results: well-marbled beef, fresh herbs, and food-safe bags make a measurable difference. Below are the ingredients for a four-serving rib-eye dish that showcases sous vide strengths.
Adjust seasoning and aromatics to taste, and scale time only by thickness rather than by weight.
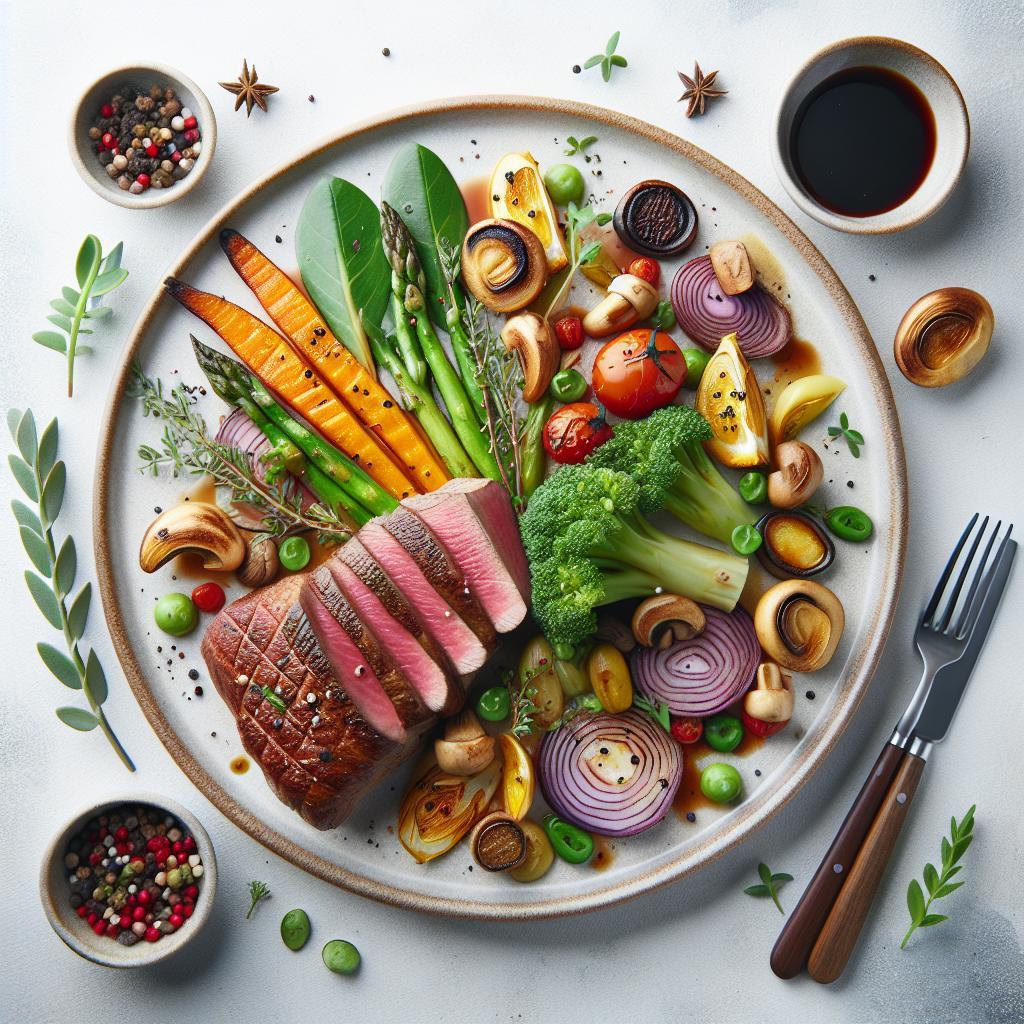
- 4 boneless rib-eye steaks, each ~8 oz and 1 inch thick
- 2 tbsp olive oil, extra virgin for finishing
- 4 sprigs fresh rosemary
- 4 cloves garlic, smashed
- 1 tsp kosher salt
- ½ tsp freshly ground black pepper
- 2 tbsp unsalted butter, for searing
- Vacuum seal bags or high-quality ziplock bags
Step-by-Step Instructions
Follow this workflow to get consistent results: season, seal, cook, dry, and finish. Each phase controls moisture and flavor differently, so treat them as distinct operations.
Use the water displacement method if you lack a vacuum sealer, and always check for leaks before you start the bath.
- Season the steaks evenly on both sides with kosher salt and freshly ground black pepper to enhance natural flavors.
- Place each steak in a vacuum seal bag with one sprig of fresh rosemary and one smashed garlic clove, then vacuum seal or remove air using the water displacement method.
- Fill the sous vide bath and preheat to 129°F (54°C) for medium-rare, or adjust temperature to your preferred doneness.
- Submerge sealed bags so they are fully under water with no air pockets; cook for a minimum of 1 hour, up to 4 hours for added tenderness.
- Remove steaks from the bags and pat them very dry with paper towels to ensure a proper sear and crust development.
- Heat a heavy skillet until very hot, add olive oil and butter, then sear steaks about 45–60 seconds per side with the garlic and rosemary for aroma.
- Rest steaks for 5 minutes before slicing to let juices redistribute for a juicier bite.
Chef’s Notes and Practical Tips
Small adjustments to temperature change texture predictably, so refine targets in 2°F (1°C) steps while you experiment. Keep a log of temperature, time, and final texture to build repeatable knowledge.
Use coarse salt sparingly before sealing if you plan to hold the steak for many hours to avoid over-salting; instead, finish with a small sprinkle post-sear.
- For deeper aromatics, add a splash of dry white wine or a small amount of citrus zest inside the bag before sealing.
- Plan your finish: a cast-iron skillet or hot grill produces the best crust in under a minute per side.
- Cook vegetables separately at appropriate temperatures; for example, carrots respond well to longer cooks that soften fibers without losing sweetness.
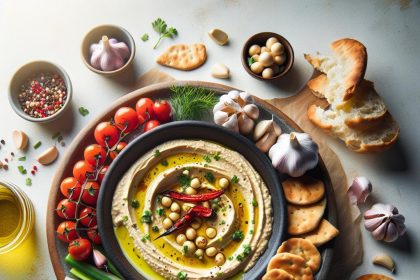
Serving Suggestions
Plate the rib-eye with a vibrant salad and a textural starch to balance richness. A bright lemon vinaigrette on bitter greens complements the fat and intensifies perceived freshness.
Finish each steak with a pat of butter and a sprig of rosemary for aroma and presentation. Also consider resting time before slicing to preserve juices and texture.
Nutrition and Yield
The nutrition below reflects a single serving from the recipe and helps with portion planning. Use it as a guideline rather than a precise label for packaged food.
Adjust portions and sides to match caloric goals or dietary restrictions while preserving technique and timing.
| Nutrient | Per Serving |
|---|---|
| Calories | 450 kcal |
| Protein | 40 g |
| Carbohydrates | 1 g |
| Fat | 32 g |
Techniques for Infusing Flavors Deeply and Uniformly
Vacuum contact drives flavor transfer; when herbs and aromatics lie against protein in an air-free bag, oils and volatiles penetrate tissue more effectively. For an overview of the method, see sous-vide on Wikipedia.
Also, the slow heat allows enzymatic and chemical reactions that boost complexity without high-heat damage. Apply aromatics evenly and avoid bulky items that block contact with meat.
Finally, finishing adds the missing dimension: the Maillard reaction produces browned, savory notes that sous vide alone does not. For the chemistry behind that crust, reference the Maillard reaction.
Combine low-temperature precision with a quick, hot finish to fuse evenness and flavor in one elevated plate.
Essential Equipment and Food Safety Practices
Choose a precision immersion circulator and stable container to maintain temperature and reduce evaporation during long cooks. Also, use food-grade vacuum bags or high-quality ziplocks and confirm seals to avoid contamination.
Follow established food-handling practices to minimize risk; brief chilling when holding cooked proteins prevents bacterial growth. For authoritative context on safe handling, consult Food safety guidance.
When possible, use vacuum packing to eliminate air and extend contact between aromatics and food. For background on vacuum methods, see vacuum packing.
After cooking, either serve immediately or rapidly chill in an ice bath and refrigerate; prolonged time in the temperature danger zone increases risk.
Q&A
Below are common, focused questions cooks ask as they adopt sous vide techniques. Each answer gives practical, tested guidance.
Refer to the Q&A to troubleshoot common issues and to refine timing and temperature choices for specific results.
What exactly is sous vide cooking?
Sous vide means ‘under vacuum’ and describes sealing food and cooking it in precisely controlled water. This method yields uniform doneness and retains moisture more effectively than many high-heat techniques.
Why is it considered both an art and a science?
It relies on scientific control of temperature to alter protein structure predictably. At the same time, cooks apply creative seasoning, timing, and finishing to craft final flavor and presentation.
How does sous vide unlock flavors that conventional cooking can’t?
Slow, low-temperature cooking reduces moisture loss and concentrates aromatics in the sealed bag. The result is a more pronounced and consistent taste from edge to edge.
Can tough cuts become tender with sous vide?
Yes. Long, low-temperature cooks break down collagen gradually while preserving moisture, producing tender results similar to braising but with less shrinkage.
What do beginners need to start?
Start with a reliable immersion circulator, a sturdy container, and a few ziplock bags. Practice with chicken or a steak at conservative time-temperature pairs, and finish with a hot pan sear for contrast.
Closing Notes
Sous vide rewards precision and patience, and it scales well from weeknight meals to professional production. Use the methodical approach described here to build consistent results quickly.
Test small adjustments, document outcomes, and combine low-temperature control with intentional finishing to produce dishes that consistently please the palate and the eye.
See also: sous vide


