Unlocking flavor with cedar planks brings a deeply aromatic dimension to grilled salmon that simply cannot be replicated by any other cooking method. Beyond imparting the unmistakable essence of wood smoke, cedar plank grilling wraps the fish in gentle heat, keeping it moist while infusing it with subtle herbal and resinous notes unique to the cedar. This technique, rooted in Indigenous North American cooking traditions, has become a beloved choice among culinary enthusiasts seeking to elevate their salmon to an extraordinary sensory experience.
Prep and Cook Time
Preparation: 30 minutes (including plank soaking) | Cook Time: 20-25 minutes | Total: 50-55 minutes
Yield
Serves 4 generously
Difficulty Level
Medium – Requires preparation and attentive grilling
Ingredients
- 1 cedar plank (approximately 12″ x 7″, untreated and food-grade)
- 4 salmon fillets (6 oz each, skin on)
- 2 tablespoons olive oil
- 1 lemon (zested and juiced)
- 2 cloves garlic, minced
- 1 tablespoon fresh dill, chopped
- 1 teaspoon sea salt
- ½ teaspoon freshly ground black pepper
- Optional: 1 teaspoon honey for a touch of sweetness
Instructions
- Choosing the Perfect Cedar Plank: Select a cedar plank labeled for food use-untreated and free of chemicals. Look for one about 12 inches by 7 inches to comfortably fit each salmon fillet. Thicker planks (about ½ inch) offer better heat retention and more aromatic smoke.
- Preparing and Soaking the Cedar Plank: Submerge the cedar plank in cold water for at least 30 minutes to prevent burning and promote a gentle steaming effect during grilling. For extra flavor, soak in a mix of water with a splash of white wine or lemon juice.
- Preheat the Grill: Lightly oil the grill grates and preheat to medium heat-approximately 350°F (175°C). Proper temperature ensures even cooking without flare-ups.
- Prepare the Salmon: Pat the salmon fillets dry with paper towels. In a bowl, whisk olive oil, lemon juice, garlic, dill, salt, pepper, lemon zest, and honey if using. Brush this mixture generously over the salmon.
- Ready the Cedar Plank on the Grill: Shake off excess water from the soaked plank and place it on the preheated grill. Wait about 2-3 minutes until the plank begins to emit fragrant cedar smoke.
- Place Salmon on the Plank: Arrange the salmon fillets skin-side down on the cedar plank. Close the grill lid and cook for 20 to 25 minutes, depending on thickness. The fish should flake easily with a fork but retain moistness.
- Finishing Touches: Remove the plank from the grill carefully (it will be very hot). Let salmon rest for 5 minutes on the plank to allow the juices to redistribute.
Tips for Success
- Plank Reuse: Cedar planks can be reused for a limited number of times (usually 2-3), but flavor intensity diminishes after each use.
- Wood Alternatives: If cedar is unavailable, try alder or maple planks for a different smoky profile.
- Checking Doneness: Use a meat thermometer-salmon is perfectly cooked at 125°F (52°C) for medium-rare, 145°F (63°C) for well done.
- Make-Ahead: Marinate salmon in the lemon-garlic mixture up to 2 hours ahead for deeper flavor penetration.
- Water Soak Variations: Adding herbs or citrus slices to soaking water enhances complexity in smoke aromas.
Serving Suggestions
Present your cedar plank grilled salmon directly on the wooden plank for a rustic, aromatic display. Garnish with sprigs of fresh dill, thin lemon wedges, and a drizzle of high-quality extra virgin olive oil. Pair it with a crisp cucumber dill salad or grilled asparagus to complement the smoky and citrusy notes. For a festive meal, serve alongside wild rice or roasted baby potatoes tossed in rosemary and thyme.

| Nutrient | Per Serving |
|---|---|
| Calories | 350 kcal |
| Protein | 34 g |
| Carbohydrates | 2 g |
| Fat | 20 g |
For further inspiration on grilling techniques and flavor layering, explore our Ultimate Grilling Guide. To deepen your understanding of cedar’s culinary role, visit the Smithsonian’s article on Indigenous Plank Cooking Traditions.
Q&A
Q: What is a cedar plank, and why is it used for grilling salmon?
A: A cedar plank is a thin, flat piece of aromatic cedar wood specifically designed for cooking. When soaked and placed on the grill, it imparts a subtle smoky sweetness to the salmon, infusing the fish with rich, natural flavors that elevate the dining experience beyond ordinary grilling.
Q: How does using a cedar plank change the taste of grilled salmon?
A: The cedar’s natural oils release a fragrant, earthy aroma as the plank heats up, which gently seeps into the salmon’s flesh. This process creates layers of flavor-smoky, slightly sweet, and woodsy-that harmonize perfectly with the fish’s delicate texture, turning each bite into a gourmet delight.
Q: Can I use any wood plank for grilling salmon, or is cedar special?
A: While many hardwoods can be used for grilling, cedar stands out because of its unique aromatic profile and the mild char it lends to fish. Unlike heavier woods like mesquite or hickory, which can overwhelm delicate flavors, cedar provides a balance that enhances rather than masks the salmon’s natural taste.
Q: What is the proper way to prepare a cedar plank before grilling?
A: Soak the cedar plank in water for at least an hour (sometimes up to three) before grilling. This prevents it from catching fire and allows the steam released during cooking to carry those coveted cedar-infused flavors into the salmon. Some chefs even soak their planks in wine, juice, or tea for a twist on the traditional scent.
Q: Does grilling salmon on a cedar plank affect its texture?
A: Absolutely! The plank acts as a gentle buffer between the fish and the grill’s high heat, promoting even cooking. This method helps the salmon retain moisture, resulting in a tender, flaky texture with a subtle crust that’s simply irresistible.
Q: Are cedar planks reusable, or are they a one-time use item?
A: Most cedar planks are intended for single use to ensure optimal flavor and safety. However, if taken care of properly-scrubbed clean and dried-they can sometimes be reused, though the aroma intensity diminishes. For the freshest flavor experience, new planks are recommended.
Q: Can cedar plank grilling be used for other types of food besides salmon?
A: Definitely! Cedar planks pair beautifully with other delicate proteins like trout, steelhead, or even chicken and vegetables. The wood’s signature flavor subtly enhances many dishes, making it a versatile tool for adventurous grillers aiming to unlock new layers of taste.
To Conclude
As the smoke curls gently around the tender salmon, infused with the rich, aromatic essence of cedar, it’s clear that this simple plank holds the key to a truly elevated grilling experience. Unlocking flavor with cedar planks isn’t just a cooking technique-it’s an invitation to connect with nature’s subtle artistry. Whether you’re a seasoned grill master or an adventurous home cook, embracing cedar planks transforms ordinary salmon into a memorable feast, where every bite tells a story of smoky sweetness and delicate warmth. So next time you fire up the grill, let the cedar plank guide your journey to flavor elevated beyond the flame.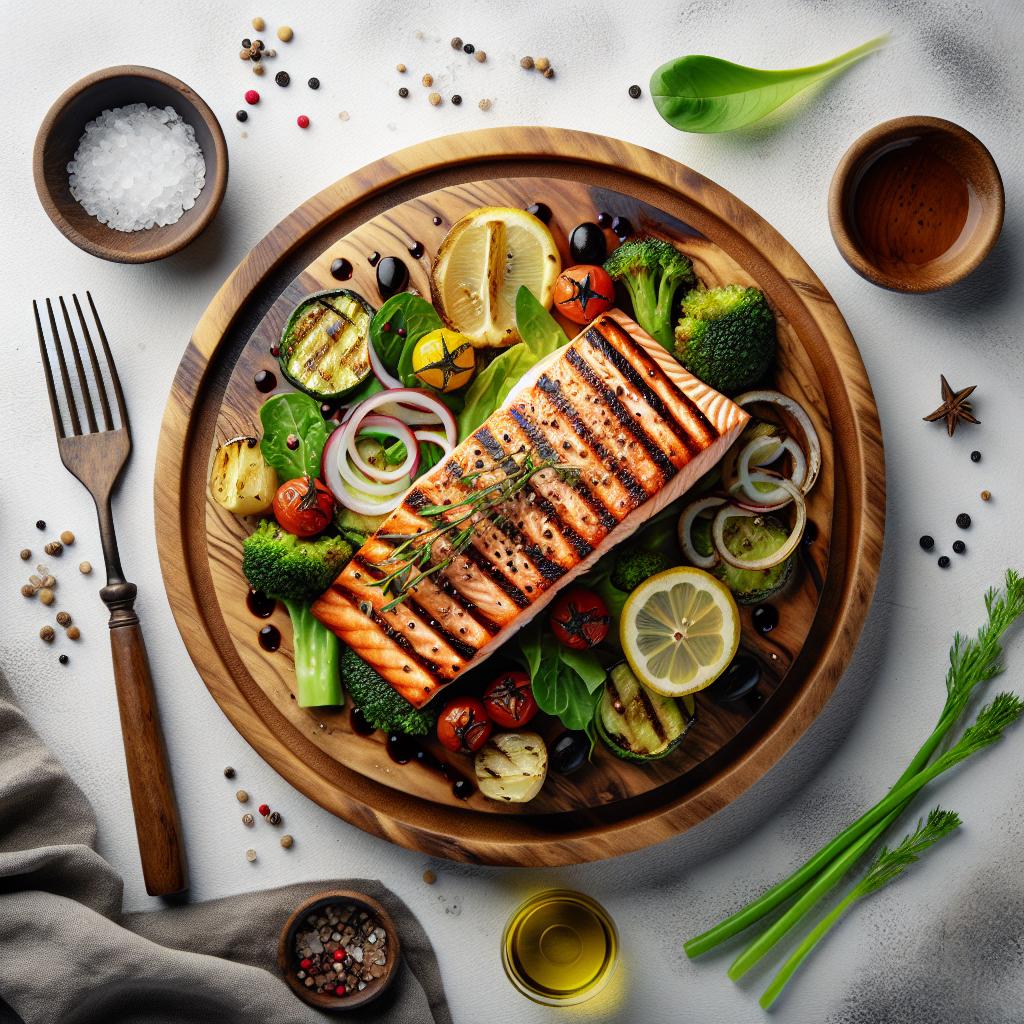
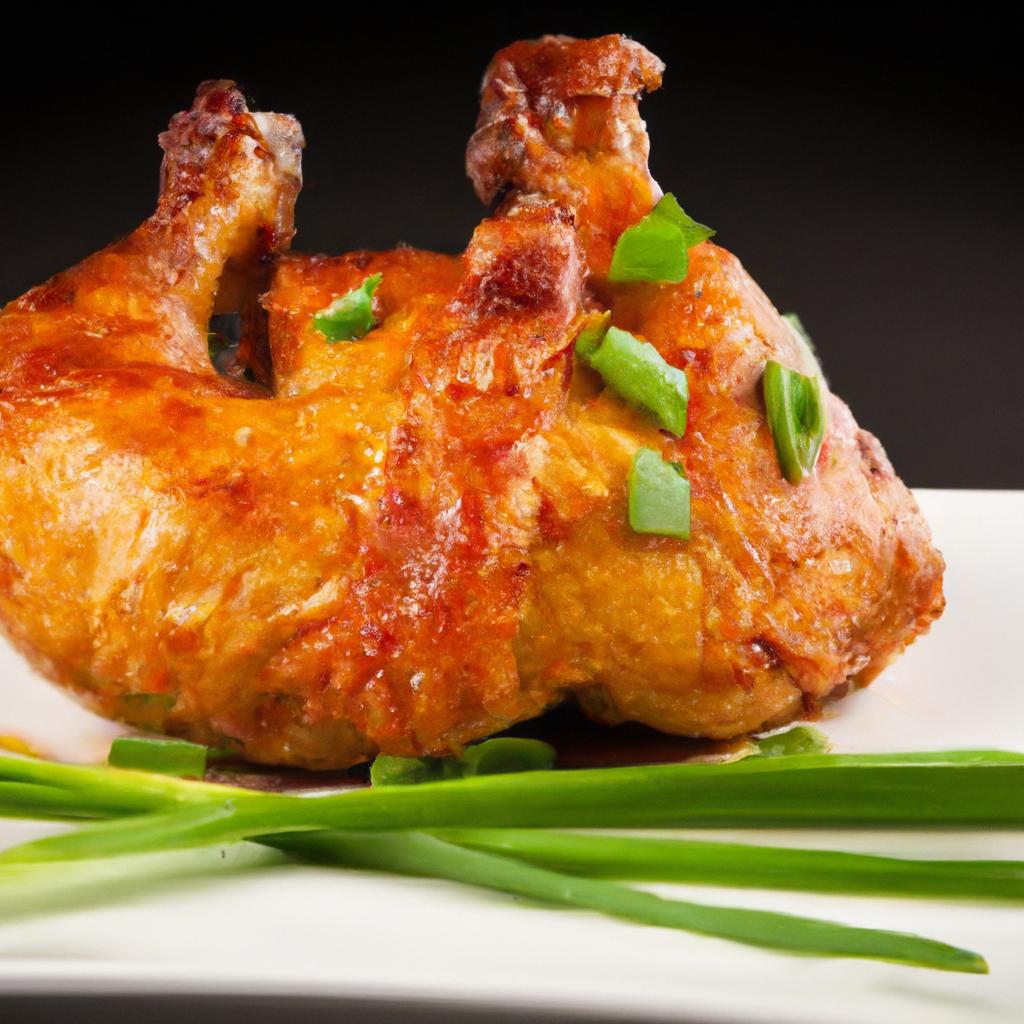
Unlocking Juicy Secrets: Why Your Grilled Chicken’s Dry
Unlocking juicy secrets: why your grilled chicken’s dry is the burning question for many home cooks passionate about perfecting outdoor cuisine. Grilling chicken is an art passed down through generations, celebrated for its smoky flavors and satisfying textures. However, nothing dims the joy of a barbecue more than dry, crumbly bites. Understanding the science behind moisture retention transforms this ordeal into triumph, empowering you to create tender, succulent chicken that steals the show at any gathering.
Prep and Cook Time
- Marinating: 30 minutes to 4 hours (depending on marinade choice)
- Grilling: 15-25 minutes
- Total Time: Approximately 45 minutes to 5 hours
Yield
Serves 4 people generously
Difficulty Level
Medium – A rewarding process that balances careful preparation with attentive grilling.
Ingredients
- 4 boneless, skinless chicken breasts (about 6 oz each)
- 1/4 cup olive oil
- 1/4 cup plain yogurt (for tenderizing; optional)
- 3 tbsp lemon juice (freshly squeezed)
- 3 garlic cloves, minced
- 1 tbsp honey or maple syrup (for a hint of sweetness)
- 1 tsp smoked paprika
- 1 tsp dried oregano
- 1/2 tsp salt
- 1/4 tsp freshly ground black pepper
- Optional: fresh herbs like thyme or rosemary
Instructions
- Prepare the marinade: In a medium bowl, whisk together olive oil, plain yogurt, lemon juice, minced garlic, honey, smoked paprika, oregano, salt, and black pepper. This blend combines acidity, fat, and aromatics to deeply flavor and retain moisture in the chicken.
- Marinate the chicken: Submerge the chicken breasts in the marinade, coating each piece evenly. Cover and refrigerate for at least 30 minutes or up to 4 hours for maximum juice retention. The acids gently break down proteins, tenderizing the meat without turning it mushy.
- Preheat your grill: Aim for medium-high heat, around 375-400°F (190-205°C). Create a two-zone fire by pushing coals to one side or adjusting burners if using gas-this allows searing then gentle finishing.
- Sear the chicken: Place the chicken breasts directly over the hot zone. Sear for 2-3 minutes on each side to develop a flavorful crust that locks moisture in.
- Finish cooking: Move the chicken to the cooler side of the grill to cook through gently, about 8-12 minutes, flipping halfway. Use a meat thermometer to check for an internal temperature of 165°F (74°C). This controlled cooking prevents drying.
- Rest the chicken: Remove from the grill, tent loosely with foil, and rest for at least 5 minutes. This crucial step allows juices to redistribute evenly, making each bite tender and flavorful.
- Slice and serve: Cut against the grain for extra tenderness and present on a platter garnished with fresh herbs.
Tips for Success
- Choosing the right marinade is a game changer. Opt for one containing fat (like olive oil) to coat the chicken and acid (citrus, yogurt, or vinegar) in moderation to avoid a dry, stringy texture.
- Avoid over-marinating-too long in acidic mixes can “cook” the meat prematurely and cause dryness.
- Preheating the grill ensures an instant sear, which is critical to sealing the meat’s juices inside.
- Always use a reliable meat thermometer for precision; guessing internal temperature is the biggest error leading to dryness.
- Resting is non-negotiable-skip it at your chicken’s peril.
- Try brining the chicken for a few hours before marinating; saltwater soaks increase moisture retention significantly.
Serving Suggestions
Present your grilled chicken with a burst of color and freshness: serve alongside grilled seasonal vegetables, a crisp green salad, or a zesty chimichurri sauce. Garnish with freshly chopped parsley, lemon wedges, or a sprinkle of smoked paprika for visual pop. For a comforting meal, pair with fluffy couscous or garlic mashed potatoes. Each addition complements the juicy, smoky profile and makes every bite memorable.

| Nutrient | Amount per Serving |
|---|---|
| Calories | 280 kcal |
| Protein | 35 g |
| Carbohydrates | 3 g |
| Fat | 12 g |
For further inspiration on grilling techniques, check out our Ultimate Guide to Grilling Techniques. Discover expert tips and recipes that complement your mastery of juicy chicken.
For scientific insights on meat cooking temperatures, visit the USDA Food Safety and Inspection Service official guidelines.
Q&A
Q&A: Unlocking Juicy Secrets – Why Your Grilled Chicken’s Dry
Q1: Why does my grilled chicken often end up dry and tough?
A1: Chicken is a lean meat-it has very little fat to keep it moist during cooking. Overcooking dries it out because the water inside evaporates and muscle fibers tighten. Grilling at too high a heat or cooking for too long are prime culprits behind that dreaded dryness.
Q2: Is the cut of chicken important for juicy grilling?
A2: Absolutely! Dark meat like thighs and drumsticks have more fat and connective tissue, staying juicy longer than lean breast meat. If you crave tender breast meat, you’ll need to go the extra mile with marination, brining, or precise cooking techniques.
Q3: How does marinating help in keeping grilled chicken juicy?
A3: Think of a marinade as a flavor-packed soak that also tenderizes and hydrates your chicken. Ingredients like acid (lemon juice, vinegar) break down muscle fibers slightly, while oils and spices lock in moisture and add that mouthwatering zing.
Q4: What’s the secret grilling technique to avoid dryness?
A4: Master indirect heat grilling and the art of “low and slow.” Start with searing over high heat for flavor and grill marks, then move your chicken to a cooler spot on the grill to finish cooking gently. Using a meat thermometer to hit the perfect internal temp (165°F or 74°C) prevents overcooking.
Q5: How does brining fit into the juicy chicken puzzle?
A5: Brining is a game-changer. Soaking your chicken in a saltwater solution pre-grill allows the meat to absorb and retain water during cooking. This extra hydration means even grilled breast meat stays succulent and tender.
Q6: Can resting grilled chicken really make a difference?
A6: Yes! Resting lets juices redistribute inside the meat rather than spilling out when you slice too soon. Give your chicken about 5-10 minutes off the grill under foil-this small wait earns big rewards in juicy bites.
Q7: Are there any grill-friendly recipes or hacks for super juicy chicken?
A7: Besides marinades and brines, try basting with butter, herb-infused oils, or even fruit juices while grilling. Wrapping chicken in foil “packets” traps steam and locks moisture. Also, cutting chicken into smaller pieces cooks evenly and reduces drying risks.
Unlock the juicy secrets, and your grilled chicken will never be dry or boring again! With a sprinkle of technique and a dash of patience, every bite will sing with flavor and succulence.
Closing Remarks
As you fire up the grill next time, remember: the secret to juicy grilled chicken isn’t just in the marinade or the spices-it’s in mastering the balance of heat, timing, and a little culinary intuition. Unlocking these juicy secrets transforms your everyday chicken from dry disappointment to smoky, tender perfection. So grab your tongs, trust your instincts, and get ready to savor every mouthwatering bite. Happy grilling!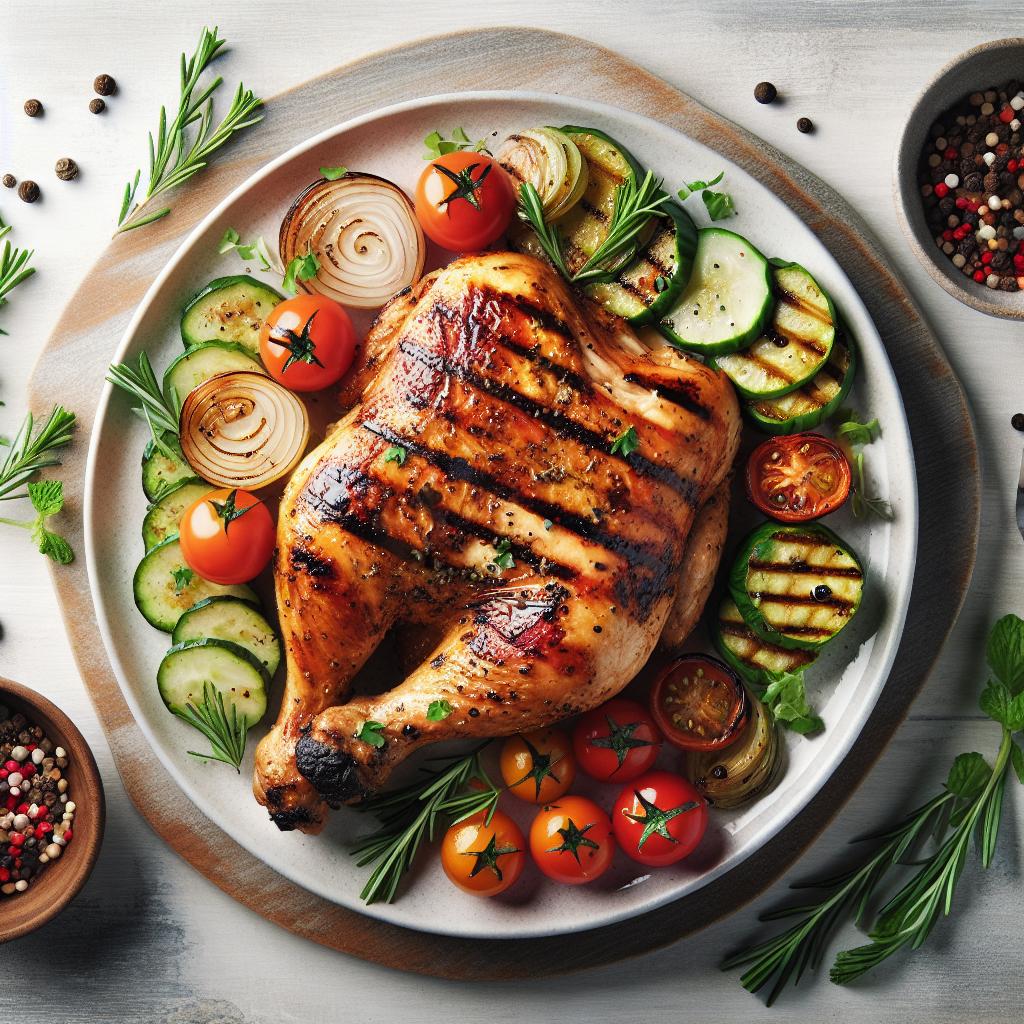
Grill Press Uncovered: The Secret to Perfectly Seared Meals
Unlocking the secrets of perfectly seared steaks and sandwiches has never been easier with a grill press. This culinary tool not only enhances flavor through even heat distribution but also transforms your cooking by maximizing Maillard reactions, the magical process that creates those irresistible crusts. Using a grill press, you can achieve restaurant-quality results without leaving your kitchen, elevating every meal with rich textures and bold taste.
Prep and Cook Time
- Prep Time: 10 minutes
- Cook Time: 8-12 minutes (depending on thickness and recipe)
Yield
Serves 2-4, perfect for intimate gatherings or family dinners.
Difficulty Level
Easy to Medium – Ideal for all home cooks eager to experiment with texture and flavor layering.
Ingredients
- 1 lb ribeye steak, about 1-inch thick, room temperature
- 1 tbsp olive oil
- 2 cloves garlic, smashed
- Salt and freshly ground black pepper, to taste
- 4 slices sourdough bread (if making sandwiches)
- Butter for spreading
- Optional: sliced cheddar cheese, fresh herbs (thyme or rosemary)
Instructions
- Preheat your grill press on medium-high heat while preparing your ingredients. A well-heated press guarantees an even sear.
- Season the ribeye steak generously with salt, pepper, and olive oil. For sandwiches, butter the outside of the bread slices lightly.
- Place the steak or sandwich on a preheated grill pan or cast-iron skillet.
- Press down firmly yet gently with the heated grill press. The even weight helps create uniform browning-hold for 4-6 minutes on the first side.
- Flip the meat or sandwich carefully, reposition the grill press, and continue cooking for another 4-6 minutes or until your desired doneness is reached.
- For steak: Add smashed garlic and herbs around the meat during the last 2 minutes to infuse aroma and deeper flavor.
- Remove from heat and let the steak rest for 5 minutes before slicing. For sandwiches, slice diagonally and serve warm.
Tips for Success with Your Grill Press
- Use a cast iron or stainless steel grill press for optimal heat retention and even weight distribution.
- Preheat the grill press for at least 5 minutes-temperature consistency is key to perfect searing.
- If your grill press has a handle, wrap it with a heat-proof sleeve to avoid burns.
- Press with gentle, even pressure-too much weight can cause juices to escape, leading to drier meat.
- For sandwiches, adding cheese under the grill press will create a beautifully melted, crispy crust.
- Always dry your steak or protein before seasoning; excess moisture impairs browning.
Serving Suggestions
Present your seared steak sliced against the grain, garnished with fresh thyme sprigs and a light drizzle of herb butter to add a glossy finish. Pair alongside grilled seasonal vegetables or a fresh arugula salad dressed with lemon vinaigrette. For sandwiches, serve with a crisp pickle and a side of homemade coleslaw for balanced textures.
| Nutrient | Per Serving |
|---|---|
| Calories | 450 |
| Protein | 38g |
| Carbohydrates | 15g |
| Fat | 28g |
Discover more tips on grill press basics and elevate your cooking game. For an in-depth look at Maillard reactions and heat science, visit Science of Cooking.

Q&A
Q&A: Grill Press Uncovered – The Secret to Perfectly Seared Meals
Q1: What exactly is a grill press and why has it become a kitchen essential?
A1: Think of a grill press as your culinary sidekick-a heavy, flat tool usually made of cast iron or stainless steel that presses down on your meats and veggies. It ensures maximum contact with the grill or pan, which means even heat distribution and those coveted, perfectly caramelized grill marks. In short, it’s the secret weapon for that irresistible sear and juicy interior.
Q2: How does a grill press improve the cooking process?
A2: The magic lies in pressure and heat. By pressing your food down, the grill press forces direct contact against the grill grates or pan surface, reducing cooking time and creating an impeccable crust. This pressure also helps render fat more efficiently, preventing flare-ups and boosting flavor while keeping your meal tender and succulent.
Q3: Are grill presses only for meat lovers?
A3: Absolutely not! While they’re fantastic for steaks, burgers, and chicken breasts, grill presses elevate veggies, sandwiches, and even tofu. Imagine a panini with perfectly crisp edges or zucchini slices with a delightful char-it’s the grill press that brings those textures to life.
Q4: What should I look for when choosing a grill press?
A4: Weight and material are key. Cast iron presses hold heat beautifully and add substantial weight for that firm press, while stainless steel options often heat up faster and are easier to clean. Also, consider a wooden or heat-resistant handle to protect your fingers from burns. Size matters too-choose one that matches your grill or pan dimensions.
Q5: Can a grill press be used on any grill type?
A5: Most definitely! Whether you’re wielding a backyard charcoal grill, a gas grill, or even cooking indoors on a stovetop griddle or skillet, a grill press fits right in. Just be mindful of heat levels and avoid non-stick surfaces if you want to preserve your press and cookware.
Q6: How do I maintain and care for my grill press?
A6: If you’ve got a cast iron grill press, seasoning it regularly is the secret to a natural non-stick surface and rust prevention. Stainless steel presses usually require just a gentle scrub and dry. Always cool your press before washing to avoid warping, and store it in a dry place to keep it in prime searing condition.
Q7: What’s the biggest mistake to avoid when using a grill press?
A7: Applying pressure too early or too hard can be a pitfall. Give your food a few moments to develop a crust before pressing, and don’t overload the press-let the weight do the work. Over-pressing can squeeze out precious juices, leading to dryness. Patience and balance are the secret ingredients to grilling bliss.
Q8: Why does using a grill press produce better flavor?
A8: It’s all about Maillard reaction-the chemical process that browns your food and unlocks deep, complex flavors. By maximizing surface contact and trapping heat, a grill press accelerates this reaction, creating that mouthwatering sear and smoky aroma that takes your meal from ordinary to extraordinary.
With a grill press in your toolkit, perfect searing isn’t just a hope-it’s a guaranteed delicious outcome. Ready to press your way to flavor heaven?
Closing Remarks
As the smoke of your perfectly seared meals fades and the sizzle quiets, the humble grill press stands revealed-not just as a kitchen accessory, but as the secret weapon behind those tantalizing grill marks and mouthwatering textures. Whether you’re aiming for that ideal crust on a steak, the crisp edge on a panini, or evenly cooked veggies bursting with flavor, the grill press transforms ordinary grilling into an art form. So next time you fire up the grill, remember: behind every flawless sear lies the steady weight of this unassuming tool, quietly elevating your culinary creations from simple to spectacular.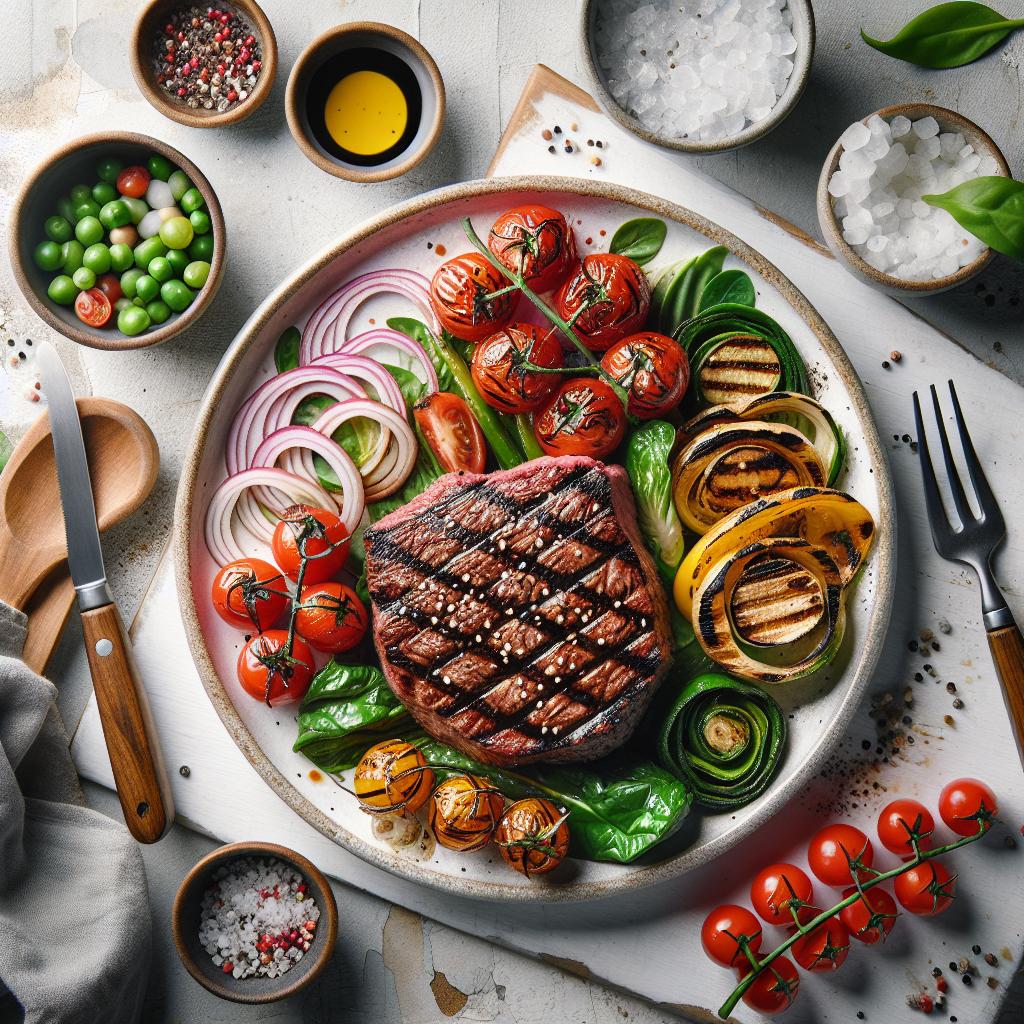
Marinades Unveiled: The Secret to Juicy, Flavorful Kebabs
Marinades Unveiled: The Secret to Juicy, Flavorful Kebabs starts with understanding how the balance of acids and oils can elevate your meat to new realms of succulence and depth. Kebabs, cherished from the Middle East to the Mediterranean, owe their irresistible flavor and tenderness to the artful chemistry hidden in their marinade. Whether you prefer lamb, chicken, beef, or even vegetables, mastering this foundational technique turns ordinary skewers into culinary masterpieces bursting with layered aromas and juicy bites.
Prep and Cook Time
- Preparation: 15 minutes (plus marinating time)
- Cooking: 10-15 minutes
- Total: 1 to 24 hours including marination
Yield
Serves 4 to 6, perfect for gatherings or family dinners.
Difficulty Level
Medium – Ideal for home cooks ready to refine their grilling skills.
Ingredients
- 1 lb boneless chicken thighs or lamb shoulder, cut into 1-inch cubes
- ⅓ cup extra virgin olive oil
- ¼ cup freshly squeezed lemon juice (acid)
- 3 cloves garlic, minced
- 1 tsp smoked paprika
- 1 tsp ground cumin
- 1 tsp ground coriander
- ½ tsp chili flakes (optional, for a hint of heat)
- ½ tsp sea salt
- Freshly ground black pepper to taste
- 2 tbsp chopped fresh parsley or cilantro
- Metal or soaked wooden skewers for grilling
Instructions
- Combine the Marinade: In a medium bowl, whisk together lemon juice, olive oil, minced garlic, smoked paprika, cumin, coriander, chili flakes, salt, and pepper until well emulsified. The acid from the lemon juice gently breaks down the protein fibers, creating tender meat, while the olive oil locks in moisture and carries aromatic flavors deep inside.
- Marinate the Meat: Add the cubed chicken or lamb to the marinade and toss to coat evenly. Cover with plastic wrap and refrigerate for at least 2 hours for smaller pieces or up to 24 hours for the deepest flavor infusion and maximum juiciness. Marinating too long can cause the meat to become mushy, so balance is key.
- Preheat Grill or Grill Pan: Bring the grill to medium-high heat. If using wooden skewers, soak them in water for 30 minutes before grilling to prevent burning.
- Thread the Meat onto Skewers: Alternate pieces with fresh vegetables like bell peppers, onions, or cherry tomatoes for added flavor and color.
- Grill the Kebabs: Place skewers on the hot grill and cook for 4-6 minutes per side, turning gently to avoid piercing the meat. Grill until well charred on the outside but still juicy inside.
- Rest and Garnish: Remove from heat and let the kebabs rest for 5 minutes to allow the juices to redistribute. Sprinkle with fresh parsley or cilantro before serving for a burst of fresh herbaceous brightness.
Expert Tips to Elevate Your Kebabs with Bold and Balanced Flavors
Marinades Unveiled: The Secret to Juicy, Flavorful Kebabs truly comes alive with attention to detail. Opt for fresh acids like lemon or yogurt over vinegars for a more subtle tang. Combining acids and oils creates a perfect medium – acids denature proteins for tenderness, oils trap moisture and carry fat-soluble flavors. Timing your marination is critical; under 2 hours won’t infuse enough flavor, while over 24 hours risks an undesirable texture.
Experiment by adding aromatics like fresh ginger or spices like turmeric for warmth. For a smoky profile, include a touch of smoked paprika or grill over charcoal. Remember, the goal is bold yet balanced flavors that complement the meat’s natural taste without overpowering it.
Chef’s Notes
- Substitutions: Swap chicken or lamb with beef sirloin or firm tofu for a vegetarian option.
- Make-Ahead: Prepare the marinade up to 24 hours in advance and keep chilled.
- Common Pitfall: Avoid overly acidic marinades beyond 24 hours to prevent mushy texture.
- Enhance Smokiness: Add a few drops of liquid smoke or char the skewers briefly over open flame.
- Resting is Key: Always allow grilled kebabs to rest covered loosely with foil before serving.
Serving Suggestions
Serve your kebabs alongside warm pita bread, a cooling yogurt-cucumber tzatziki, and a fresh tomato-cucumber salad. Drizzle extra lemon juice and sprinkle sumac or fresh herbs for visual appeal and a flavor boost. For an enticing presentation, plate kebabs on a wooden board with grilled vegetables and wedges of lemon for squeezing.

| Nutrient | Per Serving (approx.) |
|---|---|
| Calories | 260 kcal |
| Protein | 28 g |
| Carbohydrates | 2 g |
| Fat | 15 g |
For more inspiration, check our Grilled Kebabs Tips and learn advanced grilling techniques. Also, deepen your understanding of flavor chemistry at ScienceDirect Food Science: Marinades.
Q&A
Q&A: Marinades Unveiled – The Secret to Juicy, Flavorful Kebabs
Q1: Why are marinades essential for making perfect kebabs?
A1: Think of marinades as the flavor passport for your kebabs. They infuse the meat with a symphony of tastes while tenderizing it, ensuring every bite bursts with juiciness and complexity. Without a marinade, kebabs risk being dry and bland-missing that mouthwatering magic we crave.
Q2: What are the key ingredients that make a marinade effective?
A2: A successful marinade balances three pillars: acid, fat, and flavor. Acids like lemon juice, vinegar, or yogurt gently break down muscle fibers to tenderize. Fats, often olive oil or other oils, lock in moisture and help distribute flavors. Finally, fresh herbs, spices, garlic, and salt bring character and depth. This trio works in harmony to transform humble chunks of meat into succulent kebabs.
Q3: How long should kebabs marinate for optimal flavor and texture?
A3: Patience is a virtue in the world of marinades. For delicate proteins like fish or chicken, 30 minutes to 2 hours usually suffices. For heartier cuts like beef or lamb, overnight marination (up to 24 hours) allows complex flavors to deeply penetrate and the meat to tenderize beautifully. Avoid marinating too long, though, or the acid can start to “cook” the meat, making it mushy.
Q4: Can I create marinade magic without expensive or exotic ingredients?
A4: Absolutely! The best marinades often come from your own kitchen pantry staples. Lemon juice, olive oil, garlic, salt, pepper, and a sprinkle of dried herbs can create a delicious marinade. Don’t hesitate to experiment with what you have-sometimes simplicity breeds the most enchanting flavors.
Q5: What is a common mistake to avoid when marinating kebabs?
A5: Overcrowding the marinade or the skewers is a frequent trap. Each piece needs space to soak in the flavors evenly. Also, using too much acid or marinating for too long can overpower or break down the meat’s texture. Always keep an eye on balance-both in ingredients and timing.
Q6: How can I elevate my marinade to create unique and memorable kebabs?
A6: Dare to be bold with adventurous ingredients-smoky paprika, exotic spices like cumin or sumac, a touch of honey for sweetness, or a splash of soy sauce for umami depth. Freshness counts, too: adding chopped mint, cilantro, or parsley just before grilling can brighten every bite. The key is layering flavors and trusting your palate.
Q7: Is it necessary to discard the marinade after use?
A7: For food safety, never reuse marinade that’s been in contact with raw meat unless you boil it first to kill bacteria. However, preparing an extra batch reserved just for basting or dipping is a clever way to intensify flavor without risk.
Marinating kebabs isn’t just about flavor-it’s a transformative ritual that takes your grilling game from ordinary to extraordinary. Embrace the secrets of the marinade, and watch as your kebabs emerge juicy, tender, and bursting with unforgettable taste.
In Retrospect
As the sizzle of kebabs meets the grill’s fiery embrace, it’s clear that the magic begins long before the first skewer is turned. Marinades are more than just a prelude; they are the alchemy that transforms humble cuts into juicy, flavor-packed masterpieces. With the right blend of acids, oils, herbs, and spices, each bite tells a story of careful balance and bold experimentation. So next time you fire up the barbecue or prepare a quick weekday meal, remember that the secret to unforgettable kebabs lies in the marinade-where patience and passion mingle to unlock layers of taste waiting to be discovered. Embrace the art, savor the journey, and let your kebabs become legends of the grill.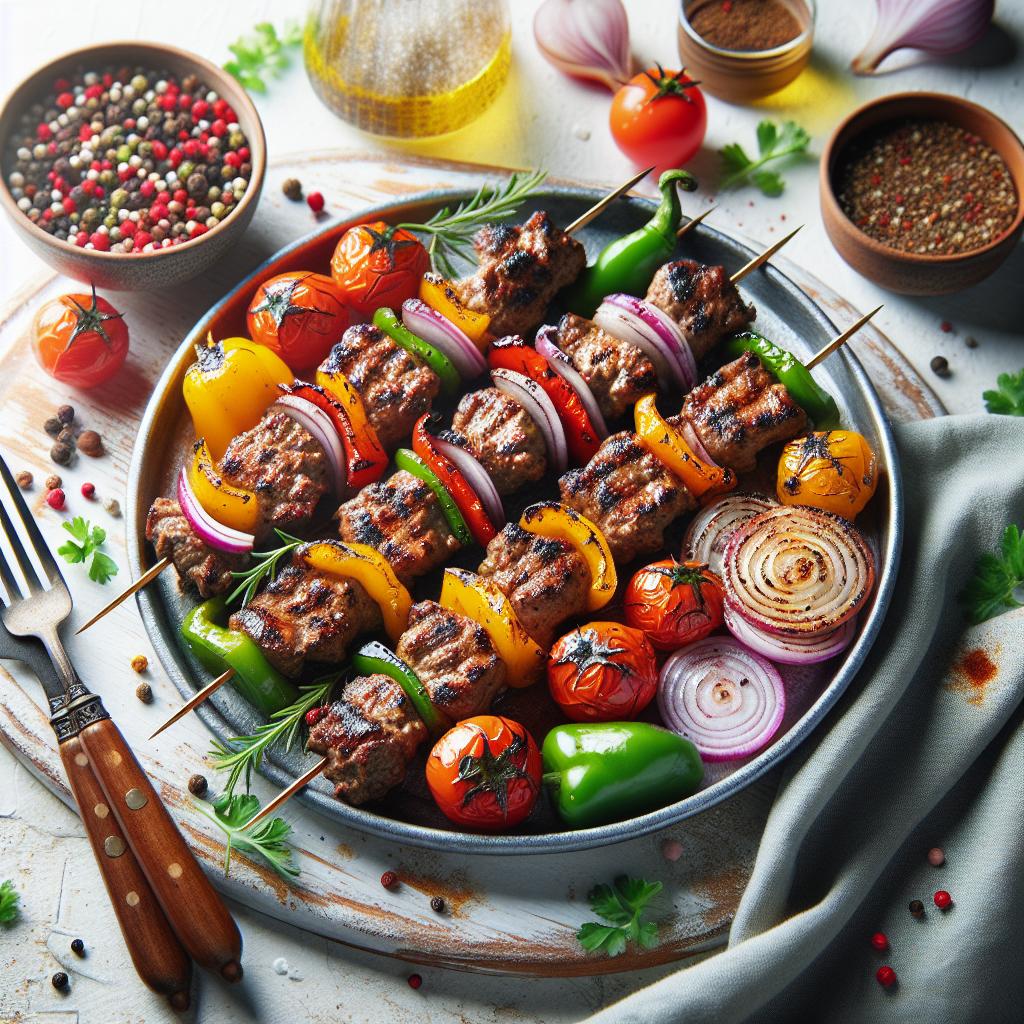
Mastering the Art: The Science Behind Perfectly Grilled Chicken reveals the transformative magic when chemistry meets culinary craftsmanship. The golden crust, juicy interior, and intoxicating aroma all hinge on understanding the Maillard reaction-a complex dance of amino acids and sugars creating incredible flavors and deep browns that captivate the senses. This knowledge guides each marinade choice, heat adjustment, and timing decision, ensuring every bite bursts with savory richness and balanced tenderness.
Prep and Cook Time
Preparation: 20 minutes | Marination: 2-6 hours | Grilling: 15-20 minutes
Yield
Serves 4
Difficulty Level
Medium
Ingredients
- 4 boneless, skin-on chicken thighs (about 6 ounces each)
- 1/4 cup olive oil
- 3 tablespoons soy sauce (for umami depth)
- 2 tablespoons honey (to amplify caramelization)
- 1 tablespoon apple cider vinegar (for tenderizing acid)
- 3 garlic cloves, minced
- 1 teaspoon smoked paprika
- 1 teaspoon freshly ground black pepper
- 1 teaspoon salt
- 1 teaspoon dried oregano
- Optional Rub: 1 tablespoon brown sugar (for extra crust)
Instructions
- Prepare the marinade: In a bowl, whisk together olive oil, soy sauce, honey, apple cider vinegar, minced garlic, smoked paprika, salt, pepper, oregano, and brown sugar if using. This balanced marinade infuses flavor and promotes Maillard browning through its sugars and acids.
- Marinate the chicken: Place the chicken thighs in a resealable bag or shallow dish. Pour the marinade over the chicken, ensuring even coating. Refrigerate for 2 to 6 hours-longer marination allows the acids and enzymes to tenderize the meat deeply without breaking down proteins excessively.
- Preheat the grill: Heat your grill to medium-high heat (about 375°F to 400°F). Clean and oil the grates to prevent sticking and assist in flame contact for an even sear.
- Grill the chicken: Remove chicken from marinade, letting excess drip off. Place skin-side down on the grill. Cook for roughly 6-8 minutes without moving-this patience helps develop a crisp, caramelized crust via the Maillard reaction.
- Flip and finish: Turn the chicken over and grill an additional 7-10 minutes, allowing the internal temperature to reach 165°F (75°C). Use a meat thermometer to prevent overcooking and dryness. If flare-ups occur, move chicken to indirect heat briefly, then return to direct heat for finishing.
- Rest the chicken: Remove from grill and tent loosely with foil. Rest for 5 minutes to allow juices to redistribute for juicy, tender bites.
Tips for Success
- Use skin-on thighs for optimal moisture, as the skin insulates meat during grilling and crisps wonderfully thanks to rendered fat.
- For a smoky flavor boost, add wood chips soaked in water to charcoal or a smoker box. Hickory or applewood complement poultry beautifully.
- Do not over-flip. Allowing the chicken to sear uninterrupted maximizes the Maillard reaction’s flavorful crust development.
- If pressed for time, a quick 30-minute marinade still imparts good flavor but less tenderizing.
- Internal temperature is king-consistently check to avoid dryness or undercooking.
- Experiment with rubs containing cumin, coriander, or chili powder for exciting variations on your grilled chicken.
- Make-ahead: Marinate chicken overnight for even deeper savory infusion.
Serving Suggestions
Present your perfectly grilled chicken nestled on a bed of fresh herb salad-think arugula, parsley, and mint-drizzled lightly with lemon vinaigrette. Complement with grilled vegetables like zucchini and bell peppers for a colorful, healthful plate. Garnish with a sprinkle of toasted sesame seeds and thinly sliced green onions to elevate visual appeal and add crunch. Serve alongside a chilled glass of dry white wine or a crisp cider to complete the meal.

| Nutrient | Per Serving |
|---|---|
| Calories | 320 |
| Protein | 28 g |
| Carbohydrates | 6 g |
| Fat | 18 g |
For more on grilling mastery and flavor science, visit Serious Eats’ guide to the Maillard reaction. Also, explore our Grilling Techniques for Chicken article for in-depth tips on perfect heat control and flavor layering.
Q&A
Q&A: Mastering the Art: The Science Behind Perfectly Grilled Chicken
Q1: What makes grilled chicken truly “perfect”?
A: Perfectly grilled chicken strikes a harmonious balance between a crispy, caramelized exterior and juicy, tender meat inside. Achieving this requires understanding heat control, marination, and timing-the trifecta that turns simple poultry into a culinary masterpiece.
Q2: How does marination affect the taste and texture of grilled chicken?
A: Marination is more than just flavor enhancement. Acids in marinades (like lemon juice or vinegar) break down muscle fibers, tenderizing the meat. Oils keep it moist, while herbs and spices infuse layers of taste. When done right, marinating can transform dry chicken into a juicy delight.
Q3: Why is temperature control crucial for grilling chicken?
A: Chicken is notorious for drying out if overcooked. Maintaining a medium heat ensures the outside crisps up without burning, while the inside cooks evenly. Using a meat thermometer to reach the safe internal temperature (165°F/74°C) prevents undercooking or dryness.
Q4: What role does the Maillard reaction play in grilled chicken?
A: The Maillard reaction is the magical browning that happens when proteins and sugars meet heat, creating complex flavors and that irresistible golden crust. It’s a key reason grilled chicken smells so delicious and tastes rich.
Q5: Can resting the chicken after grilling really make a difference?
A: Absolutely! Letting chicken rest for 5-10 minutes allows juices to redistribute within the meat, instead of spilling out when cut. This simple pause enriches tenderness and juiciness, elevating your grilled chicken to restaurant-quality status.
Q6: Are there any tricks to avoid flare-ups and burnt spots?
A: Yes! Flare-ups happen when fat drips onto flames, causing sudden bursts of heat. Trim excess fat, use a two-zone fire (one side hotter for searing, one cooler for finishing), and keep a spray bottle handy to tame flames without dousing your grill.
Q7: How important is the choice of chicken cut for grilling?
A: Very! Thighs and drumsticks are more forgiving due to higher fat content, staying juicy and flavorful. Breasts cook faster but demand careful attention to avoid dryness. Choosing the right cut matches your grilling skill and preferred texture.
Q8: What’s the best grilling technique to lock in moisture?
A: Start with a preheated grill and sear the chicken quickly over direct heat to lock surface juices, then move it to indirect heat to cook through gently. This two-step method ensures mouthwatering moisture without charring or toughness.
Q9: How can one infuse smoky flavors without overpowering the chicken?
A: Use moderate amounts of soaked wood chips or charcoal, and opt for milder smoke sources like applewood or cherrywood. Patience is key-slow, subtle smoke enhances rather than overwhelms, building depth layer by flavorful layer.
Q10: What’s the ultimate secret to mastering grilled chicken?
A: It’s a marriage of science and patience. Respect the chemistry of heat and proteins, trust your senses, and embrace the rhythm of prepping, grilling, and resting. With practice, each grilled chicken becomes less of a recipe and more of an art form-your signature masterpiece.
In Conclusion
As the flames die down and the tantalizing aroma of perfectly grilled chicken lingers in the air, it’s clear that mastering this culinary craft is as much a science as it is an art. Understanding the delicate balance of heat, timing, and seasoning transforms a simple meal into a mouthwatering masterpiece. By embracing the science behind the sizzle, you can confidently turn every grill session into a flavorful success story. So fire up your grill, trust the process, and savor the delicious harmony of technique and taste-because perfectly grilled chicken is not just cooked, it’s crafted.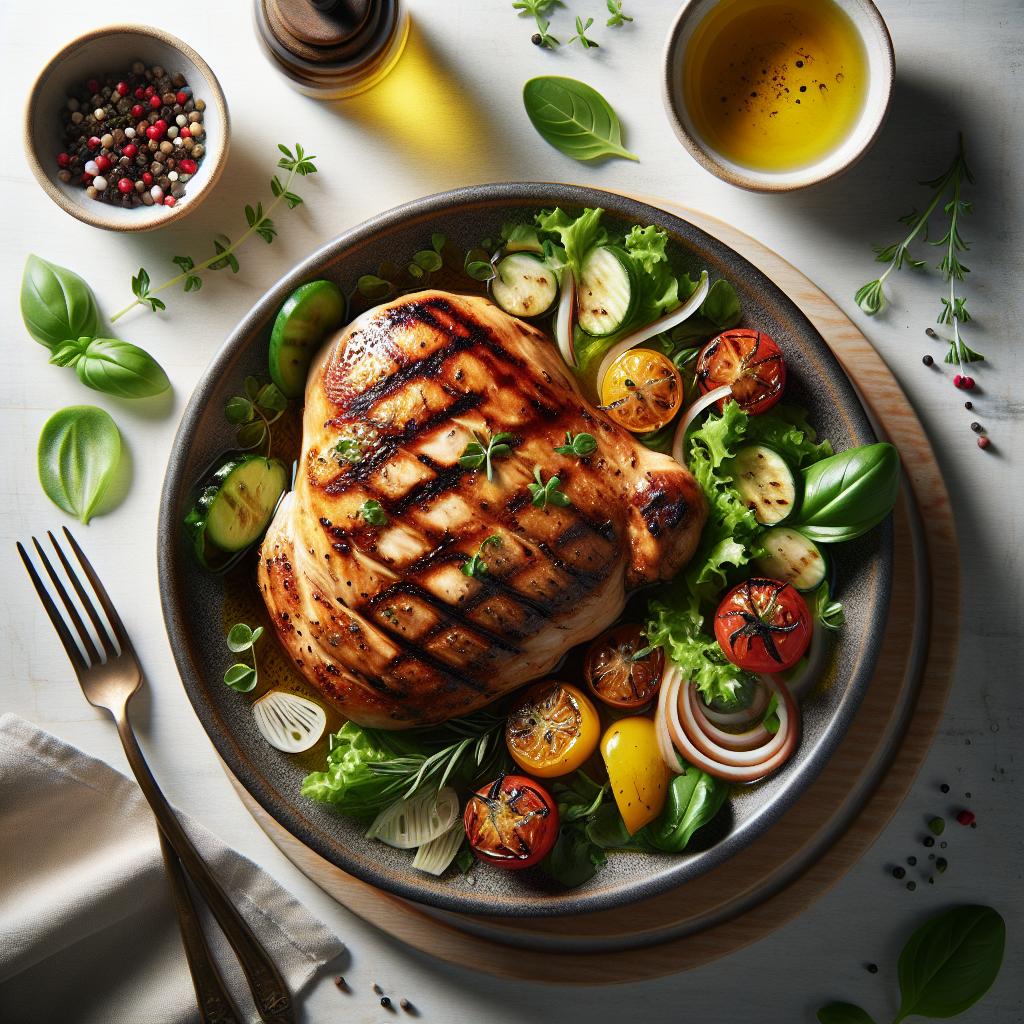
Unlocking Flavor: The Science Behind Spatchcocked Chicken invites home cooks and culinary enthusiasts alike to rediscover this time-honored technique that transforms an ordinary chicken into a dish bursting with juiciness, crisp skin, and vibrant seasoning. By meticulously understanding the anatomy of a spatchcocked bird, you unlock a pathway to deeper marinade absorption and enhanced cooking efficiency, making every bite a celebration of texture and taste.
Prep and Cook Time
Preparation: 15 minutes | Marinating: 2-4 hours (optional but recommended) | Cooking: 35-45 minutes
Yield
Serves 4 to 6 people
Difficulty Level
Medium – Requires basic knife skills and attention to heat management
Ingredients
- 1 whole chicken (3.5 to 4 lbs), spatchcocked
- 3 tbsp olive oil
- 1 tbsp smoked paprika
- 1 tsp garlic powder
- 1 tsp onion powder
- 1 tsp kosher salt
- ½ tsp black pepper, freshly ground
- ½ tsp cayenne pepper (optional for heat)
- Zest of 1 lemon
- 2 tbsp fresh rosemary, finely chopped
- 2 tbsp fresh thyme leaves
- Juice of 1 lemon
- 1 cup low-sodium chicken broth or water (for roasting)
Instructions
- Spatchcock the chicken: Using sharp kitchen shears, remove the backbone by cutting along both sides from tail to neck. Press firmly on the breastbone to flatten the chicken, ensuring it lays evenly for uniform cooking and heat distribution.
- Prepare the marinade: In a bowl, whisk olive oil, smoked paprika, garlic powder, onion powder, kosher salt, black pepper, cayenne pepper, lemon zest, rosemary, thyme, and lemon juice until fully combined.
- Marinate the chicken: Rub the marinade generously over both sides of the spatchcocked chicken. Cover and refrigerate for at least 2 hours or overnight for maximum flavor absorption, as spatchcocking exposes more surface area allowing the marinade to penetrate deeply.
- Preheat oven or grill: Set to 425°F (220°C). For oven cooking, place a rack on a rimmed baking sheet to promote air circulation; for grilling, arrange coals or burners for indirect and direct heat zones.
- Roast or grill the chicken: Place the chicken skin-side up on the rack. Pour chicken broth into the pan below to maintain moisture without steaming the skin. Cook for 35 to 45 minutes, flipping halfway only if grilling, until the internal temperature reaches 165°F (75°C) in the thickest part of the thigh. The wide, flattened shape ensures even heat distribution for perfectly crispy skin and juicy meat.
- Rest the chicken: Remove from heat and tent loosely with foil. Allow it to rest for 10-15 minutes; this crucial step lets juices redistribute so each slice remains tender and succulent.
- Carve and serve: Cut the chicken into portions along the natural joints and serve with your favorite sides and garnishes.
Tips for Success
- Master the spatchcock technique: Practice on a small chicken or ask your butcher for a spatchcocked bird to save prep time.
- Don’t skip marinating: The increased surface area from spatchcocking means every spice and herb can deeply flavor the meat.
- Manage heat carefully: Use a roasting rack or grilling zones to avoid soggy skin-direct heat crisps while indirect heat cooks through.
- Use a meat thermometer: Ensure the correct internal temperature (165°F) without overcooking.
- Experiment with seasoning blends: Swap smoked paprika for chipotle or add fresh garlic for variation.
- Make ahead: Marinate the chicken the night before and refrigerate for speed and flavor potency.
Serving Suggestions
This spatchcocked chicken pairs beautifully with rustic roasted vegetables, a bright chimichurri sauce, or a creamy garlic mashed potato. For a fresh contrast, garnish with chopped parsley and lemon wedges. Serve on a wooden board for a striking presentation, letting the crispy golden skin and vibrant herb aroma delight guests at the table.
| Nutritional Information (per serving) | Calories | Protein | Carbs | Fat |
|---|---|---|---|---|
| Spatchcocked Chicken | 320 kcal | 40 g | 1 g | 15 g |
Discover more on how precise heat application can unlock new flavor depths in poultry by visiting Serious Eats’ definitive guide on roasting techniques.
For an enhanced cooking journey and more recipes featuring the unlocking flavor: the science behind spatchcocked chicken method, explore our detailed spatchcock chicken guide to elevate your culinary repertoire.

Q&A
Q&A: Unlocking Flavor – The Science Behind Spatchcocked Chicken
Q: What exactly is spatchcocking, and why has it become a favorite among chefs?
A: Spatchcocking is the technique of removing a chicken’s backbone and flattening it out before cooking. This allows the bird to cook more evenly and faster, ensuring juicy meat and crispy skin. Chefs favor it because it’s a nifty way to unlock deeper flavors and perfect textures without fuss.
Q: How does spatchcocking change the way heat interacts with the chicken?
A: By flattening the chicken, the meat lies in a thin, uniform layer. This means heat reaches every part more evenly, avoiding the dry edges and raw centers common with roasting whole birds. You get a harmonious balance of juicy breast meat and crispy golden skin.
Q: Does spatchcocking affect the flavor, or just the cooking time and texture?
A: It does both! The faster, even cooking locks in more moisture and allows marinades or rubs to penetrate better. Plus, the increased surface area means more skin gets directly exposed to heat, caramelizing deliciously and creating intense, savory notes.
Q: Is there a science behind why removing the backbone helps the chicken cook faster?
A: Absolutely. The backbone acts like a structural spine that holds the bird’s shape, which can trap heat unevenly inside. Removing it flattens the chicken, increasing surface contact and reducing thickness, so heat penetrates quickly and uniformly. It’s basic thermodynamics meeting culinary art.
Q: Can spatchcocking be applied to other poultry or meats?
A: Yes! While chicken is the classic candidate, spatchcocking works wonders with turkey and even game birds. The principles are the same: faster, even cooking with enhanced flavor and texture. For larger birds, it’s a game-changer during holiday feasts.
Q: How can home cooks make the most of spatchcocking to unlock peak flavor?
A: Start with a sharp pair of kitchen shears and don’t rush the backbone removal. Marinate or season generously to let flavors penetrate through the open bird. Cook over high-ish heat to achieve that crispy skin, and savor the juicy interior that’s impossible to get otherwise.
Q: What’s the best cooking method for spatchcocked chicken?
A: Roasting, grilling, and even smoking shine with spatchcocked birds. The flat shape is perfect for the grill grate or roasting pan, where even heat allows browning and caramelization all over. Each method highlights different flavor profiles-smoky, charred, or herbaceous.
Q: Any final tips for unlocking the full flavor potential of spatchcocked chicken?
A: Don’t be afraid to experiment! Use flavorful brines, bold rubs, and finishing glazes. Remember, the science of spatchcocking sets the stage-it’s your culinary creativity that steals the show. Unlock flavor, one precise cut at a time.
The Conclusion
As the aromas of a perfectly spatchcocked chicken waft through your kitchen, it’s clear that this technique is more than just culinary flair-it’s science in action. By breaking down the barriers of traditional roasting, spatchcocking unlocks a symphony of flavors and textures that might otherwise remain hidden beneath the skin. From faster cooking times to the magic of even heat distribution, this method transforms a simple bird into a masterpiece of taste and tenderness. So next time you crave roast chicken, remember: sometimes, the key to unlocking unforgettable flavor lies in a little precision and a lot of science. Happy cooking!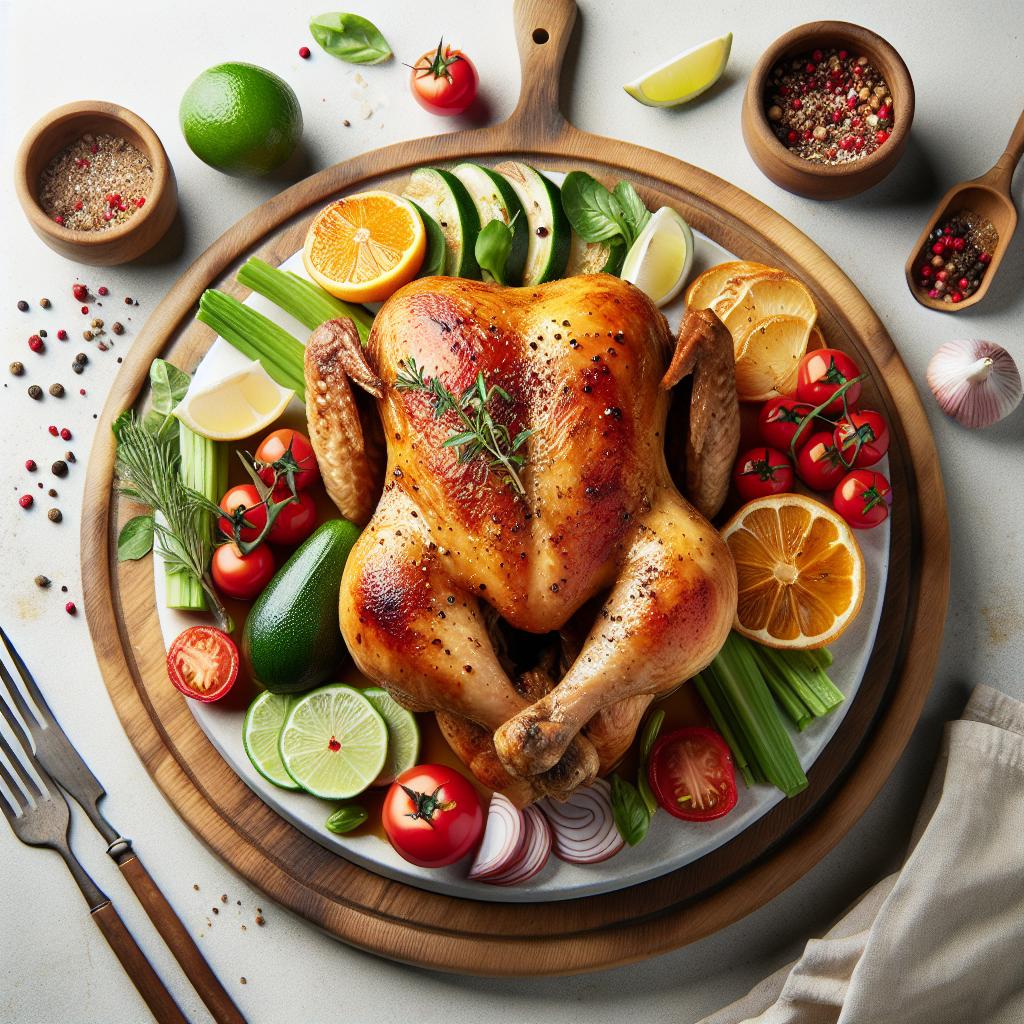
Mastering the Magic: The Science Behind Reverse Searing Steak unveils the incredible chemistry and alignment of technique that transforms a humble cut of meat into a mouthwatering masterpiece. This method, born from the blend of slow roasting and high-heat finishing, creates an exquisite crust without sacrificing juiciness-an impressive balance that any steak lover can achieve. Let’s dive deeply into optimizing temperature, selecting the ideal cuts, and perfecting seasoning to maximize flavor impact, making every bite a celebration of culinary science and artistry.
Prep and Cook Time
- Preparation: 15 minutes
- Cooking: 45-60 minutes (including resting time)
- Total: 1 hour to 1 hour 15 minutes
Yield
Serves 2 generously or 3 modest portions, perfect for an intimate dinner or a hearty meal to share.
Difficulty Level
Medium – Requires attention to temperature control but accessible with clear guidance.
Ingredients
- 2 beef ribeye steaks, 1.5 to 2 inches thick, trimmed but with fat cap intact
- 1 tbsp kosher salt
- 1 tbsp freshly ground black pepper
- 1 tsp garlic powder
- 2 tbsp high smoke point oil (e.g., grapeseed or avocado oil)
- 3 tbsp unsalted butter
- 3 sprigs fresh thyme
- 2 cloves garlic, lightly crushed
Instructions
- Prepare the steaks: Remove steaks from fridge 30 minutes before cooking to reach room temperature-this step ensures even cooking during the gentle warming phase.
- Season generously: Pat steaks dry; apply kosher salt, black pepper, and garlic powder evenly on all sides to enhance crust formation during searing.
- Preheat your oven: Set to a low temperature, ideally 225°F (107°C), to slowly bring the internal temperature of the meat up without overcooking the exterior.
- Place steaks on a wire rack: Arrange steaks on a baking sheet lined with a wire rack-this allows hot air to circulate evenly around the meat, accelerating uniform cooking.
- Slow roast: Insert a probe thermometer into the thickest part and roast until the internal temperature hits 110-115°F for medium-rare, about 30-45 minutes depending on thickness.
- Preheat skillet for searing: Heat a heavy cast iron pan on high heat for at least 5 minutes until smoking hot to guarantee instant crust creation.
- Sear steaks: Add oil to the pan; place steaks and sear for 1.5-2 minutes on each side, resisting the urge to move them, to build that iconic, deeply browned crust.
- Butter baste: Add butter, thyme, and garlic to the pan; tilt skillet and spoon the melted, aromatic butter over steaks continuously for about 1 minute per side to infuse richness and complexity.
- Rest and serve: Transfer steaks to a cutting board and rest loosely tented for 10 minutes-this resting phase allows juices to redistribute, ensuring every bite stays juicy and tender.
Tips for Success
- Use a digital instant-read thermometer or probe-precision temperature control is key to mastering the magic of reverse searing steak.
- Opt for thick cuts (1.5″ or thicker) such as ribeye, strip, or sirloin; thin steaks won’t benefit as much from this technique.
- For added flavor, consider dry-aging steaks for a few days or applying a herb butter to finish.
- If pressed for time, increase oven temperature slightly but monitor closely to avoid overcooking.
- Patience in resting is crucial: cutting too soon causes precious juices to escape.
Serving Suggestions
Serve your perfectly reverse-seared steak atop a warm wooden board with a sprinkle of flaky sea salt and freshly cracked black pepper. Accompany with roasted garlic mashed potatoes, sautéed seasonal greens like spinach or broccolini, and a robust red wine reduction. Garnish with a fresh thyme sprig and a vivid dollop of compound butter-including herbs or blue cheese-to elevate every forkful.
| Nutrient | Amount per Serving |
|---|---|
| Calories | 650 kcal |
| Protein | 55g |
| Carbohydrates | 2g |
| Fat | 48g |
For more insights on steak preparation, explore our article on Dry Aging Steak for Maximum Flavor.
Learn the science behind meat browning and flavor development from Science Daily’s feature on Maillard Reaction.

Q&A
Q&A: Mastering the Magic: The Science Behind Reverse Searing Steak
Q1: What exactly is reverse searing, and how does it differ from traditional steak cooking?
A: Reverse searing flips the classic steak-cooking script. Instead of hitting the steak with a hot pan first, you start by slowly cooking the steak at a low temperature (often in the oven or on a grill). This gentle heat ensures even cooking edge-to-edge. Only after nearing your desired internal temperature do you finish by searing the steak on high heat, creating that beautifully caramelized crust. Traditional methods sear first and then finish in the oven, often producing a gradient of doneness rather than an even pink center.
Q2: Why does the reverse sear method result in a juicier and more evenly cooked steak?
A: The magic lies in control. Cooking the steak slowly at low temperatures avoids shocking the muscle fibers, which helps them retain moisture. This gentle approach minimizes the risk of overcooking the outer layers while the center remains underdone. When you finally sear, the crust forms quickly without drawing out juices, locking in that signature steak flavor and juiciness.
Q3: How does the Maillard reaction enhance the flavor during reverse searing?
A: The Maillard reaction is the sizzling chemistry behind that irresistible steak crust. When you sear at high heat, amino acids and sugars in the meat react to form complex flavor compounds, delivering smoky, nutty, and savory notes that elevate your steak from tasty to transcendental.
Q4: Is there a science-backed reason to use a thick steak for reverse searing?
A: Absolutely! Thick steaks benefit the most because low-and-slow cooking ensures the inside gently reaches your target temperature without overcooking the exterior. Thin cuts heat through too quickly, which can make the slow cook step unnecessary or even inefficient. Plus, thick cuts allow a more gradual heat transfer, perfect for developing an even doneness profile.
Q5: What tools or techniques optimize the reverse searing process?
A: Precision is key. A digital probe thermometer or instant-read thermometer ensures you hit the exact internal temperature for your preferred doneness, eliminating guesswork. Using an oven or grill with consistent, controlled heat helps with even cooking. Finally, a heavy skillet or cast-iron pan provides the intense, steady heat needed for a perfect sear.
Q6: Can reverse searing work with all types of steak?
A: While reverse searing shines brightest with thick-cut steaks like ribeye, strip, or filet mignon, it can be adapted for various cuts. However, very lean or thin steaks might dry out or cook unevenly. Experimenting is encouraged, but the classics are the safest bets!
Q7: How does resting the steak after searing influence the final texture and flavor?
A: Resting is the silent hero of the steak world. After searing, allowing the steak to rest lets the juices redistribute throughout the meat. Cutting into it too soon causes precious liquids to spill out, leaving the steak less juicy. Resting ensures every bite is satisfyingly moist and tender.
Q8: What is the best internal temperature to aim for when reverse searing steak?
A: This depends on your doneness preference:
- Rare: 120-125°F (49-52°C)
- Medium-rare: 130-135°F (54-57°C)
- Medium: 140-145°F (60-63°C)
- Medium-well: 150-155°F (66-68°C)
Remember, the steak will rise a few degrees during resting, so removing it from heat slightly before these targets is key.
Q9: Can reverse searing be done on different cooking appliances, such as sous vide or smokers?
A: Indeed! Reverse searing is very versatile. Sous vide is essentially the ultimate low-and-slow cooking method, producing stunningly even doneness before a quick sear. Smokers can add layers of smoky flavor during the slow cook, which then finishes with a satisfying crust in a hot pan or on a grill.
Q10: Why has reverse searing become such a beloved technique among chefs and home cooks alike?
A: It’s the perfect harmony of science and culinary art. Reverse searing grants precision, consistency, and unbeatable flavor-turning steak cooking from guesswork into a near foolproof ritual. Whether you’re a seasoned chef or an enthusiastic beginner, mastering this method elevates your steak game to a magical new level.
Insights and Conclusions
As the final sizzle fades and the perfect crust crowns your steak, you’ve not just cooked-you’ve orchestrated a culinary symphony grounded in science. Mastering reverse searing is more than technique; it’s an understanding of heat, time, and texture dancing in harmony. By embracing this method, you unlock a new realm where precision meets flavor, turning an ordinary steak into an extraordinary experience. So next time you fire up the pan, remember: behind every perfect bite lies a little magic-and a whole lot of science.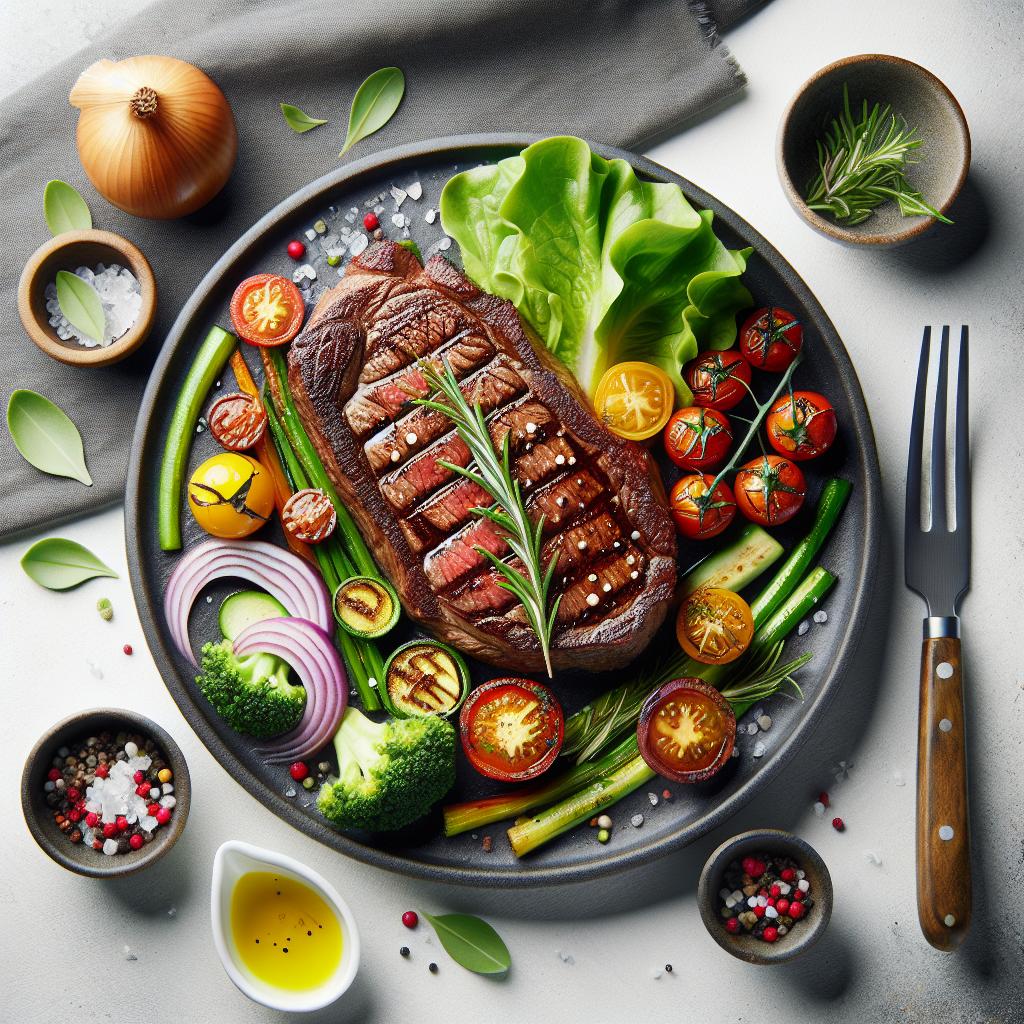
Unlocking the heat with a deep understanding of convection transforms your grilling experience from basic to exceptional. At its core, convection involves the circulation of hot air around your food, creating an even cooking environment that seals in juices and heightens flavor. This natural movement of heat is what gives grilled dishes their characteristic, mouthwatering crust and perfectly tender interiors, elevating everyday meals into unforgettable feasts.
Prep and Cook Time
Preparation: 15 minutes
Cook Time: 25-40 minutes (depending on protein)
Total Time: 40-55 minutes
Yield
Serves 4 generous portions
Difficulty Level
Medium – Perfect for grill enthusiasts ready to master airflow and temperature control
Ingredients
- 4 boneless chicken breasts, trimmed and patted dry
- 2 tablespoons olive oil
- 1 tablespoon smoked paprika
- 1 teaspoon garlic powder
- Salt and freshly ground black pepper to taste
- Fresh rosemary sprigs for garnish
- Juice of 1 lemon
- Optional: 1 teaspoon cayenne pepper for a spicy kick
Instructions
- Preheat your grill with the convection setting or indirect heat zone to 375°F (190°C). This temperature balance promotes gentle air circulation, preventing flare-ups and ensuring even doneness.
- In a mixing bowl, combine the olive oil, smoked paprika, garlic powder, salt, black pepper, and lemon juice. Whisk together until a smooth marinade forms.
- Coat each chicken breast evenly with the marinade. Allow to rest for 10 minutes to absorb flavors and enhance tenderness-this pre-cook rest activates convection’s magic on the meat fibers.
- Place the chicken breasts on the grill grate, positioning them where the airflow circulates best (usually the center or above a convection fan vent). Close the lid immediately to trap hot air.
- Grill for 20-30 minutes, flipping once halfway through. Watch for an even golden-brown crust-this is convection’s hallmark effect.
- Check doneness by inserting an instant-read thermometer into the thickest part of the breast; it should read 165°F (74°C) for safe consumption.
- Remove chicken from the grill and let rest for 5 minutes to allow juices to redistribute, a crucial step for juicy, tender results enhanced by convection cooking.
- Garnish with fresh rosemary sprigs and a squeeze of lemon before serving.
Tips for Success
- Optimize airflow: Avoid overcrowding the grill. Space items to allow hot air to circulate freely, which is the key to unlocking convection’s even cooking power.
- Use a water pan: Placing a pan of water beneath the grilling surface can help stabilize temperature and keep the air moist, improving meat juiciness.
- Monitor flare-ups: Convection reduces flare-ups but be prepared to move or flip food if flames get too aggressive.
- Experiment with convection zones: Test direct versus indirect convection zones on your grill for different textures-direct for crisp crusts, indirect for slower cooking and enhanced tenderness.
- Make ahead: Marinate the chicken overnight for deeper flavor infusion or prep the spice rub in advance to speed up your grilling session.
Serving Suggestions
For a beautifully balanced plate, serve these convection-grilled chicken breasts alongside grilled seasonal vegetables such as asparagus or bell peppers, tossed with a drizzle of olive oil and fresh herbs. Consider a vibrant quinoa salad or creamy garlic mashed potatoes for a hearty complement. A final garnish of fresh lemon zest over the top brightens the dish with a zesty finish, enhancing the smoky nuances achieved through convection cooking.
| Nutrient | Amount per Serving |
|---|---|
| Calories | 320 kcal |
| Protein | 45 g |
| Carbohydrates | 2 g |
| Fat | 12 g |

Explore more on mastering cloud cooking techniques in our Ultimate Grill Master Techniques article to elevate your grilling even further. For in-depth scientific insights, check the USDA’s official guide on convection cooking, helping you unlock the full potential of your grill’s heat dynamics.
Q&A
Q&A: Unlocking the Heat: Understanding Convection in Grills
Q1: What exactly is convection and how does it work in a grill?
A1: Convection is the magical dance of hot air circulating around your food, carrying heat efficiently from all directions. In a grill, this means the heated air moves steadily, enveloping your steak or veggies, ensuring even cooking without the dreaded hot spots or cold centers. Think of convection as the invisible chef’s assistant, stirring the air to deliver consistent, mouthwatering results.
Q2: How does convection differ from traditional grilling methods?
A2: Traditional grilling often relies on direct radiant heat from flames or coals, cooking food primarily on one side at a time and sometimes leading to uneven doneness. Convection grilling adds airflow into the equation. By circulating hot air, it cooks food more uniformly and often faster, locking in juices and flavor without excessive charring.
Q3: Can convection cooking impact the flavor of grilled food?
A3: Absolutely! While direct flames provide that iconic smoky sear, convection’s gentle yet thorough heat safeguards your food’s moisture and enhances the natural flavors. Plus, the constant air movement can help distribute smoke evenly, wrapping your meal in that irresistible barbecue aura – subtly different but delightfully delicious.
Q4: What types of grills best utilize convection principles?
A4: Many modern grills, especially pellet and some gas grills, are designed with built-in fans or vents to promote convection airflow. Kamado grills and smokers also leverage convection by controlling air pathways carefully. Even conventional charcoal grills can achieve some convection by proper vent adjustment and indirect cooking setups.
Q5: How can I optimize my grilling technique using convection?
A5: To unlock convection’s power, aim for indirect grilling setups where the heat source is off to the side or underneath a barrier. Keep vents partially open to encourage steady airflow. Using a grill lid is essential to trap and circulate hot air. Additionally, rotating food occasionally helps when your grill has uneven heat zones. The goal: let the circulating air soak every inch of your food with heat love.
Q6: Are there any foods that benefit most from convection in grilling?
A6: Yes! Whole chickens, roasts, thick fish fillets, and dense vegetables thrive in convection heat because it penetrates evenly and cooks gently. Breads and pizzas also develop crispy crusts with airy interiors thanks to that swirling hot air. On the flip side, delicate seafood or thin cuts may cook too fast, so balance is key.
Q7: Can convection grilling help with energy efficiency or cooking times?
A7: Indeed. Because convection heat surrounds food more thoroughly, it often cooks faster at lower temperatures. This can save fuel, reduce flare-ups, and make your grilling experience more eco-friendly and less wasteful. It’s a win-win for flavor and sustainability.
Q8: How can I tell if my grill is effectively using convection?
A8: If your grill has a fan or vent system designed to circulate heat, you’re on the right track. You might notice the temperature stays more consistent and food cooks faster or more evenly. Using a grill thermometer and experimenting with indirect setups can help you gauge and harness your grill’s convection capabilities.
Unlocking convection in your grill is like opening a secret door to next-level flavor and cooking precision. Embrace the swirling heat, and transform your BBQ sessions into culinary masterpieces!
In Conclusion
As the flames die down and the last wisps of smoke curl into the air, it becomes clear that mastering convection isn’t just about heat-it’s about harmony. Understanding how convection currents dance within your grill transforms cooking from a mere task into an art form. By unlocking this invisible force, you gain the power to evenly sear, tenderize, and infuse flavor with precision and care. So next time you fire up your grill, remember: beneath the glowing embers, convection is working tirelessly to bring your culinary creations to life, turning simple ingredients into unforgettable meals. Embrace this heat, and let the magic of convection elevate every bite.
Paprika’s Color Magic is truly a culinary marvel, infusing baked goods with not only a radiant golden hue but also a complex flavor profile that elevates any crust. This vibrant spice harnesses natural carotenoids, which intensify during the Maillard reaction-a fascinating chemical process that transforms simple dough into a beautifully caramelized crust bursting with aroma and depth. Embracing paprika in baking is a timeless secret to achieving that irresistibly golden, appetizing crust that appeals both visually and gastronomically.
Prep and Cook Time
- Preparation: 15 minutes
- Cooking: 25-30 minutes (depending on recipe)
- Total: 40-45 minutes
Yield
- Serves 8 generous slices or portions
Difficulty Level
- Medium – perfect for bakers looking to enhance crust color and flavor with a skillful touch
Ingredients
- 3 ½ cups all-purpose flour, sifted
- 1 ½ tsp fine sea salt
- 2 tbsp sweet or smoked paprika (choose based on flavor preference)
- 1 tbsp granulated sugar
- 1 tbsp active dry yeast
- 1 ¼ cups warm water (105-110°F)
- 2 tbsp extra virgin olive oil
- 1 tsp honey or maple syrup (to boost Maillard reaction)
- Optional: ½ tsp garlic powder for extra savory notes
Instructions
- Activate the yeast: In a small bowl, combine warm water, honey, and yeast. Let it sit for 5-10 minutes until foamy, confirming the yeast is active.
- Mix dry ingredients: In a large bowl, whisk together flour, sea salt, the paprika of choice, sugar, and garlic powder if using.
- Combine and knead: Slowly pour the yeast mixture and olive oil into the dry ingredients. Stir until a shaggy dough forms.
- Knead: Transfer dough to a floured surface and knead for 8-10 minutes until smooth and elastic. A well-kneaded dough develops gluten, enhancing the crust texture and Maillard browning intensified by paprika’s natural pigments.
- First rise: Lightly oil a large bowl, place the dough inside, cover with a damp cloth, and let rise in a warm spot for 1-1.5 hours until doubled in size.
- Shape dough: Punch down the dough and shape it as desired (loaf, rolls, or pizza base). For even crust browning, try to form a smooth surface without bubbles.
- Second rise: Set the shaped dough onto a parchment-lined baking sheet. Cover and rest for 30 minutes to 1 hour.
- Preheat oven: While the dough rises, heat your oven to 450°F (230°C), enabling optimal crust caramelization.
- Optional glaze: Brush the surface lightly with olive oil or melted butter mixed with a pinch of paprika for extra golden color and flavor complexity.
- Bake: Place the dough in the oven and bake for 25-30 minutes or until the crust is deep golden with paprika’s rich pigments magnifying the Maillard reaction’s results. Tap the crust – it should sound hollow.
- Cool: Transfer baked bread to a wire rack to cool before slicing, preserving the crust crispness.
Tips for Success
- Choosing paprika: Opt for fresh, high-quality paprika-sweet paprika offers a milder color with subtle sweetness; smoked paprika imparts a rustic, deeper hue and smoky undertones.
- Control heat: Avoid too high oven temperatures that can burn the paprika pigments, leading to bitterness instead of beautiful color.
- Hydration matters: A slightly wetter dough helps extend caramelization time on the crust’s surface, complementing paprika’s pigment effect.
- Make-ahead: Dough can be refrigerated overnight for slower fermentation, intensifying flavor and letting paprika pigments develop fully during baking.
- Enhance crust crispness: Place a small pan of water in the oven to create steam during the first 10 minutes of baking, aiding in that perfect golden crust enhanced by paprika’s magic.
Serving Suggestions
- Slice this paprika-infused bread warm and serve with herb-infused olive oil or whipped garlic butter.
- Pair with rich cheeses, smoked meats, or roasted vegetables to complement the subtle spice and smoky undertones paprika adds.
- Garnish crust edges with a dusting of paprika and flaky sea salt for visual appeal and a burst of color.
- For savory pastries, add freshly chopped herbs like rosemary or thyme to the dough to harmonize with the paprika’s aroma.
| Nutrition per slice (approx.) | Calories | Protein | Carbs | Fat |
|---|---|---|---|---|
| 1 slice (1/8 of loaf) | 160 kcal | 5 g | 30 g | 3.5 g |
Explore more about Maillard reaction and baking techniques to deepen your understanding of beautifully browned crusts. For scientific insights into paprika’s carotenoids and pigment stability, visit ScienceDirect’s detailed study.

Q&A
Q&A: Paprika’s Color Magic – How It Shapes Crust’s Golden Hue
Q1: What makes paprika more than just a flavorful spice?
A1: Beyond its smoky, sweet taste, paprika works magic in the kitchen as a natural color enhancer. It lends dishes a warm, golden-red glow, transforming plain crusts into visually stunning bites that beckon you to take a bite.
Q2: How does paprika influence the crust’s color during baking?
A2: Paprika contains natural pigments called carotenoids, which intensify when exposed to heat. As the crust heats up, these pigments oxidize and deepen, resulting in a rich, golden hue that’s both appetizing and artistically beautiful.
Q3: Is the color effect uniform across different types of paprika?
A3: Not quite! Sweet, smoked, and hot paprika varieties each have varying pigment intensities. Sweet paprika usually offers a vibrant red-orange tint, while smoked paprika can introduce deeper amber and even reddish-brown tones, adding complexity to both color and flavor.
Q4: Can paprika’s color magic make up for uneven baking?
A4: To an extent, yes. While paprika can enhance the visual appeal of a slightly pale crust, it’s not a foolproof disguise for undercooking. It complements well-baked crusts by elevating their golden shimmer, but it won’t replace the artistry of good baking technique.
Q5: Are there any tips for using paprika to maximize crust color without overpowering taste?
A5: Absolutely. Sprinkle paprika sparingly to start-too much can mask subtle flavors and make the crust overly vibrant. Toasting paprika lightly before adding it can intensify its color impact while mellowing the taste. Experimenting in small batches helps find that perfect balance of color and flavor.
Q6: Does paprika have any other roles besides coloring the crust?
A6: Definitely! Alongside its visual allure, paprika contributes warmth and depth of flavor, often hinting at smokiness or mild spice depending on the variety. It’s a sensory enhancer-engaging not just your eyes, but your taste buds and nose as well.
Q7: Can paprika’s color magic be used beyond bread crusts?
A7: Yes! From roasted vegetables to grilled meats and even sprinkled on eggs, paprika brightens dishes with its golden-orange glow. Its versatile coloring power elevates food presentation across countless culinary creations-making meals as beautiful as they are delicious.
Paprika’s enchanting ability to craft a crust’s golden hue is a vivid reminder that cooking is both science and art. By harnessing the spice’s natural pigments and knowing when and how to use them, cooks can add a splash of visual drama to everyday dishes-turning simple crusts into golden masterpieces.
Insights and Conclusions
As we’ve uncovered, paprika is far more than a humble spice-it’s a master artist behind the scenes, painting crusts with its vibrant, golden brushstrokes. Its natural pigments and subtle chemistry work in harmony during baking, turning ordinary surfaces into visually irresistible canvases of warmth and flavor. Next time you savor that perfectly golden crust, remember the colorful magic paprika weaves, transforming your dish from simple to spectacular with every sprinkle. In the world of culinary alchemy, paprika’s color magic is a vivid reminder that sometimes, beauty truly is more than skin deep.
Direct vs Indirect Heat: Mastering Chicken Cooking Techniques unlocks the delicious potential of every cut of chicken by harnessing the perfect balance of heat and timing. Whether you crave the smoky char of grilled thighs or the tender succulence of slow-roasted breasts, understanding how to wield heat transforms your cooking from routine to remarkable. This guide will elevate your chicken mastery, ensuring every bite bursts with juicy flavor and flawless texture.
Prep and Cook Time
- Preparation: 15 minutes
- Cooking: 30-45 minutes (varies by heat method and cut)
- Total Time: 45-60 minutes
Yield
- Serves 4 generously
Difficulty Level
- Medium – perfect for home cooks ready to upscale their technique
Ingredients
- 4 bone-in, skin-on chicken thighs (or 4 chicken breasts if preferred)
- 2 tbsp olive oil
- 1 tbsp smoked paprika
- 1 tsp garlic powder
- 1 tsp onion powder
- 1 tsp dried thyme
- Salt and freshly ground black pepper, to taste
- Fresh herbs (rosemary or thyme) for garnish
- 1 lemon, sliced thinly for finishing
Instructions
- Preheat your grill or oven: For direct heat, set the grill to high (450°F / 230°C). For indirect heat, arrange coals or burners so that one side is hot and another cool-or preheat your oven to 375°F (190°C).
- Prepare the chicken: Pat chicken pieces dry to promote crisp skin. Rub evenly with olive oil and sprinkle the paprika, garlic powder, onion powder, thyme, salt, and pepper. Let rest for 10 minutes to marry flavors.
- Direct heat grilling (ideal for thighs or wings): Place chicken skin side down directly over the high heat. Sear until skin crisps and develops char marks (about 5-7 minutes). Flip once and cook other side for 4-6 minutes. Monitor carefully to avoid flare-ups and burning.
- Indirect heat grilling (perfect for breasts or whole birds): Position chicken away from direct flame or heat source. Close the lid and cook slowly for 25-35 minutes, turning halfway to brown evenly. Insert a meat thermometer to check for 165°F (74°C) internal temperature for safety.
- Rest and finish: Remove chicken from heat and tent loosely with foil. Rest for 5-10 minutes to allow juices to redistribute ensuring juicy, succulent bites.
- Garnish and serve: Add fresh herbs and lemon slices for brightness before plating.
Tips for Success: Unlocking Juicy, Flavorful Chicken
- Choose your heat wisely: Use direct heat for quick cooking cuts like thighs, wings, and drumsticks with plenty of skin-this locks in moisture and crisps skin. Reserve indirect heat for thicker or boneless cuts like breasts to prevent drying out.
- Don’t rush resting: Resting after cooking is essential to hold moisture inside the meat rather than losing it the moment you cut.
- Manage flare-ups: Keep a spray bottle of water nearby to tame flames when cooking over direct heat, avoiding bitter burnt flavors.
- Temperature matters: Use a probe or instant-read thermometer for precision-165°F is the safe target without overcooking.
- Experiment with wood chips or charcoal: Adding hickory, applewood, or mesquite chips during indirect heat grilling adds enticing smoke layers to your chicken’s profile.
Serving Suggestions
Serve your masterfully cooked chicken alongside grilled seasonal vegetables like asparagus or bell peppers for vibrant color and fresh crunch. A creamy garlic aioli or tangy chimichurri pairs beautifully, enhancing both smoky direct heat or tender indirect heat flavors. Garnish with a sprinkle of fresh parsley and a wedge of lemon for a zesty punch that brightens every bite.
| Nutritional Information (per serving) | Calories | Protein | Carbs | Fat |
|---|---|---|---|---|
| Bone-in, skin-on thigh (150g) | 280 | 26g | 0g | 18g |
| Olive Oil (1/2 tbsp) | 60 | 0g | 0g | 7g |
| Spices & herbs | 5 | 0g | 1g | 0g |

To deepen your mastery over chicken cooking methods, explore our comprehensive grilling guide. For science-backed insights on poultry cooking safety, visit USDA Food Safety.
Q&A
Q&A: Direct vs Indirect Heat – Mastering Chicken Cooking Techniques
Q1: What exactly is the difference between direct and indirect heat when cooking chicken?
A1: Imagine direct heat as a laser beam-intense, focused, and straight from the source. It’s when your chicken is placed directly over the flame or heat element, perfect for quick searing and those gorgeous grill marks. Indirect heat, on the other hand, is like basking in the warmth of a cozy campfire without being right over the flames. The chicken cooks more gently, surrounded by heat but not scorched by it, ideal for slow, even cooking.
Q2: When should I use direct heat for chicken?
A2: Use direct heat when you want to achieve a crispy, golden exterior quickly-think succulent wings, thin cutlets, or even finishing touches on a spatchcocked bird. It’s your go-to technique for that smoky char and luscious crust that locks in juices.
Q3: What are the benefits of cooking chicken with indirect heat?
A3: Indirect heat is the slow dance of cooking-it allows your chicken to cook thoroughly without burning the outside. Perfect for whole chickens or thicker cuts, this method ensures juicy, tender meat by letting heat gently permeate through, creating an even, flavorful roast every time.
Q4: Can I combine direct and indirect heat while cooking chicken?
A4: Absolutely! The magic combo is often the secret to grilled chicken perfection. Start with direct heat to sear and caramelize the skin, then move the bird to indirect heat to finish cooking without drying out. It’s like giving your chicken a dynamic workout-high intensity followed by a smooth cooldown.
Q5: How does indirect heat affect cooking time compared to direct heat?
A5: Indirect heat takes the scenic route-it’s slower and more patient, allowing the chicken to cook through gently. Expect your cooking time to be longer than direct heat grilling, but the reward is a perfectly cooked bird that’s juicy and tender from inside out.
Q6: What’s the best way to set up a grill for indirect heat cooking?
A6: Think of your grill as a two-zone stage. Pile coals or turn on burners on one side to create the hot zone (direct heat). Leave the other side empty or off for your cooler zone (indirect heat). Place your chicken over the cooler side and shut the lid to create an oven-like environment.
Q7: Will cooking with indirect heat ruin that smoky flavor I love from grilling?
A7: Not at all! Indirect heat still allows your chicken to soak up that wonderful smoky essence, especially if you add wood chips or chunks to your grill. It just won’t be as aggressively charred as with direct flame, resulting in a more nuanced, evenly smoky flavor.
Q8: What pitfalls should I avoid when using direct heat on chicken?
A8: Watch out for flaming flare-ups caused by dripping fat, which can burn the chicken’s surface. Also, cooking thicker pieces on direct heat alone can dry them out or leave the inside undercooked. Keep a close eye, use medium heat, and consider flipping often to prevent scorching.
Q9: Is indirect heat suitable for all types of chicken cuts?
A9: While it’s perfect for whole chickens, bone-in thighs, and larger cuts that need gentler cooking, thinner cuts like chicken breasts or tenders might benefit from a quick sear over direct heat to avoid drying out. Sometimes, a hybrid approach is best.
Q10: How can mastering these heat techniques elevate my chicken cooking?
A10: Understanding when to harness the fiery passion of direct heat versus the nurturing embrace of indirect heat turns every chicken dish into a masterpiece. You’ll get perfectly crisp skin, juicy meat, and a symphony of flavors that sing with every bite. It’s not just cooking; it’s art.
Closing Remarks
Mastering the art of chicken cooking is a journey of heat and patience, where the choice between direct and indirect heat transforms simple poultry into culinary perfection. Whether you crave the sear and char that only direct heat can deliver or the tender, juicy results coaxed gently by indirect heat, understanding these techniques empowers you to tailor your cooking to every occasion. By harnessing the strengths of each method, you’ll not only elevate your chicken dishes but also unlock a deeper appreciation for the dance of flame and flavor. So fire up your grill, embrace the heat, and let your newfound knowledge guide you to mouthwatering mastery.