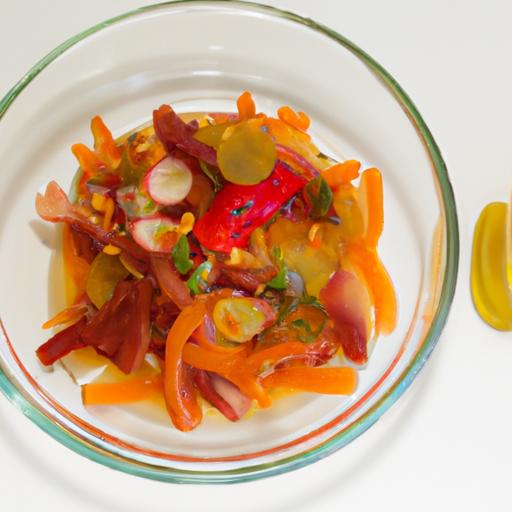
Kitchen Cell Phone Germs: Unlocking the Science Inside reveals the unseen microbial universe thriving on the surface of your kitchen cell phone. Our everyday cooking habits unknowingly seed this hotspot with bacteria, viruses, and fungi, transferring leftover food particles, moisture, and microbes directly into the tiny crevices of your device. Understanding how these tiny yet persistent life forms survive and multiply shows why regular cleaning is as crucial as washing your hands before you cook.
Prep and Cook Time
- Prep Time: 5 minutes
- Clean Time: 10 minutes
Yield
1 clean and germ-free kitchen cell phone
Difficulty Level
Easy – Requires only household items and simple steps
Ingredients
- 70% Isopropyl alcohol solution (or a commercial electronics-safe disinfectant spray)
- Microfiber cleaning cloth (lint-free)
- Soft-bristled brush (optional, for ports and crevices)
- Cotton swabs
- Distilled water (optional for diluting alcohol if necessary)
- Silicone phone case (recommended for protection and easier cleaning)
Instructions
- Power off your phone completely to prevent any electronic damage during cleaning.
- Slightly moisten the microfiber cloth with 70% isopropyl alcohol-avoid soaking it to prevent liquid damage.
- Gently wipe all surfaces of your phone, paying special attention to the screen, back, edges, and buttons. The alcohol breaks down oils and kills microbes effectively.
- Use a soft-bristled brush or cotton swab dipped in alcohol to clean ports, speaker grills, and camera lenses carefully.
- Let the phone air dry completely for at least 5 minutes to ensure all microbes are neutralized and the device is dry enough to power on safely.
- Remove and clean your phone case separately using warm, soapy water or a disinfectant wipe, allowing it to dry before reassembly.
- Repeat this cleaning routine daily or immediately after handling raw meats, vegetables, or any other potentially germ-rich ingredients.
Tips for Success
- Never spray liquid directly on the phone-always apply it to a cloth first to avoid moisture seeping inside.
- In environments with heavy cooking, wipe your phone more frequently to hinder biofilm buildup where germs hide.
- Consider using an antimicrobial phone case for added defense; these can reduce microbial growth on your device’s surface.
- Perform a deep clean at least once a week for maximum hygiene, especially during cold and flu season.
- If you’re concerned about sensitive screens, use electronics-approved sanitizers that won’t degrade oleophobic coatings.
Serving Suggestions
Keep your kitchen cell phone spotless by pairing this cleaning ritual with good kitchen hygiene habits. Display your phone on a clean, dedicated charging stand away from food prep zones to minimize contamination. For an elegant touch, wrap your device in a fresh microfiber cloth between uses and consider integrating a stylish silicone case with antimicrobial properties. This combination not only safeguards your health but ensures your culinary creativity isn’t interrupted by unexpected microbial guests.
| Cleaning Component | Effectiveness | Common Microbes Targeted |
|---|---|---|
| 70% Isopropyl Alcohol | High | Bacteria, Viruses, Fungi |
| Microfiber Cloth | Medium (removes physical debris) | Dead microbes, oils, residues |
| Soft Brush & Cotton Swabs | Medium (detail cleaning) | Microbes in crevices and ports |
Discover more about keeping your home and kitchen safe with our guide to kitchen hygiene best practices. For scientific validation on microbial contamination on personal devices, refer to this CDC resource on disinfection and sterilization.

Q&A
Q&A: Kitchen Cell Phone Germs – Unlocking the Science Inside
Q1: Why are kitchen cell phones particularly germy?
A1: Kitchens are fertile grounds for germs due to the constant exposure to food particles, moisture, and various surfaces. When you use your phone in the kitchen, it picks up bacteria from raw meats, unwashed hands, and even kitchen sponges. These microbes thrive on the warmth your phone generates, turning your device into a microscopic petri dish!
Q2: What types of germs are we talking about here?
A2: Common culprits include E. coli, Salmonella, and Staphylococcus aureus. These bacteria can cause food poisoning symptoms like stomach pain and vomiting. Your phone can also harbor more benign but persistent bacteria that contribute to bad smells and grime build-up.
Q3: How do germs actually transfer from the kitchen to the phone?
A3: Germs hitch a ride on your hands after handling raw ingredients or touching contaminated surfaces. When you swipe, tap, or answer a call without washing your hands thoroughly, those microbes get transferred onto your phone’s surface. Moisture from cooking steam and splashes further embeds them into phone crevices.
Q4: Can using my phone in the kitchen make me sick?
A4: Yes, it can increase your risk. If you’re handling food and then touching your phone, germs on the device could find their way back to your hands or directly into your mouth, especially if you’re eating or sniffing your fingers. This cycle raises the chance of ingesting harmful bacteria.
Q5: How often should I clean my kitchen phone, and what’s the best method?
A5: Ideally, clean your phone daily if you use it while cooking. Use a microfiber cloth lightly moistened with a mixture of 70% isopropyl alcohol and water. Avoid harsh chemicals or soaking the phone. Wipes made for electronics can also be effective and safe. Always power off your device before cleaning.
Q6: Are hands washing and phone cleaning equally important?
A6: Absolutely! Hands are the main vehicles for germs, so thorough washing is your first line of defense. Equally, cleaning your phone breaks the cycle of re-contamination-think of it as washing the “third hand” that’s always with you in the kitchen.
Q7: Would using a plastic cover help reduce germ build-up?
A7: A smooth, wipeable cover can make cleaning easier and reduce crevices where bacteria hide. Some covers even come with antimicrobial properties. However, the cover itself can accumulate germs, so it needs regular sanitizing too.
Q8: Can I just avoid using my phone in the kitchen altogether?
A8: That’s a great idea for reducing germ transfer! If you can limit phone use to outside the cooking area, you minimize the chance of contamination. Alternatively, using voice commands or smart speakers may reduce direct contact during messy prep.
Q9: Is there ongoing scientific research on this topic?
A9: Yes! Studies are continuously exploring how everyday devices like cell phones contribute to the spread of microbes, especially in food-prep spaces. Researchers aim to develop better cleaning methods, antimicrobial materials, and raise public awareness about hygiene in tech use.
Q10: What’s the takeaway message about kitchen cell phone germs?
A10: Your phone is a germ hotspot, especially in the kitchen! Clean hands and clean devices go hand in hand to keep harmful bacteria at bay. By staying mindful and proactive, you unlock the science of hygiene, turning your phone from a potential risk into a safe cooking companion.
In Conclusion
As we’ve uncovered, the humble kitchen cell phone is more than just a casual companion-it’s a hotspot teeming with unseen microbial life. By unlocking the science behind these tiny invaders, we gain not only awareness but also the power to transform our daily habits. So next time you reach for your phone while chopping vegetables or stirring soup, remember: a little mindful sanitizing goes a long way in keeping your kitchen-and your health-germ-free. After all, in the battle against kitchen cell phone germs, knowledge isn’t just power; it’s protection.
Unlocking the Chemistry Behind a Safe Kitchen Sink Drain: The Role of pH Balance in Preventing Clogs and Corrosion
Unlocking the Chemistry Behind a Safe Kitchen Sink Drain begins with understanding how pH balance directly affects your drain’s health. Maintaining an optimal pH not only prevents stubborn clogs but also shields your plumbing from corrosion, extending the life of your pipes. This knowledge empowers you to take simple, effective steps using both homemade and commercial solutions that respect the delicate chemistry at play.
Prep and Maintenance Time
- Daily maintenance: 5 minutes
- Weekly deep-cleaning: 15 minutes
Yield
Maintains one standard kitchen sink drain system effectively for continuous clog prevention.
Difficulty Level
Easy – perfect for homeowners and enthusiasts looking to adopt a science-backed approach to drain care.
Ingredients for Safe Homemade Drain Solution
- 1/2 cup baking soda (sodium bicarbonate)
- 1/2 cup white distilled vinegar
- 1 cup boiling water
- 1 tablespoon lemon juice
- 1 teaspoon liquid castile soap (optional)
Instructions
- Prepare the baking soda and vinegar mixture: Carefully sprinkle 1/2 cup of baking soda directly into the drain. This base helps neutralize acidic buildup and breaks down minor residues.
- Pour white vinegar slowly: Immediately follow with 1/2 cup of white distilled vinegar. The acid-base reaction creates a fizzing action that loosens grease and organic matter. Allow it to sit for 10 minutes without running water.
- Flush with boiling water: After the fizzing slows, pour 1 cup of boiling water down the drain to wash away loosened debris and kill bacteria responsible for odors and blockages.
- Add lemon juice and castile soap: For enhanced freshness and grease-cutting, squirt 1 tablespoon of lemon juice and mix in 1 teaspoon of castile soap, swishing gently if possible. These ingredients help maintain a balanced pH and add a natural fragrance.
- Repeat weekly: Incorporate this process into your weekly kitchen cleaning routine to maintain a clear and healthy drain environment without harsh chemicals.
Chef’s Notes: Tips for Success
- Variations: Swap lemon juice for grapefruit or orange juice for a different citrus scent and similar acidic benefits.
- Substitutions: If vinegar is unavailable, diluted citric acid powders can perform a comparable function but at adjusted quantities.
- Troubleshooting: Persistent slow drainage may need a mechanical snake or a professional plumber’s help to prevent damage.
- Make-ahead solution: Pre-mix dry baking soda and castile soap in a jar for quick use.
- Safety: Avoid mixing any commercial drain cleaners with homemade natural solutions; unpredictable reactions can harm your plumbing.
Serving Suggestions
Think of your kitchen sink drain like a carefully plated dish: it thrives with gentle, regular attention. Present your routine as part of a kitchen wellness ritual-clean, declutter the surrounding sink area, and finish with natural lemon or herbal-scented wipes to amplify freshness. This elevates maintenance from chore to satisfying self-care.

| Ingredient | Role in Drain Maintenance | Chemical Reaction |
|---|---|---|
| Baking Soda | Neutralizes acids; breaks down grease | Reacts with vinegar to create CO₂ fizz |
| White Vinegar | Dissolves mineral deposits and organic buildup | Acid-base reaction with baking soda |
| Lemon Juice | Enhances acidity to prevent bacterial growth | Maintains low pH, discouraging corrosion |
| Boiling Water | Physically flushes debris; kills microbes | Thermal inactivation of organic matter |
For those looking to deepen their understanding of drain chemistry, explore our Kitchen Maintenance Chemistry Guide, or visit the EPA’s Water Topics page for expert insights on protecting plumbing systems and water safety.
Q&A
Q&A: Unlocking the Chemistry Behind a Safe Kitchen Sink Drain
Q1: Why is understanding the chemistry behind kitchen sink drains important?
A: The kitchen sink drain isn’t just a simple pipe-it’s a battleground of chemical reactions! Knowing the chemistry helps prevent clogs, protect your pipes from corrosion, and ensures harmful substances don’t backflow into your home. It’s all about keeping your kitchen hygienic and your plumbing trouble-free.
Q2: What common substances interact in a kitchen sink drain?
A: The mix is surprisingly diverse-leftover food particles, oils and fats, soap residues, and even traces of cleaning chemicals. These substances engage in chemical processes like saponification (where fats turn into soap) and biodegradation, shaping how well your drain flows.
Q3: How do fats and oils cause drain problems?
A: Fats and oils can undergo a process called saponification when they mix with alkaline substances like soap or baking soda. This reaction forms soap scum that can stick to pipes, trapping debris and creating nasty clogs. Understanding this chemistry helps in choosing the right cleaning approach.
Q4: Can natural solutions help maintain a healthy drain?
A: Absolutely! Natural acids like vinegar can react with baking soda’s alkali in a bubbly neutralization dance, loosening grime without harsh chemicals. This eco-friendly duo safely breaks down residues and helps maintain a clear drain pathway.
Q5: What role do enzymes play in kitchen sink chemistry?
A: Enzymatic drain cleaners use biological catalysts to accelerate the breakdown of organic matter like grease, starches, and proteins. Unlike harsh chemicals, enzymes target clogs at a molecular level, making them an effective and environmentally safe option.
Q6: How can chemical knowledge prevent pipe corrosion?
A: Some cleaning agents are acidic or highly alkaline and can eat away at metal pipes over time. Understanding the pH and chemical nature of these substances ensures you select drain maintenance products that protect your plumbing’s longevity.
Q7: Are there any household chemistry tips for everyday sink care?
A: Yes! Regularly flushing your drain with hot water helps dissolve fats and oils before they solidify. Periodic use of baking soda and vinegar clears buildup naturally, and avoiding pouring harsh chemicals down the drain preserves pipe integrity and promotes a safe kitchen environment.
Understanding the kitchen sink drain’s chemistry is like decoding a hidden world of reactions beneath your everyday chores. With the right knowledge, you can keep your plumbing flowing smoothly, protect your home’s hygiene, and embrace efficient, eco-friendly cleaning methods. Your sink is more than a drain-it’s a tiny chemical lab working tirelessly for you!
In Conclusion
As we’ve journeyed through the molecular dance that keeps your kitchen sink drain flowing smoothly, it’s clear that the chemistry behind a safe drain is as fascinating as it is practical. From the delicate balance of pH to the power of enzymatic cleaners, each element works in harmony to prevent clogs and odors. By understanding these invisible reactions happening beneath your sink, you’re not just maintaining a drain-you’re unlocking a world where science meets everyday living. So next time you pour that homemade solution down the pipe, remember: you’re a kitchen chemist, shaping a cleaner, safer home one molecule at a time.
Listeria Uncovered: The Silent Threat in Your Food Chain
Listeria contamination has quietly infiltrated food processing chains worldwide, posing a hidden danger that demands our attention. As food lovers and culinary professionals, understanding this silent threat not only safeguards our health but also empowers us to elevate food safety to an art form in both home and commercial kitchens.
Prep and Cook Time
- Preparation: 15 minutes
- Cooking/Processing: 10 minutes
- Total Time: 25 minutes
Yield
Serves 4-6 individuals when following proper food safety measures.
Difficulty Level
Medium – Requires attentive food handling and hygiene awareness.
Ingredients
- 1 cup fresh leafy greens, thoroughly washed and dried
- 1/2 cup cooked deli meats (preferably nitrate-free and refrigerated correctly)
- 1/2 cup soft cheese, such as Brie or cream cheese, stored properly
- 1 tablespoon extra virgin olive oil
- 1 teaspoon freshly squeezed lemon juice
- Salt and pepper to taste
- Fresh herbs (optional), finely chopped
- Sanitized serving utensils and cutting board (to reduce cross-contamination)
Instructions
- Begin by rinsing the leafy greens in cold water to remove visible dirt. Pat dry thoroughly using a clean kitchen towel or spinner to prevent moisture, which can foster bacterial growth.
- Prepare the deli meats and cheese: Slice them into bite-sized pieces. Ensure your hands and surfaces are sanitized before handling these items.
- In a mixing bowl, gently toss the greens with olive oil and lemon juice, seasoning lightly with salt and pepper. This keeps the freshness vibrant and protects the delicate leaves.
- Layer the prepared deli meats and soft cheese over the greens. Keep these ingredients chilled until just before serving to minimize listeria risks.
- Before serving, double-check that all utensils and plates are clean and dry. This precaution reduces the chance of introducing Listeria during plating.
- Serve immediately with fresh herbs sprinkled on top for a fragrant and visually appealing finish.
Tips for Success
- Always store soft cheeses and deli meats at recommended refrigeration temperatures below 40°F (4°C).
- Use separate cutting boards and knives for raw meats and ready-to-eat foods to avoid cross-contamination.
- Consider purchasing pasteurized cheese varieties as they have a lower risk of Listeria presence.
- Regularly sanitize all food contact surfaces and utensils to maintain a hygienic preparation environment.
- Make this salad fresh daily; avoid storing mixed ingredients for prolonged periods to keep contamination risks minimal.
Serving Suggestions
Present this fresh, light salad alongside crusty bread or whole-grain crackers. Garnish with edible flowers or a sprinkle of toasted nuts to add texture and color-perfect as a starter or a safe snack option. Pair with chilled white wine or sparkling water infused with lemon for an elevated dining experience that puts safety and flavor hand in hand.

| Nutrient | Per Serving |
|---|---|
| Calories | 150 kcal |
| Protein | 8 g |
| Carbohydrates | 5 g |
| Fat | 10 g |
Understanding and Preventing Listeria Contamination
Recognizing the pathways of Listeria contamination is essential for every kitchen. This bacterium thrives in cool, moist environments, often hiding in hard-to-clean nooks or on improperly sanitized equipment. The first step is identifying potential risks, such as contaminated deli meats, soft cheeses, or unwashed produce. Ensure thorough washing, proper refrigeration, and segregation of raw and cooked foods to break the contamination cycle.
By embracing these proven food safety practices, from meticulous hygiene to temperature control, we can outsmart the silent threat. Listeria does not have to be a mystery or a silent saboteur in your food chain-it can become an impetus for cleaner, safer, and more mindful culinary creativity.
For a deeper dive into kitchen sanitation best practices, visit the CDC’s official guide on Listeria prevention. To explore more recipes designed with food safety in mind, check out our food safety recipe collection.
Q&A
Q&A: Listeria Uncovered – The Silent Threat in Your Food Chain
Q1: What exactly is Listeria, and why is it called a “silent threat”?
A1: Listeria monocytogenes is a sneaky little bacterium that can hitch a ride on your food, often without any obvious sign. It’s called a “silent threat” because it can lurk in refrigerated foods, multiplying quietly and causing serious illness before you even realize it’s there.
Q2: Which foods are the prime suspects in spreading Listeria?
A2: Listeria loves the cold and damp, making ready-to-eat deli meats, soft cheeses, smoked seafood, and unpasteurized milk its favorite hangouts. Fresh produce like cantaloupe and sprouts have also been linked to outbreaks, proving it’s not just the “usual suspect” foods that carry this risk.
Q3: How does Listeria affect our health?
A3: For most healthy folks, Listeria might cause mild flu-like symptoms or none at all. But for vulnerable groups-pregnant women, newborns, the elderly, and those with weakened immune systems-it can lead to severe infections like meningitis, septicemia, or miscarriages. It’s a microscopic menace with full-sized consequences.
Q4: Is Listeria easy to kill during cooking?
A4: Absolutely! Listeria can be wiped out by heating food to an internal temperature of 165°F (74°C). The trouble arises because it thrives in refrigerated conditions, so foods that aren’t cooked, like cold cuts or soft cheeses, can be a risk.
Q5: How can consumers protect themselves from Listeria?
A5: Keep your refrigerator clean and cold (at or below 40°F/4°C). Eat perishable ready-to-eat foods promptly, pay close attention to “use by” dates, and avoid unpasteurized dairy products. And when in doubt-heat it up or throw it out!
Q6: Can food producers completely eliminate Listeria from the food chain?
A6: While zero tolerance is the goal, Listeria is notoriously persistent in food processing environments. Rigorous sanitation, regular testing, and smart facility design help keep it in check, but vigilance is key-this bacterium’s resilience keeps the battle ongoing.
Q7: Why is Listeria getting more attention these days?
A7: With more people consuming ready-to-eat and fresh foods, the risk landscape has shifted. Plus, better detection methods mean outbreaks are spotted quicker. Understanding Listeria’s “silent” nature empowers us all to make safer food choices and demand higher safety standards.
Q8: What can governments and industry do to tackle the Listeria challenge?
A8: Continued investment in food safety research, stricter regulations, enhanced surveillance, and public education campaigns are crucial. Collaboration across the food chain-from farm to fork-ensures this quiet pathogen doesn’t get the final word.
Listeria might be silent, but knowledge about it speaks volumes. Stay informed, stay cautious, and keep this hidden hazard out of your food chain!
Key Takeaways
As we peel back the layers of Listeria’s silent march through our food chain, it becomes clear that vigilance is our strongest defense. This microscopic intruder may be stealthy, but knowledge empowers us to outpace it-whether through rigorous food safety practices, informed choices, or continued research. By understanding the risks and embracing preventative measures, we don’t just protect ourselves; we safeguard the very trust we place in the food that fuels our lives. In the battle against Listeria, awareness is not just power-it’s the key to turning a silent threat into a story of resilience and safety.
Tailgate Triumph: Science-Backed Tips for Safe Celebrations
Tailgate Triumph begins with mastering the art of outdoor cooking that marries irresistible flavors with rigorous food safety. Whether you’re rallying around the grill or sharing bites among friends, creating a reliable setup for your tailgate feast is essential to ensuring everyone enjoys not only the taste but also the peace of mind. Inspired by countless outdoor parties and the vibrant energy of game day gatherings, this guide elevates your tailgate experience with practical, science-backed strategies that keep your spread deliciously fresh, safe, and unforgettable.
Prep and Cook Time
- Preparation: 20 minutes
- Cook Time: 15 minutes
- Total Time: 35 minutes
Yield
- Serves 6-8 hungry tailgaters
Difficulty Level
- Medium – perfect for outdoor enthusiasts eager to enhance flavor and safety
Ingredients
- 1 lb lean ground beef (85% lean, freshly refrigerated)
- 1 cup finely chopped onions
- 2 cloves garlic, minced
- ½ cup shredded sharp cheddar cheese
- 4 whole wheat burger buns, split and toasted
- Salt and freshly ground black pepper, to taste
- 1 tbsp olive oil
- 4 large lettuce leaves, washed and dried
- Tomato slices, optional but recommended for freshness
- Prepared mustard and ketchup, for serving
- Instant-read grill thermometer (for food safety verification)
Instructions
- Preheat your grill to medium-high heat, ensuring it reaches about 375°F (190°C) – this prime temperature locks in flavor and safely sears your patties.
- Form the ground beef into 4 equal-sized patties, about ¾-inch thick. Press a slight indentation in the center of each to prevent puffing during grilling.
- Brush each patty lightly with olive oil and season generously with salt and black pepper on both sides for balanced seasoning.
- Place the patties on the grill, leaving space between them. Cook for 5-6 minutes on the first side without moving to develop a crust.
- Flip carefully and add shredded cheddar on top of each patty. Close the grill lid and cook for an additional 4-5 minutes or until the internal temperature reaches 160°F (71°C), confirmed using your instant-read grill thermometer.
- Meanwhile, toast the buns directly on the grill for about 1-2 minutes, until golden and crisp, adding texture to every bite.
- Remove patties and buns from the grill; assemble burgers with lettuce leaves, tomato slices, mustard, and ketchup as preferred.
- Serve immediately for best flavor, keeping any leftovers chilled promptly within two hours to maintain food safety.
Tips for Success
- Use a reliable grill thermometer to maintain the ideal grilling temperature throughout for perfectly cooked, healthful burgers.
- Keep raw and cooked foods separate using distinct plates and utensils to avoid cross-contamination.
- Consider prepping patties in advance and storing them on ice packs if your tailgate setup will delay cooking.
- For a healthier twist, substitute lean ground turkey and serve on gluten-free buns.
- Bring along an insulated cooler with ice packs to keep perishable ingredients cold until cooking.
Serving Suggestions
Present your Tailgate Triumph burgers atop a rustic wooden board garnished with fresh parsley or chives for visual pop. Pair them with crispy sweet potato fries or a vibrant corn salad to complement the smoky, cheesy goodness. Include colorful paper plates and reusable utensils for a festive, eco-friendly vibe. For beverages, icy lemonade or a craft beer balance the bold flavors beautifully. Don’t forget to keep hand sanitizers handy, ensuring everyone enjoys their tailgate merriment mindfully and hygienically.
| Nutrition | Per Serving |
|---|---|
| Calories | 420 kcal |
| Protein | 28 g |
| Carbohydrates | 32 g |
| Fat | 22 g |
Explore more safe grilling tips for your next tailgate adventure.
For comprehensive guidelines on food safety at outdoor events, visit the USDA Food Safety and Inspection Service.

Q&A
Q&A: Tailgate Triumph – Science-Backed Tips for Safe Celebrations
Q1: What is the key to a successful tailgate party?
A: A successful tailgate balances fun, food, and safety! Science shows that planning ahead-choosing the right spot, ensuring food safety, and staying hydrated-creates a festive atmosphere without mishaps. Think of it as game day strategy beyond the field.
Q2: How can I keep my grill-session safe while enjoying the tailgate?
A: Grilling is the heart of many tailgates, but science warns about cross-contamination and undercooked food. Use separate platters for raw and cooked items, keep meats at safe temperatures, and never leave your grill unattended. Bonus tip: a meat thermometer is your best buddy!
Q3: What role does hydration play in tailgate safety?
A: Hydration is crucial, especially when you’re outdoors for hours. Dehydration can dull your senses and increase risks-scientific studies suggest drinking water regularly, alternating alcoholic drinks with water, and keeping electrolyte-rich options handy to maintain energy and alertness.
Q4: Is there a smart way to manage alcohol consumption during tailgates?
A: Absolutely! Science recommends pacing your drinks, combining them with food, and knowing your limits. Setting a “drink stop” time before driving or arranging alternative rides underscores safety. Remember, tailgate triumph means celebrating responsibly.
Q5: How can I protect myself and others from weather-related risks during tailgate parties?
A: Weather vigilance is key! Use sunscreen to prevent burns, wear layers to adapt to temperature shifts, and have a shaded area or canopy if possible. Checking forecasts ahead allows you to prepare for rain or heat, ensuring your tailgate stays enjoyable and safe.
Q6: Are there any tech tools that can help enhance tailgate safety?
A: Yes! From apps that track your blood alcohol content to portable coolers with built-in thermometers, technology can be a game-changer. Even simple things like battery-powered lights and first-aid apps keep your celebration secure after the sun sets.
Q7: Can tailgating be eco-friendly and safe simultaneously?
A: Definitely! Science supports using reusable plates and utensils, proper waste disposal, and choosing eco-conscious charcoal alternatives. Keeping your space clean reduces slips and hazards, making your tailgate both green and safe-a true victory for everyone involved.
Celebrate smart, stay safe, and enjoy the ultimate tailgate triumph!
Insights and Conclusions
As the sun sets on another unforgettable tailgate, remember that the true triumph lies not just in the cheers and good times, but in the mindful choices that keep everyone safe and sound. Backed by science and seasoned experience, these tips transform your celebration from a simple gathering into a masterclass of care and camaraderie. So next time you pop that cooler open or fire up the grill, do it with confidence-because the best tailgate is one where the memories are as bright as the day, and everyone makes it home safely. Here’s to many more celebrations where fun meets responsibility, and every victory is a safe one.
Picnic Chemistry: Safely Blending Fun with Food Science in Your Outdoor Kitchen
Picnic chemistry: safely blending fun with food science transforms ordinary outdoor meals into captivating culinary adventures that blend flavor, safety, and discovery. Imagine biting into a perfectly toasted sandwich-its textures and tastes a result of scientific magic right in nature’s dining room. This recipe reveals how basic principles of heat transfer and food safety converge to create picnic treats that delight both palate and curiosity, making your next outing unforgettable and safe.
Prep and Cook Time
Preparation: 15 minutes | Cooking: 10 minutes | Total: 25 minutes
Yield
Serves 4 picnic enthusiasts
Difficulty Level
Easy – perfect for beginners eager to explore food science outdoors.
Ingredients
- 8 slices whole grain bread, sturdy and fresh
- 4 tbsp unsalted butter, softened for even spreading
- 8 slices sharp cheddar cheese (or your preferred melting cheese)
- 2 medium tomatoes, thinly sliced and seeded for extra moisture control
- 1 cup fresh spinach leaves, washed and patted dry
- 2 tbsp Dijon mustard, to add tang and balance flavors
- Salt and freshly ground black pepper, to taste
- Optional: 4 slices cooked bacon for added crunch and flavor
Instructions
- Prepare your workspace: Ensure all ingredients and utensils are clean and portioned. Use a clean cutting board and bring along paper towels to maintain hygiene outdoors.
- Butter the bread: Spread butter evenly on one side of each slice. This acts as an insulator and browns the bread beautifully when toasted.
- Layer your ingredients: On the unbuttered side of 4 slices, spread a thin layer of Dijon mustard, then layer cheese slices evenly. Add tomato slices and spinach leaves, seasoning lightly with salt and pepper. Add bacon if using.
- Assemble sandwiches: Place the remaining bread slices butter-side up on top of the fillings to form sandwiches.
- Heat your cooking surface: Over a camping stove or picnic grill, preheat a non-stick skillet or griddle over medium heat. Use the science of heat conduction here; a moderate temperature avoids burning while melting cheese thoroughly.
- Grill sandwiches: Place sandwiches on the hot surface. Press lightly and cook for about 4-5 minutes per side, flipping carefully with a spatula. Toast until bread is golden brown and cheese melts, a sign that heat’s penetrated perfectly.
- Rest and slice: Remove sandwiches and let rest for 2 minutes to allow melted cheese to stabilize. Slice diagonally for neat presentation.
Chef’s Notes
- Ingredient Safety: Keep perishable ingredients like cheese and spinach chilled in a cooler to prevent spoilage during your outdoor adventure.
- Variations: Swap cheddar with mozzarella or provolone for a different melt and flavor profile. Add avocado for creamy texture, but add it fresh to avoid browning.
- Substitutions: Use gluten-free bread if needed. For vegan options, substitute butter with plant-based spreads and cheese with vegan slices.
- Make-Ahead Tips: Assemble sandwiches in advance and keep them wrapped in parchment paper in a cooler. Toast them fresh on site for best results.
- Common Issues: If the bread browns too quickly but cheese isn’t melting, reduce heat and cover pan briefly to trap heat effectively.
Serving Suggestions
Serve these scientifically perfected grilled sandwiches with a crisp side salad and a refreshing homemade lemonade for a balanced picnic plate. Garnish with fresh basil or edible flowers to visually elevate your dish in a natural setting. Pair with a chilled sparkling water infused with cucumber or mint for a sensory feast. Wrap individual sandwiches in beeswax wraps to maintain warmth and eco-friendliness.
| Nutrient | Per Serving |
|---|---|
| Calories | 350 kcal |
| Protein | 18 g |
| Carbohydrates | 30 g |
| Fat | 15 g |

Explore more about outdoor culinary safety in our Food Safety Tips for Picnics guide. For deeper understanding of the chemistry behind grilling cheese, visit the Royal Society of Chemistry’s article on cheese melting.
Q&A
Q&A: Picnic Chemistry – Safely Blending Fun with Food Science
Q1: What exactly is “Picnic Chemistry”?
A1: Picnic Chemistry is the delightful fusion of outdoor leisure and the magic of food science. Imagine blending your favorite picnic treats with simple chemistry experiments that turn a sunny day into an edible science adventure. It’s learning through taste, sight, and even smell-right on your picnic blanket!
Q2: Why combine chemistry with a picnic? Isn’t that risky?
A2: When approached thoughtfully, it’s absolutely safe and incredibly rewarding. Picnic Chemistry emphasizes using everyday kitchen ingredients and natural elements, keeping all experiments edible or biodegradable. With proper preparation and safety measures, it’s a fantastic way to engage curious minds without any lab hazards.
Q3: What are some fun and safe experiments I can try?
A3: The possibilities are as tasty as they are educational! Try the classic vinegar and baking soda reaction to make a fizzy lemonade, or create natural pH indicator drinks using red cabbage juice that change color with citrus or baking soda. Another favorite is making edible “slime” with gelatin, which is fun and completely safe to eat!
Q4: How can Picnic Chemistry enhance a child’s learning experience?
A4: It transforms abstract science concepts into tangible and delicious experiences. Kids see science at work in real life, making learning memorable and multisensory. The outdoors adds an element of freedom and creativity, encouraging questions, experimentation, and discovery beyond the classroom walls.
Q5: What safety tips should participants keep in mind?
A5: Basic precautions include: using food-safe and non-toxic materials, supervising children closely, washing hands before and after experiments, and avoiding allergens. It’s also wise to prepare experiments away from ants or wildlife and to pack biodegradable waste bags for responsible cleanup.
Q6: Can Picnic Chemistry be a group activity?
A6: Absolutely! It’s perfect for family outings, school field trips, or community picnics. Group participation encourages teamwork, sharing of ideas, and collective wonder. Plus, who doesn’t love the joy of tasting the fruits (or fizz) of your shared experiments?
Q7: Any tips for organizing a successful Picnic Chemistry event?
A7: Plan easy-to-follow experiments with readily available ingredients, bring plenty of clean water, prepare a checklist of supplies, and select a comfortable picnic spot with shade and space. Most importantly, keep the atmosphere light-hearted-science tastes better when it’s fun!
Q8: Where can I find resources to get started with Picnic Chemistry?
A8: Numerous books, websites, and educational kits cater to outdoor food science activities. Look for kid-friendly science blogs, cooking and chemistry mashups, or even local science museums offering picnic-friendly experiment ideas. Your kitchen pantry can be your lab stash!
Picnic Chemistry invites everyone to savor the wonders of science alongside sandwiches and sunshine. With a pinch of curiosity and a dash of care, your next picnic can become a delicious laboratory of discovery!
To Wrap It Up
As the sun dips below the horizon and your picnic blanket folds away, remember that the magic of picnic chemistry doesn’t have to end with the meal. By blending curiosity with caution, you transform a simple outdoor feast into a vibrant laboratory where science and flavor mingle freely. Whether it’s the fizz of citrus with baking soda or the gentle glow of natural indicators in your lemonade, these experiments invite both young and old to savor learning alongside lunch. So next time you pack your basket, bring along a dash of scientific wonder-because the best recipes combine safety, fun, and a pinch of discovery. Here’s to tasty experiments and picnic memories that linger long after the last crumb is gone!
Decoding Key Provisions of the FDA Food Code: How It Shapes Food Handling Practices
Unlocking Safety: What Is the FDA Food Code? provides a crucial framework that every food service operation should embrace to protect consumers and ensure impeccable food quality. Rooted in science and best practices, this comprehensive guide directs the safe preparation, storage, and service of food, reducing the risk of contamination and foodborne illnesses. Understanding the foundations of the FDA Food Code is like mastering a recipe that guarantees safety and satisfaction every time.
Prep and Cook Time
- Preparation: 15 minutes
- Implementation & Familiarization: Ongoing process within daily operations
Yield
- 100% safe and consumer-compliant food handling environment
Difficulty Level
- Medium – requires attentive application and continual updates
Ingredients
- Clear understanding of temperature control – maintaining cold and hot foods at safe temperatures
- Personal hygiene standards – frequent handwashing and glove use
- Cross-contamination prevention techniques – using separate equipment and surfaces
- Sanitation protocols – cleaning schedules, approved sanitizers
- Training materials – staff education on FDA Food Code principles
- Monitoring tools – thermometers, checklists, logs
- Compliance documentation – record-keeping for inspections and audits
Instructions
- Learn the core temperature requirements: Familiarize yourself with safe zone temperatures such as cold holding below 41°F (5°C) and hot holding above 135°F (57°C).
- Train staff consistently: Conduct regular training sessions emphasizing hand hygiene, glove use, and when to change gloves to prevent contamination.
- Set up proper food storage zones: Organize refrigerators and freezers to separate raw from cooked foods, using color-coded containers or designated shelving.
- Implement rigorous cleaning schedules: Assign daily, weekly, and monthly sanitation tasks and verify with checklists ensuring surfaces and utensils are sanitized using FDA-approved methods.
- Monitor food temperatures actively: Use calibrated thermometers to check food during preparation, cooking, cooling, and holding phases, logging findings for accountability.
- Maintain detailed records: Document all corrective actions, training attendance, and cleaning activities. Well-maintained records reinforce compliance and ease audits.
- Stay updated with FDA Food Code revisions: Regularly review the latest FDA Food Code updates through official channels, adapting procedures as needed to reduce emerging risks.
Chef’s Notes: Tips for Success
- Adapt local regulations: Cross-reference the FDA Food Code with your state or local health department guidelines to ensure alignment and avoid compliance gaps.
- Use visual aids: Post signage for handwashing, temperature targets, and cleaning protocols in accessible areas for staff reinforcement.
- Invest in training videos: Engaging multimedia training makes retention easier and encourages active participation.
- Conduct regular mock inspections: Simulate health inspections internally to spotlight weaknesses and improve continuously.
- Leverage technology: Use digital temperature sensors and automated logs to minimize human error and streamline compliance tracking.
Serving Suggestions: Bringing Compliance to Life
Visualize compliance as a beautifully plated dish-each element, from temperature controls to personal hygiene, harmonizing to create a safe dining experience. Enhance your “presentation” by celebrating successes-recognize staff adherence with monthly awards or displays showcasing zero non-compliance days. Garnish your kitchen culture with ongoing education sessions, and pair the FDA Food Code practices with quality ingredients to delight customers while guaranteeing safety.

| Key Provision | Importance | Impact on Safety |
|---|---|---|
| Temperature Control | Prevent pathogen growth | Minimizes foodborne illness risk |
| Personal Hygiene | Blocks contamination sources | Maintains food integrity |
| Cross-Contamination Prevention | Separates raw and ready-to-eat foods | Ensures safe handling |
| Sanitation Procedures | Keeps surfaces and tools clean | Prevents microbial buildup |
| Employee Training | Builds food safety culture | Promotes consistent compliance |
For a deeper dive into the scientific basis of food safety, visit the FDA Food Code official webpage. For practical kitchen hygiene routines, explore our related article on Kitchen Safety Best Practices.
Q&A
Q&A: Unlocking Safety – What Is the FDA Food Code?
Q1: What is the FDA Food Code, and why should I care?
A: The FDA Food Code is a carefully crafted blueprint for food safety in retail and food service operations across the U.S. Think of it as a master recipe-not for your favorite dish, but for keeping your food safe from farm to fork. It sets the standards to prevent foodborne illnesses, ensuring what lands on your plate is both delicious and safe.
Q2: Who creates the FDA Food Code, and how often does it change?
A: The U.S. Food and Drug Administration (FDA) authors the Food Code every four years, blending the latest science, technology, and best practices. It’s like an evolving safety guidebook, continuously updated to meet new challenges in the food world.
Q3: Is the FDA Food Code a law?
A: The Food Code itself isn’t a federal law but a model that states and local health departments adopt and adapt. It’s like a trusted map: while the FDA charts the path, each state decides how closely to follow its route.
Q4: How does the FDA Food Code protect consumers?
A: By setting clear rules on everything from food storage temperatures to employee hygiene, the Food Code puts guardrails around food handling. These safeguards stop harmful bacteria in their tracks, making your dining experience safer.
Q5: Who uses the FDA Food Code?
A: Food inspectors, restaurant owners, caterers, and even food truck operators lean on the Food Code’s guidelines. It’s their trusted companion in the mission to keep kitchens clean and customers healthy.
Q6: Can consumers benefit from knowing about the FDA Food Code?
A: Absolutely! Understanding its basics empowers you to make safer choices when eating out or preparing food at home. It’s knowledge that turns you into a savvy food safety advocate for yourself and your loved ones.
Q7: What are some key highlights of the FDA Food Code?
A: From handwashing protocols and safe cooking temperatures to preventing cross-contamination, the Food Code covers it all. It’s like a safety toolkit that tackles every step where food could go from safe to risky.
Q8: How can businesses implement the FDA Food Code effectively?
A: By training staff, regularly reviewing procedures, and embracing the Food Code’s recommendations, businesses turn safety rules into everyday habits. It’s not just compliance-it’s a culture of care.
Q9: Where can I find the latest version of the FDA Food Code?
A: The FDA’s official website is your go-to source for the most current Food Code editions, insights, and educational materials. Unlocking this resource is the first step toward food safety mastery.
Unlocking the secrets of the FDA Food Code reveals a world where safety meets deliciousness-a world where everyone can enjoy food with confidence and peace of mind.
Wrapping Up
As we peel back the layers of the FDA Food Code, it becomes clear that this comprehensive guide is more than just a rulebook-it’s the blueprint for safeguarding every meal, protecting public health, and building trust in the food we eat. Whether you’re a food handler, restaurant owner, or an everyday consumer, understanding these standards unlocks a safer dining experience for all. So next time you savor a meal, remember-the FDA Food Code is quietly working behind the scenes, ensuring that safety is always on the menu.
Is Your Meal Safe? Spot Signs Before You Take a Bite – knowing when food has crossed from fresh to unsafe is essential for safeguarding your health and enjoying every dish without worry. Whether it’s a vibrant salad, a sumptuous stew, or a tempting piece of deli meat, subtle clues often reveal when a meal may contain hidden contamination risks. This guide will inspire your confidence in the kitchen by equipping you with practical insights to catch those early warnings and protect every bite.
Prep and Cook Time
- Prep Time: 10 minutes
- Inspection & Safety Check: 5 minutes
Yield
Difficulty Level
- Easy
Ingredients for a Safe Meal Inspection
- 1 clean set of hands for handling and smelling
- Bright natural light or a well-lit kitchen area for color inspection
- Magnifying glass (optional) to detect molds or subtle spots
- Food thermometer to accurately check internal temperatures of cooked items
- Clean paper towels or cloth for patting food dry
- Trash bin within reach for disposal of questionable items
Instructions: How to Check Your Food for Safety
- Observe Visual Cues: Carefully examine color, texture, and appearance. Look for discoloration such as brown or green spots, slimy surfaces on meats or vegetables, or unnatural dryness. Fresh foods often have vibrant colors; dull or faded hues can signal spoilage.
- Sniff for Freshness: Bring the item close and breathe in deeply. Sour, rancid, or ammonia-like odors almost always indicate bacterial growth or spoilage. Fresh produce should smell earthy or sweet; dairy and meats must not emit pungent or foul scents.
- Feel the Texture: Use clean hands to gently press or rub the surface. Mushy spots, excessive stickiness, or an unusually dry and cracked texture-especially in fruits, vegetables, or bakery items-warrant caution.
- Check Packaging and Labels: Inspect expiry dates, and integrity of sealed packaging. Puffy or dented containers, broken seals, or residue buildup can harbor dangerous bacteria. Never ignore faded print or torn packaging.
- Measure Temperatures: Use a Food thermometer to verify fully cooked meats have reached a safe core temperature (e.g. 165°F for poultry). Cold items should remain below 40°F to minimize bacterial proliferation.
- Trust Your Intuition: If something “feels off,” err on the side of caution. Better to discard suspicious food than jeopardize your health.
Tips for Success in Food Safety
- Store perishables promptly: Refrigerate leftovers within two hours of cooking.
- Practice proper hygiene: Always wash hands before handling food.
- Avoid cross-contamination: Use separate cutting boards for raw meat and fresh produce.
- Use your senses: Sight, smell, touch, and temperature all combine to help you make informed decisions about food safety.
- Have a backup plan: When uncertain, quickly prepare a fresh alternative for peace of mind.
Serving Suggestions
Once confirmed safe and delicious, present your meal with care and flourish. Garnish fresh salads with colorful herbs like basil or cilantro, or add a squeeze of lemon for bright acidity. For cooked items, sprinkle a dash of cracked black pepper or a drizzle of high-quality olive oil to elevate natural flavors. Remember, enjoying safe food means savoring every bite with confidence and joy.
| Nutrient | Fresh Produce | Cooked Meat |
|---|---|---|
| Calories | 40 per cup | 250 per 3 oz |
| Protein | 2g | 22g |
| Carbohydrates | 9g | 0g |
| Fat | 0g | 15g |

For a deeper dive into safe food handling practices, explore our related article on kitchen hygiene tips. Additionally, the FDA provides comprehensive food safety guidelines at FDA Food Safety.
Q&A
Q: How can I tell if my meal is safe before taking a bite?
A: Trust your senses! Look for unusual colors, off smells, or strange textures. If the food looks slimy, smells sour, or feels mushy when it shouldn’t, those are red flags. When in doubt, don’t risk it-your health is worth more than a bite!
Q: What are some subtle signs that my food might be spoiled?
A: Spoilage can be sneaky. Slight discoloration, a faint sour or metallic odor, or tiny bubbles in packaged foods can hint at bacterial growth. Also, if the packaging is swollen or leaking, it’s time to toss it.
Q: Can expired dates accurately tell me if a meal is unsafe?
A: Expiration dates give a guideline, but they’re not foolproof. Some foods might still be safe shortly after the date, while others could spoil earlier if improperly stored. Always combine date checks with sensory inspection.
Q: Are leftovers safe to eat after a few days?
A: Leftovers can be safe for 3-4 days if stored properly in the fridge at or below 40°F (4°C). Beyond that, bacteria can multiply, increasing spoilage risks. Always reheat leftovers to steaming hot before eating.
Q: How does food preparation affect meal safety?
A: Cross-contamination is a sneaky culprit! Using the same cutting board for raw meat and veggies without washing can spread harmful bacteria. Proper cooking temperatures and hygienic prep are key to keeping meals safe.
Q: What should I do if I suspect food poisoning after a meal?
A: If nausea, vomiting, diarrhea, or fever appears within hours to days after eating, stay hydrated and rest. Severe symptoms or those lasting more than a couple of days warrant a doctor’s visit-better safe than sorry!
Q: Can frozen meals be trusted?
A: Freezing slows bacteria but doesn’t kill it. If a frozen meal has thawed and been refrozen or shows freezer burn and odd smells, it’s safer to discard it. Always check packaging integrity and date before heating.
Q: What role does trusting your gut feeling play in food safety?
A: Sometimes your instincts know best. If something feels off-no matter how minor it seems-listen to that inner voice. It’s better to miss a meal than to risk your health with suspicious food.
Keep these signs in mind, and you’ll be safer navigating the delicious world on your plate!
Final Thoughts
As you sit down to enjoy your next meal, remember that a few mindful moments of scrutiny can be your best defense against unseen hazards. From subtle changes in color and texture to off-putting odors and unfamiliar tastes, your senses are invaluable tools in spotting trouble before it sneaks onto your plate. Staying informed and attentive not only protects your health but also transforms eating into a safer, more satisfying experience. So, the next time you reach out for that tempting bite, pause, observe, and trust your instincts-because a safe meal is the first step toward a happy, healthy you.
Safe Bites: Creative Ways to Teach Kids Food Safety Today
Safe Bites: Creative Ways to Teach Kids Food Safety Today opens a fun gateway into teaching our little ones the essentials of food hygiene through imaginative, hands-on activities that stick for life. Imagine helping children understand why clean hands and fresh food are not just rules but magical keys to a healthy body and happy tummy! By blending storytelling, simple experiments, and interactive games, you empower youngsters to practice safe eating habits with enthusiasm and confidence.
Prep and Cook Time
- Prep Time: 15 minutes
- Activity Duration: 30-45 minutes
Yield
Designed for small groups of 4-6 children to maximize interaction and personalized attention.
Difficulty Level
Easy – Perfect for educators, parents, and caregivers to facilitate without any special equipment.
Ingredients
- Fresh vegetables: 2 bell peppers (any color), sliced thinly
- Whole grain bread: 6 slices, cut into fun shapes with cookie cutters
- Fruit slices: 1 cup assorted (apple, kiwi, banana), for healthy snacks
- Hand soap and clean towels for demonstrating proper handwashing
- Paper plates and napkins for food handling practice
- Food-safe markers for storytelling cards
- Printed storytelling cards illustrating germs, safe cooking steps, and fun kitchen heroes
Instructions
- Start the adventure: Gather children around and introduce the idea that food safety is like a superhero shield protecting us. Use storytelling cards to show characters such as “Captain Clean Hands” and “Germ Buster.”
- Demonstrate handwashing: Lead a lively handwashing session using warm water and soap, encouraging children to sing a 20-second song. This ensures they learn the timing while having fun.
- Food handling fun: Distribute paper plates with sliced veggies and shaped bread. Guide kids to arrange their snacks while explaining the importance of clean surfaces and avoiding cross-contamination.
- Play “Germ Detective”: Hide small paper “germs” on the snack table and have kids spot and “sanitize” them using paper towels and pretend cleaner sprays, reinforcing germ awareness.
- Interactive quiz: Using food-safe markers, have children draw or write one thing they learned on their paper plate or napkin, making it a memorable keepsake.
- Wrap it up: Taste the safe snacks together, praising the children for becoming food safety heroes and encouraging them to share these tips at home and school.
Tips for Success
- Use brightly colored props and themed illustrations to keep young minds visually engaged.
- Incorporate sensory elements like scented soap or textured cards to deepen the connection with hygiene lessons.
- Repeat key phrases such as “Clean hands save the day!” to build positive associations and easy recall.
- Adapt activities for different age groups by simplifying or adding challenges, such as timing handwashing with a sand timer.
- Encourage participation from parents or caregivers to reinforce continuity beyond the activities.
Serving Suggestions
Present these activities in a colorful, inviting space with child-sized furniture. Use colorful bowls and plates to create an appealing setup, garnished with fresh herbs like parsley for a touch of nature. Share takeaway cards with parents outlining simple food safety habits to nurture at home, ensuring the lessons resonate well beyond the session.
| Activity Element | Benefits |
|---|---|
| Handwashing Demonstration | Improves hygiene awareness, builds routine |
| Food Handling Practice | Teaches clean workspace, reduces contamination risk |
| Storytelling Cards | Visual memory aid, makes learning captivating |
| “Germ Detective” Game | Encourages critical thinking, engages tactile senses |
Explore more creative food safety tips for kids in our related article. For trusted guidelines, visit the CDC Food Safety website for expert advice.

Q&A
Q&A: Safe Bites – Creative Ways to Teach Kids Food Safety Today
Q1: Why is it important to teach kids about food safety early on?
A1: Just like learning to tie their shoes or bike safely, understanding food safety sets kids up for a lifetime of healthy habits. Early lessons help them avoid foodborne illnesses, recognize contamination risks, and build confidence in the kitchen – turning potential hazards into safe, tasty adventures.
Q2: How can parents make food safety fun instead of preachy?
A2: Turn food safety rules into games! For example, create a “Germ Detective” challenge where kids hunt for common sneaky spots needing extra washing. Use colorful stickers or badges for “Clean Hands Champions” to reward good hygiene. When kids play role models in mini cooking shows or puppet theaters, lessons stick without the lecture.
Q3: Are there creative tools or crafts to explain concepts like cross-contamination?
A3: Absolutely! Use colored playdough or felt to represent different food groups and germs. Kids can act out “don’t mix me” scenarios by physically separating their creations. Another idea: build a “Clean Kitchen” collage with cutouts of clean vs. dirty kitchen items. Hands-on projects make invisible dangers like bacteria visible and memorable.
Q4: What role can technology play in teaching food safety to children?
A4: Technology turns learning into an interactive adventure. Kid-friendly apps with quizzes, animations, or augmented reality can simulate cooking scenarios where children spot unsafe practices. Short, catchy YouTube videos or songs about handwashing and refrigerator safety make tricky topics catchy and easy to recall.
Q5: How do you balance teaching safety without making kids afraid to try new foods or help in the kitchen?
A5: Emphasize empowerment over fear. Present safety like a superhero skill – knowing how to wash hands or keep raw meat separate means they’re protecting themselves and others. Celebrate every “safe bite” attempt, and encourage curiosity about food origins, how it’s prepared, and ways to keep it fresh and safe without over-worrying.
Q6: What are some everyday habits kids can learn to keep food safe?
A6: Simple habits like washing hands before eating and cooking, rinsing fruits and veggies, using separate cutting boards for raw meat and veggies, and storing leftovers promptly in the fridge go a long way. Making these actions a normal part of their day helps kids internalize food safety without extra effort.
Q7: Can involving kids in cooking boost their interest in food safety?
A7: Definitely! When kids help prepare meals, they naturally become more engaged and aware of safety practices like washing veggies, handling utensils carefully, and checking food temperature. Making cooking a team effort nurtures respect for food, turning safety tips into practical and delicious experiences.
Q8: Where can parents find additional resources or activities on food safety for kids?
A8: Many health departments and food safety organizations offer free downloadable lesson plans, coloring books, and games tailored for children. Websites like the USDA’s FoodSafety.gov or the CDC’s “Clean Hands” campaign feature kid-friendly materials. Local libraries and community centers often host fun food safety workshops too!
Teaching kids about food safety can be a creative, joyful journey-one where knowledge is paired with curiosity and fun, laying the foundation for healthy, safe eating habits that last a lifetime. Safe bites, happy hearts!
In Conclusion
As we wrap up our culinary adventure through the world of safe bites, remember: teaching kids about food safety isn’t just about rules-it’s about empowering the next generation to make smart, healthy choices with confidence and creativity. By turning food safety into a playful exploration, we can inspire lifelong habits that protect their well-being and spark their curiosity. So whether it’s through colorful games, hands-on cooking, or storytelling, let’s make every meal a safe and joyful learning experience. After all, nurturing safe eaters today seeds a healthier tomorrow-one bite at a time.
Cracking the Code: Explaining Food Safety to Skeptics
Cracking the Code: Explaining Food Safety to Skeptics begins with debunking widespread myths that often cloud our understanding of what truly keeps food safe. As someone who has spent decades in culinary arts and food styling, I’ve witnessed how misinformation can lead to unnecessary fears or careless practices. This guide takes you on a science-backed journey embracing practical tips to ensure your food handling and preparation routines are both safe and enjoyable, building trust through clear, transparent communication.
Prep and Cook Time
Preparation: 10 minutes | Cooking: No cooking required | Total Time: 10 minutes
Yield
Yields enough knowledge and confidence to enhance food safety practices for 4-6 household members.
Difficulty Level
Easy – Perfect for home cooks, food enthusiasts, and professionals looking to excel in food safety awareness.
Ingredients
- 1 cup fresh knowledge about foodborne pathogens and safe internal cooking temperatures
- 2 tablespoons practical food handling skills, such as separating raw from cooked items
- 1 teaspoon critical thinking to question common food safety myths
- 3 cups transparent communication to share correct food safety information with family and guests
- 4 ounces basic kitchen tools for temperature measurement (digital thermometer recommended)
- Pinch of curiosity to explore authoritative food safety sources, like the CDC (Centers for Disease Control and Prevention)
Instructions
- Separate facts from fiction: Start by identifying common food safety myths such as “If it smells fine, it’s safe” or “Frozen food does not cause foodborne illnesses.” Challenge these beliefs with science-based evidence.
- Understand the science behind pathogens: Familiarize yourself with bacteria like Salmonella, Listeria, and E. coli, known culprits in foodborne illnesses. Learn the temperatures at which they are destroyed (generally 140°F/60°C and above).
- Adopt safe food handling procedures: Use separate cutting boards for raw meats and vegetables. Always wash your hands before and after handling food. Keep cold foods below 40°F (4°C) and hot foods above 140°F (60°C).
- Use proper temperature control: Invest in a food thermometer to measure internal temperatures accurately. For example, poultry should reach at least 165°F (74°C) to be safe.
- Communicate transparently: When sharing recipes or serving meals, clearly inform guests about any allergen information or special handling steps you’ve followed to ensure safety.
- Stay curious and up-to-date: Regularly consult trusted sources such as the FDA or CDC to stay informed on emerging food safety guidelines and outbreaks.
Tips for Success
- Always trust a food thermometer over tactile or visual cues when determining doneness.
- Remember that cross-contamination can happen easily-clean utensils and surfaces often.
- Pre-chill perishable ingredients before assembling dishes to keep bacteria growth at bay.
- Make a habit of reading expiration dates and knowing food storage timelines.
- Educate guests by sharing quick food safety facts while serving, making the experience engaging and informative.
Serving Suggestions
Present your dishes on clean, chilled platters to emphasize freshness and safety. Garnish with fresh herbs and serve with informative note cards that detail cooking temperatures and hygiene practices applied, reassuring and educating your guests simultaneously. Enhancing the sensory experience with crisp textures, vibrant colors, and aromatic herbs reinforces confidence in your safe food preparation methods.

| Nutritional Focus* | Effect on Safety |
|---|---|
| Temperature Control | Halts harmful bacterial growth and ensures pathogens are killed. |
| Handwashing Frequency | Reduces likelihood of transferring contaminants. |
| Raw vs Cooked Separation | Prevents cross-contamination and foodborne illnesses. |
* These key elements emphasize how culinary precision blends perfectly with food safety standards, empowering cooks to confidently crack the code behind safe meals.
For more insightful tips on kitchen safety, explore our article on Kitchen Hygiene Best Practices.
Q&A
Q&A: Cracking the Code – Explaining Food Safety to Skeptics
Q1: Why do some people remain skeptical about food safety despite scientific evidence?
A1: Skepticism often stems from mistrust-be it of corporations, governments, or the science community. People may have heard conflicting information or experienced personal anecdotes that contradict official guidelines. Also, the complexity of food safety science can feel like an inaccessible “code,” making it easier to doubt than understand.
Q2: What’s the “code” behind food safety that needs cracking?
A2: The “code” is the science-driven system of practices, regulations, and technologies designed to minimize risks like contamination, spoilage, and foodborne illness. From microbial control to proper cooking temperatures, the code ensures that the food reaching your plate is as safe as possible. Cracking it means translating jargon into relatable terms and actionable steps.
Q3: How can we explain complex food safety concepts in simpler terms?
A3: Use storytelling and analogies. For instance, think of bacteria like unwelcome party crashers that multiply quickly when conditions are just right-warm, damp environments are their favorite spots. Keeping food cold or cooking it to the right temperature is like closing the door and turning off the lights to stop their party. Breaking down data into everyday scenarios helps make the science less intimidating.
Q4: Are food safety regulations really trustworthy?
A4: While no system is flawless, food safety regulations are typically based on rigorous science and continuous monitoring. Agencies like the FDA, USDA, and WHO set standards after thorough risk assessments. Regulations evolve as new evidence emerges, aiming not to control arbitrarily but to protect public health. Transparency and accountability are key pillars, though ongoing improvements and public communication are essential.
Q5: What are the most common misconceptions about food safety?
A5: Many believe that natural or organic foods don’t need the same precautions or that “danger zones” for bacterial growth are exaggerated. Another misconception is that washing raw meat kills all germs-actually, it can spread bacteria. Understanding these myths helps skeptics see why certain guidelines exist.
Q6: How can individuals become empowered in ensuring their own food safety?
A6: Knowledge is empowerment. Learning the basics-like washing hands before handling food, storing perishables properly, cooking meat to safe temperatures, and avoiding cross-contamination-can drastically reduce risk. Being an informed consumer also means asking questions at markets, reading labels critically, and staying updated on recalls or outbreaks.
Q7: What role does technology play in modern food safety?
A7: Technology is a huge ally-from high-tech sensors that detect contamination in real-time to blockchain systems that track food’s journey from farm to fork. These innovations enhance transparency and speed up responses to potential hazards, giving both regulators and consumers new tools to enforce and verify safety standards.
Q8: How do we engage skeptics without dismissing their concerns?
A8: Listening respectfully and acknowledging their worries builds trust. Rather than overwhelming skeptics with data, focus on relatable stories, shared values (like family health), and incremental learning. Inviting them to participate in food safety practices or join community discussions can also bridge gaps and reduce fear through familiarity.
By “cracking the code” of food safety communication, we transform confusion and doubt into clarity and confidence-one informed bite at a time.
In Retrospect
In a world brimming with misinformation and myths, cracking the code of food safety is more than just understanding facts-it’s about building trust on a foundation of science and transparency. By peeling back the layers of complexity, we empower skeptics to see beyond the fear, replacing doubt with informed confidence. As we continue to bridge the gap between knowledge and perception, food safety transforms from an abstract concept into a shared commitment to health and well-being. So next time you question what’s on your plate, remember: the code isn’t as cryptic as it seems-it’s a roadmap to protection, nourishment, and peace of mind.
Starter Cultures: The Unsung Heroes of Food Fermentation
Starter cultures are fascinating microorganisms responsible for unlocking complex flavors and preserving foods through fermentation. These tiny yet powerful allies transform raw ingredients, boosting aromas, textures, and shelf life with remarkable precision and artistry.
Prep and Cook Time
- Preparation: 15 minutes (selection and setup)
- Fermentation: 1 to 7 days (depending on recipe)
Yield
- Varies with recipe; generally yields 4-6 servings
Difficulty Level
- Intermediate
Ingredients
- 1 cup unpasteurized milk (for dairy fermentations)
- 2 tablespoons sauerkraut brine (rich in natural lactic acid bacteria)
- 1 teaspoon dried kefir grains (optional for probiotic enhancement)
- 1 tablespoon sea salt (non-iodized, for vegetable fermentations)
- Fresh vegetables or base ingredient such as 1 head cabbage or 2 cups diced cucumbers
- Filtered water (chlorine-free, for saltwater brine)
Instructions
- Prepare your base ingredient: Wash vegetables thoroughly. For cabbage, remove tough outer leaves and slice thinly.
- Create your brine: Dissolve 1 tablespoon of sea salt in 2 cups filtered water. Ensure it’s fully dissolved to maintain optimal conditions for microbes.
- Introduce starter cultures: For quicker fermentation, add 2 tablespoons of sauerkraut brine or 1 teaspoon dried kefir grains to your base ingredient.
- Combine ingredients: In a sterilized glass jar, pack your sliced veggies tightly, pressing down to release natural juices. Pour over the salt brine to submerge completely.
- Seal and ferment: Cover the jar with a cloth or fermentation lid. Leave it at room temperature (~68°F / 20°C) away from direct sunlight.
- Monitor your culture: Check daily, pressing down vegetables if needed to remain submerged, preventing mold formation. Expect bubbling and tangy aromas as fermentation progresses.
- Finish and store: After 3-7 days, taste your creation. When flavors reach desired tanginess, refrigerate to slow fermentation and preserve character.
Chef’s Notes: Tips for Success
- Selecting starter cultures: Opt for high-quality, live-fermentation brines or specific culture starters designed for your food type to ensure consistent and robust results.
- Sanitation matters: Always sterilize vessels and utensils to avoid unwanted microbes competing with starter cultures.
- Temperature control: Warm, steady room temperatures (65-72°F) maximize microbial activity without risk of spoilage.
- Experiment with ingredients: Incorporate herbs like caraway or garlic to complement flavors and subtly influence microbial growth.
- Make ahead: Prepare starter cultures in advance by maintaining a ‘mother’ batch of fermented vegetables, which you can use repeatedly as an inoculant.
- Troubleshooting: Cloudiness in brine or white film (kahm yeast) on surface is normal – just skim off gently. Avoid black or fuzzy mold, which indicates contamination.
Serving Suggestions
Enjoy your fermented treasures as vibrant side dishes, tangy toppings for sandwiches, or zesty additions to grain bowls. Garnish with fresh herbs like dill or parsley for an extra layer of color and aroma. Pair with creamy cheeses or charcuterie boards to balance their bright acidity.

| Nutrient | Per Serving |
|---|---|
| Calories | 45 kcal |
| Protein | 2 g |
| Carbohydrates | 6 g |
| Fat | 0.2 g |
Understanding the Role of Starter Cultures in Flavor and Preservation
The magic of starter cultures lies in their ability to trigger biochemical transformations. These microbes, primarily lactic acid bacteria and yeasts, metabolize sugars and produce organic acids, alcohols, and aromatic compounds. This process not only imparts signature tangy and umami notes but also creates acidic and anaerobic environments that inhibit spoilage organisms, extending the food’s shelf life.
Research shows that specific starter cultures can be tailored to influence textures-like the creamy consistency in yogurt or the crisp crunch in pickles-making them incredibly versatile in traditional and modern fermentation applications. With a keen understanding of their science, home fermenters and industry professionals alike can achieve consistent, flavorful outcomes.
Ready to deepen your fermentation journey? Explore more on NIFA’s fermentation resource and check our Ultimate Guide to Homemade Fermented Veggies for inspired recipes and expert tips.
Q&A
Q&A: Starter Cultures – The Unsung Heroes of Food Fermentation
Q1: What exactly are starter cultures?
Starter cultures are carefully selected microorganisms-usually bacteria, yeasts, or molds-that kickstart and control the fermentation process in foods. Think of them as the tiny chefs who transform raw ingredients into tangy yogurts, flavorful cheeses, and bubbly sourdough breads.
Q2: Why are starter cultures considered “unsung heroes”?
They work quietly behind the scenes, often invisible to our eyes, yet their impact is immense. Without starter cultures, many beloved fermented foods wouldn’t have their unique flavors, textures, or even their shelf stability. They turn ordinary ingredients into culinary masterpieces, but seldom get the spotlight.
Q3: How do starter cultures influence the taste and texture of fermented foods?
Each type of microorganism produces specific enzymes and acids that break down sugars and proteins in the food. This biochemical magic creates distinctive aromas, tanginess, and textures – from the creamy bite of yogurt to the tangy crust of sourdough bread. Starter cultures are essentially flavor architects.
Q4: Are all fermented foods made with starter cultures?
Not always. Some traditional fermentations rely on wild or natural microbes present in the environment. However, using starter cultures gives producers control over consistency, safety, and flavor precision. Many commercial products depend on starter cultures to ensure quality.
Q5: Can starter cultures impact food safety?
Absolutely! Starter cultures often produce acids and antimicrobial compounds that inhibit harmful bacteria. This natural preservation method not only extends shelf life but also makes fermented foods safer to eat, acting as microscopic bodyguards.
Q6: How have starter cultures evolved over time?
Ancient civilizations unknowingly harnessed wild microbes to ferment foods. Today, science isolates and selects specific strains for optimal results. Modern biotechnology allows us to customize starter cultures, improving taste, nutrition, and even health benefits.
Q7: What’s the future of starter cultures in food?
Starter cultures are poised to revolutionize food innovation-crafting new flavors, reducing food waste, and enhancing probiotic qualities. As we learn more about the microbiome, these tiny heroes might even play a bigger role in personalizing nutrition and wellness.
Q8: Can I make my own starter culture at home?
Yes! Many artisans and home fermenters cultivate starter cultures from previous batches or natural sources like whey or sourdough discard. It’s a fascinating blend of science and tradition that turns your kitchen into a living lab.
Q9: How do starter cultures benefit our health?
Some starter cultures produce beneficial probiotics that support gut health, boost immunity, and even improve digestion. Eating fermented foods with active cultures can be a delicious way to nurture your microbiome.
Q10: Why should we celebrate starter cultures?
Because they’re the microscopic magicians converting simple ingredients into cultural treasures. They embody the art and science of fermentation, enriching our plates, preserving heritage, and inspiring new culinary adventures. Without them, our world of fermented foods would be a lot less flavorful-and far less fascinating.
Concluding Remarks
As we peel back the layers of fermentation, it becomes clear that starter cultures are far more than mere microorganisms – they are the quiet architects of flavor, texture, and nutrition that transform humble ingredients into culinary marvels. These tiny, tireless heroes orchestrate a symphony of biochemical magic, turning simple foods into vibrant, living expressions of culture and history. By appreciating the science and artistry behind starter cultures, we not only deepen our understanding of fermentation but also gain a renewed respect for the time-honored traditions and innovations that enrich our tables. So, the next time you savor a tangy yogurt, a crusty sourdough, or a zesty kimchi, remember to tip your hat to the unseen allies making that delicious transformation possible.