Unlocking Flavor: The Science Behind Evidence-Based Cooking
Unlocking flavor in your kitchen begins with understanding the chemistry of taste and aroma compounds that transform humble ingredients into remarkable dishes. This recipe highlights how the art of heat, time, and ingredient interaction converge to achieve exceptional flavor, illustrating the profound impact of science in everyday cooking. Whether you’re searing meat to induce the Maillard reaction or gently simmering spices to release essential oils, this method will inspire you to harness culinary science while delighting your palate.
Prep and Cook Time
Preparation: 15 minutes | Cooking: 45 minutes | Total Time: 1 hour
Yield
Serves 4
Difficulty Level
Medium
Ingredients
- 2 lbs bone-in chicken thighs, skin on
- 1 tbsp olive oil
- 1 tsp kosher salt
- ½ tsp freshly ground black pepper
- 1 medium yellow onion, finely chopped
- 3 cloves garlic, minced
- 1 tsp smoked paprika
- ½ tsp ground cumin
- 1 cup low-sodium chicken broth
- 1 tbsp tomato paste
- 1 tsp lemon zest
- 2 tbsp fresh parsley, chopped (for garnish)
- Juice of 1 lemon
Instructions
- Prep the chicken: Pat the chicken thighs dry with paper towels to ensure a crispy skin. Season both sides evenly with kosher salt and black pepper.
- Develop aroma through searing: Heat olive oil in a heavy-bottom skillet over medium-high heat. Add the chicken skin-side down, pressing gently to ensure contact with the pan. Sear until the skin is deep golden brown, about 6-8 minutes, then flip and sear the other side for 3 minutes.
- Sauté aromatics: Remove the chicken and set aside. Reduce heat to medium, add onions, and cook until translucent and fragrant, about 5 minutes. Stir in minced garlic, smoked paprika, and ground cumin, cooking until the spices bloom and release their aroma, about 1 minute.
- Build the cooking liquid: Stir in tomato paste and cook for 2 minutes, allowing Maillard-type reactions to deepen the flavor. Pour in chicken broth, scraping the bottom of the pan to release browned bits, which are packed with flavor.
- Simmer to meld tastes: Return chicken thighs to the pan, skin side up. Add lemon zest and reduce heat to a gentle simmer. Cover and cook for 30 minutes, allowing heat and time to tenderize the meat while infusing aromatic compounds into the sauce.
- Finish with acidity: Remove the lid, squeeze fresh lemon juice over the chicken, and increase heat to medium-high to reduce the sauce slightly, intensifying flavor without additional seasoning.
- Plate and garnish: Transfer chicken to serving plates, spoon pan sauce over the top, and sprinkle with fresh parsley for brightness and contrast.
Chef’s Notes: Tips for Success
- Dry your chicken thoroughly: Moisture inhibits browning and suppresses the Maillard reaction crucial for flavor development.
- Control your heat: High heat searing builds complex aroma compounds, but be vigilant to avoid burning spices – lower heat when sautéing after initial sear.
- Use bone-in cuts: Bones contribute minerals and depth in the cooking liquid, intensifying umami notes.
- Make ahead: This chicken improves when rested for a few hours or overnight in the fridge as flavors meld further; simply reheat gently to avoid drying.
- Ingredient swaps: For a vegetarian version, substitute chicken thighs with thick slices of roasted eggplant and use vegetable broth.
Serving Suggestions
Pair this dish with fragrant basmati rice or a creamy polenta that soaks up the rich sauce beautifully. A crisp green salad with a citrus vinaigrette balances the warmth of smoky spices. Garnish with freshly chopped parsley and a wedge of lemon for a vibrant finish that awakens the senses.

| Nutrient | Per Serving |
|---|---|
| Calories | 370 kcal |
| Protein | 32 g |
| Carbohydrates | 6 g |
| Fat | 24 g |
For more insights on food chemistry and flavor science, explore our guide to Flavor Chemistry in Cooking. To dive deeper into the role of aroma compounds in taste, visit the ScienceDaily article on Taste and Smell Chemistry.
Q&A
Q&A: Unlocking Flavor – The Science Behind Evidence-Based Cooking
Q1: What exactly is evidence-based cooking?
A1: Evidence-based cooking is the delicious fusion of science and culinary art. It’s about using well-researched techniques, proven reactions, and measurable results to elevate flavor and texture in every dish-moving beyond guesswork to cook with precision and confidence.
Q2: How can science improve my everyday cooking?
A2: Science demystifies cooking by explaining why certain methods work best. For example, knowing the Maillard reaction helps you sear meat to caramelized perfection, while understanding acid-base chemistry guides you in balancing flavors or tenderizing proteins. These insights lead to tastier meals that wow the palate every time.
Q3: Isn’t cooking more about intuition and creativity than science?
A3: Creativity definitely spices up cooking, but harnessing science ensures your culinary experiments don’t fall flat. Evidence-based cooking doesn’t replace intuition; it supports it with reliable techniques and predictable outcomes-so your creative flair can flourish on a solid foundation.
Q4: Can evidence-based cooking help with dieting or nutrition?
A4: Absolutely! Science-based methods let you optimize nutrient preservation, control portion sizes, and develop healthier recipes without sacrificing flavor. For instance, steaming vegetables to retain vitamins or using emulsifiers for creamy textures without excess fat are smart, tasty techniques grounded in research.
Q5: What role do temperature and timing play in unlocking flavor?
A5: They’re key players! Temperature influences chemical reactions like caramelization and denaturation, while timing controls these reactions’ extent. Overcooking can dull flavors or toughen meat, but precise temperature control and timing yield juicy, aromatic dishes bursting with freshness.
Q6: Are there any simple evidence-based tips for home cooks?
A6: Yes! Start with basics like salting meat ahead of cooking for better seasoning and moisture retention, resting cooked proteins before slicing to redistribute juices, or using acidic marinades to tenderize. These well-studied habits turn good meals into memorable feasts.
Q7: How does understanding food texture contribute to flavor?
A7: Texture shapes our eating experience as much as taste. Science explains how starch gelatinizes or how proteins coagulate, helping you achieve desired textures-from crispy crusts to silky sauces-that amplify overall flavor perception.
Q8: What tools or resources can help me practice evidence-based cooking?
A8: Plenty of resources exist, from scientific cookbooks like Harold McGee’s On Food and Cooking to food science blogs and cooking apps with precise temperature guidance. Kitchen gadgets like sous vide machines offer exact control for replicable, perfect results.
Q9: Is evidence-based cooking only for professional chefs?
A9: Not at all! While pros benefit greatly, home cooks can also harness science to improve their skills, reduce mistakes, and discover new flavors. It’s about empowering anyone with curiosity and a willingness to learn the “why” behind the “how.”
Q10: What is the ultimate takeaway from the science of flavor?
A10: The secret to unlocking flavor lies in curiosity and knowledge. Understanding the science transforms cooking from a routine task into an experimental adventure-where every bite tells a story of meticulous technique, intentional choices, and the joy of truly mastering your craft.
Key Takeaways
As we’ve journeyed through the fascinating world where art meets science, it becomes clear that unlocking flavor is far more than a stroke of luck or tradition-it’s a delicious dance choreographed by evidence and experimentation. By embracing the principles behind evidence-based cooking, we empower ourselves to transform ingredients into sensory experiences, marrying precision with creativity. So next time you step into your kitchen, remember: every sizzle, every stir, and every sprinkle holds the potential to unlock new dimensions of taste-if only you know the science behind the flavor. Happy cooking, and may your culinary adventures be as flavorful as they are informed!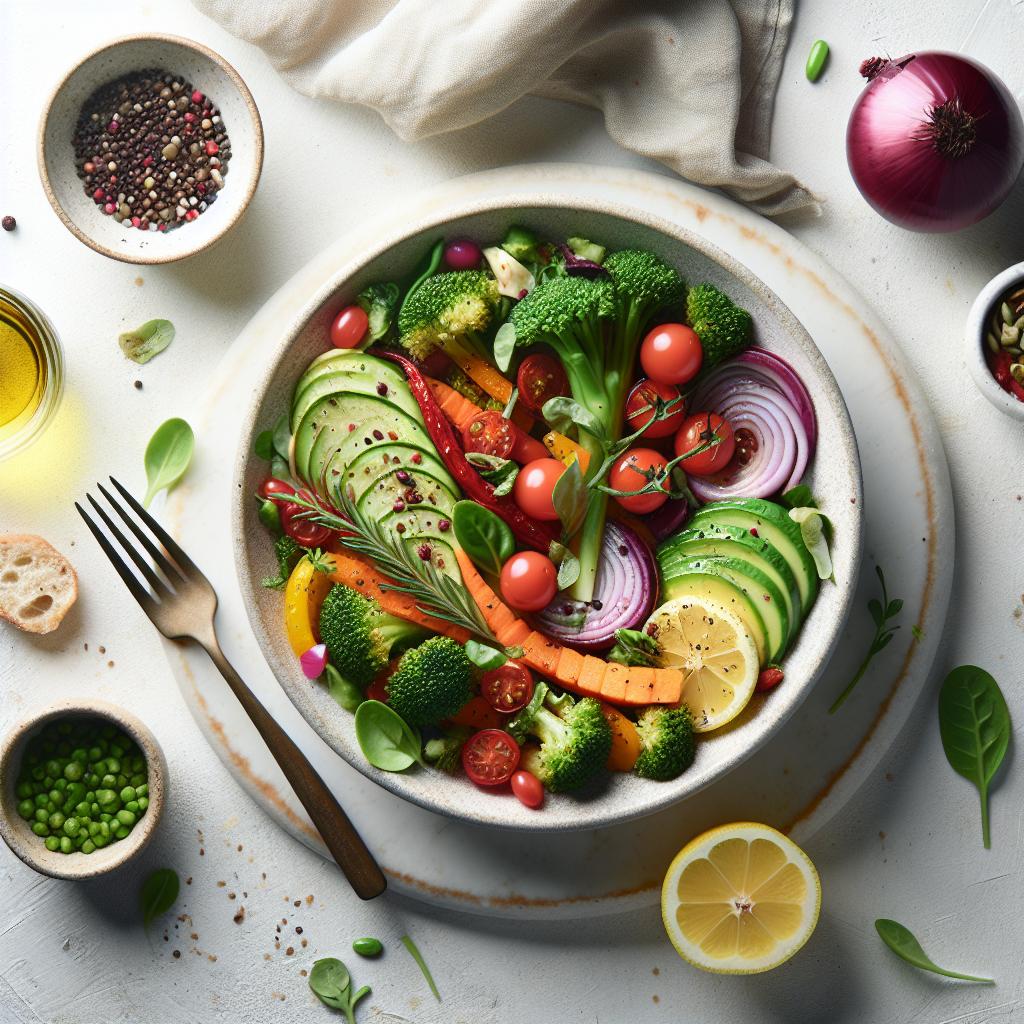
Nutritional yeast unlocks a world of cheesy magic in the kitchen, transforming simple dishes into savory delights bursting with umami richness. This vibrant ingredient, derived from deactivated yeast, boasts a nutty, cheesy flavor along with a powerhouse of B-vitamins and protein that makes every bite nourishing and satisfying.
Prep and Cook Time
Preparation: 10 minutes
Cooking: 15 minutes
Total Time: 25 minutes
Yield
4 servings
Difficulty Level
Easy
Ingredients
- 1/2 cup nutritional yeast
- 3 cups cooked pasta (preferably fusilli or shells for great sauce cling)
- 1 cup unsweetened almond milk (or other plant-based milk)
- 2 tbsp olive oil
- 2 cloves garlic, minced
- 1 tbsp fresh lemon juice
- 1 tsp smoked paprika
- Salt and pepper to taste
- 2 tbsp chopped fresh parsley for garnish
- Optional: 1/4 cup toasted pine nuts
Instructions
- Sauté garlic: In a large skillet over medium heat, warm the olive oil and sauté the minced garlic until fragrant, about 1-2 minutes, being careful not to burn it.
- Add milk and spice: Pour in the almond milk and stir in the smoked paprika, salt, and pepper. Bring to a gentle simmer.
- Mix nutritional yeast: Slowly whisk in the nutritional yeast, stirring constantly until the sauce thickens into a creamy, cheesy coating, roughly 5 minutes.
- Toss pasta: Add the cooked pasta directly into the sauce and toss well to fully coat every piece with that cheesy umami goodness.
- Add brightness: Stir in fresh lemon juice to balance the richness and enhance flavors.
- Serve: Remove from heat and plate the pasta. Garnish with chopped parsley and sprinkle toasted pine nuts on top for a crunchy texture contrast.
Tips for Success
- For a dairy-free boost, almond or oat milk works beautifully, but avoid coconut milk as it can overpower the umami.
- If the sauce is too thick, thin it with small splashes of water or more plant milk.
- Experiment by swapping paprika for turmeric or nutritional yeast with ground cumin to create diverse flavor profiles.
- Make ahead by preparing the sauce base and storing it in an airtight container for up to 3 days; just reheat gently before adding pasta.
- Use high-quality, flaky nutritional yeast stored in a cool dry place to maximize fresh flavor.
Serving Suggestions
This cheesy pasta shines as a standalone meal but beautifully complements vibrant roasted vegetables or crisp green salads. For a heartier option, serve alongside grilled tofu or a medley of sautéed mushrooms to deepen the umami experience. A sprinkle of cracked black pepper or a drizzle of truffle oil elevates this dish into an indulgent, yet wholesome dinner.
| Nutrient | Per Serving |
|---|---|
| Calories | 320 kcal |
| Protein | 15 g |
| Carbohydrates | 42 g |
| Fat | 8 g |
Explore more creative ways to transform your meals with vegan recipes featuring nutritional yeast for inspiration. Discover the scientific benefits here.

Q&A
Q&A: Unlock Cheesy Magic – Top Tips for Using Nutritional Yeast
Q1: What exactly is nutritional yeast, and why is it called “cheesy magic”?
A1: Nutritional yeast is a deactivated yeast, often derived from Saccharomyces cerevisiae, packed with vitamins, protein, and fiber. It’s trademarked by its nutty, savory, and unmistakably cheesy flavor – hence the “cheesy magic.” It’s a pantry essential for vegans, vegetarians, or anyone craving that rich umami punch without dairy.
Q2: How can I incorporate nutritional yeast into my daily meals?
A2: The possibilities are deliciously endless! Sprinkle it over popcorn, stir it into sauces, fold it into mashed potatoes, or blend it into creamy dressings. It also shines in homemade vegan cheese sauces and soups, delivering that cheesy essence without the lactose.
Q3: Can nutritional yeast replace cheese in recipes?
A3: Absolutely! While it won’t mimic the stretchy texture of melted cheese, its flavor is a star substitute. Use it as a topping for pasta, pizza, or roasted veggies, or mix it into nut-based cheeses for a rich, cheesy taste.
Q4: Are there nutritional benefits beyond the flavor?
A4: Yes! Nutritional yeast is a powerhouse of B-vitamins, including B12 if fortified, making it a smart addition for plant-based diets. It’s also rich in protein and antioxidants, contributing to energy support and immune health.
Q5: Any tips for storing nutritional yeast to keep its magic fresh?
A5: Keep it sealed in an airtight container, away from heat and moisture. Stored in a cool, dark pantry, nutritional yeast can stay fresh and flavorful for up to two years.
Q6: Can I use nutritional yeast in baking?
A6: Definitely! While it’s not a leavening agent, it can be infused into savory baked goods like crackers, breads, or scones for an extra depth of flavor.
Q7: Is there a difference between nutritional yeast and brewer’s yeast?
A7: Yes. Although both are types of yeast, nutritional yeast is specifically grown and processed for food use, with a milder, nutty flavor. Brewer’s yeast tends to be bitter and is mainly a byproduct of beer production.
Unlock your kitchen’s cheesy potential by embracing nutritional yeast-the magic spice your taste buds have been waiting for!
In Retrospect
As you embark on your culinary adventures with nutritional yeast, remember that this golden sprinkle is more than just a flavor booster-it’s a secret ingredient that transforms everyday dishes into cheesy masterpieces without dairy. Whether you’re adding a nutty crunch to salads, stirring it into creamy sauces, or sprinkling it atop popcorn for a guilt-free treat, nutritional yeast invites you to unlock a world of cheesy magic with every pinch. So go ahead, experiment boldly, and let this pantry superstar elevate your cooking with its savory charm and nourishing benefits. Your taste buds-and your kitchen-will thank you.
Kitchen Cell Phone Germs: Unlocking the Science Inside reveals the unseen microbial universe thriving on the surface of your kitchen cell phone. Our everyday cooking habits unknowingly seed this hotspot with bacteria, viruses, and fungi, transferring leftover food particles, moisture, and microbes directly into the tiny crevices of your device. Understanding how these tiny yet persistent life forms survive and multiply shows why regular cleaning is as crucial as washing your hands before you cook.
Prep and Cook Time
- Prep Time: 5 minutes
- Clean Time: 10 minutes
Yield
1 clean and germ-free kitchen cell phone
Difficulty Level
Easy – Requires only household items and simple steps
Ingredients
- 70% Isopropyl alcohol solution (or a commercial electronics-safe disinfectant spray)
- Microfiber cleaning cloth (lint-free)
- Soft-bristled brush (optional, for ports and crevices)
- Cotton swabs
- Distilled water (optional for diluting alcohol if necessary)
- Silicone phone case (recommended for protection and easier cleaning)
Instructions
- Power off your phone completely to prevent any electronic damage during cleaning.
- Slightly moisten the microfiber cloth with 70% isopropyl alcohol-avoid soaking it to prevent liquid damage.
- Gently wipe all surfaces of your phone, paying special attention to the screen, back, edges, and buttons. The alcohol breaks down oils and kills microbes effectively.
- Use a soft-bristled brush or cotton swab dipped in alcohol to clean ports, speaker grills, and camera lenses carefully.
- Let the phone air dry completely for at least 5 minutes to ensure all microbes are neutralized and the device is dry enough to power on safely.
- Remove and clean your phone case separately using warm, soapy water or a disinfectant wipe, allowing it to dry before reassembly.
- Repeat this cleaning routine daily or immediately after handling raw meats, vegetables, or any other potentially germ-rich ingredients.
Tips for Success
- Never spray liquid directly on the phone-always apply it to a cloth first to avoid moisture seeping inside.
- In environments with heavy cooking, wipe your phone more frequently to hinder biofilm buildup where germs hide.
- Consider using an antimicrobial phone case for added defense; these can reduce microbial growth on your device’s surface.
- Perform a deep clean at least once a week for maximum hygiene, especially during cold and flu season.
- If you’re concerned about sensitive screens, use electronics-approved sanitizers that won’t degrade oleophobic coatings.
Serving Suggestions
Keep your kitchen cell phone spotless by pairing this cleaning ritual with good kitchen hygiene habits. Display your phone on a clean, dedicated charging stand away from food prep zones to minimize contamination. For an elegant touch, wrap your device in a fresh microfiber cloth between uses and consider integrating a stylish silicone case with antimicrobial properties. This combination not only safeguards your health but ensures your culinary creativity isn’t interrupted by unexpected microbial guests.
| Cleaning Component | Effectiveness | Common Microbes Targeted |
|---|---|---|
| 70% Isopropyl Alcohol | High | Bacteria, Viruses, Fungi |
| Microfiber Cloth | Medium (removes physical debris) | Dead microbes, oils, residues |
| Soft Brush & Cotton Swabs | Medium (detail cleaning) | Microbes in crevices and ports |
Discover more about keeping your home and kitchen safe with our guide to kitchen hygiene best practices. For scientific validation on microbial contamination on personal devices, refer to this CDC resource on disinfection and sterilization.

Q&A
Q&A: Kitchen Cell Phone Germs – Unlocking the Science Inside
Q1: Why are kitchen cell phones particularly germy?
A1: Kitchens are fertile grounds for germs due to the constant exposure to food particles, moisture, and various surfaces. When you use your phone in the kitchen, it picks up bacteria from raw meats, unwashed hands, and even kitchen sponges. These microbes thrive on the warmth your phone generates, turning your device into a microscopic petri dish!
Q2: What types of germs are we talking about here?
A2: Common culprits include E. coli, Salmonella, and Staphylococcus aureus. These bacteria can cause food poisoning symptoms like stomach pain and vomiting. Your phone can also harbor more benign but persistent bacteria that contribute to bad smells and grime build-up.
Q3: How do germs actually transfer from the kitchen to the phone?
A3: Germs hitch a ride on your hands after handling raw ingredients or touching contaminated surfaces. When you swipe, tap, or answer a call without washing your hands thoroughly, those microbes get transferred onto your phone’s surface. Moisture from cooking steam and splashes further embeds them into phone crevices.
Q4: Can using my phone in the kitchen make me sick?
A4: Yes, it can increase your risk. If you’re handling food and then touching your phone, germs on the device could find their way back to your hands or directly into your mouth, especially if you’re eating or sniffing your fingers. This cycle raises the chance of ingesting harmful bacteria.
Q5: How often should I clean my kitchen phone, and what’s the best method?
A5: Ideally, clean your phone daily if you use it while cooking. Use a microfiber cloth lightly moistened with a mixture of 70% isopropyl alcohol and water. Avoid harsh chemicals or soaking the phone. Wipes made for electronics can also be effective and safe. Always power off your device before cleaning.
Q6: Are hands washing and phone cleaning equally important?
A6: Absolutely! Hands are the main vehicles for germs, so thorough washing is your first line of defense. Equally, cleaning your phone breaks the cycle of re-contamination-think of it as washing the “third hand” that’s always with you in the kitchen.
Q7: Would using a plastic cover help reduce germ build-up?
A7: A smooth, wipeable cover can make cleaning easier and reduce crevices where bacteria hide. Some covers even come with antimicrobial properties. However, the cover itself can accumulate germs, so it needs regular sanitizing too.
Q8: Can I just avoid using my phone in the kitchen altogether?
A8: That’s a great idea for reducing germ transfer! If you can limit phone use to outside the cooking area, you minimize the chance of contamination. Alternatively, using voice commands or smart speakers may reduce direct contact during messy prep.
Q9: Is there ongoing scientific research on this topic?
A9: Yes! Studies are continuously exploring how everyday devices like cell phones contribute to the spread of microbes, especially in food-prep spaces. Researchers aim to develop better cleaning methods, antimicrobial materials, and raise public awareness about hygiene in tech use.
Q10: What’s the takeaway message about kitchen cell phone germs?
A10: Your phone is a germ hotspot, especially in the kitchen! Clean hands and clean devices go hand in hand to keep harmful bacteria at bay. By staying mindful and proactive, you unlock the science of hygiene, turning your phone from a potential risk into a safe cooking companion.
In Conclusion
As we’ve uncovered, the humble kitchen cell phone is more than just a casual companion-it’s a hotspot teeming with unseen microbial life. By unlocking the science behind these tiny invaders, we gain not only awareness but also the power to transform our daily habits. So next time you reach for your phone while chopping vegetables or stirring soup, remember: a little mindful sanitizing goes a long way in keeping your kitchen-and your health-germ-free. After all, in the battle against kitchen cell phone germs, knowledge isn’t just power; it’s protection.
Unlocking the Sear offers a captivating journey into the transformative power of heat that elevates ordinary cuts of meat to culinary masterpieces. The alchemy behind the perfect sear reveals how Maillard reactions and temperature control work harmoniously to develop deep flavors and enviable textures that delight both the eye and palate. Whether you’re wielding a favorite cast iron skillet or an ultra-slick stainless steel pan, the key lies in understanding your tools and timing.
Prep and Cook Time
- Preparation: 10 minutes
- Cooking: 8-12 minutes
- Resting: 5 minutes
- Total Time: Approximately 25-30 minutes
Yield
- Serves 2-3 people
Difficulty Level
- Intermediate
Ingredients
- 2 thick-cut ribeye steaks (1.5-inch thick, about 12 oz each)
- 2 tbsp high smoke point oil (grapeseed, avocado, or refined sunflower oil)
- 1 tbsp unsalted butter
- 3 cloves garlic, crushed
- 2 sprigs fresh thyme
- Freshly ground black pepper, to taste
- Coarse sea salt, to taste
Instructions
- Bring the steaks to room temperature. Remove steaks from the fridge 30-45 minutes before cooking to ensure even cooking and optimal crust development.
- Season liberally. Pat the steaks dry with paper towels, then generously season all sides with coarse sea salt and freshly ground black pepper. The salt draws moisture to the surface, which evaporates during searing, promoting a beautiful crust.
- Preheat your pan. Place your cast iron or heavy stainless steel skillet on medium-high heat for 5 minutes until it’s shimmering hot-this ensures immediate sizzle and seals in flavors.
- Add the oil. Pour in 2 tablespoons of your chosen high smoke point oil and swirl to coat the pan evenly. Heat until it shimmers but does not smoke.
- Sear the steaks. Place the steaks in the pan without crowding. You should hear an unmistakable sizzle immediately. Sear undisturbed for 3-4 minutes, until the edges show a deep, mahogany crust.
- Flip and flavor. Turn the steaks with tongs to sear the other side. After 2 minutes, add the butter, garlic, and thyme. Tilt the pan and spoon the melted butter over the steaks repeatedly to deepen flavor complexity-known as “arroser.”
- Check doneness carefully. Use an instant-read thermometer-125°F (52°C) for rare, 135°F (57°C) for medium-rare-to achieve your preferred temperature. Cooking times may vary slightly depending on steak thickness.
- Rest the steaks. Transfer to a warm plate, tent loosely with foil, and rest for 5-7 minutes. This step allows juices to redistribute, ensuring every bite is tender and succulent.
- Serve with flair. Slice against the grain and garnish with a sprinkle of flaky sea salt and a sprig of fresh thyme for a visually stunning presentation.
Tips for Success: Maximizing the Perfect Sear
- Choosing the Right Pan and Oil: Cast iron is ideal for retaining consistent high heat, while stainless steel offers excellent control-avoid non-stick pans that don’t handle high temperatures well. Opt for oils with smoke points above 400°F to prevent off-flavors and smoke.
- Temperature Mastery: A hot pan is essential; test by flicking a drop of water-it should dance and evaporate instantly. Don’t overcrowd the pan to avoid steaming; if cooking multiple steaks, work in batches.
- Resting Ritual: Resist the urge to slice immediately. Resting preserves the steak’s juices, preventing dryness and enhancing that melt-in-the-mouth texture.
- Variations: For added depth, marinate steaks in a mixture of soy sauce, garlic, and a touch of brown sugar before searing or finish with a pat of compound butter infused with herbs.
- Troubleshooting: If your crust isn’t forming, your pan isn’t hot enough. If the oil smokes excessively, lower the heat and choose a different oil.
Serving Suggestions
Pair your perfectly seared steak with vibrant sides like garlic roasted asparagus, creamy mashed potatoes, or a bright chimichurri sauce to contrast the rich, savory crust. A sprinkle of flaky Maldon salt and freshly cracked black pepper on top enhances the final flavor explosion. For an elegant touch, garnish with microgreens or edible flowers.
| Nutrient | Per Serving (1 steak) |
|---|---|
| Calories | 600 kcal |
| Protein | 55 g |
| Carbohydrates | 1 g |
| Fat | 44 g |
Explore more techniques on perfect pan-searing
For deeper scientific insights, check this authoritative source on the Maillard Reaction and Meat Flavor Development.

Q&A
Q&A: Unlocking the Sear: The Science Behind the Perfect Sizzle
Q1: What exactly is the “sear” that chefs rave about?
A1: The sear is that glorious, caramelized crust you find on the surface of meats, fish, or even vegetables when cooked at high heat. It’s more than just a brown surface; it’s a flavor-packed barrier that locks in juices and creates a sensational texture.
Q2: Why does searing create such an irresistible aroma and taste?
A2: The secret is the Maillard reaction-a complex chemical dance between amino acids and sugars that happens at temperatures typically above 300°F (150°C). This reaction generates hundreds of new flavor compounds and that signature golden-brown hue, which tantalizes your nose and taste buds.
Q3: Does searing actually seal in juices?
A3: Ah, the age-old myth! While searing doesn’t exactly “seal” juices, it does create a crust that enhances texture and flavor. Interestingly, the crust slows down moisture loss during further cooking, making your meat juicier overall.
Q4: How important is the temperature?
A4: Crucial! The pan must be hot enough to trigger the Maillard reaction but not so hot that it burns the food. Aim for a surface temperature between 300°F and 500°F for that perfect sizzle. Using a heavy-bottomed pan helps maintain consistent heat.
Q5: Can I use any oil or fat for searing?
A5: Not quite. Choose oils with high smoke points-like avocado oil, grapeseed oil, or clarified butter-to prevent burning. These oils withstand the high temperatures needed for searing without breaking down and imparting off-flavors.
Q6: What tips will help me achieve a perfect sear every time?
A6: Start with dry food-pat it down to remove excess moisture, as water reduces the pan temperature and hampers browning. Don’t overcrowd the pan, allowing each piece enough space to contact the heat. Finally, resist the urge to flip repeatedly; give the sear time to develop undisturbed.
Q7: Is searing only for meats?
A7: Absolutely not! Vegetables like zucchini, mushrooms, and eggplant benefit hugely from searing, developing sweet, smoky notes. Even tofu and cheeses like halloumi love a golden crust.
Q8: How does searing fit into different cooking methods?
A8: Think of searing as the flavorful prologue to your cooking story. For braising or roasting, searing adds depth of flavor and attractive color before slow cooking. For steaks and seafood, it’s the starring moment, providing texture contrast and intense aroma.
Q9: Can searing be done on other heat sources besides stovetops?
A9: Indeed! Grills, broilers, and even cast-iron skillets over open flames are excellent for searing. Each imparts subtle differences, but the principle remains: high, dry heat stimulating the Maillard magic.
Q10: Any science-backed hacks for squeezing extra flavor from the sear?
A10: Yes! After searing, deglaze the pan with wine, stock, or even coffee to dissolve the flavorful browned bits stuck to the surface-these “fond” bits are liquid gold for sauces and gravies, amplifying the gourmet punch of your dish.
Dive into the sizzling science, and transform your cooking with every sear!
To Conclude
As the final sizzle fades and the aroma lingers, it’s clear that unlocking the perfect sear is more than just heat and timing-it’s a delicate dance of science and sensation. From the Maillard reaction’s complex chemistry to the precise control of moisture and temperature, every element plays a starring role in crafting that irresistible crust. So next time you hear that satisfying crackle in your pan, remember: you’re not just cooking, you’re orchestrating a flavorful masterpiece, one perfect sear at a time.
Myth Busted: Microwaves Don’t Cook Food Inside Out
Myth Busted: Microwaves Don’t Cook Food Inside Out is a revelation that breaks down one of the most persistent kitchen myths. Contrary to popular belief, microwaves heat food not by starting in the center and moving outward, but through a fascinating scientific process involving electromagnetic waves and water molecule excitation. Unlocking the secrets behind how microwaves truly penetrate and cook distinct layers of food allows you to approach microwave cooking with newfound confidence and creativity.
Prep and Cook Time
- Preparation: 5 minutes
- Cook Time: Typically 3-8 minutes, depending on food type
Yield
Serves 2-4, adjustable based on recipe scale
Difficulty Level
Easy to Medium – perfect for weeknight meals or vibrant food experiments
Ingredients
- 1 cup fresh vegetables, chopped (e.g., broccoli, carrots, bell peppers)
- 2 tablespoons olive oil or melted butter
- Salt and pepper to taste
- 1 teaspoon dried herbs (thyme, basil, or rosemary)
- 1/2 cup cooked protein (chicken, tofu, or beans)
- 1 cup cooked rice or quinoa
- 1/4 cup shredded cheese or nutritional yeast (optional)
- 1 tablespoon lemon juice or vinegar (for freshness)
Instructions
- Arrange chopped vegetables evenly in a microwave-safe dish. Drizzle with olive oil and season with salt, pepper, and dried herbs.
- Cover with a microwave-safe lid or vented plastic wrap to trap steam while allowing moisture to escape, preventing sogginess.
- Microwave on high for 2 to 3 minutes. Pause halfway to stir gently, which distributes heat for even cooking and avoids hot spots commonly caused by uneven microwave penetration.
- Add the cooked protein and grains. Stir well to combine and promote even warmth throughout the dish.
- Cover again and microwave for an additional 2 to 4 minutes, depending on the density of ingredients and quantity.
- Check doneness by carefully touching the center and edges with a fork or a food thermometer. If warmth is uneven, stir and microwave in 30-second bursts until heated through.
- Finish by sprinkling cheese or nutritional yeast and a splash of lemon juice for brightness. Let sit covered for 1 minute before serving to allow heat to equalize.
Chef’s Notes: Tips for Success
- Microwave penetration depth varies with food density and shape. Thin, flat layers heat faster and more evenly, so consider slicing larger items.
- Stirring and repositioning during microwave cooking minimizes the common issue of hot spots – pockets of overheated food surrounded by cold areas.
- Use microwave-safe containers with lids or vented covers to harness steam and carefully control moisture for tender results.
- Avoid metal utensils inside the microwave; instead, use silicone or microwave-safe plastic tools for stirring.
- Embrace standing time post-microwave; internal heat will continue to even out, completing the cooking cycle efficiently.
- Reheating leftovers? Cut or spread food evenly in a shallow dish to achieve uniform heating without drying out the edges.
The Science Behind Microwave Penetration Depth and Common Misconceptions
Microwaves heat food by exciting water molecules, producing friction that generates heat. This interaction occurs mainly in the outer layers-usually about 1 to 1.5 inches deep-depending on water content and density. Many believe microwaves penetrate deeply causing inside-out cooking, but in reality, the center heats through conduction of heat from the outer layers inward. This misconception lingers due to uneven cooking, where outer parts are hot while centers remain cool, or vice versa, if microwaves are blocked or unevenly distributed.
Understanding that microwave energy penetrates to a limited depth helps explain why stirring and rearranging food during cooking are essential, promoting even heat diffusion throughout the dish.
Tips for Even Cooking and Avoiding Hot Spots
- Use a microwave turntable to rotate food consistently during cooking.
- Cut food into uniform pieces; this exposes more surface area to microwave energy.
- Cover food to trap steam which helps cook food evenly and prevents drying.
- Choose round or oval dishes to reduce corners, where microwaves often cause hot spots.
- Pause and stir food partway through cooking to distribute heat and avoid undercooked portions.
Serving Suggestions
Serve your vibrant microwave-cooked meal straight from the dish for a rustic feel, or plate with a sprinkle of fresh herbs like parsley or cilantro for freshness. A drizzle of extra virgin olive oil or a dollop of creamy yogurt can elevate the texture and flavor. Pair with crusty bread or a crisp green salad to balance the warm, tender ingredients.
Visualize an inviting burst of colors and textures with steamed vegetables glistening alongside tender grains and flavorful protein, highlighting the magic of smart microwave cooking.

| Nutrition | Per Serving |
|---|---|
| Calories | 320 |
| Protein | 18g |
| Carbohydrates | 35g |
| Fat | 10g |
For deeper insights on microwave cooking and food safety, explore USDA’s Food Safety Site. Also, check our related article here for practical microwave culinary inspirations.
Q&A
Q&A: Myth Busted – Microwaves Don’t Cook Food Inside Out
Q1: Is it true that microwaves cook food from the inside out?
A: Nope! Despite the popular myth, microwaves don’t cook your food from the inside out. In reality, they heat food from the outside in, though the process differs from conventional ovens.
Q2: If microwaves don’t cook from the inside, how do they actually heat the food?
A: Microwaves use electromagnetic waves to agitate water molecules and other polar molecules in the outer layers of food. This molecular friction generates heat, which then transfers inward by conduction, gradually warming the entire dish.
Q3: Why do some foods feel hot inside after microwaving, then?
A: That happens because the microwaves penetrate only a few centimeters into the food. The surface heats up quickly and passes on the heat internally. So, the center gets hot after enough conduction time, but it’s not cooked directly by microwaves.
Q4: What makes the inside-out cooking myth so believable?
A: It’s mostly from the odd sensation that microwave-heated food can be hot inside while the outer layers feel cooler. This uneven heating happens because microwaves heat water molecules irregularly, creating hot spots inside even when the surface isn’t yet very warm.
Q5: Can microwaves penetrate all foods evenly?
A: Not quite. Foods vary in water content, density, and composition. High-water-content foods absorb microwaves well, heating efficiently, while dense or dry foods heat less uniformly. This is why stirring or rotating food during microwaving is recommended.
Q6: So, is microwave cooking less safe or less effective because it doesn’t cook from the inside out?
A: Absolutely not! Microwaving is a fast, efficient, and generally safe cooking method. Understanding how microwaves heat helps you use them better-just be sure to stir thick or dense dishes to avoid cold spots where bacteria might linger.
Q7: Any quick tips to microwave food evenly?
A: Yes! Use microwave-safe covers that trap steam, stir or rotate food midway, cut food into smaller pieces, and choose containers that don’t block microwaves. These practices help spread heat evenly and bust any lingering myths!
In summary: Microwaves don’t magically cook food inside out; they heat from the outside inward via water molecule excitation and heat conduction. Next time you zap your leftovers, you’ll know exactly what’s going on under that spinning plate!
In Summary
And there you have it-microwaves aren’t the culinary tricksters we once feared. Instead of cooking food from the inside out, these convenient kitchen gadgets operate with a fascinating blend of physics and chemistry, heating your meals from the outside in by exciting water molecules near the surface. So next time you zap your leftovers or reheat your morning coffee, you can do so with a little extra confidence, knowing the science behind the magic. Myth busted, curiosities satisfied, and dinner served-now that’s a hot story worth sharing!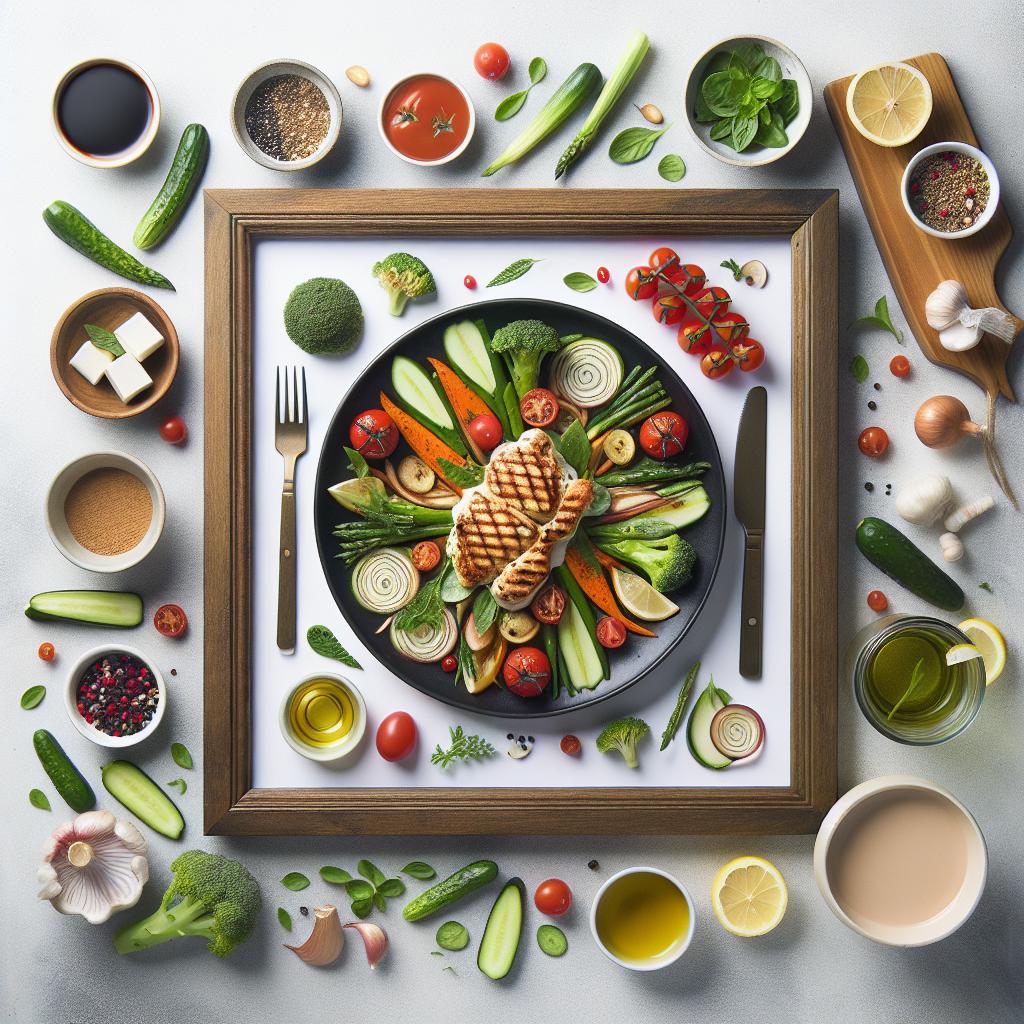
Unlocking Flavor: The Science Behind Perfect Roast Chicken starts with understanding how heat transforms simple ingredients into a symphony of taste and texture. The magic of roasting lies in mastering the balance between a crisp, golden skin and a juicy, tender interior. This delicate dance depends on scientific principles like the Maillard reaction, precise heat control, and thoughtful preparation techniques such as brining and marinating. Let’s explore how these elements intertwine to elevate your roast chicken from ordinary to extraordinary.
Prep and Cook Time
- Preparation: 30 minutes
- Brining/Marinating (optional): 4 to 12 hours
- Cooking: 1 hour 15 minutes to 1 hour 30 minutes
Yield
Serves 4 to 6 people
Difficulty Level
Medium
Ingredients
- 1 whole chicken, about 4 to 5 pounds, patted dry
- 4 cups water (for brine)
- ¼ cup kosher salt (for brine)
- 2 tablespoons granulated sugar (optional, for brine)
- 4 sprigs fresh thyme
- 4 cloves garlic, smashed
- 1 lemon, halved
- 3 tablespoons unsalted butter, softened
- 2 tablespoons olive oil
- Freshly ground black pepper, to taste
- 1 teaspoon smoked paprika
- 1 teaspoon dried oregano
Instructions
- Prepare the brine: In a large bowl, dissolve kosher salt and sugar in 4 cups of cold water. Submerge the chicken completely. Cover and refrigerate for 4 to 12 hours. This step enhances moisture retention and season inside the meat.
- Remove and dry: Take the chicken out of the brine, rinse briefly, and pat completely dry with paper towels. Dry skin is critical for the Maillard reaction to create that irresistible golden crust.
- Preheat oven: Set your oven to 425°F (220°C) to ensure high initial heat for crisping skin.
- Season the chicken: Rub the softened butter all over the skin and under it where possible. Drizzle with olive oil, then sprinkle smoked paprika, black pepper, dried oregano, and a pinch of salt evenly. Stuff the cavity with thyme, garlic, and lemon halves.
- Rest before roasting: Let the chicken sit at room temperature for 20 minutes. This step helps cook the meat evenly, preventing the outside from overcooking before the inside is done.
- Roast: Place the chicken breast-side up on a roasting rack inside a shallow pan. Insert a digital probe or thermometer if available. Roast for about 60 to 90 minutes, or until the internal temperature at the thickest part of the thigh reads 165°F (74°C).
- Manage heat: After 30 minutes of roasting, reduce oven temperature to 375°F (190°C) to finish cooking gently while maintaining skin crispness.
- Rest after roasting: Remove chicken from oven and tent loosely with foil. Let rest for 15 minutes before carving. Resting allows juices to redistribute, resulting in succulent meat.
Tips for Success
- For deeper flavor, experiment with varying herbs like rosemary or sage in the cavity or as a herb butter infusion under the skin.
- Use a light brush of oil rather than butter alone if you prefer a crisper skin without much browning from dairy fats.
- To avoid rubbery skin, ensure the chicken surface is completely dry before seasoning and roasting.
- If pressed for time, a dry rub with salt, pepper, and spices can substitute the brine, but the texture won’t be as moist or balanced.
- Use an oven thermometer and probe to prevent under or overcooking-juiciness hinges on perfectly reached internal temperature.
- For make-ahead convenience, brine the chicken the night before and keep covered in the fridge until roasting day.
Serving Suggestions
After carving, arrange your roast chicken on a wooden board or warm platter. Spoon pan juices over the slices for added richness. Garnish with fresh thyme sprigs and thin lemon slices for bright contrast and visual appeal.
Pair this dish with a seasonal medley of roasted root vegetables or a crisp green salad dressed in vinaigrette for complementary textures and flavors. A glass of chilled Chardonnay or a light Pinot Noir accompanies beautifully.
| Nutrient | Per Serving (approx.) |
|---|---|
| Calories | 350 kcal |
| Protein | 45 g |
| Carbohydrates | 1 g |
| Fat | 16 g |

For additional insights on roasting techniques and heat control, check out our Complete Guide to Roasting Vegetables. To deepen your knowledge of the Maillard reaction, visit Science.org’s detailed explanation, an authoritative resource.
Q&A
Q: What makes roast chicken taste truly unforgettable?
A: It’s all about the magic of chemistry and technique. The Maillard reaction-where proteins and sugars dance at high heat-creates that golden-brown, crispy skin packed with complex, savory flavors. Plus, how you prep and cook the bird influences every juicy bite.
Q: Why is brining often called the secret to moist roast chicken?
A: Brining infuses the chicken with salt and sometimes sugar, which helps the meat hold onto moisture during roasting. Salt slightly denatures proteins, allowing the chicken to absorb and retain more water, resulting in tender, juicy meat that stays succulent long after it hits the oven.
Q: How important is the temperature in roasting chicken perfectly?
A: Temperature is king. Starting at a high temperature helps crisp the skin through rapid moisture evaporation and Maillard browning. Then, lowering the heat lets the meat cook evenly without drying out, sealing in flavorful juices for a perfect balance of texture and taste.
Q: Does resting the chicken after roasting really make a difference?
A: Absolutely! Resting lets the muscle fibers relax and reabsorb the flavorful juices that were pushed to the surface during cooking. Carving too soon results in a drier bird, while resting guarantees each slice bursts with moist, tender goodness.
Q: Can the choice of herbs and aromatics impact the flavor scientifically?
A: Indeed! Aromatics like rosemary, thyme, garlic, and lemon oils contain volatile compounds that infuse the chicken with distinctive aromas and tastes. These compounds release and penetrate the meat’s surface during roasting, creating a multi-layered flavor experience beyond simple seasoning.
Q: Why does butter or oil improve roast chicken?
A: Fats conduct heat efficiently and promote crisp skin by aiding browning. Butter adds rich, nutty flavors and helps carry the aromas of herbs and spices deeper into the skin. Oil creates a protective barrier, locking in moisture while transforming the skin into a delectably crisp shell.
Q: How does the shape and size of the chicken affect cooking?
A: Larger birds need slower, longer cooking to ensure the heat penetrates to the thickest parts without drying out the exterior. Trussing (tying the legs and wings) helps the chicken cook evenly by keeping it compact, preventing uneven cooking and ensuring each bite is perfectly tender.
Q: What’s the best way to check if a roast chicken is done?
A: The gold standard is an instant-read thermometer inserted into the thickest part of the thigh, avoiding bone. A temperature of around 165°F (74°C) ensures safety and optimal juiciness. Visual cues like clear juices and golden skin help, but the thermometer doesn’t lie!
Unlocking the secrets of roast chicken is part science, part artistry. Master these principles, and every roast transforms from simple dinner to culinary masterpiece bursting with flavor.
To Conclude
As the aroma of a perfectly roasted chicken fills your kitchen, you’re not just savoring a meal-you’re experiencing the culmination of chemistry, heat, and technique working in harmony. Understanding the science behind the roast transforms cooking from guesswork into a deliciously precise art. So next time you prepare this timeless classic, remember: unlocking flavor is less about luck and more about knowledge. Embrace the science, trust the process, and watch as each perfectly golden, juicy bite tells the story of heat and flavor masterfully unlocked.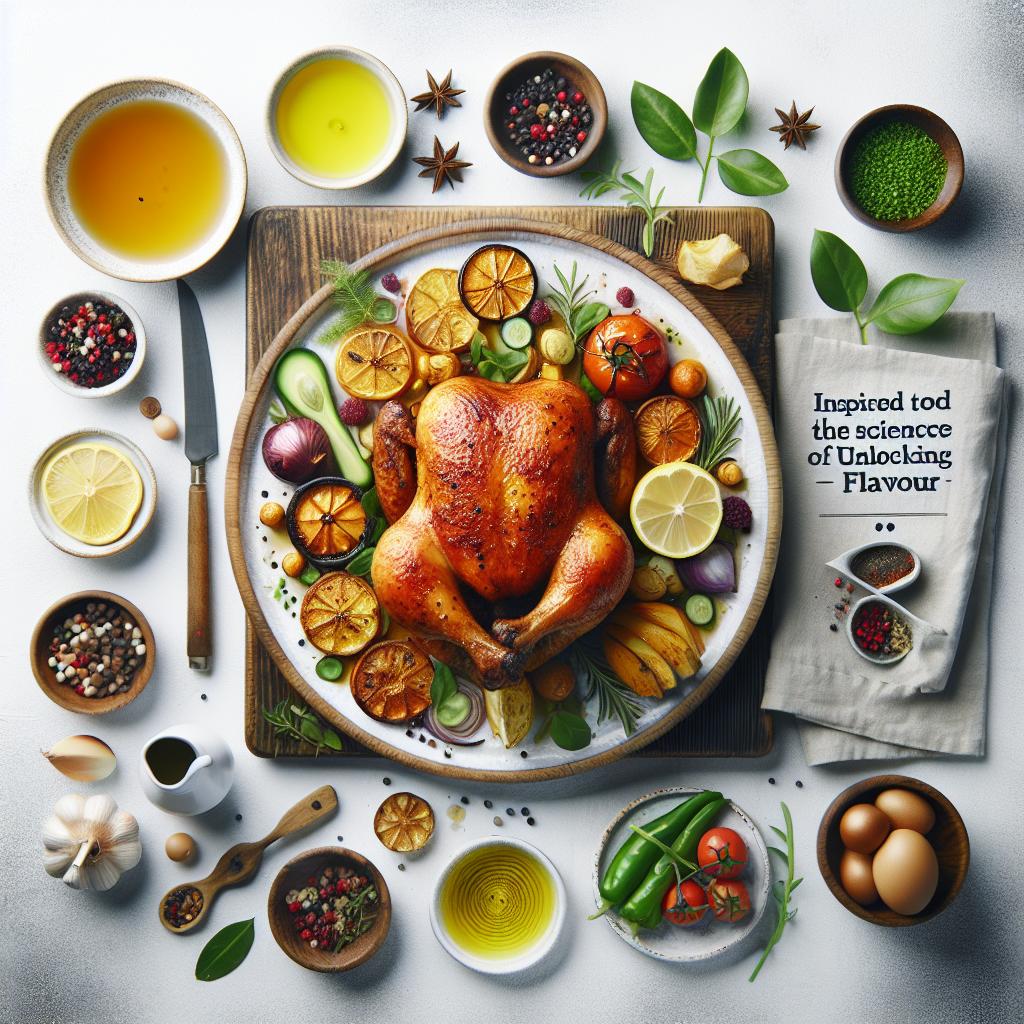
Unlocking the Chemistry Behind a Safe Kitchen Sink Drain: The Role of pH Balance in Preventing Clogs and Corrosion
Unlocking the Chemistry Behind a Safe Kitchen Sink Drain begins with understanding how pH balance directly affects your drain’s health. Maintaining an optimal pH not only prevents stubborn clogs but also shields your plumbing from corrosion, extending the life of your pipes. This knowledge empowers you to take simple, effective steps using both homemade and commercial solutions that respect the delicate chemistry at play.
Prep and Maintenance Time
- Daily maintenance: 5 minutes
- Weekly deep-cleaning: 15 minutes
Yield
Maintains one standard kitchen sink drain system effectively for continuous clog prevention.
Difficulty Level
Easy – perfect for homeowners and enthusiasts looking to adopt a science-backed approach to drain care.
Ingredients for Safe Homemade Drain Solution
- 1/2 cup baking soda (sodium bicarbonate)
- 1/2 cup white distilled vinegar
- 1 cup boiling water
- 1 tablespoon lemon juice
- 1 teaspoon liquid castile soap (optional)
Instructions
- Prepare the baking soda and vinegar mixture: Carefully sprinkle 1/2 cup of baking soda directly into the drain. This base helps neutralize acidic buildup and breaks down minor residues.
- Pour white vinegar slowly: Immediately follow with 1/2 cup of white distilled vinegar. The acid-base reaction creates a fizzing action that loosens grease and organic matter. Allow it to sit for 10 minutes without running water.
- Flush with boiling water: After the fizzing slows, pour 1 cup of boiling water down the drain to wash away loosened debris and kill bacteria responsible for odors and blockages.
- Add lemon juice and castile soap: For enhanced freshness and grease-cutting, squirt 1 tablespoon of lemon juice and mix in 1 teaspoon of castile soap, swishing gently if possible. These ingredients help maintain a balanced pH and add a natural fragrance.
- Repeat weekly: Incorporate this process into your weekly kitchen cleaning routine to maintain a clear and healthy drain environment without harsh chemicals.
Chef’s Notes: Tips for Success
- Variations: Swap lemon juice for grapefruit or orange juice for a different citrus scent and similar acidic benefits.
- Substitutions: If vinegar is unavailable, diluted citric acid powders can perform a comparable function but at adjusted quantities.
- Troubleshooting: Persistent slow drainage may need a mechanical snake or a professional plumber’s help to prevent damage.
- Make-ahead solution: Pre-mix dry baking soda and castile soap in a jar for quick use.
- Safety: Avoid mixing any commercial drain cleaners with homemade natural solutions; unpredictable reactions can harm your plumbing.
Serving Suggestions
Think of your kitchen sink drain like a carefully plated dish: it thrives with gentle, regular attention. Present your routine as part of a kitchen wellness ritual-clean, declutter the surrounding sink area, and finish with natural lemon or herbal-scented wipes to amplify freshness. This elevates maintenance from chore to satisfying self-care.

| Ingredient | Role in Drain Maintenance | Chemical Reaction |
|---|---|---|
| Baking Soda | Neutralizes acids; breaks down grease | Reacts with vinegar to create CO₂ fizz |
| White Vinegar | Dissolves mineral deposits and organic buildup | Acid-base reaction with baking soda |
| Lemon Juice | Enhances acidity to prevent bacterial growth | Maintains low pH, discouraging corrosion |
| Boiling Water | Physically flushes debris; kills microbes | Thermal inactivation of organic matter |
For those looking to deepen their understanding of drain chemistry, explore our Kitchen Maintenance Chemistry Guide, or visit the EPA’s Water Topics page for expert insights on protecting plumbing systems and water safety.
Q&A
Q&A: Unlocking the Chemistry Behind a Safe Kitchen Sink Drain
Q1: Why is understanding the chemistry behind kitchen sink drains important?
A: The kitchen sink drain isn’t just a simple pipe-it’s a battleground of chemical reactions! Knowing the chemistry helps prevent clogs, protect your pipes from corrosion, and ensures harmful substances don’t backflow into your home. It’s all about keeping your kitchen hygienic and your plumbing trouble-free.
Q2: What common substances interact in a kitchen sink drain?
A: The mix is surprisingly diverse-leftover food particles, oils and fats, soap residues, and even traces of cleaning chemicals. These substances engage in chemical processes like saponification (where fats turn into soap) and biodegradation, shaping how well your drain flows.
Q3: How do fats and oils cause drain problems?
A: Fats and oils can undergo a process called saponification when they mix with alkaline substances like soap or baking soda. This reaction forms soap scum that can stick to pipes, trapping debris and creating nasty clogs. Understanding this chemistry helps in choosing the right cleaning approach.
Q4: Can natural solutions help maintain a healthy drain?
A: Absolutely! Natural acids like vinegar can react with baking soda’s alkali in a bubbly neutralization dance, loosening grime without harsh chemicals. This eco-friendly duo safely breaks down residues and helps maintain a clear drain pathway.
Q5: What role do enzymes play in kitchen sink chemistry?
A: Enzymatic drain cleaners use biological catalysts to accelerate the breakdown of organic matter like grease, starches, and proteins. Unlike harsh chemicals, enzymes target clogs at a molecular level, making them an effective and environmentally safe option.
Q6: How can chemical knowledge prevent pipe corrosion?
A: Some cleaning agents are acidic or highly alkaline and can eat away at metal pipes over time. Understanding the pH and chemical nature of these substances ensures you select drain maintenance products that protect your plumbing’s longevity.
Q7: Are there any household chemistry tips for everyday sink care?
A: Yes! Regularly flushing your drain with hot water helps dissolve fats and oils before they solidify. Periodic use of baking soda and vinegar clears buildup naturally, and avoiding pouring harsh chemicals down the drain preserves pipe integrity and promotes a safe kitchen environment.
Understanding the kitchen sink drain’s chemistry is like decoding a hidden world of reactions beneath your everyday chores. With the right knowledge, you can keep your plumbing flowing smoothly, protect your home’s hygiene, and embrace efficient, eco-friendly cleaning methods. Your sink is more than a drain-it’s a tiny chemical lab working tirelessly for you!
In Conclusion
As we’ve journeyed through the molecular dance that keeps your kitchen sink drain flowing smoothly, it’s clear that the chemistry behind a safe drain is as fascinating as it is practical. From the delicate balance of pH to the power of enzymatic cleaners, each element works in harmony to prevent clogs and odors. By understanding these invisible reactions happening beneath your sink, you’re not just maintaining a drain-you’re unlocking a world where science meets everyday living. So next time you pour that homemade solution down the pipe, remember: you’re a kitchen chemist, shaping a cleaner, safer home one molecule at a time.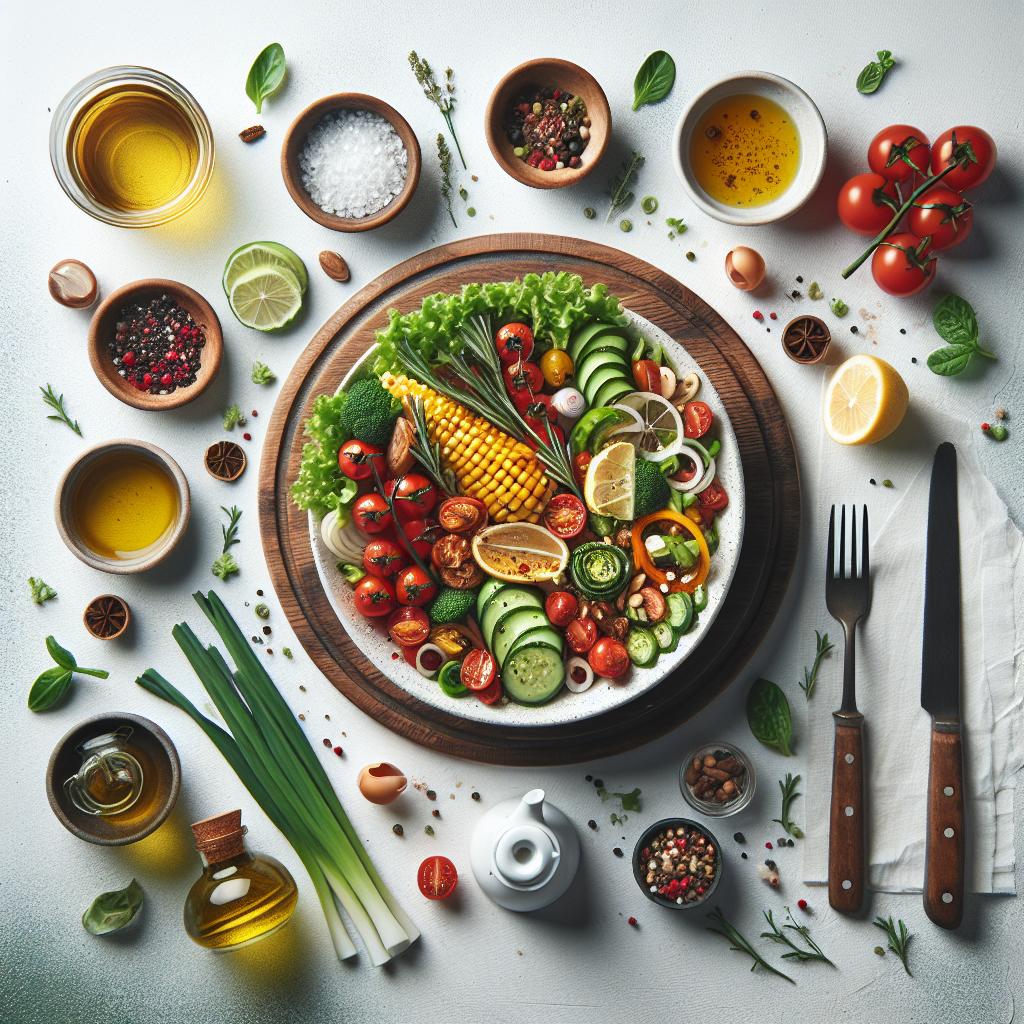
Unpacking the Juicy Myth: The History of “Sealing In Juices”
Unpacking the juicy myth: the history of “sealing in juices” reveals a fascinating journey where culinary tradition meets modern science. For centuries, chefs and home cooks alike have harnessed heat to transform raw ingredients into flavorful dishes-believing that searing meat “locks in” moisture. But what truly happens beneath the surface when your steak sizzles or chicken browns?
Prep and Cook Time
- Preparation: 15 minutes
- Cooking: 25 minutes
- Total: 40 minutes
Yield
- Serves 4
Difficulty Level
- Medium
Ingredients
- 4 boneless chicken breasts, skinless and patted dry
- Salt and freshly ground black pepper, to taste
- 2 tablespoons olive oil
- 3 cloves garlic, minced
- 1 teaspoon fresh rosemary, chopped
- 1 tablespoon unsalted butter
- Juice of 1 lemon
- Fresh parsley, chopped for garnish
Instructions
- Season the chicken generously on both sides with salt and pepper. Let it rest at room temperature for 10 minutes to ensure even cooking.
- Heat olive oil in a heavy-bottomed skillet over medium-high heat until shimmering but not smoking. This provides the perfect surface for browning without burning.
- Place the chicken breasts carefully in the pan. Sear without moving them for about 4-5 minutes, forming a flavorful golden crust. Flip and cook the other side for an additional 4 minutes.
- Reduce heat to medium. Add butter, minced garlic, and rosemary to the skillet. Tilt the pan and spoon the melted butter and aromatic herbs continuously over the chicken (basting) for about 3-4 minutes for enhanced flavor infusion.
- Check internal temperature with a meat thermometer; it should read 165°F (74°C) for perfectly cooked chicken.
- Remove chicken from the skillet and squeeze lemon juice over each breast. Let rest for 5 minutes to allow juices to redistribute naturally.
- Garnish with chopped parsley before serving for a bright, fresh finish.
Chef’s Notes
- Why oil? Olive oil creates the perfect hot surface for browning, but for a richer flavor, try clarified butter or ghee.
- Resting time is key-this lets the juices settle back inside the meat, debunking the myth that searing traps juices instantly.
- Garlic burns fast; add it after you flip the chicken to avoid bitterness.
- For thicker cuts, finish cooking in a preheated 375°F oven after searing to ensure even doneness without drying.
- Substitute herbs based on preferences-thyme or oregano work beautifully.
Serving Suggestions
Serve this beautifully seared chicken over creamy mashed potatoes or a bed of sautéed seasonal greens. Drizzle the pan juices or a light pan sauce for added moisture and flavor. A side of roasted carrots glazed with honey and thyme complements this dish perfectly. Garnishing with vibrant fresh parsley adds an inviting pop of color and freshness.

| Nutrient | Per Serving |
|---|---|
| Calories | 320 kcal |
| Protein | 42 g |
| Carbohydrates | 1 g |
| Fat | 14 g |
The Science Behind Sealing In Juices: Why the Myth Lives On
Many culinary traditions arose from observation rather than science. While “sealing in juices” is a popular phrase, research from ScienceDaily clarifies that searing builds flavor through the Maillard reaction-it doesn’t actually prevent moisture loss. Cooking proteins causes muscle fibers to contract and release juices whether you sear or not. Understanding this empowers cooks to focus on resting meat and using proper cooking techniques rather than relying solely on searing.
By unpacking the juicy myth, you not only elevate your technique but gain confidence that great flavor and moistness comes from balance-heat, timing, seasoning, and rest-rather than a single “locking in” moment.
Q&A
Q&A: Unpacking the Juicy Myth: The History of “Sealing In Juices”
Q1: What exactly is the “sealing in juices” myth?
A1: The “sealing in juices” myth is the popular belief that when you cook meat, high heat instantly locks in the natural juices, creating a juicy, succulent result. Think of it like slamming a lid on a steaming pot to keep everything inside. Spoiler alert: science reveals it’s not quite that simple.
Q2: Where did this juicy myth originate?
A2: The myth likely traces back to classic cooking advice from the early 20th century, promoted by culinary schools and cookbooks aiming to simplify meat cooking techniques. The dramatic image of “sealing” juices made the idea easy to grasp, and it stuck-much like a perfectly seared steak on a grill.
Q3: Does high heat really lock juices inside meat?
A3: Not really. What actually happens is that when meat hits a hot surface, proteins coagulate and form a brown crust known as the Maillard reaction, which adds flavor. However, this crust doesn’t act like an impenetrable seal. Juices can still escape, especially if the meat is overcooked.
Q4: So why has this myth persisted for so long?
A4: Humans love simple explanations, especially in the kitchen. The “sealing in juices” idea gives cooks an easy mantra to remember to avoid drying out meat. Plus, it’s intuitive to imagine heat trapping moisture like a lid traps steam-even if the meat is more porous on a microscopic level.
Q5: How should we really think about cooking juicy meat?
A5: The secret lies in temperature control and timing, not just heat intensity at the start. Cooking meat to the right internal temperature and letting it rest after cooking allows juices to redistribute, resulting in that tender, juicy bite. So, forget the seal; think slow and steady with smart resting.
Q6: Has modern science changed how chefs approach this myth?
A6: Absolutely. Modern chefs and food scientists emphasize the importance of precision cooking methods-like sous vide-and debunk the myth in culinary schools. They focus on the chemistry of proteins, moisture movement, and temperature gradients to maximize flavor and juiciness.
Q7: Can the Maillard reaction help with juiciness at all?
A7: While the Maillard reaction enhances flavor and texture, it doesn’t lock in moisture like a seal. It creates a delicious crust which can help retain some moisture inside by limiting evaporation, but the true juicy magic is in proper cooking and resting techniques rather than a literal “seal.”
Q8: What’s the takeaway for home cooks reading this?
A8: Don’t stress about “sealing in juices” with a crazy hot pan frenzy. Instead, use moderate heat to build flavor, pay attention to internal temperature, and let meat rest before slicing. Your taste buds will thank you with every juicy bite-myth-free and delicious!
This Q&A peels back the layers on a beloved culinary myth, blending history and science to reshape how we think about juicy meat. Cook smarter, not mythically!
Closing Remarks
As we close the chapter on the sizzling saga of “sealing in juices,” it becomes clear that this culinary myth has more steam than substance. From the early days of kitchen lore to modern scientific scrutiny, the belief that heat can trap moisture inside food has been both passionately upheld and thoroughly debunked. Yet, despite the myth’s unraveling, it continues to flavor conversations around the dinner table-reminding us that food is not just fuel, but a story woven through tradition and taste. So next time you hear someone swear by sealing in those succulent juices, smile knowingly, savor the story behind the science, and cook on with curiosity and confidence.
Microwave Showdown: Which Container Warms Up Fastest?
When it comes to reheating meals, the choice of container is far more than a matter of convenience; it plays a crucial role in how quickly and evenly your food warms. Understanding microwave material efficiency can revolutionize your kitchen routine. This exploration into glass, ceramic, and plastic containers dives deep into the science of heat transfer and safety, transforming your microwave habits into a culinary advantage.
Prep and Cook Time
Preparation Time: 2 minutes
Cook (Microwave) Time: 1-5 minutes (depending on container and food)
Yield
Serves 1-4 (depending on portion size)
Difficulty Level
Easy – Perfect for everyday use
Ingredients
- 1 cup cooked rice or pasta
- ½ cup cooked vegetables (e.g., broccoli, carrots)
- ¼ cup protein (chicken, tofu, or beans)
- 2 tablespoons olive oil or butter
- Salt and pepper, to taste
- Optional: fresh herbs for garnish (parsley, basil)
The Science Behind Container Choice
Choosing the right container influences how rapidly and uniformly your meal heats up. Glass and ceramic have excellent heat retention and distribute warmth evenly due to their dense molecular structure, which causes slower initial heating but steadier temperature consistency. On the other hand, plastic containers heat faster but often unevenly, potentially causing hot spots that affect food quality and safety.
Because microwave energy agitates water molecules, containers with lower water content-like glass and ceramic-do not heat themselves but pass the heat to the food. Plastics absorb some microwave energy, which can speed heating but risks melting or warping if not microwave-safe. Therefore, understanding material efficiency aids in balancing speed and food integrity.
Instructions for Speedy Microwave Heating
- Prepare your food by placing your rice or pasta, cooked vegetables, and protein into your chosen container.
- Add oil or butter to enhance moisture retention and flavor during reheating.
- Season with salt and pepper to refresh your meal.
- Cover the container with a microwave-safe lid or vented plastic wrap to trap steam and prevent splatter.
- Microwave on high power for 1 to 3 minutes, depending on the container type:
- Glass or ceramic: 2-3 minutes for even heating.
- Plastic (microwave-safe): 1-2 minutes, watching carefully for overheating.
- Stir halfway through to distribute heat and avoid cold spots.
- Allow standing for 1 minute post-heating for residual heat to finish warming your meal.
- Check food temperature before serving to ensure it’s thoroughly warmed.
Safety and Practicality Tips
Plastic containers should always be labeled “microwave-safe” to prevent harmful chemical leaching and warping. Avoid heating oily or fatty foods in plastic containers as they can reach higher temperatures, exceeding material tolerance and releasing toxins.
Glass and ceramic containers are excellent for maintaining food quality but may become hot to the touch – use oven mitts or a towel to handle. Additionally, never heat containers with metallic paint or trims.
Top Container Picks for Efficiency
- Tempered glass containers, like Pyrex, offer robust heat resistance, durability, and even heating.
- Ceramic bowls with microwave-safe labels provide gentle heat diffusion perfect for soups and stews.
- BPA-free plastic containers, preferably with vented lids, offer lightweight convenience for quicker meals but require more vigilance.
Chef’s Notes: Tips for Success
- Venting is key: Always keep lids slightly ajar or use vented covers to allow steam to escape, preventing pressure build-up and uneven heating.
- Layer ingredients thoughtfully, placing denser, colder items at the bottom for more effective warming.
- Microwave setting matters: Avoid using high power for more than a few minutes; medium power prolongs heating slightly but preserves texture and moisture.
- Make ahead and reheat: Store leftovers in the original glass or ceramic container to reduce transfer and breakage.
- Test new containers: Conduct a quick trial heating with water to ensure safe use and check heat distribution.
Serving Suggestions
Present your warmed meal on a beautiful ceramic plate, garnished with fresh herbs like basil or parsley to add vibrant color and aroma. Complement it with a side salad or crusty bread to round out the dish. A drizzle of olive oil or a sprinkle of freshly ground pepper enhances both visual appeal and flavor depth.
| Nutrient | Per Serving |
|---|---|
| Calories | 350 kcal |
| Protein | 18 g |
| Carbohydrates | 45 g |
| Fat | 10 g |
Internal Resource: For more on food safety and microwave use, see Microwave Safe Materials: Your Ultimate Guide.
External Resource: Learn more about microwave cooking safety at FDA Microwave Oven Safety.

Q&A
Q: Why does the type of container matter when heating food in a microwave?
A: The container influences how evenly and quickly heat is transferred to your food. Different materials absorb or reflect microwaves differently, affecting warming speed and food quality.
Q: Which containers were tested in the microwave showdown?
A: We tested glass, ceramic, plastic, and microwave-safe paper containers to see which warmed up the fastest and maintained the best temperature.
Q: How does glass perform in the microwave?
A: Glass heats food evenly and doesn’t absorb microwaves itself, allowing faster warming. However, it can get hot to the touch, so handle with care!
Q: What about ceramic containers?
A: Ceramic is heat-retentive and warms food well but typically takes a bit longer to heat up initially compared to glass. It’s great for keeping food warm after microwaving.
Q: Are plastic containers efficient for microwaving?
A: Plastic containers heat quickly because some absorb microwaves, but they often heat unevenly and can sometimes release unwanted chemicals if not labeled microwave-safe.
Q: How do paper containers stack up?
A: Microwave-safe paper containers heat food fast but may not retain heat as well and can sometimes become soggy or warp, affecting usability.
Q: Which container won the showdown?
A: Glass containers took the crown for fastest and most even heat-up, combining efficiency with safety-making them a top pick for microwave reheating.
Q: Any tips for choosing a microwave container?
A: Always use microwave-safe containers, avoid metals, and consider the balance between heating speed, heat retention, and safety. Glass or ceramic usually provide the best experience.
Q: Can container shape affect heating time?
A: Absolutely! Containers with a wider, shallower shape expose more food surface area to microwaves, promoting faster and more even heating than deep, narrow ones.
Q: How can I safely handle hot containers out of the microwave?
A: Use oven mitts or microwave-safe gloves, as some containers-especially glass and ceramic-can get very hot. Let food sit a moment for heat to distribute before eating.
In Retrospect
As the final beep echoes and the steam rises, it’s clear that not all containers are created equal in the microwave arena. From the nimble glass bowl that heats swiftly and evenly, to the sturdy ceramic mug that holds onto warmth, and the plastic standby that sometimes lags behind – each contender brings its own strengths and quirks to the table. Choosing the right container isn’t just about speed; it’s about safety, convenience, and preserving the flavor of your favorite leftovers. So next time you’re about to zap your meal, remember this container showdown-armed with knowledge, you can make every microwave minute count. Heat smart, eat happy!
The Alchemy Behind the Perfect Savory Galette Crust
The Alchemy Behind the Perfect Savory Galette Crust begins with a delicate interplay of ingredients and techniques that transform simple dough into a flaky masterpiece. Achieving that flawless balance-where layers flake apart with buttery ease while the crust remains tender-yet-crisp-requires understanding how fat, hydration, flour, and gentle handling coalesce. This is more than baking; it’s culinary magic that invites you into a world of texture and flavor innovation.
Prep and Cook Time
- Preparation: 20 minutes
- Chilling: 1 hour
- Baking: 35-40 minutes
- Total Time: 1 hour 55 minutes
Yield
- Serves 6 generously
Difficulty Level
- Medium – Perfect for home bakers looking to elevate their pastry skills
Ingredients
- 1 ¼ cups all-purpose flour, sifted (for ideal structure and subtle nutty flavor)
- ½ cup cold unsalted butter, cubed (the cornerstone for flakiness)
- 1 teaspoon fine sea salt (to enhance overall flavor)
- 3-4 tablespoons ice-cold water (hydration balanced for tenderness)
- Optional: 1 tablespoon finely ground almond flour for extra richness and flavor
Instructions
- Prepare the Fat: Keep cold butter in the freezer until just before use. Cold fat creates tiny pockets in the dough that bake into crisp layers, heightening flakiness.
- Mix Dry Ingredients: In a large bowl, combine the all-purpose flour, almond flour (if using), and salt. Whisk lightly to blend.
- Cut in Butter: Using a pastry cutter or clean hands, quickly work the cold butter into the flour mixture until it resembles coarse cornmeal with some pea-sized chunks.
- Add Ice Water Gradually: Drizzle 3 tablespoons of ice water, mixing gently with a fork or your fingers just until the dough starts to come together. Add the extra tablespoon only if needed-overhydration will toughen the crust.
- Form and Chill: Lightly press the dough into a 5-inch disc, wrap tightly in plastic wrap, and refrigerate at least 1 hour. Chilling solidifies fat and relaxes gluten, which aids in tenderness.
- Roll Out Carefully: On a floured surface, roll the dough into a roughly 12-inch circle, working quickly to keep it cold. Use gentle, even pressure-overworking develops gluten and toughens crust.
- Transfer & Shape: Transfer dough to a parchment-lined baking sheet. Fill with your savory fillings, then fold edges over, gently pressing to seal while preserving visible folds for rustic charm.
- Bake Until Golden: Bake in a preheated 400°F (205°C) oven for 35-40 minutes until the crust is a beautiful golden brown and the filling bubbles enticingly.
Chef’s Notes – Tips for Success
- Role of Fat: Butter is preferred for flavor, but you can blend in a bit of shortening for extra flakiness if desired.
- Aim for Cold: Keeping all ingredients cold is key-warm butter melts into the dough, losing layering effect.
- Hydration Balance: Add water sparingly; too little water means dry dough, too much causes stickiness and chewiness.
- Flour Selection: All-purpose flour offers a great balance. For more robust flavor, consider half whole wheat pastry flour.
- Handling: Minimal handling ensures a tender crust. Use a light touch when mixing and rolling.
- Make Ahead: Dough can be made up to 2 days ahead; simply wrap well and refrigerate. Bring to fridge temperature before shaping.
Serving Suggestions
Serve your savory galette crust with a fresh side salad of peppery arugula and a drizzle of aged balsamic vinegar. Garnish with finely chopped fresh herbs such as thyme or tarragon to brighten flavors. Accompany with a glass of crisp white wine or a rustic cider. For an extra visual and textural contrast, sprinkle flaky sea salt over the warm crust just before serving.

| Nutrient | Per Serving |
|---|---|
| Calories | 320 kcal |
| Protein | 5 g |
| Carbohydrates | 28 g |
| Fat | 20 g |
For more on creating perfect galette fillings, explore savory galette recipes. To deepen your knowledge on the science of fats in baking, the principles outlined here at Crafty Baking are invaluable.
Q&A
Q: What is the secret ingredient that transforms a savory galette crust from ordinary to extraordinary?
A: The true alchemy lies in the humble combination of cold butter and a splash of ice-cold water. The butter creates delicate flakes, while the water helps bind the dough just enough-without unleashing gluten’s chewy grip. This balance grants the crust a tender, crisp texture that’s pure magic.
Q: Why is chilling the dough such a critical step in making the perfect galette crust?
A: Think of chilling as a pause button on the dough’s transformation. It allows the butter to firm up, so when baked, it melts and steams in pockets, creating flaky layers. Plus, the cold temperature keeps the gluten relaxed, preventing toughness and ensuring a buttery crumb that softly flakes under your fork.
Q: Can alternative flours be used without losing the crust’s signature flakiness?
A: Absolutely-but with caution. All-purpose flour’s protein content is ideal for structure and flake. Swap in nut flours or whole-grain varieties, and you’ll need to adjust hydration and fat ratios. Often, blending flours and adding a touch of cornstarch or arrowroot can mimic that coveted crispness while adding unique flavors.
Q: How does salt influence the flavor and texture of the galette crust?
A: Salt is the mastermind, coaxing flavors from the flour and butter while subtly balancing the earthiness of savory fillings. It also tightens gluten networks just enough for structure without sacrificing tenderness-turning a simple crust into a gourmet foundation.
Q: Is rolling the dough multiple times essential to create layers, or is there a simpler trick?
A: While traditional laminating techniques build layers in puff pastry, galette crusts rely on a gentler touch. The trick is to handle the dough minimally-fold it just a couple times to create pockets of butter and flour mixture. Overworking shakes up the alchemy, releasing too much gluten and melting the butter, resulting in a tough crust.
Q: How can one tell when the galette crust is perfectly baked?
A: Watch for a golden hue with slightly deeper browning at the edges-a visual cue that the butter has crisped the dough to perfection. The crust should feel firm yet not rock-hard, with a subtle snap when you slice through, giving way to a tender interior that complements the savory fillings.
Q: What role does fat type play in shaping the crust’s texture and flavor?
A: Butter reigns supreme for its rich flavor and ideal melting properties, but mixing in a bit of lard or crème fraîche can elevate flakiness and add subtle tang. Experimenting with fats is alchemy itself-a dance of science and taste that can personalize your galette beyond the ordinary.
Q: Can resting the dough overnight improve the final galette crust?
A: Yes! Resting is like giving the dough time to harmonize. It allows moisture to distribute evenly, gluten strands to relax, and flavors to deepen. Refrigerating overnight often results in an easier-to-roll, more flavorful crust with heightened tenderness once baked.
Q: What’s the best method to prevent a soggy bottom in savory galettes?
A: The key lies in both the dough and the filling. Brush the crust with a thin layer of egg wash or cheese before adding moist ingredients, creating a moisture barrier. Also, partially cooking or draining wet fillings reduces excess liquid, preserving that crisp, flaky foundation vital to the perfect savory galette.
To Wrap It Up
In the end, the perfect savory galette crust is nothing short of a humble masterpiece-a delicate dance between science and artistry, where flour meets butter in a transformative embrace. Understanding the alchemy behind each flaky layer elevates this rustic pastry from simple comfort food to an elegant canvas for bold, savory flavors. So next time you roll dough across your countertop, remember: you’re not just baking a crust-you’re crafting a culinary spell, one buttery fold at a time. Embrace the science, honor the technique, and let your galette become the golden gateway to delicious discovery.