Understanding Milk Kefir Grains and Their Magical Role
Crafting Creamy Magic in your kitchen begins with the enchanting world of milk kefir grains, tiny living communities of bacteria and yeast that transform ordinary milk into a probiotic-rich elixir. These gelatinous grains are not grains in the traditional sense but are living symbiotic cultures that thrive on lactose, fermenting milk into a tangy, creamy beverage bursting with health benefits and complex flavors.
Originating from the Caucasus Mountains, milk kefir grains carry centuries of heritage and microbial diversity, making your homemade kefir an artisanal jewel. Their gentle fermentation process naturally balances tartness with subtle sweetness, creating a culinary canvas that invites endless creativity.
Prep and Cook Time
- Preparation: 5 minutes
- Fermentation: 18-24 hours (depending on temperature and desired tartness)
- Total Time: Approximately 24 hours
Yield
Approximately 1 quart (about 4 cups) of milky, creamy kefir.
Difficulty Level
Easy to Medium – A welcoming project for beginners and a refined art for enthusiasts.
Ingredients
- 2 tablespoons fresh milk kefir grains (live and active)
- 1 quart whole milk (preferably organic, raw or pasteurized)
- Optional: filtered water to rinse grains
Instructions
- Prepare your fermentation jar: Use a clean glass quart jar, rinsed with warm water but not soap, to preserve beneficial microbes.
- Add the kefir grains: Gently place 2 tablespoons of fresh milk kefir grains into the jar.
- Pour the milk: Pour in 1 quart of whole milk, leaving about 1 inch of headspace to allow for expansion during fermentation.
- Cover the jar: Use a breathable cloth or paper towel secured with a rubber band to allow airflow while keeping out dust and insects.
- Ferment at room temperature: Place the jar in a cozy spot, between 68-78°F (20-25°C), avoiding direct sunlight. Let it ferment for 18-24 hours – the longer it ferments, the tangier and thicker it becomes.
- Strain the kefir: Once the milk has thickened and smells pleasantly tangy, strain out the grains using a plastic or stainless steel sieve to avoid metal damage.
- Store your kefir: Transfer the strained kefir to a glass bottle with a lid and refrigerate. It’s best enjoyed within 7 days.
- Care for your grains: Immediately feed the grains with fresh milk for continued use or store them temporarily in a small amount of milk in the fridge.
Tips for Success
- Keep your grains happy: Avoid exposing kefir grains to metal utensils or containers to prevent damage; glass or food-grade plastic is best.
- Adjust fermentation times: Warmer temperatures speed up fermentation but can yield a more sour kefir; cooler temps slow down the process for a milder flavor.
- Milk choice matters: Whole milk produces the creamiest results, but you can experiment with goat’s milk or sheep milk for unique profiles.
- Troubleshooting: If your kefir smells off or the grains seem slimy, pause use and rinse grains gently, ensuring freshness and quality of milk.
- Resting the grains: For short breaks, store grains submerged in milk in the fridge for up to a week. For longer single-use pauses, drying or freezing protocols are advised.
Serving Suggestions
Enjoy your milky creamy kefir chilled as a refreshing probiotic tonic, or transform it into smoothies, salad dressings, and breakfast bowls. For a bit of flavor alchemy, add fresh fruit purées, a drizzle of raw honey, vanilla beans, or aromatic spices like cinnamon and cardamom. Garnish with fresh mint leaves, toasted nuts, or edible flowers for a visually stunning presentation.
Pair kefir with hearty granola, soaked oats, or as a base for cold soups like cucumber gazpacho. Its velvety texture and lively tang make it a versatile ingredient across sweet and savory dishes.
| Nutrient | Per 1 Cup (240ml) |
|---|---|
| Calories | 150 |
| Protein | 8 g |
| Carbohydrates | 12 g |
| Fat | 8 g |
For a deeper dive into probiotic fermentation, check out our related Guide to Probiotic Fermented Foods.
Learn more about the scientific benefits of milk kefir grains at the National Center for Biotechnology Information.

Q&A
Q: What is milk kefir, and why is it called “creamy magic”?
A: Milk kefir is a fermented dairy beverage crafted using kefir grains-tiny, gelatinous clusters of bacteria and yeast. The “creamy magic” comes from its velvety texture and rich tang, born from the symbiotic dance of microbes transforming milk into a probiotic powerhouse. It’s like turning ordinary milk into a lively elixir that nourishes both body and palate.
Q: What exactly are kefir grains, and how do they work?
A: Kefir grains aren’t grains like wheat or oats; they’re living colonies of beneficial microbes-a mixture of bacteria and yeast-that resemble cauliflower florets. When you submerge them in milk, these microorganisms feast on lactose, creating lactic acid, carbon dioxide, and a bouquet of flavors, which results in the creamy, effervescent kefir. Think of them as tiny alchemists performing a fermentation sorcery.
Q: How do you start making milk kefir at home?
A: Begin by obtaining fresh kefir grains-often from a friend or a trusted supplier. Place the grains into fresh milk (cow, goat, or even sheep’s milk works) and leave the mixture at room temperature, covered loosely to allow airflow, for about 24 hours. During this time, the grains work their magic, producing a creamy beverage with a gentle tang and a hint of fizz.
Q: What types of milk can be used for making kefir?
A: You can experiment with various milks-traditional cow’s milk is most common, but goat, sheep, or even buffalo milk create distinct flavor profiles. Full-fat milk tends to yield a richer, creamier kefir, enhancing that “magic” feel. Just note that plant-based milks need special attention and don’t ferment the same way since kefir grains thrive on lactose.
Q: How do you know when your kefir is ready?
A: Kefir is ready when it thickens slightly, smells fresh with a tangy, yeasty aroma, and has a pleasantly tart flavor. The milk will transform from sweet and fluid to creamy and mildly effervescent. Over-fermentation can lead to separation into curds and whey-still edible but more sour-so timing is key to capturing that perfect creamy magic.
Q: Can kefir grains be reused indefinitely?
A: Yes! One of the wonders of kefir grains is their ability to multiply and regenerate endlessly with proper care. After straining your finished kefir, simply rinse the grains gently with clean, cool water (if desired) and plunge them into fresh milk for the next batch. They’re your perpetually living keys to creamy magic.
Q: What health benefits does milk kefir offer?
A: Milk kefir is a probiotic treasure trove packed with beneficial bacteria and yeasts that can support digestion, boost immunity, and promote gut health. Its creamy texture belies a complex community of microbes working behind the scenes to help balance your internal ecosystem-making it as nourishing as it is delicious.
Q: How can you incorporate milk kefir into your daily life?
A: Drink it straight for a refreshing probiotic boost, blend it into smoothies for silky texture, or use it as a tangy base for salad dressings and marinades. You can even bake with kefir to add moisture and a gentle lift to breads and cakes. It’s a versatile, creamy companion to many culinary adventures.
Q: Any tips for beginners to avoid common pitfalls?
A: Absolutely! Use fresh, high-quality milk and avoid metal utensils or containers, as kefir grains prefer glass or food-grade plastic. Maintain a consistent room temperature near 68-78°F (20-25°C) for optimal fermentation. Start with small batches to get a feel for timing, and don’t worry if the flavor varies-that’s just the grains expressing their magic.
Q: How do you store milk kefir once it’s made?
A: Once fermented to your liking, strain out the grains and transfer the kefir to a sealed container in the refrigerator. Chilling slows fermentation, preserving the creamy texture and flavor. Consume within a week for the freshest experience-though some aficionados enjoy the evolving tastes of kefir as it continues to mature slowly in the fridge.
In the alchemy of crafting creamy milk kefir, you hold the power to summon a living beverage filled with ancient microbial wisdom and modern zest. With a little patience and care, milk kefir grains transform humble milk into a sparkling potion of health and flavor-a true creamy magic worth experiencing daily.
The Way Forward
As you embark on your journey with milk kefir and its living grains, remember that each batch is a small, bubbling universe of nourishment and tradition. Crafting this creamy magic is more than a simple fermentation process-it’s an art form rooted in biology and culture, waiting for your hands to bring it to life. With patience and curiosity, you’ll transform humble milk into a tangy elixir teeming with probiotics, offering a delicious gateway to gut health and culinary adventure. So, nurture those tiny grains, experiment with flavors, and savor the ever-evolving story that each jar of milk kefir tells. Cheers to your new craft-where science meets comfort, and every sip is a celebration of life’s microscopic wonders.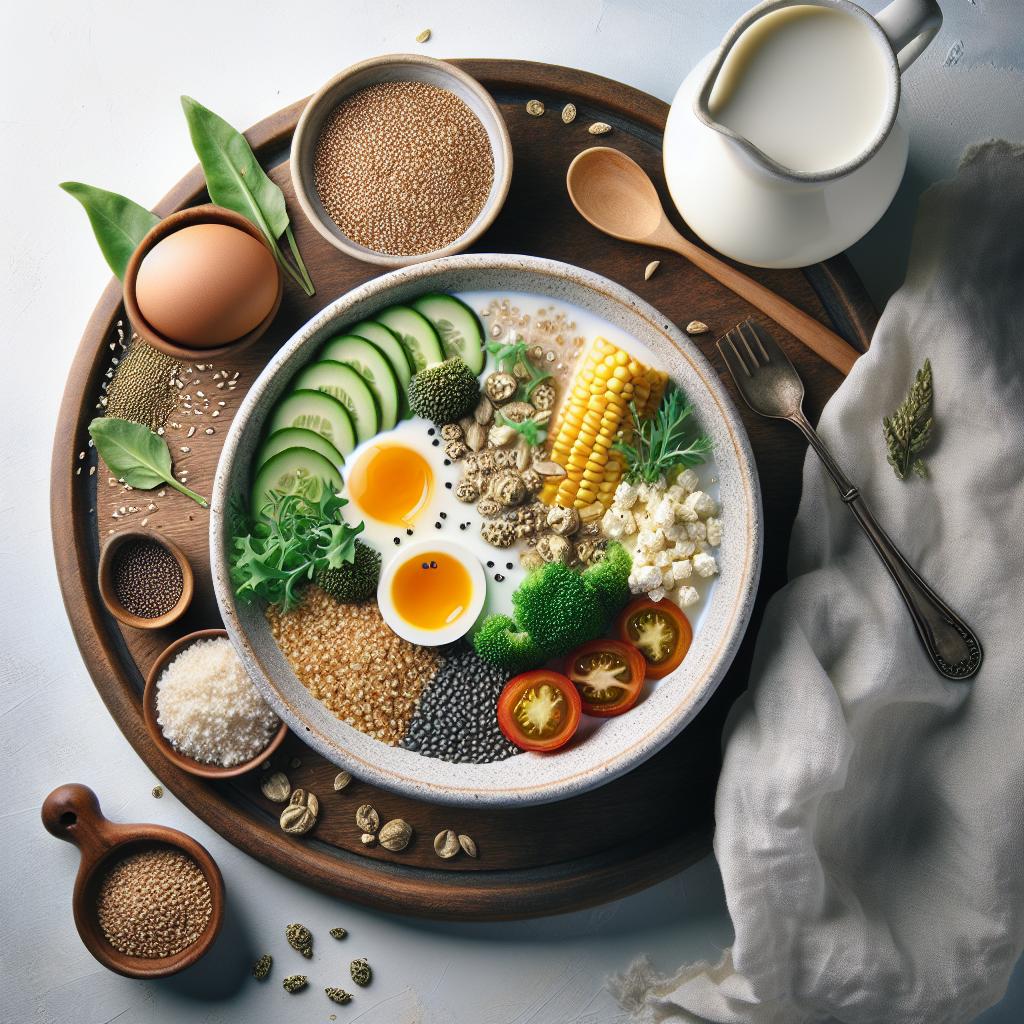
Bubbly Bliss: Crafting the Perfect Water Kefir Soda at Home
Bubbly Bliss begins with the careful selection of premium water kefir grains that serve as the vibrant heart of this enchanting fermented soda. These delicate, symbiotic cultures transform simple ingredients into a sparkling, probiotic-rich elixir bursting with effervescent charm and delightful flavor twists. Whether you’re a fermentation aficionado or a curious beginner, mastering this craft will captivate your senses and elevate your homemade sparkling beverages.
Prep and Cook Time
- Preparation: 15 minutes
- Primary Fermentation: 24 to 48 hours
- Flavor Infusion & Secondary Fermentation: 24 to 48 hours
- Total Time: Approximately 3-4 days
Yield
- About 1 liter (4 cups) of sparkling water kefir soda
Difficulty Level
- Easy to Medium: Perfect for beginners keen to explore fermentation as well as seasoned makers looking to refine their craft
Ingredients
- 3 tablespoons water kefir grains, rinsed gently with non-chlorinated water
- 1/4 cup organic cane sugar or coconut sugar, dissolved
- 1 liter filtered water, chlorine-free
- 1 tablespoon lemon juice (freshly squeezed)
- Optional flavor additions for second fermentation: sliced fresh ginger, berries, lemon zest, or dried hibiscus flowers
Instructions
- Bring the filtered water to room temperature if freshly boiled, then stir in the organic cane sugar until fully dissolved, ensuring a pure, sweet medium for the grains to thrive.
- Transfer the sugared water into a clean glass jar. Add the water kefir grains carefully, avoiding vigorous agitation that might damage them.
- Cover the jar with a breathable cloth secured with a rubber band to allow airflow while keeping out contaminants. Let ferment at room temperature away from direct sunlight for 24 to 48 hours, checking for a slight tang and gentle carbonation starting to form.
- Once fermentation primary phase completes, strain out the grains using a non-metal mesh sieve. Rinse them softly with non-chlorinated water, then set aside for reuse in a fresh batch.
- Pour the strained liquid into a sealable bottle, adding your chosen flavor infusions such as fresh ginger slices or berries to the bottle for an enticing second fermentation.
- Seal tightly and leave the bottle at room temperature for another 24 to 48 hours to develop natural carbonation and vibrant flavors. Burp the bottle once daily to release excess pressure and avoid bursting.
- Refrigerate the finished water kefir soda for at least 12 hours before serving chilled and sparkling to perfection.
Tips for Success
- Use non-chlorinated, filtered water to protect the delicate balance of your kefir grains.
- If fermentation stalls, try increasing room temperature slightly or adding a pinch of additional sugar to jumpstart activity.
- Experiment with fruit combos like pineapple and mint or blueberry with lavender for uniquely refreshing blends.
- Always use glass or food-grade plastic containers; avoid metal to prevent unwanted chemical reactions.
- Keep your kefir grains healthy by feeding them regularly and storing them in a sugar water solution during breaks from fermentation.
Serving Suggestions
Present your radiant water kefir soda in tall, clear glasses adorned with fresh herbs like mint or basil, thin slices of lemon, or edible flowers for an irresistible, photogenic touch. Serve it as a vibrant companion to light salads, grilled seafood, or as a refreshing alternative to sugary soft drinks at gatherings. For a festive flair, garnish with frozen berries or a twist of citrus peel that enhances the natural sparkle and complexity.
| Nutrient | Per 8 oz Serving |
|---|---|
| Calories | 40 |
| Protein | 0 g |
| Carbohydrates | 10 g (mainly sugars) |
| Fat | 0 g |
For more on fermentation basics and creative twists, explore our comprehensive guide to fermentation or delve into scientific insights on water kefir to deepen your understanding of this sparkling craft.

Q&A
Q&A: Bubbly Bliss – Crafting the Perfect Water Kefir Soda at Home
Q1: What exactly is water kefir, and how does it differ from other fermented drinks?
A1: Water kefir is a naturally fermented, effervescent beverage made using water kefir grains-tiny symbiotic colonies of bacteria and yeast. Unlike dairy-based kefir, water kefir uses sugar water or fruit juice as a base, making it vegan-friendly and lighter. Its lively bubbles and tangy-sweet flavor set it apart from kombucha and probiotic sodas, offering a gentle, refreshing fizz that’s a probiotic powerhouse.
Q2: Why should I consider making water kefir soda at home instead of buying it?
A2: Crafting water kefir soda at home lets you customize flavors, sweetness, and carbonation levels to perfectly suit your taste buds. It’s also more economical and eco-friendly, reducing plastic waste from store-bought bottles. Plus, the hands-on fermentation process is incredibly satisfying-a bubbling science experiment with delicious results!
Q3: What are the basic ingredients I need to start making water kefir soda?
A3: To begin, you’ll need:
- Water kefir grains (the friendly fermenting microbes)
- Clean, chlorine-free water (spring or filtered water is best)
- Sugar (white cane sugar works well as food for the grains)
- Optional flavor enhancers like dried fruits, lemon slices, or ginger for the second fermentation.
Q4: How do I ensure my water kefir grains stay healthy and happy?
A4: Feed your grains regularly with fresh sugar water every 24-48 hours. Use non-chlorinated water to protect their delicate ecosystem, and keep them at room temperature-ideally between 68-78°F (20-25°C). Give them a gentle swirl daily to distribute nutrients. When resting, store them in sugar water in the fridge and refresh weekly.
Q5: What’s the step-by-step process for making sparkling water kefir soda at home?
A5:
- First Fermentation: Combine sugar water and water kefir grains in a jar. Cover loosely and let it ferment 24-48 hours at room temperature.
- Strain: Remove the grains with a plastic or stainless steel strainer.
- Second Fermentation: Pour the strained liquid into sealed bottles with added flavors like fruit or ginger. Seal tightly to trap carbonation and ferment for another 24-48 hours.
- Chill and Serve: Refrigerate, then open carefully to enjoy your naturally fizzy, probiotic soda!
Q6: Can I experiment with flavors and sweetness?
A6: Absolutely! The second fermentation is your playground. Try berries, citrus zest, herbs like mint, or spices such as cinnamon. For sweetness, adjust the sugar in the first fermentation or add a splash of juice during the second. Each tweak crafts a new bubbly bliss to discover.
Q7: Are there any safety tips to keep in mind while fermenting?
A7: Yes! Always use clean utensils and bottles to avoid unwanted bacteria. Avoid metal containers during fermentation; stick with glass or BPA-free plastic. If your kefir develops a bad smell (like rotten eggs) or mold, it’s best to discard and start fresh. Trust your senses-kefir should smell pleasantly yeasty, slightly sweet, and tangy.
Q8: How can drinking water kefir benefit my health?
A8: Water kefir floods your gut with beneficial probiotics that can aid digestion, boost your immune system, and even enhance mood. It’s a tasty way to support your microbiome without the heaviness of dairy or sugary sodas.
Q9: What’s the best way to store and enjoy my homemade water kefir soda?
A9: Store your bottled kefir in the fridge to slow fermentation and keep carbonation. Enjoy it chilled as a sparkling treat any time-perfect on a sunny afternoon or paired with your favorite meal. Take care when opening since natural carbonation can build pressure.
Q10: Where can I find water kefir grains to get started?
A10: You can find water kefir grains through health food stores, online marketplaces, or community fermentation groups. Many enthusiasts enjoy sharing grains-so ask around local forums or social media groups dedicated to fermentation!
Crafting your own water kefir soda unlocks an artisanal world of playful fermentation-where science meets flavor and your glass bubbles with wellness. Cheers to your bubbly bliss!
The Way Forward
As the final bubbles dance their way to the top of your homemade water kefir soda, you’ll realize that crafting this effervescent elixir is more than just a refreshing pursuit-it’s a celebration of life’s natural rhythms. From nurturing your lively kefir grains to experimenting with vibrant flavors, each step invites a little magic into your kitchen and wellness routine. So, embrace the art of bubbly bliss, let your creativity fizz, and raise a glass to the sparkling joy of home-fermented refreshment that’s as unique as you are. Cheers to your perfectly crafted water kefir soda-where health, happiness, and effervescence meet in every delightful sip!
Unlocking the Science Behind Salt and Fermentation Harmony
Salt Savvy enthusiasts know that the delicate dance between salt and fermentation is more than just an ingredient choice-it’s a transformative alchemy that turns simple vegetables into vibrant, tangy treasures. The salt controls microbial growth, encourages lactic acid bacteria, and preserves the crispness and flavor of your ferments. Understanding this science is your first step to mastering flavorful, crunchy ferments that sing with depth.
Choosing the Right Salt for Crisp and Flavorful Ferments
When selecting salt, purity and mineral content are key. Non-iodized salts like sea salt, kosher salt, or Himalayan pink salt allow the natural enzymes and bacteria to flourish without undesirable additives. Fine-table salts can dissolve too quickly, sometimes leading to over-salted or mushy textures. A coarse sea salt retains its integrity during fermentation, imparting subtle mineral notes that elevate flavor complexity. For consistent results, avoid salts with anti-caking agents or iodine, which may inhibit fermentation.
Mastering Salt Ratios for Different Vegetables and Flavors
Salt ratios typically range between 1.5% to 3% of the vegetable weight. For example, lighter, leafy ferments like kale or cabbage thrive between 2-2.5% for crispness and tang, while root vegetables like carrots and beets may benefit from 2.5-3% for deeper fermentation. Too little salt invites unwanted bacteria and softness; too much impedes fermentation activity, leading to bland results. Weighing your vegetables and salt using a kitchen scale ensures perfect balance every time.
Troubleshooting Common Salt-Related Fermentation Issues
Encountering mushy textures, off-odors, or slimy surfaces often traces back to salt mismanagement. If your ferment feels too soft, increase the salt slightly, as it helps maintain cell rigidity by drawing moisture out. A sour or bitter taste may indicate uneven salt distribution or insufficient salt penetration. Stir your vegetables well with salt before packing to encourage even brining. Mold spots on the surface can sometimes be cleaned off-always ensure the ferment is submerged and use a properly fitting weight to avoid air exposure.
Prep and Cook Time
- Preparation: 20 minutes
- Fermentation: 5 to 14 days (depending on desired sourness)
Yield
Yields approximately 1 quart of flavorful fermented vegetables
Difficulty Level
Medium – requires patience and precise measurement but beginner-friendly with practice
Ingredients
- 1 lb fresh vegetables (cabbage, carrots, cucumbers, or mixed)
- 20 to 30 grams non-iodized coarse sea salt (2-3% by weight of vegetables)
- Filtered water (if needed to submerge vegetables)
- Optional: 1 tsp caraway seeds, 2 cloves garlic, or 1 small chili pepper
Instructions
- Weigh your trimmed vegetables. Rinse thoroughly and slice or shred as desired for your ferment.
- Sprinkle the non-iodized sea salt evenly over the vegetables. Massage and gently crush for 5-7 minutes until the vegetables release enough liquid to create a brine.
- Add optional aromatics like garlic or caraway seeds to deepen flavor if desired.
- Pack the salted vegetables tightly into a clean fermentation jar. Press down firmly so the brine rises above the vegetables, leaving at least 1 inch of headspace.
- Place a fermentation weight or clean small jar on top to keep vegetables submerged. Cover with a breathable ferment lid or cloth secured with a rubber band.
- Store in a cool, dark spot between 65-72°F (18-22°C) for 5 to 14 days, tasting every 2-3 days to assess tanginess and texture.
- Once desired fermentation is reached, transfer to the refrigerator to slow the process and maintain freshness.
Tips for Success
- Measure precisely: Salt-to-vegetable weight ratio is critical-use a kitchen scale.
- Keep everything clean: Use sterilized jars and tools to prevent unwanted bacteria.
- Submerge fully: Ensure vegetables stay underwater to avoid mold formation.
- Adjust salt for different textures: Higher salt for crunchier root veggies, slightly less for leafy greens.
- Avoid iodized and anti-caking salts: These can inhibit beneficial bacteria growth.
- For troubleshooting molds: Remove any surface mold immediately; if pervasive, discard the batch.
Serving Suggestions
Serve your fermented vegetables as a vibrant condiment alongside rich comfort foods like smoked meats, add a crunchy punch to grain bowls, or mix into fresh salads for a probiotic boost. Garnish with freshly chopped herbs, a drizzle of good-quality olive oil, or toasted seeds for contrast in color and texture. The tangy snap of a perfectly salted ferment livens up everything from sandwiches to charcuterie boards.

| Nutrient | Per Serving (1/2 cup) |
|---|---|
| Calories | 35 |
| Protein | 1g |
| Carbohydrates | 7g |
| Fat | 0g |
| Salt (Sodium) | 400mg |
For continued inspiration, explore our Fermentation Basics for Beginners to build confidence in crafting your own cultured foods. Also, dive deeper into the microbiology of fermentation via this authoritative resource from the National Center for Biotechnology Information.
Q&A
Q&A: Salt Savvy – How to Perfectly Balance Your Ferments
Q1: Why is salt such a critical ingredient in fermentation?
A: Salt is the maestro behind the scenes of every successful ferment. It controls the microbial environment, encouraging the growth of beneficial bacteria while keeping harmful ones at bay. Without the right amount of salt, your cabbage might turn into a slimy mess instead of crisp, tangy kimchi or sauerkraut.
Q2: How do I know how much salt to use in my ferment?
A: The golden rule is usually about 2% salt by weight of the vegetables. That means if you have 1,000 grams of cabbage, you’d use around 20 grams of salt. This balance preserves crunch, flavor, and safety-too little salt invites spoilage; too much stifles fermentation.
Q3: Can I use any kind of salt for fermenting?
A: While you can experiment with various salts, the best choices are plain, additive-free salts like kosher salt or sea salt. Avoid iodized salts or those with anti-caking agents, which can cloud your brine or inhibit microbial action. Each salt has its own mineral profile, subtly influencing flavor and texture.
Q4: What happens if my ferment is too salty?
A: A salt spike creates a hostile environment for many microbes, slowing fermentation or halting it entirely. Your veggies may stay crunchy but won’t develop that characteristic tang. If you catch this early, rinsing the ferment lightly or diluting with fresh veggies can rescue the batch.
Q5: How do I adjust salt ratios for different fermenting projects?
A: Fermenting softer vegetables like cucumbers or quick pickles often require slightly less salt (around 1.5-2%), while heartier veggies like cabbage, carrots, or beets can handle up to 2.5%. Always start with the standard 2%, then tweak depending on texture, taste, and fermentation speed.
Q6: Is salt the only thing controlling fermentation?
A: Salt is key, but temperature, cleanliness, and the natural microbes on your vegetables all play vital supporting roles. Salt sets the stage; the environment and microbes perform the fermentation symphony.
Q7: Can I substitute salt with other preservatives in fermentation?
A: Not really. Salt’s unique ability to create osmotic pressure and select for friendly bacteria can’t be duplicated by sugar, vinegar, or spices alone. While other ingredients add flavor or assist preservation, salt remains the cornerstone of traditional fermentation.
Q8: How do I store my ferments after salting and fermenting?
A: Once your ferment achieves the flavor you love, store it in a cool, dark place-ideally the fridge. The salt will continue to preserve your creation, slowing fermentation and extending shelf life without sacrificing that beloved tang.
Mastering the salt balance in fermentation means unlocking a world of flavor and preservation. With the right pinch, you turn humble vegetables into crunchy, briny treasures that dance on your tongue and nourish your gut. Salt savvy is fermenting success!
The Conclusion
Mastering the art of salinity is the secret ingredient that transforms ordinary ferments into vibrant, tangy treasures. By understanding how to balance salt with care and intention, you unlock a world where flavors deepen, textures bloom, and preservation thrives. Whether you’re a seasoned fermenter or a curious beginner, embracing salt savvy empowers you to craft ferments that are not only delicious but also alive with the magic of controlled fermentation. So, sprinkle wisely, taste regularly, and let your jars become a celebration of both science and sensory delight-one perfectly balanced batch at a time.
Crafting classic sourdough English muffins is a rewarding culinary journey that transforms humble ingredients into a bakery-quality delight. With their trademark nooks and crannies, these muffins offer a perfect canvas for butter, jam, or savory toppings and boast a flavor depth born from natural fermentation. Inspired by traditional methods yet approachable for home bakers, this guide will lead you through each stage-from nurturing a lively sourdough starter to mastering hydration and gluten development, all the way through shaping and cooking techniques that yield an irresistibly golden crust with a tender crumb inside.
Prep and Cook Time
- Starter Preparation: 5-7 days (active sourdough starter readiness)
- Dough Preparation: 3-4 hours (including fermentation and resting)
- Cooking Time: 15-20 minutes
- Total Hands-On Time: Approximately 1 hour
Yield
Yields approximately 8 medium-sized classic sourdough English muffins.
Difficulty Level
Medium – Suitable for bakers with some experience handling sourdough or yeast-based doughs.
Ingredients
- 1/2 cup (120g) active sourdough starter (at peak fermentation, bubbly and doubled)
- 2 cups (240g) all-purpose flour, sifted for lightness
- 1/2 cup (120ml) whole milk, warmed to approximately 85°F (29°C)
- 2 tablespoons (25g) unsalted butter, melted and cooled
- 1 tablespoon (12g) granulated sugar
- 1 teaspoon (5g) fine sea salt
- Cornmeal for dusting and preventing sticking
- Additional all-purpose flour for dusting and shaping as needed
Instructions
- Feed your sourdough starter 4-6 hours prior to beginning or when it’s at its peak – bubbly and active. This ensures optimal fermentation power for your dough.
- Mix the dough: In a large bowl, combine the active sourdough starter, warm milk, and sugar. Stir gently until the starter is dispersed. Gradually add sifted flour and salt, mixing until a rough shaggy dough forms.
- Hydrate and develop gluten: Transfer to a lightly floured surface and knead by hand for about 8-10 minutes, or until the dough is smooth and elastic. This process develops gluten, which is crucial for the muffins’ signature airy crumb.
- Incorporate butter: Add the melted butter and knead briefly until fully integrated. The fat adds tenderness and richness to the dough.
- Bulk fermentation: Place the dough in a lightly oiled bowl, cover with a damp towel or plastic wrap, and let it rise at room temperature for 2-3 hours, until increased in size by about 50%. During this time, perform a gentle stretch and fold once halfway through to encourage gluten strength.
- Pre-shape and rest: Turn the dough out, gently pat into a 1-inch thick slab, and allow it to rest for 15 minutes to relax gluten.
- Shape muffins: Using a 3-inch round cutter dipped in flour, cut out rounds. Reroll scraps once to minimize toughness. Lightly dust each muffin on both sides with cornmeal to ensure that iconic textured crust and prevent sticking on the griddle.
- Final proof: Transfer muffins to a parchment-lined tray, cover loosely, and let them proof for 45-60 minutes until puffy but not doubled.
- Cook on griddle: Heat a heavy skillet or cast iron griddle over medium-low heat. Place muffins on the surface and cook for 6-8 minutes per side, covered with a lid to trap steam, until each side is golden brown. Flip carefully using a thin spatula to preserve the airy crumb structure.
- Cool: Transfer muffins to a wire rack and let cool completely before splitting with a fork to reveal the nooks and crannies that soak up butter beautifully.
Tips for Success
- For a more tangy flavor, allow the dough to ferment a bit longer-up to 4 hours at room temperature.
- If your sourdough starter is newly active, incorporate 1/2 teaspoon of instant yeast to boost rise consistency without overpowering the sourdough character.
- Maintain hydration between 65-70% for ideal dough elasticity-too wet and shaping becomes difficult; too dry and muffins turn dense.
- Don’t rush the final proof; the gentle rise ensures that classic muffins’ airy texture.
- Use a fork, not a sharp knife, to split muffins-this preserves the crumb’s open structure perfect for trapping melted butter.
Serving Suggestions
Enjoy your classic sourdough English muffins toasted lightly and topped with a generous spread of creamy butter and your favorite preserves. For a savory twist, try them with smashed avocado, a sprinkle of flaky sea salt, and a poached egg. Serve alongside brunch favorites like smoked salmon, cream cheese, or sautéed mushrooms for a deliciously balanced plate.
| Nutrient | Per Muffin |
|---|---|
| Calories | 150 kcal |
| Protein | 5 g |
| Carbohydrates | 28 g |
| Fat | 3.5 g |
Discover more sourdough baking tips to deepen your artisan bread skills. For science-backed insights on sourdough fermentation, consult the latest research from ScienceDaily.

Q&A
Q&A: Crafting Classic Sourdough English Muffins – A Step-by-Step Guide
Q1: What makes sourdough English muffins different from regular English muffins?
A1: The magic lies in the sourdough starter-a living culture of wild yeast and bacteria that breathes life into the dough. Unlike commercial yeast, sourdough imparts a tangy depth and complex flavor, creating muffins with that perfect balance of crisp crust and tender, airy crumb laden with signature nooks and crannies.
Q2: Why are those nooks and crannies so important?
A2: Those delightful little pockets aren’t just for show-they’re the hallmark of a perfect English muffin. They trap butter and jam, making every bite a buttery, sweet, and textured symphony. The secret: gentle folding and careful proofing coax the dough to create these characteristic air bubbles.
Q3: What are the essential ingredients for sourdough English muffins?
A3: Keep it simple yet classic: active sourdough starter, bread flour for structure, a touch of sugar to feed the yeast, a pinch of salt for depth, and warm milk or water to bind. Some bakers add melted butter for tender crumb and richness-pure comfort in every bite!
Q4: How do I know when my sourdough starter is ready to bake with?
A4: Your starter should be bubbly and doubled in size 4 to 6 hours after feeding. The telltale sign? A pleasant, tangy aroma and a surface alive with bubbles. This indicates it’s bursting with yeast power to give your muffins that delightful rise and chew.
Q5: What’s the best method to cook English muffins to get that perfect crust?
A5: Traditional English muffins love a slow dance on the griddle or skillet-medium-low heat, covered with a lid to trap steam. This gentle touch cooks them evenly, creating a golden crust while maintaining moist, tender interiors. Flip carefully once the bottoms are golden, and let the magic continue.
Q6: Can I bake the muffins in the oven instead of on a griddle?
A6: Absolutely! While griddling is traditional, baking on a parchment-lined tray inside a hot oven can yield lovely muffins too. For that classic texture, try a hybrid approach: start on the griddle then finish in the oven, or vice versa, to harness the best of both worlds.
Q7: How long does it typically take to make sourdough English muffins from start to finish?
A7: Patience is the secret ingredient! Expect roughly 12 to 18 hours from mixing your dough to savoring warm muffins. Most of this time is gentle fermenting and proofing, where flavor develops slowly. The hands-on time is surprisingly short, making this a perfect weekend project.
Q8: Any tips for storing sourdough English muffins?
A8: Store cooled muffins in an airtight container at room temperature for up to 3 days. For longer life, slice and freeze them-pop directly into the toaster straight from frozen for a fresh-baked taste any time.
Q9: How can I customize my sourdough English muffins?
A9: Feel adventurous? Mix in dried herbs, cracked wheat, or seeds like sesame or poppy to the dough before shaping. A sprinkle of cornmeal on the cooking surface adds rustic texture underfoot. The beauty is in the layering of simple additions that turn classic comfort into signature creations.
Q10: What’s the ultimate way to enjoy homemade sourdough English muffins?
A10: Slather warm halves with creamy butter and honey, pile on poached eggs and sautéed spinach for brunch, or craft a tangy smoked salmon and cream cheese sandwich. Each muffin is a blank canvas waiting for its dazzling debut at your breakfast table. Enjoy the artisanal love baked into every bite!
Future Outlook
As your freshly toasted classic sourdough English muffins emerge golden and aromatic, you’ve not only crafted a delightful breakfast staple-you’ve connected with a centuries-old tradition of baking mastery. Each chewy crumb and tender nodule tells the story of patience, fermentation, and precise technique, transforming simple ingredients into a canvas for endless culinary possibilities. Whether layered with melting butter, crowned with jam, or nestled beneath eggs Benedict, these muffins mark the delicious reward of your baking journey. So, take pride in your creation, savor every bite, and let your kitchen be forever warmed by the timeless art of sourdough English muffins.
Kahm Yeast Uncovered: Harmless Film or Hidden Threat?
Kahm yeast is a delicate, powdery film that often appears during fermentation, silently forming atop your jars filled with pickles, sauerkraut, and other preserved delights. As any avid fermenter quickly learns, kahm yeast can both puzzle and concern, but understanding its true nature is key to mastering safe and successful fermentation.
Prep and Cook Time
- Preparation: 10 minutes (plus fermentation time)
- Fermentation duration: 1 to 4 weeks, depending on the recipe and ambient temperature
Yield
- Approximately 4 to 5 cups of fermented vegetables or other fermented goods
Difficulty Level
- Easy to Medium – perfect for both beginners and seasoned fermenters aiming to refine their craft
Ingredients
- 1 medium head of green cabbage, shredded
- 1 tablespoon sea salt (non-iodized, finely ground)
- Filtered water, enough to submerge the cabbage
- Optional: 2 teaspoons caraway seeds or other herbs for flavor
Instructions
- Prepare your ingredients: Remove outer leaves of cabbage, set one whole leaf aside for later use. Shred the remaining cabbage finely.
- Salt and massage: In a large bowl, toss shredded cabbage with 1 tablespoon of sea salt. Massage vigorously for 5-7 minutes until the cabbage softens and liquid begins to release, creating a brine.
- Pack the jar: Transfer the cabbage and brine into a clean fermentation jar. Use the reserved cabbage leaf to press down as a natural weight, ensuring the cabbage remains submerged under liquid.
- Seal and store: Cover the jar with a cloth secured by a rubber band or use a fermentation lid to allow gases to escape. Store in a cool, dark place, ideally around 65-72°F (18-22°C).
- Monitor for kahm yeast: Within a few days, watch for the appearance of a thin, white film on the surface – this is kahm yeast. It is harmless but can alter flavor if left unchecked.
- Remove kahm yeast: Carefully skim the kahm yeast off the surface daily using a clean spoon. If the brine becomes cloudy or develops off-odors, discard the batch.
- Ferment to taste: Depending on your preference, allow fermentation for 1 to 4 weeks before refrigerating and enjoying.
Chef’s Notes: Tips for Success with Kahm Yeast Awareness
- Understanding formation: Kahm yeast forms when wild yeasts come into contact with oxygen during fermentation-it thrives on sugars but is non-toxic and part of many natural ferments.
- Don’t panic: Unlike mold, kahm yeast appears as a thin, white to off-white film-not fuzzy or greenish. It doesn’t penetrate food and can be carefully removed.
- Preventing kahm yeast: Ensure vegetables are fully submerged in brine to block oxygen; use a fermentation weight or reserved cabbage leaf to keep contents below the surface.
- Clean environment: Sanitize jars and utensils before use to reduce unwanted contaminants.
- Flavor impact: While benign, kahm yeast can impart a slightly off-flavor, so regular removal is recommended for optimal taste.
- Substitutions: Experiment with different salt concentrations or add aromatic herbs-just maintain the protective brine barrier to limit kahm growth.
Serving Suggestions
Once your fermentation is complete and kahm yeast properly managed, enjoy your preserved cabbage as a crunchy, tangy side or ingredient. Serve chilled atop sandwiches, crisp salads, or alongside rich dishes to balance flavors.
Garnish fermented vegetables with fresh dill, a sprinkle of toasted caraway, or a drizzle of quality olive oil to elevate your plate visually and flavorfully.
| Nutrient | Per 100g |
|---|---|
| Calories | 19 kcal |
| Protein | 1 g |
| Carbohydrates | 4 g |
| Fat | 0 g |

Further Reading and Resources
For a deeper dive into fermentation science and safety tips, visit the CDC’s Food Safety Guidelines. Explore our comprehensive Fermentation Basics Guide for hands-on techniques to enhance your kitchen adventures.
Q&A
Q&A: Kahm Yeast Uncovered: Harmless Film or Hidden Threat?
Q1: What exactly is kahm yeast?
A1: Kahm yeast is a thin, whitish, often powdery film that appears on the surface of fermented foods and liquids, such as sauerkraut, pickles, or kombucha. It’s a naturally occurring wild yeast that thrives in acidic, low-oxygen environments, often forming as a sign of fermentation in progress.
Q2: Should I be worried if I see kahm yeast on my ferment?
A2: Generally, kahm yeast is harmless and not toxic. While its presence might look alarming, it doesn’t indicate dangerous mold or spoilage. However, it can impart off-flavors or an undesirable smell, so many fermenters choose to remove it to maintain the best taste.
Q3: How can I tell kahm yeast apart from harmful mold?
A3: Kahm yeast usually presents as a smooth, white or cream-colored film that floats on the surface. Harmful molds often have fuzzy, green, black, or blue patches with a more three-dimensional texture. If you detect any mold, it’s safer to discard the batch altogether.
Q4: What causes kahm yeast to grow?
A4: Kahm yeast flourishes when there’s exposure to oxygen, lack of sufficient salt, or temperature swings during fermentation. It’s more common in brines that aren’t fully covered or sealed, allowing wild yeasts from the environment to settle on the surface.
Q5: Can kahm yeast spoil my homemade ferment?
A5: While kahm yeast itself doesn’t make the ferment unsafe, it can alter the flavor profile-sometimes giving a slightly cheesy or yeasty taste. If removed promptly and the ferment is properly sealed afterward, the batch is usually just fine to eat.
Q6: How do I prevent kahm yeast from forming?
A6: Prevention revolves around limiting oxygen exposure: keep your ferment submerged under brine, use fermentation weights, ensure proper salt concentration, and ferment at consistent, appropriate temperatures. Using airtight lids or fermentation airlocks can also help create an ideal environment.
Q7: Is kahm yeast beneficial at all?
A7: While kahm yeast isn’t typically sought after, it’s part of the wild ferment ecosystem. It can assist in breaking down ingredients during early fermentation stages. However, its presence is more of a byproduct than a beneficial agent compared to lactic acid bacteria that drive the fermentation.
Q8: What should I do if kahm yeast forms on my ferment?
A8: Simply skim off the kahm yeast layer with a clean spoon. Ensure the food underneath is submerged and the environment stays anaerobic. If the ferment smells off or shows signs of mold, it’s better to err on the side of caution and discard it.
Q9: Can animals or pets be affected by kahm yeast on human ferments?
A9: Kahm yeast isn’t known to be harmful, but fermented foods may not always be suitable for pets’ diets. Always consult a vet before sharing homemade ferments with animals, but the yeast itself isn’t considered toxic.
Q10: Where can I learn more about safe fermentation practices?
A10: For anyone diving into home fermentation, resources like the National Center for Home Food Preservation, books by fermentation experts, or local workshops are invaluable. Understanding the science behind fermentation will help you embrace wild yeasts like kahm with confidence-or know when to take action.
In Retrospect
As we peel back the layers of kahm yeast, it becomes clear that this slippery film is more friend than foe-a natural passenger in the fermentation journey rather than a sinister saboteur. While its presence may raise eyebrows and prompt a quick wipe, kahm yeast primarily serves as a harmless byproduct of nature’s microbial dance. Yet, understanding its traits and when to intervene helps home fermenters nurture the delicate balance between flavor development and spoilage. In the end, kahm yeast reminds us that in the world of fermentation, not all unwelcome guests threaten the party; some simply join in uninvited, quietly adding their subtle signature to the ever-evolving canvas of taste.
Crafting Zesty Fermented Mustard Using Whey Magic
Crafting zesty fermented mustard using whey magic unlocks a vibrant symphony of flavors that elevates everyday condiments into gourmet delights. The tangy punch from fermentation, combined with the wholesome punch of whey, creates a mustard that dances on the palate with complexity and depth. This artisanal approach not only brightens flavor but improves texture, offering a creamy yet bold condiment perfect for adventurous food lovers.
Prep and Cook Time
- Preparation Time: 20 minutes
- Fermentation Time: 5-7 days
- Total Time: Approximately 1 week
Yield
- Servings: Approximately 1 cup (16 tablespoons) of fermented mustard
Difficulty Level
- Medium – Suitable for home cooks familiar with fermentation basics
Ingredients
- 1/2 cup yellow mustard seeds – for a mild, bright base flavor
- 1/4 cup brown mustard seeds – for pungency and heat
- 1 cup whey – fresh, unpasteurized to enhance fermentation
- 1/2 cup apple cider vinegar – to balance acidity and preserve
- 1 tablespoon sea salt – to aid fermentation and flavor depth
- 1 tablespoon honey or maple syrup – optional, to round out sharpness
- 2 cloves garlic, minced – for subtle aromatic notes (optional)
- 1/4 teaspoon turmeric powder – for color and warmth
Instructions
- Soak the Mustard Seeds: Combine yellow and brown mustard seeds in a clean bowl. Pour in the whey and allow to soak for 12 hours or overnight. The seeds will absorb moisture and begin to swell, which jumpstarts the fermentation.
- Blend to Desired Texture: Transfer the soaked seeds and whey into a food processor. Pulse until the mixture reaches your preferred consistency-smooth, coarse, or grainy. Remember, blending less will preserve more texture for that authentic mustard bite.
- Add Flavor Enhancers: Stir in the apple cider vinegar, sea salt, honey (if using), minced garlic, and turmeric powder. These ingredients balance acidity, contribute to preservation, and layer in complex flavor notes.
- Ferment Under Controlled Conditions: Pour the mustard mixture into a sterilized glass jar. Cover with a breathable cloth secured by a rubber band to allow gases to escape yet prevent contaminants. Leave the jar at room temperature (65-75°F) away from direct sunlight. Fermentation typically takes 5 to 7 days; taste daily to track tanginess.
- Seal and Refrigerate: Once the mustard reaches your ideal zingy profile, seal the jar with an airtight lid. Store in the refrigerator to slow fermentation and enhance shelf life. The flavor will continue to deepen over time.
- Shake and Serve: Before serving, give your fermented mustard a gentle shake for uniform consistency and vibrant aroma.
Tips for Success When Crafting Zesty Fermented Mustard Using Whey Magic
- Select quality whey: Raw, fresh whey from cultured dairy yields the best fermentation results compared to store-bought isolates.
- Mustard seed choice matters: A blend of yellow and brown seeds strikes a perfect balance between mildness and heat, enhancing complexity without overwhelming.
- Temperature control: Keep fermentation steady-too warm speeds sourness; too cool risks stagnation.
- Adjust sourness: For milder tang, ferment fewer days; for bold tang, extend up to 10 days.
- Substitutions: Vegetable whey or kefir whey work as alternatives, each imparting subtle flavor differences.
- Make ahead: This mustard improves in flavor after a week, and can keep refrigerated up to 3 months.
Serving Suggestions
Pair your zesty fermented mustard with artisan sausages, roasted vegetables, or spread it lavishly on sandwiches. It’s superb drizzled over grilled meats or stirred into salad dressings for a tangy kick. Garnish with fresh herbs like dill or parsley and a sprinkle of coarse sea salt for a rustic presentation. The deep golden hue and textured seeds create a visually enticing condiment that invites bites full of vibrant flavor.

Nutritional Information
| Nutrient | Per 1 Tbsp |
|---|---|
| Calories | 15 |
| Protein | 1g |
| Carbohydrates | 2g |
| Fat | 0.5g |
Elevate your culinary creations by embracing the ancient art of fermentation coupled with the magic of whey. For a deeper dive into fermentation fundamentals, see our Guide to Fermentation Basics. To understand the science behind whey’s probiotic power, check this comprehensive research article.
Q&A
Q1: What exactly is “Whey Magic” and how does it transform mustard fermentation?
A1: Whey Magic is the natural elixir extracted from strained yogurt or cheese, teeming with live probiotics and enzymes. When introduced to mustard seeds, this tangy powerhouse jumpstarts fermentation, supercharging flavor development with a vibrant zing and creamy complexity that’s hard to replicate with plain water or vinegar.
Q2: Why ferment mustard at all? Why not just use ground seeds or prepared mustard?
A2: Fermentation unlocks hidden depths of flavor beyond the sharp bite of ground mustard. It softens bitterness, amplifies natural pungency, and creates a lively, effervescent profile infused with subtle tangs and umami undertones-a sensory journey you miss with off-the-shelf condiments.
Q3: How do you start crafting zesty fermented mustard using whey?
A3: Begin with quality mustard seeds-yellow, brown, or black depending on your heat preference. Soak them in fresh whey, enough to cover the seeds fully, then add a splash of water and a touch of salt. Let the jar breathe with a loose lid or cloth cover, storing it at room temperature to let nature’s microbes weave their magic over several days.
Q4: What should I expect during the fermentation process?
A4: Watch for subtle bubbles, a slight rise in aroma intensity, and a gentle sour tang emerging over 3 to 7 days. The seeds will plump, soften, and release their oils, blending with the whey’s lactic tang to produce a lively, creamy, and complex mustard base.
Q5: Can I customize the flavor during fermentation?
A5: Absolutely! Add aromatics like garlic, turmeric, or honey to guide flavor notes. For more heat, toss in chili flakes or black pepper. The whey harnesses and enhances these additions, resulting in a multidimensional condiment that’s uniquely yours.
Q6: How do I know when my fermented mustard is ready?
A6: Taste triumphantly! When the mustard hits your perfect balance of tang, heat, and creaminess, it’s time. It should taste bright and alive, never flat or overly sour. Once satisfied, transfer to the fridge to slow fermentation and deepen flavor over time.
Q7: How long can fermented mustard last?
A7: Stored in an airtight container in the fridge, your zesty fermented mustard can beautifully age for months, growing richer and mellower while retaining probiotic benefits. Just give it a good stir before use.
Q8: What dishes pair best with whey-fermented mustard?
A8: Drizzle it over roasted vegetables, spread on sandwiches, whisk into dressings, or stir into marinades. Its vibrant zing and creamy tang elevate everything from grilled meats to grain bowls, adding a probiotic punch and zingy farewell to bland mustard flavors.
Harness the transformative magic of whey and watch humble mustard evolve into a radiant condiment bursting with bold personality and gut-loving goodness!
To Wrap It Up
As the tangy aroma of your homemade fermented mustard fills the air, you’re reminded that this isn’t just a condiment-it’s a celebration of time-honored fermentation and the unassuming magic of whey. Crafting zesty fermented mustard using whey unlocks layers of flavor and probiotic goodness that elevate every dish it graces. Whether drizzled on roasted veggies, stirred into dressings, or spread on a hearty sandwich, your creation tells a story of transformation, patience, and the vibrant dance of microbes at work. So, embrace the whey magic in your kitchen, and let your mustard journey add a lively zing-and a little wild wonder-to your culinary repertoire.
Unveiling Wild Yeasts: Nature’s Secret Brewers Explained
Unveiling wild yeasts: nature’s secret brewers explained introduces homebrew enthusiasts and culinary adventurers to the mysterious microorganisms that create one-of-a-kind flavors in fermented foods and beverages. These wild yeasts, found naturally on fruits, grains, and in the environment, offer a fascinating journey into traditional fermentation methods and dynamic flavor profiles that commercial yeast strains can’t replicate.
Prep and Cook Time
Preparation: 20 minutes (plus 3-7 days fermentation)
Active Brewing: 45 minutes
Yield
Approximately 1 gallon (3.8 liters) of wild yeast fermented brew
Difficulty Level
Medium – Requires patience, careful monitoring, and some fermentation knowledge
Ingredients
- 5 lbs pale malt extract (liquid or dry)
- 1 lb wheat malt (crushed)
- 1 oz aromatic hops (boiled)
- Filtered water, enough to make 1 gallon
- Fruit skins or local herbs (for wild yeast capture, e.g., organic apple peel or blackberry leaves)
- 1 cup unchlorinated water (for starter culture)
- 1/4 cup sugar (for activating wild yeast)
- Sanitizer solution (to clean equipment)
Instructions
- Sanitize all brewing equipment thoroughly to prevent unwanted bacteria contamination.
- In a large pot, combine pale malt extract, wheat malt, and water. Heat gently, stirring until dissolved.
- Bring the liquid to a boil; add aromatic hops and boil for 45 minutes. This develops bitterness and flavor while sterilizing the wort.
- Cool the wort rapidly to room temperature using an ice bath or fermentation chiller.
- Prepare your wild yeast starter: Submerge your chosen fruit skins or herbs in the unchlorinated water with sugar in a glass jar. Cover loosely with a breathable cloth. Allow it to ferment for 3-7 days at room temperature, stirring daily to encourage wild yeast growth.
- Strain the wild yeast liquid through a fine mesh to capture the yeast culture.
- Transfer the cooled wort into a sanitized fermentation vessel and add the wild yeast starter; stir gently to mix without introducing oxygen.
- Seal the fermenter with an airlock and store in a dark, stable temperature environment (between 65-75°F / 18-24°C).
- Allow fermentation for 5 to 7 days or until bubbling slows considerably, indicating wild yeast activity is slowing.
- Bottle the beer carefully, leaving sediment behind. Cap the bottles and age for 2-4 weeks, enhancing complexity.
Tips for Success
- Wild yeast cultivation: Opt for local, organic fruits or herbs to capture a truly regional yeast profile; avoid sprayed or conventionally treated produce.
- Patience is key: Wild yeast fermentation usually takes longer than commercial yeast-don’t rush the aging process.
- Temperature control: Consistency in temperature helps wild yeasts thrive and prevents unwanted bacterial growth.
- Sanitize rigorously: While wild yeast is robust, maintain proper cleanliness to avoid off-flavors or contamination.
- Flavor exploration: Experiment by adding small amounts of wood chips, spices, or various fruits-wild yeasts interact uniquely and can transform the brew’s character.
Serving Suggestions
Serve your wild yeast fermented beer in a tulip glass to capture the aromatic complexity. Garnish with a fresh sprig of thyme or lemon zest for a refreshing herbal accent that complements the wild yeast’s earthy, fruity notes. Enjoy chilled between 48-55°F (9-13°C) to fully appreciate the layered flavors.

Nutritional Information (Per 8 oz Serving)
| Calories | Protein | Carbs | Fat |
|---|---|---|---|
| 120 | 1.3 g | 10 g | 0 g |
For a deeper dive into fermentation science, check out this scientific overview. Interested in more advanced brewing techniques? Visit our Advanced Homebrewing Techniques guide to elevate your skills.
Q&A
Q&A: Unveiling Wild Yeasts – Nature’s Secret Brewers Explained
Q1: What exactly are wild yeasts, and how do they differ from cultured yeasts?
A: Wild yeasts are the free-spirited microorganisms living all around us-in the air, on fruit skins, and even on the surfaces of our grains. Unlike cultured yeasts, which are carefully selected strains bred for consistent performance, wild yeasts are untamed and unpredictable, lending unique flavors and aromas to fermented foods and beverages. They’re nature’s original brewers, working their magic without any lab coats involved.
Q2: Why have wild yeasts been overshadowed by commercial yeast strains in brewing?
A: Commercial yeast strains won the popularity contest because they deliver predictable, reliable results-essential for large-scale production. Wild yeasts, by contrast, are the wild cards: they ferment more slowly and can produce funky, sometimes strange flavors that not everyone appreciates. But this unpredictability is precisely what makes them fascinating to artisan brewers and sourdough bakers seeking complexity and character in their creations.
Q3: How do wild yeasts influence the flavor profile of beer or bread?
A: Picture wild yeasts as tiny alchemists, transforming sugars into alcohol, carbon dioxide, and an orchestra of flavor compounds. These yeasts often produce tart, fruity, earthy, or spicy notes, adding layers of depth that cultured yeasts might gloss over. In bread, wild yeast fermentation creates a tangy sourness and chewy texture; in beer, it can evoke anything from bubblegum sweetness to wild herbal undertones.
Q4: Can anyone harness wild yeasts for home brewing or baking?
A: Absolutely! Capturing wild yeasts is like extending an invitation to nature’s own fermenters. Home brewers and bakers often cultivate wild yeasts by exposing their starter mixtures to the open air or by using ingredients naturally rich in yeasts, such as local fruits, flowers, or grains. It’s a slow and adventurous path, full of trial and error, but the reward is a product that’s truly a reflection of your environment-a delicious liquid or loaf with a story infused into every bite or sip.
Q5: Are there any risks or challenges with using wild yeasts?
A: Wild yeasts play by their own rules, which can be both thrilling and challenging. They can be slow to ferment, sometimes competing with wild bacteria that might produce off-flavors or spoilage. Careful monitoring, proper sanitation, and patience are essential to coaxing out the best from these microscopic artists. However, with experience and respect for their quirks, wild yeasts unlock flavors that no commercial strain can replicate.
Q6: What makes wild yeast fermentation an important cultural and scientific journey?
A: Wild yeast fermentation connects us to ancient traditions and the wild ecosystem around us, reminding us that fermentation is both an art and a science. By embracing these natural brewers, we deepen our understanding of biodiversity, terroir (the environmental “signature” in flavor), and sustainable food practices. Wild yeasts are not just microbes; they’re storytellers, shaping the heritage and future of culinary craft worldwide.
Unlock the secrets of wild yeasts, and you embark on a flavorful voyage where nature’s invisible artisans brew stories into every bubble and crumb!
Future Outlook
As we close the chapter on our journey through the fascinating world of wild yeasts, it’s clear that these microscopic marvels are far more than mere ingredients-they are nature’s original brewers, quietly crafting complexity and character in every bubbling brew. By embracing the wild, we not only honor ancient traditions but also unlock new realms of flavor and discovery. So next time you savor a tangy sour or a rustic farmhouse ale, remember the unseen artisans at work, thriving in the wild and turning simple sugars into liquid stories worth telling. The secret of wild yeasts invites both brewers and enthusiasts alike to explore boldly, experiment freely, and celebrate the untamed magic fermenting right before our eyes.
Understanding Water Chemistry and Its Impact on Fermentation
Choosing the perfect water for flavorful, safe ferments is the foundation for successful fermentation adventures, whether you’re crafting crisp sauerkraut, tangy kimchi, or bubbly sourdough starters. Water is not just a passive ingredient; its chemistry profoundly influences the development, safety, and flavor profiles of your ferments. From mineral content to pH levels, understanding the nuances of your water can elevate your fermentation from ordinary to extraordinary.
Prep and Cook Time
- Preparation: 10 minutes
- Fermentation Monitoring: Varies by recipe (usually 1-7 days)
Yield
- Enough treated water for up to 2 gallons of fermenting brine or dough hydration
Difficulty Level
- Easy to Medium (basic water treatment skills with room to refine)
Ingredients
- Tap water: Untreated municipal water (check quality reports)
- Filtered water: Using activated carbon or reverse osmosis filters
- Mineral additives: Food-grade calcium chloride or magnesium sulfate (optional)
- Distilled or spring water: For comparison or sensitive ferments
- Water testing kit: pH strips and mineral content test kits
Instructions
- Evaluate Your Water Source: Begin with a simple water test. Use strips or kits to gauge pH, chlorine, chloramine presence, and mineral content. Pure flavor depends on starting with good data.
- Choose the Right Water: Municipal tap water often contains chlorine or chloramine, which can inhibit fermentation. If using tap water, treat it by letting it sit uncovered for 24 hours to off-gas chlorine, or better yet, run it through an activated carbon filter.
- Filter and Treat Water: For consistent flavor, employ household filtration systems targeting chlorine and chloramine removal. Reverse osmosis systems provide ultra-pure water but may remove beneficial minerals necessary for fermentation vigor.
- Balance Minerals: Pure distilled or RO water lacks minerals. For optimal ferment growth, add mineral salts like a pinch of calcium chloride or a small amount of magnesium sulfate. These support the metabolic processes of beneficial microbes, promoting safety and flavor complexity.
- Adjust pH if Necessary: Ideal fermentation water is neutral to slightly acidic (pH 6.5-7.5). Use pH strips to test and gently acidify with food-safe acids if needed, but avoid drastic changes that may shock your ferment.
- Use Water Immediately or Store Properly: Treated water should be used fresh or stored in clean, sealed containers to avoid contamination. Oxygen-rich water supports microbial health-avoid overly stagnant conditions.
Chef’s Notes
- Using spring water with naturally balanced minerals can produce consistently vibrant ferments with layered complexity.
- If you notice sluggish fermentation, check your water’s hardness and mineral balance first before altering your recipe.
- For those experimenting, try side-by-side batches with differently treated water to discover how subtle mineral differences translate to flavor nuances.
- Reverse osmosis water is excellent for precision recipes but always reintroduce essential minerals; microbes need these to thrive safely.
- Regularly clean your water filters and replace cartridges to ensure peak performance and prevent off-flavors.
Serving Suggestions
- Use your perfectly hydrated ferments as bold accompaniments on artisan breads, charcuterie boards, or inventive salads.
- Garnish fermented vegetables with fresh herbs or a drizzle of high-quality olive oil to accentuate their natural tang and crunch.
- In sourdough or other fermented batters, proper water chemistry can yield a perfect crumb and crust-serve slices warm with cultured butter or seasonal jams.
- For probiotic drinks, serve chilled with a splash of citrus or sparkling water for refreshing effervescence.
- Detailed fermentation water tips can be explored further in our Ultimate Guide to Fermentation Water.
| Mineral | Impact on Fermentation | Recommended Level |
|---|---|---|
| Calcium (Ca2+) | Enhances microbial activity and fermentation safety | 20-50 ppm |
| Magnesium (Mg2+) | Supports enzyme systems, flavor development | 5-15 ppm |
| Sodium (Na+) | Contributes to taste but can inhibit microbes in excess | Less than 20 ppm |
| pH | Optimal for bacterial fermentation | 6.5-7.5 |

Want to dive deeper into the fascinating world of water chemistry? Visit the Water Research Foundation for authoritative insights on water quality and treatment.
Q&A
Q&A: Choosing the Perfect Water for Flavorful, Safe Ferments
Q1: Why does the type of water matter when fermenting foods?
A1: Water is the silent hero in fermentation, carrying minerals and microbes that shape the taste and safety of your ferment. Tap water with chlorine can inhibit good bacteria, while mineral-rich spring water can boost flavor complexity. Choosing the right water sets the stage for vibrant, safe ferments.
Q2: Can I just use plain tap water for fermentation?
A2: It depends on your tap water’s quality. Chlorine and chloramines commonly found in tap water kill beneficial microbes essential for fermentation. If you must use tap water, let it sit uncovered overnight to dissipate chlorine, or use a charcoal filter to remove chemicals. Alternatively, opt for filtered or spring water to keep your ferments alive and kicking.
Q3: What type of water is best for crisp, flavorful ferments?
A3: Soft, mineral-balanced water is ideal. Spring water or filtered tap water usually fits this bill. It provides essential minerals like calcium and magnesium that nurture lactic acid bacteria, resulting in tangy, complex flavors. Avoid distilled or reverse osmosis water since it lacks minerals, which can lead to sluggish fermentation.
Q4: How do minerals in water affect fermentation?
A4: Minerals are like tiny chefs seasoning your ferment behind the scenes. Calcium strengthens cell walls of fermenting veggies, enhancing crunch. Magnesium and other trace elements act as catalysts for microbial activity, ensuring a lively, efficient fermentation. Too little mineral content and your ferment may be bland or slow to develop.
Q5: Is bottled water a safe bet for fermenting?
A5: Bottled spring water is often a safe and flavorful choice if its source is pure and mineral-rich. However, some bottled waters are purified or distilled, stripping them of beneficial minerals. Always check the label-look for “spring water” rather than “purified” or “distilled” if you want your ferment to thrive.
Q6: What about well water or rainwater?
A6: Well water can be excellent if tested safe and free of contaminants. Its natural minerals can support robust fermentations. Rainwater, while soft and free of chlorine, can be too pure and may lack minerals, so supplementing with a small pinch of sea salt or mineral powder might be wise. Remember to always ensure water cleanliness first.
Q7: How important is water pH in fermentation?
A7: Water pH plays a subtle role. Neutral to slightly alkaline water (pH 7 to 8) tends to be most conducive to healthy microbial growth. Extremely acidic or highly alkaline water can hamper fermentation or alter taste unexpectedly. If you’re curious, test your water pH and adjust with natural mineral additives if necessary.
Q8: Can the wrong water spoil my ferment?
A8: Yes, water heavy in chlorine, chloramine, fluoride, or contaminants can disrupt beneficial bacteria, resulting in failed or unsafe ferments. Using unsuitable water might produce off-flavors or slimy textures. Choosing clean, mineral-balanced water is your best guard against ferment failures.
Q9: Any quick tips for choosing water for fermentation?
A9: Absolutely! Use filtered or spring water with balanced minerals. Avoid chlorinated tap water or let it sit to dissipate chemicals. Skip distilled or distilled-like waters unless you add minerals back in. Test your water source or simply taste it-if it’s bland or chemically, swap for a better option.
Q10: In a pinch, what’s the simplest way to ensure good ferment water?
A10: Boil tap water and cool it without covering to eliminate chlorine, then add a pinch of sea salt to mimic mineral content. This easy fix can keep fermentations flavorful and safe until you get your hands on spring or filtered water.
Choosing the perfect water is like tuning an instrument-small adjustments create a symphony of flavor and safety in your ferments. Cheers to your delicious, bubbly creations!
The Conclusion
As you embark on your fermenting adventures, remember that the water you choose is more than just a functional ingredient-it’s the silent partner shaping the flavor, safety, and success of your creations. By understanding what lies within your tap, spring, or filtered water, you hold the key to unlocking vibrant, tangy, and safe ferments that dance on the palate. So next time you reach for a jar, consider the purity and mineral makeup of the water within-it’s the subtle secret that transforms ordinary batches into extraordinary bites. Cheers to making every drop count in your flavorful fermentation journey!
The Science Behind Wild Fermentation and Its Health Benefits
The Magic of Wild Fermentation: Nature’s Taste Adventure invites you to uncover the fascinating microbial symphony that transforms humble ingredients into culinary treasures rich in probiotics, flavor, and tradition. Rooted in ancient techniques, wild fermentation harnesses the power of local microbes, cultivating unique tangy and complex flavors that reflect your environment-a true gastronomic journey from nature’s own pantry.
Prep and Cook Time
- Preparation Time: 15 minutes
- Fermentation Time: 5-14 days (varies by recipe and ambient temperature)
- Total Time: 5-14 days plus initial prep
Yield
- Approximately 1 quart batch (serves 4-6 as a condiment or side)
Difficulty Level
- Easy to Medium
Ingredients
- 1 medium organic cabbage, chopped or shredded (about 1.5 lbs)
- 1 tablespoon fine sea salt (non-iodized, for optimal fermentation)
- Filtered water (enough to create a brine, approx. 1 cup)
- Optional flavorings: 2 cloves garlic, thinly sliced; 1 teaspoon caraway seeds; 1 small grated carrot for color and sweetness
Instructions
- Prepare Your Vegetables: Rinse the cabbage thoroughly and chop into bite-sized pieces. In a large bowl, combine the cabbage, optional garlic, carrot, and caraway seeds.
- Salt and Massage: Sprinkle the sea salt over the vegetables. Using clean hands, massage and squeeze the mixture for about 8-10 minutes until the cabbage softens and releases natural juices.
- Pack into Your Fermentation Vessel: Transfer the salted cabbage mixture tightly into a clean glass jar. Press firmly to eliminate air pockets. Pour in any juices released during massaging.
- Add Brine if Needed: If the cabbage is not fully submerged under its liquid, add filtered water to create a brine that covers the vegetables completely to prevent mold.
- Weight and Seal: Place a fermentation weight or a small glass insert on top of the cabbage to keep it submerged. Cover the jar with a cloth secured by a rubber band or use an airlock lid to allow gas escape.
- Ferment Time: Store your jar at room temperature (65-75°F) away from direct sunlight. Begin tasting after 3 days; fermentation can continue anywhere from 5 to 14 days depending on desired sourness and texture.
- Refrigerate: Once the desired flavor is achieved, seal with a lid and move to refrigeration to slow fermentation and preserve your creation.
Tips for Success
- Salt Precision: Correct salt quantity is critical; too little can cause spoilage, while too much slows fermentation.
- Healthy Microbes: Use organic, fresh vegetables and filtered water without chlorine to encourage beneficial bacteria.
- Avoid Mold: Always keep vegetables submerged under brine; if mold forms, remove carefully-fermentation below remains safe.
- Experiment Boldly: Wild fermentation thrives on creativity-try local herbs, spices, or even seasonal fruits to uncover new flavor dimensions.
- Clean Tools Only: Sanitize your utensils and jars before use to prevent unwanted microorganisms from invading.
Serving Suggestions
Present your tangy, probiotic-rich fermented cabbage as a bright, crisp side to grilled meats or roasted vegetables. Garnish with fresh dill or parsley for added vibrancy. Use it to top sandwiches, tacos, or incorporate into salads to add depth and a natural zing. A drizzle of extra virgin olive oil and a sprinkle of toasted seeds elevates both texture and taste. Let this living condiment be the star of your next meal by pairing it with earthy cheeses or hearty grains for an unforgettable bite.

| Nutrient | Per Serving |
|---|---|
| Calories | 35 |
| Protein | 2 g |
| Carbohydrates | 7 g |
| Fat | 0.2 g |
| Fiber | 3 g |
Discover more about fermentation fundamentals and innovative recipes in our comprehensive fermentation techniques guide. For a deeper understanding of probiotics and gut health foundations, visit the National Center for Complementary and Integrative Health.
Q&A
Q&A: The Magic of Wild Fermentation – Nature’s Taste Adventure
Q1: What exactly is wild fermentation?
A1: Wild fermentation is a magical microbial dance where nature’s own yeasts and bacteria transform simple ingredients into complex, tangy, and flavorful creations. Unlike commercial fermentation, it relies on the natural microbes present in the environment-on the food, in the air, and on your hands-to spark a lively alchemy of taste and preservation.
Q2: Why is wild fermentation considered a “taste adventure”?
A2: Each jar, crock, or slice fermented in the wild develops its own unique personality. Because wild microbes vary by region, season, and even kitchen atmosphere, no two batches are exactly alike. This unpredictable artistry turns every bite into a flavorful journey, where you savor nature’s creativity and your own hands’ craftsmanship.
Q3: What are some popular foods made through wild fermentation?
A3: From the crisp tang of sauerkraut and kimchi to the fizzy zing of naturally fermented sodas and sourdough breads, wild fermentation infuses everyday foods with depth and complexity. There’s also pickles, kombucha, miso, and even fermented hot sauces-each capturing a wild microbial signature.
Q4: How does wild fermentation benefit our health?
A4: Wild fermentation not only preserves food but also boosts its nutritional profile and digestibility. The friendly microbes break down hard-to-digest compounds and produce beneficial probiotics, enzymes, and vitamins, making fermented foods a delicious passport to gut health and vitality.
Q5: Is it safe to practice wild fermentation at home?
A5: Absolutely! When done with care and patience, wild fermentation is as safe as it is rewarding. The key is to create an environment where beneficial microbes flourish-think clean utensils, proper salt ratios, oxygen control-and to trust your senses: vibrant smells, pleasing bubbles, and bright colors are your guides. Any off-putting odors or molds mean it’s time to pause and start anew.
Q6: How does wild fermentation connect us to nature?
A6: Engaging in wild fermentation invites us to slow down and listen to nature’s microbial whispers. It reconnects us to the soil, the seasons, and traditional knowledge. In cultivating living cultures, we become partners in a timeless cycle of transformation, honoring the unseen ecosystems that flavor our food-and our lives.
Q7: Can anyone start their own wild fermentation adventure?
A7: Definitely! Wild fermentation is as accessible as a cucumber or a head of cabbage and as creative as your curiosity allows. With a little patience and an open mind, anyone can embark on this sensory quest, unlocking flavors and stories nurtured by the wild microbes all around us.
Dive into the world of wild fermentation and discover how nature’s smallest artisans craft the richest tastes-one bubbling jar at a time!
In Summary
As we journey through the enchanting world of wild fermentation, it becomes clear that this age-old craft is much more than a method of preservation-it’s a vibrant celebration of nature’s unseen alchemy. Each bubbling jar holds a story written by wild microbes, transforming humble ingredients into complex symphonies of flavor that awaken our senses and nourish our bodies. Embracing wild fermentation invites us to slow down, listen to the whispers of the earth, and rediscover the magic woven into life’s simplest processes. So next time you savor a tangy sauerkraut or a fizzy kombucha, remember: you’re partaking in a timeless adventure where nature herself plays the master chef, crafting tastes that delight, heal, and connect us to the wild wonders all around.
Why Are My Water Kefir Grains Not Multiplying? Trouble Tips is a question many ferment enthusiasts encounter when nurturing their vibrant probiotic cultures. Understanding the science behind water kefir grain growth unlocks the secrets to cultivating thriving grains that can multiply robustly, delivering fizzy, gut-loving beverages. Delving into water kefir’s microscopic ecosystem reveals how temperature, minerals, and nutrient availability create the perfect harmony-or discord-that impacts the grains’ ability to expand.
Prep and Cook Time
- Preparation: 10 minutes
- Fermentation: 24-48 hours
- Total Time: 1-2 days
Yield
About 1 quart (4 cups) of water kefir, suitable for 4 servings
Difficulty Level
Easy to Medium
Ingredients
- 3-4 tablespoons water kefir grains (active, healthy, preferably fresh)
- 1 quart (4 cups) filtered water, chlorine-free
- 1/4 cup organic cane sugar or evaporated coconut sugar (avoid refined sugars)
- 1 tablespoon Himalayan pink salt or sea salt, mineral-rich and additive-free
- Optional: small piece of dried fig or 2 tablespoons of raisins (to provide additional minerals and nutrients)
- Optional: a splash of mineral water (for extra trace minerals)
Instructions
- Dissolve the sugar and salt in the filtered water at room temperature. Stir gently until fully dissolved to avoid stressing the grains with undissolved granules.
- Add the dried fig or raisins if using; these natural sources boost nutrient complexity and aid grain growth.
- Introduce the water kefir grains into the sweetened water gently. Avoid metal contact by using glass or food-safe plastic containers.
- Cover the jar with a breathable cloth or coffee filter, securing with a rubber band to prevent contamination while allowing airflow.
- Place the jar in a warm, stable environment (ideal 68°F-78°F / 20°C-26°C). Avoid direct sunlight but maintain consistent temperature for optimal fermentation.
- Allow fermentation for 24-48 hours. Check grain activity periodically-active grains will appear plump and translucent with bubbles forming.
- Upon completion, strain the grains using a plastic mesh strainer. Transfer the fermented liquid to bottles for secondary fermentation or immediate consumption.
- Rinse grains only if necessary-usually with the same water kefir liquid or filtered water to prevent shock.
Chef’s Notes: Optimizing Nutrients and Troubleshooting
- Mineral balance is key: Water lacking minerals often stalls grain multiplication. Use mineral-rich salts and optionally add dried fruits to boost trace minerals.
- Water quality matters: Avoid tap water with chlorine or fluoride, as these can inhibit fermentation. Filtered or spring water is best.
- Fermentation temperature: Too cold or too hot environments slow or kill grains. Temperature fluctuations cause stress-maintain steady warmth.
- Over-fermentation signs: If grains start shrinking or turning mushy, decrease fermentation time. Shorter, more frequent batches keep grains happy.
- Feed regularly: Grains need constant nourishment. Don’t leave them in the same sugary water beyond 48 hours or risk starvation and decline.
- Reviving grains: If your grains have stagnated, try a ‘rest period’-remove them to fresh sugar water enriched with a pinch of baking soda and a mineral salt to reactivate metabolism.
Serving Suggestions
Serve your sparkling water kefir chilled over ice with a slice of fresh citrus or a sprig of mint to accentuate its refreshing effervescence. For a creative twist, flavor with ginger slices, berries, or hibiscus petals during secondary fermentation for a colorful, probiotic-packed beverage perfect for warm days or as a healthy digestive aid anytime.
| Nutrient | Per 1 cup Serving |
|---|---|
| Calories | 40 kcal |
| Protein | 0.5 g |
| Carbohydrates | 10 g |
| Fat | 0 g |
For more on nurturing your ferment cultures, visit our Fermentation Basics Guide. To dive deeper into the microbiological science, explore this comprehensive review on water kefir cultures.

Q&A
Q&A: Why Are My Water Kefir Grains Not Multiplying? Trouble Tips
Q1: What are water kefir grains supposed to do?
A1: Water kefir grains are tiny living cultures made of bacteria and yeast that ferment sugary water, turning it into a fizzy, probiotic-rich drink. Ideally, these grains multiply naturally as they feast on sugar and thrive in the right environment.
Q2: My water kefir grains aren’t multiplying-what could be going wrong?
A2: Several factors can slow or stop the growth of your grains. Common culprits include stagnant or inappropriate temperature, poor water quality, insufficient or incorrect food (sugar), contamination, and overcrowding.
Q3: How does temperature affect kefir grains growth?
A3: Water kefir grains love a cozy climate, typically between 68-85°F (20-29°C). If it’s too cold, their metabolism slows down; too hot, and they could get stressed or die off. Finding that Goldilocks temperature is key for multiplication.
Q4: Can the type of water impact grain health?
A4: Absolutely! Chlorinated or heavily mineralized water can harm your grains. If your tap water is questionable, use filtered, spring, or dechlorinated water to keep your kefir grains happy and growing.
Q5: What about the sugar-does it matter what kind I use?
A5: Yes, it does! Water kefir grains thrive on real sugar sources like organic cane sugar, brown sugar, or even molasses in moderation. Avoid artificial sweeteners or honey as they can inhibit fermentation or harm the grains.
Q6: How important is feeding frequency?
A6: Very! Leaving the grains in the same sugar water solution for too long can exhaust their food supply and stunt growth. Ideally, you refresh the sugar water every 24-48 hours to keep the ferment bubbling and the grains multiplying.
Q7: Could competition from other microbes be an issue?
A7: Yes, contamination by unwanted yeasts or bacteria can slow your grains down or cause them to weaken. Always use clean utensils, jars, and avoid cross-contamination to protect the delicate balance in your kefir culture.
Q8: Do I need to worry about grain overcrowding?
A8: Surprisingly, yes. If your grains get too crowded in a small volume of sugar water, they might struggle to multiply. Giving them enough “room to grow” and splitting the batch if it gets too thick can encourage expansion.
Q9: How can I revive sluggish grains?
A9: Try giving them a rest in fresh sugar water with ideal temperature and pure water. You can also feed them a bit of molasses or add a pinch of sea salt to boost mineral levels. Patience and consistent care usually bring them back to life.
Q10: When should I consider replacing my grains?
A10: If after multiple tries your grains remain dormant, discolored, slimy, or emit a foul smell, it might be time for a fresh batch. Healthy grains should be translucent, chewy, and slightly gelatinous-always smelling pleasantly yeasty.
Keep these tips in mind, and your water kefir grains will soon be multiplying like bubbly little superheroes, transforming sugar water into your favorite probiotic elixir!
Wrapping Up
In the lively world of water kefir, those tiny grains hold the secret to sparkling, probiotic-rich refreshment-and watching them multiply is a sure sign your fermentation is thriving. If your grains are struggling to grow, don’t worry; troubleshooting this little mystery is part of the fermentation adventure. By fine-tuning factors like water quality, sugar type, temperature, and feeding frequency, you can create the perfect environment for your kefir grains to flourish. Remember, patience and persistence are your allies-after all, even the smallest grain has the power to spark a bubbling revolution in your gut health. So keep nurturing your culture, and soon enough, those resilient little grains will be multiplying merrily, ready to fuel your next batch of delicious, effervescent water kefir. Cheers to your thriving fermentation journey!