The Art & Science of Sourdough: Young vs Mature Starters Explained
The art & science of sourdough: young vs mature starters explained is a fascinating journey into the heart of fermentation, where microbial orchestras craft flavors and textures unlike any other bread. Whether you’re twirling a fresh, lively young starter or savoring the deep nuances of a mature colony, understanding their unique traits is your ticket to bakery-level sourdough mastery at home.
Prep and Cook Time
- Starter preparation: Varies by age – 4 to 12 hours for young starter readiness, 8 to 24 hours for fully mature starter activation
- Dough mixing and bulk fermentation: 4 to 6 hours (depending on starter maturity and temperature)
- Shaping and final proof: 2 to 4 hours
- Baking time: 40 to 50 minutes
- Total: Approximately 12 to 24 hours including resting and fermentation (active working time around 30 minutes)
Yield
Makes one rustic loaf, approximately 800g to 1kg depending on hydration.
Difficulty Level
Medium – ideal for home bakers ready to deepen their understanding of fermentation dynamics.
Ingredients
- 500g bread flour, preferably high protein for strong gluten development
- 350g water, lukewarm (about 75°F / 24°C)
- 100g sourdough starter (young or mature, active and bubbly)
- 10g fine sea salt
- Optional: 1 teaspoon honey (to boost microbial activity in younger starters)
Instructions
- Mix the starter and water in a large bowl until fully combined. This initiates enzymatic action crucial for flavor extraction.
- Add the bread flour and stir with a wooden spoon or spatula until no dry patches remain. The dough will be shaggy and sticky – this is perfect.
- Cover tightly with a damp towel or plastic wrap and let autolyse for 30 minutes. This resting phase hydrates the flour and develops gluten gently.
- Sprinkle the salt evenly over the dough, then fold it in by hand, pressing and stretching the dough for 3-4 minutes until the salt is fully absorbed.
- Bulk ferment at room temperature for 4 to 6 hours. During this time, perform gentle stretch-and-folds every 30 minutes for the first 2 hours to strengthen the dough’s structure.
- Shape the dough on a lightly floured surface into a taut boule or bâtard. Be gentle to preserve the gas bubbles formed during fermentation.
- Place the dough seam-side up in a floured banneton basket or a bowl lined with a tea towel. Cover and proof for 2 to 4 hours, or refrigerate overnight for a longer, slow proof enhanced by mature starter complexities.
- Preheat your oven to 475°F (246°C) with a Dutch oven or baking stone inside to capture radiant heat.
- Carefully transfer the loaf onto parchment and score the surface with a sharp blade to direct oven spring.
- Bake covered for 25 minutes to trap steam, then remove the lid and bake an additional 20-25 minutes until the crust is deep golden brown and crackling.
- Cool on a wire rack for at least 1 hour before slicing to lock in moisture and let flavors mature further.
Tips for Success
- Feeding young starters: Young starters benefit from frequent, smaller feedings every 12 hours to encourage a robust microbial population and flavor depth.
- Recognizing maturity: Mature starters show consistent bubbling, a pleasant tangy aroma, and double in size predictably, delivering more complex flavor profiles and elasticity.
- Adjust hydration: Young starters often yield stickier doughs requiring slight water reduction (by 5-10%) for easier handling.
- Experiment with temperature: Slightly lower fermentation temps (68°F / 20°C) favor mature starters’ flavor complexity, while warmer (75°F / 24°C) is ideal for speeding up young starter activity.
- Store your starter: Mature starters thrive when refrigerated with weekly feedings; young starters require daily care at room temperature.
Serving Suggestions
This loaf shines best fresh, slathered with creamy butter and a pinch of flaky sea salt. For a gourmet touch, top slices with smashed avocado, heirloom tomato slices, and a drizzle of good olive oil. Complement with sharp cheeses or a bowl of rustic lentil soup for a cozy meal experience.

| Nutrient | Per 100g |
|---|---|
| Calories | 280 kcal |
| Protein | 9g |
| Carbohydrates | 55g |
| Fat | 1g |
Harnessing the art & science of sourdough: young vs mature starters explained empowers you to tailor every loaf to your taste and texture preferences. For deeper insights and recipes on fermentation, explore our comprehensive guide to Sourdough Fermentation Techniques. To learn more about the health benefits and science of sourdough microbes, consult this resource at Science Daily.
Q&A
Q&A: The Art & Science of Sourdough – Young vs Mature Starters Explained
Q1: What exactly is a sourdough starter?
A: Think of a sourdough starter as a living, bubbling orchestra of wild yeast and friendly bacteria. It’s a naturally fermented mixture of flour and water that captures wild yeast from the environment, creating the magic that makes sourdough bread rise and develop that signature tangy flavor.
Q2: How do young and mature starters differ?
A: A young starter is like an enthusiastic apprentice-newly awakened, still building its microbial community, and full of raw potential but inconsistent performance. A mature starter, on the other hand, is a seasoned maestro-stable, balanced, and confidently producing delicious, reliably leavened bread with a rich depth of flavor.
Q3: What happens in the early days of a starter’s life?
A: During its infancy-the first week or so-a starter undergoes a microbial wild party. Initially, natural yeasts and bacteria coexist in a chaotic dance, with the environment selecting the strongest players. The pH drops, acids develop, and eventually, the yeast and lactobacilli form a harmonious, symbiotic community that fuels consistent fermentation.
Q4: Can I bake with a young starter?
A: Absolutely, but with caveats! Young starters may produce uneven rise and unpredictable flavors-they’re still finding their groove. Experimentation is key: use them for lighter, quicker fermentations or pancakes until they mature. The best loaf often comes when the starter has aged at least 7-14 days and displays reliable bubbling and aroma.
Q5: Why does a mature starter produce better bread?
A: Over time, a mature starter develops a stable population of wild yeasts and lactic acid bacteria that work in concert. This balance creates a steady rise, a complex flavor profile (with subtle sour notes), and a robust gluten structure. The mature starter’s predictable activity means baking becomes both an art and a science you can trust.
Q6: How do I know if my starter is mature?
A: A mature starter doubles or even triples in size within 4 to 6 hours after feeding, is bubbly with a pleasing tangy aroma, and passes the “float test”-a spoonful floats easily in water, hinting at the abundant gas inside. If your starter has been regularly fed for at least two weeks and behaves consistently, congratulations-it’s mature!
Q7: How can I nurture my starter to maturity?
A: Feed it regularly with fresh flour and water, keep it at a cozy temperature (around 70-75°F or 21-24°C), and be patient. Avoid adding any antimicrobials (including chlorinated water). Stirring and discarding a portion before feedings keeps the culture vibrant and prevents it from becoming overwhelmed.
Q8: What flavor differences come from young vs mature starters?
A: Young starters often create milder, less complex breads-think gentle hints of sourness and fresh grain characteristics. Mature starters bring a layered flavor palette with tangy acidity, subtle fruitiness, and deep umami notes, painting your crust and crumb with a true artisanal soul.
Q9: Can I keep a starter indefinitely?
A: Yes! A sourdough starter can live for decades if properly cared for. Many bakers have “heirloom” starters passed down through generations, capturing local terroir and history in every loaf.
Q10: In short, what’s the takeaway?
A: The journey from young to mature starter mirrors that of any great artist: from fledgling enthusiasm to seasoned expertise. Understanding this evolution empowers bakers to harness sourdough’s living essence-turning flour, water, and time into masterpieces of taste and texture.
Embrace patience, feed your starter well, and watch as science and artistry rise together in your sourdough adventures!
To Wrap It Up
In the intricate dance of sourdough baking, understanding the subtle nuances between young and mature starters transforms a simple loaf into a living work of art. The science behind their activity, flavor development, and resilience unlocks endless possibilities for creative expression in your kitchen. Whether you’re nurturing a vibrant newborn starter or a time-honored mature culture, each stage offers unique gifts that shape the character of your bread. Embracing both the art and science of sourdough not only deepens your connection to this ancient craft but also elevates every bake into a testament of patience, passion, and natural magic. So, nurture your starter with care, and let the timeless story of fermentation unfold slice by slice.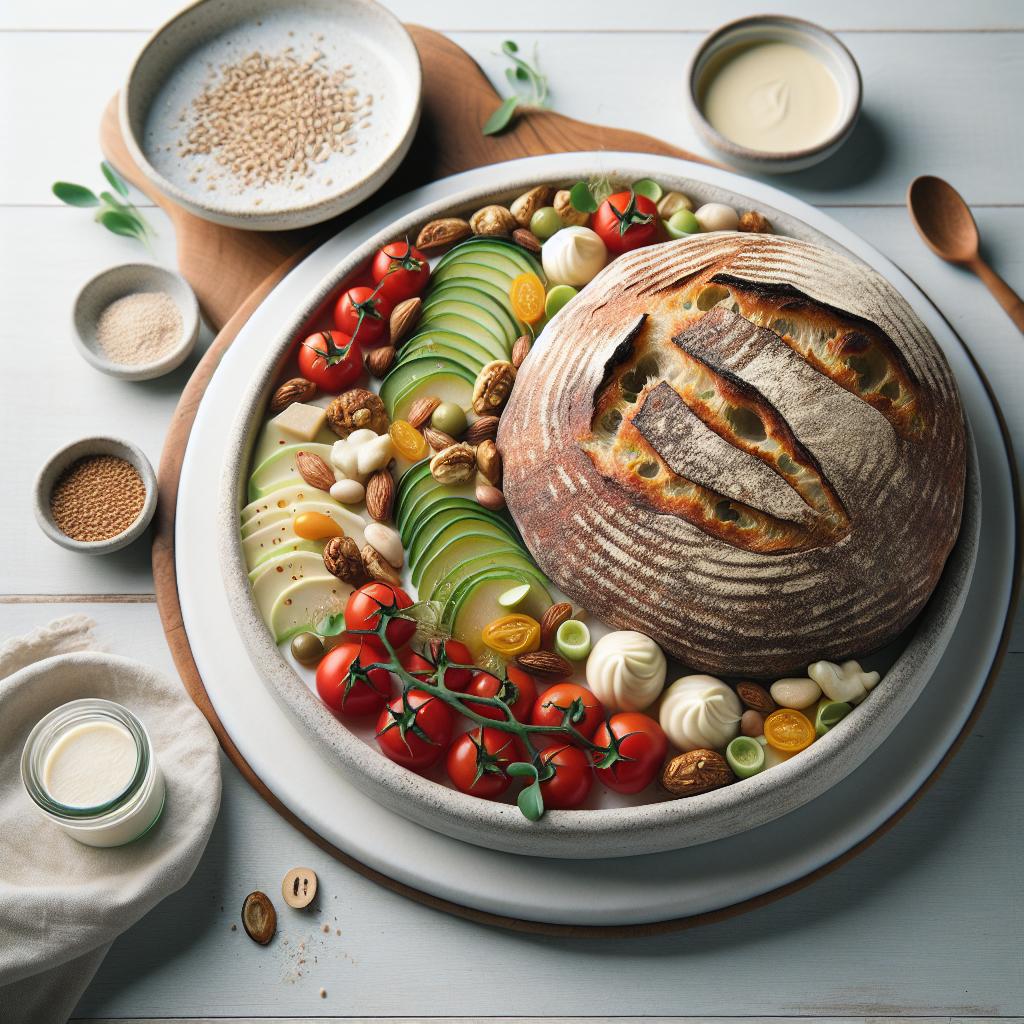
The chemistry behind caramelization is a mesmerizing dance of heat and sugar molecules transforming into a symphony of complex flavors and golden hues. Mastering temperature control is the secret to coaxing out the perfect caramel-its smoky, nutty, and rich undertones elevate countless dishes from humble to extraordinary. By understanding how ingredients interact during this transformation, you can deepen sweetness and add layers of flavor that capture the true sweet science of caramelization.
Prep and Cook Time
- Preparation: 5 minutes
- Cooking: 15-20 minutes
- Total Time: 20-25 minutes
Yield
Serves 6 generous portions
Difficulty Level
Medium – Requires attentive temperature control and timing
Ingredients
- 1 cup granulated sugar
- 1/4 cup water
- 2 tbsp unsalted butter, cut into cubes, softened
- 1/2 cup heavy cream, warmed
- 1/4 tsp fine sea salt
- 1 tsp pure vanilla extract
Instructions
- In a medium, heavy-bottomed saucepan, combine sugar and water over medium heat. Stir gently to dissolve the sugar, then stop stirring once the mixture comes to a simmer. This prevents crystallization.
- Allow the syrup to cook undisturbed, gently swirling the pan occasionally to ensure even caramelization. Watch carefully for the color to shift from clear to a deep amber-this usually happens around 320°F (160°C).
- As soon as the syrup reaches the golden-amber stage, remove it from heat immediately to avoid burning, which lends a bitter flavor.
- Carefully whisk in the butter cubes, stirring until fully melted and incorporated. The butter enriches the caramel with luscious creaminess.
- Slowly pour in the warm heavy cream while whisking vigorously. The mixture will bubble up dramatically-this is the alchemy in action.
- Add the sea salt and vanilla extract, stirring well to harmonize flavors and develop complexity.
- Let the caramel cool slightly in the pan, then transfer to a heat-safe container. Use immediately or store at room temperature for up to a week.
Tips for Success
- Control your heat: Use moderate heat to achieve gradual caramelization-high heat may burn sugar too quickly.
- Prevent crystallization: Avoid stirring the syrup once heated. If crystals form on the pan edges, brush them down with a wet pastry brush.
- Ingredient temperature matters: Adding cold cream directly can cause the caramel to seize. Warm cream blends more smoothly.
- Flavor variations: Infuse cream with cinnamon sticks or star anise for an aromatic twist.
- Make ahead: Caramel sauce can be refrigerated and gently reheated before use.
Serving Suggestions
This velvety caramel sauce is an exquisite companion to vanilla ice cream, drizzled over warm apple crumble, or swirled into coffee for a touch of indulgence. Garnish with flaky sea salt or toasted nuts to add texture and heighten the flavor experience. For a stunning visual, serve in a clear glass jar showcasing its rich amber glow.
| Nutrient | Amount per Serving |
|---|---|
| Calories | 180 kcal |
| Protein | 1 g |
| Carbohydrates | 22 g |
| Fat | 9 g |

For further exploration of sugar chemistry, visit the Science of Cooking. Also, check out our related guide on molecular cooking techniques to expand your culinary repertoire.
Q&A
Q&A: The Sweet Science: Unlocking the Magic of Caramelization
Q1: What exactly is caramelization?
A1: Caramelization is the magical process where sugar transforms under heat, turning from simple sweetness into a complex symphony of flavors and colors. When sugar molecules break down at high temperatures (usually above 320°F or 160°C), they create a cascade of compounds that taste nutty, buttery, and richly deep-anything but just sweet.
Q2: How does caramelization differ from Maillard reaction?
A2: While both create delicious browning and flavor, caramelization involves the direct breakdown of sugars, purely by heat. The Maillard reaction, on the other hand, is a chemical dance between amino acids and reducing sugars, often responsible for the savory flavors in roasted meat and bread crusts. Caramelization is the star in candy-making, Maillard steals the show in baking and grilling.
Q3: What sugars caramelize best?
A3: Not all sugars are created equal in the caramel game. Sucrose (table sugar) caramelizes beautifully and cleanly, making it the caramel king. Fructose caramelizes at a lower temperature and gives a slightly different flavor profile-fruitier and more intense. Glucose is a bit tricky since it tends to burn faster, so it’s often blended for balance.
Q4: Why does caramel sometimes turn bitter or burn?
A4: Timing and temperature are caramel’s delicate dance partners. Too low heat, and it won’t brown; too high or for too long, and the sugars break down beyond caramelization into bitter, burnt compounds. Stirring too aggressively or adding water late can cause crystallization or uneven heating, ruining the smooth texture.
Q5: How can I master caramelization in my kitchen?
A5: Patience is key. Use a heavy-bottomed pan for even heat, and monitor temperature closely, preferably with a candy thermometer. Start with dry heat or add a little water to dissolve sugar evenly, then watch the color change-golden to deep amber signals caramel’s perfect moment. Don’t walk away, because caramel waits for no one!
Q6: What are some creative uses of caramelization beyond candy?
A6: Caramelization isn’t just for sweets-it adds depth wherever sugar is involved. Think caramelized onions transforming simple dishes into savory wonders, roasted vegetables with a natural sweetness boost, or even caramelized fruit toppings that elevate desserts. That golden crust on crème brûlée? Pure caramelized magic.
Q7: Can caramelization happen at home without specialized tools?
A7: Absolutely! While candy thermometers help, caramelization can be achieved with just steady eyes, good quality sugar, and a dependable stove. Many home cooks master caramel sauces, brûlée toppings, and caramelized veggies using simple techniques and careful attention.
Q8: What’s the science behind caramel’s aroma and flavor?
A8: When sugar molecules heat up, they break apart and recombine into hundreds of new compounds. These molecules create the rich bouquet of aromas-from butterscotch and toffee to subtle smoky hints. It’s a molecular orchestra that turns basic sugar into a tantalizing sensory experience.
Unlocking caramelization is like discovering a sweet alchemy-it’s part art, part science, and 100% delicious. Dig in and let the magic caramelize your kitchen creations!
The Conclusion
As the golden hues of caramelization dance across your culinary creations, you begin to see that this is more than just a chemical reaction-it’s a secret language spoken by sugar and heat. Unlocking the magic of caramelization invites you to explore new depths of flavor, texture, and aroma, transforming everyday ingredients into extraordinary delights. So next time you watch that simple syrup darken or hear the gentle crackle of sugar melting, remember: you’re not just cooking-you’re practicing the sweet science that turns the ordinary into pure magic.
Rice Rivalry: Jasmine vs Basmati invites you on a sensory journey through the captivating fragrance, texture, and culinary versatility of two of the world’s most beloved rice varieties. Both Jasmine and Basmati rice boast distinctive aromas rooted in their unique origins-Jasmine hailing from the lush plains of Thailand, wrapped in a subtle nutty scent with floral undertones, while Basmati, cultivated in the foothills of the Himalayas, exudes a strikingly rich, popcorn-like fragrance. Understanding these aromatic personalities helps elevate every dish you create, refining how these grains complement flavors and textures on your plate.
Prep and Cook Time
- Preparation: 10 minutes
- Cooking: 18-20 minutes (Jasmine) / 20-25 minutes (Basmati)
- Total: 30-35 minutes
Yield
Serves 4 generous portions
Difficulty Level
Easy to Medium – perfect for everyday cooks looking to master the art of rice cooking.
Ingredients
- 1 cup Jasmine rice (rinsed thoroughly until water runs clear)
- 1 cup Basmati rice (rinsed and soaked for at least 30 minutes)
- 2 ½ cups water (for cooking each rice type)
- ½ teaspoon salt
- 1 tablespoon butter or neutral oil (optional, for fluffier grains)
Instructions
- Rinse the rice: Thoroughly rinse the Jasmine and Basmati separately under cold water to remove excess starch, ensuring fluffy, separate grains post-cooking.
- Soak the Basmati rice: Soak the Basmati rice in cold water for 30 minutes prior to cooking. This step unlocks its signature elongation and soft texture.
- Boil the water: Bring 2 ½ cups of water to a boil in separate pots for each rice type.
- Cook Jasmine rice: Add rinsed Jasmine rice and ¼ teaspoon salt to boiling water, reduce heat to low, cover, and simmer gently for 18 minutes. Avoid lifting the lid during cooking to preserve steam.
- Cook Basmati rice: Drain soaked Basmati rice, add to boiling salted water, reduce heat to low, cover tightly, and simmer for 20-25 minutes until tender and fragrant.
- Let it rest: Remove pots from heat and let the rice rest, covered, for 5-10 minutes to let steam fully develop the grains’ texture.
- Fluff and serve: Gently fluff each rice with a fork or chopsticks, incorporating butter or oil if desired to enhance sheen and taste.
Chef’s Notes
- For an authentic touch, cook Jasmine rice in coconut milk for a subtle tropical sweetness that beautifully amplifies its natural aroma.
- If time is tight, you can skip soaking Basmati, though soaking enhances grain length and fluffiness significantly.
- Use a heavy-bottomed pot with a tight-fitting lid to trap steam and prevent burning or drying out the rice.
- Leftover cooked rice can be spread thin on a baking sheet to cool quickly and stored in the fridge, perfect for fried rice dishes the next day.
Serving Suggestions
Both Jasmine and Basmati rice shine when presented as fragrant bases for vibrant curries, stir-fries, or grilled meats. For Jasmine rice, accompany with Thai-inspired dishes like green curry and fresh herbs-cilantro and lime amplify its floral notes. Basmati pairs wonderfully with aromatic Indian spiced lentils, creamy dal, or garam masala-roasted vegetables. Garnish with toasted nuts, fresh cilantro, or a squeeze of lemon to add textural contrast and vivid freshness.
| Rice Type | Calories (per 1 cup cooked) | Protein | Carbohydrates | Fat |
|---|---|---|---|---|
| Jasmine | 205 kcal | 4.2 g | 45 g | 0.4 g |
| Basmati | 190 kcal | 4.5 g | 42 g | 0.3 g |
Discover more about rice varieties and proper cooking techniques to master your grain game. For an inspiring spice pairing, visit our guide on spices that elevate rice dishes, helping you create sensational meals every time.

Q&A
Q&A: Rice Rivalry – Jasmine vs Basmati Showdown Tested and Explained
Q1: What makes Jasmine and Basmati rice the superstars of the rice world?
A: Jasmine and Basmati rice each hail from distinct regions and bring their own signature flair to the table. Jasmine rice, with its fragrant floral aroma and soft, slightly sticky texture, is the beloved staple of Southeast Asian cuisine. Basmati rice, on the other hand, boasts a nutty fragrance and fluffy, separate grains, making it the crown jewel of Indian and Middle Eastern dishes. Both have cultivated cult followings, thanks to their unique aromas and cooking characteristics.
Q2: How do their aromas differ?
A: Jasmine rice carries a sweet, flowery scent often compared to pandan leaves, which seduces the senses before the first bite. Basmati emits a nutty, almost popcorn-like fragrance that hints at exotic spice markets and traditional biryanis. The aromatics are not just pleasing but define the identity of their respective cuisines.
Q3: What about texture? How do they stack up?
A: Texture is where Jasmine and Basmati truly diverge. Jasmine cooks up soft, moist, and slightly sticky – perfect for scooping up with chopsticks or a spoon. Basmati, conversely, offers separate, fluffy grains that stay light and airy, ideal for layering flavors in dishes like pilaf or biryani. Think of Jasmine as the cozy rice hug and Basmati as the elegant rice dance.
Q4: Can they be used interchangeably in recipes?
A: While you can swap them in a pinch, it’s like trading jazz for classical music: both are beautiful but evoke entirely different moods. Jasmine’s sticky texture complements saucy Thai curries and stir-fries, whereas Basmati’s dry, fluffy nature shines in fragrant Indian and Persian rice dishes. Using the wrong one could transform the dish’s intended texture and flavor experience.
Q5: How do they differ nutritionally?
A: Nutritionally, Jasmine and Basmati are similar, both being primarily carbohydrate sources with modest protein content. However, Basmati often has a slightly lower glycemic index, meaning it may cause a gentler rise in blood sugar levels – a helpful trait for those watching their insulin response. Brown versions of both types offer more fiber and nutrients.
Q6: Which rice is easier to cook?
A: Jasmine rice is generally more forgiving – it requires less soaking and tends to cook evenly with less fuss. Basmati, however, benefits from rinsing and soaking to elongate the grains and prevent clumping, requiring a bit more technique. Mastering Basmati can feel like a rewarding culinary triumph.
Q7: What dishes highlight each rice’s strengths?
A: Jasmine shines in Thai green curry, coconut-infused sticky rice desserts, and any dish where that subtle floral scent can sing alongside fresh herbs and vibrant spices. Basmati takes center stage in biryanis, pilafs, and as a fluffy bed for kebabs or rich gravies, where its distinct aroma enhances complex flavor profiles.
Q8: So who wins the rice rivalry?
A: The true winner? Your palate. Jasmine and Basmati each bring distinct aromas, textures, and cultural stories to the table. Whether you crave the soft, fragrant comfort of Jasmine or the lofty, aromatic elegance of Basmati, this showdown invites you to savor both and celebrate the delicious diversity of rice. No need to pick a side – just enjoy the journey!
Final Thoughts
In the end, the Jasmine and Basmati rice rivalry is less about declaring an absolute winner and more about celebrating the unique qualities each grain brings to the table. Whether you crave the fragrant, slightly sticky embrace of Jasmine or the nutty, fluffy allure of Basmati, both have earned their rightful place in kitchens around the world. The true delight lies in knowing when to call upon each rice to elevate a dish, turning every meal into a flavorful adventure. So next time you’re facing that rice aisle decision, remember: it’s not just about preference, but about pairing the perfect grain to unlock your recipe’s full potential. The showdown might be over, but your culinary exploration has just begun.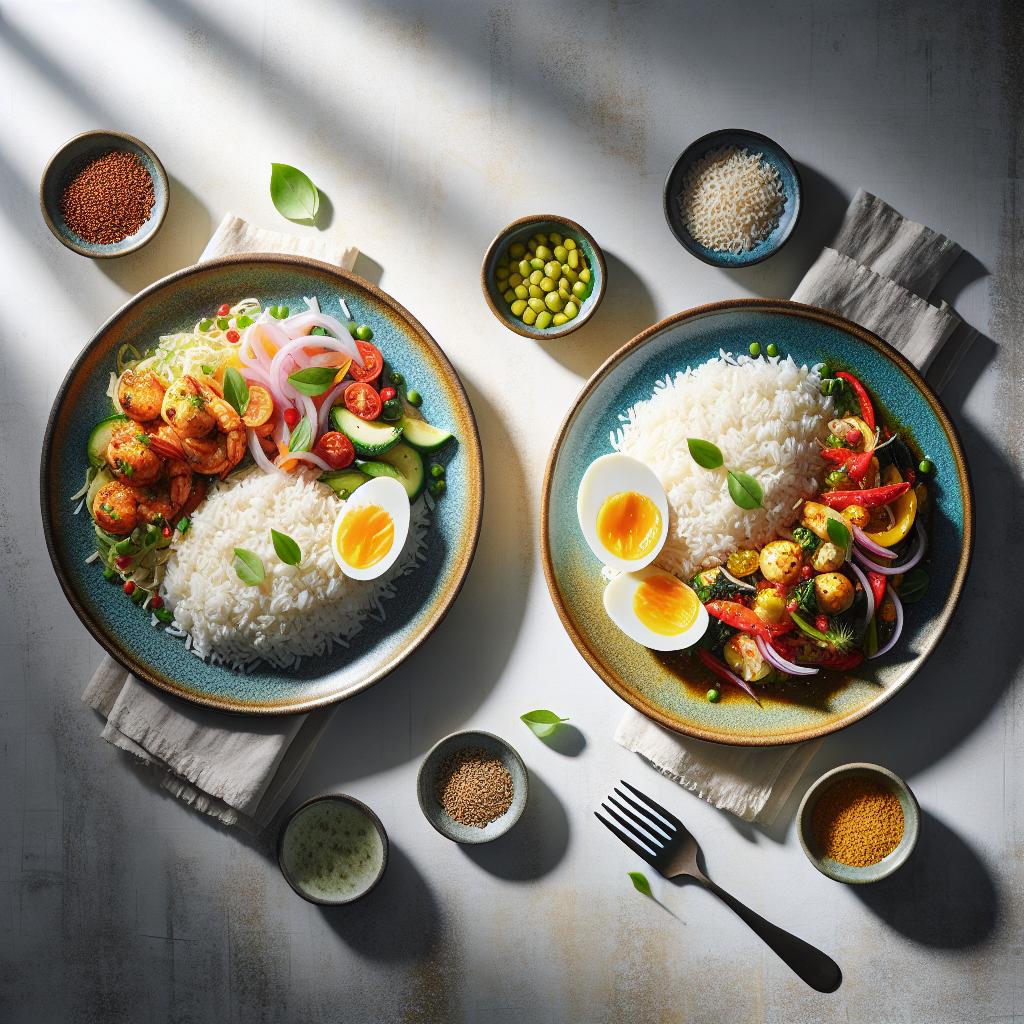
Mastering the Role of Ingredients for a Perfect Meringue on a Humid Day
Whipping Wonders: Crafting Meringue on a Humid Day is more than a recipe-it’s an invitation to understand the delicate alchemy behind turning simple egg whites and sugar into ethereal clouds of sweetness. Creating flawless meringue when humidity threatens to steal your smooth, glossy peaks can feel like a culinary challenge. However, knowing how ingredients interact with moisture is the secret to achieving stability and shine even on damp days.
Prep and Cook Time
- Preparation: 15 minutes
- Cooking/Baking: 45 minutes
- Cooling: 30 minutes
Yield
- Makes approximately 12 medium-sized meringue kisses or one 8-inch pavlova shell
Difficulty Level
- Advanced
Ingredients
- 4 large egg whites, at room temperature (about 70°F/21°C)
- 1 cup superfine granulated sugar (castor sugar)
- 1/4 teaspoon cream of tartar or 1 teaspoon white vinegar
- 1 teaspoon cornstarch (adds stability)
- 1 teaspoon vanilla extract or almond extract (optional)
- A pinch of salt
Instructions
- Prepare your equipment: Ensure your mixing bowl and whisk are impeccably clean and dry. Any trace of grease or moisture can prevent your egg whites from whipping properly. For best results, use a metal or glass bowl.
- Separate the egg whites: Gently separate the egg whites, making sure no yolk contaminates the whites. Slight traces of fat will hinder volume.
- Add cream of tartar: Place the egg whites in the bowl and sprinkle the cream of tartar or white vinegar over them. This acid helps stabilize the proteins and resiliently hold air, especially crucial on humid days.
- Start whisking: Using a handheld or stand mixer on medium speed, whisk the egg whites until they become foamy and soft peaks begin to form.
- Incorporate sugar gradually: Slowly add the superfine sugar-one tablespoon at a time-while continuing to whisk. This slow addition helps sugar dissolve fully, preventing graininess and moisture absorption.
- Fold in cornstarch and vanilla: Just before the meringue reaches stiff peaks, gently sift in the cornstarch and fold it through, along with the vanilla extract if using. Cornstarch absorbs excess moisture, lending a drier finish and added durability.
- Check for readiness: The meringue should stand in sharp peaks and feel silky and smooth between fingers. If you rub a bit on your skin, it should not feel gritty.
- Bake with care: Transfer your meringue to a parchment-lined tray. Bake at low heat (around 225°F/110°C) for about 45 minutes to an hour until crisp on the outside. Turn the oven off and leave the meringue inside to cool slowly-this prevents cracks caused by sudden temperature changes.
Tips for Success
- Humidity is your enemy: Use a dehumidifier in the kitchen or bake early in the day when moisture is typically lowest.
- Room temperature eggs whip better: If in a hurry, place eggs in warm water for 10 minutes before separating.
- Superfine sugar dissolves faster: If you can’t find caster sugar, pulse granulated sugar briefly in a food processor.
- Storage is key: Store baked meringues in airtight containers with silica gel packs or in a dry area to prevent sogginess.
Serving Suggestions
Present your stunning meringue as an elegant pavlova topped with fresh berries, whipped cream, and a drizzle of passion fruit pulp. Alternatively, use smaller meringue kisses garnished with edible flowers or dipped in dark chocolate for a refined treat. The crisp exterior and marshmallow-soft interior create a textural wonder bound to impress any guest.
| Nutrient | Amount per Serving (1 medium meringue) |
|---|---|
| Calories | 45 |
| Protein | 1.5g |
| Carbohydrates | 10g |
| Fat | 0g |
For more insight on perfect egg white techniques, check out our guide to flawless meringue. Understanding these core principles empowers you to transform the most intimidating baking conditions into whimsical success.
To further appreciate the molecular science behind egg whites and sugar interactions, the ScienceDaily article on meringue chemistry offers detailed study and fascinating insights.

Q&A
Q&A: Whipping Wonders – Crafting Meringue on a Humid Day
Q1: Why is making meringue on a humid day such a challenge?
A1: Meringue loves dry, crisp air because it helps the egg whites dry out and stabilize. Humidity sneaks in moisture, making the whites more reluctant to fluff up and hold their shape. Think of it as trying to ice a cake during a rainstorm-the extra moisture disrupts the magic!
Q2: What’s the secret to beating humidity when whipping meringue?
A2: Start with cold, fresh eggs-the colder, the better for volume and stability. Add an acid like cream of tartar or a splash of lemon juice early in the whipping process to strengthen the egg white proteins. And be patient: whip slowly at first to build structure, then speed it up to stiff peaks. Some even recommend using a dehumidifier or air conditioner to dry the air around you!
Q3: Does the type of sugar matter in humid conditions?
A3: Absolutely! Fine granulated sugar dissolves more easily, which is vital so the meringue doesn’t feel gritty or weep moisture. Some bakers swear by superfine or caster sugar. Adding sugar gradually, once soft peaks form, helps keep the meringue stable even when the air is damp.
Q4: Can you rescue a meringue that’s gone soft or sticky because of humidity?
A4: You can try! Sometimes a quick re-whip with a pinch of cream of tartar or a few drops of lemon juice helps bring it back. If it’s too far gone, spreading the meringue thinly on a baking sheet and drying it in a low oven or dehydrator can turn it into crisp meringue cookies.
Q5: What’s the best way to store meringue made on a humid day?
A5: Seal it airtight and keep it in a dry, cool spot. If the air outside is muggy, pop the container in the fridge but allow it to come back to room temperature before serving to avoid condensation ruins. Meringue is a delicate cloud; treat it gently and keep moisture far away!
Q6: Does altitude impact meringue making on humid days?
A6: Yes! High altitudes have drier air which can actually help with meringue, but volatile air pressure means whipping and baking times might change. On humid, low-altitude days, experiment with slightly longer whipping and slower baking to get that perfect, sturdy peak.
Q7: Are there alternative recipes better suited for humid weather?
A7: If the meringue gods aren’t smiling, try Swiss or Italian meringue, which involve heating the egg whites and sugar mixture before whipping. This cooks the sugar and proteins together, creating a more stable, less humidity-sensitive meringue. Plus, they’re wonderfully silky and perfect for frostings and toppings!
No matter the weather antics, with a little patience and these whipping wonders, your meringue can still reach ethereal heights-even on the muggiest of days. Happy whipping!
Key Takeaways
As the final peaks of your meringue stand tall against the odds of a humid day, you’ve not only crafted a delicate dessert but also conquered the invisible challenge of moisture in the air. Whipping wonders like these require a blend of science, patience, and a touch of artistry-reminding us that even the most stubborn environmental factors can be tamed with the right techniques. So next time the air feels heavy and damp, let your whisk be your weapon and your kitchen your battleground. With these tips in hand, your meringues will rise, crisp, and glow with glossy perfection, no matter what the weather throws your way. Happy whipping!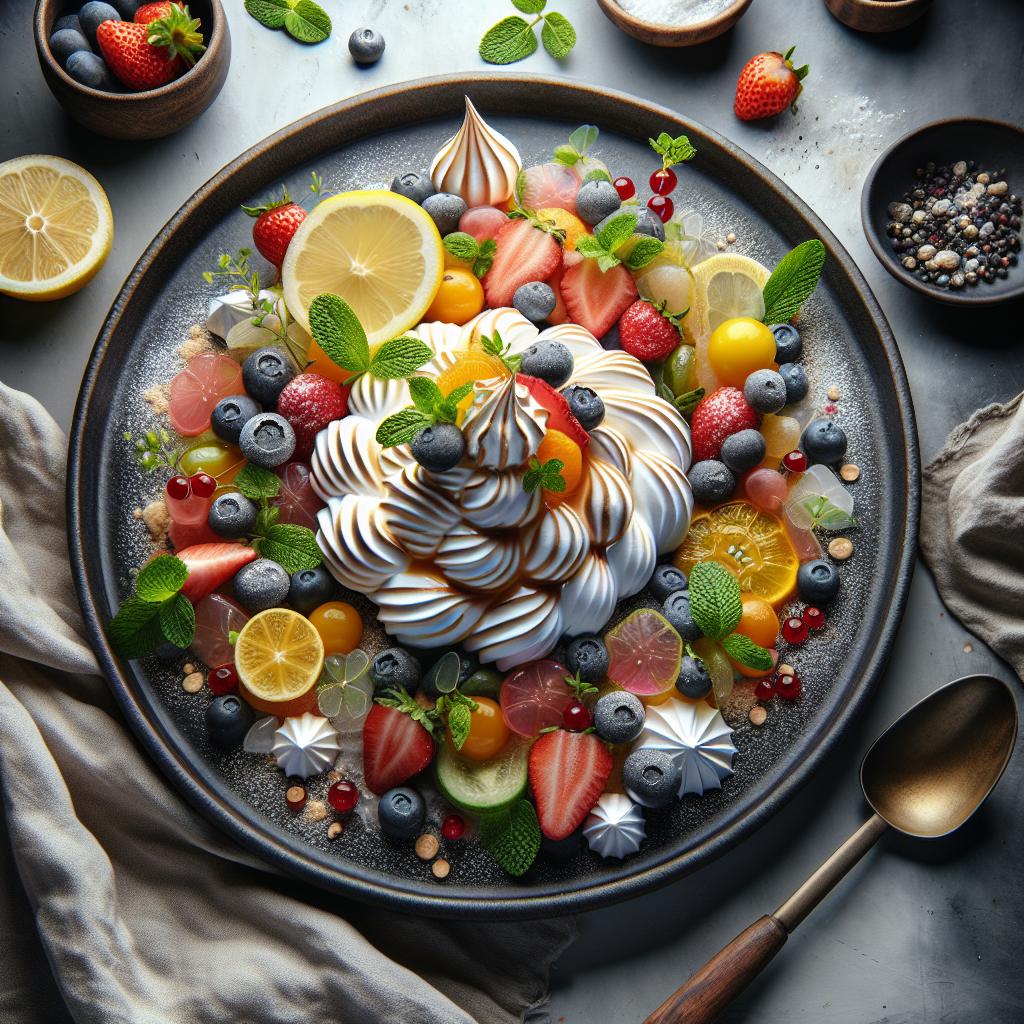
Optimizing Temperature and Timing for Consistent Culinary Results
Mastering kitchen control starts with understanding how temperature and timing profoundly influence the flavor and texture of your dishes. From the moment ingredients hit the pan, precise heat adjustments and watchful timing create an alchemy that transforms raw food into culinary masterpieces. Imagine searing a steak-the perfect Maillard reaction only happens at the right temperature. Too low, and it stews; too high, and it chars. Similarly, knowing when to introduce ingredients or pause allows flavors to develop and meld seamlessly, ensuring each bite delivers consistency and satisfaction.
Prep and Cook Time
- Prep Time: 20 minutes
- Cook Time: 30 minutes
Yield
- Serves 4
Difficulty Level
- Medium
Ingredients
- 2 tbsp olive oil, extra virgin for vibrant flavor
- 1 medium onion, finely diced
- 3 garlic cloves, minced
- 1 lb chicken breasts, cut into 1-inch cubes
- 1 tsp smoked paprika
- ½ tsp sea salt
- ¼ tsp freshly ground black pepper
- 1 cup cherry tomatoes, halved
- ½ cup chicken broth, low sodium
- 1 tbsp fresh thyme, chopped
- 1 tbsp lemon juice, freshly squeezed
Instructions
- Heat the olive oil in a heavy skillet over medium heat. Wait until shimmering hot before adding diced onion.
- Sauté the onion gently until translucent and tender, about 4 minutes, stirring occasionally to prevent browning.
- Add minced garlic and cook for 30 seconds until fragrant-avoid burning to keep flavors bright.
- Increase heat to medium-high and add cubed chicken, seasoned with smoked paprika, salt, and pepper. Sauté until golden and cooked through, about 8 minutes. Flip pieces midway for even caramelization.
- Stir in cherry tomatoes and cook until they start to soften, about 3 minutes, releasing natural juices into the pan.
- Pour chicken broth carefully, scraping up any browned bits from the bottom to enhance depth of flavor. Simmer uncovered for 5 minutes, allowing sauce to reduce and thicken slightly.
- Remove from heat and stir in fresh thyme and lemon juice for a final burst of freshness that balances richness beautifully.
Tips for Success
- Temperature control: Use a kitchen thermometer for perfect searing temperatures (around 350°F to 375°F) to avoid toughening protein.
- Timing: Resist the urge to crowd the pan; cook chicken in batches if necessary to maintain even heat distribution and consistent browning.
- Ingredient measuring: Use digital scales for precision, especially with spices, to ensure balanced flavor every time.
- Adaptation tip: If using induction cooktops, reduce heat slightly since induction heats faster and more evenly than gas or electric coils.
- Make ahead: This dish can be prepped one day ahead; reheat gently over low heat to maintain moisture and texture.
Serving Suggestions
Serve this vibrant dish nestled atop a bed of fluffy couscous or creamy mashed potatoes for comforting contrast. Garnish with extra fresh thyme sprigs and a light drizzle of high-quality olive oil to elevate aromatics and presentation. A crisp green salad with lemon vinaigrette pairs perfectly, cutting through richness while keeping the plate balanced and inviting.

| Nutrient | Amount per Serving |
|---|---|
| Calories | 320 kcal |
| Protein | 35 g |
| Carbohydrates | 6 g |
| Fat | 15 g |
For further expertise on precision in ingredient measuring and ingredient chemistry, explore our related guide on Precision in Kitchen Techniques. Additionally, the USDA FoodData Central offers extensive nutritional insights and ingredient details, which can deepen your culinary science understanding – visit USDA FoodData Central.
Q&A
Q&A: Mastering Kitchen Control – The Ultimate Guide to Variables
Q1: What exactly do we mean by “variables” in the kitchen?
A1: In the culinary world, variables are the dynamic factors that influence the outcome of your dishes – from ingredient types, quantities, and temperatures, to cooking time, humidity, and even altitude. Mastering these variables means taking control of your cooking environment and recipe to consistently achieve delicious results.
Q2: Why is understanding kitchen variables so important?
A2: Cooking is part science, part art. While recipes give you a framework, variables affect how those instructions translate into real-life results. Without understanding how to adjust these elements, you risk overcooking, under-seasoning, or ruining textures. Grasping variables puts you in the driver’s seat, turning guesswork into precise culinary craft.
Q3: Which variables are the most crucial for a home cook to master?
A3: Start with temperature (heat control), timing, ingredient freshness, and measuring precision. For example, knowing the exact temperature for searing meat or when to reduce heat while simmering lets you unlock flavors and textures. Next, adjust seasoning and acidity to balance taste, and pay attention to cooking equipment, as it can impact heat distribution.
Q4: Can mastering kitchen variables improve diet and health?
A4: Absolutely! When you control variables, you can substitute ingredients, adjust cooking methods, and tweak portion sizes without sacrificing flavor. This flexibility allows you to create meals tailored to dietary needs, reducing fats, sugars, or sodium while amplifying nutrition and satisfaction.
Q5: How can a beginner start experimenting with kitchen variables without feeling overwhelmed?
A5: Start small. Pick one variable, like cooking temperature or salt levels, and observe the effects. Keep a simple kitchen journal to note changes and outcomes. Over time, layer in additional variables. Remember: every great chef began by embracing curiosity and learning from each attempt.
Q6: What role does technology play in managing kitchen variables?
A6: Tools like digital thermometers, timers, and smart ovens give precise control that removes guesswork. Apps and online platforms help track recipes and adjustments, allowing you to perfect timing and temperature settings. Technology acts as your sous-chef, supporting consistent mastery of complex variables.
Q7: Is it possible to master all kitchen variables, or is some unpredictability always present?
A7: While you can control most variables, some elements – like ingredient variability (think tomatoes from different seasons) or environmental factors – will always introduce a bit of unpredictability. Embrace that! Cooking is an evolving dance between control and creativity, and mastering variables empowers you to navigate this dance with confidence.
Q8: Where can readers learn more about advanced kitchen control techniques?
A8: Dive into culinary science books, enroll in cooking workshops focused on technique, or follow chefs who break down recipes by their scientific elements. Experimentation is your best teacher, so combine learning with hands-on practice to truly master your kitchen universe.
Final Thoughts
As you close the chapter on mastering kitchen control, remember that variables are the secret ingredients behind every culinary success. From adjusting heat to timing and seasoning, understanding how to wield these elements transforms cooking from a chore into an art form. With this ultimate guide in hand, you’re not just following recipes-you’re orchestrating flavors, textures, and aromas with confidence and precision. So step into your kitchen as the true conductor of your culinary symphony, where every variable is a note, and every dish becomes a masterpiece. Happy cooking!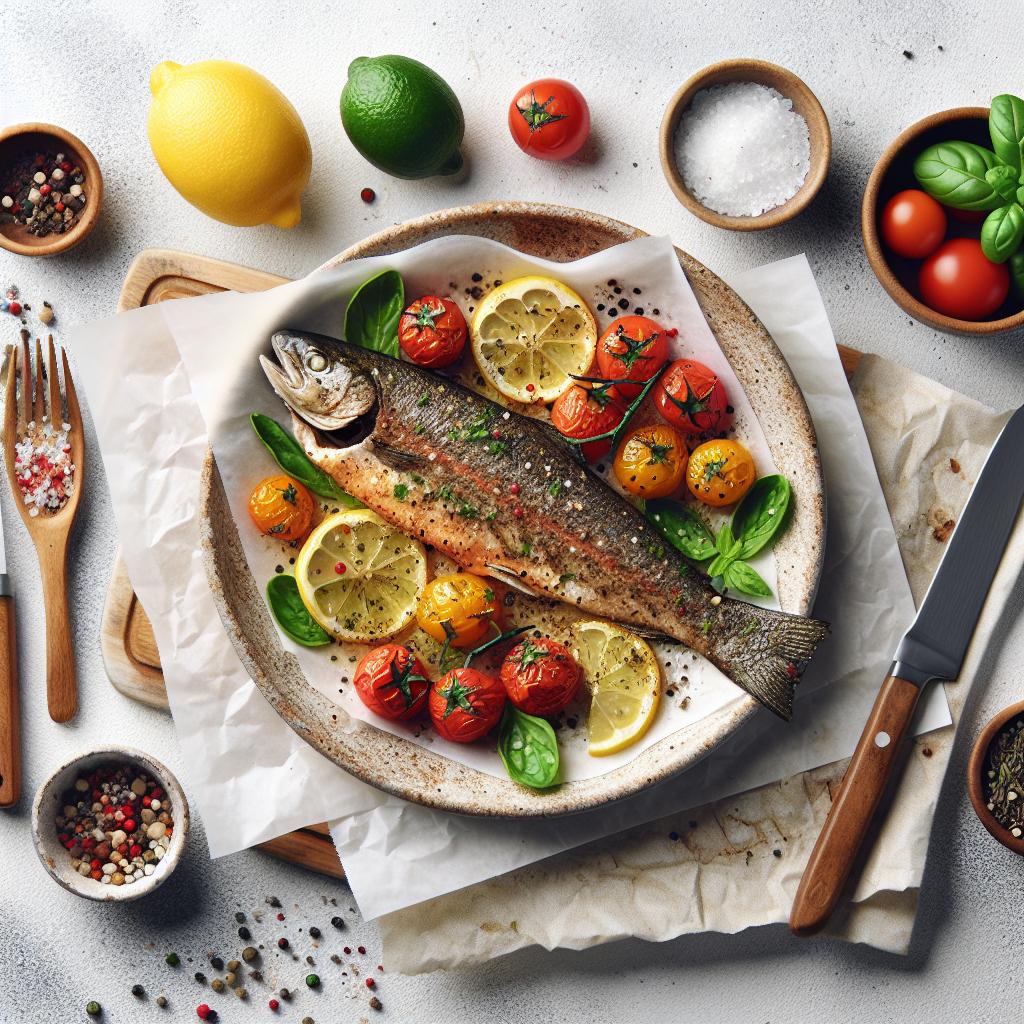
Unlocking flavor is the key to transforming any plate from dull to dazzling. When your dishes taste flat or one-dimensional, it often signals an imbalance in the essential taste profiles and aroma elements you might be missing. Mastering the art of layering seasonings and understanding the science behind each note brings your culinary creations to life, offering a full-bodied flavor experience. Let’s dive into how to balance tastes, enhance textures, and create dishes that sing with complexity.
Prep and Cook Time
Prep Time: 15 minutes
Cook Time: 30 minutes
Yield
Serves 4
Difficulty Level
Medium
Ingredients
- 2 tbsp olive oil, extra virgin for depth of flavor
- 1 medium onion, finely chopped
- 3 cloves garlic, minced
- 1 tsp smoked paprika, to add warmth and complexity
- 1 tsp ground cumin, for earthy undertones
- 1/2 tsp sea salt, balances all flavors
- 1/4 tsp freshly ground black pepper, for a mild heat
- 1 cup crushed tomatoes, ripe and juicy for natural acidity
- 1 cup vegetable broth, low sodium for better control
- 1 tbsp fresh lemon juice, brightens and lifts flavors
- 1 tbsp fresh chopped parsley, for garnish and fresh herbaceous notes
Instructions
- Heat the olive oil in a heavy-bottomed skillet over medium heat until shimmering but not smoking.
- Add the finely chopped onion and sauté until translucent and slightly golden, about 7 minutes, stirring occasionally to prevent sticking. This step unlocks the natural sweetness in the onions, giving your base a rounded depth.
- Incorporate the minced garlic and cook for 1 minute until fragrant, careful not to burn it, as bitter garlic can flatten flavor.
- Sprinkle in smoked paprika, cumin, salt, and black pepper. Toast the spices gently in the pan for 30 seconds to release their essential oils, intensifying their impact.
- Pour in the crushed tomatoes and vegetable broth, stirring to combine fully. Simmer uncovered on low heat for 15 minutes until the sauce thickens and the flavors meld beautifully.
- Stir in the fresh lemon juice at the end to add bright acidity, awakening the palate and balancing richness.
- Taste and adjust seasoning if needed-sometimes a pinch more salt or a dash of smoked paprika can make all the difference.
- Remove from heat and garnish with fresh parsley just before serving to add a burst of fresh aroma and color.
Tips for Success
- Layer your seasoning thoughtfully: Adding spices at different stages allows them to develop nuance and prevents the dish from tasting flat.
- Use fresh herbs and acids at the end: These bright notes can easily fade with prolonged cooking but are essential for complexity.
- Avoid over-salting early: Salt enhances flavor but too much upfront can mask the delicate layers you build.
- For added texture: Consider light toasting nuts or seeds as a crunchy garnish, offering a contrast to the sauce’s smooth base.
- Make-ahead instructions: Flavors deepen after resting. Prepare 1 day ahead, refrigerate, and reheat gently for an even more cohesive taste.
Serving Suggestions
This vibrant sauce pairs beautifully with hearty grains like couscous or quinoa, roasted root vegetables, or grilled proteins such as chicken or tofu. Serve with a crisp green salad and a sprinkle of toasted pine nuts for a complete sensory experience. Garnish with extra fresh parsley and an optional drizzle of quality extra virgin olive oil to highlight the luxurious layers of flavor.
| Nutrient | Per Serving |
|---|---|
| Calories | 180 kcal |
| Protein | 3 g |
| Carbohydrates | 15 g |
| Fat | 12 g |

Explore more tips on balancing complex flavors in our related guide and broaden your culinary knowledge with insights from ScienceDaily’s flavor chemistry research.
Q&A
Q&A: Unlocking Flavor – Why Your Dish Tastes Flat or One-Dimensional
Q1: Why does my dish sometimes taste flat or boring, even when I follow the recipe?
A1: Flavor is a complex dance of tastes, aromas, and textures. Even if the recipe is correct, missing key elements like acidity, salt, or contrasting textures can make a dish fall flat. Think of flavor like a symphony-if one instrument is silent, the harmony suffers.
Q2: What does it mean for a dish to be “one-dimensional” in taste?
A2: A one-dimensional dish often hits only one flavor note-perhaps just salty, overly sweet, or solely spicy-without layering complementary tastes. Without that interplay of sweetness, sourness, bitterness, saltiness, and umami, the palate becomes bored, resulting in a flat experience.
Q3: How can I add depth and complexity to my cooking?
A3: Unlock complexity by embracing balance and contrast. Add a splash of acid (lemon juice or vinegar) to brighten, a pinch of salt to awaken, or a touch of bitterness (like charred greens) to intrigue. Textural contrast-crispy versus creamy-also elevates the experience, making the flavors pop.
Q4: Are herbs and spices crucial to avoiding dull dishes?
A4: Absolutely! Fresh herbs and thoughtfully chosen spices can elevate a dish from mundane to mesmerizing. They layer aroma and taste, engaging multiple senses. However, balance is key; overpowering spices without complementary elements can tip the scales toward one-dimensionality.
Q5: Can cooking technique influence how flat or flavorful a dish tastes?
A5: Yes! Techniques like caramelizing, roasting, toasting, or slow-cooking break down ingredients, releasing deeper, richer flavors. For instance, browning vegetables unlocks sweetness and umami that can’t be matched by boiling alone. Technique is your secret weapon to flavor depth.
Q6: Why is seasoning throughout cooking important instead of just at the end?
A6: Seasoning in layers builds flavor gradually. Salt boosts the inherent taste of ingredients and helps develop complex flavors during cooking. Waiting until the end often means flavors haven’t fully developed, resulting in a dull and flat profile.
Q7: How can I train my palate to better detect and balance flavors?
A7: Taste mindfully! Sample ingredients separately and together. Try tasting with fresh bread or crackers between bites to reset your palate. Experiment with small adjustments-adding a pinch of salt or acid-and notice the difference. Over time, your flavor radar will become much sharper.
Q8: What’s a simple trick to fix a flat dish at the last minute?
A8: Brighten it up with acid! A squeeze of lemon, a dash of vinegar, or a spoonful of yogurt can awaken tired flavors instantly. A final sprinkle of fresh herbs or an unexpected crunch (nuts, seeds, crispy shallots) also revives lifeless dishes.
Unlocking flavor is an art-one that blends science and creativity. Next time your dish tastes flat, remember: it’s all about layering, balancing, and awakening your senses. Flavor is waiting just beneath the surface!
Key Takeaways
As you embark on your culinary journey, remember that unlocking vibrant flavor isn’t about a single secret ingredient-it’s about the delicate dance of balance, contrast, and depth. Flat, one-dimensional dishes don’t have to be your norm; with a pinch of acidity, a touch of umami, or a sprinkle of freshness, you can transform everyday meals into extraordinary experiences. So next time your dish feels lackluster, don’t just add salt-explore the layers waiting to be awakened. Your palate, and those you share your table with, will thank you. Flavor isn’t just taste-it’s the story your food tells. Make yours unforgettable.
Understanding Starch Composition and Its Impact on Frying Texture
Crispy Science: Testing Starches for Perfect Frying Results is a culinary journey into the heart of what creates irresistibly crunchy textures. At the core of this transformation lie the two primary starch components: amylose and amylopectin. Their delicate balance dictates how your fried foods achieve that coveted golden crispness or become disappointingly soggy. By grasping their unique properties, you’ll unlock the secrets to elevating your frying game, ensuring every bite snaps with pleasure.
The Role of Amylose and Amylopectin in Achieving Ultimate Crispiness
In the world of starch, amylose is a linear molecule that forms strong gels and films upon cooling, creating a firm, sturdy crust on fried foods. This results in that perfect crunch you dream of when biting into fries or tempura. Conversely, amylopectin features a highly branched structure that retains moisture, which can lead to a softer, chewier texture if used alone.
For example, potato starch, high in amylose, naturally forms a rustling, crackly exterior during frying. Meanwhile, tapioca starch’s amylopectin-rich profile contributes to a lighter, less brittle crunch, ideal for delicate coatings. The key to crispiness lies in striking the right ratio between these two starches or choosing the starch that complements the frying method and the food’s natural moisture content.
Optimizing Frying Techniques for Different Starches
Temperature control is paramount when working with starches for frying. Begin by preheating your oil between 350°F to 375°F (175°C to 190°C). A higher amylose starch like corn or potato benefits from slightly cooler oil to allow the starch proteins to bind and form a crackling shell without burning. Conversely, amylopectin-heavy starches, such as tapioca or rice starch, excel at higher temperatures to quickly vaporize moisture and lock in crispness.
Another pro tip is to double-fry: fry once at a lower temperature to cook through, drain and rest, then fry a second time at higher heat to develop a golden, irresistibly crispy surface. This process works wonders, especially with high-amylose starch coatings.
Expert Tips for Selecting the Best Starch to Elevate Your Frying Game
Your choice of starch influences not just texture but also oil absorption, color, and flavor release. For a robust crunch and minimal oiliness, opt for potato starch. For a lighter, airy crunch that complements delicate proteins like shrimp or chicken, tapioca starch is a game-changer. Rice starch adds a nuanced crisp with slight flakiness, perfect for Asian-style frying.
Consider blending starches for customized crunch: a 50/50 mix of potato and tapioca starch can balance the firmness and translucency, yielding a silky yet crunchy texture. Always sift your starches before use to break up clumps and ensure even coating.
Prep and Cook Time
- Preparation: 15 minutes
- Cooking: 10-15 minutes (including double-fry step)
Yield
Serves 4-6 crispy servings
Difficulty Level
Medium – requires temperature control and timing precision
Ingredients
- 1 cup potato starch, sifted
- 1/2 cup tapioca starch, sifted
- 1 teaspoon salt
- 1/2 teaspoon black pepper, freshly ground
- 2 large eggs, beaten
- 1 pound chicken tenders or shrimp, patted dry
- Vegetable oil for frying, enough to submerge
Instructions
- Prepare your starch blend: Combine sifted potato starch, tapioca starch, salt, and black pepper in a shallow bowl for even seasoning. This blend balances amylose and amylopectin for crunch.
- Set up a dredge station: Place beaten eggs in a separate bowl. Dip the dried chicken tenders or shrimp first into the eggs, then coat thoroughly in the starch blend, pressing gently to adhere.
- Heat oil: Pour vegetable oil into a heavy-bottomed pot or deep fryer, heating to 350°F (175°C). Use a thermometer to maintain consistent temperature.
- First fry: Fry chicken or shrimp in batches, avoiding overcrowding. Fry for 4-5 minutes until cooked through but not deeply colored. Remove and drain on wire racks or paper towels.
- Rest and cool: Allow the fried pieces to rest for 5-10 minutes. This step lets steam escape and the starch gel to set for better crispness.
- Second fry: Increase oil temperature to 375°F (190°C). Quickly re-fry the pieces for 1-2 minutes until golden and crunchily blistered. Remove and drain as before.
- Serve immediately: Enjoy warm for the best contrast of crispy exterior and juicy interior.
Tips for Success
- Dry your protein well. Excess moisture prevents starch adhesion and promotes sogginess.
- Maintain oil temperature. Frequent frying lowers oil heat; adjust burner accordingly.
- Sift starches before use to avoid clumps and create a lighter crust.
- Try starch blends. Customize your crisp by changing ratios as desired.
- Rest fried food on a wire rack. Avoid paper towels which trap steam and soften the crust.
Serving Suggestions
Present your crispy creations on a rustic wooden board or bright white platter to highlight golden hues. Garnish with fresh herbs such as chopped parsley or cilantro for color contrast and brightness. A wedge of lemon or a zesty dipping sauce-like spicy aioli or soy-ginger glaze-compliments the texture and adds a burst of flavor, inviting guests to savor each crispy bite.
| Nutrient | Per Serving |
|---|---|
| Calories | 320 kcal |
| Protein | 28 g |
| Carbohydrates | 18 g |
| Fat | 14 g |
For more insights on starch science and mastering your culinary techniques, explore our Ultimate Guide to Frying. Additionally, expert resources on starch properties are available at USDA Agricultural Research Service.

Q&A
Q&A: Crispy Science – Testing Starches for Perfect Frying Results
Q1: Why does starch matter when it comes to frying?
A1: Starch is the unsung hero behind that coveted crispy crust and tender interior. When fried, starches gelatinize and then harden, creating the crispy texture we crave. But not all starches are created equal-different types behave uniquely under heat and oil, influencing the crunch, color, and moisture retention of fried foods.
Q2: What types of starches are commonly tested in frying?
A2: The big players are potato starch, cornstarch, tapioca starch, and rice starch. Each starch has its own molecular makeup and granule size, which means they interact with oil and moisture differently. Potato starch, for example, tends to yield a light, airy crunch, while cornstarch often produces a denser crisp.
Q3: How do starch granules affect frying performance?
A3: Think of starch granules as tiny, microscopic balloons. When exposed to hot oil, they swell, rupture, and form a matrix that traps moisture and oil. The size and shape of these granules influence how quickly they absorb oil and how crisp the final result will be-the smaller and more uniform, the better the fry!
Q4: Can mixing starches improve frying results?
A4: Absolutely! Combining starches can harness the strengths of each. For instance, a blend of potato and tapioca starch can create a crust that’s both crispy and resilient, holding up well to sauces or dips without sogginess. It’s basically starch synergy for the perfect fry.
Q5: Does the starch coating affect oil absorption?
A5: Yes, the starch layer acts like a shield, regulating oil uptake. A well-gelatinized starch crust can reduce oil penetration, making your fries or chicken less greasy yet still crispy. But too thin or uneven a coating might soak up excess oil, leading to a soggy bite.
Q6: Are there any experimental tips to optimize starch use in frying?
A6: Experiment with starch concentration, moisture levels, and blanching techniques. For example, soaking potato slices in cold water before frying removes excess surface starch, resulting in a crispier finish. Also, adjusting frying temperature and oil quality can amplify the starch’s crispy magic.
Q7: How does frying temperature interact with starch properties?
A7: Temperature is the starch’s catalytic partner. At optimal frying temps (usually around 350-375°F), starch granules gelatinize swiftly, creating a robust and crunchy crust. Too low, and the starch won’t crisp properly; too high, and it can burn before fully gelatinizing, yielding a bitter, charred outcome.
Q8: What’s the final takeaway for home cooks eager to master crispy frying?
A8: Understanding starch is your secret weapon! Play around with different starches or combinations for your batter or coating, control moisture through proper prepping, and fry at just the right temperature. With these tips, every bite will sing-a perfect harmony of crunch and tenderness!
Concluding Remarks
As the golden crusts of perfectly fried foods continue to captivate our taste buds, understanding the science behind starches becomes an essential step in culinary mastery. From the humble potato to exotic root vegetables, each starch carries unique properties that influence texture, browning, and crunch. By harnessing the crispy science uncovered through careful testing, home cooks and professional chefs alike can elevate their frying game-achieving that coveted balance between crunch and tenderness every time. So next time you reach for the fryer, remember: the secret to perfection lies not just in heat or oil, but in the very starch that starts it all. Happy frying!
Recipes Are Not Rigid Rules, But Guides: Unlocking Culinary Creativity
Recipes are not rigid rules, but guides that invite you to explore your kitchen with confidence and joy. This mindset transforms cooking from a mechanical task into an artful experiment, where swapping ingredients and adjusting methods leads to dishes uniquely yours. Whether you’re a seasoned cook or just starting out, embracing this flexibility empowers you to tailor flavors and textures to your taste while discovering delightful surprises along the way.
Prep and Cook Time
Prep: 15 minutes | Cook: 25 minutes | Total: 40 minutes
Yield
Serves 4 generously
Difficulty Level
Medium – perfect for adventurous home cooks ready to experiment
Ingredients
- 1 cup all-purpose flour, sifted (can substitute with whole wheat flour for nuttier flavor)
- 2 large eggs, beaten (or flax eggs for vegan alternative)
- 1/2 cup milk (dairy or plant-based depending on preference)
- 1 tablespoon olive oil (room temperature)
- 1 teaspoon baking powder
- 1/2 teaspoon salt
- 1 teaspoon vanilla extract (optional for sweeter profiles)
- 1 cup fresh berries or chopped fruit (fresh or frozen works well)
- 2 tablespoons sugar (adjust based on sweetness of fruit)
Instructions
- Preheat your oven to 375°F (190°C). Grease a baking dish or line with parchment paper for easy cleanup.
- In a large bowl, whisk together the flour, baking powder, salt, and sugar, ensuring even distribution of dry ingredients.
- Make a well in the center, then add the beaten eggs, milk, olive oil, and vanilla extract. Stir gently until just combined – a few lumps are fine and keep texture light.
- Fold in the fresh berries or chosen fruit, gently coating them with batter to prevent sinking during baking.
- Pour the mixture into the prepared baking dish and spread evenly with a spatula to create a uniform layer.
- Bake for 20-25 minutes or until the top is golden and a toothpick inserted in the center comes out clean.
- Remove from the oven and allow to cool slightly before serving – this lets flavors meld and texture set beautifully.
Chef’s Notes: Tips for Success
- Ingredient substitutions: Try swapping milk for almond or oat milk to embrace plant-based options while adding subtle nutty notes. Use applesauce or mashed banana as a natural sweetener and binder.
- Adjusting cooking times: If using denser flours like whole wheat, extend baking by 5 minutes to ensure thorough cooking. For smaller portions, reduce bake time accordingly.
- Flavor tailoring: Incorporate fresh herbs like rosemary or thyme for savory variations, or mix in citrus zest for a bright, fragrant twist.
- Experiment with textures: Add chopped nuts or seeds for crunch, or swirl in yogurt or cream cheese to create pockets of creamy richness.
- Make-ahead option: Prepare batter the night before and refrigerate; give it a gentle stir before baking for a freshly baked taste anytime.
Serving Suggestions
This versatile dish shines when served warm, topped with a dollop of homemade whipped cream or a drizzle of honey or maple syrup. Garnish with additional fresh berries, a sprinkle of powdered sugar, or chopped toasted nuts for visual appeal and extra flavor dimension. Pair it with a crisp green salad for a light brunch or alongside a cup of tea for an indulgent afternoon treat.
| Nutrient | Per Serving |
|---|---|
| Calories | 320 kcal |
| Protein | 9 g |
| Carbohydrates | 45 g |
| Fat | 8 g |

To dive deeper into ingredient substitutions and culinary creativity, visit Serious Eats substitution guide. Looking to experiment with textures? Check out our related article on baking textures for more inspiration.
Q&A
Q&A: Myth Busted – Recipes Are Not Rigid Rules, But Guides
Q1: Are recipes meant to be followed exactly as written?
A1: Not at all! Think of recipes more like treasure maps than strict commandments. They provide directions and ingredients to get you close to the treasure (a delicious dish), but your personal touch and creativity are the true X that marks the spot.
Q2: Why do people believe recipes have to be precise?
A2: Many associate recipes with baking science-where measurements can be critical-and assume all cooking follows the same exactness. Plus, beginner cooks often seek certainty. But in reality, cooking is an art form that thrives on intuition and experimentation.
Q3: How can I confidently deviate from a recipe?
A3: Start small! Swap one ingredient for something you prefer, adjust seasoning to taste, or experiment with cooking times and methods. Cooking is a dialogue between you and your ingredients, not a test with a strict answer key.
Q4: What benefits come from treating recipes as guides rather than rules?
A4: Freedom to innovate, a better understanding of flavors, and often tastier results tailored to your palate. Plus, it makes cooking more fun and less stressful-because mistakes become opportunities, not setbacks.
Q5: Isn’t there a risk of “ruining” a dish without a recipe?
A5: Risks exist when you disregard too many fundamental techniques or proportions, but even then, “ruined” dishes often lead to unexpected discoveries. Every great chef’s journey is paved with both flops and epiphanies.
Q6: How does this mindset affect experienced versus novice cooks?
A6: Experienced cooks naturally adapt and improvise recipes, building on knowledge and intuition. Novices can benefit from understanding that recipes are starting points-not finish lines-encouraging confidence to try new things and learn through experience.
Q7: Can all recipes be flexible, or are some exceptions?
A7: Some recipes, especially in baking (think soufflés or certain pastries), demand precision for chemical reactions to work properly. But even then, small tweaks can be made over time once you understand the basics.
Q8: What’s the takeaway message about recipes and cooking?
A8: Recipes are your loyal guides-pointing the way, sharing wisdom, and sparking inspiration. But you are the chef-author of your kitchen adventure. Embrace flexibility, trust your senses, and cook with curiosity. After all, the best recipes are the ones written by you.
The Way Forward
In the grand kitchen of creativity, recipes serve not as strict commandments but as helpful maps-inviting you to explore, experiment, and make each dish uniquely your own. By shedding the notion that recipes are rigid rules, we open the door to culinary freedom, where intuition and imagination blend into every bite. So next time you find yourself stirring a pot or whisking a batter, remember: the recipe is just the beginning. The real masterpiece comes from your willingness to play, adapt, and savor the journey. Bon appétit to breaking molds and crafting flavors that tell your story!
Unlocking Flavor through the art and science of marination transforms ordinary proteins into culinary masterpieces bursting with depth and complexity. Understanding how acids, oils, enzymes, and aromatics interact with different foods allows you to tailor each marinade specifically for maximum flavor infusion. Whether infusing a tender chicken breast or bold flank steak, the secret lies not only in the ingredients but also in the timing and technique you employ.
Prep and Cook Time
- Preparation Time: 15 minutes
- Marination Time: 30 minutes to 24 hours (depending on protein)
- Cooking Time: 10-30 minutes (varies by cooking method)
Yield
Serves 4 generously
Difficulty Level
Medium – requires some planning for marination timing but easy to execute
Ingredients
- 1/2 cup extra virgin olive oil
- 1/4 cup fresh lemon juice (acid for tenderizing)
- 3 cloves garlic, minced
- 2 tablespoons soy sauce (adds umami depth)
- 1 tablespoon honey (balances acidity with sweetness)
- 1 teaspoon smoked paprika
- 1 teaspoon freshly ground black pepper
- 1 teaspoon sea salt
- 1 tablespoon fresh chopped rosemary or thyme
- Proteins of choice: chicken breasts, flank steak, tofu, or fish fillets
Instructions
- Combine marinade ingredients: In a medium bowl, whisk together olive oil, lemon juice, garlic, soy sauce, honey, paprika, black pepper, and salt until emulsified. Stir in fresh herbs last to preserve aroma.
- Prepare proteins: Pat dry your choice of protein to ensure marinade clings properly. Lightly score thicker cuts of meat for deeper infusion.
- Marinate: Place proteins in a resealable bag or shallow dish and pour marinade over. Massage gently to coat evenly. Seal and refrigerate according to timing below:
- Timing tips for proteins:
- Chicken breasts: 1-4 hours for optimal juiciness
- Flank steak: 6-12 hours for deep flavor and tenderness
- Firm fish (salmon, tuna): 30 minutes to 1 hour to avoid breakdown
- Tofu: 30 minutes to 2 hours to absorb without becoming mushy
- Cook: Remove from marinade and let excess drip off. Grill, pan-sear, or bake according to your preference until cooked through and flavorful. Use medium-high heat for caramelized edges.
- Rest and serve: Allow cooked proteins to rest for 5 minutes to redistribute juices before slicing.
Tips for Success: Balancing Patience and Practicality
- Use acidic ingredients like lemon juice or vinegar thoughtfully: They break down proteins but too long can make textures mushy.
- Oils and herbs protect and add complexity: They slow acid’s over-tenderizing effect and infuse fragrant layers.
- Adjust marination times based on thickness: Thin fish needs shorter marinating; dense beef benefits from longer periods up to overnight.
- Marinate in the refrigerator: Food safety and flavor preservation go hand in hand.
- Make ahead and freeze: Marinate proteins overnight and freeze in marinade to enhance both convenience and intensity.
Serving Suggestions
Present your marinated masterpiece atop a bed of fluffy jasmine rice or seasoned quinoa. Garnish with freshly chopped herbs, a drizzle of high-quality olive oil, and a wedge of lemon or lime. For a colorful finish, scatter toasted sesame seeds or a spoonful of vibrant chimichurri sauce to elevate textures and tastes. Pair with roasted seasonal vegetables or a crisp green salad to balance richness.

| Nutrition | Per Serving |
|---|---|
| Calories | 320 |
| Protein | 28g |
| Carbohydrates | 6g |
| Fat | 18g |
Explore more marinating techniques for grilling success and deepen your culinary prowess. For an authoritative dive into food chemistry and safe marinating practices, visit USDA Food Safety and Inspection Service.
Q&A
Q&A: Unlocking Flavor – How Marinating Time Transforms Taste
Q1: What exactly happens to food during marinating?
A1: Marinating is like giving your food a flavorful hug. As it soaks in the marinade-a blend of acids, oils, herbs, and spices-the ingredients begin to break down and absorb those vibrant flavors. Acids tenderize the protein while the aromatic components infuse their essence, transforming a simple dish into a taste sensation.
Q2: How important is the duration of marinating?
A2: Time is flavor’s best friend! The longer food lounges in its marinade, the deeper and more pronounced the taste becomes. However, it’s a delicate dance-too short, and the flavors barely sneak in; too long, especially with acidic marinades, and the texture can become mushy or overly sour. Finding the sweet spot for each ingredient is key.
Q3: Can all foods be marinated for the same length of time?
A3: Not quite. Different foods have varying textures and porousness. For example, tender seafood may only need 15-30 minutes, while tougher cuts of beef or chicken shine after several hours or even overnight. Vegetables typically require less time, as their structure absorbs flavors quicker but can become watery if over-marinated.
Q4: Does the type of marinade affect how long it should be applied?
A4: Absolutely! Acid-heavy marinades (like lemon juice or vinegar) work quickly but can “cook” delicate proteins if left too long. Oil-based or herb-infused marinades might take longer to impart flavor but are gentler on the texture. The marinade’s composition and the ingredient’s nature guide marinating time.
Q5: What are some tips for mastering marinating time at home?
A5: First, consider the food’s density and the marinade’s acidity. Keep marinating times in check-think of it as flavor layering rather than a sprint. Always marinate in the refrigerator to keep things safe and fresh, and use a non-reactive container like glass or stainless steel. Experiment with timing in small batches to find your perfect flavor balance.
Q6: Can marinating time impact the nutritional value of food?
A6: While marinating is primarily about flavor and texture, it can slightly alter nutritional profiles. Acidic marinades can break down some proteins, and antioxidant-rich herbs can add nutritional perks. Just be cautious with sugar-heavy marinades, which might add extra calories.
Q7: Is marinating the only way to boost flavor, or can marinating time be combined with other techniques?
A7: Marinating is just one player in the flavor game. Combining marinating with techniques like grilling, roasting, or searing can create complex, multi-dimensional tastes. Marinating enhances the inside; cooking methods develop a delicious, caramelized crust or smoky finish-together, they unlock flavor magic.
Unlocking the power of marinating time invites you to become part chemist, part artist in the kitchen-transforming every bite into a vibrant, flavor-packed experience!
Concluding Remarks
As the final minutes tick away, remember that marinating is more than just a step-it’s a journey of flavor waiting to unfold. Whether you’re dipping a quick 30 minutes or letting your dish luxuriate overnight, the time your ingredients spend soaking in spices, acids, and herbs can unlock a world of taste previously unexplored. So next time you stand before your cutting board and a bowl of marinade, think of it not as waiting, but as setting the stage. Because when it comes to flavor, patience isn’t just a virtue-it’s the secret ingredient that transforms every bite into a masterpiece.
Crafting Culinary Gold begins with understanding how each ingredient and technique works together to elevate your dishes into memorable experiences. Imagine a simple roasted chicken transforming into a feast that dances on the palate through vibrant layering of flavors, thoughtful ingredient swaps, and precise textures. This recipe embraces the artistry of ingredient mastery and culinary balance, inspiring you to wield substitutions and harmonize components for dishes that tell their own savory story.
Prep and Cook Time
Preparation: 20 minutes
Cooking: 1 hour 15 minutes
Total: 1 hour 35 minutes
Yield
Serves 6 hearty portions
Difficulty Level
Medium – ideal for those ready to experiment with flavor layers and texture balance
Ingredients
- 1 whole chicken (about 4 lbs), patted dry
- 2 tbsp olive oil (preferably extra virgin)
- 1 lemon, zested and quartered
- 4 garlic cloves, minced
- 2 tsp smoked paprika
- 1 tsp ground cumin
- 1 tbsp fresh thyme leaves, chopped
- Salt – 1½ tbsp coarse sea salt, divided
- Freshly ground black pepper – 1 tsp
- 1 small onion, quartered
- 1 cup low-sodium chicken broth
- Optional garnish: chopped fresh parsley and lemon wedges
- Ingredient substitution options:
- For olive oil: avocado or walnut oil to add unique nutty notes
- For smoked paprika: chipotle powder or sweet paprika for either smokiness or subtle sweetness
Instructions
- Preheat your oven to 425°F (220°C).
- Prepare the chicken skin by gently loosening it with your fingers to allow the herb and seasoning mixture to permeate beneath – this step boosts flavor absorption.
- Combine the olive oil, lemon zest, minced garlic, smoked paprika, cumin, thyme, 1 tbsp salt, and black pepper in a small bowl. Rub this mixture liberally all over the chicken and under the skin for a bold flavor infusion.
- Place the quartered lemon and onion inside the chicken cavity to add moisture and fragrant aromatics during roasting.
- Truss the chicken legs with kitchen twine to promote even cooking and maintain a beautiful shape.
- Transfer chicken to a roasting pan or oven-safe skillet.
- Roast the chicken for 15 minutes at high heat to crisp the skin, then reduce temperature to 350°F (175°C) and cook for another 45-55 minutes, basting occasionally with the pan juices to maintain juiciness.
- Check doneness by inserting a meat thermometer into the thickest part of the thigh; it should read 165°F (74°C).
- Remove chicken from the oven and let it rest for 15 minutes on a carving board. Resting allows juices to redistribute, ensuring moist and tender meat.
- Carve and serve, garnished with freshly chopped parsley and lemon wedges for a pop of color and brightness.
Tips for Success
- Unlock unique twists by substituting smoked paprika with a pinch of garam masala or za’atar to explore Middle Eastern flavor profiles.
- Keep the chicken skin dry before roasting for a beautifully crispy finish – pat it firmly with paper towels.
- Make-ahead magic: Marinate the chicken in the seasoning mixture overnight to deepen flavor complexity.
- If you prefer a spicier profile, add a dash of cayenne pepper or fresh chili flakes to the rub.
- For complementary textures, serve alongside a cooling cucumber-yogurt salad or crisp roasted root vegetables.
Serving Suggestions
Plate this roasted chicken with a side of vibrant quinoa salad tossed with cherry tomatoes and fresh herbs to contrast the warm, smoky flavors. Garnish with lemon wedges and a sprinkle of parsley to invigorate the plate visually and aromatically. Drizzle the pan sauce over the carved chicken for an irresistible, glossy finish. Pair with a crisp white wine or sparkling mineral water with lemon to refresh the palate.

| Nutritional Information (per serving) | Calories | Protein (g) | Carbs (g) | Fat (g) |
|---|---|---|---|---|
| Roasted Herbed Chicken | 380 | 45 | 2 | 18 |
For more insights on ingredient experimentation and precise recipe testing, explore our Advanced Culinary Techniques guide. For science-backed flavor compatibility, visit ScienceDaily’s Food Flavor Study.
Q&A
Q&A: Crafting Culinary Gold – Experiment Your Way to Perfect Recipes
Q1: What does “crafting culinary gold” really mean?
A1: Crafting culinary gold is the art of transforming ordinary ingredients into extraordinary dishes. It’s about elevating recipes through creativity, precision, and a touch of daring experimentation, turning everyday meals into unforgettable experiences.
Q2: Why is experimentation important in cooking?
A2: Experimentation is the secret sauce of innovation in the kitchen. It invites exploration, encourages breaking rules, and helps discover unique flavor combinations and techniques. Without experimentation, culinary creativity would be stuck in a loop of repetition.
Q3: How can beginners start experimenting with recipes?
A3: Start small. Swap one ingredient at a time, tweak cooking times, or play with seasoning levels. Keep notes on what works and what doesn’t. Remember, every “mistake” is a stepping stone to your perfect recipe.
Q4: What are some risks involved in experimenting with recipes, and how can they be managed?
A4: Risks include flavor clashes, texture mismatches, or overly complex dishes that lose their essence. To manage these risks, balance creativity with knowledge-understand basic flavor profiles and cooking principles. Use intuition but also rely on taste tests along the way.
Q5: Can following recipes strictly limit creativity?
A5: Absolutely-but recipes are also invaluable guides. Consider them as starting points rather than rules etched in stone. Use them to build confidence before venturing into your own culinary experiments, reinventing dishes based on your preferences.
Q6: How does one know when a recipe is “perfect”?
A6: Perfection in cooking is subjective and personal. A recipe is perfect when it excites your palate, satisfies nutritional needs, suits the occasion, and reflects your culinary voice. It’s the harmony between taste, texture, and presentation that resonates with you and your diners.
Q7: What role do tools and ingredients play in culinary experimentation?
A7: Tools and ingredients are your playground. Quality ingredients inspire flavor adventures, while versatile tools enable precise technique and creative presentation. Experimenting with new gadgets can open doors to textures and methods you never imagined.
Q8: How can chefs balance tradition and innovation?
A8: Embrace the roots of classic recipes while adding your twist-be it through ingredient substitutions, modern plating, or mixing culinary cultures. Innovate with respect, honoring tradition while invigorating dishes with fresh energy.
Q9: Can experimenting with recipes improve cooking skills?
A9: Undoubtedly. Experimentation sharpens your palate, hones intuition, and builds problem-solving skills. Each trial deepens your understanding of how ingredients interact and how heat and timing affect flavors and texture.
Q10: What’s the best mindset for experimenting in the kitchen?
A10: Cultivate curiosity, patience, and fearlessness. View the kitchen as a laboratory and yourself as an alchemist. Celebrate surprises, embrace failures, and constantly refine until your recipe gleams with culinary gold.
Key Takeaways
As you embark on your own culinary adventures, remember that each experiment in the kitchen is a step closer to your perfect recipe – a unique masterpiece crafted by your own hands and tastes. Embrace the unexpected flavors, the joyful tweaks, and even the occasional mishaps, for they are the alchemy that transforms simple ingredients into golden delights. In the grand tapestry of cooking, your creativity is the secret ingredient that turns every dish into a story worth savoring. So, don your apron, trust your instincts, and let the magic of culinary experimentation lead you to your next great creation. Happy cooking!