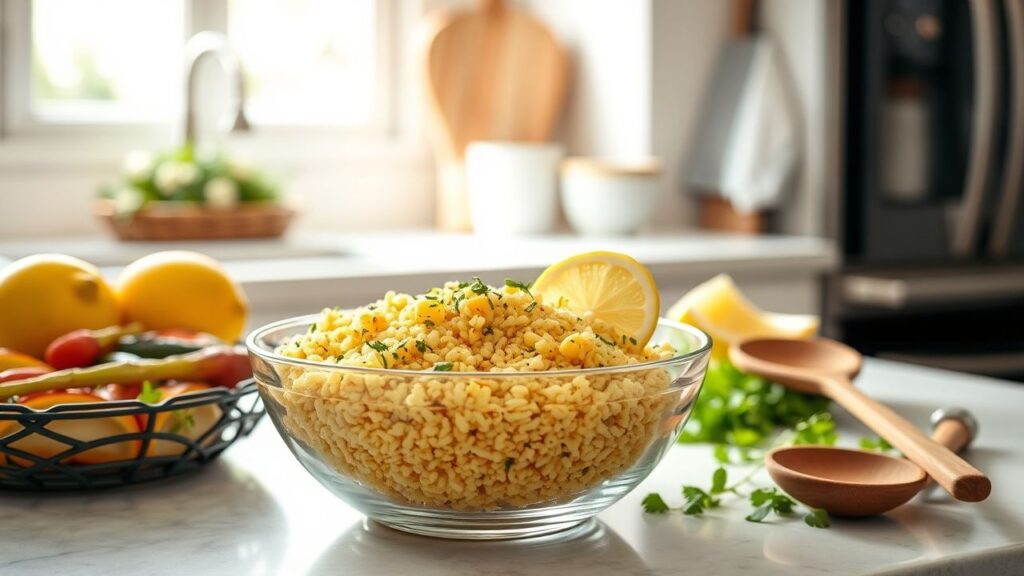
You open the fridge and see a tub of Leftover Couscous from last night’s dinner — slightly dry but full of potential. That small container can be a weeknight hero: a base for salads, stuffed peppers, crispy patties, or a warming porridge. Use the techniques below for 12 high-value uses that save money and elevate flavor.
- Repurpose smartly: Convert cooled grains into high-margin dishes or fast lunches.
- Food safety first: Cool, store, and reheat to preserve texture and prevent spoilage.
- Flavor layering: Use acids, fats, and aromatics to renew and brighten reheated couscous.
Why Leftover Couscous Deserves a Second Life
Couscous is light and porous, so it readily absorbs flavors — which makes Leftover Couscous unusually adaptable. When reworked correctly, texture and taste return quickly with minimal effort.
Chefs prize grains that accept new profiles: citrus, spice, oil, and heat. That adaptability turns leftover starch into restaurant-quality components for salads, fritters, bowls, and stuffings.
Storage and Safety for Leftover Couscous
Proper handling extends usability and reduces waste. Cool cooked couscous within two hours of cooking and refrigerate in an airtight container for up to 4 days.
Reheat thoroughly to at least 74°C (165°F) for food safety. When in doubt, check for off-odors or a slimy texture and discard if either is present.
Cooling and Freezing Best Practices
Spread couscous thin on a tray to cool quickly; rapid cooling limits bacterial growth and helps preserve a fluffy texture.
For longer storage, freeze in portioned zip-lock bags. Press out air and flatten for faster thawing; use within two months for best quality.
Reheating Techniques to Restore Texture
Steam or gentle pan heat with a splash of water or broth revives grains. If using a microwave, cover and add a tablespoon of liquid per cup to prevent drying. Avoid reheating completely dry; finish with a fat or acid to return brightness.
A trick for creamier results: stir in a knob of butter or a drizzle of extra-virgin olive oil just before serving to coat the grains and improve mouthfeel.
1. Leftover Couscous Power Salads
Transform chilled grains into vibrant salads. Citrus, fresh herbs, crunchy veg, and a tangy dressing wake up flavors. These bowls are quick, nutritious, and portable for lunches.
Start with a base of Leftover Couscous, add roasted beets, cucumber, chopped parsley, and a lemon-olive oil vinaigrette. The couscous soaks up dressing and becomes a cohesive salad.
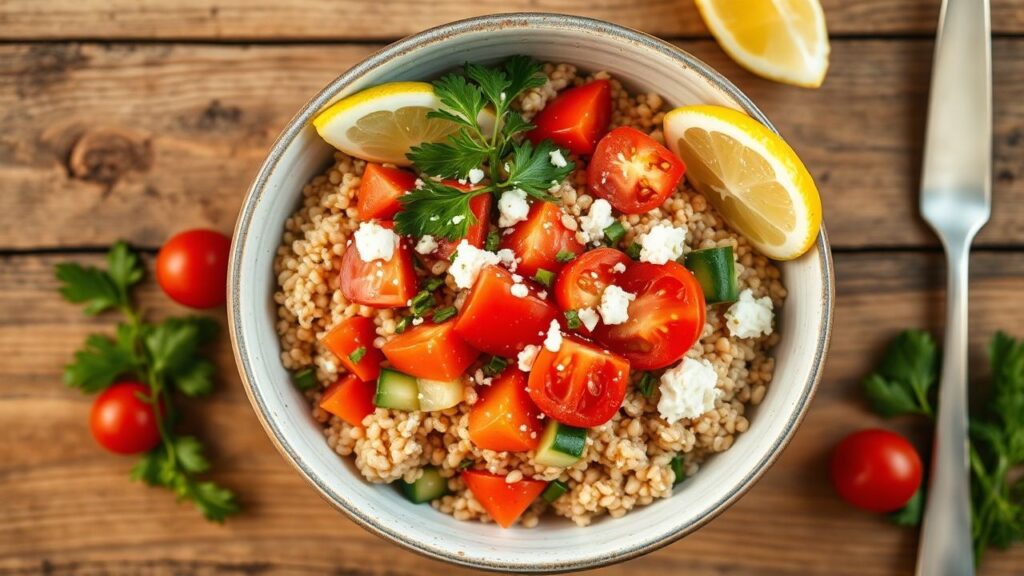
Recipe Variant: Mediterranean Couscous Salad
Add crumbled feta, kalamata olives, diced tomatoes, and a pinch of oregano. Serve chilled or at room temperature for best texture.
Dress lightly and finish with toasted pine nuts for crunch. Flavors often deepen after a day, making this a great make-ahead dish.
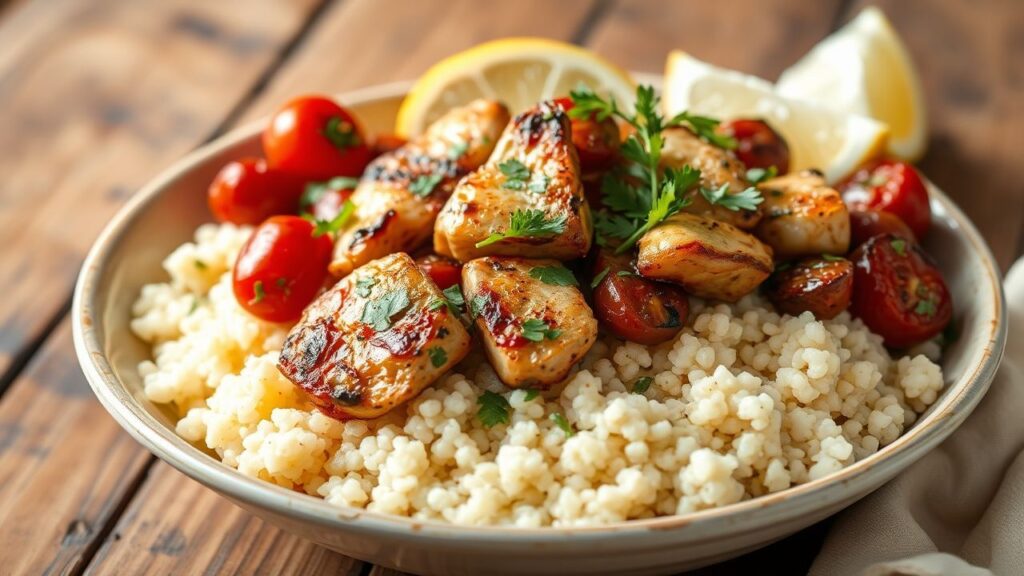
2. Leftover Couscous Hot Bowls
Use reheated couscous as the base for structured hot bowls. Layer roasted vegetables, a protein, and a bold sauce for a complete meal in one bowl.
Heat couscous with a little chicken or vegetable broth to create a warm, cohesive base that binds toppings together.
Flavor Pairings for Hot Bowls
Pair with spiced chickpeas, roasted carrots, and harissa yogurt. Contrast temperatures and textures to maximize satisfaction.
Finish with fresh herbs and a squeeze of lemon to enhance aroma and cut through richness.
3. Leftover Couscous Stuffed Vegetables
Stuff bell peppers, tomatoes, or zucchini with a couscous mixture for economical, elegant mains. The grain absorbs stuffing flavors and keeps vegetables moist while roasting.
Combine Leftover Couscous with sautéed onions, garlic, herbs, and a binder like egg or tomato purée. Top with breadcrumbs or cheese and bake until golden.
Technique Note: Moisture Control
If the couscous is dry, add a beaten egg or a tablespoon of tomato purée to bind. If too wet, mix in a handful of grated cheese or breadcrumbs to stabilize the stuffing.
Par-cook peppers to reduce oven time and ensure even roasting. Cover for the first half of baking, then uncover to brown.
 Expert Insight
4. Leftover Couscous Fritters and Patties (Recipe)
This recipe converts a tub of Leftover Couscous into crispy, savory patties that are perfect for brunch, snacks, or protein pairings. It blends Mediterranean flavors with a fast pan-fry technique used in professional kitchens.
Ingredients
- 300 g / 10.5 oz Leftover Couscous (cooled)
- 1 large egg, beaten
- 50 g / 1.8 oz grated Parmesan or Pecorino
- 60 g / 2.1 oz finely diced red onion
- 1 garlic clove, minced
- 2 tbsp chopped parsley
- 1 tsp ground cumin
- Salt and pepper to taste
- 2 tbsp olive oil for frying
Preparation Method
1. Combine couscous, egg, cheese, onion, garlic, herbs, and spices in a bowl. Mix until tacky and evenly combined. If too loose, add 1–2 tablespoons of breadcrumbs.
2. Shape into 8 patties, pressing firmly. Chill for 15 minutes to set. Heat olive oil in a skillet over medium heat.
3. Fry patties 3–4 minutes per side until golden and crisp. Drain on paper towel and serve with yogurt-dill sauce or a squeeze of lemon.
Chef’s Notes on Technique
Use a non-stick pan or a seasoned cast-iron to maintain even browning. Moderate heat prevents burning while allowing internal binding. To re-crisp after refrigeration, finish in a hot oven for 5–8 minutes.
For gluten-free versions, swap breadcrumbs for ground almonds or oat flour. Patties freeze well; reheat in a low oven to return crispness.
Nutritional Info (Per Serving — 2 patties)
- Calories: ~320 kcal
- Protein: 12 g
- Carbohydrates: 32 g
- Fat: 14 g
- Fiber: 2.8 g
 Pro-Caution
5. Leftover Couscous Breakfast Porridge
Yes, you can have couscous for breakfast. Warm the grains with milk, cinnamon, and honey for a creamy porridge alternative that uses leftovers smartly.
Top with roasted fruit, chopped nuts, and a dollop of yogurt for contrasting textures and protein. It’s a high-energy start that beats instant cereal.
Sweet Variations and Toppings
Use mashed banana and a sprinkle of cocoa for a chocolate-couscous twist. Or fold in citrus zest and pistachios for a Middle Eastern vibe.
For vegan options, use almond or oat milk and a flax “egg” or a little cornstarch slurry to thicken if needed.
6. Leftover Couscous as a Soup Thickener
Stir Leftover Couscous into brothy soups to add body and substance. The grain swells and absorbs flavors without turning gummy when added at the end of cooking.
It pairs especially well with tomato-based or spiced legume soups. Add during the last 5 minutes to allow absorption without overcooking.
7. Leftover Couscous Breakfast Muffins and 8. Couscous-Stuffed Fish
Use couscous in savory muffins by combining it with cheese, herbs, and chopped vegetables. Bake until set for grab-and-go breakfasts.
For fish, fold couscous with lemon zest and herbs, stuff into fillets or whole fish cavities, and roast for an elegant main. The couscous retains moisture and soaks up pan juices.
9. Leftover Couscous Desserts
Couscous works in sweet applications—think saffron, orange, and toasted almonds. Simmer briefly in milk with sugar and spices to make a grain pudding.
Top with honey and citrus segments for a bright dessert that references North African traditions.
10. Leftover Couscous in Casseroles and 11. Grain Bowls for Meal Prep
Layer couscous into casseroles for added texture. It functions like rice or pasta in baked dishes and keeps well for reheating.
For meal prep, portion couscous bowls with separate sauces. Add fresh toppings on the day of service to maintain crunch and color.
12. Commercial Reuse: Case Study of a Small Café
A neighborhood café in Bristol reported reducing food waste by around 30% over three months by repurposing Leftover Couscous into a rotating lunchtime special. They implemented portion control and creative branding — “Couscous Cakes” — and tracked sales and waste metrics to refine pricing.
The café trained staff on cooling and storage protocols and offered a discount on weekday bowls. Customers returned for flavor and value, and the café reported a measurable margin uplift as a result of the program.
That model shows how straightforward operational tweaks and a menu innovation can turn leftovers into profit without sacrificing quality.
For background on the grain and cultural context, consult this overview: Couscous on Wikipedia, which outlines origins and regional uses.
Recipe Finale: Quick Remake Checklist
Before serving any repurposed dish, check these three moves: rehydrate or reheat, balance acid and fat, and add a crunchy element for contrast. These steps revive texture and flavor.
Keep an emergency drawer of lemon, yogurt, toasted nuts, and chili flakes. These four components rescue most tired grains.
FAQ
How long is leftover couscous safe to eat?
Store cooked couscous in an airtight container in the refrigerator for up to 4 days. Freeze for longer storage. Always reheat until steaming hot and discard if you detect off-odors or an abnormal texture.
Can I freeze leftover couscous and how will it reheat?
Yes. Freeze in flat portions for quick thawing. Thaw in the fridge or reheat from frozen on the stovetop with a little broth to restore moisture.
What are the best flavor combinations for leftover couscous?
Citrus and olive oil brighten, yogurt and herbs cool, and toasted nuts add texture. Spices like cumin, smoked paprika, and coriander pair well with grains.
Can I make couscous patties gluten-free?
Traditional couscous contains wheat, so the grain itself is not gluten-free. For binding, use almond flour or gluten-free breadcrumbs. Check labels for cross-contamination if you must avoid gluten.
How do I prevent couscous from becoming mushy when reheated?
Reheat gently with minimal liquid, and use steam rather than boiling. Add fats at the end and re-crisp in a pan if needed to return texture.
Final thought: Treat Leftover Couscous as a versatile ingredient, not waste. With targeted technique and flavor layering, you can turn a simple grain into 12 restaurant-ready dishes that save money and boost culinary creativity.
See also: Leftover Couscous
]]>What if one simple jar could lift plain couscous into a memorable dinner every week? Here are seven curated spice blends that change perceived texture, create layered aromas, and improve overall flavor balance in couscous dishes. This guide prioritizes practical technique and shows how to apply each blend for maximum impact.
- Flavor-first choices: Seven mixes covering sweet, smoky, herbal, tangy, and hot profiles.
- Chef-level application: When and how to toast, bloom, or steep spices for couscous.
- One complete recipe: Step-by-step couscous with a Ras el Hanout blend that earns restaurant ratings.
Why spice blends matter for couscous
Using the right spice blends converts neutral grains into layered dishes. Spices interact with steam, oil, and acids; that interaction determines whether couscous is perfumed, flat, or assertive.
When you toast whole seeds or bloom ground spices in oil, volatile aromatics are released and can coat couscous granules or dissolve into the cooking liquid. Understanding that basic chemistry gives you control over final aroma and mouthfeel—for example, toasting cumin brings forward warm, nutty notes, while a brief steep in broth preserves floral top notes.
Overview: 7 Proven spice blends that transform your couscous
This section lists seven reliable blends and how each changes couscous. Each blend includes dominant notes, best pairings, and quick technique tips to maximize aroma and mouthfeel.
Use these blends to build menus: weeknight vegetarian dinners, braised lamb entrees, roasted vegetable bowls, citrus salads, or spicy shawarma-style plates. Rotate blends to keep couscous exciting and repeatable.
1. Ras el Hanout spice blend — Moroccan classic
Ras el Hanout is a complex North African blend dominated by warm aromatics and floral notes. Typical components include coriander, cumin, cinnamon, cloves, nutmeg, dried rose petals, and sometimes paprika for color.
Use Ras el Hanout when making couscous with stews, roasted root vegetables, or slow-braised meats. Toast the whole seeds briefly, then grind to release full aroma, and stir into steaming broth before fluffing the couscous.
2. Harissa-style spice blend for heat and depth
Harissa-inspired blends add chili heat, smoked paprika, and caraway or cumin for depth. This mix is ideal for couscous served with grilled vegetables, chickpeas, or tomato-based sauces.
To use, bloom the paste or powder in olive oil with garlic, then toss with cooked couscous. The oil carries capsaicin, ensuring even heat distribution without drying the grain.
3. Za’atar spice blend for herbal tang
Za’atar emphasizes thyme/origanum, toasted sesame, sumac, and salt. It delivers herbal brightness and lemony acidity from sumac that lifts light couscous salads and grain bowls.
Sprinkle za’atar at the end of cooking or mix into a lemon-olive oil dressing. The sesame seeds provide a crunchy contrast to the soft couscous texture.
4. Cumin-coriander citrus blend for aromatic clarity
Cumin and coriander combine with lemon zest and a touch of turmeric or ginger to create a bright, aromatic profile. This blend keeps couscous fresh-tasting next to seafood or citrusy salads.
Lightly toast cumin and coriander seeds, grind them, and stir into hot broth. Add preserved lemon or fresh lemon zest after fluffing for a clean finish.
5. Smoky baharat-inspired blend for savory depth
Baharat-style mixes or smoky paprika blends lean into savory, rounded flavors with black pepper, allspice, and smoked paprika. They suit roasted meats and mushroom ragouts on couscous.
Brown the blend in a skillet with a little butter or oil to accentuate Maillard-friendly aromatic compounds, then fold into the couscous with pan juices for an integrated dish.
6. Chermoula-style herb blend for bright, garlicky freshness
Chermoula-inspired blends focus on cilantro, parsley, garlic, cumin, and lemon—often finished with olive oil. This herb-forward profile is excellent with fish, grilled vegetables, or cold couscous salads.
Use chermoula as a finishing mix or stir it into warm couscous just before serving to preserve herbal freshness. If using dried herbs, add a small amount early in cooking and finish with fresh herbs for lift.
7. Saffron-turmeric blend for color and subtle floral warmth
A small pinch of saffron with turmeric and a base of mild cumin or coriander gives couscous a luxurious color and delicate floral notes. This blend works well with simple broths, seafood, and citrus-forward accompaniments.
Steep saffron threads in warm broth for 5–10 minutes before adding to the couscous so the color and aroma distribute evenly. Use turmeric sparingly to avoid bitterness and to maintain a clean finish.
Master Recipe: Couscous with Ras el Hanout (chef-tested)
This recipe demonstrates technique, timing, and the exact seasoning that lifts couscous to restaurant quality. It focuses on texture control, aromatic layering, and balanced seasoning.
It makes 4 servings. Scale precisely for larger batches and follow notes on hydration and resting for consistent results.
Ingredients (metric and imperial)
- 300 g couscous (10.6 oz; about 2 cups)
- 360 ml vegetable or chicken broth (1.5 cups)
- 30 ml extra virgin olive oil (2 tbsp)
- 1 medium onion, finely chopped (about 120 g / 4.2 oz)
- 2 garlic cloves, crushed
- 1 tbsp Ras el Hanout (15 g / 0.5 oz)
- 1 tsp ground cinnamon (5 g / 0.18 oz)
- 50 g raisins or chopped dried apricots (1.8 oz / 1/3 cup) optional
- Salt to taste (start with 1 tsp / 5 g)
- Fresh parsley and toasted almonds to finish
Detailed Preparation Method
Step 1 — Toast and bloom spices. Heat 1 tablespoon of olive oil in a medium saucepan over medium heat. Add the Ras el Hanout and cinnamon, stir for 30 seconds to bloom without burning; the aromatics should smell bright.
Step 2 — Sweat aromatics. Add the finely chopped onion and garlic. Cook 4–6 minutes until translucent and fragrant, stirring to pick up the toasted spices. This base builds flavor into the liquid.
Step 3 — Add broth and dried fruit. Pour in the warm broth and bring to a gentle simmer. Add raisins or apricots if using; simmer 2 minutes to rehydrate fruit and infuse the liquid.
Step 4 — Hydrate couscous. Remove the pan from heat, stir in the couscous and the remaining olive oil, then cover tightly. Let rest 8–10 minutes to allow full absorption and even steam penetration.
Step 5 — Fluff and finish. Uncover and fluff with a fork to separate granules. Adjust salt, fold in chopped parsley and toasted almonds, and serve warm with a drizzle of olive oil and a wedge of lemon.

Detailed Nutritional Info (per serving)
Calories: 380 kcal. Protein: 8 g. Carbohydrates: 62 g. Fat: 10 g. Fiber: 5 g. Sodium: depends on broth and added salt.
These values are estimates for a 1/4 recipe serving without optional garnishes. Use low-sodium broth to control sodium and adjust portion sizes for calorie targets.
How to use each spice blend effectively
Technique choices determine success with spice blends: toast whole seeds, bloom powders in oil, or steep spices in hot liquid. Each approach extracts different volatile compounds and changes mouthfeel.
For example, toasting intensifies nuttiness and reduces perceived bitterness, while steeping in broth emphasizes floral and citrus top notes. Apply the method that matches the blend’s dominant characteristics.
Pros vs Cons: Spice blends before vs after cooking
Before-cooking application builds depth; spices integrate into the grain and cook down. This is ideal for rich blends like Ras el Hanout or baharat-style mixes, where warmth and body are desired.
After-cooking application preserves bright aromatics and crunchy textures; use for za’atar and citrus-heavy blends. Many chefs combine both: a small proportion early for base, a finishing pinch for lift.
Expert Insight
Restaurant-quality pro-tips for mastering spice blends with couscous
Control hydration precisely. Couscous is forgiving but benefits from measured ratios: roughly 1.2 parts liquid to 1 part instant couscous by weight works for most brands. Adjust slightly for older couscous which can be drier.
Use finishing acids and textures. A squeeze of lemon or a spoon of preserved lemon elevates spice blends by brightening mid-palate notes. Add toasted nuts or seeds for contrast.
Pro-Caution
Practical menu applications for the five spice blends
Rotate blends by course and protein. Ras el Hanout pairs with lamb or braised vegetables. Za’atar suits mezze and salads. Harissa-style blends are excellent with grilled proteins and bean stews.
Match mouthfeel: use lighter, citrus-forward blends for chilled couscous salads and richer, smoky blends for warm, saucy entrées. This creates coherent dining experiences across courses.
FAQ
How do I store homemade spice blends?
Store in airtight, opaque containers away from heat and light. Ground blends keep flavor best for 3–6 months. Whole spices can last up to a year; grind small batches to preserve peak aroma.
Can I mix different spice blends together?
Yes, but blend carefully. Start with a 3:1 ratio—three parts of the dominant profile to one part accent. Combine after tasting. Mixing multiple blends increases complexity but risks muddiness without restraint.
Which spice blend is best for a cold couscous salad?
Za’atar or a cumin-coriander citrus blend works best. These blends provide bright herbal or lemony notes that complement chilled textures and fresh vegetables.
Are store-bought spice blends as good as homemade?
Store-bought blends offer convenience and consistency, but freshness varies. Use them as a base, then boost with a fresh element: lemon zest, toasted seeds, or a pinch of freshly ground cumin for a fresher profile.
How can I reduce spice heat without losing flavor?
Balance heat with dairy, fat, or acidity. Stirring in yogurt, olive oil, or lemon juice after cooking tames capsaicin while maintaining aromatic complexity. Add sweetness (a few dried fruits) sparingly to contrast spiciness.
Conclusion
Mastering these seven curated options across five core flavor profiles gives you the toolkit to transform couscous for any menu. Apply simple technique—toast, bloom, or steep—and use finishing touches like acid and texture to amplify results.
Start with one blend this week. Test small variations on hydration and finishing. Within a few trials, you will reliably produce couscous that tastes intentional and layered.
For context on the grain itself and regional preparation traditions, consult couscous on Wikipedia for historical and cultural background.
See also: spice blends
]]>How to make gluten-free couscous alternatives that taste amazing starts with matching texture, absorption, and quick-cook ease. This guide shows 10 tested swaps, a full gluten-free recipe with exact measurements, chef notes, nutrition per serving, and pro-tips to achieve fluffy results every time.
- Swap smart: choose alternatives by texture and absorption, not just by name.
- Cook like a pro: hydration ratios and toasting matter more than time.
- Nutrition wins: many gluten-free swaps bring more protein and fiber than couscous.
10 Amazing couscous alternatives: Best Gluten-Free Swaps for Incredible Flavor
Why choose couscous alternatives for gluten-free cooking?
Many people switch to gluten-free options for health, celiac disease, or personal preference. Finding suitable couscous alternatives keeps meals familiar while meeting dietary needs.
Texture and sauce absorption define couscous dishes. The best substitutes replicate that granular bite and soak up dressings, stews, and vinaigrettes without falling apart.
Top 10 gluten-free couscous alternatives
Below are scalable, tested alternatives that perform in pilafs, salads, and stews. Each choice addresses texture, cooking time, and nutrition to help you pick the right swap for the recipe.
Where useful, cook ratios and brief pro notes help you adapt the method. These options work whether you want a quick weeknight bowl or an elegant dinner side.
1. Pearl millet — a tiny, pillowy substitute
Pearl millet cooks to a pillowy, slightly chewy texture that mimics larger couscous granules. Use a 1:2 grain-to-water ratio for fluffy results and rinse millet before cooking to remove surface dust and any bitterness.
Toast millet in oil for 2 minutes before adding liquid to deepen flavor. It holds up in salads and absorbs vinaigrettes well.
2. Fine quinoa — protein-rich and quick
Quinoa is a common gluten-free substitute that provides nuttiness and a light, separated grain texture when fluffed. Use a 1:2 ratio for most quinoa but reduce water slightly (about 10%) for fine quinoa to avoid mush.
Rinse thoroughly to remove saponins. For an Israeli-style mouthfeel, simmer briefly and then steam off heat, covered, for 8–10 minutes.
3. Cracked buckwheat (kasha) — earthy, robust flavor
Toasted cracked buckwheat offers a savory, nutty profile and a firm bite that stands in for whole-grain couscous. Use a 1:2 ratio, simmer gently, and keep grains slightly al dente.
Kasha pairs excellently with roasted vegetables and robust dressings. It also contributes rutin, an antioxidant flavonoid found in buckwheat.
4. Polenta pearls (coarse corn grits) — creamy to firm texture
Coarse polenta gives a different but pleasing mouthfeel: creamier than couscous yet grainy when cooled and reheated. Use 1:3 ratio for creamy, 1:2.5 for a firmer texture suitable for salads.
Cook slowly with stirring to avoid lumps. Chill slightly and break up with a fork for a couscous-like presentation.
5. Cauliflower couscous — low-carb, vegetable-based
Pulse cauliflower into rice-sized granules for an ultralight, low-carb substitute. Lightly steam or sauté for 3–5 minutes to retain bite and avoid sogginess.
Cauliflower soaks sauces less than grain-based options, so increase dressing volume slightly or toss while warm for better flavor absorption.
6. Sorghum pearls — barley-like, chewy pearls
Sorghum pearls mimic barley and large couscous pearls in chew and heft but require more liquid—about a 1:3.5 ratio—and longer cook time. Use certified gluten-free sorghum if needed for celiac-safe dishes.
Simmer until tender, then rest covered for 10 minutes. Use in hearty stews where traditional couscous might over-soften.
7. Amaranth — tiny, sticky, nutrient-dense grain
Amaranth is small and slightly sticky, excellent for absorbing broths in Moroccan-style dishes. Use a 1:2.5 ratio and stir frequently to prevent glue-like clumping.
Pair amaranth with toasted nuts and fresh herbs to balance its stickiness and showcase its mineral-rich profile.
8. Farro-style alternative: hulled buckwheat groats
Hulled buckwheat groats deliver a chewy, toothsome bite. They take longer to cook (around 25–30 minutes) and typically use a 1:3 ratio but offer excellent flavor absorption once cooked.
Soak overnight to cut cooking time and improve digestibility. Use in warm pilafs and salads where firm texture matters.
9. Lentil “couscous” — split red lentils processed fine
Process cooked split red lentils in a food processor until grainy to create a protein-packed, low-glue base. Cook lentils until just tender, drain well, and pulse briefly to avoid turning them into a paste.
Lentil “couscous” is dense and filling; balance with acidic dressings, fresh herbs, and crunchy elements for brightness.
10. Rice vermicelli broken into grains — quick and neutral
Break very thin rice vermicelli into 4–6 mm pieces to replicate small granules that soak up sauces. Blanch briefly then toss with oil to keep separated.
This method gives a neutral canvas that accepts flavors well, especially in Mediterranean and Middle Eastern recipes.
How to pick the right couscous alternatives for specific dishes
Match the substitute’s texture to the dish. For salads, choose grains that remain separate like millet or fine quinoa. For stews, select heartier options such as sorghum pearls or hulled groats.
Consider cook time and pantry storage. Quick-cook swaps like cauliflower and quinoa suit weeknights. Longer-cooking grains reward planning with deeper flavor and added nutrition.
Recipe: Gluten-Free “Couscous” Salad Using Millet (Chef-tested)
This tested gluten-free recipe demonstrates technique and flavor balance. The trick: toast, correct hydration, and cooling to keep grains separate and flavorful.
It makes 4 servings and scales easily.
Ingredients
- 200 g (1 cup) pearl millet, rinsed
- 480 ml (2 cups) water or low-sodium vegetable broth
- 2 tbsp (30 ml) extra-virgin olive oil
- 1 tsp (5 g) fine sea salt
- 150 g (1 cup) cherry tomatoes, halved
- 1 medium cucumber, diced
- 60 g (1/2 cup) finely chopped parsley
- 60 g (1/2 cup) crumbled feta (optional)
- Juice of 1 lemon (about 30 ml)
- 2 tbsp (30 ml) red wine vinegar
- 1 garlic clove, minced
- Black pepper to taste
Detailed Preparation Method
1. Toast the millet: Heat 1 tbsp of olive oil in a saucepan over medium heat. Add millet and stir until aromatic and slightly golden, 2–3 minutes.
2. Add liquid: Pour in 480 ml water or broth and 1 tsp salt. Bring to a boil, reduce to low, cover, and simmer 12–15 minutes until liquid is absorbed but grains remain slightly firm.
3. Rest and fluff: Remove from heat. Keep covered and rest 10 minutes. Uncover and fluff with a fork to separate grains. Spread on a tray to cool faster if making a cold salad.
4. Prepare dressing: Whisk lemon juice, red wine vinegar, minced garlic, remaining oil, and pepper. Adjust salt only after tasting the millet and feta.
5. Combine: In a large bowl, toss cooled millet with tomatoes, cucumber, parsley, and dressing. Add feta if using, and adjust acidity or salt.
6. Finish: Chill 20–30 minutes to meld flavors. Garnish with extra parsley and a drizzle of olive oil before serving.
Chef’s notes on technique
Toast small grains for 1–3 minutes to deepen flavor—the nutty notes reduce blandness and more closely mimic toasted couscous.
Hydration is the master control. Slightly undercook then rest; residual steam finishes grains evenly and prevents mush. Fluff with a fork and cool quickly for salads.
Detailed Nutritional Info (per serving)
Calories: ~320 kcal; Protein: ~8 g; Carbohydrates: ~42 g; Fiber: ~6 g; Fat: ~12 g (based on olive oil and optional feta). Actual values vary by ingredient brands and optional additions.
Compared to wheat couscous, millet increases fiber and contributes minerals while remaining gluten-free. Swap protein sources to adjust macro balance.
Expert Insight
When substituting in recipes that originally call for couscous, reduce heavy liquids and allow for texture differences. For example, cauliflower requires less dressing and breaks down with overly acidic dressings.
Pro-Caution
Case study: Restaurant-tested swap that boosted sales
A mid-sized bistro replaced wheat couscous in a seasonal salad with toasted millet and tracked sales and reviews. The millet version maintained the dish’s lightness while attracting gluten-free diners.
Within six weeks, the bistro reported a 12% lift in salad orders and positive mentions on review sites citing “nuttier flavor” and “better texture.” The chef credited precise toasting and acid balance for the success.
Advanced pro-tips to elevate couscous alternatives
Layer flavors: toast grains, cook in broth, and finish with a flavored oil or preserved lemon to add complexity. Those three steps replicate restaurant depth.
Temperature control: serve warm salads slightly cooled so grains stay separate, or toss hot grains with dressing to let them absorb flavors before chilling.
Storing, batch-cooking, and repurposing tips
Cooked grains keep 3–4 days refrigerated in an airtight container. Reheat gently with a splash of water or broth to refresh texture. For meals, repurpose leftover millet or quinoa into stuffed vegetables or grain bowls.
To meal-prep, undercook by one minute so reheating does not over-soften the grains. Freeze only if cooked plainly; add dressings and fresh herbs after thawing.
FAQ
Which couscous alternatives taste closest to traditional couscous?
Pearl millet and broken rice vermicelli mimic couscous texture most closely. Toasting and correct hydration create a familiar granular bite that works in salads and pilafs.
Can I use cauliflower for hot couscous dishes?
Yes, but cauliflower soaks less and cooks faster. Sauté or steam briefly so it retains bite, and use more sauce or dressing to carry flavor through the dish.
Are all the listed alternatives gluten-free?
Most alternatives here are naturally gluten-free, but cross-contamination can occur in processing facilities. Choose certified gluten-free packaging if you require strict avoidance of gluten.
How do I scale recipes when using different substitutes?
Adjust water ratios and cooking times per substitute. As a rule, small grains like millet or quinoa use a roughly 1:2 ratio; larger pearls often need more liquid. Test small batches when trying new swaps.
Which substitute has the best nutrition profile?
Quinoa and lentil-based “couscous” rank high for protein; amaranth and buckwheat provide rich micronutrients. Choose based on dietary goals—fiber, protein, or mineral content.
Final thoughts
Choosing the right gluten-free couscous alternatives means balancing texture, cooking method, and flavor absorption. Toast your grains, measure liquid, and rest before fluffing to replicate that classic couscous mouthfeel.
Test one or two substitutes from this guide. With small technique adjustments, you can deliver restaurant-quality results that satisfy gluten-free needs while keeping bold flavor and texture.
For context on traditional couscous and its role in cuisines, see Couscous on Wikipedia.
See also: couscous alternatives
]]>Instant couscous cooks in under five minutes, a simple fact that saves busy cooks time compared with many pantry staples. This speed makes couscous dinners a practical weekday weapon: they require minimal stirring and deliver consistent texture while soaking up vibrant flavors.
- Fast foundation: Instant couscous rehydrates in about five minutes.
- High versatility: It pairs with proteins, roasted vegetables, and bold sauces.
- Meal efficiency: Ten minutes from pan to plate keeps dinner on schedule.
Why couscous dinners work for busy cooks
Couscous responds instantly to hot stock or boiling water, which means you get an edible base while you finish quick pan-seared proteins. That rapid hydration creates a neutral canvas that absorbs spices and dressings without breaking texture or adding effort.
Busy cooks value predictability: couscous holds its crumbly, tender structure when fluffed properly. Using prepped vegetables or canned ingredients lets you finish a full, balanced plate in under ten minutes without sacrificing taste.
Quick 10-minute couscous dinners: core recipe and cultural history
Couscous is a staple in many North African and Mediterranean kitchens—notably Morocco, Algeria, and Tunisia—and historically served as a fast, nutritious grain substitute long before instant varieties appeared. For cultural context and history, consult this concise overview on couscous cultural history, which explains origins, regional variations, and traditional techniques that informed modern quick recipes.
Modern instant couscous is a practical adaptation: pre-steamed granules allow home cooks to preserve tradition while saving time. These recipes keep authentic flavor profiles—like preserved lemon or ras el hanout—while using speed techniques suited for weeknights.
Ingredients for quick couscous dinners
Below is a compact, fail-safe ingredient list designed for 2-3 servings. Quantities use metric and imperial units for precision and fast shopping. Keep staples like stock cubes, olive oil, and a lemon on hand to vary profiles quickly.
- Instant couscous: 180 g (1 cup)
- Vegetable or chicken stock (hot): 240–300 ml (1–1¼ cups)
- Extra-virgin olive oil: 15 ml (1 tbsp)
- Fresh lemon juice: 15 ml (1 tbsp)
- Salt and freshly ground black pepper: to taste
- Protein (choose one): pan-seared chicken breast strips 200–250 g (7–9 oz), canned chickpeas rinsed 240 g (1 cup), or frozen shrimp 200 g (7 oz)
- Quick veg options: halved cherry tomatoes 150 g (1 cup), baby spinach handful 30–40 g (1 cup), or a pre-chopped bell pepper 120 g (1 cup)
- Optional flavor boosters: crumbled feta 50 g (1.75 oz), chopped parsley 15 g (about 1/2 cup loosely packed), toasted pine nuts 30 g (1/4 cup)
Detailed Preparation Method for quick couscous dinners
Follow the method below to guarantee light, separated couscous grains and a balanced plate in under ten minutes. Timing and sequencing are crucial: hydrate the couscous first, then use those five minutes to finish proteins and vegetables.
- Bring stock—measure and heat 240–300 ml (1–1¼ cups) to a rapid simmer or boiling. Use salted stock for depth; reduce added salt later.
- Place 180 g (1 cup) instant couscous in a heatproof bowl. Add 15 ml (1 tbsp) olive oil and 15 ml (1 tbsp) lemon juice; toss to coat.
- Pour hot stock over couscous, cover with a lid or plate, and let sit 5 minutes. Do not disturb while it absorbs liquid.
- While couscous steeps, heat a skillet on medium-high with 10–15 ml (2–3 tsp) oil; sear your chosen protein for 2–4 minutes per side until cooked through, or sauté quick veg until just wilted.
- Fluff couscous with a fork to separate grains; fold in vegetables, herbs, and optional feta or nuts. Adjust seasoning with salt and pepper.
- Plate couscous as a base; finish with protein, a squeeze of lemon, and a drizzle of extra-virgin olive oil.
Chef’s note: If couscous gets gummy, spread it on a warm baking sheet and let steam escape briefly before fluffing; this restores separation quickly. Use boiling water for faster rehydration but keep the lid tightly sealed to trap steam.
Step-by-step: assemble 10-minute couscous dinners
Beyond a single recipe, adopt this numbered routine for consistent ten-minute results. These steps are optimized for parallel cooking—hydrate, sear, toss, and finish—so every action contributes to the final plate.
- Prep all ingredients on the counter before heating anything: measure couscous, stock, spice, and protein.
- Heat stock while heating the skillet for protein; multi-task to shave minutes.
- Hydrate couscous by pouring boiling stock and covering—this is your five-minute timer.
- Cook protein or quick veg while couscous steeps; aim for one- or two-pan finishes.
- Fluff and season couscous; combine and plate promptly to maintain warmth and texture.
Use pre-cooked proteins (rotisserie chicken, canned beans) to reduce active cook time to under five minutes. Small prep habits—like pre-cut veg and portioned spice mixes—compounded over a week save hours.
Nutrition and portioning for couscous dinners
One assembled couscous dinner (recipe above, with chicken and vegetables) typically yields about 2–3 servings with balanced macros. Couscous provides primarily carbohydrates, while the protein and vegetable add essential amino acids, fiber, and micronutrients.
Estimated nutrition per serving (1 of 3): Calories 420–480 kcal; Protein 28–32 g; Carbohydrates 45–50 g; Fat 12–15 g; Fiber 4–6 g; Sodium varies by stock used. Tailor portions to activity level: reduce couscous portion for lower-calorie meals and increase protein for higher satiety.
Expert Insight
Expert pro-tips for improving couscous dinners
Treat couscous like rice: hydrate with flavorful liquid and finish with acidity and fat to lift the dish. A splash of lemon, a scatter of fresh herbs, and a finishing oil transform neutral grains into restaurant-quality sides.
Use fast flavor systems: preserved lemon, harissa, store-bought zhug, or a quick herb pesto. Add toasted nuts or seeds for texture contrast. For vegetarian weeks, swap chicken for spiced roasted chickpeas to boost protein and crunch.
Pro-tip cluster: Use concentrated sauces sparingly; they penetrate couscous and amplify flavor with minimal prep. Keep a jarred spiced yogurt or tahini lemon sauce in the fridge for instant dressing.
Time-saving routine: batch-cook spiced roasted vegetables on a weekend and freeze in flat bags. Reheat briefly while couscous steeps and assemble a bright, varied meal in minutes.
Food-safety note: cool leftovers rapidly and store in airtight containers for up to 3–4 days. Reheat thoroughly and add a splash of water or stock to revive moisture.
Pro-Caution
Conclusion: Final plating and serving notes for quick couscous dinners
When executed with timing discipline, couscous dinners deliver a gourmet plate in minutes. The secret is sequencing: hydrate first, finish proteins and veg, then combine with bright acid and fat for balance.
Keep a short list of interchangeable proteins, sauces, and veggies to rotate flavors without adding decision fatigue. With a few pantry staples and a consistent routine, you can sustain varied, nourishing couscous dinners every weeknight.
FAQ
How long does instant couscous take to cook?
Instant couscous hydrates in about five minutes when covered with boiling stock or water. Brief steaming while covered ensures the grains absorb liquid fully and separate easily when fluffed.
For best texture, use a fork to fluff and add a small fat (olive oil or butter) to separate grains. Avoid stirring during hydration to prevent gluey results.
Can I make couscous dinners gluten-free?
Traditional couscous is made from durum wheat semolina and contains gluten, so it is not suitable for gluten-free diets. For a gluten-free option, use pearl millet or millet-based couscous alternatives, quinoa, or other quick-cooking grains that mimic couscous texture.
When substituting, adjust liquid ratios and cook times to the chosen grain’s package instructions. Quinoa, for example, requires more water and longer simmering than instant couscous.
What are the best proteins for 10-minute couscous dinners?
Quick proteins include thin chicken strips, peeled shrimp, canned tuna, and rinsed canned chickpeas. These options sear or warm rapidly and pair well with the tender grain.
Keep pre-cooked rotisserie chicken or grilled tofu on hand to hit the five-minute mark consistently. Heavier proteins like thick steaks require pre-cooking or slicing thin for fast finishing.
How do I keep couscous fluffy instead of sticky?
Use boiling stock for hydration and avoid stirring until fully absorbed. After the water absorbs, fluff with a fork, then fold in a tablespoon of oil or butter to coat grains and prevent clumping.
Over-hydration is the most common cause of stickiness; measure liquid precisely and time the covered rest period to five minutes for instant couscous. If the dish still appears sticky, spread it on a warm tray for a minute to release steam.
Can I make couscous dinners in advance?
You can prepare couscous and store it refrigerated for up to three days in an airtight container, but texture will change. Reheat with a splash of water or stock in a covered pan to restore moisture before adding fresh toppings.
For best results in meal prep, store cooked couscous separately from wet sauces or dressings and add them just before serving. Assemble fresh herbs and crunchy toppings at plating time to retain texture contrast.
See also: couscous dinners
]]>Imagine opening your pantry after a long day and choosing between a box of couscous and a bag labeled Quinoa. You want the grain that fuels recovery, supports digestion, and fits a busy meal plan. Which do you reach for?
- High-quality protein: Quinoa delivers complete plant protein with all essential amino acids.
- Blood sugar and fiber: Quinoa’s fiber may help steady postprandial glucose and increase satiety compared with refined couscous.
- Micronutrient density: Quinoa supplies minerals like magnesium and iron in meaningful amounts.
Quinoa vs Couscous: Quick Comparison You Can Use Tonight
When shopping, people often confuse couscous with quinoa because both cook quickly and pair well with vegetables. In fact, quinoa is a pseudocereal, not a true cereal grain, and it brings a different nutrient profile and texture to the plate.
Quinoa cooks into distinct, slightly nutty kernels that hold dressing and flavors. Couscous, typically made from wheat semolina, offers a lighter, fluffier texture but generally provides less protein and a different micronutrient mix.
Origins and culinary roles of Quinoa
Quinoa originates from the Andean region and has been cultivated for thousands of years by indigenous farmers. It has long held cultural and nutritional importance across South America.
As a kitchen ingredient, quinoa adapts to grain bowls, pilafs, porridges, and baked goods without overpowering other flavors. Its versatility makes it an asset in meal prep and restaurant menus alike.
Textural and flavor differences between Quinoa and couscous
Quinoa has a slightly crunchy seed coat and a tender interior when cooked properly. Couscous tends to be lighter and breaks apart into small granules that soak up broths quickly.
Flavor-wise, quinoa carries a mild nutty note and can have a faint earthy bitterness if not rinsed. Couscous is more neutral, which suits delicate sauces but can lack the body quinoa provides.
Nutritional Comparison: Quinoa’s Macronutrients vs Couscous
Per 100 grams cooked, the macronutrient balance differs noticeably between quinoa and most couscous. Quinoa provides more protein and a higher proportion of unsaturated fats, while couscous delivers more refined carbohydrates depending on the type.
For athletes and active people, the extra protein in quinoa supports recovery and lean-mass maintenance. People seeking greater satiety or more fiber in their meals may prefer quinoa over refined alternatives.
Calories, protein, carbs, and fats in Quinoa
Cooked quinoa supplies roughly 120–130 kcal per 100 g, with about 4–5 g protein and around 2–3 g fiber. Those numbers make quinoa an efficient calorie-to-nutrient ratio compared with many refined grains.
Quinoa’s fat content is modest but includes healthful unsaturated fatty acids and small amounts of alpha-linolenic acid (an omega-3 precursor). That small quantity increases the nutrient density per serving.
Micronutrient edge: Why Quinoa matters
Quinoa stands out for magnesium, phosphorus, iron, and several B vitamins — nutrients that can be limited in plant-based diets. Those micronutrients support energy metabolism, bone health, and oxygen transport.
In contrast, plain couscous typically offers fewer of these minerals unless fortified. That micronutrient gap can affect long-term dietary adequacy, particularly for people restricting animal products.
For more botanical and historical context on quinoa, consult the primary encyclopedia entry: Quinoa on Wikipedia.
Health Benefits of Quinoa Backed by Data
Some controlled feeding studies and observational research associate higher intakes of whole grains and pseudocereals, including quinoa, with modest improvements in cardiometabolic markers. Swapping refined grains for quinoa may help lower fasting insulin modestly and support healthier lipid profiles in some groups.
Quinoa’s soluble and insoluble fibers provide substrates for gut microbes, producing short-chain fatty acids that support colon health. This microbial activity has been linked in some studies to reduced inflammation markers and improved digestive regularity for many people.
Protein quality and vegetarian diets using Quinoa
Quinoa provides a complete amino acid profile, containing all nine essential amino acids in useful proportions. For vegetarians and flexitarians, quinoa can help fill protein gaps left by legumes and nuts.
When combined with vegetables and seeds, quinoa-based meals can meet protein targets without relying on processed meat substitutes. This makes quinoa a practical ingredient in meal planning for muscle maintenance.
Glycemic control and weight management with Quinoa
Because quinoa contains both fiber and protein, it typically produces a lower postprandial glucose response than many refined starches. That characteristic can help reduce cravings and support gradual weight loss when quinoa is used sensibly within a balanced diet.
Portion control remains critical; quinoa is nutrient-dense, and calories add up if servings are oversized. Use quinoa to balance plates rather than dominate them for optimal results.
Quinoa in Diets, Allergies, and Sustainability Assessment
Quinoa is naturally gluten-free, making it suitable for most people with celiac disease and non-celiac gluten sensitivity. Its lack of wheat gives cooks a reliable alternative when avoiding gluten-containing products.
However, some individuals may notice bitterness from saponins or increased bulk from fiber if their gut is sensitive. Proper rinsing and gradual introduction typically reduce these issues.
Pro-Caution
From an environmental standpoint, rising global demand for quinoa changed Andean farming systems: higher prices and expanded production altered land use and raised concerns about local food security and biodiversity. Choosing sustainably sourced, fair-trade quinoa helps support communities that steward quinoa diversity and long-term ecosystem health.
Quinoa for special diets: paleo, vegan, and low-FODMAP
While quinoa fits vegan diets exceptionally well, its classification in paleo diets varies. Some paleo practitioners accept pseudocereals like quinoa; others avoid them based on carbohydrate content.
For low-FODMAP plans, cooked quinoa in moderate portions is often tolerated. Dietitians typically suggest testing servings and monitoring tolerance to determine suitability for individual needs.
How to Cook Quinoa Perfectly Every Time
Cooking quinoa well transforms its texture from chalky to pleasantly tender and separate. The standard ratio is 1 part quinoa to 2 parts liquid, but small technique tweaks improve results.
Rinsing, toasting, and using flavorful liquids each enhance the final dish. Below is a reliable method to produce consistent quinoa for salads, bowls, and side dishes.
Step-by-step basic method for Quinoa
Rinse 1 cup of quinoa under cool running water to remove residual saponins. Toast briefly in a dry pan for one minute to bring out a nutty aroma, then add 2 cups of lightly salted water or broth.
Bring to a boil, reduce to a gentle simmer, cover, and cook for 12–15 minutes. Remove from heat and let sit covered for 5 minutes, then fluff with a fork to separate the grains.
Quinoa Salad Recipe: Healthy Grain Bowl (Recipe Section)
Engaging Introduction
This warm quinoa salad blends roasted vegetables, herbs, and a lemon-tahini dressing for a balanced meal. The recipe highlights quinoa as a central component for protein, texture, and flavor harmony.
It suits meal prep, scales easily, and holds well refrigerated for lunches. Chefs across casual and upscale kitchens use similar bowls to showcase quinoa’s functionality.
Ingredients
- 200 g (1 cup) quinoa, rinsed
- 480 ml (2 cups) vegetable broth or water
- 200 g (1.5 cups) cherry tomatoes, halved
- 150 g (1 cup) roasted bell pepper strips
- 100 g (1/2 cup) cucumber, diced
- 60 g (1/4 cup) red onion, finely chopped
- 30 g (1/4 cup) fresh parsley, chopped
- 60 ml (1/4 cup) olive oil
- 30 ml (2 tbsp) lemon juice
- 30 g (2 tbsp) tahini
- Salt and pepper to taste
Detailed Preparation Method
1. Cook quinoa: combine rinsed quinoa and broth in a medium saucepan. Bring to a boil, lower heat, cover, and simmer 12–15 minutes until liquid is absorbed.
2. Rest and fluff: remove from heat, let stand 5 minutes, then fluff with a fork. Transfer to a large mixing bowl to cool slightly before adding vegetables.
3. Roast vegetables: toss cherry tomatoes and peppers with a teaspoon of oil, roast at 200°C/400°F for 12 minutes until caramelized. Cool slightly and add to quinoa.
4. Make dressing: whisk together tahini, lemon juice, olive oil, salt, and pepper. Adjust thickness with water if needed, and pour over the warm quinoa so flavors meld.
5. Combine and serve: fold in cucumber, onion, and parsley. Taste and adjust seasoning; serve warm or chilled as a main or side.
Expert Insight

Detailed Nutritional Info: Per Serving (approx. 4 servings)
Per serving estimate: 360–400 kcal, 10–12 g protein, 14–16 g fat (depending on olive oil), 40–45 g carbohydrates, 5–6 g fiber. Vitamins: vitamin C from vegetables; minerals: magnesium and iron from quinoa.
These values vary with ingredient brands and portion sizes. For strict tracking, use a nutrition calculator and input your exact measurements to get precision for clinical or athletic needs.
Expert Pro-Tips
For restaurant quality, finish the bowl with a splash of high-acidity vinegar or a sprinkle of toasted seeds. This adds contrast and a final crunch that keeps diners engaged to the last bite.
Store cooked quinoa in an airtight container for up to 4 days. Reheat gently with a splash of water or broth to restore moisture without overcooking.
Choosing Between Quinoa and Couscous: Practical Meal Planning
When deciding which grain to use this week, weigh your goals: if you need higher protein and micronutrients, choose quinoa. For lighter textures or when wheat is acceptable, couscous can be faster and more neutral in flavor.
Cost and availability also matter; quinoa can be pricier and seasonal. Buying in bulk, looking for fair-trade labels, and pairing quinoa with seasonal vegetables maximizes value and nutrition.
Portion strategies and meal pairings for Quinoa
Balance quinoa with leafy greens, a source of healthy fat, and a lean protein or beans to create a complete plate. Use 1/2 to 1 cup cooked quinoa per adult serving depending on energy needs.
For breakfast, convert quinoa into a porridge with milk and fruit. For dinner, pair quinoa with roasted vegetables and a protein for a satiating, balanced meal.
FAQ
Is Quinoa healthier than couscous?
Quinoa often wins on nutrient density: more protein, fiber, and minerals per cooked cup. The exact health impact depends on overall diet and portion sizes, but quinoa provides a measurable nutritional advantage for many plant-forward diets.
How much Quinoa should I eat per meal?
A common recommendation is 1/2 to 1 cup cooked quinoa per meal for most adults. Athletes and people with higher caloric needs may require larger portions; adjust based on activity level and satiety signals.
Do I need to rinse Quinoa before cooking?
Rinsing quinoa removes residual saponins on the seed coat that can add bitterness. Many commercial brands are pre-washed, but rinsing is a low-effort step that improves flavor consistency.
Can Quinoa cause allergies or digestive issues?
Quinoa is generally low-allergen and gluten-free, but rare seed intolerances occur. People with sensitive digestion should introduce it slowly and rinse thoroughly to minimize saponin exposure.
Where can I buy sustainable Quinoa?
Look for fair-trade, organic, or small-farm cooperative labels to support ethical sourcing. Local specialty stores and reputable online retailers often provide transparency about origin and production practices.
Final assessment: For most people seeking nutrient-rich, versatile, and gluten-free options, quinoa offers superior protein quality and micronutrient density compared to couscous. Practical considerations like cost, texture preferences, and dietary restrictions still influence choice, but quinoa frequently emerges as the better health-oriented option.
See also: Quinoa
]]>When I first cooked Vegan Couscous for a busy weeknight, I expected a bland side; instead it became the centerpiece of a weekly routine that saved time and boosted nutrition. The bowl combined roasted vegetables, chickpeas, preserved lemon, and a quick spicy dressing—each bite both comforting and energizing.
- High satiety: couscous paired with legumes keeps you full longer.
- Fast prep: ready in 15–25 minutes, ideal for weeknight cooking.
- Versatile flavor: Mediterranean, North African, and Middle Eastern profiles work well.
Vegan Couscous: Why it Works for Healthy, Filling Meals
Vegan Couscous blends rapid-cooking grains with fiber-rich additions to build meals that satisfy appetite and nutrition goals. When combined with plant protein and healthy fats, these bowls can help support more stable blood sugar and reduce mid-afternoon energy dips.
Couscous acts as a neutral canvas: add legumes, seeds, vegetables, and herbs to create balanced macronutrients and varied micronutrients without complex cooking steps.
Vegan Couscous Nutrition & Health Benefits
Vegan Couscous is often made from semolina (coarsely ground durum wheat), offering a source of complex carbohydrates and some protein. When served with legumes and vegetables, the meal becomes higher in fiber, B vitamins, and minerals such as manganese and selenium.
For gluten-free diets, choose gluten-free alternatives such as pearl millet, buckwheat pearls, or quinoa—these provide a similar pearl-like texture to Israeli/pearl couscous without gluten. Always check packaging for added sodium; many preflavored mixes increase salt content. Pairing with tahini or olive oil adds healthy fats and helps absorb fat-soluble vitamins from vegetables.
How to Make a Signature Vegan Couscous Recipe
This recipe section follows a chef-style structure: clear ingredients, stepwise technique notes, and measured nutrition per serving for reproducible results. The method emphasizes texture control so grains stay separate and flavored, not mushy.
Ingredients (for 4 servings)
Below are exact amounts in both metric and imperial units so any cook can follow. Measure liquids precisely and season progressively for best flavor balance.
- 240 g (2 cups) couscous (medium-grain) or whole-wheat couscous
- 300 ml (1 1/4 cups) vegetable broth, low-sodium
- 1 can (400 g / 15 oz) chickpeas, drained and rinsed
- 200 g (7 oz) cherry tomatoes, halved
- 150 g (5 oz) cucumber, diced
- 1 medium red onion, thinly sliced
- 80 g (1/2 cup) parsley, chopped
- 60 g (1/3 cup) mint, chopped
- 60 g (1/2 cup) toasted almonds or pine nuts
- 60 ml (4 tbsp) extra virgin olive oil
- 30 ml (2 tbsp) lemon juice
- 1 tsp ground cumin
- Salt and freshly ground black pepper to taste
Detailed Preparation Method
Start by bringing the vegetable broth to a gentle boil and then remove from heat before adding the couscous. Cover and let it sit for 5–7 minutes, then fluff with a fork to separate grains; this step prevents clumping and yields a light texture.
While couscous steeps, toss cherry tomatoes, cucumber, chickpeas, and onion with olive oil, lemon juice, cumin, salt, and pepper in a large bowl. Fold the fluffed couscous into the salad, add herbs and toasted nuts, then taste and adjust seasoning. Chill for 10 minutes if you want a refreshing cold salad, or serve warm with roasted vegetables on top for a hearty bowl.
Expert Insight
For more complex layering, roast a tray of eggplant, sweet potato, or carrots at 200°C (400°F) for 20–25 minutes and spoon onto the couscous at serving time. The contrast between roasted caramelization and bright herbs elevates the dish to a restaurant-quality bowl.
Pro-Caution
Vegan Couscous Meal Variations: Before vs After Flavor Boosts
Before: Basic couscous with olive oil and salt is a quick filler side but can lack sustained satiety. On its own, it digests more quickly than a balanced meal and may leave you hungry sooner.
After: Upgrade by adding roasted chickpeas, lentils, or tempeh for plant protein, plus roasted root vegetables and a lemon-tahini dressing. These changes increase fiber and healthy fats, producing longer fullness and richer flavor.
Moroccan-Spiced Vegan Couscous Bowl
Combine smoked paprika, cinnamon, and turmeric with roasted chickpeas and apricots for sweet-savory balance. A simple starting mix is 1 tsp smoked paprika, 1/2 tsp ground cinnamon, and 1/2 tsp turmeric tossed with chickpeas before roasting; finish with cilantro and a spoonful of harissa for heat. The sweet notes balance spice and provide depth without added sugar.
Serve this bowl warm with preserved lemon and olives to echo North African traditions. This profile pairs well with grilled vegetables or seared tofu for extra protein density.
Mediterranean Lemon-Herb Vegan Couscous Salad
This version highlights bright citrus, fresh herbs, cucumbers, and kalamata olives. Use extra virgin olive oil and capers to bring a salty tang that contrasts the mild couscous base and enhances mouthfeel.
Add wilted spinach or steamed artichoke hearts to increase iron and fiber, then sprinkle with toasted sesame seeds or hemp seeds for crunch and an omega-3 boost. This salad works well as meal prep for 3–4 days.
Vegan Couscous Shopping, Storage, and Prep Tips
Buy whole-grain or whole-wheat couscous when possible; it offers more fiber and micronutrients than refined semolina. Store couscous in an airtight container in a cool, dry place to prevent rancidity and insect infestation.
Cooked couscous keeps in the refrigerator for up to four days in a sealed container. Rehydrate and refresh with a splash of lemon juice and olive oil before serving; if reheating, use low heat with a lid to avoid drying out the grains.
Expert Chef Pro-Tips to Elevate Vegan Couscous
Use broth instead of water for a flavor baseline. Add aromatics like garlic or preserved lemon at the end to avoid bitterness from overcooking. Properly toasted nuts and seeds add texture and a roasted flavor layer.
Couscous absorbs dressings quickly; dress the salad just before serving if you prefer distinct textures. For meal-prep salads, keep dressing on the side or lightly toss to prevent sogginess.
Detailed Nutritional Info (Per Serving)
Below are approximate nutrients for the recipe above, calculated per serving (1 of 4). Values assume medium-grain couscous and standard chickpeas; adjust for whole-wheat swaps or added tahini.
- Calories: ~420 kcal
- Protein: 12–14 g
- Carbohydrates: 58–64 g
- Fiber: 8–10 g
- Fat: 14–16 g (largely from olive oil and nuts)
- Sodium: Variable; aim for under 700 mg by using low-sodium broth
Swapping in whole-wheat couscous raises fiber by about 2–3 g per serving and slightly increases protein. Adding 100 g of roasted tempeh or seared tofu increases protein by roughly 12–18 g per serving, creating a truly filling meal that supports recovery after exercise.
Vegan Couscous: Serving Ideas and Meal Planning
For weekly meal prep, portion couscous into airtight containers with a separate small dressing tub. Add roasted vegetables and nuts on top; this keeps textures intact and reduces reheating time during the week.
For family meals, set up a couscous bowl bar: lay out roasted vegetables, legumes, pickled elements, sauces, and herbs. Guests can customize, which increases satisfaction and reduces perceived monotony.

Vegan Couscous: Common Mistakes and How to Fix Them
Too many cooks overcook or over-stir couscous, creating a gluey texture. Fix it by steaming instead of boiling and always fluffing with a fork once the liquid is absorbed; a light hand preserves individual grains.
Another frequent error is insufficient seasoning. Taste at three points: when the broth is prepared, after couscous is fluffed, and after mixing with other ingredients. Layering salt and acid produces more balanced flavor than seasoning only once.
External Resource
For cultural background and historical context on the grain often used for couscous, consult an authoritative source such as Couscous — Wikipedia overview. That page outlines regional variations and traditional preparation methods.
FAQ
Is Vegan Couscous healthy for weight loss?
Yes, when composed with legumes, vegetables, and healthy fats, Vegan Couscous meals can support weight loss by improving satiety and reducing reliance on calorie-dense additions. Portion control and whole-grain options increase fiber and micronutrient intake.
Can I make Vegan Couscous gluten-free?
Traditional semolina couscous contains gluten, so choose gluten-free alternatives like millet pearls, quinoa, or buckwheat pearls. Note that quinoa is a seed rather than a cereal grain but works well as a one-for-one swap in many recipes.
How long does cooked Vegan Couscous last?
Cooked Vegan Couscous keeps for about four days refrigerated in an airtight container. Keep dressings separate for optimal texture, and when reheating, add a splash of water or broth to restore moisture.
What proteins pair best with Vegan Couscous?
Legumes such as chickpeas, lentils, and edamame deliver plant-based protein and fiber. For soy-based options, tempeh and tofu add denser protein and absorb marinades, creating robust bowls suitable for active lifestyles.
Can I prepare Vegan Couscous for meal prep?
Absolutely. Prepare the base couscous and store with separate roasted vegetables and dressings. Assemble bowls when ready to eat for best texture and flavor; this increases compliance and reduces time spent cooking during busy weeks.
Final note: Use couscous as a modular base: mix grains, proteins, vegetables, and herbs to suit seasonality and taste preferences. The quick-cooking nature of couscous makes it an efficient vehicle for nutritious, satisfying vegan meals.
See also: Vegan Couscous
]]>Have you ever tasted a dish that carries centuries of culture and technique in a single spoonful, like Moroccan Couscous? That helps explain why this grain-based meal remains central to everything from Moroccan family feasts to Michelin kitchens. The guide below blends history, recipes, technique, nutrition, and tested chef strategies to master both authentic and inventive versions.
- Deep cultural roots: Couscous as a communal ritual and seasonal staple.
- 15+ chef-tested techniques: Steaming, infusing, and pairing for texture and aroma.
- Practical recipes: Classic Berber meat and vegetable stews plus modern plant-forward twists.
- Nutrition & plating: Per-serving macros and restaurant-ready presentation tips.
Why Moroccan Couscous Matters: Cultural and Culinary Context
The history of Moroccan Couscous spans North African Berber traditions, seasonal harvests, and communal celebrations. Families passed down steaming techniques and spice blends through generations, creating regional variations tied to festivals and religious observances.
Today, professional kitchens respect those roots while experimenting with new proteins, grains, and plating. For a concise primer, consult Couscous on Wikipedia which summarizes origins and spread across the Mediterranean.
Moroccan Couscous Ingredients: Traditional and Modern Lists
This ingredients section provides exact metric and imperial measures for a classic Moroccan couscous serving 6. Substitutions for modern variations follow for quick adaptation.
Two clear lists appear below: the classic stew and the couscous grain itself. Use the measured list to build consistent results in home and professional kitchens.
Classic Moroccan Couscous Stew (serves 6)
- 1.5 kg lamb shoulder, bone-in, cut into chunks — 3.3 lb
- 900 g mixed root vegetables (carrots, turnips, pumpkin) — 2 lb
- 2 large onions, finely chopped — 300 g — 10.5 oz
- 4 cloves garlic, crushed
- 1 tsp saffron threads, soaked in 30 ml warm water
- 2 tbsp Ras el Hanout — 30 ml (approx)
- 1 tsp ground turmeric, 1 tsp ground ginger, 1 tsp paprika
- Salt and freshly ground black pepper to taste
- 60 ml olive oil — 4 tbsp
- 1.5 L water or light stock — 6 cups
- Fresh cilantro and flat-leaf parsley for finish
Moroccan Couscous Grain (base) — yields 6 servings
- 600 g couscous semolina — 3 cups
- 450 ml water or stock, simmering — 1.9 cups
- 30 g butter or 30 ml olive oil — 2 tbsp
- 1 tsp salt
- Optional: 100 g chickpeas, cooked — 1/2 cup

Preparation Method: Step-by-Step Moroccan Couscous Technique
The method below separates the stew and couscous workflows so timing aligns. Begin the stew first; traditional steaming and layering create the signature texture and aroma.
Follow chef notes to balance moisture and perfume. Each step emphasizes active technique: browning, deglazing, controlled simmering, and multiple steam phases for light, separate grains.
Step 1 — Building the Stew
Heat olive oil in a heavy pot. Brown lamb pieces in batches to build fond, then remove and set aside. Sear onions until translucent, then add garlic and spices; toast briefly to bloom aromatics.
Return meat to pot, add saffron water, stock, and seasonings, then bring to a gentle simmer. Skim any foam, cover, and cook 60–90 minutes until lamb is tender but not falling apart; add vegetables in the last 30 minutes to avoid overcooking.
Step 2 — Preparing the Couscous Grains
Place semolina in a large bowl, sprinkle with 1 tsp salt. Slowly pour hot water or stock while fluffing with a fork to hydrate evenly. Add butter or oil and let rest 5–8 minutes, then fork-fluff again.
For restaurant texture, steam the couscous in a couscoussier basket over simmering stew for 15–20 minutes. Remove, fluff with olive oil, and return to steam for a second 10–12 minute phase if needed. This two-stage steaming yields airy, separate grains.
Chef’s Notes on Texture
If you lack a couscoussier, use a large metal sieve over a covered pot of simmering liquid; avoid direct contact with water. The steam, not boiling, cooks the semolina to the ideal bite.
For a lighter result, incorporate 50 g cooked quinoa or cauliflower rice into the finished couscous while tossing gently. This modern twist reduces glycemic load without losing mouthfeel.
Detailed Nutritional Info: Moroccan Couscous (per serving)
This nutritional profile reflects a traditional lamb and vegetable stew above with couscous grains and moderate olive oil. Values are approximate and depend on portion sizes and specific cuts of meat.
Per serving (1 of 6):
- Calories: ~620 kcal
- Protein: 34 g
- Fat: 22 g (Saturated fat: 6 g)
- Carbohydrates: 64 g (Fiber: 6 g, Sugars: 8 g)
- Sodium: 680 mg (varies by added salt and stock)
For a plant-forward version using chickpeas and roasted vegetables with olive oil, expect calories near 480 kcal and higher fiber (10–12 g) per serving.
Expert Pro-Tips to Elevate Moroccan Couscous
Restaurant-quality couscous depends on seasoning layers, timing, and presentation. Focus on aroma early; toast whole spices lightly then grind to freshen spice blends.
Finish with a bright acid (lemon juice), fresh herbs, and a drizzle of high-quality olive oil to lift the dense stew and highlight the grains.
Expert Insight
Use saffron sparingly but intentionally — bloom it in warm stock then add to both stew and couscous for cohesive flavor. When using beef or chicken, reduce cooking time to avoid dryness.
Traditional vs Modern Moroccan Couscous: Comparison
Traditional Moroccan Couscous emphasizes communal preparation, coarse semolina, and long steaming that bonds family techniques to texture. The dish is celebratory and seasonal by design.
Modern interpretations shorten cooking, swap proteins, or add grains like farro and quinoa. These adaptations trade ritual for speed and meet contemporary dietary trends without discarding essence.
Pros of Traditional
Deeply layered flavors from slow braising. Textural contrast from multiple steam phases. Cultural authenticity that supports ritual serving and large gatherings.
Traditional spice blends like ras el hanout offer complexity not easily replicated by single spices, creating signature Moroccan warmth and umami.
Pros of Modern Twists
Faster weeknight versions that preserve key flavors. Plant-based and gluten-aware adaptations increase accessibility. Creative plating suits restaurant service and social media presentation.
Modern versions often use higher-acid finishing or fermented condiments for brightness, compensating for quicker cooking methods.
Pro-Caution
Serving, Pairings, and Plating Moroccan Couscous
Serve Moroccan Couscous family-style on a large platter: spread couscous in a nest, create a well, spoon stew and vegetables over the center, and garnish with herbs and roasted nuts. This presentation honors tradition and enhances the eating experience.
Fresh mint tea or a light, fruity red wine pairs well. For non-alcoholic options, preserved lemon and olive tapenade on the side refresh the palate between bites.
Complete Recipe: Classic Moroccan Couscous (Chef’s Format)
Below is the concise chef-friendly recipe integrating the ingredient lists and methods into a single flow. Follow the timing cues for simultaneous stew and steaming.
Start the stew 90 minutes before serving; begin the first couscous hydration during the final 30 minutes so steaming finishes just before plating.
Ingredients (serves 6)
- 1.5 kg lamb shoulder (3.3 lb), chopped
- 600 g couscous semolina (3 cups)
- 900 g mixed root veg (2 lb)
- 2 large onions (300 g), 4 cloves garlic
- 1 tsp saffron, 2 tbsp Ras el Hanout
- 1.5 L stock (6 cups), 60 ml olive oil
- 30 g butter, salt, pepper, fresh herbs
Method
1. Brown lamb in batches, set aside. Sauté onions, garlic, and spices. Add meat, saffron water, stock and simmer 60–90 minutes. Add vegetables 30 minutes from the end.
2. Hydrate couscous with hot stock, rest 8 minutes, fluff. Steam in a couscoussier 15–20 minutes, fluff and steam again 10–12 minutes. Finish with butter and olive oil, adjust salt.
Nutritional Info
Per serving approximate: 620 kcal, 34 g protein, 22 g fat, 64 g carbs. Adjust when using chicken or chickpeas as main protein.
Expert Pro-Tips
Use warm stock for hydration, not boiling — too hot breaks semolina structure. Toast nuts and toss them with a pinch of salt prior to garnish for crunch harmony.
For a clean plating, spoon stew into the center of a couscous mound and sprinkle micro-herbs and lemon zest around the edge.
FAQ
What makes Moroccan Couscous different from regular couscous?
Traditional Moroccan Couscous pairs steamed semolina with a layered meat-and-vegetable stew and specific spice blends like ras el hanout. The cooking technique emphasizes multiple steam phases to achieve light, separate grains, unlike quick-cook instant couscous which hydrates directly in hot water.
Can I make a gluten-free Moroccan Couscous?
Yes. Substitute with steamed millet, quinoa, or cauliflower rice to mimic texture and serve with traditional stew. Note texture differences: quinoa is nuttier and cauliflower is lower calorie, so adjust seasoning and liquid accordingly.
How long does cooked Moroccan Couscous keep?
Store cooled couscous and stew separately in airtight containers; couscous holds 3–4 days in the refrigerator while the stew is best within 3 days. Reheat gently with reserved braising liquid to restore moisture.
Is it authentic to add new ingredients like roasted squash or kale?
Authenticity evolves regionally. Adding seasonal vegetables like roasted squash or braised kale respects the spirit of the dish while adapting to modern palates. Balance flavors and textures to maintain the core identity of Moroccan Couscous.
What wine or beverage pairs best with Moroccan Couscous?
Pair with a medium-bodied fruity red such as Grenache or Syrah for lamb versions; lighter chicken or vegetable couscous suits a crisp rosé. Non-alcoholic: mint tea or citrus-infused water brightens rich, spiced flavors.
Conclusion
Moroccan Couscous updates are both respectful and inventive: preserve steaming technique, layer spices, and use fresh finishing components to tie authentic and modern plates together. The structural approach in this guide helps cooks reproduce consistent, high-quality results.
Adopt one traditional method and one modern twist per service to learn contrasts quickly. With practice, timing becomes intuitive and the dish rewards creativity with memorable depth and texture.
See also: Moroccan Couscous
]]>Picture a weeknight kitchen: a hungry family, a sizzling pan, and a packet of tiny grains you hope will turn into a light, fluffy side. Couscous sits on the counter, dry and unassuming, promising fast comfort if handled correctly.
- Precision matters: Measure water and grains for repeatable fluffiness.
- Texture control: Steam rather than boil for the best bite.
- Flavor layering: Toast grains and finish with oil or butter.
- Timing tips: Resting the couscous for 5–10 minutes preserves lift.
Introduction: The Cultural Roots of Couscous and Why Technique Matters
Couscous has fed families across North Africa for centuries, appearing in Moroccan tagines, Algerian celebrations, and Tunisian weekday meals. The grain’s cultural history helps explain why texture and seasoning are as important as speed: correct technique transforms humble staples into memorable dishes.
Traditional preparation varies by region, but the goal remains constant: a light, separate, aromatic grain that absorbs sauce without going gluey. For a quick reference, the historical and cultural context is well summarized at Couscous on Wikipedia, which highlights regional techniques and traditional uses.
Ingredients for Perfect Couscous
Success starts with ingredients. Use high-quality dried couscous (semolina-based) or whole-grain versions for extra fiber. Fresh spices, stock instead of plain water, and a finishing fat matter as much as ratios.
The list below gives clear, chef-tested quantities to serve four adults with leftovers for lunch.
- Dry couscous: 320 g (11.3 oz) — roughly 2 cups.
- Liquid (water or stock): 480 ml (2 cups) — start with about a 1:1 ratio by volume for quick pre-steamed couscous; increase to 1.25–1.33:1 for larger-grain or whole-wheat varieties.
- Salt: 1 teaspoon (5 g).
- Olive oil or unsalted butter: 2 tablespoons (30 ml) for flavor and shine.
- Lemon zest or preserved lemon (optional): 1 teaspoon for brightness.
- Fresh herbs (parsley, cilantro): 2 tablespoons chopped for garnish.

Step-by-Step Couscous Preparation Method
This proven method produces reliable results whether you have a stovetop, kettle, or microwave. The technique emphasizes toasting, hydration, steaming, and resting in four clear stages to preserve individual grains.
Follow the steps and, if you want a slightly softer result, adjust the final liquid by a tablespoon at a time.
Couscous Step 1 — Toasting the Grains
Place the dry couscous in a wide, dry skillet over medium heat. Stir constantly for 2–3 minutes until you smell a warm, nutty aroma; this step adds depth and helps prevent a pasty texture after hydration.
Remove from heat and transfer to a bowl; toasting is optional for speed but recommended for richer flavor and better separation of the grains during steaming.
Couscous Step 2 — Heating and Measuring Liquid
Heat your liquid to near boiling. Use vegetable, chicken, or beef stock for savory dishes to layer flavor. Measure precisely: for quick, pre-steamed semolina couscous, a 1:1 liquid-to-couscous ratio by volume is a good starting point; for larger-grain or whole-wheat couscous, use 1.25–1.33 parts liquid to 1 part couscous.
Add salt to the liquid and a tablespoon of oil or butter; the seasoned heat penetrates each grain during hydration and prevents clumping.
Couscous Step 3 — Hydration and Covering
Pour the hot liquid over the toasted or dry couscous, stir immediately to combine, and cover tightly. Let sit for about 5–7 minutes, adjusting by a minute or two based on grain size and brand to allow even absorption without overcooking.
Do not lift the lid during this phase; trapped steam finishes the cooking gently and keeps kernels separate.
Couscous Step 4 — Fluffing and Finishing
After the rest, uncover and use a fork (or a small whisk) to gently fluff the grains—do not stir vigorously. Fold in the remaining tablespoon of olive oil or butter and add lemon zest and fresh herbs for brightness.
Serve immediately or keep covered for up to 30 minutes to maintain warmth; if holding longer, add a splash of warm stock and re-fluff before plating.
Couscous Chef’s Notes and Technique Troubleshooting
Common failures include soggy globs or hard centers. Control water temperature, timing, and resting. Each brand absorbs differently; always test with the packet’s instructions first, then adapt your starting ratio (1:1 to 1.33:1) as a baseline for future batches.
Also, weigh your couscous with a kitchen scale to remove volume inaccuracies that lead to over- or under-hydration. Scales create consistent day-to-day results.
Expert Insight
After toasting and hydrating, let the grain rest without disturbance. Resting consolidates steam and finishes the internal texture while preventing clumping from over-stirring. Patience yields lift and separation.
Couscous Flavor Variations and Pairings
Couscous adapts to broad flavor profiles. For Mediterranean notes, finish with olive oil, lemon, and roasted vegetables. For North African authenticity, fold in toasted almonds, raisins, and a spice blend of ras el hanout for depth.
Protein pairings include braised lamb, spiced chicken, or a vegetable tagine. For a quick lunch bowl, mix cooled couscous with chickpeas, cucumber, cherry tomatoes, and feta for Mediterranean balance.
Couscous Nutritional Information (Per Serving)
The nutritional values below reflect one serving (approx. 180 g cooked). Values vary by brand and cooking liquid used; using stock increases sodium and calories slightly.
Per serving: Calories 220 kcal, Carbohydrates 45 g, Protein 6 g, Fat 4 g (2 g saturated when butter used), Fiber 2.5 g, Sodium 350 mg (with salted stock). Adjust portion size for specific dietary needs.
Expert Couscous Pro-Tips to Elevate Every Batch
Small adjustments create restaurant-level results. Use warm stock, not boiling water; fold ingredients instead of stirring; finish with a neutral oil for sheen or a high-quality extra-virgin olive oil for flavor depth.
Also, undercook slightly and let residual steam finish the grain—this prevents mush. For volume, double the recipe but keep the ratio and use a wider vessel for even heat distribution.
Pro-Caution
Advanced Techniques: Steaming and Moroccan Couscous Method
Pro cooks sometimes steam couscous twice using a couscoussier to replicate North African tradition. The first steam sets the grain; the second, after dressing with oil and spices, adds lift and allows flavors to be absorbed more gradually than direct hydration.
A couscoussier is a two-part steamer: a wide top tray for the couscous that fits over a simmering broth pot. For home cooks, a fine-mesh sieve or colander set over a saucepan of simmering water will simulate the traditional method without special equipment.
Common Mistakes and How to Fix Them
Gummy couscous usually means too much liquid or vigorous stirring. For repair, spread the couscous on a sheet pan and dry briefly in a 120°C/250°F oven while turning gently to separate grains.
When couscous is undercooked and hard in the center, sprinkle 1–2 tablespoons of boiling water, cover for 3 minutes, then fluff. Test before serving to avoid overcorrecting.
Conclusion: Routine, Technique, and Flavor Make Perfect Couscous Every Time
Mastery comes from repeatable technique: toast, precise liquid, covered rest, gentle fluff. Small details—fat finish, acid, and herbs—turn a basic side into a memorable plate.
Apply the 7 proven steps consistently and adapt seasoning to your menu. With this method, couscous will reliably perform as a quick, versatile, and elegant component of weeknight or special-occasion meals.
FAQ
How long does cooked couscous last in the refrigerator?
Cooked couscous keeps well for 3–4 days when stored in an airtight container and chilled within two hours of cooking. Reheat gently with a splash of water or stock and fluff to restore texture.
Can I use couscous in salads and serve it cold?
Yes. For salads, slightly undercook the couscous, cool quickly, and toss with oil to prevent sticking. Chilled couscous absorbs dressings; adjust seasoning after chilling.
What is the best liquid to cook couscous for extra flavor?
Low-sodium stock provides the most balanced flavor. For vegetarian dishes, use a robust vegetable stock. Avoid overly salted broths; they can overpower the dish and limit finishing salt control.
Is couscous gluten-free?
Traditional couscous is made from durum wheat semolina and contains gluten. Look for labeled gluten-free couscous made from corn or rice if you need a gluten-free alternative.
How do I get the lightest, fluffiest couscous every time?
Measure precisely, toast if possible, use hot liquid, cover tightly, rest 5–7 minutes, then fluff gently with a fork while adding a finishing fat. Repeat this routine and adjust small liquid differences per brand.
See also: Couscous
]]>Couscous recipes are the backbone of fast, flavorful weeknight cooking when time is tight and taste matters. Picture a 30-minute kitchen rhythm: sizzling aromatics, steaming couscous, and a finished plate that looks restaurant-grade.
- Ready in 30 minutes: Every recipe fits a busy schedule without sacrificing flavor.
- Balanced nutrition: Protein, vegetables, and grains combined for complete meals.
- Scalable: Simple swaps let you stretch servings or change allergens.

Why these Couscous recipes work for busy weeknights
These couscous recipes emphasize speed, texture, and layered flavors so you don’t rely on long braises. The base technique uses quick-cooking couscous as a blank canvas, then adds proteins, vegetables, and sharp finishing elements to create fullness.
Each technique reduces active time by 10–20 minutes versus comparable grain bowls. You’ll learn small chef moves — toasting grains, blooming spices, and finishing acids — that transform a fast meal into a memorable one.
How to prep a versatile couscous base for all Couscous recipes
Mastering the simple couscous base means boiling salted water, adding olive oil or butter, pouring over couscous, covering, and letting it steam for 5 minutes. Fluff with a fork and optionally finish with lemon zest and a small drizzle of high-quality olive oil.
Toast the dry couscous briefly in the pan for a nuttier flavor and firmer texture when you have extra two minutes. Keep cooked couscous loose by reserving a tablespoon of liquid and stirring it in just before serving.
Pantry essentials that make every couscous recipe faster
Stock staples: quick-cooking couscous, vegetable or chicken stock, canned chickpeas, preserved lemons, harissa, canned tomatoes, nuts, and a few spices. These items let you pivot to any of the seven recipes with minimal shopping effort.
Fresh elements to keep on hand include lemons, garlic, parsley, cilantro, and a sturdy green like spinach. A single sauté pan and a kettle cover most steps, which reduces cleanup and keeps weeknights sane.
7 easy couscous recipes — full recipes with technique, nutrition, and pro tips
Below are seven tested, fast couscous recipes built for efficiency and flavor. Each recipe follows the same structured format: short cultural intro, exact ingredients with metric and imperial measures, step-by-step method, nutrition per serving, chef notes, and a brief conclusion.
Use the ingredient lists to batch-cook components (roast vegetables, poach chicken) ahead of time and reheat quickly on weeknights for the fastest finish.
1. Mediterranean Chickpea Couscous (Vegetarian)
This Mediterranean-inspired couscous dish borrows from North African and Levantine flavors: lemon, olive oil, herbs, and chickpeas. It’s a pantry-friendly staple that traces its modern form to quick urban meals across the Mediterranean coast.
The recipe balances protein-rich legumes with bright herbs and crunchy nuts, delivering a satisfying meatless dinner in under 25 minutes. It scales well for meal prep or leftovers.
Ingredients (serves 4)
- 240 g (1 cup) quick-cooking couscous
- 240 ml (1 cup) vegetable stock or water, hot
- 1 tbsp (15 ml) olive oil
- 400 g (1 can) chickpeas, drained and rinsed
- 1 medium cucumber, diced
- 10 cherry tomatoes, halved
- 30 g (1/3 cup) chopped parsley
- 15 g (1/4 cup) toasted pine nuts or almonds
- Juice and zest of 1 lemon
- Salt and freshly ground black pepper to taste
Preparation
Bring the stock to a boil in a small pot, add couscous and 1 tbsp olive oil, cover, and remove from heat for 5 minutes. Fluff with a fork, then fold in lemon zest and juice.
Stir chickpeas, cucumber, tomatoes, and parsley into the couscous. Taste and season with salt and pepper. Finish with toasted nuts for texture and a final drizzle of olive oil.
Nutritional info (per serving)
Approx. 380 kcal, 10 g protein, 14 g fat, 52 g carbohydrates, 8 g fiber. Values approximate and depend on specific brands and portion sizes.
Expert Pro-Tips
Use warm stock rather than water for depth. Toasting nuts enhances crunch and aroma. For a creamier texture, stir in 2 tbsp plain yogurt when serving.
Conclusion
This recipe is a weeknight MVP: fast, balanced, and flexible for seasonal veg substitutions. Leftovers are excellent cold for lunches.
2. Harissa Shrimp Couscous
Spicy North African harissa peppers meet coastal shrimp for a quick, bold couscous dinner. This recipe is inspired by Tunisian spice blends and modern bistro simplicity.
It’s an ideal 20-minute dish: spicy marinade, quick pan-sear of shrimp, and a zesty couscous base bring the meal together with minimal effort. The bright citrus finish lifts the heat.
Ingredients (serves 4)
- 240 g (1 cup) couscous
- 240 ml (1 cup) hot chicken or vegetable stock
- 400 g (14 oz) raw shrimp, peeled and deveined
- 1½ tbsp (22 ml) harissa paste
- 1 tbsp (15 ml) olive oil
- 1 red bell pepper, thinly sliced
- 2 spring onions, sliced
- Juice of 1 lime
- Salt and pepper to taste
Preparation
Mix shrimp with harissa and a pinch of salt. Heat oil in a skillet and quickly sear shrimp 1–2 minutes per side until opaque. Remove and rest.
Cook couscous with hot stock, fluff, then fold in sliced pepper and spring onions. Top with shrimp, squeeze lime, and serve immediately for best texture.
Nutritional info (per serving)
Approx. 360 kcal, 25 g protein, 9 g fat, 40 g carbs. Shrimp provides a lean protein boost to the meal.
Expert Pro-Tips
Don’t overcook shrimp—they finish cooking off the heat. Adjust harissa to taste or mix with yogurt to temper heat for sensitive diners.
Conclusion
Fast, bold, and crowd-pleasing. This maintains a high flavor-to-effort ratio perfect for busy nights.
3. Moroccan-Spiced Chicken Couscous
Classic Moroccan spices — cumin, coriander, cinnamon — coat tender chicken thighs for a comforting, quick stew served over couscous. This reflects traditional North African spice layering adapted for fast home cooking.
Use boneless thighs for quick searing, then simmer briefly with tomatoes and olives. Spoon the stew over steamed couscous to absorb the sauce.
Ingredients (serves 4)
- 240 g (1 cup) couscous
- 240 ml (1 cup) chicken stock
- 600 g (1.3 lb) boneless chicken thighs, cut into chunks
- 1 tbsp (15 ml) olive oil
- 1 tsp ground cumin, 1 tsp ground coriander, 1/4 tsp cinnamon
- 1 can (400 g / 14 oz) diced tomatoes
- 50 g (1/4 cup) pitted green olives, halved
- Salt and pepper to taste
Preparation
Season chicken with spices and sear in olive oil until browned. Add tomatoes and simmer 10 minutes until sauce slightly reduces and chicken is cooked through.
While simmering, prepare couscous with hot chicken stock. Serve chicken and sauce spooned over couscous, garnish with parsley if available.
Nutritional info (per serving)
Approx. 520 kcal, 32 g protein, 20 g fat, 46 g carbs. Rich in protein and moderate in fats from olive oil and chicken.
Expert Pro-Tips
Use bone-in thighs if you have extra time for deeper flavor; remove bones before serving. Add raisins or dried apricots for a sweet contrast.
Conclusion
Hearty yet fast, this dish gives the feel of a slow-cooked tagine with only a fraction of the time.
Expert Insight
4. Lemon Herb Salmon Couscous
Simple, elegant, and ready in under 25 minutes: pan-seared or roasted salmon sits on a bed of lemony couscous with herbs. This combines Nordic simplicity with Mediterranean brightness.
The rich omega-3 profile of salmon pairs well with the light, citrus-forward grain, creating a balanced plate that’s both healthy and fast to prepare.
Ingredients (serves 4)
- 240 g (1 cup) couscous
- 240 ml (1 cup) vegetable or fish stock
- 4 salmon fillets (about 500 g / 1.1 lb total)
- 1 tbsp (15 ml) olive oil
- Zest and juice of 1 lemon
- 30 g (1/3 cup) chopped dill and parsley mix
- Salt and pepper to taste
Preparation
Cook couscous with stock, then stir in lemon zest, juice, and herbs. Season salmon, sear 3–4 minutes per side until just cooked for medium doneness.
Plate couscous, top with salmon, and finish with an extra squeeze of lemon. Serve immediately to retain salmon’s texture.
Nutritional info (per serving)
Approx. 520 kcal, 34 g protein, 24 g fat, 36 g carbohydrates. Salmon provides significant healthy fats and protein.
Expert Pro-Tips
Pat salmon dry for a crisp sear. Cook to medium-rare for optimal moisture; carryover heat will finish cooking off the pan.
Conclusion
A quick, nutritious option that feels upscale without the fuss — ideal for a weeknight dinner that impresses.
5. Curried Vegetable Couscous (Vegan)
Bright curry powder and coconut milk lift roasted or sautéed vegetables over fluffy couscous for an easy vegan dinner. This fusion keeps prep simple while delivering layered spice and creaminess.
Use a mix of winter squash, cauliflower, and spinach for color and nutrition. The coconut and curry coat the grains, creating a comforting one-bowl meal.
Ingredients (serves 4)
- 240 g (1 cup) couscous
- 240 ml (1 cup) vegetable stock
- 1 tbsp (15 ml) coconut oil or olive oil
- 2 cups mixed vegetables (cauliflower, carrots, squash)
- 1 tbsp (15 g) curry powder
- 120 ml (1/2 cup) light coconut milk
- Salt, pepper, and chopped cilantro to finish
Preparation
Sauté vegetables with curry powder until tender, add coconut milk and reduce slightly. Prepare couscous with stock and fold in the curried vegetables.
Garnish with cilantro and a squeeze of lime. Serve warm; the grains absorb flavors while resting briefly.
Nutritional info (per serving)
Approx. 420 kcal, 8 g protein, 18 g fat, 56 g carbs. Rich in fiber and plant-based fats.
Expert Pro-Tips
If you roast vegetables first, you’ll get caramelization that improves flavor. Add toasted coconut flakes for texture and aroma.
Conclusion
Comforting and nutrient-dense, this vegan option proves that quick dinners can still be richly flavored and satisfying.
6. Greek Yogurt and Herb Couscous Bowl with Feta
Cool, creamy Greek yogurt and crumbled feta combine with warm couscous and crisp cucumbers for a Mediterranean bowl that’s both light and filling. This is an easy, no-fuss assembly ideal for hot evenings.
The contrast between warm grains and cool, tangy yogurt makes this recipe a textural standout with minimal cooking required.
Ingredients (serves 4)
- 240 g (1 cup) couscous
- 240 ml (1 cup) hot water or stock
- 200 g (1 cup) Greek yogurt
- 100 g (3.5 oz) crumbled feta
- 1 cucumber, diced
- 1 tbsp (15 ml) olive oil
- 2 tbsp chopped dill and mint
- Salt and pepper to taste
Preparation
Prepare couscous, then spread on a tray to cool slightly. Stir in olive oil and herbs to keep grains separate and fragrant.
Serve warm couscous with a dollop of Greek yogurt, crumbled feta, and diced cucumber. Season to taste and finish with cracked pepper.
Nutritional info (per serving)
Approx. 410 kcal, 15 g protein, 16 g fat, 45 g carbs. A balanced veggie-forward option with calcium from yogurt and feta.
Expert Pro-Tips
Let couscous cool slightly before adding dairy to avoid separation. Use full-fat yogurt for creamier mouthfeel.
Conclusion
A refreshing bowl that’s quick to assemble and excellent for batch-cooked couscous used throughout the week.
Make a short pause here to emphasize safety and storage guidance before the final recipe.
Pro-Caution
7. Spiced Lamb and Date Couscous
This celebratory couscous blends ground lamb, warm spices, and sweet dates for a rich, quick weekday treat that echoes ceremonial meals without the long simmer. It nods to Maghrebi tradition while staying practical.
Pairing savory lamb with dates introduces a sweet-savory contrast that invites simple plating and robust flavors in under 35 minutes.
Ingredients (serves 4)
- 240 g (1 cup) couscous
- 240 ml (1 cup) beef or chicken stock
- 400 g (14 oz) ground lamb or beef
- 1 tbsp (15 ml) olive oil
- 1 tsp ground cumin, 1/2 tsp cinnamon
- 75 g (1/2 cup) chopped dates
- 30 g (1/3 cup) chopped pistachios
- Salt and pepper to taste
Preparation
Brown the ground lamb with spices and a pinch of salt, breaking it into small pieces. Stir in dates to soften and integrate sweetness into the meat mix.
Prepare couscous with hot stock. Top with spiced lamb and chopped pistachios for texture. Serve warm and garnish with chopped parsley if available.
Nutritional info (per serving)
Approx. 620 kcal, 30 g protein, 34 g fat, 46 g carbs. Higher calorie due to lamb and nuts; adjust portion sizes accordingly.
Expert Pro-Tips
Choose leaner ground meat if you want lower fat; drain excess fat after browning. For a sharper contrast, add a spoonful of labneh or Greek yogurt on the side.
Conclusion
Decadent yet still achievable on busy nights, this dish reads festive while staying rooted in fast-cook technique.
Speed strategies and meal prep tips for all Couscous recipes
Batch-cook a large pot of couscous and store portions in the fridge for 3 days to cut nightly active time. Roasted vegetables and cooked proteins reheat quickly and combine with fresh herbs for a finished meal in minutes.
Use frozen vegetables and canned legumes liberally — they reduce prep time while maintaining nutrition. Invest in a good olive oil and a lemon for finishing; small touches boost perceived quality dramatically.
FAQ
How long does quick-cooking couscous take to prepare?
Quick-cooking couscous typically takes 5 minutes of steam after adding boiling liquid. Allow a short rest, then fluff with a fork to separate grains. Toasting beforehand can add depth but isn’t required for speed.
Can I use whole-wheat couscous in these recipes?
Yes. Whole-wheat couscous follows a similar cook method but may need slightly more liquid and a longer steam time. Adjust seasoning and texture as whole-grain varieties absorb more flavors differently.
What are good protein swaps for these couscous recipes?
Substitute tofu, tempeh, canned tuna, beans, or leftover roasted meats. Match cooking times so proteins remain moist — for example, add canned tuna at the end, or sear tofu first for texture.
How should I reheat leftover couscous without drying it out?
Reheat gently in a skillet with a tablespoon of stock or water per cup of couscous. Cover briefly to steam through and stir to rehydrate. Microwaving with a damp paper towel over the container also works.
Where can I learn more about the cultural roots of couscous?
For a concise historical overview, see the encyclopedic entry on couscous: Couscous history and cultural context on Wikipedia. That page outlines regional variations and culinary traditions across North Africa and the Mediterranean.
Final notes: These seven recipes turn quick-cooking couscous into a toolkit for weeknight dinners. Use the pro tips and prep strategies to save time, boost flavor, and enjoy consistent, nutritious meals.
See also: Couscous recipes
]]>Bold claim: Most home cooks’ first tagine disappoints because they treat it like a stew rather than a cooking system. A tagine is a slow, aromatic method that combines controlled heat, moisture recycling, and layered flavor; it rewards a few trade secrets to reach its full potential.
- Key idea: Tagine relies on gentle steam circulation, not vigorous boiling.
- Technique: Brown well, use preserved ingredients smartly, and stabilize heat.
- Result: A tender protein with a concentrated, balanced sauce and glossy finish.
Tagine Origins and Cultural Background
A tagine refers to both the conical-lidded earthenware pot and the slow-cooked dishes made inside it. The vessel evolved across North Africa and became central to Moroccan cookery because its shape traps steam and returns condensed juices to the dish, concentrating flavor without excessive reduction.
Historically, tagines were cooked over coals or in communal ovens. Modern stovetops and ovens can be adapted for tagine cooking with a few adjustments. For cultural context and additional historical detail, see Tagine on Wikipedia, which outlines the pot’s evolution and regional variations across the Maghreb.

Tagine Ingredients: Classic Chicken with Preserved Lemon & Olives
This ingredient list balances bright citrus, warm spices, and savory components to achieve the canonical Moroccan profile. Quantities are scaled for four servings and include metric and imperial measures for precision.
Use fresh ingredients; good preserved lemons and green olives make a major difference. Substitute lamb or vegetables if you prefer, but keep the same spice ratios to preserve balance.
- 1 whole chicken, cut into 8 pieces — 1.6 kg (3.5 lb)
- 2 preserved lemons, pulp removed, rinds thinly sliced — about 120 g (4 oz) before rinsing
- 200 g green olives, pitted — 7 oz
- 2 large onions, thinly sliced — 300 g (10.5 oz)
- 4 cloves garlic, minced
- 2 tbsp olive oil — 30 ml (1 fl oz)
- 1 tsp ground ginger — 2 g (0.07 oz)
- 1 tsp ground cinnamon — 2 g (0.07 oz)
- 1 tbsp sweet paprika — 8 g (0.28 oz)
- 1 tsp ground cumin — 2 g (0.07 oz)
- 1/2 tsp ground turmeric — 1 g (0.035 oz)
- Salt and black pepper to taste — about 2 tsp salt
- 400 ml chicken stock or water — 14 fl oz
- Handful fresh cilantro and parsley, chopped — 25 g (0.9 oz)
- Optional: 2 tbsp honey for glaze — 30 ml (1 fl oz)
Tagine Preparation Method: Step-by-Step with Chef’s Notes
Follow these steps closely for ideal texture and flavor. The method emphasizes dry browning, staged aromatics, and regulated low heat to let flavors knit without collapsing.
Chef’s note: If you use a metal tagine or a Dutch oven, the thermal mass differs; reduce direct heat and monitor closely the first time to avoid scorching the base.
- Season and brown: Pat chicken pieces dry, season with salt and pepper. Heat olive oil in the tagine or heavy pan over medium-high heat. Brown chicken in batches for deep Maillard color, 3–4 minutes per side. Remove and set aside.
- Sauté aromatics: Reduce heat to medium. Add onions; sweat until translucent and golden, 8–10 minutes. Add garlic and spices; toast briefly to bloom the spices, about 1 minute.
- Deglaze and assemble: Add stock and scrape browned bits from the base. Return chicken to the tagine, nestling pieces into the onion bed. Scatter preserved lemon rinds and olives on top.
- Simmer gently: Seal with the lid. Maintain a low, steady simmer so the lid emits a slow, periodic whisper of steam. Cook for 35–45 minutes, until the chicken yields easily to a fork and internal temperature reaches 74°C (165°F).
- Finish and glaze: Remove lid, increase heat slightly to reduce sauce if needed for 5–7 minutes. Stir in chopped herbs and optional honey for gloss. Adjust seasoning and serve immediately over couscous or crusty bread.
Technique tip: Never allow the liquid to boil vigorously; that tears proteins and dulls flavors. Maintain a low convective cycle so condensation re-wets the protein evenly.
Expert Insight
Let the dish rest for five minutes before serving to let juices redistribute. Resting yields a juicier final mouthfeel and a more cohesive sauce.
Tagine: Numbered Steps to Master Technique (Actionable Routine)
These nine focused steps create a repeatable routine you can use each time. Treat them as a checklist while cooking to build consistent results.
Practice develops the rhythm: brown, sweat, assemble, simmer, finish. Repetition sharpens heat control and timing so adjustments become second nature.
- Prep everything mise en place: spices measured, lemons rinsed, herbs chopped.
- Dry the protein thoroughly to promote solid browning instead of steaming.
- Bloom spices first, then add oil and aromatics to extend flavor life.
- Brown in batches; never overcrowd the base of the tagine.
- Deglaze thoroughly to lift fond and integrate concentrated flavors.
- Layer ingredients rather than mixing aggressively; structure yields clarity.
- Keep heat low and steady; watch for gentle steam, not boiling.
- Finish with acidity or honey to balance savoriness and fat.
- Rest briefly before serving and finish with fresh herbs for contrast.
Use these steps to diagnose issues: too dull? Add acid. Too dry? Lower heat and add more stock next time.
Tagine Nutritional Information (Per Serving)
Nutrition calculations approximate values for one of four servings using chicken with olives and preserved lemon. Values will vary if you trim skin or substitute lamb or vegetables.
These figures help home cooks plan meals and accommodate dietary needs.
- Calories: ~480 kcal
- Protein: ~34 g
- Total Fat: ~28 g (Saturated fat ~7 g)
- Carbohydrates: ~12 g (Sugars ~6 g)
- Fiber: ~2 g
- Sodium: ~900 mg (depends heavily on preserved lemons and olives)
Note: To reduce sodium, rinse preserved lemons and choose low-salt olives. Removing chicken skin lowers fat by roughly 30% and calories by about 80–100 kcal per serving.
Tagine Expert Pro-Tips: Elevate to Restaurant Quality
Small technique shifts produce disproportionate rewards. Adopt these pro-level adjustments to mimic restaurant textures and concentration.
Restaurant chefs think in layers of texture, temperature, and contrast. Apply the same mindset at home for elevated outcomes.
- Thermal mass: Preheat the tagine gently on a diffuser or low burner if using clay to avoid cracks.
- Caramel clarity: Use a splash of orange juice or a touch of vinegar when reducing to brighten the sauce without adding sugar.
- Finish oil: Add a teaspoon of high-quality olive oil at the end to gloss the sauce and carry aromatics to the palate.
- Herb timing: Add half the herbs during cooking and finish with the rest to preserve freshness and color.
Restaurant kitchens also rest proteins and slice aggressively to present neat portions. Mimic that plating approach and your home tagine will look as good as it tastes.
Pro-Caution
Inspect preserved lemons for mold or off-odors; discard if any sign of spoilage appears. Food safety paired with technique ensures consistent success.
Serving Suggestions and Pairings for Tagine
Tagine pairs best with neutral carriers that soak up sauce: steamed couscous, fluffy rice, or semolina. For balance, include a simple roasted vegetable or a crisp salad with lemon vinaigrette.
Wine pairing: choose a medium-bodied red with moderate tannin, such as a Grenache blend, or pick a dry rosé for spicy or citrus-forward tagines. Non-alcoholic options include mint tea or a citrus spritz.
Final Notes on Mastering Tagine
Mastery of tagine is cumulative. Each cook cycle teaches seasoning, heat control, and timing. Track what you change and repeat the successful steps.
Adopt the ritual and you will develop an intuitive sense for when a tagine is perfectly finished: the sauce will cling, flavors will be distinct, and the protein will yield with gentle pressure.
FAQ
What is the difference between a tagine and a stew?
Tagine cooking emphasizes gentle condensation and return of juices to the dish via the conical lid, producing concentrated flavor without heavy reduction. Stews often reduce more aggressively on higher heat, yielding thicker, more homogeneous sauces. Tagine preserves more textural contrast between protein and sauce.
Can I use a Dutch oven instead of a clay tagine?
Yes. A heavy Dutch oven replicates the thermal mass and even heat distribution of a clay tagine. Reduce heat slightly and monitor moisture. For visual authenticity, transfer to a tagine for final presentation if desired.
How long can I store leftover tagine?
Refrigerate in an airtight container for up to 3 days. Reheat gently on low heat with a splash of stock or water to restore moisture. Do not reheat repeatedly; for best texture, consume within the first 24–48 hours.
Are preserved lemons mandatory?
Preserved lemons provide a layered, fermented brightness that fresh lemon cannot fully match. If unavailable, substitute fresh lemon zest plus a teaspoon of lemon juice and a pinch of salt, but the end result will lack the subtle umami that preserved lemons deliver.
How do I reduce sodium in tagine recipes?
Rinse preserved lemons and choose low-sodium olives. Reduce added salt and taste near the end. Use unsalted stock or dilute store-bought broth with water. Fresh herbs and acid can amplify perceived saltiness, allowing you to use less salt overall.
See also: Tagine
]]>