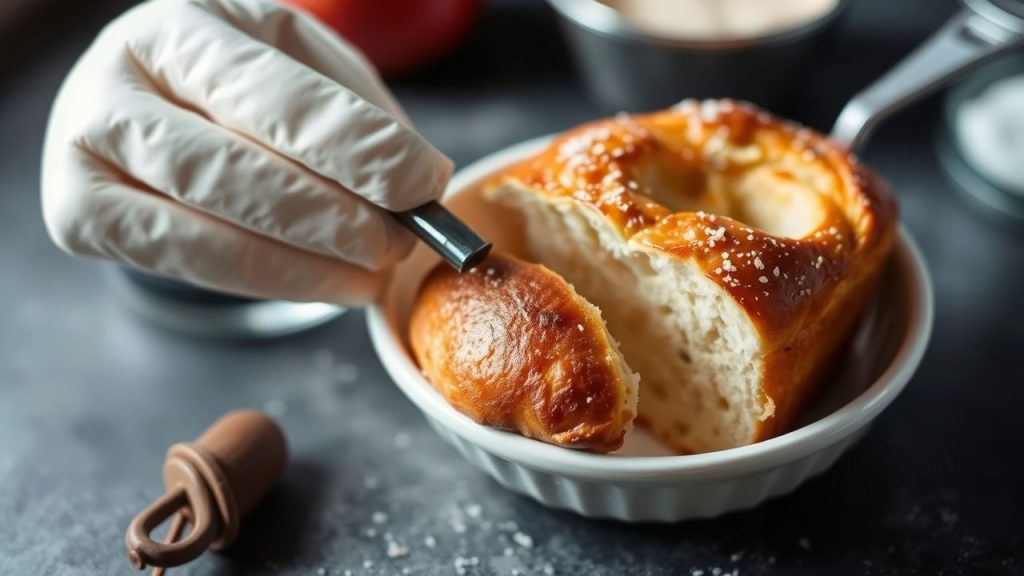
The perfectly baked gnocchi casserole combines tender potato pillows with a golden, flavorful crust. Understanding the physical chemistry behind that texture helps you repeat success reliably.
- Balance moisture and starch to avoid soggy or dry gnocchi.
- Use heat strategically so cheeses melt while the top browns via the Maillard reaction.
- Choose cheeses and sauce that complement texture and flavor without overloading liquid.
- Resting matters: brief rest time sets structure and improves sliceability.
The guidance that follows treats gnocchi as a food system: starch matrix, fat phase, and aqueous phase. I write from bench-tested kitchen practice and culinary science so you can adjust technique with confidence.
Prep and Cook Time
Preparation: 30 minutes. Plan your mise en place for sauces and cheese before you boil the gnocchi.
Cooking: 35 minutes. Bake at moderate heat to allow gelatinization and even crust formation.
- Total Time: 1 hour 5 minutes
Yield
This recipe yields about six generous portions. It scales well; increase baking time slightly for larger, deeper dishes.
Portion control matters for texture: thinner layers brown faster, deeper layers retain more moisture and need slightly longer bake time.
Difficulty Level
Medium. The techniques require attention to moisture and timing more than advanced knife skills. Most home cooks can execute these steps with predictable results.
Key skills: boiling gnocchi just until they float, preparing a lump-free béchamel, and judging top coloration during the final minutes of baking.
Ingredients
1 lb (450g) potato gnocchi, store-bought or homemade. Fresh potato gnocchi usually respond best because you can control density.
2 cups shredded mozzarella, divided; 1 cup Parmigiano-Reggiano; 1 ½ cups marinara; and 1 cup béchamel. Also butter, olive oil, garlic, basil, and seasoning.
Use cheeses with different melting profiles: mozzarella for stretch and a hard aged cheese for flavor depth and browning. Choose a marinara with controlled water content to limit free liquid.
To deepen your technique, compare potato chemistry to wheat-based pasta on the Potato page and review starch basics on the Starch overview.
For the Béchamel Sauce
2 tbsp unsalted butter, 2 tbsp all-purpose flour, 1 ½ cups warmed whole milk, pinch of nutmeg, salt and white pepper. A smooth white sauce adds cream without excess free water.
Make a traditional roux, then add warm milk gradually while whisking to avoid lumps. A brief simmer develops body but avoid prolonged boiling which thins the sauce.
Instructions
Prepare the béchamel: Melt butter, whisk in flour, cook briefly, then add warm milk in a slow stream while whisking. Simmer until it coats the back of a spoon and season to taste.
Cook gnocchi: Boil in well-salted water until they float, about 2–3 minutes. Drain thoroughly and let them sit briefly in the colander to shed surface water.
Sauté garlic: Gently heat olive oil and butter, soften garlic until pale gold to avoid bitterness. Transfer aromatic oil to the mixing bowl to fold into the casserole base.
Assemble and bake: Combine gnocchi, marinara, half the mozzarella, and béchamel. Pour into a greased 9×13-inch dish, top with remaining cheese and Parmigiano, and bake at 375°F (190°C) for 30–35 minutes.
Tips for Success
Moisture control: Drain boiled gnocchi well and avoid adding excess sauce. The béchamel adds controlled creaminess while minimizing free liquid.
Gnocchi choice: Fresh or high-quality store gnocchi that are tender yet cohesive yield the best texture. Overly dense or flour-heavy gnocchi can become chewy after baking.
Mix cheeses for functional performance: fontina or provolone adds melt, while aged Parmigiano improves browning and umami. If you want a crunchy top, add a breadcrumb-cheese mix in the final minutes under the broiler.
 Expert Insight
Allow assembled casseroles that were refrigerated to warm at room temperature for 20 minutes before baking. This reduces oven shock and promotes even heat penetration.
Serving Suggestions
Serve the casserole with a bright, acidic side like a lemon-dressed green salad to cut richness. A light-bodied red such as Chianti matches the tomato and cheese notes without overpowering texture.
Garnish with fresh basil and a final dusting of Parmigiano for contrast. Roasted seasonal vegetables or sautéed mushrooms pair well as warm sides that echo the casserole’s savory profile.
 Pro-Caution
Science of Texture and Heat
When you heat gnocchi, starch granules absorb water and swell; they gelatinize and form a soft network that gives each piece structure. That process links directly to how well the gnocchi hold form after baking.
Temperature control matters: moderate oven heat allows gelatinization, protein coagulation, and gradual moisture migration. Too hot and the surface will brown before the interior sets; too cool and you will not achieve that browned, savory top.
The Maillard reaction at the surface creates complex flavor and brown color. Read the detailed mechanism on the Maillard reaction page to understand why sugars and amino acids impact crust development.
Heat transfer governs bake time and texture. Conduction from the baking dish and convection in the oven move energy into the casserole; consult basic principles on the Heat transfer entry to visualize how depth and dish material change outcomes.
Practical Adjustments
If your gnocchi tend to become gummy, reduce added flour in homemade batches and increase draining time after boiling. Denser gnocchi require slightly longer bake times to reach internal gelatinization.
Substitute cheeses sparingly. Ricotta-based gnocchi or semolina varieties have different water absorption and will need lower oven temperatures or shorter bakes. Test with a small pan first to refine timing.
Nutritional Snapshot
| Nutritional Info (per serving) | Calories | Protein | Carbs | Fat |
|---|---|---|---|---|
| Gnocchi | 250 | 5g | 50g | 2g |
| Cheese Blend | 180 | 12g | 2g | 14g |
| Béchamel Sauce | 90 | 3g | 10g | 4g |
| Marinara Sauce | 70 | 2g | 14g | 1g |
| Total | 590 kcal | 22g | 76g | 21g |
Discover how to make your own potato gnocchi to control density and starch content for better bakes. Homemade gnocchi lets you tune texture for this casserole specifically.
For a deeper primer on classic sauce technique, see the béchamel fundamentals at our béchamel guide. A stable white sauce helps bind the casserole without adding free water.
FAQ
What makes gnocchi unique in casseroles?
Gnocchi combines potato starch and a small amount of flour to form a soft, absorbent matrix. That matrix swells with heat and sauce, so it needs controlled moisture to keep a pillowy interior and intact shape.
How do I prevent a soggy casserole?
Drain boiled gnocchi thoroughly, use a measured amount of sauce, and favor a thicker béchamel. Bake uncovered so surface moisture evaporates and a crust forms.
Which cheeses work best?
Use a blend: mozzarella for melt and stretch, a semi-soft cheese like fontina for cohesive melt, and Parmigiano-Reggiano for umami and crunchy browning. Balance fat and salt to avoid a greasy or overly salty bake.
Can I prepare this ahead?
Yes. Assemble the casserole, cover tightly, and refrigerate up to 24 hours. Allow the dish to sit 20 minutes at room temperature before baking to reduce thermal shock and ensure even heating.
Is there a science tip for a perfect crust?
Sprinkle a mix of toasted breadcrumbs and grated hard cheese over the top and finish under the broiler for 2–3 minutes. The dry topping dehydrates and browns quickly, producing crisp texture while the interior remains soft.
Final Notes
When you bake with awareness of starch behavior, heat flow, and cheese chemistry, you control the final texture rather than relying on luck. Small adjustments in draining, sauce ratio, and bake time yield consistent results.
Study the linked foundational resources and practice once with a small pan to dial in your oven. With the principles above, you will execute a golden, tender gnocchi casserole reliably.

See also: gnocchi casserole
]]>
- Cold fat + minimal handling create steam pockets for lift and layers.
- High heat (425°F / 220°C) gives rapid oven spring and brown tops.
- Buttermilk + correct leavening balance flavor and tender crumb.
- Weight measurements improve repeatability for large biscuits.
Prep and Cook Time
Preparation: 15 minutes. Cooking: 12–15 minutes. These biscuits bake quickly, so have tools and ingredients staged before you start.
Preheat the oven to 425°F (220°C) and place the rack in the center. A fully preheated oven gives consistent rise; use an oven thermometer if your range varies.
Yield & Difficulty Level
This recipe makes about 8 large cathead biscuits, each roughly 2¾–3 inches across when scooped generously. Scale the batch as needed for crowds, keeping proportion rules intact.
Difficulty: Medium. Techniques are straightforward—cold butter, gentle folding, and high-heat baking—but execution affects texture. One practice batch teaches the dough feel and timing quickly.
Ingredients
Choose simple, high-quality ingredients. Each plays a functional role: flour supplies structure, fat produces layers, and acid plus leaveners create tenderness and lift.
For background on the product category and ingredient science, review general entries such as biscuit (bread), buttermilk, and baking powder.
- 3 cups all-purpose flour, sifted for lighter texture (about 360–390 g).
- 1 tablespoon baking powder for primary lift.
- ½ teaspoon baking soda to react with buttermilk acid.
- 1 teaspoon fine sea salt for balanced flavor.
- 12 tablespoons (1½ sticks) cold unsalted butter, cubed.
- 1 cup buttermilk, chilled; acid improves tenderness.
- 1 tablespoon honey, optional for color and subtle sweetness.
Instructions
Work fast and keep ingredients cold to protect butter pockets that steam in the oven. Gentle folding preserves those pockets for flaky lift.
Use a pastry cutter, two knives, or fingertips to cut butter into flour. Aim for a coarse crumb with pea-size butter pieces rather than a uniform paste.
- Preheat: Heat oven to 425°F (220°C). Line a baking sheet with parchment.
- Mix dry: Whisk flour, baking powder, baking soda, and salt until uniform.
- Cut in butter: Add cold butter cubes and cut until mixture shows coarse crumbs with pea-sized bits.
- Wet mix: Whisk buttermilk and honey in a small bowl until blended.
- Combine: Make a well in the dry mix and pour in the buttermilk. Fold just until dough begins to hold together; do not overmix.
- Fold for layers: Turn dough onto a lightly floured surface, fold 3–4 times to form layers, then pat to 1½” thick.
- Portion: Scoop generous mounds (~¾ cup) or cut rounds from the pat. Place on sheet with about 1″ spacing.
- Finish and bake: Brush tops with melted butter or buttermilk; bake 12–15 minutes until puffed and golden.
- Rest: Remove and brush again with butter so it melts into the hot layers before serving.
For a crisper bottom, bake on a preheated baking steel or inside a hot cast-iron skillet. Direct radiant heat promotes a desirable base crust without changing the interior crumb.
Tips for Success
Temperature control matters more than fancy technique. Keep butter and buttermilk cold; warm fat reduces steam and flakiness.
Measure flour by weight for repeatable results; three-cup volume measures vary by how you spoon and level. Aim for roughly 360–390 g for the listed cup measure.
- Cold fat: Keep butter cubed and chilled; if it softens, return it to the freezer for 5–10 minutes.
- Scooping: Use an ice-cream scoop or large spoon for consistent cathead mounds.
- Fold, don’t knead: Overworking the dough develops gluten and yields a tough biscuit.
- Make-ahead: Shape and freeze on a tray, then transfer to a bag; bake from frozen, adding 3–5 minutes to time.
Expert Insight
Rotate the pan halfway through baking only if your oven has hot spots. Consistent heat yields even rise and color without breaking the delicate rise.
Pro-Caution
Serving Suggestions
Serve cathead biscuits hot and buttered for classic appeal. They pair well with savory sauces, sausage gravy, or sharp cheese on a split biscuit.
Try split biscuits with herb butter, preserves, or chilled pimento cheese for texture contrast. For seasonal variations, add grated sharp cheese and chopped chives into the folded dough sparingly.
Nutritional Snapshot
Nutrition varies by portion and ingredient brands. These figures estimate a large biscuit made to the recipe above.
Per biscuit (approximate): 230 kcal, 4 g protein, 25 g carbohydrates, 12 g fat. Adjust ingredient choices to match dietary goals or substitute lower-fat options if desired.

Technique Notes & Ingredient Science
Cold fat creates pockets that steam and separate layers during baking. The same principle underpins laminated pastries, but catheads rely on minimal steps and mechanical folding instead of multiple turns.
Acid in buttermilk reacts with baking soda to produce additional lift and flavor. For technical reference on butter properties, consult the butter entry.
FAQ
What are cathead biscuits and why the name?
Cathead biscuits are large, rustic Southern biscuits roughly the size of a cat’s head. The name describes their generous, freeform shape produced by scooping or hand-shaping rather than precise cutter use.
How do cathead biscuits differ from standard biscuits?
They differ mainly by scale and interior texture. Cathead biscuits use larger portions, cold fat, and high heat to yield a taller rise and a pillowy interior compared with smaller drop or cut biscuits.
Can I substitute milk or a non-dairy option for buttermilk?
Yes. Make a quick buttermilk substitute by adding 1 tablespoon vinegar or lemon juice to 1 cup milk and letting it sit for 5–10 minutes. For a vegan version, use unsweetened plant milk plus an acid and a vegan butter alternative.
How should I store and reheat leftovers?
Store baked biscuits in an airtight container at room temperature for 1–2 days. Reheat in a 300°F oven for 6–8 minutes to refresh texture; you can also freeze baked or unbaked biscuits for longer storage.
Why do some biscuits turn out dense instead of flaky?
Density usually comes from overworking the dough, warm fat, or stale leavening. Keep butter cold, fold gently, and verify baking powder freshness for the best rise and flaky crumb.
For additional reading on leavening and dairy, see the referenced encyclopedia entries linked above for objective background. Apply the methods here and adjust small variables—thickness, scoop size, oven behavior—until the biscuits match your preferred profile.
Practice one batch to learn the dough’s look and feel; after that, you can adapt sizes and mix-ins while keeping the classic Southern texture and flavor. Happy baking.
See also: Cathead biscuits
]]>These mini brown butter sourdough Cinnabundts pair a nutty beurre noisette note with the tang of fermented dough and a warm cinnamon swirl. The result is a tender, airy crumb with rich layers and a crisp golden exterior that rewards careful technique.
- Yield: 12 mini bundts with 18–22 minute bake time.
- Proofing: 6–8 hours bulk or overnight for flavor depth.
- Key flavor drivers: active starter, properly browned butter, and controlled hydration.
- Make-ahead: Shape, freeze, then bake from frozen with a 5–7 minute time addition.
Why this recipe works
This formula balances hydration and strength so the sourdough contributes tang without collapsing the cinnamon swirl. Browning the butter concentrates nutty aromatics that resist dilution during bulk fermentation.
I reference fermentation science routinely; sourdough’s wild yeasts and lactic bacteria create organic acids and gas that shape crumb structure. See sourdough fermentation for the microbiology that underpins the texture.
Prep and Cook Time
Preparation: 30 minutes active work, not counting rest and proofing. Active steps include mixing, kneading, shaping, and glazing.
Proofing: 6–8 hours at room temperature or refrigerate overnight for more sourness. Baking: 18–22 minutes at 375°F (190°C); rotate pans halfway for even color.
Yield and Difficulty
Makes: 12 mini Cinnabundts. Each serves as a single-indulgence portion suited for brunch or gifting. Use a well-greased mini bundt pan for clean release.
Difficulty: Medium. Techniques include brown-butter preparation, sourdough bulk fermentation, and tight rolling for visible swirls. These require attention but reward precision.
Ingredients
Use active, bubbly starter to guarantee oven spring. Measure ingredients by weight for repeatable results and consistent crumb.
Key ingredients include bread flour for strength, some whole wheat for flavor, browned butter for aroma, and cinnamon for the classic profile. For background reading on brown butter, consult beurre noisette.
- 150g active sourdough starter
- 300g bread flour
- 50g whole wheat flour
- 200ml whole milk, warmed
- 100g unsalted butter, browned and cooled
- 75g granulated sugar
- 1 tsp fine sea salt
- 1 tbsp ground cinnamon
- 1 tsp vanilla extract
- 1 large egg
- Filling: 50g brown sugar, 2 tbsp melted browned butter, 1.5 tbsp ground cinnamon
- Glaze: 100g powdered sugar, 2 tbsp cream cheese, 1 tbsp whole milk, 1 tsp vanilla
Instructions
Follow each step deliberately and keep work surfaces lightly floured to prevent sticking. Temperature control and timing govern final crumb and swirl definition.
- Brown the butter: Melt butter over medium heat, allow foaming and browning until nutty aroma appears, about 4–6 minutes. Cool to warm but not hot before adding to dough.
- Mix the dough: In a large bowl, whisk starter, warmed milk, and vanilla until uniform. Add flours, sugar, salt, cinnamon, egg, then the cooled browned butter. Stir to form a cohesive dough.
- Knead for strength: Knead 8–10 minutes by hand or 6–7 minutes in a mixer on medium until smooth and elastic. The dough should pass a gentle windowpane check.
- Bulk ferment: Place dough in an oiled bowl, cover, and bulk ferment 4–6 hours at room temperature until doubled and bubbly. Refrigerate overnight to develop more acidity if desired.
- Roll and fill: On a floured surface, roll dough to a 12×18 inch rectangle. Brush with 2 tbsp melted browned butter, then evenly sprinkle brown sugar and cinnamon mixture.
- Shape: Roll tightly from the long edge into a log. Cut into 12 equal pieces and place each cut-side up in well-greased mini bundt molds, tucking ends under to create a neat swirl.
- Final proof: Cover loosely and proof 2–3 hours until puffy. Use the finger-poke test: a light indentation should slowly spring back.
- Bake: Preheat oven to 375°F (190°C). Bake 18–22 minutes until golden brown. Cool 5–10 minutes before unmolding for best shape retention.
- Glaze: Whisk powdered sugar with cream cheese, milk, and vanilla to a pourable glaze. Drizzle over warm Cinnabundts and garnish as desired.
For a note on bundt equipment and pan characteristics, consult Bundt pan design. Proper pan conductance affects baking time and crust.
Tips for Success with Your Mini Brown Butter Sourdough Cinnabundts
Starter vitality: Use a starter fed 4–12 hours before mixing so it peaks and shows active bubbles. A weak starter produces denser results and flatter swirls.
Browned butter handling: Let browned butter cool to warm; adding very hot fat can weaken dough gluten and stress yeast cells.
Shaping and Proofing Detail
Roll with consistent pressure to form even layers; inconsistencies create irregular expansion and leaking filling. Use a bench scraper to lift and transfer the log cleanly.
During proofing, monitor ambient temperature and humidity. If the dough proofs too quickly, move pans to a cooler spot or refrigerate briefly to slow the process.
Pro-Caution
Cool the Cinnabundts slightly in the pan to allow structure to set. Unmolding too soon risks tearing the crumb and losing the swirl definition.
Expert Insight
Experiment with glaze variants: cream cheese yields tang and body, while a simple powdered sugar glaze lets brown-butter notes dominate. Add orange zest or a splash of bourbon for nuance.
Serving Suggestions
Serve warm to maximize aroma and melt-in-mouth texture. Pair with bold coffee or a spiced tea to complement the brown butter and cinnamon layers.
Garnishes such as toasted pecans, a light dusting of cinnamon, or a pinch of flaky sea salt balance richness and add texture. For brunch menus, present with seasonal fruit or a dollop of cinnamon whipped cream.
Explore related recipes and technique articles on the same site for progressive learning. Visit sourdough basics and baking resources for detailed guides and pantry tips.
Nutritional Snapshot
Estimate per mini Cinnabundt: ~210 kcal, 5g protein, 28g carbohydrates, 8g fat. Values vary with ingredient brands and portioning.
Adjust portion size, swap dairy, or alter sugar to manage dietary needs. Use part-skim milk or reduce glaze to decrease calories if required.
FAQ
What makes Cinnabundts different from cinnamon rolls?
Cinnabundts combine sourdough fermentation with a bundt-style shape. The method emphasizes a slightly lower hydration and a tight roll to maintain spiral integrity during baking.
The result contrasts with classic cinnamon rolls, which often use enriched yeast dough and a softer, loaf-like rise.
How do I know my sourdough starter is ready?
Your starter should double within 4–12 hours after feeding and display active bubbles across the surface. A ready starter floats in a water test and smells pleasantly tangy.
If unsure, feed twice daily for a few days to increase activity before using in enriched recipes.
Can I use commercial yeast instead of sourdough?
Yes. Substitute 7g instant yeast and reduce proofing time to 1–2 hours for bulk and 40–60 minutes for final proof. Expect less sourness and slightly different crumb structure.
Adjust sugar and salt ratios if you swap ingredients to maintain flavor balance.
Can I freeze shaped Cinnabundts?
Freeze shaped, unbaked Cinnabundts on a tray until solid, then transfer to airtight bags. Bake from frozen and add 5–7 minutes to the bake time. Thawing first can make proofs less predictable.
Label bags with the date and use within 2 months for best quality.
What variations work well with this base recipe?
Try chopped toasted pecans or walnuts in the filling, add citrus zest to the glaze, or swap ground cinnamon for cardamom for a different aromatic profile. Brown butter pairs well with nutty and citrus notes.
For a seasonal twist, fold in grated apple or pear with a light sprinkle of nutmeg to avoid excess moisture.

Technical references: read about cinnamon for spice chemistry and cream cheese for glaze behavior affecting texture.
These mini Cinnabundts reward careful timing and steady technique. Follow the steps, monitor proofing, and preserve browned butter character to produce reliably excellent results.
See also: Cinnabundts
]]>
- Pigments matter: Paprika’s carotenoids add warm orange-red tones to crusts.
- Heat chemistry: Pigment oxidation and the Maillard reaction work together to deepen color.
- Technique wins: Application method, oven humidity, and sugars influence final hue.
- Balance flavor: Use smoked or sweet paprika sparingly to avoid bitterness.
Why paprika colors crusts
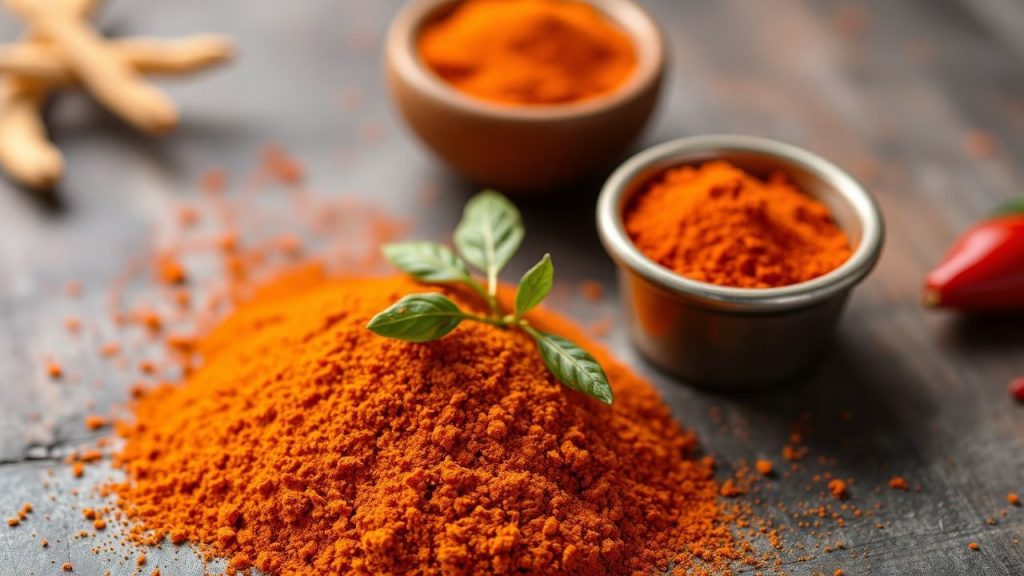
At the molecular level, paprika contains a mix of pigments called carotenoids. These lipid-soluble molecules carry strong orange-red color that survives mixing and shows on the dough surface when applied correctly.
Moreover, heat alters those pigments. As the crust reaches high temperatures, pigments oxidize and change tone, which amplifies the perceived golden hue. For background on the spice itself, see paprika.
Pigments, oxidation and visual change
Carotenoids like capsanthin and capsorubin dominate paprika’s color profile. These compounds absorb and reflect light in the orange-red range, so even small amounts affect color strongly.
During baking, heat-driven oxidation modifies chromophores in carotenoids, changing the way they reflect light. For technical context on these pigments, see carotenoid chemistry.
How paprika interacts with dough and surface
When you fold paprika into dough, pigments distribute through the crumb and the surface. This internal distribution gently tints the crumb and helps the crust appear warmer when baked.
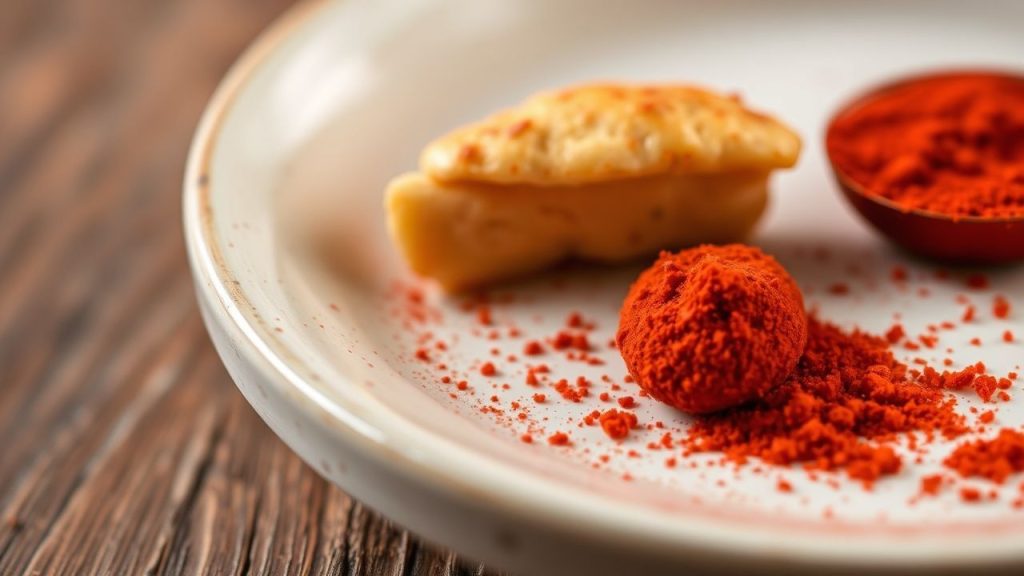
Applying paprika to the surface—by dusting or mixing it into a final oil or butter glaze—keeps pigments concentrated on the crust. That targeted approach yields the most visible color change with the smallest impact on taste.
Application methods and timing
First, incorporate a measured amount into the dough to produce a subtle, consistent tint. Second, reserve a light surface dusting or glaze for the last proof or pre-bake brush; this concentrates color where heat has the greatest effect.
Additionally, a thin oil or butter wash with dissolved paprika improves pigment adhesion and surface sheen. This method also encourages more even browning across the crust surface.
Maillard reaction and complementary chemistry
Color development on crusts rarely results from pigments alone. The Maillard reaction produces melanoidins—brown polymers that deepen color and add roasted notes.
Paprika and Maillard chemistry act together: pigments add hue, while Maillard products add depth and complexity. For a technical overview, consult the Maillard reaction entry.
In practice, bakers use small amounts of sugars or honey to accelerate Maillard browning at safe oven temperatures. Likewise, controlled oven humidity can prolong surface caramelization without burning pigments.
Prep and Cook Time
These timings reflect a standard enriched or lean dough baked for color emphasis. Adjust times modestly for hydration and loaf size.
- Preparation: 15 minutes
- Cooking: 25–30 minutes (depending on recipe)
- Total: 40–45 minutes
Yield
Yield depends on shaping. A standard formula here yields a single loaf suitable for slicing or as dinner rolls.
Serves: 8 generous slices or portions.
Difficulty Level
This technique rates as medium difficulty because it requires judgment on pigment amount and oven control. Less experienced bakers should experiment with small test loaves.
However, with practice, the visual and flavor gains are consistent and repeatable.
Ingredients
Use high-quality base ingredients and fresh paprika for the best results; stale spice yields dull color and muted aroma.
- 3 ½ cups all-purpose flour, sifted
- 1 ½ tsp fine sea salt
- 2 tbsp sweet or smoked paprika (adjust by preference)
- 1 tbsp granulated sugar
- 1 tbsp active dry yeast
- 1 ¼ cups warm water (105–110°F)
- 2 tbsp extra virgin olive oil
- 1 tsp honey or maple syrup (to boost Maillard reaction)
- Optional: ½ tsp garlic powder for savory depth
Instructions
Follow clear steps to preserve yeast activity and pigment integrity. Measure paprika carefully; the spice is potent and can dominate flavor if overused.
- Activate the yeast: Combine warm water, honey, and yeast. Let sit 5–10 minutes until foamy.
- Mix dry ingredients: Whisk flour, salt, paprika, sugar, and optional garlic powder until uniform.
- Combine and knead: Add the yeast mix and oil. Stir to form a shaggy dough, then knead 8–10 minutes until smooth and elastic.
- First rise: Oil a bowl, place dough inside, cover, and allow to double in 1–1.5 hours.
- Shape and second rise: Shape as desired. Rest on a parchment-lined sheet for 30–60 minutes.
- Preheat and finish: Heat oven to 450°F (230°C). Optionally brush with oil or butter mixed with a pinch of paprika.
- Bake: Bake 25–30 minutes until the crust is deep golden and sounds hollow when tapped.
- Cool: Transfer to a wire rack to retain crispness before slicing.
Tips for Success
Small shifts in technique yield noticeable differences in color and flavor. Keep notes on quantity and method so you can reproduce results.
Freshness of spice and even surface application determine how vivid the final crust appears.
Choosing paprika: Sweet paprika gives a milder orange tint; smoked paprika adds deeper, warmer tones with a smoky edge.
Control heat: Avoid excessive oven temperature that can burn pigments and cause bitterness rather than appealing color.
Hydration matters: A slightly wetter dough prolongs caramelization time on the surface, allowing pigments and Maillard products to develop fully.
Make-ahead: Refrigerating dough overnight improves flavor and gives pigments more time to integrate into the matrix of the dough.
[VIABLE_BREAK]
Expert Insight
After testing, you can alternate between mixing paprika into the dough and applying a surface wash depending on the intensity you want.
Pro-Caution
Serving Suggestions
Paprika-tinted crusts pair well with savory toppings because the spice accentuates roasted and smoky notes. Slice warm to showcase aroma and color contrast.
Consider simple accompaniments like herb oil or a mild butter to highlight the crust without masking the paprika’s visual effect.
- Pair with rich cheeses, smoked meats, or roasted vegetables.
- Garnish edges with a light dusting of paprika and flaky sea salt for presentation.
- For savory pastries, add chopped herbs such as rosemary or thyme to harmonize with paprika.
Practical baking adjustments
If your crust darkens too quickly, lower the top heat and increase steam during the first 5–8 minutes. This stabilizes pigment development and delays scorching.
Conversely, if crusts remain pale, add a modest sugar or honey boost and reduce oven humidity to accelerate Maillard browning and pigment oxidation.
For extra technical context around bread structure and baking fundamentals, see bread. For general baking processes, consult baking.
Q&A
What makes paprika more than just a flavorful spice?
Paprika supplies concentrated carotenoid pigments that alter color independently of taste. Also, it contributes volatile compounds that subtly influence aroma during baking.
Therefore, paprika acts as both a colorant and a flavor enhancer when used judiciously.
How does paprika influence the crust’s color during baking?
Heat-driven oxidation changes pigment chromophores and, combined with Maillard browning, produces a deep, warm tone on crust surfaces. The two processes complement each other to produce a richer final color.
Consequently, temperature control and sugar presence directly affect how vivid that color becomes.
Is the color effect uniform across different types of paprika?
No. Sweet, smoked, and hot paprika differ in pigment concentration and additional flavor compounds. Smoked varieties add darker tones and a smoky profile, while sweet paprika leans orange-red.
Thus, choose the variety based on the visual and flavor target for your bake.
Can paprika fix uneven baking or pale crusts?
Paprika can improve visual appeal, but it cannot replace proper baking technique. It makes slightly pale crusts look more appetizing, yet it cannot restore underbaked centers.
Therefore, use paprika as a finishing and augmenting tool, not as a substitute for even heat and correct bake times.
How much paprika should I use without overpowering taste?
Begin conservatively: for a standard loaf, 1–2 tablespoons total divided between dough and surface works well. Increase incrementally and taste at each step during experiments.
Moreover, prefer diluted application methods—oil-based glazes or mixed dough—if you want strong color but mild flavor impact.
Insights and Conclusions
Paprika proves to be a practical, low-risk tool for bakers who want to influence crust color deliberately. It works best when combined with sound baking technique and controlled heat.
By understanding pigments, oxidation, and the Maillard reaction, bakers can reproduce vivid, appetizing crusts reliably and with minimal flavor compromise.
For laboratory-grade pigment stability data and deeper chemical explanations, supplement baking practice with peer-reviewed literature on carotenoid thermal behavior and Maillard pathways.
See also: paprika
]]>
- Steam is the mechanical leavening: trapped moisture expands and separates dough layers.
- Cold, solid fat preserves layers: it must remain distinct through shaping and baking.
- Folding creates structure: lamination multiplies thin fat and dough sheets.
- Temperature control wins: chill between folds and bake hot for puff.
What steaming fat means in practical baking
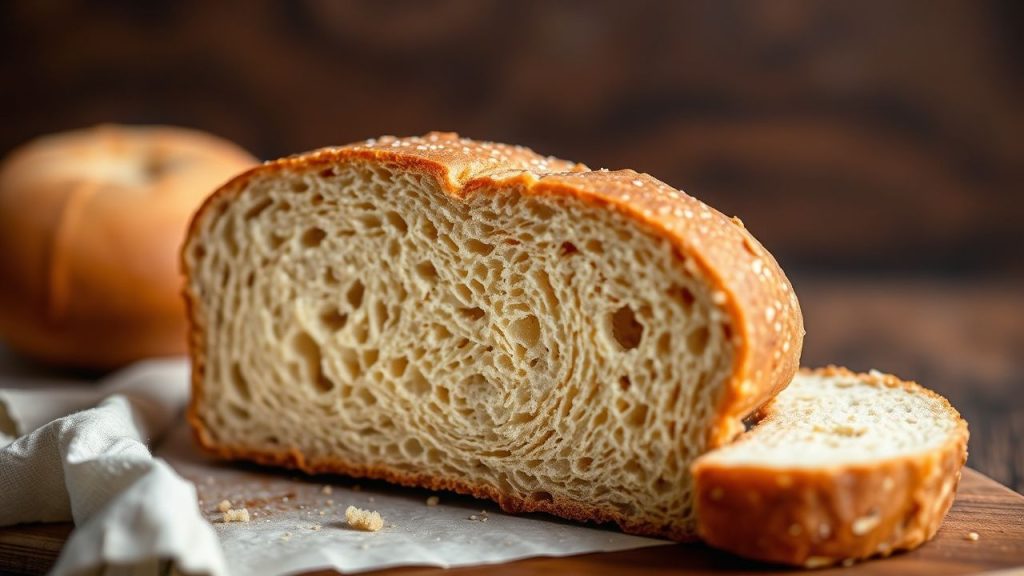
Steaming fat refers to the way small, discrete pieces of fat melt and release water vapor during baking. That vapor inflates and separates adjacent dough sheets, yielding the classic flaky texture.
Professional bakers treat the technique as a controlled physical reaction. They use fats with predictable melting behavior to time the expansion and final structure.
Why steam separates layers and how to exploit it
When fat pieces remain solid until the oven’s heat, their internal water turns to steam and forces a split between dough layers. That split creates crisp outer sheets and tender inner laminations.
Manipulate three variables to maximize the effect: fat distribution, dough hydration, and oven temperature. Change any one and the final lift changes in predictable ways.
Science of steam, fat and gluten
Gluten forms a flexible matrix that can stretch as steam expands. If gluten is too tight, it resists separation and yields dense layers. If too weak, the dough breaks and collapses.
Balancing gluten strength means controlling mixing and adding acids like vinegar or lemon juice in small amounts to relax gluten release while keeping dough strong enough to trap steam.
Ingredients and equipment that matter
Choose a fat with the right melting profile. Unsalted butter gives superior flavor and a predictable water content. Lard and solid vegetable shortening melt at different temperatures and alter texture accordingly.
Use a bench scraper, rolling pin, and a chilled work surface. Maintain cold utensils and a refrigerator nearby to keep fat from softening while you fold and roll.
Expert Insight
Step-by-step technique for reliable layering
Start by mixing flour and salt, then cutting cold fat into pea-sized pieces. Those discrete particles are the loci of steam and the building blocks of layers.
Bring the dough together with ice-cold water just until it holds. Overworking will develop gluten and reduce flakiness.
Incorporating the fat
Use a pastry cutter or grater to create even pieces of butter. The goal is controlled distribution rather than fully emulsifying fat into the flour.
Work quickly and return the bowl to the fridge if the butter warms. Small, colder pieces produce more distinct steam pockets when baked.
Lamination: folding to multiply sheets
Roll into a rectangle, fold into thirds, rotate, and repeat. Each fold multiplies layers: three folds give dozens of alternating fat-and-dough planes.
Rest the dough 10–20 minutes between folds in the fridge. This keeps butter firm and prevents tearing while you roll.
Baking: convert moisture into puff
Preheat the oven to a high temperature—typically 400–425°F (200–220°C) for many pastries. The initial blast of heat converts water in the fat and dough into steam rapidly.
Place pastries on a preheated tray or baking stone to ensure an immediate transfer of heat and consistent rise from the bottom as well as the top.
Troubleshooting common faults
If pastries bake flat, the usual causes are warm fat, insufficient folds, or a slack gluten structure. Double-check chilling intervals and the size of your fat pieces.
If layers bake dense or gummy, you likely overhydrated or overworked the dough. Reduce mixing and increase rest times to let gluten relax.
Pro-Caution
Serving, storage, and make-ahead options
Serve pastries warm to highlight crisp layers and buttery aroma. A brief 3–5 minute reheat in a hot oven will refresh stored goods without sogginess.
Wrap dough tightly and freeze for up to two weeks. Thaw slowly in the refrigerator before final shaping; this preserves fat distribution and maintains layering performance.
| Nutrient | Per Serving |
|---|---|
| Calories | 220 kcal |
| Protein | 3 g |
| Carbohydrates | 15 g |
| Fat | 16 g |
Relevant references and further reading
Compare techniques across pastry styles. For classic laminated pastry background, consult resources on puff pastry and how repeated folds produce lift.
Review the composition and culinary use of common fats via the butter and shortening pages. For technique specifics, study laminated yeast doughs such as the croissant.
Want recipes and related technique articles? See our detailed guide on artisan pastry techniques and a focused primer at pie crust basics for single-crust building blocks.
FAQ
What is the ideal fat for maximum steam lift?
Unsalted butter offers the best balance of flavor and water content for steam. It performs consistently in laminated doughs and browns attractively during baking.
Lard and solid shortening also perform well for flaky texture but change flavor and mouthfeel. Test small batches when switching fats.
How cold should the fat and dough remain?
Keep fat just firm, not rock-hard. Fat too cold can fracture; too warm will smear into the flour. Aim for refrigerated temperature, around 35–45°F (2–7°C).
Chill tools and rest dough between folds. Quick work with frequent chilling yields the most reliable layers.
Can steaming fat be used in all pastries?
The principle applies broadly: any pastry that benefits from separate sheets can use the technique. Applications vary from puff pastry to biscuits and croissants.
Adjust the number of folds, fat type, and hydration to suit the target texture—more folds for dramatic lift, fewer for rustic flake.
Why do some pastries brown before they fully puff?
Fast surface browning indicates high sugar or butter on the exterior or an oven hotspot. Reduce top heat slightly or shield tops with foil after initial rise to allow internal puff to complete.
Use an oven thermometer and rotate trays to reduce uneven color and to encourage uniform steam expansion throughout the bake.
How do I store laminated dough and finished pastries?
Unbaked laminated dough freezes well for up to two weeks. Thaw in the refrigerator overnight to preserve layer integrity before rolling and baking.
Store baked pastries at room temperature in a loose tent to avoid trapping steam; crispness returns with a brief oven reheat the next day.
Mastering steaming fat refines your control over texture and taste. Keep experimenting with fat type, fold count, and oven heat to build repeatable, flaky results.
See also: Steaming fat
]]>
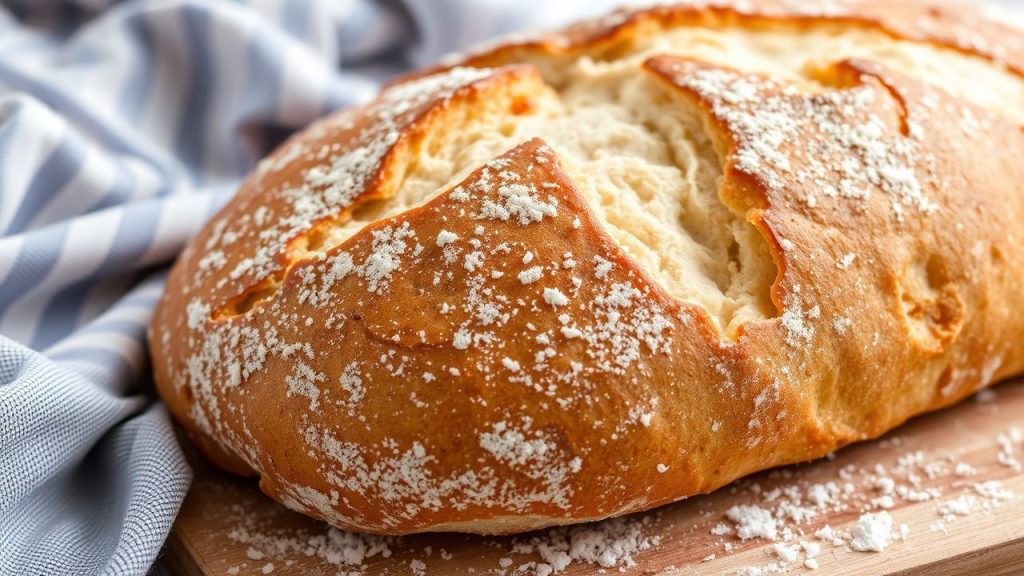
- Bread browning forms when heat transforms sugars and amino acids into dozens of flavorful compounds.
- Temperature, moisture, and ingredient mix determine the balance between caramelization and the Maillard reaction.
- Simple technique changes—steam, scoring, small amounts of sugar or honey—sharply alter crust color and taste.
- Controlling fermentation and flour protein improves both crumb and browning potential.
The chemistry behind bread browning
Bread browning stems from two main reactions: the Maillard reaction and sugar caramelization. The Maillard reaction requires amino acids and reducing sugars and produces a wide set of aroma compounds that bakers prize for toasty and nutty notes.
The Maillard reaction is well described in scientific literature. For technical background, see Maillard reaction. Caramelization, a separate thermal breakdown of sugars, also contributes to darker color and sweet-toasty tones; details appear on Caramelization.
Key factors that control browning
Four variables govern browning intensity: temperature, surface moisture, sugar availability, and protein content. Bakers adjust these to reach preferred crust color without burning.
Temperature speeds up chemical reactions, while moisture slows them until surface water evaporates. Protein level (gluten-forming proteins) supplies amino acids for Maillard pathways; learn more about gluten chemistry at Gluten.
Recipe, timing and ingredient roles
Preparation-active time and ingredient ratios influence the bread’s browning potential. A well-planned timeline yields consistent color and flavor.
Below are practical details for a standard loaf that highlights browning techniques while maintaining good crumb structure.
Prep and Cook Time
Preparation: 20 minutes. Keep hands efficient when mixing and kneading to retain temperature control.
Rising: 1 hour 30 minutes. Fermentation creates sugars and gases that shape flavor and surface reactions.
Baking: 30–35 minutes. Use an initial burst of steam, then finish in dry heat for crust development.
Total: About 2 hours 25 minutes depending on room temperature and dough strength.
Yield and Difficulty
Yield: 1 large loaf, serves 8–10. This scale produces a single surface area suited for controlled browning.
Difficulty: Medium. The methods require attention to fermentation and oven management, but they are reproducible with practice.
Ingredients
- 3 ½ cups bread flour, sifted
- 1 ¼ cups warm water (≈110°F)
- 2 tsp active dry yeast
- 1 tbsp granulated sugar
- 2 tsp fine sea salt
- 2 tbsp olive oil, plus extra for greasing
- 1 tbsp honey (adds fermentable sugars for better crust color)
Instructions
- Activate the yeast: Combine warm water, yeast and sugar. Wait 5–7 minutes until frothy; this confirms active fermentation.
- Mix dough: Combine flour and salt, then add the yeast mix, oil and honey. Stir until a rough mass forms; the honey boosts surface sugars that help caramelize.
- Knead: On a lightly floured board, knead 8–10 minutes until elastic and smooth. Kneading develops the gluten network so the crumb supports even browning.
- First rise: Oil a bowl and place dough inside. Cover and let rise in a warm spot about 1 hour, until doubled. Fermentation creates flavor precursors for Maillard chemistry.
- Shape and second rise: Punch down gently, shape into a boule, and place on parchment. Cover and rest 30–45 minutes for final proofing; avoid overproofing to keep surface sugars available.
- Preheat and prepare: Heat oven to 450°F (230°C). Place a pan on the lower rack to create steam during the first 15 minutes of baking.
- Score and bake: Slash the top to control expansion. Add hot water to the lower pan to generate steam, bake 15 minutes with steam, then remove pan and bake 15–20 minutes until deep golden.
- Cool: Transfer to a wire rack and cool at least 30 minutes before slicing; cooling completes interior setting and allows flavors to stabilize.
How technique alters chemistry
Steam delays crust setting and keeps the surface moist long enough for internal expansion. After steam ends, the surface dries and undergoes browning reactions more rapidly.
Scoring increases surface area and directs where the crust will expand, which affects heat exposure and browning patterns. Small changes in oven placement change localized temperatures and color development.
Techniques to enhance browning
Use honey or a small sugar addition in the dough to increase reducing sugar content. Brushing with egg wash or milk before baking adds proteins and fats that encourage more intense browning.
High initial heat followed by a slight drop can create a crisp, dark crust without burning the crumb. Monitor the oven and rotate the loaf if your oven has hot spots.
Expert Insight
Experiment with flour blends. Adding 5–10% whole wheat or rye increases soluble sugars after fermentation and can deepen crust tone. However, whole grains absorb more water; adjust hydration accordingly.
Pro-Caution
Chef’s notes and troubleshooting
Temperature control: Use an oven thermometer to verify real temperature. Many home ovens run 10–25°F off the dial, which alters browning rates significantly.
Moisture balance: If you get pale crusts, reduce hydration slightly on the surface or shorten initial steam time. If crusts burn before crumb finishes, lower the rack or reduce initial temperature.
For longer flavor development, try a cold overnight proof. Extended refrigeration increases enzymatic sugar release and improves browning potential when baked. Read our in-depth guide on bread baking chemistry for lab-style explanations and practice protocols.
For technique primers, see our starter guide at basic bread techniques, which covers kneading, shaping and scoring drills useful for consistent crusts.
Serving suggestions and presentation
Slice warm for the best aroma and mouthfeel. A pat of butter highlights Maillard-derived savory notes, while herb oils pair well with toasty flavors.
For a rustic finish, dust lightly with flour before baking and sprinkle few grains of coarse sea salt immediately on removal. Those small finishing touches increase sensory contrast and visual appeal.
| Nutrient | Per Serving (1 slice) |
|---|---|
| Calories | 140 kcal |
| Protein | 4 g |
| Carbohydrates | 28 g |
| Fat | 2 g |
Further reading and science links
For foundational context on bread as a cultural and chemical staple, consult the general overview at Bread. To explore fermentation mechanics that produce fermentable sugars, see Fermentation.
These sources clarify the basic science behind the processes discussed here and help you plan controlled experiments at home or in a test kitchen.
FAQ
What exactly causes the golden-brown crust?
The golden-brown crust results mainly from the Maillard reaction, where amino acids and reducing sugars react under heat to form browning pigments and dozens of flavor molecules. Caramelization of sugars also adds sweet, toasty notes at higher surface temperatures.
Does adding sugar always make bread browner?
Adding small amounts of sugar increases reducing sugars available for browning, which often darkens the crust. However, too much sugar raises the risk of burning, so use modest additions and adjust oven time and temperature accordingly.
How does moisture affect browning?
Moisture delays browning because water must evaporate before surface temperatures rise enough to trigger Maillard and caramelization pathways. Steam initially helps the loaf expand, then removing steam allows rapid browning.
Will different flours change crust color?
Yes. Higher-protein flours supply more amino acids for Maillard reactions, often producing richer crusts. Whole grains contribute additional sugars and phenolic components that can deepen color and add complexity.
How do I avoid a burnt crust while still getting good color?
Use high heat for a short initial period with steam, then lower or remove direct heat and continue in dry conditions. Monitor visually and rotate the loaf if your oven heats unevenly; keep a thermometer handy to ensure consistent results.
Mastering bread browning lets you control both appearance and layered flavor. With practice you will predict how small changes in ingredients and technique alter the chemistry and produce reliably delicious crusts.
See also: bread browning
]]>
- Check hydration and proofing: small changes make big flavor differences.
- Inspect ingredients: flour age and yeast activity shape taste.
- Adjust baking and storage: bake times, steam, and proper storage preserve freshness.
- Revive smartly: quick oven reheat or repurposing restores usability.
Understanding the Role of Ingredients in Bread Flavor
Bread flavor begins with the raw materials. Flour supplies starch and protein; its type and freshness directly influence aroma and crumb. For a primer on basic flour types, see flour on Wikipedia.
Protein level matters: higher-protein bread flour builds structure and chew, while lower-protein flour produces a softer but less flavorful crumb. Whole grain flours add oils and phenolic compounds that create richer, nuttier notes.
Yeast contributes both lift and flavor through fermentation. Active, healthy yeast yields alcohols and organic acids that build complexity over time. For background on the organism, see yeast on Wikipedia.
Salt tightens gluten and enhances perceived sweetness by suppressing bitterness. Omitting or reducing salt produces flat, insipid results. Small additions of fats, dairy, or sugar boost mouthfeel and aroma; leaving them out will make the loaf taste thinner.
How Baking Techniques Influence the Taste and Texture
Oven conditions shape the final sensory profile. Crust color stems from the Maillard reaction and caramelization; those browned notes provide toasted, savory flavors. Learn more about the chemistry at Maillard reaction on Wikipedia.
Temperature and time balance moisture retention. Underbaking leaves gummy interior; overbaking strips moisture and concentrates a papery taste. Steam during the first minutes of baking improves crust development and helps trap interior moisture for a softer crumb.
Fermentation time also controls depth. Short, fast fermentations create simple flavors. Conversely, long cold ferments or mature sourdough starters produce organic acids and esters that make bread taste alive rather than flat.
Tools and technique matter: baking on a hot stone or steel yields more even heat and better oven spring. Simple steps like proper scoring and using the correct hydration keep the crumb light and flavorful rather than dense and dull.
Common Storage Mistakes That Lead to Cardboard-Like Bread
Staling is a physical process: starch molecules recrystallize, pushing moisture outward and creating a dry, firm crumb. This process accelerates in cool environments like refrigerators and is described under staling on Wikipedia.
Putting bread in the fridge speeds retrogradation; the crumb firms and the mouthfeel becomes papery. Wrapping a crusted loaf in plastic traps moisture and kills the crust; leaving it exposed dries the loaf. Aim for a balance: a paper bag or a dedicated bread box often works best.
Freezing halts staling and preserves flavor when done correctly. Slice before freezing for convenience, and thaw gently at room temperature or refresh briefly in a moderate oven to revive texture. Avoid repeated freeze–thaw cycles, which harm structure and taste.
Storage choices can obscure ingredient and technique issues. If a loaf tastes cardboard on day one, the root cause likely sits in the recipe or bake rather than storage alone.
Pro-Caution
Expert Tips to Revive and Enhance Your Bread’s Flavor
Revival tactics work well and often restore palatability. Lightly misting the crust, wrapping in foil, and warming at 175°C (350°F) for 10–15 minutes reintroduces moisture and softens the crumb. Toasting slices concentrates caramelized notes and improves perceived richness.
Repurposing stale bread gives it new life: make croutons, panzanella, bread pudding, or French toast. These preparations add moisture and complementary flavors that mask dryness and improve enjoyment.
Expert Insight
Small finishing touches elevate taste. A light brush of high-quality olive oil or a sprinkle of flaky sea salt on warm slices sharpens flavor. Pairing with butter, aged cheeses, or tangy preserves masks minor dryness better than neutral spreads.
If you bake often, keep multiple flour batches on rotation and note mill dates. Fresh, properly stored flour and active yeast reduce the risk of flat, cardboard-like loaves.
Basic Loaf Recipe and Practical Notes
This straightforward loaf highlights key variables: hydration, protein, salt, and fermentation. It serves as a test bed: tweak one variable at a time to isolate flavor problems.
Use this recipe as a baseline and adjust fermentation or hydration to improve taste. For advanced methods like sourdough or autolyse, see our internal resources linked below.
Prep and Cook Time
- Preparation: 15 minutes
- Proofing: 1.5–2 hours (or overnight cold ferment)
- Baking: 30–35 minutes
Yield
Produces 1 standard loaf (about 8–10 slices).
Difficulty Level
Medium — requires attention to timing, hydration, and oven performance.
Ingredients
- 3 cups bread flour
- 1 ½ tsp salt
- 2 tsp instant yeast
- 1 1/4 cups warm water (about 43°C)
- 1 tbsp olive oil or melted butter
- 1 tsp sugar (optional)
Instructions
- Mix dry ingredients: Combine bread flour, salt, sugar, and yeast in a bowl.
- Add liquids: Stir in warm water and oil until a shaggy dough forms.
- Knead: Knead 8–10 minutes by hand or 6–7 minutes in a mixer.
- First rise: Place dough in an oiled bowl and proof until doubled.
- Shape and second rise: Shape into a loaf and proof again until puffy.
- Bake: Slash the top, bake at 200°C (400°F) for 30–35 minutes until golden and hollow-sounding.
- Cool: Cool fully on a wire rack to set the crumb before slicing.
Storage and Serving Recommendations
For same-day use, store crusty loaves in a paper bag or bread box to keep crust crisp and crumb soft. For longer storage, slice and freeze; refresh in a moderate oven when needed.
Serve warm with butter or combine with flavors that complement the loaf. If you need structured guidance, consult our internal pages on Sourdough Bread Techniques and Bread Storage Tips.
FAQ
Why does my bread taste like cardboard?
A cardboard taste usually indicates low moisture, stale ingredients, overbaking, or inadequate fermentation. Address each step: check flour freshness, boost hydration slightly, confirm yeast activity, and avoid overbaking to restore flavor.
Can the type or age of flour cause off flavors?
Yes. Old or rancid whole-grain flours contain oxidized oils that mute flavor. Fresh, properly stored flour yields better aroma and structure; store flour in a cool, dry place or refrigerate whole-grain flour for long-term storage.
Does refrigeration ruin bread?
Refrigeration speeds starch retrogradation and makes bread go stale faster than room temperature storage. Use the fridge only when necessary; freeze instead for longer preservation.
How do I test if my yeast is still active?
Bloom dry yeast in warm water with a pinch of sugar for 5–10 minutes. Active yeast will foam and smell yeasty. If it remains flat, replace it to avoid under-fermented, bland bread.
What are quick ways to make bland bread taste better?
Lightly toast or reheat slices with a splash of water in foil, then add butter, olive oil, or strong-flavored toppings. For stale loaves, transform them into croutons, bread pudding, French toast, or panzanella to recover lost flavor.
By methodically checking ingredients, fermentation, bake conditions, and storage, you can eliminate the cardboard problem and produce bread with consistent flavor and texture. Small, targeted changes yield noticeable improvement.
See also: bread taste
]]>
- Slow, low heat and a water bath keep the surface intact.
- Room-temperature ingredients yield a lump-free, dense batter.
- Minimal air in the batter prevents bursting and fissures.
- Gradual cooling finishes structure without stress.
Why cheesecakes crack — the core mechanics
Cracks form when differential contraction occurs between the set outer ring and a still-soft center. The center expands or collapses relative to the edges and the tension creates fissures on the surface.
Key drivers include trapped air, excessive oven heat, and sudden temperature change. Understanding these mechanisms lets you plan countermeasures at each stage of mixing, baking, and cooling.
Essential equipment and setup
Use a quality 9-inch springform pan and seal its base when you bake in a water bath. Wrap the exterior with heavy-duty foil to prevent water intrusion and maintain even heat transfer.
Place a reliable oven thermometer in the center of the oven to verify temperature. If your oven runs hot, reduce set temperature by 10–15°F and extend the bake time for a gentler finish.
Ingredients that matter
Choose full-fat cream cheese and bring it to room temperature for smooth blending. Low-fat or cold blocks introduce lumps and inconsistent texture that make the batter fragile.
Use sour cream or heavy cream to add moisture and stability; these dairy fats reduce shrinkage while maintaining silkiness. For reference on dairy products, see cream cheese and sour cream.
Prep and timing
Preparation: 20 minutes. Baking: 1 hour 10 minutes. Cooling: 4+ hours refrigerated. These windows are practical targets for home ovens and predictable results.
Room-temperature eggs and dairy integrate faster and reduce mixing time. Shorter mix time means less air incorporated into the batter, which lowers crack risk.
Detailed instructions
1. Prepare the pan: Butter the springform ring, and line the base with parchment for clean release. Wrap the base in foil when you plan a water bath to prevent leaks.
2. Beat the cream cheese: Use a paddle on a stand mixer or a hand mixer on medium-low. Mix until completely smooth; stop and scrape the bowl often to eliminate pockets of unblended cheese.
3. Add sugar and eggs: Add sugar slowly on low speed, then incorporate eggs one at a time. Mix only until combined after each egg to avoid aeration.
4. Fold the wet ingredients: Add sour cream and vanilla on low speed or fold with a spatula. Finish with sifted flour or cornstarch for stability while keeping a tender crumb.
5. Water bath and bake: Place the springform pan inside a larger roasting pan and pour boiling water to reach halfway up the side. Bake at 325°F (163°C) until edges are set and center still jiggles slightly.
6. Gradual cooling: Turn the oven off and crack the door open for 60 minutes with the cake inside. Then move it to a rack until it reaches room temperature before chilling uncovered in the fridge for at least 4 hours.
Common staging errors to avoid
Do not rush the cooling process; sudden temperature drops cause the surface to contract and crack. Avoid high oven temperatures and do not overbake to a firm center.
Avoid vigorous mixing at any stage. Aeration introduces bubbles that expand and collapse during baking, creating structural weak points on the surface.
Practical tips for a silky texture
Ingredient temperature matters: Cold cream cheese takes longer to smooth and requires more mixing, which traps air. Allow at least two hours on the counter or use a gentle microwave burst set to defrost if short on time.
Low-speed mixing: Always mix on low and stop as soon as ingredients combine. Use a rubber spatula to finish blending manually, preserving density without lumps.
Expert Insight
When adding eggs, ensure each one is fully incorporated before adding the next. This prevents streaks and reduces the need for extra mixing later.
Water bath technique explained
A water bath (bain-marie) surrounds the cheesecake with moist, uniform heat that slows the outer set. This method reduces thermal gradients that cause the center to pull away from the edges.
Use boiling water for immediate thermal mass, and avoid splashing water into the pan. For technical background on the method, consult bain-marie.
Pro-Caution
After cooling in the oven, leave the cake uncovered in the fridge the first few hours to allow moisture redistribution. Cover later only once the surface is fully set to avoid sweating.
Fixes and finishing touches
If a thin crack appears, conceal it with a thin spread of sour cream mixed with a touch of sugar, then briefly torch or broil to set. For deeper cracks, use a homemade fruit coulis or ganache to mask imperfections and add flavor contrast.
Careful decoration turns a cosmetic flaw into an intentional finish. Fresh berries, citrus zest, or a textured nut sprinkle add visual interest while hiding minor surface defects.
Serving and storage
Chill the cheesecake thoroughly for at least 4 hours, ideally overnight. Cutting cold slices with a hot, dry knife produces clean edges and a professional presentation.
Store leftovers tightly covered in the fridge for up to five days. For longer storage, wrap tightly and freeze slices up to two months; thaw in the refrigerator before serving.
Nutrition snapshot
| Nutrient | Per Serving |
|---|---|
| Calories | 420 |
| Protein | 7g |
| Carbohydrates | 32g |
| Fat | 30g |
For advanced technique notes and troubleshooting, read our Perfect Baking Techniques guide. For crust options and blind-baking tips, see the Cheesecake Crust Guide.
FAQ
Why does my cheesecake crack on the surface?
Cracks result from trapped air, uneven heat, or rapid cooling. If the center continues to move while the edge is set, the resulting stress produces fissures.
Prevent this by minimizing mixing speed, baking at lower temperature, and allowing a gradual cool-down inside the turned-off oven.
Can I bake without a water bath?
You can, but expect a higher risk of cracking in many home ovens. A stable, moist environment reduces edge-setting and thermal shock.
If you skip a water bath, lower oven temperature and extend bake time to mimic the gentler effect of a bain-marie. Read the technique notes on baking for context.
How long should I beat cream cheese?
Beat until smooth with no visible lumps, typically 2–4 minutes on low-medium speed. Overbeating increases air and jeopardizes surface integrity.
Scrape the bowl frequently and finish by hand-folding to ensure an even texture without aeration. For ingredient details refer to cheesecake ingredient practices.
Can I fix cracks after baking?
Yes. Light cracks respond well to a thin sour cream layer or fruit coulis. Broil briefly to set a sour cream top and blend the repair into the surface.
Use decorations strategically: fruit compote, ganache, or whipped cream hide flaws and add complementary flavor and texture.
Which ingredient swaps reduce cracking?
Sour cream, heavy cream, or a small amount of cornstarch stabilize the batter without toughening it. These additions increase moisture and reduce shrinkage during cooling.
Adjust amounts sparingly; too much starch or liquid changes mouthfeel. Test minor changes in small batches before applying them to a full recipe.
Final note: Reproducible results come from discipline: consistent temperatures, careful mixing, and measured cooling. Use the checks above and refine one variable at a time to find the exact settings your kitchen requires.
See also: cheesecake
]]>Recipe myths shape how many cooks approach the kitchen, often turning adaptable guidance into rigid dogma. Professional cooks treat recipes as tested frameworks; they analyze ingredient function and adjust with intent to improve outcomes.
- Key insight: Recipes serve as adaptable guides, not immutable laws.
- Key insight: Small substitutions preserve texture and flavor when you respect function.
- Key insight: Understanding ingredient roles shortens troubleshooting time and saves batches.
Prep and Cook Time (Practical Notes on Recipe Myths)
Prep Time: 15 minutes. This reflects a straightforward mise en place for a standard adaptable cake and assumes familiarity with basic technique.
Cook Time: 25–30 minutes. Rely on sensory checks: toothpick, spring-back, and crust color rather than strict minutes when you test the claim behind timing-related recipe myths.
Yield (Scaling and Recipe Myths)
Serves: 4 hearty portions. Yield changes with mix-ins and batter volume; the numbers on a recipe are starting points, not fixed outcomes.
Scaling works predictably when you preserve functional ratios. Double ingredients and monitor baking time; expect about 10–20% longer bake when you increase volume, and adjust by sensory checks.
Difficulty Level (How Myths Affect Skill Assessment)
Skill: Medium. This level expects you to experiment with measured substitutions and observe batter behavior rather than follow instructions blindly.
Practicing swaps—small, documented changes—builds competence quickly. That process converts recipe myths into tested techniques you can rely on.
Ingredients
Below are baseline ingredients for a simple adaptable cake and the functional groups they represent: structure, leavening, fat, liquid, binder, and flavor. Recognize roles to test or adjust with confidence and to debunk common recipe myths.
- 2 cups all-purpose flour, sifted — structure
- 1 tbsp baking powder — leavening
- 1 tsp salt — balance
- 3/4 cup granulated sugar — sweetness, moisture regulation
- 1/2 cup unsalted butter, melted — fat for tenderness
- 1 cup whole milk — liquid for consistency
- 2 large eggs — binder and lift
- 1 tsp vanilla extract — flavor anchor
- Optional mix-ins: 1/2 cup berries, chocolate chips, or nuts
When you change one functional group, compensate elsewhere. For example, replacing half the milk with yogurt increases acidity; adjust leavening accordingly to maintain rise and avoid common recipe myths about one-size-fits-all substitutions.
Instructions (Stepwise, with Rationale to Counter Recipe Myths)
1. Preheat: Set oven to 350°F (175°C). Grease and flour a 9-inch pan or line with parchment for clean release. Preheating stabilizes oven environment, debunking the myth that short preheats don’t matter.
2. Combine dry: Whisk flour, baking powder, salt, and sugar to distribute leavening evenly. Even distribution prevents uneven rise and supports predictable results.
3. Mix wet: Beat eggs lightly, then whisk in melted butter, milk, and vanilla until homogeneous. Emulsified fat and liquid create a consistent batter and reduce pockets that cause structural failures.
4. Combine: Fold wet into dry until just combined. Small lumps are fine; overmixing develops gluten and toughens crumb—a frequent source of myths about required mixing time.
5. Add mix-ins: Fold berries or chips gently. Toss heavy or wet add-ins in a dusting of flour to help suspend them and avoid sinking during bake.
6. Bake: Pour batter into pan and bake 25–30 minutes. Tent with foil if the top browns too quickly. Cool 10 minutes in pan, then transfer to a wire rack to finish cooling evenly.
Trust sensory checks rather than strict minutes: altitude, oven variance, and ingredient temperature all influence timing. This approach dissolves timing-related recipe myths into practical checks you can repeat.
Tips for Success
Customize sweetness: Start at 3/4 cup sugar. Reduce by 1–2 tablespoons when using sweet mix-ins or swap part sugar for honey; reduce other liquids as needed to keep texture stable.
Flour swaps: Replace up to 50% all-purpose with whole wheat pastry flour for a nuttier flavor. Higher substitution rates require added hydration or tenderizers to avoid dense crumb and to counter myths that whole grain simply drops in with no change.
Expert Insight
Milk substitutions: Plant milks (almond, oat) work for most quick breads. Expect slight flavor shifts and add 1–2 teaspoons extra fat if the batter feels too thin to maintain mouthfeel.
Pro-Caution
Mix-in caution: Heavy or dense items weigh batter down. Fold them gently and limit to 1/2 cup to preserve lift and crumb structure.
Make-ahead: Wrap cooled cake tightly and store at room temperature overnight to let flavors meld. Refrigerate only if you use perishable toppings to avoid staling and texture change.
Serving Suggestions
Serve slices lightly dusted with powdered sugar or with a drizzle of honey for balance. Fresh berries or a small dollop of whipped cream add contrast and brighten presentation.
For a tangy finish, mix Greek yogurt with lemon zest and a pinch of salt. Pair with tea or coffee to showcase subtle crumb and flavor nuances.
Nutritional Info
Per serving estimate: Calories ~320; Protein 6 g; Carbs 42 g; Fat 12 g. Values shift with substitutions and portion size, so treat these as approximations rather than absolutes.
Nutrition changes when you modify ingredients. Swapping oil for butter alters saturated fat; reducing sugar lowers calories but may affect browning and moisture retention, which are practical trade-offs rather than myths.
Understanding Where Recipe Myths Come From
Many recipe myths originate from tradition, oversimplified instruction, and misapplied science. A step that succeeds in one kitchen can fail in another because of equipment, ingredient quality, or environment.
To evaluate claims, read primary technical resources. For fundamental chemical reactions that affect color and flavor, consult the Maillard reaction explanation on Maillard reaction. For method context, see the general pages on cooking and the more focused baking.
Practical Substitutions and When to Use Them
Substitutions work when you respect ingredient function. Replace fat with another fat, not with a liquid. Replace eggs with a binder unless you intentionally accept a texture change. That practical rule dispels many substitution-related recipe myths.
Examples: swap butter for an equal weight of neutral oil for added moistness; compensate by chilling or adding a touch more flour if the crumb opens up too much. When using applesauce to reduce fat, expect denser texture and reduce liquid slightly.
For deeper background on ingredient behavior, consult reputable food science resources such as the food science overview to connect cause and effect before you test changes.
Common Recipe Myths and the Practical Truths
Myth: You must always measure by weight. Truth: Weight improves precision in baking, but well-tested volume recipes work if you understand the recipe’s tolerances. Use weight when you need high reproducibility.
Myth: Room-temperature eggs always beat air into batter better. Truth: Temperature affects emulsification and structure; adapt technique if the batter or outcome indicates a problem rather than follow temperature dogma blindly.
At a Glance: Key Takeaways on Recipe Myths
- Recipes are frameworks: Learn roles and adjust with purpose.
- Measure functionally: Swap like-for-like (fat for fat, binder for binder).
- Use sensory checks: Rely on texture and color, not just minutes.
- Document experiments: Small, recorded changes dismantle myths efficiently.
FAQ
Why do people treat recipes as unbreakable?
People follow recipes strictly to reduce risk, particularly when learning. Rigid adherence feels safe because it removes variables, but that behavior often perpetuates recipe myths instead of encouraging functional understanding.
When is precision essential?
Baking requires precision for reliable rise and structure. In contrast, many stovetop and roasting dishes tolerate taste-driven adjustments. Assess where precision matters and where it does not.
Which common substitutions work reliably?
Replacing cow milk with most plant milks works for quick breads, though flavor and fat content differ. Replacing butter with oil typically increases moistness but may reduce structure; adjust flour or chilling as needed.
How do I practice safe improvisation?
Start with small, documented tests: reduce sugar by 10–15%, swap 25% of butter for oil, or replace half the flour with whole wheat pastry flour. Record outcomes and refine technique systematically.
Where can I learn the science behind recipes?
Read foundational sources and applied overviews to connect cause and effect. The Wikipedia article on baking and the food science page give accessible technical background you can apply in experiments.
Embracing measured flexibility turns recipe myths into tested strategies. Keep experiments small, document results, and prioritize ingredient function to convert dogma into repeatable technique.
See also: recipe myths
]]>