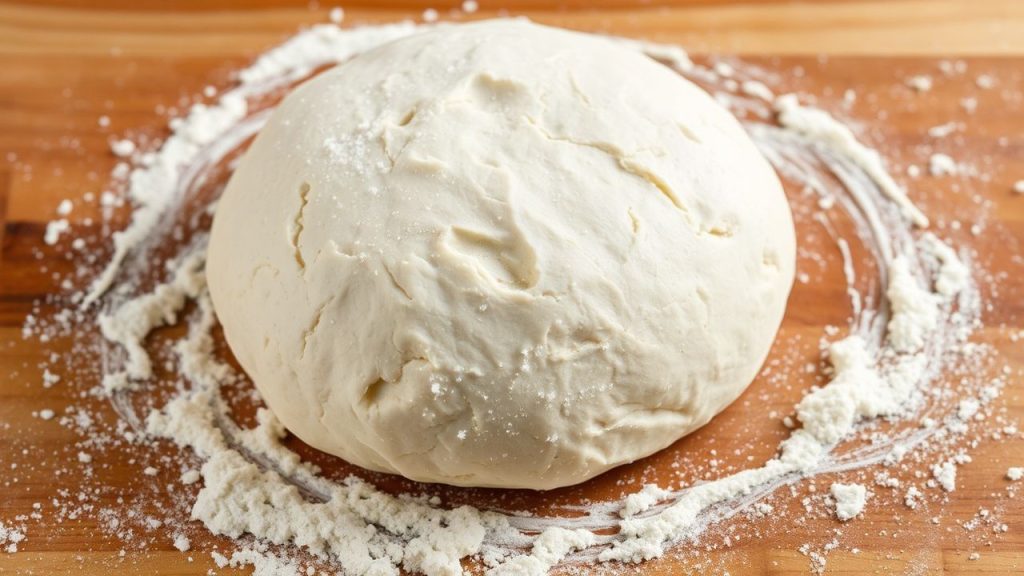
- At a glance: Yeast produces carbon dioxide and ethanol during fermentation, shaping crumb and crust.
- Practical tip: Water temperature and yeast strain control rise time and flavor development.
- Technique matters: Kneading, proofing humidity, and handling determine crumb openness and shelf life.
- Variation: Use commercial yeast for consistency or wild starters for complex flavor.
Prep and Cook Time
Plan your schedule around fermentation rather than oven time. Typical active prep is 20 minutes, followed by bulk fermentation and a final proof.
Bulk fermentation often takes 1 to 2 hours at room temperature depending on the strain and ambient warmth. Baking itself generally requires 25 to 35 minutes at 375°F (190°C).
Yield
This dough produces one large loaf or twelve medium rolls, depending on shaping and final proof. Weight and room conditions will change exact yield slightly.
For consistent portioning, weigh the dough into equal pieces before final shaping. That improves bake uniformity and presentation.
Difficulty Level
Medium. This recipe suits bakers ready to refine fermentation control and gluten development. You will practice kneading, shaping, and timed proofing.
With attention to temperature and timing, novice bakers can achieve reliable results. Documenting times and temperatures helps reproduce success.
Ingredients
Use quality, measured ingredients to let yeast perform predictably. Scale ingredients by weight when possible for reproducibility.
- 3 ½ cups all-purpose flour, sifted
- 2 ¼ tsp active dry yeast (one packet)
- 1 ¼ cups warm water (105°F to 110°F / 40–43°C)
- 2 tbsp granulated sugar
- 2 tbsp unsalted butter, softened
- 1 ½ tsp fine sea salt
- Additional flour for dusting
For whole-grain or enriched doughs, adjust hydration upward and extend resting times. Enzymes in whole grains alter sugar availability and can speed fermentation.
Instructions
Follow steps with attention to feel, not just time. Dough temperature and texture are your best indicators of readiness.
- Activate the yeast: Combine warm water and sugar and sprinkle yeast on top. Wait 5–10 minutes until a foamy cap appears; that shows vitality.
- Mix the dough: Whisk flour and salt, make a well, add yeast mix and butter, and stir until a shaggy mass forms. Rest 5 minutes before kneading to hydrate flour fully.
- Knead to develop gluten: Knead on a floured surface 8–10 minutes until the dough is smooth and elastic. A proper windowpane indicates sufficient gluten strength.
- First rise: Place dough in an oiled bowl, turn to coat, cover, and ferment until doubled, usually 1–1.5 hours. Temperature and yeast strain alter this timing.
- Shape and rest: Gently deflate the dough to release gas and shape into a loaf or rolls. Place in a pan or on a tray and proof until noticeably puffy, about 30–45 minutes.
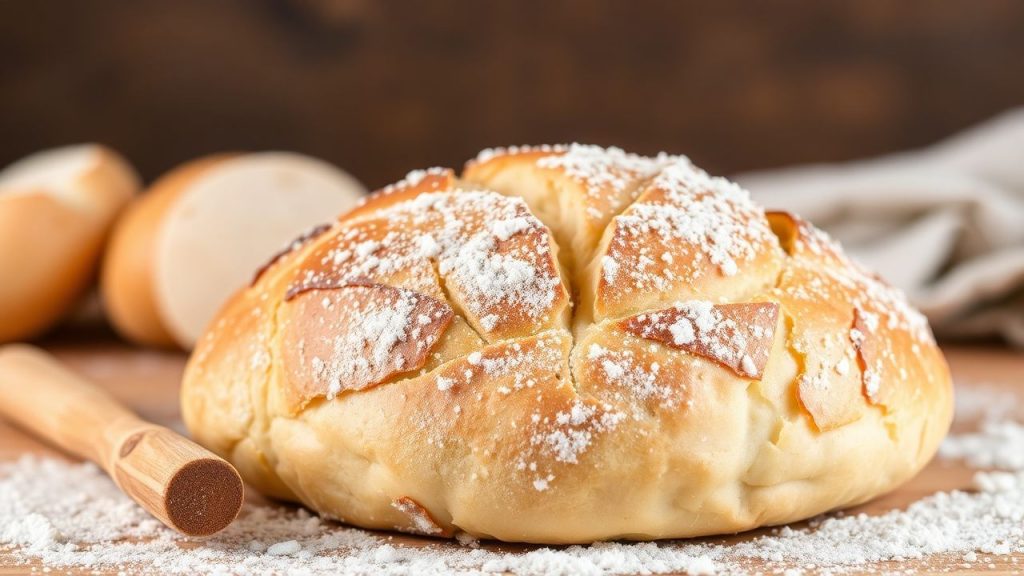
- Bake to golden perfection: Preheat oven to 375°F (190°C) and bake 25–35 minutes until the crust is golden and the loaf sounds hollow when tapped. Internal temperature near 190–200°F (88–93°C) signals doneness for most breads.
- Cool before slicing: Transfer to a wire rack and cool completely to let steam finish crumb structure. Cutting too early produces a gummy interior.
Document and adjust variables: water temperature, room temperature, and proofing duration. Those three factors control fermentation rate and final texture.
Chef’s Notes: Tips for Success
Yeast strains influence both speed and flavor. Instant yeast shortens rise times, while active dry yeast needs rehydration for consistent activation. Sourdough starters introduce organic acids and esters for complex taste.
Control dough temperature. Aim for a final dough temperature around 75–78°F (24–26°C) for balanced fermentation. Adjust water temperature to compensate for warm or cool kitchens.
 Expert Insight
Hydration tweaks make a measurable difference. Increase water for whole-grain mixes and for loaves you wish to have a softer, more open crumb. Note that higher hydration requires gentler handling.
 Pro-Caution
Proofing environment matters. A slightly humid, draft-free space speeds yeast activity and prevents a crust from forming too soon. Use a proofing box or an oven with a pan of hot water if needed.
Make-ahead options: retard the dough in the refrigerator after the first rise to develop flavor slowly. Bring dough back to room temperature before shaping for best spring.
Serving Suggestions
Serve warm slices with butter, olive oil, or savory spreads for a simple, high-impact presentation. Herbs like rosemary and thyme pair well with fermentation-derived flavors.
Use this loaf for sandwiches, toast, or alongside stews. The bread also absorbs soups and sauces without disintegrating when properly baked and rested.
Nutritional Information per Serving
The table below lists typical macronutrients for one serving of this bread. Values vary with flour type and added ingredients.
| Calories | Protein | Carbs | Fat |
|---|---|---|---|
| 180 kcal | 5 g | 35 g | 3 g |
Adjust servings and ingredients for dietary needs such as whole-grain substitution or reduced-sodium recipes. Ingredient swaps change caloric and nutrient values predictably.
Why Yeast Works: The Science Brief
Yeast metabolizes simple sugars into carbon dioxide and ethanol through glycolysis and fermentation pathways. The trapped carbon dioxide inflates the gluten network and forms the bread’s crumb structure.
Enzymes in flour break down starch into fermentable sugars, feeding yeast and contributing to flavor. Proteins form gluten, which traps gas and sets crumb structure during baking.
For background on these topics consult authoritative resources such as yeast biology, fermentation processes, and gluten structure.
Resources and Further Reading
Explore method variations and controlled experiments on proofing and hydration. Keeping a bakers’ log improves results over repeated trials.
See our internal guides for more detail: Baking Science Guide and Bread Recipes. These pages document protocols, temperature charts, and troubleshooting notes for home and professional bakers.
FAQ
What is the best temperature to activate active dry yeast?
Warm water between 105°F and 110°F (40–43°C) activates active dry yeast reliably. Use a thermometer; water that feels merely warm by hand may vary too much.
Temperatures above 120°F (49°C) risk killing yeast, while cooler water slows activity and prolongs fermentation times.
Can I substitute instant yeast for active dry yeast?
Yes. Instant yeast can be mixed directly into flour and often produces a faster rise. Reduce proofing time accordingly and monitor dough behavior rather than clocks.
If substituting by weight, use roughly 70–80% of the active dry yeast amount for instant yeast to achieve similar rise profiles.
How do I store yeast for maximum shelf life?
Keep unopened dry yeast in a cool, dry place. Once opened, store in an airtight container in the refrigerator or freezer to maintain viability.
Test stored yeast with a proof test: combine warm water, a pinch of sugar, and yeast and wait for foaming within 10 minutes to confirm activity.
What causes a dense loaf and how do I fix it?
Density usually results from underproofing, insufficient gluten development, or inactive yeast. Check yeast freshness and extend bulk fermentation if needed.
Increase kneading or add stretch-and-folds to strengthen the dough, and ensure correct hydration; sometimes a small hydration increase opens the crumb noticeably.
Is wild sourdough better than commercial yeast?
Neither is categorically better; they serve different aims. Sourdough offers complex flavor from lactic acid bacteria and wild yeasts, but requires maintenance and longer fermentation.
Commercial yeast brings predictability and speed, ideal for consistent production and tight schedules. Choose based on flavor goals and available time.
Final note: Mastery comes from controlled experiments and careful recording. Tweak one variable at a time to understand how yeast, temperature, and technique shape your results.

See also: Yeast
]]>
- Short process control: proof and boil timing determine structure and chew.
- Flour and hydration: high-protein flour and ~62% hydration deliver chew and handling strength.
- Boil then bake: boiling gelatinizes starches and locks moisture for a firm crust.
- Cold retard for flavor: overnight refrigeration tightens crumb and improves taste.
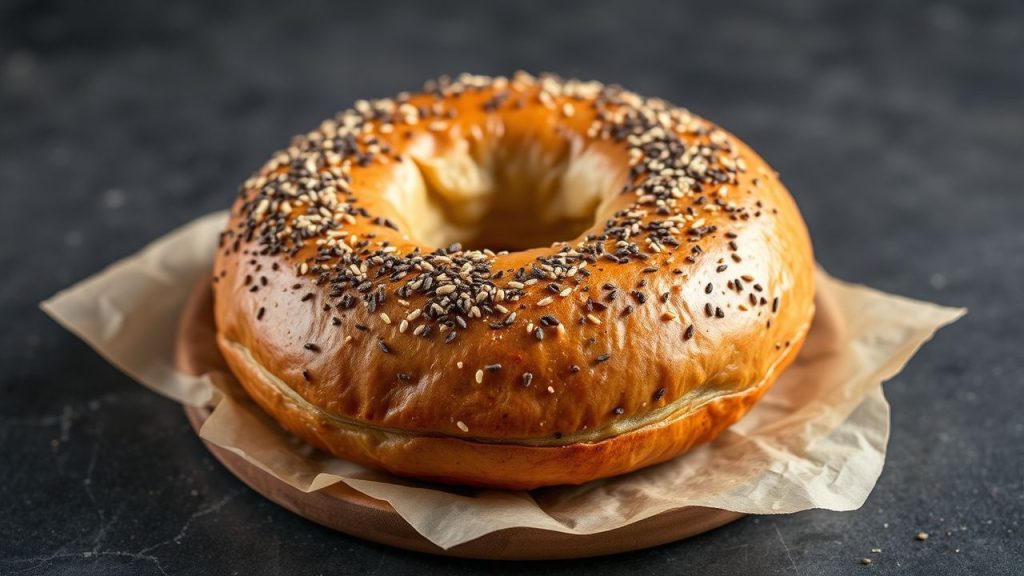
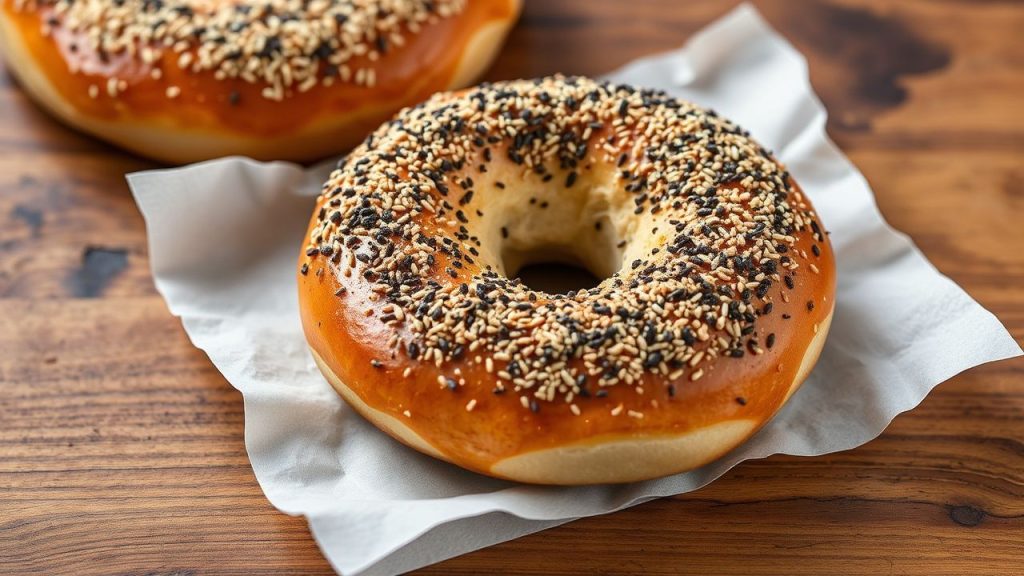
Why a Chewy Bagel Crust Matters
A true chewy bagel stands apart by bite, sheen, and density. The exterior forms when surface starches gelatinize in the boil and then brown in the oven, producing a glossy, resilient crust.
That structure relies on a strong gluten network and controlled Maillard browning. Read about bagel history and how technique shapes texture, or consult Maillard reaction basics to understand crust color.
Prep and Cook Time for Chewy Bagels
Plan for about two hours of active work for a same-day batch: mixing, kneading, first proof, shaping, short bench rest, boiling, and baking. Ambient temperature and ingredient coldness will change timelines, so measure and note times.
If you prefer deeper flavor, retarding the shaped dough overnight adds 8–18 hours but only a few minutes of active work. Cold retard tightens crumb and concentrates fermentation flavors in the chewy bagel.
Yield and Size Guidance for Chewy Bagels
This formula yields eight medium bagels at roughly 4 inches each. Scaling is linear; double ingredients to produce 16 bagels while keeping fermentation and boil times consistent for chew uniformity.
For larger or smaller bagels, adjust shaping and bake time by 2–5 minutes. Larger bagels need slightly longer in the oven to build a deep, even color without burning the crust.
Difficulty Level and Tools for Chewy Bagel Success
Rated medium: the method requires basic dough handling and timing discipline rather than advanced equipment. A digital scale and a timer produce consistent outcomes more quickly than guesswork.
Key tools: mixing bowl, bench scraper, slotted spoon, baking stone or steel, and a thermometer if you track fermentation precisely. Use a scale to hit hydration and flour weight targets every batch.
Ingredients for Chewy Bagel Dough
Core ingredients create structure, flavor, and crust. Use a reliable bread or high-gluten flour to develop the required gluten network for chew.
Typical roles: flour builds gluten; yeast ferments sugars into gas and flavor; salt controls fermentation; and barley malt or sugar aids browning. For background on protein and elasticity, consult gluten fundamentals and yeast basics.
- 4 cups bread flour (high-protein; weigh for accuracy)
- 1 ½ teaspoons instant yeast
- 1 ¼ cups warm water (about 110°F/43°C)
- 2 tablespoons granulated sugar
- 1 tablespoon salt
- 1 tablespoon barley malt syrup (or substitute honey for similar browning)
- Optional toppings: sesame, poppy, minced onion, everything seasoning
- For boiling: 2 quarts water, 2 tablespoons baking soda, 1 tablespoon barley malt syrup
Flour, Yeast, and Hydration Details
Select bread flour or high-gluten flour to reach the elasticity needed for a chewy bagel. Replace up to 10–15% with whole wheat for flavor but reduce hydration slightly to compensate for bran absorption.
Instant yeast delivers a predictable rise; active dry yeast will work if rehydrated. Maintain roughly 62% hydration for this formula and weigh ingredients to hit that target repeatedly.
Instructions to Make a Chewy Bagel
Follow the sequence: mix, develop gluten, ferment, shape, rest, boil, and bake. Each step affects gluten alignment and gas retention; omitting any stage changes final texture and chew.
Read the full set of numbered steps before you begin so the shaping and boiling proceed smoothly and you manage timing for each batch of bagels.
- Mix dry ingredients. Combine flour, yeast, sugar, and salt in a large bowl. Whisk to distribute and break up clumps.
- Add liquid and malt. Add warm water and barley malt syrup; mix until a rough dough forms. Scrape the bowl to ensure even hydration.
- Knead the dough. Knead 8–10 minutes by hand until smooth, elastic, and slightly tacky. Proper gluten development delivers the desired chew.
- First proof. Place dough in a lightly oiled bowl, cover, and let rise in a warm spot until doubled — roughly 1 hour depending on room temperature.
- Shape bagels. Divide into 8 equal pieces, pre-shape into tight balls, then form a hole with your thumb and stretch to about 3 inches diameter.
- Second proof. Rest shaped bagels on a parchment-lined tray, covered lightly, for 20 minutes to puff slightly before boiling.
- Prepare the boil. Bring 2 quarts water to a rolling boil. Add baking soda and barley malt syrup to raise pH and encourage color and sheen.
- Boil bagels. Lower bagels into boiling water two or three at a time. Boil 60 seconds per side to gelatinize surface starches and seal moisture.
- Drain and top. Remove with a slotted spoon, drain briefly on a rack, then add toppings while the surface is still tacky so they adhere and toast.
- Bake until golden. Preheat the oven to 425°F (220°C). Bake 20–25 minutes on a preheated stone or steel until evenly golden, rotating if needed for color consistency.
- Cool and serve. Cool briefly to finish interior set, then slice and serve warm to display the chewy bagel crust and tender crumb.
Using a preheated stone or steel improves bottom heat transfer and helps develop a crisp exterior without overbrowning the top. Consult baking resources for heat transfer basics if you want to optimize equipment choices.
Pro-Caution
Drain bagels well and apply toppings quickly; damp but not dripping surfaces produce the best adhesion and even toasting in the oven.
If bagels collapse in the oven, reduce proof time or knead a bit longer to strengthen gluten. Small adjustments often solve common issues.
Tips for Chewy Bagel Success
Small adjustments yield large improvements. Weigh flour and water for consistent hydration and test one bagel as a control to refine boil time and oven spring for your setup.
Cold retardation after shaping improves flavor and tightens crumb. Remove shaped bagels from the fridge and let them come closer to room temperature before boiling to reduce shock.
Expert Insight
Try mixing a small portion of high-gluten flour into bread flour for extra elasticity. If your bagels taste flat, check yeast freshness and fermentation temperature first.
Serving Suggestions for Chewy Bagels
Serve warm with traditional spreads: plain or herbed cream cheese, butter, or smoked fish. The chewy bagel crust stands up to heavy toppings without becoming soggy when prepared correctly.
Toast leftovers briefly to refresh the crust and warm the interior. Light toasting revives chew and releases aromas from toasted toppings like sesame or onion flakes.
Nutritional Snapshot for Chewy Bagels
Per bagel, expect roughly 280 kcal, 11 g protein, 57 g carbohydrates, and 1.5 g fat. Exact values vary with flour brand, toppings, and bagel size.
To reduce calories, make smaller bagels or increase whole-grain content for added fiber. Changes to flour type and size will alter hydration and bake time, so adjust method accordingly.
Q&A
What creates the bagel’s chewy crust?
A strong gluten network and a short boil produce the chew. Gluten gives elasticity; boiling gelatinizes surface starches and seals moisture before the crust browns.
How long should I boil each bagel?
Boil 60 seconds per side for this formula. Longer boils increase density; shorter boils yield a softer crust. Time consistently and work in small batches for uniform results.
Can I make bagels without barley malt?
Yes. Sugar or honey will help browning, but barley malt provides a characteristic flavor and sheen. Expect a slightly different color and flavor without malt.
Why do my bagels become too airy?
Overproofing or weak gluten structure causes excess airiness. Control proof time and temperature; the dough should double but not become excessively puffy or bubbled.
How should I store bagels to preserve chew?
Cool fully, then freeze if not consumed soon. For short-term storage, use a paper bag to prevent moisture build-up and toast before serving to re-crisp the crust.
Wrapping Up
Consistent chewy bagels come from measured flour choice, accurate hydration, managed proofing, and a disciplined boil before a hot bake. Each variable affects chew and crust in predictable ways.
Practice one batch, record adjustments, and refine timing. With careful control of ingredients and process you will replicate bakery-style chewy bagels reliably in your kitchen.
See also: bagel topping ideas and artisan techniques referenced throughout this guide for method crossover and variations.
See also: Chewy Bagel
]]>
- Slow, controlled time deepens flavor without extra ingredients.
- Temperature precision steers enzymatic breakdown and yeast kinetics.
- Minimal yeast and high protein flour improve texture and structure.
- Regular folds strengthen gluten while preserving gas pockets.
Prep and Cook Time
Preparation: 20 minutes for mixing and initial handling. Work quickly to keep ingredients cold so fermentation begins under controlled conditions.
Cold fermentation: 18–72 hours depending on recipe goals. Shorter times favor mild flavor; longer times intensify sweetness and subtle acidity.
Final proof and baking: 1–2 hours after returning dough to room temperature for shaping and rise. Use a preheated oven and a hot surface or Dutch oven to maximize oven spring.
Yield
This formula yields two medium artisanal loaves, about eight slices each when cut evenly. Expect variable weight loss during baking based on hydration and bake time.
For scaling, adjust ingredient quantities proportionally and monitor fermentation time: larger mass ferments differently than smaller pieces due to thermal inertia.
Difficulty Level
Medium: Ideal for confident home bakers who can read dough behavior and control fridge temperature. You do not need professional equipment, but consistent technique matters.
Practice develops intuition. Over several bakes you learn how your flour, hydration, and refrigerator interact to create consistent results.
Recipe
This recipe highlights technique over gimmicks. Follow timing and temperature closely to get repeatable results.
For best structure, use bread flour with 12–14% protein and measure water with a thermometer. Cold water slows yeast activation and keeps enzyme activity gradual.
Ingredients
- 3 ½ cups bread flour, sifted and chilled
- 1 ½ cups cold water (about 40°F / 4°C)
- 1 tsp fine sea salt
- ½ tsp instant dry yeast
Choose flour for protein content to trap CO₂ and produce a chewy crumb. If you use whole grain flours, boost hydration slightly and expect denser crumb.
Use a reliable scale when possible; weight-based measurements give predictable hydration and dough consistency.
Instructions
- Combine dry ingredients: Whisk flour, salt, and yeast to distribute evenly. Cold yeast and dry salt separation prevent premature activity.
- Add cold water gradually: Stir until the dough just forms a shaggy mass. Stop when the mixture becomes homogenous but still tacky; avoid overmixing.
- Autolyse rest: Cover and rest 30 minutes to hydrate flour and jump-start gluten bonding. This step aids enzyme action and improves extensibility.
- Gentle knead: Knead 3–5 minutes until smoother, adding minimal flour. Aim for a cohesive, slightly elastic dough rather than a stiff ball.
- Bulk cold fermentation: Oil a container, place dough inside, and refrigerate at 38–42°F (3–6°C). The low temperature slows yeast so enzymes convert starches into flavor precursors.
- Periodic folds: Every 12 hours, perform gentle stretch-and-folds to align gluten without releasing gas. These folds strengthen structure while preserving fermentation gases.
- Warm and shape: After 48–72 hours, let dough sit 1 hour at room temperature, then shape into loaves. Avoid degassing; maintain internal bubbles for open crumb.
- Proof: Place shaped loaves in a floured banneton and proof 1–1.5 hours at room temperature until nearly doubled. Use a bench scrape to tighten the surface for better oven spring.
- Bake: Preheat oven to 475°F (246°C) with a stone or Dutch oven. Score to control expansion and bake 20–25 minutes until the crust caramelizes and sounds hollow when tapped.
- Cool: Cool completely on a rack before slicing to finish crumb set and preserve moisture balance.
Tips for Success
Temperature control: Use a fridge thermometer and measure water temperature. Small changes alter fermentation rates and flavor outcomes.
Hydration and flour: Higher hydration yields more open crumb but requires confident handling. For predictable results, start at 65–70% hydration for bread flour.
- Minimal yeast: Use a small yeast quantity to let enzymes and native microbes drive flavor rather than fast gas production.
- Regular folds: Strengthen gluten gently; do not over-knead after cold rest.
- Monitor dough, not time: Watch signs—blooming gas pockets and a softer feel—rather than strict hours; dough behavior varies by flour and fridge.
For deeper technical context on the organisms and chemistry, read about yeast and fermentation. These pages explain how microbes convert sugars and produce flavor compounds.
Expert Insight
For gluten mechanics and dough strength, review the principles of gluten formation. Understanding protein behavior helps you adjust hydration and folding cadence.
Pro-Caution
Serving Suggestions
Slice thick and toast lightly to emphasize the crust and open crumb. Pair simple spreads like cultured butter or a drizzle of oil to let the bread’s flavor lead.
Use the loaf with soups, cheese boards, or as a base for sandwiches where texture supports bold fillings. The balanced acid and sweetness from slow fermentation complement savory profiles.
- Butter and local honey for contrast.
- Olive oil with rosemary and sea salt as an appetizer.
- Thick slices with braised meats or creamy stews for hearty meals.
Nutrition
The table below shows per-slice estimates for a medium loaf. Values vary by flour, hydration, and portion size.
| Nutrient (per slice) | Amount |
|---|---|
| Calories | 120 kcal |
| Protein | 4 g |
| Carbohydrates | 24 g |
| Fat | 0.5 g |
Practical Adjustments and Variations
Experiment with hydration, flour blends, and fermentation times to find your desired balance. For example, adding 10–20% whole-grain flour increases flavor but reduces extensibility.
Try incorporating a portion of preferment or a small sourdough starter for layered acidity and aroma. For directions on wild fermentation, consult our internal guides such as Bread Making Basics and Sourdough Guide.
FAQ
What is the ideal fridge temperature for cold fermentation?
Keep the fridge at roughly 38–42°F (3–6°C). This range slows fermentation enough to develop flavor while keeping yeast active. Measure with a dedicated fridge thermometer to avoid guesswork.
How does cold fermentation change dough flavor?
Slow fermentation lets yeast and enzymes break down starches and proteins into flavorful molecules such as organic acids and maltose. As a result, the bread develops subtle sweet and tangy notes and a richer aroma.
Can I cold ferment pizza dough the same way as bread?
Yes. Pizza dough benefits from cold aging for 24–72 hours to improve extensibility and flavor. Shape gently after warming briefly and bake on a hot surface for optimal crust and blistering.
What signs indicate over-fermentation?
Look for a dough that collapses, smells overly alcoholic, or lacks strength when shaped. If the dough loses structure and becomes slack, shorten the next ferment or reduce temperature slightly.
Is cold fermentation healthier than quick fermentation?
Slow fermentation can increase digestibility by breaking down some complex carbohydrates and gluten proteins, and it can create acids that aid nutrient absorption. However, claims vary by ingredient and method, so evaluate results case by case.
Cold fermentation rewards disciplined technique with consistent results. Control your variables, keep clear notes, and refine one factor at a time to build repeatable, delicious outcomes.
See also: cold fermentation
]]>
- No-knead relies on time: long fermentation develops gluten slowly.
- Texture shifts: you often get a more open, irregular crumb.
- Flavor deepens: extended fermentation produces more complex acids and aromas.
- Handling changes: higher hydration and gentle shaping become critical.
What is kneading and why it matters
Kneading mechanically develops gluten, the protein matrix that traps gas and gives bread structure. Bakers apply folding and pressure to align gluten strands rapidly.
This mechanical action contrasts with biochemical development over time. For more on the protein itself, see gluten on Wikipedia.
Mechanics of gluten formation
Kneading stretches and orients gluten-forming proteins (gliadin and glutenin). That creates elasticity and strength so the dough holds rise and shape.
When you skip this work, enzymes and hydration gradually do the aligning for you during fermentation. For background on fermentation processes, consult fermentation.
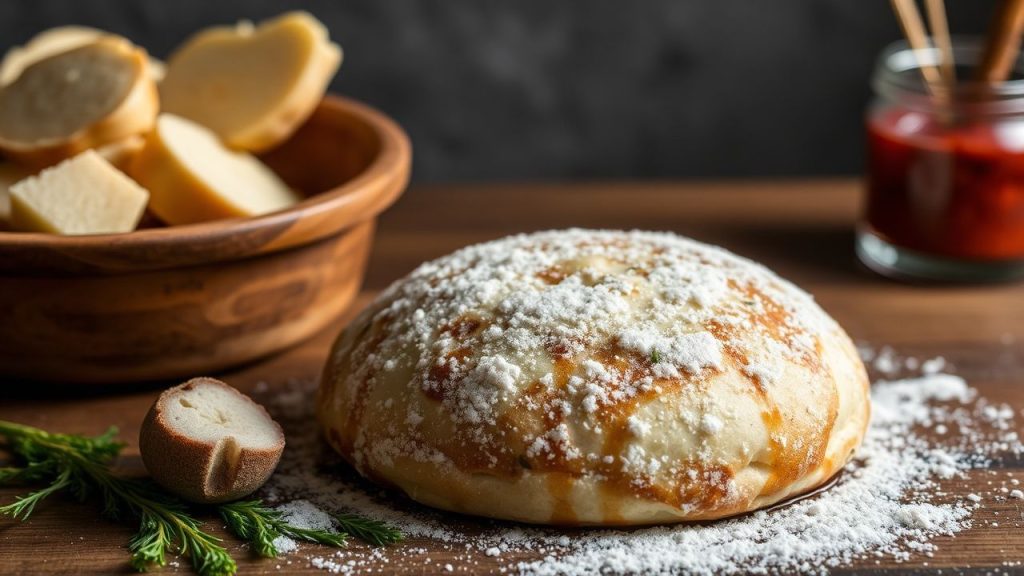
How skipping kneading changes dough structure
Skipping kneading shifts the method from physical manipulation to time-based chemistry. You give enzymes, water, and yeast hours to develop the network that kneading would otherwise force in minutes.
That slower pathway creates characteristic differences in crumb, crust, and flavor. Understanding those differences lets you control outcomes deliberately.
Texture and crumb
No-knead doughs often yield a more open, irregular crumb with larger alveoli. The result looks rustic and can hold toppings or dips well.
If you under-ferment, however, the loaf will be dense and gummy. Correct timing prevents that problem and rewards patience.
Flavor and aroma
Extended fermentation increases organic acid and ester production, which gives the loaf deeper, tangy notes. This is why many bakers prefer long, slow rises for flavor.
Long fermentation also improves keeping quality; the loaf stays flavorful longer compared with a quick, mechanically developed loaf.
Practical steps for reliable no-knead loaves
Successful no-knead bread requires deliberate adjustment of hydration, time, and shaping. Treat it as a method, not a shortcut.
Start with a high-hydration dough (typically 70–80% hydration) and allow 12–18 hours of fermentation at room temperature for most yeasted recipes.
- Hydration: higher water content encourages natural gluten development.
- Fermentation time: longer bulk ferment improves strength and flavor.
- Handling: minimal degassing and gentle shaping preserve open crumb.
For recipe ideas and tested methods, see our internal bread recipes collection. For technical background, review our baking science resources.
Expert Insight
Allow the shaped dough a final proof in a well-floured banneton or a lined bowl to build surface tension gently. That tension supports oven spring and a pleasing crust.
Common pitfalls and how to avoid them
People often assume no-knead means no attention. The truth: no-knead trades effort now for patience and timed care later.
Common mistakes include under-hydration, insufficient fermentation, and harsh shaping. Each leads to predictable faults like tight crumb, weak oven spring, or collapsed loaves.
Pro-Caution
Temperature control matters. Cooler rooms slow enzyme activity and require longer fermentation. Warmer rooms speed fermentation but risk overproofing.
When troubleshooting, log times, temperatures, and hydration. That data makes adjustments rapid and reliable.
Quick troubleshooting table
| Symptom | Likely cause | Fix |
|---|---|---|
| Dense crumb | Under-fermented or low hydration | Extend bulk ferment 2–4 hours; increase hydration 2–4% |
| Large collapse mid-loaf | Overproofed or weak shaping | Shorten proof or tighten shaping; cold retard overnight |
| Sticky handling | High hydration and low gluten development | Use gentle dusting, stretch-and-folds, or chill briefly |
How yeast and microbes shape the no-knead profile
Yeast metabolizes sugars into CO2 and alcohol, driving the rise. Bacterial activity introduces acids and flavor compounds over long fermentation.
Different leavens (commercial yeast vs. sourdough starter) produce distinct profiles. For more on yeast and starters, consult yeast and sourdough entries.
Choosing between quick no-knead and sourdough
Quick no-knead uses commercial yeast and yields reliable results with less time. Sourdough emphasizes complex flavor and longer retards.
Both methods benefit from long hydration and gentle handling. Choose by desired flavor profile and the time you can commit.
Final considerations for home bakers
Skipping kneading is a conscious technique choice. It favors fermentation-driven structure and flavor over mechanical speed.
Adopt the method with intention: monitor times, use appropriate hydration, and adjust for room temperature. You will control the result, not leave it to chance.
FAQ
Can I skip kneading completely and still get good bread?
Yes. You can get excellent bread with no-knead methods if you allow adequate fermentation and use higher hydration. Skillful shaping and proofing finish the loaf.
How long should I ferment no-knead dough?
Typical room-temperature fermentation runs 12–18 hours for a standard recipe. Adjust based on room temperature and desired flavor intensity.
Will no-knead bread have the same chew as kneaded bread?
No-knead loaves often have a different chew—less uniform but pleasantly open. Proper hydration and time produce good chew even without mechanical kneading.
Do I need special equipment for no-knead baking?
You do not need special mixers. A Dutch oven helps create steam and strong oven spring, but you can also use a baking stone and steam pan.
Can I adapt my favorite kneaded recipe to a no-knead method?
Yes, but adapt hydration and increase fermentation time. Log changes and test small batches until you get reliable results.
See also: no-knead
]]>
- Gluten forms when water hydrates glutenin and gliadin, then mechanical action aligns them.
- Hydration and time often matter more than forceful kneading; temperature speeds enzyme and yeast activity.
- Flour choice sets the baseline: higher protein flours yield stronger gluten.
- Tests and techniques—windowpane, stretch-and-fold, and fermentation control—ensure consistent results.
What Is Gluten and How It Works
Gluten describes the protein network formed mainly from glutenin and gliadin when wheat flour meets water. These proteins bond and create an elastic, extensible matrix that traps carbon dioxide produced by yeast.
Understanding gluten chemistry helps you choose the right methods. For core background on the proteins and structure, see gluten on Wikipedia and use that foundation when you test dough performance.
Key Factors That Develop Gluten
Three variables control gluten strength: hydration, mechanical action, and time. You must balance these elements according to the flour, recipe, and desired crumb.
Adjust any variable to tune dough. For example, increase hydration to develop gluten with gentle handling, or increase kneading time for lower-hydration doughs to reach similar strength.
Hydration: Percentage and Feel
Hydration equals water weight divided by flour weight. Typical ranges: 55–65% for sandwich loaves, 65–75% for artisan loaves.
Higher hydration creates a more extensible gluten network but makes handling trickier. Use wet-hand techniques and stretch-and-fold to manage higher-hydration doughs.
Kneading vs. Time: Methods Compared
Traditional kneading aligns proteins quickly through mechanical action. However, long, slow fermentation can achieve similar gluten structure with minimal kneading.
Use the no-knead approach for hands-off dough, or employ short, periodic stretch-and-folds to build strength while preserving gas and flavor.
Practical Techniques: Tests, Tools, and Timing
Use objective checks rather than guesswork. The windowpane test and a tactile assessment of dough elasticity tell you when gluten has developed enough for shaping.
Temperature control also counts. Aim for a final dough temperature around 24–27°C (75–80°F) to balance yeast activity and enzyme action for most yeasted breads.
Windowpane Test and Benchmarks
Pinch a golf-ball-size piece and stretch it thin. If it forms a translucent, stretchable membrane without tearing, gluten is ready for bulk fermentation.
If it tears, rest the dough for 10–20 minutes and test again. Often, a short autolyse (rest after mixing flour and water) dramatically improves windowpane results.
Tools and Additives
Use a bench scraper, dough hook, or your hands depending on batch size. Bakers sometimes add vital wheat gluten to strengthen weak flours.
Rely first on technique: hydration, autolyse, and fold cycles deliver the best flavor and structure. Reserve additives when you cannot change flour sources.
| Bread Type | Hydration |
|---|---|
| Sandwich loaves | 55–65% |
| Artisan boules | 65–75% |
| Ciabatta | 75–85%+ |
Flour Choice and Its Impact
Protein content dictates potential gluten strength. Bread flour typically contains 12–14% protein, while all-purpose ranges 10–12%. Whole grain flours include bran that can cut gluten strands, yielding denser crumbs.
Blend flours to balance nutrition and texture. For weak flours, a small addition of high-protein flour or vital wheat gluten brings structure without overworking the dough.
Refer to the flour overview at flour on Wikipedia for technical details about milling and protein levels.
Troubleshooting Common Problems
Density, lack of oven spring, and tearing all point to gluten issues or fermentation errors. Diagnose by re-checking hydration, knead time, and proofing temperature.
For instance, dense crumb often means underdeveloped gluten or short fermentation. Conversely, open crumb with large uneven holes can indicate overproofing or very high hydration without sufficient surface tension.
Pro-Caution
After resting the dough, re-evaluate elasticity. Often a controlled, cool bulk ferment fixes structural issues and improves flavor through slower enzyme activity.
Specific Techniques: Stretch-and-Fold, Autolyse, and No-Knead
Stretch-and-fold builds alignment without aggressive kneading. Lift a portion of dough, stretch it over itself, and rotate. Repeat every 20–30 minutes during early bulk fermentation.
Autolyse—mixing water with flour and resting 20–60 minutes before adding salt and yeast—improves hydration and reduces kneading time. The method enhances extensibility and flavor.
Expert Insight
The no-knead method relies on long fermentation to develop gluten passively. It suits high-hydration doughs and yields excellent flavor due to extended enzyme and yeast interaction.
For hands-on guidance, find practical walkthroughs on internal pages like baking techniques and recipe-specific adjustments at bread recipes on this site.
Temperature, Fermentation, and Yeast Control
Yeast performance depends on dough temperature. Warmer dough accelerates fermentation but shortens flavor development. Cooler dough slows activity and improves complexity.
Target dough fermentation temperatures (final dough temp) will vary with your schedule. For baseline reading on yeast species and handling, see baker’s yeast on Wikipedia.
Practical Temperature Ranges
Room-temperature bulk fermentation typically runs 1–4 hours depending on dough strength and yeast amount. Retarding in the fridge overnight yields deeper flavor and easier shaping.
Use a thermometer to calculate water temperature for your mixing target. Control variables and reproduce results reliably across bakes.
Final Shaping and Oven Spring
Proper shaping builds surface tension, which supports oven spring. Tight shaping reduces degassing and helps the loaf rise vertically in the oven.
Score loaves to control expansion. For crust and crumb balance, add steam in the first 10 minutes of baking to delay crust set and maximize oven spring.
FAQ
How do I know when gluten is strong enough?
Perform the windowpane test. If the dough stretches thin and translucent without tearing, it has sufficient gluten. Also check that it holds gas and feels springy when poked.
Can I improve gluten in whole wheat dough?
Yes. Use higher hydration, autolyse, and slightly longer fermentation. Sifted dough or added vital wheat gluten can also improve structure while preserving whole-grain flavor.
Is vigorous kneading always better?
No. Vigorous kneading builds strength fast but can overheat the dough and damage structure. Often, gentle folding and time produce better flavor and an open crumb.
When should I add salt and why does timing matter?
Add salt after autolyse and with yeast if using direct methods. Salt tightens gluten and slows enzyme activity, so adding it too early can reduce extensibility during initial development.
What if my dough never forms a windowpane?
Check flour quality, add short rests (autolyse), and increase hydration slightly. If needed, use small additions of high-protein flour or vital wheat gluten and extend fermentation time.
For additional technical context about fermentation and enzymatic action, consult fermentation (food) on Wikipedia.
Armed with these techniques—controlled hydration, deliberate resting, and measured mechanical action—you can unlock gluten consistently so your loaves rise, slice, and taste like professional-baked bread. Practice the tests, monitor temperature, and adjust flour blends to match your goals. Happy baking and precise measuring yield reliable results.
See also: gluten
]]>