- Salt early: dry-brine for flavor and improved muscle relaxation.
- Sear hot: create a Maillard crust to lock flavor and texture.
- Control temp: use an instant-read thermometer and rest before slicing.
- Aging or enzymes: break down collagen for sustained tenderness.
Prep and Cook Time
Preparation: 10 minutes. Bring steaks to room temperature for even cooking and predictable carryover.
Cook Time: 12–15 minutes depending on thickness. Use direct high heat for a short sear, then lower the heat to finish to target temperature.
Yield and Difficulty
Yield: Serves 2 hearty portions. Adjust times when cooking thicker cuts or multiple pieces in one pan.
Difficulty: Medium. The techniques require timing, temperature tracking, and attention to surface moisture for a reliable result.
Ingredients
Gather quality ingredients and simple tools: two 10–12 oz ribeye steaks, kosher salt, freshly ground black pepper, a high smoke-point oil, unsalted butter, fresh thyme, and garlic.
Use a heavy skillet (cast iron preferred) and an instant-read thermometer. Choosing the right cut matters; ribeye offers marbling that improves tenderness and mouthfeel.
- 2 (10-12 oz) ribeye steaks, at room temperature
- 1 tablespoon kosher salt
- 1 teaspoon freshly ground black pepper
- 2 tablespoons high smoke-point oil (canola or avocado)
- 2 tablespoons unsalted butter
- 3 sprigs fresh thyme
- 3 cloves garlic, lightly crushed
Instructions
Step 1 — Dry the surface: Pat steaks thoroughly with paper towels. A dry surface ensures a rapid Maillard reaction and prevents steaming.
Step 2 — Season and rest: Salt both sides generously. Let seasoned steaks sit for 30–120 minutes uncovered in the fridge for a basic dry-brine effect or rest 30 minutes at room temperature if cooking immediately.
- Preheat skillet: Heat a heavy pan over high heat until smoking hot. Add oil and swirl to coat the surface.
- Sear both sides: Place steak away from you to avoid splatter. Sear undisturbed 3–4 minutes per side to build a dark crust, then reduce heat.
- Finish and baste: Lower heat to medium-low, add butter, thyme, and garlic, and spoon melted butter over the steaks to enrich flavor.
- Check doneness: Use an instant-read thermometer: 130°F for medium-rare, 140°F for medium; remember carryover heat raises temperature after removal.
- Rest and slice: Tent loosely with foil and rest 5–10 minutes. Slice against the grain to shorten fibers and maximize tenderness.
 Pro-Caution
Science of Tenderness
Meat tenderness depends on three physical elements: muscle fiber structure, connective tissue, and intramuscular fat. Each element responds differently to salt, heat, and time.
Connective tissue like collagen toughens with heat but converts to gelatin under long, low temperatures. Learn more about connective tissue on connective tissue.
Maillard Reaction and Flavor
The Maillard reaction produces the brown crust and dozens of flavor compounds. It requires a dry surface and high heat to proceed efficiently.
Control moisture and maximize surface temperature to favor Maillard products while avoiding burning. For a technical reference, see Maillard reaction.
Enzymes, Aging, and Tenderizing
Aging concentrates flavor and allows endogenous proteolytic enzymes to cleave proteins. Both wet and dry aging promote measurable tenderization.
For background on controlled breakdown processes used in the trade, consult aging of meat.
Chef’s Notes
Cut selection: Choose cuts with appropriate marbling for your cooking method. Ribeye offers intramuscular fat that melts during cooking and improves tenderness.
Temperature control: Use an instant-read thermometer for accuracy. Remove steaks slightly below target temp to account for carryover cooking.
 Expert Insight
Variations and Advanced Techniques
For tougher cuts, employ low-and-slow braises to hydrolyze collagen into gelatin. Alternatively, consider sous-vide cooking to hold temperature precisely while enzymes work.
Enzymatic marinades (pineapple, papaya) contain proteases that act on surface proteins. Use them briefly to avoid a mushy surface and to preserve internal texture; read about proteases protease.
Serving Suggestions
Serve sliced steaks with a simple pan jus or herb butter to complement but not mask beef flavor. Sides such as roasted potatoes or a bright arugula salad balance richness.
Finish with flaky sea salt and fresh herbs. A small garnish adds visual contrast and a final aromatic note without overwhelming texture.

Nutrition
Estimate per serving: approximately 680 kcal, 55 g protein, 52 g fat, 0 g carbohydrates. Values vary by cut and trimming.
Trim visible fat to control saturated fat content, or choose leaner cuts when desired. Balance portions with vegetable sides for a complete plate.
FAQ
Why does a properly rested steak taste juicier?
Resting allows muscle fibers to relax and reabsorb some exuded juices. Cutting immediately forces those juices onto the plate, reducing perceived juiciness.
Rest time depends on thickness; 5–10 minutes is common for typical steaks to equalize temperature and retain moisture.
Does salt actually tenderize meat?
Salt initially draws moisture out, then reabsorbs it with dissolved salt molecules that season and slightly alter protein structure. This process, known as dry brining, improves water-holding capacity and texture.
Timing matters: brief salting seasons the surface, while longer salting (30–120 minutes) yields more pronounced tenderizing effects.
How should I use a thermometer for best results?
Insert an instant-read thermometer into the steak’s center, avoiding bone or fat pockets. Aim for 5°F below your target and allow carryover heat to finish cooking during rest.
Verify multiple pieces when cooking several steaks to ensure uniform doneness across the batch.
Are marinades necessary for tenderness?
Marinades add flavor and can alter surface texture. Acidic or enzymatic marinades tenderize mainly at the surface and are less effective on thick cuts without extended time.
For deep tenderization, use aging, mechanical tenderizing, or long, low-temperature cooking methods instead of relying solely on marinades.
What cut should I pick for consistent tenderness?
Select cuts from low-activity muscles for natural tenderness. Filet mignon and ribeye top the list because they have less connective tissue and good marbling.
For leaner preferences, sirloin or strip steak can perform well with careful temperature control and proper slicing against the grain.
Master these steps and you will consistently produce steaks that are tender, flavorful, and texturally satisfying. Science gives you the rules; precise technique delivers the result.
See also: tender steak
]]>
- Even doneness: Short, frequent flips reduce the exterior-to-center temperature gradient.
- Consistent crust: Repeated returns to searing temperature sustain the Maillard reaction while avoiding burned edges.
- Faster, controlled cooking: Cadenced flipping shortens total cook time for many 1–1.5 inch steaks.
- Practical for home cooks: The method requires attention, not special equipment, and suits common kitchen pans.
Prep and Cook Time
Preparation: Allow steaks to sit at room temperature for 30–45 minutes to stabilize core temperature. That improves predictability when you perform the steak flip cadence.
Cooking: Expect about 8–12 minutes on the stovetop for a 1–1.5 inch ribeye using frequent flips, depending on target doneness and pan conductance. Use a probe thermometer to remove guesswork and track carryover heat.
Yield and Difficulty
Yield: The recipe yields two hearty servings from two ribeyes of the specified thickness. Portion size and trimming affect plate yield and nutrition estimates.
Difficulty: Medium. The technique depends on timing, heat management, and observing visual cues; it rewards an attentive cook more than a passive one.
Ingredients
Keep seasoning simple to highlight beef flavor. Salt, oil, aromatic butter, and fresh herbs support crust formation during repeated steak flip intervals without masking the meat.
Ingredients (serves 2):
- 2 ribeye steaks, 1–1.5 inches thick, trimmed to preference
- 2 tbsp neutral oil with a high smoke point (canola or grapeseed)
- 2 tsp coarse salt, adjusted to taste
- 1 tsp black pepper, freshly ground
- 2 cloves garlic, lightly crushed
- 2 sprigs thyme or rosemary
- 2 tbsp unsalted butter
Equipment and Rationale
Choose a heavy, heat-retaining pan for predictable surface temperature during repeated steak flip cycles. A cast iron skillet performs well because it resists rapid temperature drop when the meat is introduced.
For more on the pan type and why it matters, consult cast-iron skillet. Pair the pan with a reliable instant-read thermometer for consistent pulls and to measure carryover heat.
Instructions
Follow precise steps but stay observant: the steak flip cadence interacts with pan temperature and steak thickness. Adjust intervals slightly based on visible browning and the thermometer readout.
Preheat the skillet over medium-high until it radiates heat across the surface. Add oil and lay steaks away from you to avoid splatter. Begin with a short initial sear to establish a base crust before the cadence.
- Preheat the pan: Heat the skillet over medium-high until it is very hot and stable.
- Season the steaks: Pat dry, salt both sides generously, and apply pepper just before searing to limit moisture draw.
- Initial sear: Add oil; sear each side approximately 90–120 seconds to begin crust formation without overcooking the center.
- Apply the cadence: After the initial sear, flip every 30–60 seconds depending on pan temperature and thickness. This is the core of the steak flip method to even internal heat distribution.
- Baste with aromatics: On a later flip, add butter, garlic, and thyme. Tilt the pan and spoon butter continuously to layer flavor without dropping surface temperature too far.
- Probe for doneness: Insert the thermometer laterally into the center for accurate readings: medium-rare ~130°F, medium ~140°F, then account for 5–8°F carryover.
- Rest: Tent loosely with foil and rest 5–7 minutes to allow juices to re-distribute and the center to equilibrate.
Timing checklist
Start with a 90–120 second initial sear. Then switch to the cadence that matches your observation of browning and thermometer movement. Keep notes and calibrate times to your stovetop.
If the pan smokes excessively, lower the heat briefly and allow the oil to recover. Overheating negates the benefit of frequent steak flip cycles by forcing long recovery times between flips.
Expert Insight
Why multiple flips work (the science)
Frequent steak flip intervals reduce the temperature gradient between exterior and center by delivering heat in stepped increments. That moderates edge overcooking while the core approaches the target temperature.
The Maillard reaction still proceeds because the surface periodically returns to searing temperatures with each flip. For more on the chemical process that creates browning and flavor, see Maillard reaction. Repeated short exposures drive these reactions in bursts while avoiding excessive charring.
Chef’s Notes: Practical Tips for Success
Cut selection matters: Well-marbled steaks such as ribeye and strip respond predictably to the steak flip method. Their intramuscular fat supports even cooking and flavor development.
Avoid crowding: Give each steak space so steam escapes and surface temperature stays high. Crowding forces steaming and prevents a reliable crust.
- Thermometer placement: Insert the probe from the side, parallel to any bone, into the thickest part for accurate internal readings.
- Carryover heat: Expect a 5–8°F rise while resting. Plan to remove the steak a few degrees below target to account for this.
- Oven finish: For steaks thicker than 1.5 inches, sear on the stove then finish to temperature in a 400°F oven for 3–8 minutes as needed.
Pro-Caution
If heavy smoking or burnt bits appear, reduce heat and scrape the pan to remove carbonized residue between batches. Maintain consistent oil choice to keep smoke behavior predictable.
Serving Suggestions
Always slice against the grain to shorten muscle fibers and maximize tenderness. Serve immediately after the rest period so juices remain inside the meat rather than on the plate.
Pair the steak with bright sides that cut through fat, such as herb chimichurri or a lemony salsa verde. Classic roasted potatoes or grilled seasonal vegetables match the intensity of a well-seared ribeye.
Nutrition
Nutrition estimates depend on trim and portioning. Use the following rough numbers for a ribeye-based serving as a reference for meal planning.
Per serving (approximate):
| Nutrient | Per Serving |
|---|---|
| Calories | 650 kcal |
| Protein | 48 g |
| Carbohydrates | 2 g |
| Fat | 48 g |
Key Practical Comparisons
Single-flip advocates point to uninterrupted contact for an unbroken crust. That argument can hold for very thick cuts where a single extended sear is part of a reverse-sear sequence.
However, for a wide range of medium-thickness steaks, the steak flip approach balances crust and interior control. Match technique to thickness, bone presence, and fat distribution rather than applying a one-size-fits-all rule.
For background on beef as an ingredient and consumer considerations, see meat and for context on steaks specifically, consult steak.
FAQ
What exactly is the “steak flip” myth?
The myth says flipping once guarantees the best crust and juiciness. In practice, flip frequency is a tool: you can achieve both a strong crust and even doneness by controlling heat and timing with the steak flip cadence.
How often should I flip a 1-inch ribeye?
Aim to flip every 30–60 seconds after the initial sear for a 1–1.5 inch ribeye. Adjust based on visual browning and the thermometer reading; the cadence is a guideline, not a rigid rule.
Will flipping more often stop the crust from forming?
No. If the pan remains in the searing temperature window, repeated short exposures still promote the Maillard reaction and crust formation. Avoid long cooldowns between flips.
Are there cuts that still prefer a single flip?
Very thin steaks or very thick bone-in cuts can benefit from fewer flips or hybrid methods like reverse sear. Match your approach to the cut and your target doneness for predictable results.
What tools make the steak flip method more reliable?
A heavy skillet with good heat retention, an instant-read thermometer, and tongs for confident handling improve consistency. Internal monitoring and note-taking help you replicate success across cooks.
See also: steak flip and ribeye steaks
See also: steak flip
]]>
- At a glance: Dry the fillet thoroughly, use a heavy pan, sear mostly skin-side down, finish with butter for flavor and gloss.
- Timing tip: For a 1-inch fillet, expect about 6–8 minutes skin-side down and 2–3 minutes on the flesh side.
- Pan care: Work in batches to avoid steam and maintain surface temperature for repeatable crisping.
Choosing Fish and Tools for Crispy Skin
Pick a fresh, skin-on fillet to maximize the chance of crisping. Fresh salmon has firm flesh and a taut skin that responds predictably to high-heat contact.
Use a heavy-bottomed skillet to hold steady heat and create an even crust. A cast-iron or thick stainless pan resists temperature drop; see the mechanics of good cookware on cast-iron cookware.
Prep and Timing for Crispy Skin
Effective prep focuses on removing surface moisture and tempering the fish. Pat fillets completely dry, salt just before cooking, and let the skin air-dry briefly on a rack to improve contact.
Time is variable by thickness, but the method is constant: long skin-side contact, short flesh-side finish. Visual cues—color change from the edge inward—give more reliable results than rigid timers.
Yield, Difficulty, and Batch Management for Crispy Skin
Plan yield by fillet size and pan capacity so you do not overcrowd the surface. Overcrowding lowers pan temperature and creates steam that defeats crisping.
Difficulty is moderate because the technique depends on temperature control and timing. With practice and consistent mise en place, the steps become routine and reproducible.
Ingredients That Build Crispy Skin
Keep the ingredient list short and functional: a neutral high smoke-point oil, a small finishing amount of butter, coarse salt, and pepper. The oil handles sear heat while butter adds gloss late in the cook.
Use oils suited to searing heat and flavor goals; compare options on the cooking oil overview. Choose avocado or grapeseed for neutral flavor and high smoke point.
Instructions to Achieve Crispy Skin
Follow a fixed sequence: dry, season, preheat pan, add oil, sear skin-side down, flip, baste, rest, and serve. Each step isolates a single variable—moisture, heat, contact, or finish—so you can troubleshoot precisely.
Heat the pan until it retains heat well and the oil shimmers but does not smoke. For a 1-inch fillet, press the skin briefly to ensure contact, sear skin-side down for 6–8 minutes, then flip and finish for 2–3 minutes.
Step-by-step details
Pat the skin until it feels tack-free and season immediately before cooking to avoid extracting excess moisture. If you must salt early, re-pat the fillet before it hits the pan.
Add oil and heat to a visible shimmer; this reduces sticking and encourages Maillard reaction for a golden crust. Avoid moving the fillet while the crust forms; the fish will release when the crust is ready.
After flipping, lower the heat and add a small amount of butter to baste for 30–60 seconds. Basting adds flavor without burning when used at the end of the cook.
Rest the cooked fillet briefly on a warm plate for 1–2 minutes to let carryover heat equalize the interior. Serve skin-side up to preserve and showcase the crisp texture.
Pro-Caution
When working multiple fillets, wipe the pan between batches and reheat the oil so each piece hits the optimal surface temperature. That reset preserves consistent results across servings.
Techniques and Physics Behind Crispy Skin
The goal is direct conduction of heat to the skin to drive Maillard browning while limiting steam formation. Surface dryness and firm contact remove insulating air pockets, enabling even browning.
Press the fillet at initial contact to flatten edges and eliminate air pockets. Maintain a stable pan temperature to sustain conduction; erratic heat produces uneven browning or burning.
Pan-frying mechanics
Pan-frying relies on sustained surface contact and the oil’s heat capacity to transfer energy into the skin. For deeper context on frying techniques, review frying.
Use a thin metal fish spatula for precise flipping. A careful flip preserves the crust and avoids tearing the skin.
Tips for Crispy Skin Success
Dryness matters: Even light surface moisture prevents crusting. Pat dry well and let fillets rest uncovered briefly if needed to remove residual dampness.
Temperature control: Start at medium-high for initial sear, then drop to medium-low after flipping to finish the flesh without burning the skin. This sequencing protects both texture and flavor.
Expert Insight
Use fats with high smoke points for the main sear and reserve butter as a finishing agent. Butter browns quickly and contributes desirable nutty notes when added late in the cook.
Work in single layers and avoid overcrowding so each fillet cooks in consistent, dry heat. If you must cook in batches, reheat the pan and oil to maintain a strong sear surface.
Serving Crispy Skin Salmon
Plate the fillet skin-side up to preserve the crunch and show off the color contrast between skin and flesh. A late squeeze of lemon and a sprinkle of flaky sea salt sharpen the perception of crispness.
Pair the salmon with something creamy, like mashed potatoes or a yogurt-based sauce, to amplify mouthfeel contrast. Bright sides, such as sautéed greens, cut richness and refresh the palate.
Common Problems and Troubleshooting for Crispy Skin
If the skin sticks, the pan or oil was not hot enough or the skin still held moisture. Reheat the pan and wait until the oil shimmers before trying again.
If the skin chars before the flesh cooks, reduce initial heat slightly and lengthen the finish on the flesh side at lower temperature. Use a thermometer to confirm internal temperature when precision is required.
FAQ
How does moisture affect crispy skin?
Moisture creates steam between skin and pan, preventing direct contact and browning. Dry thoroughly and, if needed, air-dry fillets briefly to eliminate surface dampness.
Salt draws moisture out of flesh; salt immediately before cooking or re-pat the fish if you salted earlier to maintain dryness for crisping.
Which oil is best for crispy skin pan-searing?
Choose a neutral oil with a high smoke point like avocado or grapeseed. These oils tolerate searing heat and preserve oil integrity during the sear phase.
Add a small knob of butter near the end for flavor and gloss, but avoid using butter as the primary searing fat because it browns and smokes quickly.
Why does the skin sometimes stick to the pan?
Sticking typically indicates the pan or oil wasn’t hot enough or the skin retained moisture. Heat the pan correctly and avoid moving the fish until the crust forms.
A properly formed crust releases naturally; forceful flipping risks tearing the skin and compromising crispness.
Can frozen salmon produce crispy skin?
Yes, but only if fully thawed and dried thoroughly. Frozen fillets often retain more water, so extend drying time and consider patting and air-drying before searing.
Fresh fillets give the most predictable results, but careful handling of thawed fish can still yield satisfying crispy skin.
How do I judge doneness without overcooking?
Look for an opaque band moving from the edge toward the center and a slightly translucent core for medium doneness. Use a gentle lift with a thin spatula to inspect doneness without piercing the flesh.
Remove the fillet while a slight translucence remains; carryover heat during the short rest will finish the center without drying out the fish.
See also: Technique references on searing and pan tools support repeatable results across kitchens. Practice and controlled technique produce consistent crispy skin every time.

For repeatable outcomes, focus on surface dryness, pan heat retention, and fat selection. Those three levers determine whether you get a crisp, golden skin or a soggy surface.
Adopt a checklist approach—dry, season, preheat, sear, finish—to reduce variation and increase success on the first try.
See also: crispy skin
]]>Searing vegetables concentrates flavor, deepens color, and creates crisp edges that contrast tender interiors. When you control heat, moisture, and surface contact, ordinary produce develops a savory, roasted character that few simple methods match.
- Quick wins: Dry produce, hot pan, and no crowding yield better browning.
- Science: The Maillard reaction and caramelization build complex aromas.
- Tools: Choose a heavy pan and an oil with a stable smoke point.
- Finish: Acid and herbs brighten and balance caramelized notes.
Prep and Cook Time
Preparation: 15 minutes. Trim, slice, and pat vegetables dry for even browning and predictable cook times.
Cooking: 10 minutes. Sear in batches on medium-high heat so each piece makes full contact with the pan surface and browns evenly.
Yield
This recipe serves 4 as a side or component for bowls and grain salads. Adjust quantities while keeping pan space in mind to avoid overcrowding.
Scale oil and salt proportionally. For plating, reserve some seared pieces whole for visual appeal and chop the rest for mixed dishes.
Difficulty Level
Easy to Medium. The technique relies on timing and heat control rather than advanced skills. Home cooks can master consistent results with a few practice runs.
Repeatability matters: same pan, same heat setting, and similar piece sizes produce predictable browning and texture every time.
Ingredients
Use sturdy, low-moisture vegetables for reliable searing. Uniform cut sizes help pieces cook at the same rate and develop an even crust.
Choose a neutral oil with a suitable smoke point and season simply to let the seared flavors shine.
- 2 cups broccoli florets, trimmed and dried
- 1 large zucchini, sliced into ½-inch rounds
- 1 red bell pepper, cut into 1-inch strips
- 3 tablespoons extra virgin olive oil
- 1 teaspoon smoked paprika
- ½ teaspoon garlic powder
- Freshly ground black pepper, to taste
- 1 teaspoon kosher salt, divided
- 1 tablespoon fresh lemon juice
- Fresh thyme or rosemary (optional, for garnish)
Instructions
Prepare vegetables: Trim and slice to uniform sizes, then pat completely dry. Moisture on the surface causes steaming and prevents effective browning.
Preheat pan: Heat a heavy-bottomed cast-iron skillet or stainless-steel pan over medium-high heat until the surface is shimmering.
- Oil and season: Toss vegetables lightly with olive oil and half the salt to coat without pooling excess oil.
- Sear in batches: Add veggies in a single layer; leave undisturbed until a golden crust forms. Flip and brown the opposite side.
- Adjust heat: Reduce slightly if the oil smokes or the crust burns; maintain a high enough temperature to drive the Maillard chemistry.
- Finish: Return all vegetables to the pan, sprinkle remaining salt and pepper, then remove from heat and drizzle lemon juice to lift the flavors.
- Rest and garnish: Let the vegetables rest briefly so juices redistribute, then garnish with fresh herbs.
Pro-Caution
Science of Searing
Searing produces more than color; it creates new flavor molecules. The primary pathway for savory browning is the Maillard reaction, where amino acids and reducing sugars interact under heat to form complex aroma compounds.
Alongside that, simple sugar breakdown—known as caramelization—adds sweet, nutty notes. Together these processes explain the roasted, umami-rich character of well-seared vegetables.
Tips for Success
Control moisture, heat, and surface contact. Pat-dry produce, preheat the pan, and space pieces so each piece touches the metal. These three variables determine whether you brown or steam.
Match vegetable types and cut sizes. Harder vegetables need longer sear time and may tolerate higher heat than delicate ones like zucchini, which can char quickly.
- Vegetable selection: Favor bell peppers, mushrooms, carrots, Brussels sprouts, and broccoli for dependable browning.
- Heat control: Aim for a pan surface that sizzles on contact but does not burn the oil.
- No crowding: Sear in small batches to keep temperatures stable and contact consistent.
- Season after searing: Salt draws moisture; seasoning post-sear preserves texture and crunch.
Expert Insight
Serving Suggestions
Serve seared vegetables hot to showcase contrast between crisp edges and tender centers. A squeeze of bright acid helps balance the richness produced by browning.
Combine seared pieces with grains, roast proteins, or simply top with a sprinkle of cheese or toasted nuts. The texture and flavor elevate simple plates into composed side dishes.

Nutrition
Searing does not add significant calories beyond the oil you use. It can reduce some heat-sensitive nutrients but also increases palatability, which encourages vegetable consumption.
Balance searing with quick steaming or raw components in a meal to preserve vitamins while delivering flavor-rich bites.
| Nutrient | Per Serving |
|---|---|
| Calories | 110 |
| Protein | 3g |
| Carbohydrates | 8g |
| Fat | 8g |
FAQ
What is the difference between searing and roasting?
Searing applies intense direct heat to the surface of small pieces to form a crust quickly. Roasting cooks larger quantities more slowly in an oven, producing even internal tenderness and surface browning over time.
Which oils suit high-heat searing?
Use stable oils with higher smoke points like refined olive oil, avocado, or grapeseed oil. These tolerate searing temperatures without breaking down and keep flavors clean.
Can I sear frozen vegetables?
Frozen vegetables release moisture as they thaw, which promotes steaming instead of searing. Thaw and dry them thoroughly before attempting a proper sear for best results.
Will searing make vegetables healthier or less healthy?
Searing can reduce some heat-sensitive nutrients like vitamin C, but it also increases the availability of certain antioxidants. The main trade-off is flavor and texture, which often improves consumption and nutritional intake indirectly.
How do I avoid bitter char when searing?
Bitter flavors result from burning, not browning. Control heat, avoid prolonged contact at extreme temperatures, and remove pieces as soon as a golden crust forms to prevent charring.
Final Thoughts
Searing is a practical, science-backed method to amplify vegetable flavor through targeted heat and surface contact. When you manage moisture, pan temperature, and timing, the results reward simple ingredients with rich, complex notes.
Practice with familiar produce, note how your stove behaves, and use acid and herbs to balance the caramelized profile. Mastering searing turns routine vegetables into compelling dishes that diners notice and enjoy.
See also: Searing vegetables
]]>
- Quick steam expansion inflates the pocket within seconds.
- Gluten structure provides the elastic skin that traps steam.
- Heat-holding surfaces like stones or cast iron replicate traditional ovens.
- Short bake time prevents overbrowning while ensuring a full puff.
Why high heat works
High temperatures cause rapid phase change: water in the dough becomes vapor almost instantly. That sudden steam expansion lifts the dough into a two-layered pocket and sets the crust quickly, preventing collapse.
Thermodynamics drives the transformation, and you can observe the effect whether you bake on a hearth or fry on a skillet. For more on the food-science side, consult the primer on steam.
Rapid steam expansion
When dough surface temperature climbs past 100°C (212°F), contained water flashes to vapor and generates internal pressure. That pressure separates the dough into an inner and outer layer; the outer layer sets as the crust while the inside stays tender and hollow.
Because the event lasts only seconds, you need both a high starting temperature and a surface that keeps heat delivery constant. Therefore, preheating matters more than any single ingredient change.
Gluten network and elasticity
The dough must form a resilient gluten scaffold that stretches rather than tears as steam expands. Kneading and resting develop that network, which controls the speed and uniformity of the puff.
Use flour with sufficient protein to build elasticity and avoid overhydrating to the point the dough cannot hold its shape. For background on the protein structure, see gluten.
Equipment and temperature
Choose a surface that stores heat: a pizza stone, heavy cast-iron skillet, or steel will deliver the sudden thermal shock pita needs. Those materials act like a small hearth and minimize temperature drop when dough contacts the surface.
Set ovens or griddles to the highest safe setting you have—typically 450–500°F (232–260°C). Use an infrared thermometer or oven thermometer to verify actual surface temperature rather than relying on the dial.
Pan, stone, or steel?
Each surface performs differently. A preheated pizza stone radiates heat evenly, while cast iron transfers heat rapidly through conduction, which encourages a swift lift and blistering crust.
If you bake inside a home oven, use a preheated stone or steel on the middle or upper rack to approximate a hearth. For context on traditional tools and methods, review the technology behind the oven.
Prep and cook time
Preparation: 15 minutes. Proofing: 1–1.5 hours. Proper timing ensures the dough is relaxed and ready to expand without tearing.
Cooking: 8–12 minutes total for batches, with individual pitas taking 1–2 minutes per side. You need a steady workflow so shaped rounds go straight to the hot surface.
Yield
Recipe yields 8 medium pitas (about 6–7 inches in diameter). For larger or smaller pockets, scale dough ball size accordingly and adjust roll thickness.
Consistent portioning helps the oven or pan deliver identical heat to each round, which improves uniform puffing across a batch.
Difficulty level
Medium. You need to manage heat and handle the dough quickly, but the techniques are repeatable and scalable for home cooks. Mastery comes from attention rather than special ingredients.
With practice, you will time preheating, rolling, and cooking so moisture and structure align for reliable pockets every bake.
Ingredients
These simple ingredients combine into an elastic, steam-ready dough. Use quality flour and fresh yeast for a predictable rise and texture.
- 2 ¼ teaspoons (1 packet) active dry yeast
- 1 ¼ cups warm water (about 110°F/43°C)
- 3 cups all-purpose or bread flour (higher protein preferred)
- 1 teaspoon salt
- 1 tablespoon olive oil, plus extra for coating
- 1 teaspoon sugar or honey (optional)
Instructions
Follow the steps in order to develop structure and trap moisture. Work briskly once you shape the rounds so the dough retains its internal water until it meets heat.
- Activate the yeast: Dissolve sugar or honey in warm water, sprinkle yeast on top, and wait 5 minutes until foamy.
- Mix and knead: Combine flour and salt, add the yeast mix and oil, then knead 8–10 minutes until smooth and elastic.
- First rise: Oil a bowl, place dough inside, cover, and let double for 1–1.5 hours in a warm spot.
- Preheat surface: Heat your stone, steel, or cast iron to the highest safe temperature for at least 30 minutes.
- Shape: Divide dough into 8 balls, rest briefly, then roll to ~1/8 inch thickness and 6–7 inch diameter.
- Cook: Transfer one round to the hot surface. Cook 1–2 minutes until bubbles form, flip, and cook another 1–2 minutes. If puffing lags, press small bubbles gently to help the pocket form.
- Keep warm: Stack finished pitas in a clean towel to retain heat and moisture while you finish the batch.
After the batch, let the surface re-stabilize before adding more rounds to preserve consistent heat transfer. Consistency produces consistently puffed pitas.
Tips for success
Hydration balance matters: a slightly wetter dough creates more internal steam but demands faster handling. Find the sweet spot where the dough is tacky yet manageable.
Thickness control: Roll to about 1/8 inch. Thinner discs cook too fast and tear; thicker discs trap less steam and resist separation.
Expert Insight
Rotate cooking positions on the pan if you notice hot spots. Variations in burner output or oven zones change how pitas brown and puff.
Pro-Caution
Serving suggestions
Split pitas to reveal the pocket and fill with grilled meats, vegetables, or falafel. They also pair perfectly with dips and spreads served at room temperature.
Try warm pitas with creamy hummus or use them as the base for sandwiches alongside roasted chicken and crisp salad. For oven-based baking guidance, see the internal guide on using a baking stone.
Nutritional information (per pita)
Estimate calories and macronutrients to plan meals. A standard medium pita is moderate in calories and provides usable carbohydrates for sandwiches and meals.
| Nutritional Information (per pita) | Amount |
|---|---|
| Calories | 170 kcal |
| Protein | 5 g |
| Carbohydrates | 34 g |
| Fat | 2 g |
Q&A
Why does pita bread puff up perfectly in high heat?
High heat causes the water inside dough to vaporize rapidly, and that steam inflates a pocket. The outer layer firms quickly and traps the air, creating the hollow center.
Can you get a pocket without very high temperatures?
Lower temperatures rarely produce a full pocket because steam forms too slowly and escapes rather than inflating the dough. You might get some lift, but not the consistent hollow center you want.
What temperature range is ideal for baking pita?
Aim for 450–500°F (232–260°C) surface temperature to produce rapid steam formation and a quick bake. Verify actual surface heat with a thermometer for best results.
Does the type of oven affect puffing?
Yes. Heat-retaining surfaces like stone or steel and cookware that transfers heat quickly improve puffing consistency. A home oven can mimic commercial ovens when you preheat a proper thermal mass.
How does dough hydration affect puffing?
More hydration increases available steam and supports fuller pockets but makes the dough stickier and harder to handle. Adjust flour and practice handling wet dough to balance steam potential with usability.
Insights and conclusions
High heat is the defining factor in creating a true pita pocket; it converts internal moisture to steam and separates dough layers in seconds. Build dough strength, control hydration, and present the rounds to a reliably hot surface to reproduce bakery-style results at home.
Practice the timing: preheat thoroughly, shape quickly, and cook with steady heat. With these controls in place, you will produce puffy, tender pitas that perform predictably across batches.
See also: Pita Bread
]]>
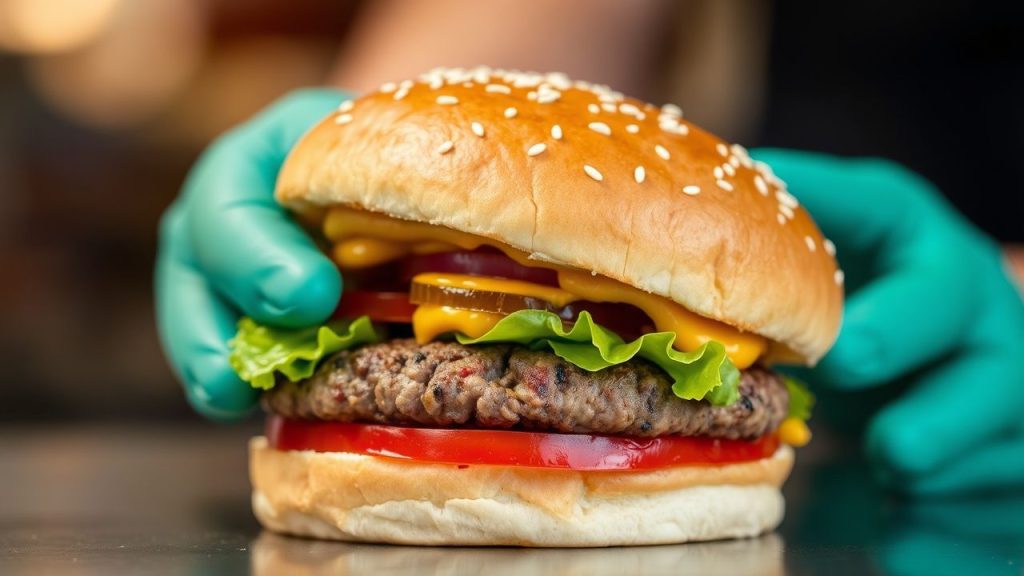
- At a glance: smash burgers rely on surface contact, high heat, and the right fat ratio.
- Crust formation: the Maillard reaction produces complex savory compounds.
- Technique matters: quick smashing, minimal handling, and proper seasoning drive results.
Why smash works: surface, heat, and chemistry
The smash burger technique maximizes surface contact between meat and hot metal to force rapid browning. That browning is the Maillard reaction, a chemical process that turns simple amino acids and sugars into dozens of flavorful compounds.
High temperature and thin thickness permit quick crust formation without overcooking the interior. That contrast between a crisp exterior and a tender center creates the defining mouthfeel of a great smash burger.
Key elements that control flavor
Fat content, grind size, and meat temperature determine both flavor intensity and juiciness. Use freshly ground beef at roughly an 80/20 lean-to-fat ratio for balanced flavor and effective rendering.
Equipment also matters: a heavy flat surface gives even heat transfer. A seasoned cast-iron skillet or steel griddle stores heat and resists temperature drop when patties hit the surface.
Ingredients and prep: what to choose and why
Select quality ground chuck or an appropriate blend labeled for burgers; the small amount of connective tissue and intramuscular fat improve flavor release during cooking. For reference, see general notes on ground beef composition and labeling.
Keep meat cold until the moment you cook it. Cold fat holds its shape until it hits the hot surface, allowing controlled rendering and reducing premature flare-ups. Form loose portions; do not compact them.
Cooking technique: step-by-step operational details
Preheat the pan until it is very hot. A hot surface initiates browning immediately and prevents the patty from sticking; maintain a consistent heat source throughout the cook.
Place loosely formed balls of meat on the surface and press firmly with a sturdy, flat spatula to achieve about 1/4-inch thickness. Hold pressure briefly to increase contact area and then release; the patty should not be continuously compressed during the full cook time.
Seasoning and timing
Season the exposed surface immediately after smashing; salt helps extract surface moisture that then aids the Maillard reaction. Avoid salting too long in advance, which can draw excessive moisture into the meat.
Cook the first side undisturbed for 2 to 3 minutes, until the edges brown and crispen. Flip once, add cheese if desired, and finish for another 1 to 2 minutes for medium to medium-rare, depending on thickness.
Cheese and assembly
Place cheese on the patty immediately after flipping to encourage rapid melting into the crusted surface. Use thin-sliced cheeses that melt quickly to preserve the burger’s short cook time and textural contrast.
Toast buns in butter until lightly crisp to add a fat barrier that keeps the bun from sogging. Layer acidic elements—pickles or a tangy sauce—to cut through fat and sharpen perceived flavor.
Tips for success
Handle meat minimally; overworking protein creates dense texture. Form loose portions that will compress when smashed, preserving interior moisture.
Use a firm, flat spatula and apply even pressure. A second spatula or a specialized press helps maintain flatness without tearing the crust.
Expert Insight
Keep the pan hot between batches. If the surface cools too much, the patties will steam rather than sear and the crust will suffer. Allow the pan to regain temperature for 30–60 seconds between batches.
Pro-Caution
Variation ideas and experimentation
Try different blend ratios or introduce a small percentage of brisket or short rib to increase flavor complexity. Test cheeses like sharp cheddar, smoked gouda, or pepper jack for different melting profiles and taste notes.
Adjust smash pressure and hold time to tune crispness. Heavier pressure yields more crust and less interior thickness; lighter pressure retains slightly more juiciness but reduces the characteristic sear.
Serving suggestions and pairing
Keep toppings minimal to let the crusted patty remain the star. Classic pairings include thin-sliced red onion, pickles, and a tang-forward sauce that balances fat.
Serve with fries, coleslaw, or a simple green side to add texture contrast. A cold, acidic beverage works well to cut through the burger’s richness and refresh the palate.
Practical recipe snapshot
Prep time: 10 minutes. Cook time: 8 minutes total for 4 patties. This timing assumes a very hot pan and thin smash thickness.
Yield: Four 4-inch smash patties. Use 1 lb (450 g) ground chuck at 80/20 for optimal fat rendering and mouthfeel.
Nutrition (per serving)
| Nutrient | Per Serving |
|---|---|
| Calories | 650 kcal |
| Protein | 38 g |
| Carbohydrates | 40 g |
| Fat | 38 g |
For techniques on handling beef and grinding at home, visit our internal guide on Ultimate Beef Cooking Guide. To practice pressing and timing, see our step-by-step drills on smash burger techniques.
FAQ
What makes a smash burger different from a regular burger?
Smash burgers use high heat and immediate pressure to create a thin patty with extensive surface contact. This method favors rapid Maillard browning, which produces intense crust flavors not typical of thicker patties.
What fat ratio should I use?
Around 80/20 lean-to-fat gives the best balance of flavor and juiciness for smash burgers. Higher fat renders more liquid fat that bastes the meat and deepens flavor, while too-lean blends can dry out quickly.
When should I season the meat?
Season the exposed surface immediately after smashing. Salt applied at that moment helps surface moisture promote browning without drawing out excessive internal juices before cooking.
Can I make smash burgers on a griddle at home?
Yes. Use a heavy griddle or a well-seasoned cast-iron skillet and preheat until very hot. Maintain temperature between batches and use a sturdy spatula for consistent pressure.
How do I keep the bun from getting soggy?
Toast buns in butter until crisp and serve hot. A light barrier of melted butter or a thin sauce layer helps prevent moisture migration from the patty into the bun.
The way forward
Understanding the interaction of heat, surface area, and fat transforms how you approach burger building. Small technique adjustments yield large flavor gains.
Practice timing, maintain heat, and treat each smash as a focused experiment in surface chemistry. With deliberate technique you can consistently reproduce restaurant-quality smash burgers at home.
See also: smash burger
]]>
- Heat retention: heavy iron holds and evens temperature for consistent results.
- Durability: properly maintained pans can last generations.
- Natural nonstick: a seasoned surface releases food without synthetic coatings.
- Versatility: stove-to-oven performance simplifies recipes.
Intro: Why Cast Iron Still Matters
Professional chefs and serious home cooks use cast iron because it solves real cooking problems. The pan’s thermal mass and rough surface influence browning and crust development in ways that thin pans cannot match.
Cast iron’s history and function are inseparable: a heavy skillet stores heat and releases it steadily. That behavior means fewer temperature swings and more control when searing or roasting.
Learn more about the material itself on the Cast iron page for background on composition and manufacturing.
Prep and Cook Time
Prep Time: 10 minutes | Cook Time: 25 minutes | Total: 35 minutes.
These times assume a preheated skillet and a standard oven set to 425°F (220°C). Allow extra time if your pan starts cold; cast iron benefits from gradual heating to avoid thermal shock.
Yield
This roast yields about four portions and scales well with larger pans or two smaller pans. Use a thermometer to confirm an internal temperature of 165°F (74°C) for poultry.
Leftovers reheat reliably in the same skillet because the pan keeps food warm without drying it out. Store shredded meat in an airtight container and reheat gently to preserve texture.
Difficulty Level
Medium. Cast iron removes much of the guesswork for high-heat cooking, but it requires attention to care and seasoning. Expect a short learning curve with big returns in flavor and crust.
Basic cooking competence plus attention to temperature and timing produces excellent results. The pan rewards consistent technique rather than complex tricks.
Ingredients
These ingredients are listed for a classic pan-roast chicken. Adjust herbs and aromatics according to taste; cast iron amplifies those flavors during browning.
- 1 tablespoon vegetable oil or melted lard (for seasoning)
- 1 whole chicken (about 3-4 pounds), patted dry
- 2 teaspoons kosher salt
- 1 teaspoon freshly ground black pepper
- 4 cloves garlic, smashed
- 2 sprigs fresh rosemary or thyme
- 1 lemon, halved
- 1 large yellow onion, quartered
- 1 cup chicken broth (optional, for pan deglazing)
Seasoning oils and aromatics interact with the pan’s surface to build flavor. Use a high-smoke-point fat when searing to protect the seasoning layer.
Instructions
Prepare the pan and chicken as separate steps to ensure even browning. Preheat the skillet gently on medium before moving to higher heat for a sear.
Preheat & Sear
Preheat your oven to 425°F (220°C). Place the seasoned cast iron pan on the stovetop and warm over medium heat for 3-5 minutes to stabilize surface temperature.
Rub the chicken with vegetable oil or melted lard and season liberally with kosher salt and pepper. Dry skin promotes crisping; pat the bird thoroughly before oiling.
Oven Roast & Finish
Fill the cavity with smashed garlic, fresh herbs, and lemon halves to infuse aroma during cooking. Arrange the quartered onion evenly in the pan to create a shallow rack and a reservoir for pan juices.
Place the chicken breast-side up on the bed of onions and transfer the pan to the preheated oven. Roast for 20-25 minutes or until the thickest part reaches 165°F (74°C), basting once halfway for moistness.
Deglazing & Sauce
When the roast is done, remove the chicken and return the pan to medium heat on the stove. Pour in chicken broth to deglaze, scraping browned bits into a quick pan sauce and simmer for 2-3 minutes.
Strain if desired, then spoon the sauce over the carved bird. Deglazing both dissolves flavor and helps maintain a clean surface on the pan.
Chef’s Notes
For crisp skin, ensure the chicken is completely dry before oiling and seasoning. A hot pan at the point of searing seals protein surfaces and directs juices inward.
If the pan shows signs of rust or uneven seasoning, scrub gently with coarse salt and a soft cloth before re-seasoning. Repeat a light oiling and heating cycle to rebuild the patina.
Expert Insight
Get detailed conditioning steps in our Cast Iron Seasoning Guide. Regular maintenance prevents rust and improves release over time.
Serving Suggestions
Serve the roasted chicken straight from the skillet for a rustic presentation. Garnish with fresh rosemary or a light squeeze of lemon to brighten the rich juices.
Pair with creamy mashed potatoes or a crisp green salad to balance texture. The caramelized onions from the pan make an ideal topping for both meat and vegetables.
Care & Performance: What the Science Says
Cast iron behaves like a thermal reservoir: it absorbs heat slowly and releases it steadily. This property reduces temperature variance and produces consistent results during searing and roasting.
For technical background, review principles of heat conduction and thermal mass. Knowing how heat flows clarifies why heavy pans outperform thin sheets for certain techniques.
Seasoning chemistry converts oils into a polymerized layer that resists sticking and corrosion. For more about surface technologies, see the Non-stick cookware overview, which contrasts synthetic coatings with traditional seasoning.
Nutritional Snapshot
Per serving, the roast averages about 340 kcal, with protein around 38 g and fat near 18 g. Values vary by cut and added fats.
Use a light hand with added oil and trim excess fat to lower calories. Cast iron does not significantly add iron to food under normal cooking conditions, though minute leaching can occur with very acidic preparations.
Q&A
What makes cast iron pans so popular?
Cast iron pairs high heat capacity with a rough surface that encourages browning. The result is deeper crusts and better caramelization than many lightweight pans.
Durability and repairability play a role too: a pitted or rusty pan can be restored, which supports long-term ownership. Learn how to restore and maintain your pan in the seasoning guide.
How does cast iron distribute heat compared with stainless steel?
Cast iron heats slowly but evenly and holds temperature well. Stainless steel heats faster but can show hot spots on thin constructions, which makes it less forgiving for long sears.
For techniques that require rapid temperature shifts, lighter metals may excel. For steady high-heat work, cast iron is preferable because of its thermal mass.
What is seasoning and how long does it take?
Seasoning is the polymerized oil layer that forms with repeated heating and oiling. Initial build-up takes a few cycles, but a robust patina develops after many uses.
Use frequent, light seasoning rather than infrequent heavy coats. Each cooking session contributes microscopic layers that enhance release and protect the metal.
Can I cook acidic foods in cast iron?
Occasional acidic dishes are fine for a well-seasoned pan, but long braises with tomatoes or vinegar can degrade the seasoning. Protect the surface by limiting contact time and re-oiling after cleaning.
If you plan frequent acidic cooking, consider enameled cast iron or a dedicated stainless vessel. For typical home use, rotating recipes preserves seasoning.
How eco-friendly is cast iron compared to single-use nonstick pans?
Cast iron lasts decades and is fully recyclable, which reduces lifetime environmental cost. By contrast, coated nonstick pans often need earlier replacement and may involve synthetic materials with greater disposal concerns.
Longevity, reparability, and recyclability make cast iron a practical, lower-impact choice when cared for properly. For basic roasting techniques using cast iron, see the Roasting (cooking) entry.
Pro-Caution
After cleaning, always dry the pan immediately and apply a thin oil film before storage. These small steps prevent rust and preserve the seasoning built over time.
Closing Remarks
Mastering cast iron is a combination of technique and routine care. Heat control and regular seasoning produce reliable results and long service life.
Whether searing steaks, roasting chicken, or baking cornbread, the pan’s properties reward consistent practice. Use the included guides and our internal recipes to build skills and safeguard performance.
Related: see our Roast Chicken Recipe for a step-by-step roast adapted to cast iron performance.
For hands-on maintenance steps and restoration techniques, consult the Cast Iron Seasoning Guide. Regular care extends function and flavor over decades.
See also: Cast Iron
]]>
- Key takeaways: Dry mushrooms and avoid overcrowding to trigger surface browning.
- Use high heat and a sturdy pan to sustain the temperatures needed for Maillard chemistry.
- Balance oil and butter: oil for sear, butter for flavor finish.
- Adjust time and spacing by mushroom variety and thickness.
Prep and Cook Time
Preparation: 10 minutes. This includes cleaning and slicing mushrooms to uniform thickness so they cook evenly.
Cooking: About 12 minutes over medium-high heat in small batches for consistent crust formation. Total time typically runs under 25 minutes.
- Preparation: 10 minutes
- Cooking: 12 minutes
- Total Time: 22 minutes
Yield
This recipe yields a versatile seared mushroom component for mains or sides. A pound of cremini delivers substantial volume once reduced by evaporation.
Serve as a side for four diners or incorporate into salads, bowls, or sandwiches to stretch flavor across dishes.
- Serves 4 as a side dish or ingredient
Difficulty Level
Technically straightforward but timing-sensitive. The technique is easy to learn and repeats reliably when you control moisture and heat.
Beginners should practice one pan at a time, focusing on batch size rather than rushing through the skillet.
- Easy to Medium
Ingredients
Use fresh, firm mushrooms and choose a high-smoke-point oil. Butter adds flavor but lowers the maximum safe pan temperature.
Scale ingredients by portion. For dairy-free versions, replace butter with a neutral oil or a finishing knob of dairy-free butter after searing.
- 1 lb (450g) cremini mushrooms, cleaned and sliced 1/4-inch thick
- 2 tbsp unsalted butter (or olive oil for dairy-free)
- 1 tbsp high-smoke point oil (grapeseed or avocado oil recommended)
- 1/2 tsp kosher salt
- 1/4 tsp freshly ground black pepper
- 2 garlic cloves, finely minced
- 1 tbsp fresh thyme leaves (optional)
- 1 tsp lemon juice (optional, for bright finishing)
Instructions
Follow sequencing: dry, heat, oil, space, sear, season, finish. Each step affects the pan temperature and surface chemistry.
Work in small batches to avoid crowding. Overcrowding traps steam and prevents the surface temperature from rising to Maillard-friendly levels.
- Pat mushrooms dry completely using a clean kitchen towel; moisture inhibits proper searing and stalls the Maillard reaction.
- Preheat a heavy-bottomed skillet (preferably cast iron or stainless) over medium-high heat until it shimmers.
- Add oil and butter, swirling to coat. Use oil for heat tolerance; butter can be added late for flavor.
- Spread mushrooms in a single layer without overcrowding; steam forms if pieces touch densely.
- Cook undisturbed for 5–6 minutes to form a golden crust. Flip when edges are deeply browned.
- Season immediately after flipping to avoid premature moisture extraction.
- Add garlic and thyme once mushrooms are ~75% done; stir for 2–3 minutes to release aroma without burning.
- Finish off heat with a squeeze of lemon to brighten the rich, earthy notes.
- Serve hot to showcase contrast between crisped edges and tender interiors.
Why Chemistry Matters
The key reaction is the Maillard reaction, a set of complex interactions between amino acids and reducing sugars that produces brown pigments and savory compounds. Temperature and dryness dictate if this chemistry proceeds.
Mushrooms also contribute unique flavor precursors. Their umami compounds interact with Maillard products to give the deep, roasted notes you expect from a great sear. Learn more about umami and its role in savory perception.
Key Principles
Three variables control success: moisture, heat, and fat. Tweak each to push surface temperature above water boiling and into Maillard territory.
Understand how mushroom biology affects cooking. The fungal tissues hold water differently by species; adjust spacing and heat accordingly.
Moisture Management
Water prevents surfaces from reaching the ~150°C (300°F) needed for Maillard chemistry because the pan temperature remains tied to water’s boiling point. Dry surfaces brown; wet surfaces steam.
Pat mushrooms dry or brush off dirt rather than rinsing. Also, avoid salting too early because salt draws water out by osmosis and can sabotage crust formation.
Heat and Pan Choice
A cast-iron skillet holds heat best and resists temperature drop when food is added. See the cookware behavior on the cast-iron skillet page for material context.
Preheat thoroughly and use medium-high heat. If the pan smokes immediately, reduce slightly; if it cools when mushrooms hit the surface, work in smaller batches.
Fats and Flavor
Fats transfer heat and coat surfaces to promote even browning. Use a neutral, high-smoke-point oil for initial searing and a knob of butter near the end for aroma.
Butter contains milk solids that brown at lower temperatures; combine fats for performance and flavor control. Adjust amounts to taste and dietary needs.
Expert Insight
Step-by-step technique refinement
Batch size matters. If mushrooms touch, steam pockets form and the surface never dries. Aim for a single, non-overlapping layer.
Timing changes by species: thin chanterelles brown faster; portobellos require slightly longer to release moisture but reward with greater depth of flavor.
Chef’s Notes: Tips for Success
Moisture control: Wipe or brush mushrooms rather than rinsing. If you must rinse, dry thoroughly before cooking to avoid steam formation.
Pan selection: Cast iron or heavy stainless steel is preferred for steady, even heat retention. Non-stick pans rarely reach the temperatures needed for a true sear.
- Heat strategy: Start hot to achieve color, then regulate to prevent burning.
- Make ahead: Sear mushrooms in advance but add fresh herbs and citrus only at service.
- Variations: Match mushroom variety to the dish—for example, shiitake or oyster bring stronger earthiness.
Pro-Caution
Serving Suggestions
Seared mushrooms pair with grilled proteins, roasted vegetables, or toasted bread. Their concentrated flavors act as a high-impact garnish or a main ingredient in vegetarian plates.
Finish with a small scatter of fresh herbs, a dusting of grated cheese, or a calibrated drizzle of acid to balance fat and intensify perception of umami.
Nutrition
Seared mushrooms remain low-calorie while adding savory depth. Fat and salt additions change the nutrition profile more than the mushrooms themselves.
For precise counts, track added fats and finishes; basic seared mushrooms are modest in calories and provide small amounts of protein and fiber.
| Nutrition per serving | Calories | Protein | Carbs | Fat |
|---|---|---|---|---|
| Mushroom Sear | 85 | 3g | 6g | 6g |
Explore related technique articles such as Mastering the Art of Sautéing and our internal Mushroom Searing Guide for recipe variations and plating ideas.
FAQ
Why is searing mushrooms different from searing meat?
Mushrooms contain up to ~90% water and lack the higher fat content found in many meats. That water must evaporate before the surface temperature can rise enough for Maillard browning. The result: mushrooms will steam if not dried and properly spaced.
What chemical reactions create the seared flavors?
The Maillard reaction produces browned pigments and a complex mixture of flavor compounds when amino acids and reducing sugars react at elevated temperatures. The reaction differs from pure sugar caramelization and yields savory, nutty, roasted notes.
How does moisture affect browning?
Exposed water buffers the pan temperature at water’s boiling point, preventing the higher temperatures required for Maillard reactions. Drying prior to pan contact and avoiding early salting are practical controls.
Does mushroom type change technique?
Yes. Different species vary in water content, tissue density and sugar levels. Adjust heat and cook time: delicate varieties brown quickly, while dense caps need longer to release internal moisture.
What role do oil and butter play?
Oil raises the pan’s usable heat range, while butter contributes flavor through its milk solids. Many chefs sear using oil, then add butter at the end for aroma and mouthfeel.
Understanding the science behind searing turns a routine sauté into a repeatable skill. Apply these steps, and the next time you hear that satisfying sizzle you’ll know the chemistry doing the work beneath the surface.
See also: mushroom sear
]]>Searing a steak straight from the freezer tests conventional cooking rhythm and rewards precise technique. This guide explains what changes when you skip thawing, how to manage heat and moisture, and which steps reduce risk while improving flavor.
- Quick summary: a hot sear plus gentle finish can produce a crusty exterior and a juicy center.
- Key risk: uneven cooking and surface steaming if heat management fails.
- Tools matter: heavy pans and an instant-read thermometer cut uncertainty.
- Safety tip: verify internal temperature before serving.
Why sear frozen steak?
Searing from frozen saves time and limits spoilage from repeated thawing. It also changes how the Maillard reaction develops because the outer layer meets extreme heat while the core stays cold.
When you create that deep brown crust, the Maillard reaction drives rich flavor and color. Read more about the chemistry behind browning at Maillard reaction.
Prep, Cook Time, and Yield
Preparation: 5 minutes. Cooking: 20–25 minutes depending on thickness. Total: about 30 minutes for a standard 1–1.5-inch cut.
This timing assumes a quick, high-heat sear followed by finishing in a moderate oven. Use an instant-read thermometer to target internal temperatures precisely.
Cooking time by thickness
Thickness alters how long the oven step takes. A 1-inch steak needs less oven time than a 1.5-inch steak to reach medium-rare.
Plan for an extra 5–10 minutes in the oven for steaks at the thicker end of the range. Always measure internal temperature rather than relying on visual cues alone.
Ingredients and Equipment
Ingredients are straightforward: frozen ribeye or similar cut, high smoke point oil, butter, garlic, and herbs. Keep seasonings simple when the meat is frozen.
Choose heavy cookware. A massy pan stores heat and helps vaporize surface ice, which supports crust formation. See the benefits of heavy pans at cast-iron skillet.
- 1 frozen ribeye (10 oz, 1–1.5 in thick)
- 1 tbsp high smoke point oil (grapeseed, avocado, refined canola)
- 1 tsp kosher salt
- ½ tsp black pepper
- 2 tbsp unsalted butter, 2 cloves garlic, 2 sprigs thyme or rosemary
Technique: Step-by-step
This is a two-stage approach: sear hard, finish gently. Preheating the oven and a heavy skillet balances rapid crusting with controlled internal cook-through.
Keep each action deliberate. Overcrowding, low heat, or impatience converts the process to steaming and ruins the crust.
- Preheat oven to 375°F (190°C). A moderate oven finishes the center without overcooking the crust.
- Heat a heavy skillet over medium-high until hot. Add oil and let it shimmer; you want surface vaporization when the frozen steak lands.
- Place the frozen steak on the pan. Sear undisturbed for 3–4 minutes to build a deep brown crust.
- Flip carefully and add butter, garlic, and herbs. Baste with the melted butter to support even browning.
- Sear second side for 3–4 minutes, then transfer the skillet to the oven to finish—10–15 minutes typical for medium-rare.
- Rest the steak under loose foil for 5–7 minutes before slicing against the grain.
Heat management
Use medium-high for the initial sear but avoid raging flames that brown too quickly without penetrating. If the oil smokes excessively, reduce heat slightly.
After searing, the oven provides even conduction. That transition avoids a burnt exterior with a raw center when the surface cooks faster than the interior.
Safety and Internal Temperature
Food safety depends on internal temperature, not external appearance. Use an instant-read thermometer to confirm doneness across the center of the steak.
Aim for 125°F (52°C) for medium-rare, 135°F (57°C) for medium. For safety guidance and context on handling, see Food safety.
Pro-Caution
After resting, verify temperature near the thickest part. If the core falls short of your target, return to the oven briefly rather than slicing early.
Tips for Success
Pat the steak dry with paper towels to reduce surface ice. Fewer surface crystals mean less steam when the meat hits the pan.
Seasoning after searing can work, but a light dust of salt before searing helps draw flavors into the crust. Adjust technique by cut and thickness.
Expert Insight
Common mistakes
Flipping too soon is the fastest way to lose crust. Let the meat form a stable crust before moving it; that shell resists tearing and maintains juices.
Using low-mass pans or overcrowding the skillet reduces pan temperature and increases steaming. Work in single layers and preheat between batches.
Why chefs sometimes prefer alternative finishes
Chefs often combine searing with slow or controlled methods to guarantee doneness. For example, some sear quickly then finish by sous-vide or in a low oven to hold exact temperatures.
Finishing techniques trade time for consistency. When repeatable results and texture control matter, controlled-temperature methods reduce variance compared with oven-only approaches.
Serving Suggestions
Serve the sliced steak with simple, high-acid or herb-driven sides to cut richness. Lemon-dressed greens or roasted vegetables provide balance.
A pat of herb butter or a light pan jus elevates perceived juiciness. Keep garnishes minimal so the sear and meat quality remain the star.
Nutrition and Yield
Typical nutrition for a 10 oz cooked ribeye seared from frozen will vary with fat content and cooking loss. The table below presents a reasonable estimate per serving.
| Nutrient | Amount per Serving |
|---|---|
| Calories | 450 kcal |
| Protein | 42 g |
| Carbohydrates | 1 g |
| Fat | 32 g |
Adjust portions and sides for your diet goals. Searing does not materially change macronutrient totals compared with conventional thawed cooking.
FAQ
Can you sear steak straight from the freezer?
Yes. You can sear a steak from frozen if you manage heat properly and finish the interior slowly. The method relies on a strong initial sear and a gentle cook-through step to avoid raw spots.
What are the main risks of searing frozen steak?
The primary risks are uneven cooking and surface steaming. Excess moisture can turn a potential crust into a soggy surface, and the center can remain undercooked without careful finishing.
How do I check doneness when cooking from frozen?
Use an instant-read thermometer inserted into the thickest part of the steak. Target your preferred internal temperature and allow for carryover during resting.
Which pans and fats work best?
Heavy, high-mass pans like cast iron provide thermal stability and help vaporize surface moisture quickly. Use oils with a high smoke point and add butter late for flavor.
Should I try this at home or stick to thawing?
If you enjoy kitchen experimentation and have the right tools, searing from frozen is a solid option. For absolute consistency, thaw-first methods remain the simplest route for predictable results.
Further reading: Explore related techniques in our internal guide on perfect sear steak techniques for more controlled approaches and troubleshooting.
See also: frozen steak
]]>Cast iron skillets combine simple metallurgy with practical cooking science to deliver reliably excellent sears. This article explains how heat retention, seasoning chemistry, and correct technique create the crust and flavor that chefs prize.
- Heat retention: Cast iron stores and releases heat consistently for even searing.
- Seasoning: Polymerized oil layers provide nonstick behavior and protect against corrosion.
- Maillard reaction: High surface temperature drives complex flavor chemistry.
- Technique matters: Dry meat, right oil, and controlled basting ensure optimal results.
Quick Recipe Overview
Preparation Time: 10 minutes. Read these steps fully before you start to set up your workflow.
Cook Time: 15 minutes. Timing varies with thickness and exact pan temperature, so use an instant-read thermometer.
- Total Time: 25 minutes
- Yield: Serves 2 hearty portions
- Difficulty: Medium
Ingredients
Two thick-cut ribeye steaks at room temperature form the central protein for this sear-focused recipe. Bring the steaks out of the fridge 30–45 minutes before cooking to reduce internal temperature gradients.
Use a high-smoke-point oil such as grapeseed or avocado for initial contact, plus butter, garlic, and rosemary for finishing. Have coarse salt and freshly ground pepper ready for seasoning.
- 2 ribeye steaks, 1″ thick, room temperature
- 1 tbsp high smoke-point oil (grapeseed or avocado)
- 2 sprigs fresh rosemary
- 3 cloves garlic, crushed
- 2 tbsp unsalted butter
- Coarse sea salt and freshly ground pepper
Step-by-Step Instructions
Preheat your seasoned skillet over medium-high heat for 4–6 minutes until it distributes heat evenly across the cooking surface. Cast iron takes longer to heat than thin pans, but once hot it holds temperature steadily.
Dry the steaks thoroughly with paper towels, then season both sides generously with salt and pepper. Add oil to the hot pan and wait until it shimmers but does not smoke before placing the steaks in the skillet.
- Place steaks in the pan without crowding. Let each side sear undisturbed for 3–4 minutes to develop a crust.
- Flip the steaks, add butter, garlic, and rosemary, and baste continuously for 2–3 minutes to build flavor and finish browning.
- Check internal temperature: 130°F for medium-rare; adjust time for desired doneness.
- Remove steaks and rest for 5 minutes to allow juices to redistribute before slicing.
For more seasonal plating ideas and side integrations, see our internal cooking manuals. Refer to the step-by-step cast iron care guide for maintenance tips before and after cooking: cast iron care guide and seasoning maintenance.
The Science of Cast Iron
Cast iron’s thermal mass gives it two practical advantages: steady heat and resistance to rapid cooling when food enters the pan. Those properties let you reach and hold temperatures ideal for browning and crust formation.
For technical context, review the material overview at cast iron, which explains its density and typical composition. Use that knowledge when choosing and preheating cookware.
Heat Retention and Heat Transfer
Cast iron heats more slowly than thinner metals, but it stores energy and releases it steadily, so the surface temperature recovers quickly after a cold piece of meat hits the pan. That stability prevents the pan from dropping below the Maillard reaction threshold prematurely.
Understanding the fundamentals of heat transfer helps you visualize how mass and conductivity affect pan behavior. For example, a heavy skillet transfers heat into the meat evenly, reducing hotspots.
Seasoning Chemistry
Seasoning forms when lipid molecules oxidize and polymerize into a hard, slick film that bonds to the iron surface. That film creates a semi-nonstick layer and protects the metal from moisture-driven corrosion.
For technical background, consult the article on seasoning (cooking). Proper seasoning enhances flavor development and improves heat contact between meat and pan.
Maillard Reaction and Flavor Development
The Maillard reaction begins around 300°F and intensifies up to about 500°F, producing a cascade of aromatic compounds that we perceive as savory and roasted. Achieving and maintaining surface temperature in that window is crucial for optimal crust formation.
Read more about the chemical basis at Maillard reaction. Use this guidance to balance time and temperature for the best crust without burning.
Chef’s Notes and Practical Tips
Seasoning Build: Repeated light oiling and baking creates a durable polymer layer; avoid aggressive scrubbing that removes this buildup. Instead, use hot water and a stiff brush for routine cleaning.
Temperature Strategy: Preheat slowly to prevent thermal stress. If you see localized smoking, reduce the heat slightly and allow the pan to stabilize before adding food.
- Use the right oil: Select oils with a smoke point above your working temperature to avoid early burning.
- Don’t overcrowd: Overfilling the pan cools the surface and promotes steaming rather than searing.
- Rest meat: Resting for several minutes locks in juices and improves final texture.
Expert Insight
Use a reliable instant-read thermometer and aim for target temperatures rather than fixed times. This method accounts for variations in meat thickness and pan performance.
Pro-Caution
Serving Suggestions
Present steaks on a warm serving board and finish with flaky salt and a small pat of herb butter to enhance perceived juiciness. The contrast between a crunchy crust and a tender interior creates a satisfying mouthfeel.
Pair with simple sides that complement richness, such as creamy mashed potatoes or roasted seasonal vegetables. For a wine match, choose a medium to full-bodied red that balances fat and tannin.
Nutritional Information
Per serving estimates depend on cut and fat content. The following table reflects a typical ribeye portion cooked with butter and oil.
| Calories | Protein | Carbs | Fat |
|---|---|---|---|
| 680 kcal | 62 g | 2 g | 48 g |
Adjust portion size and trim levels to alter caloric load. For lower fat, choose leaner cuts and reduce added butter.
Maintenance and Longevity
After cooking, clean cast iron with hot water and a brush while the pan is warm, then dry thoroughly to prevent rust. Apply a thin coat of neutral oil and store in a dry environment to maintain seasoning integrity.
Periodically re-season by applying oil and heating the pan in the oven at 450°F for an hour. This process polymerizes the oil into a durable layer that improves nonstick performance over time.
FAQ
How hot should I preheat my cast iron skillet?
Preheat for 4–6 minutes over medium-high heat, until the surface evenly radiates heat and oil shimmers. Use an infrared thermometer for precision if you have one.
Can I cook acidic foods in a seasoned cast iron pan?
Occasional short cooking of tomato-based sauces is fine, but prolonged acidity can degrade seasoning. Re-season afterward if you notice loss of the slick surface.
What is the best way to restore a rusty skillet?
Scrub rust to bare metal, dry completely, then apply a thin oil coat and bake upside down at 450°F with a tray below to catch drips. Repeat light oiling and heating cycles to rebuild seasoning.
How often should I re-season my pan?
Light maintenance after each use prevents the need for frequent full seasoning. Perform a full seasoning cycle when food begins to stick or the surface appears dull or uneven.
Is cast iron better than stainless steel for searing?
Cast iron offers superior heat retention and a more consistent searing surface for thick cuts. Stainless steel heats faster but loses heat more readily when food is added.
Master these principles, and your skillet will reward you with superior sears and durable performance. Practice technique, maintain seasoning, and control heat to unlock the full potential of cast iron cookware.
See also: Cast Iron
]]>