- Slow, controlled time deepens flavor without extra ingredients.
- Temperature precision steers enzymatic breakdown and yeast kinetics.
- Minimal yeast and high protein flour improve texture and structure.
- Regular folds strengthen gluten while preserving gas pockets.
Prep and Cook Time
Preparation: 20 minutes for mixing and initial handling. Work quickly to keep ingredients cold so fermentation begins under controlled conditions.
Cold fermentation: 18–72 hours depending on recipe goals. Shorter times favor mild flavor; longer times intensify sweetness and subtle acidity.
Final proof and baking: 1–2 hours after returning dough to room temperature for shaping and rise. Use a preheated oven and a hot surface or Dutch oven to maximize oven spring.
Yield
This formula yields two medium artisanal loaves, about eight slices each when cut evenly. Expect variable weight loss during baking based on hydration and bake time.
For scaling, adjust ingredient quantities proportionally and monitor fermentation time: larger mass ferments differently than smaller pieces due to thermal inertia.
Difficulty Level
Medium: Ideal for confident home bakers who can read dough behavior and control fridge temperature. You do not need professional equipment, but consistent technique matters.
Practice develops intuition. Over several bakes you learn how your flour, hydration, and refrigerator interact to create consistent results.
Recipe
This recipe highlights technique over gimmicks. Follow timing and temperature closely to get repeatable results.
For best structure, use bread flour with 12–14% protein and measure water with a thermometer. Cold water slows yeast activation and keeps enzyme activity gradual.
Ingredients
- 3 ½ cups bread flour, sifted and chilled
- 1 ½ cups cold water (about 40°F / 4°C)
- 1 tsp fine sea salt
- ½ tsp instant dry yeast
Choose flour for protein content to trap CO₂ and produce a chewy crumb. If you use whole grain flours, boost hydration slightly and expect denser crumb.
Use a reliable scale when possible; weight-based measurements give predictable hydration and dough consistency.
Instructions
- Combine dry ingredients: Whisk flour, salt, and yeast to distribute evenly. Cold yeast and dry salt separation prevent premature activity.
- Add cold water gradually: Stir until the dough just forms a shaggy mass. Stop when the mixture becomes homogenous but still tacky; avoid overmixing.
- Autolyse rest: Cover and rest 30 minutes to hydrate flour and jump-start gluten bonding. This step aids enzyme action and improves extensibility.
- Gentle knead: Knead 3–5 minutes until smoother, adding minimal flour. Aim for a cohesive, slightly elastic dough rather than a stiff ball.
- Bulk cold fermentation: Oil a container, place dough inside, and refrigerate at 38–42°F (3–6°C). The low temperature slows yeast so enzymes convert starches into flavor precursors.
- Periodic folds: Every 12 hours, perform gentle stretch-and-folds to align gluten without releasing gas. These folds strengthen structure while preserving fermentation gases.
- Warm and shape: After 48–72 hours, let dough sit 1 hour at room temperature, then shape into loaves. Avoid degassing; maintain internal bubbles for open crumb.
- Proof: Place shaped loaves in a floured banneton and proof 1–1.5 hours at room temperature until nearly doubled. Use a bench scrape to tighten the surface for better oven spring.
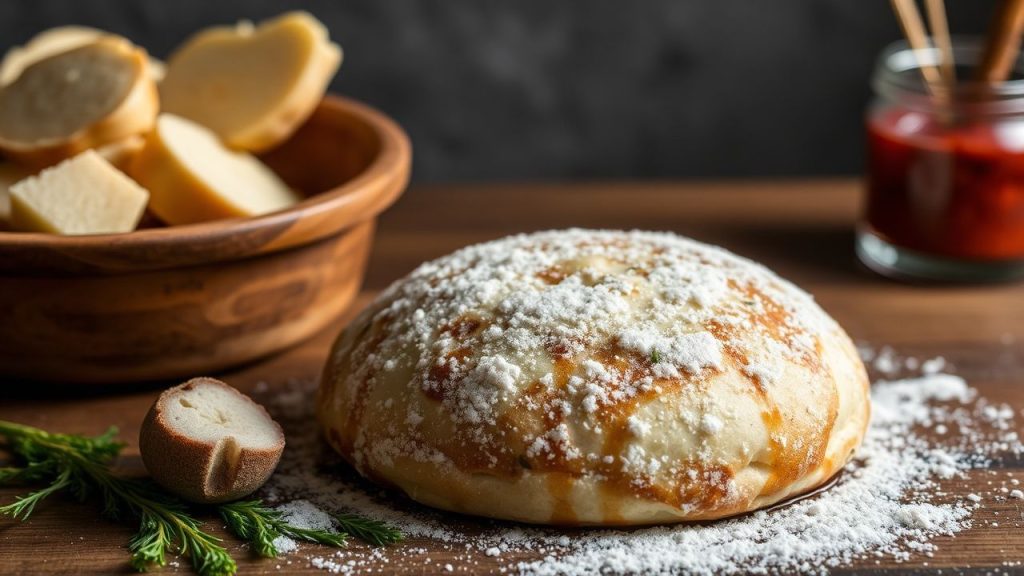
- Bake: Preheat oven to 475°F (246°C) with a stone or Dutch oven. Score to control expansion and bake 20–25 minutes until the crust caramelizes and sounds hollow when tapped.
- Cool: Cool completely on a rack before slicing to finish crumb set and preserve moisture balance.
Tips for Success
Temperature control: Use a fridge thermometer and measure water temperature. Small changes alter fermentation rates and flavor outcomes.
Hydration and flour: Higher hydration yields more open crumb but requires confident handling. For predictable results, start at 65–70% hydration for bread flour.
- Minimal yeast: Use a small yeast quantity to let enzymes and native microbes drive flavor rather than fast gas production.
- Regular folds: Strengthen gluten gently; do not over-knead after cold rest.
- Monitor dough, not time: Watch signs—blooming gas pockets and a softer feel—rather than strict hours; dough behavior varies by flour and fridge.
For deeper technical context on the organisms and chemistry, read about yeast and fermentation. These pages explain how microbes convert sugars and produce flavor compounds.
 Expert Insight
For gluten mechanics and dough strength, review the principles of gluten formation. Understanding protein behavior helps you adjust hydration and folding cadence.
 Pro-Caution
Serving Suggestions
Slice thick and toast lightly to emphasize the crust and open crumb. Pair simple spreads like cultured butter or a drizzle of oil to let the bread’s flavor lead.
Use the loaf with soups, cheese boards, or as a base for sandwiches where texture supports bold fillings. The balanced acid and sweetness from slow fermentation complement savory profiles.
- Butter and local honey for contrast.
- Olive oil with rosemary and sea salt as an appetizer.
- Thick slices with braised meats or creamy stews for hearty meals.
Nutrition
The table below shows per-slice estimates for a medium loaf. Values vary by flour, hydration, and portion size.
| Nutrient (per slice) | Amount |
|---|---|
| Calories | 120 kcal |
| Protein | 4 g |
| Carbohydrates | 24 g |
| Fat | 0.5 g |
Practical Adjustments and Variations
Experiment with hydration, flour blends, and fermentation times to find your desired balance. For example, adding 10–20% whole-grain flour increases flavor but reduces extensibility.
Try incorporating a portion of preferment or a small sourdough starter for layered acidity and aroma. For directions on wild fermentation, consult our internal guides such as Bread Making Basics and Sourdough Guide.
FAQ
What is the ideal fridge temperature for cold fermentation?
Keep the fridge at roughly 38–42°F (3–6°C). This range slows fermentation enough to develop flavor while keeping yeast active. Measure with a dedicated fridge thermometer to avoid guesswork.
How does cold fermentation change dough flavor?
Slow fermentation lets yeast and enzymes break down starches and proteins into flavorful molecules such as organic acids and maltose. As a result, the bread develops subtle sweet and tangy notes and a richer aroma.
Can I cold ferment pizza dough the same way as bread?
Yes. Pizza dough benefits from cold aging for 24–72 hours to improve extensibility and flavor. Shape gently after warming briefly and bake on a hot surface for optimal crust and blistering.
What signs indicate over-fermentation?
Look for a dough that collapses, smells overly alcoholic, or lacks strength when shaped. If the dough loses structure and becomes slack, shorten the next ferment or reduce temperature slightly.
Is cold fermentation healthier than quick fermentation?
Slow fermentation can increase digestibility by breaking down some complex carbohydrates and gluten proteins, and it can create acids that aid nutrient absorption. However, claims vary by ingredient and method, so evaluate results case by case.
Cold fermentation rewards disciplined technique with consistent results. Control your variables, keep clear notes, and refine one factor at a time to build repeatable, delicious outcomes.
See also: cold fermentation
]]>