The paella pan is a deliberate piece of culinary engineering. Its wide, shallow form governs heat, evaporation, and browning in ways that a deep pot cannot replicate.
- Even heat distribution: a broad base exposes more rice to direct heat for uniform doneness.
- Controlled evaporation: wide surface area helps liquids reduce at the right pace to form socarrat.
- Flavor concentration: increased surface contact enhances Maillard-driven browning and aroma.
- Social design: the shape encourages communal serving and visual presentation.
The Science Behind the Wide Surface
The paella pan’s geometry spreads rice and other ingredients into a thin, even layer. That physical arrangement changes heat transfer, evaporation rate, and the way flavor compounds develop during cooking.
Heat conduction across a shallow metal disc creates a broad, relatively uniform temperature field. This reduces thermal gradients that cause uneven cooking in deeper vessels.
The pan also increases the ratio of surface area to volume. Air and steam escape more readily, which prevents steaming and encourages gentle drying of the grain exterior.
That drying concentrates sugars and amino acids at the rice surface. When those molecules interact with heat, the result is the complex browning that adds nutty and toasted notes to paella.
For context on the dish historically and technically, see paella on Wikipedia. For the botanical and aromatic aspects of the spice used, consult saffron on Wikipedia.
How the Pan’s Shape Influences Heat Distribution
A broad diameter means more rice contacts metal directly. That direct contact creates uniform crust formation and avoids localized overcooking or undercooking.
Metal type matters: carbon-steel pans heat quickly and pass heat well, while heavier alternatives retain temperature differently. Choose material with predictable conductivity for your heat source.
Open flame or wide burners work best because they match the pan’s footprint. Small concentrated burners create hot spots at the center and cool edges, which defeats the pan’s design intent.
When rice lies in a single layer, each grain absorbs liquid and heat at a similar rate. This physical parity is the foundation for consistent texture across the entire pan.
Recipe: Seafood Paella — Prep and Practical Method
This recipe emphasizes technique that exploits the pan’s surface. Follow the order of operations and resist stirring once the broth goes in to protect the socarrat.
Yield and timing below assume a single thin layer of rice spread across a 15–18 inch pan. Adjust pan size and liquid proportionally to preserve depth and cooking dynamics.
Prep and Cook Time
- Prep time: 25 minutes
- Cook time: 40 minutes
- Total time: 65 minutes
Yield
- 4–6 generous servings, ideal for sharing
Difficulty Level
- Medium — requires timing and attention to heat
Ingredients
- 2 cups bomba or short-grain rice (short-grain rice absorbs without turning mushy; see rice varieties on Wikipedia for context)
- 4 cups warm chicken or seafood broth
- 12 large shrimp, peeled and deveined
- 1/2 lb mussels or clams, scrubbed
- 1/2 cup green peas
- 1 medium onion, finely chopped
- 2 cloves garlic, minced
- 1 large ripe tomato, grated or 1/2 cup canned crushed tomato
- 1 red bell pepper, sliced
- 1/4 cup extra-virgin olive oil
- 1 teaspoon smoked paprika
- Pinch of saffron threads, soaked in 2 tbsp warm broth
- Salt and freshly ground black pepper to taste
- Fresh flat-leaf parsley for garnish
- Lemon wedges for serving
Instructions
- Prepare saffron: Soak threads in warm broth for at least five minutes to release color and aroma.
- Heat the pan: Warm the paella pan over medium heat, add olive oil and heat until shimmering but not smoking.
- Sauté aromatics: Cook onion and garlic until translucent. Add bell pepper and cook until slightly softened.
- Add tomato and paprika: Stir in tomato and smoked paprika, reduce until mixture thickens and deepens in color.
- Toast rice: Spread rice evenly across the pan. Stir briefly to coat each grain in the sofrito base; toast for one to two minutes.
- Add broth and saffron: Pour warm broth and saffron infusion evenly over the rice. Do not stir after this point; spreading must remain even for correct socarrat formation.
- Arrange seafood and peas: Place shrimp, mussels and peas evenly across the rice. The wide surface prevents crowding and ensures consistent exposure to heat.
- Simmer uncovered: Maintain a gentle boil for 20–25 minutes until liquid absorbs. Adjust flame to keep even simmering across the pan.
- Rest: Remove from heat, cover loosely with a kitchen towel and rest 5 minutes to equalize moisture and finish cooking by residual heat.
 Pro-Caution
After resting, garnish with parsley and lemon wedges. Serve directly from the pan for the best presentation and texture contrast.
Why Socarrat Forms and How to Manage It
Socarrat is the caramelized, slightly crisp layer that forms at the bottom of the pan. It results from concentrated heat and reduced moisture at the metal-rice interface.
To encourage socarrat, use a single layer of rice and allow controlled reduction of the broth. Avoid stirring after the broth goes in; agitation interrupts crust formation.
Monitor color and aroma rather than time alone. A faint, toasted scent signals safe formation; burnt notes indicate excessive heat and require immediate reduction.
Understanding the chemistry helps: Maillard reactions and sugar caramelization at the surface produce the crunchy, flavorful base. For the underlying chemistry, see Maillard reaction on Wikipedia.
Care and Seasoning of Paella Pans
Carbon-steel pans perform exceptionally well but require seasoning and maintenance. A properly seasoned surface resists sticking and builds flavor over time.
To season, apply a light coat of oil and heat the pan until it smokes lightly; repeat the process several times. Never use abrasive detergents that strip the seasoning.
After cooking, clean the pan with hot water and a firm brush, then dry it thoroughly and rub with oil to prevent rust. For more on choosing durable cookware, see our guide on choosing the right cast iron skillet.
 Expert Insight
For detailed maintenance routines and tracker-friendly steps, consult our internal care guide at paella pan care. Regular maintenance extends the pan’s service life and preserves flavor benefits.
Serving, Pairings, and the Social Role of the Pan
The wide, shallow pan creates an immediate visual cue for communal dining. Presentation matters: serve straight from the pan to emphasize texture contrasts between tender rice and crisped socarrat.
Pair paella with a crisp white such as Albariño or a light red Tempranillo. The acidity balances the dish’s richness and heightens aromatic saffron notes.
Sharing from one pan shapes the meal’s social dynamics. It places emphasis on collective tasting and ensures each diner samples both moist rice and the coveted crust.
Traditional service practices complement technical considerations: nearby burners, proper utensils and preheated plates speed service and preserve texture.
In Retrospect
The wide surface of a paella pan is a functional choice that affects material science, heat dynamics and culinary chemistry. It actively shapes texture, flavor and presentation.
Adopt the pan’s methodical approach: spread ingredients thin, match the heat source, avoid post-broth stirring, and maintain your equipment. Those steps convert simple ingredients into layered, well-balanced paella.

FAQ
How does a paella pan differ from a regular skillet?
A paella pan is broader and shallower than most skillets. That shape spreads food in a single layer and optimizes evaporation and even heat contact.
Skillets focus heat into a smaller footprint, which can create depth rather than wide, uniform contact with rice grains.
Can I use a non-carbon pan for paella?
Yes. Stainless steel or enameled pans will work, but they change heat retention and require different heat management. Adjust flame size and timing accordingly.
Carbon steel remains a preferred choice for responsiveness and socarrat formation, but any heavy, flat-bottomed pan with similar diameter can produce good results.
Why should I avoid stirring after adding broth?
Stirring disperses temperature zones and can release starch that makes rice gummy. An undisturbed layer allows individual grains to set and a crust to form underneath.
Leave the rice to absorb and redistribute heat naturally; this preserves grain integrity and texture contrast.
How do I know when the socarrat is ready?
Color and aroma guide you more reliably than time. Look for an even, toasted tone and a pleasant nutty scent. If you smell burnt smoke, act quickly to lower the heat.
If unsure, lift a corner with a flat spatula to inspect the crust. It should be crisp and golden, not blackened or bitter.
Where can I learn more about paella history and equipment?
For technical background and historical context, consult the paella entry on Wikipedia. For rice science and grain selection, see the rice article.
These sources complement practical experience and help you align technique with reliable culinary science.
If you want a step-by-step seafood-focused variant, see our internal recipe at seafood paella recipe for a tested ingredient list and timing adjustments.
See also: paella pan
]]>
- Slow, controlled heat amplifies natural sugars and umami for depth.
- Surface browning (Maillard) delivers savory, nutty notes.
- Moisture management concentrates flavor without collapsing texture.
- Simple seasonings tune acidity and aroma for balance.
The Science of Sweetness and Acidity in Roasting Tomatoes
Roasting changes tomato chemistry at the molecular level. Water evaporates, concentrating sugars and organic acids such as citric and malic acid, which reduces perceived sharpness and increases sweetness.
As temperature rises, reducing sugars react with free amino acids in a sequence known as the Maillard reaction, producing brown pigments and savory aroma compounds. Additionally, caramelization of sugars generates sweet, toasty flavors that complement Maillard-derived notes.
How Texture and Water Activity Change
Roasting reduces water activity by evaporating moisture, which concentrates soluble solids and thickens the flesh. This change improves mouthfeel and allows volatile aroma compounds to dominate the eating experience.
Cell wall breakdown releases pectins and soluble sugars, softening the fruit while the exterior develops a more structured, slightly chewy edge. For explanation of water movement and solute effects, consider basic osmotic principles that guide moisture migration during heating.
Prep & Timing
Preparation: 10 minutes. Roasting: 45–60 minutes at 300°F (150°C) for slow concentration, or 20–40 minutes at 375–425°F (190–220°C) for faster caramelization.
Choose the time/temperature trade-off that matches your goal: lower temp preserves acidity and gently concentrates sugars; higher temp accelerates Maillard reactions and surface browning. Adjust based on tomato size and water content.
Yield
Serves 4 as a side or component for other dishes. Yield varies with tomato type and degree of shrinkage after roasting.
Difficulty Level
Easy to medium: the technique relies on time and observation rather than advanced skills. With practice, results become highly consistent.
Ingredients
Use ripe, meaty varieties such as Roma or plum for predictable texture and fewer seeds. Ripe fruit provides a favorable sugar-to-acid ratio that responds best to heat-driven flavor development.
- 2 pounds ripe Roma tomatoes, halved lengthwise
- 3 tablespoons extra virgin olive oil
- 1 teaspoon kosher salt
- ½ teaspoon freshly ground black pepper
- 3 cloves garlic, peeled and left whole
- 1 tablespoon fresh thyme leaves or 1 teaspoon dried thyme
- 1 teaspoon balsamic vinegar (optional, to finish)
Instructions
Preheat the oven to your chosen temperature. Arrange halved tomatoes cut side up on a parchment-lined baking sheet to encourage evaporation and browning of the exposed surface.
Drizzle with olive oil, then season with salt, pepper, and thyme; nestle whole garlic cloves among the halves. Roast until the flesh becomes tender and edges show golden-brown caramelization; timing depends on temperature and tomato size.
- 300°F / 150°C: Roast slowly for 45–60 minutes for balanced concentration and gentle browning.
- 375–425°F / 190–220°C: Roast 20–40 minutes for faster surface browning and more pronounced Maillard notes.
- Finish: Remove when edges brown and flesh is tender; cool slightly and, if desired, finish with a splash of vinegar to brighten flavor.
Tips for Success
Selecting tomatoes: Firm, ripe fruit yields the best concentration. Large beefsteaks can work, but they require longer roasting and may produce more liquid.
Surface preparation: Halve lengthwise to expose more flesh and maximize caramelized surface area. Light oiling promotes even heat conduction and better browning.
Expert Insight
Moreover, taste at the 30–45 minute mark when using moderate heat to decide whether to extend roasting. For underripe tomatoes, a pinch of sugar or a drizzle of honey before roasting compensates for low reducing sugar content and improves caramelization.
Pro-Caution
How Seasonings Influence Chemistry
Salt draws moisture out through osmotic action, concentrating sugars and amplifying perceived sweetness. Oils distribute heat and help extract fat-soluble aroma compounds, improving aroma delivery on the palate.
Herbs contribute volatile terpenes and phenolics that meld with Maillard and caramel notes. Acidic finishes such as a light vinegar splash restore balance by lifting the flavors and rounding the profile.
Serving Suggestions
Use roasted tomatoes as a component to elevate many dishes. They pair with creamy cheeses, rustic breads, pastas, and vinaigrette-driven salads to add concentrated sweetness and savory depth.
For a simple application, mound roasted halves on fresh mozzarella or burrata with basil leaves and a pinch of flaky salt. Alternatively, pulse many roasted tomatoes with a drizzle of olive oil for a quick, intensely flavored sauce.
Nutrition & Storage
Roasting concentrates calories and sugars per serving due to moisture loss, though per-tomato nutrient density remains high for vitamins and antioxidants. Fat content increases slightly when oil is added.
Store leftovers refrigerated in an airtight container for up to 3 days. Reheat gently or use them cold to add contrast to salads and composed plates.
| Nutritional Info (per serving) | Calories | Protein | Carbs | Fat |
|---|---|---|---|---|
| Roasted Tomatoes | 90 | 2g | 8g | 6g |
FAQ
Why do roasted tomatoes taste sweeter than raw ones?
Heat reduces water content and concentrates natural sugars, which elevates perceived sweetness. Furthermore, thermal reactions create new flavor compounds that complement and enhance fruit sugars.
Which chemical reactions produce savory notes during roasting?
The Maillard reaction between reducing sugars and amino acids forms complex, savory and nutty compounds. Caramelization of sugars also contributes sweet and toasty flavors that work with Maillard products.
How should I adjust roasting for juicier vs. meatier varieties?
For juicier tomatoes, use higher heat with shorter time to encourage surface browning while limiting collapse. For meatier varieties, slower roasting at moderate temperature concentrates flavor uniformly without drying the interior.
Can I add sugar or honey to improve caramelization?
Yes. A light sprinkle of sugar or a small drizzle of honey helps under-ripe tomatoes reach desirable caramelization. However, use sparingly to avoid cloying sweetness and to preserve acidity balance.
How do I preserve roasted tomatoes for longer storage?
Refrigerate in airtight containers for short-term use (up to 3 days) or freeze portions for longer storage. Alternatively, preserve in a sterilized jar covered with oil and refrigerate, which extends usable life while adding flavor.
Final note: Controlled heat, attention to moisture, and minimal seasonings let the tomato’s natural chemistry deliver refined, layered flavors. Apply these principles consistently to produce reliable, restaurant-quality roasted tomatoes at home.
See also: Roasted Tomatoes
]]>
- Key takeaway: Browning arises from interactions between sugars and amino acids, not simple caramelization.
- Timing matters: High, dry heat with good surface contact produces the best sear.
- Safety balance: Manage temperature to minimize unwanted compounds while maximizing flavor.
- Practical tip: Pat meats dry and use a high-smoke-point oil for a reliable crust.
Science of the Maillard Reaction
The Maillard reaction occurs when reducing sugars react with free amino acids under heat, producing hundreds of flavor compounds and brown pigments called melanoidins. This cascade begins around 140°C (285°F) and accelerates as temperature rises, producing savory, roasted and nutty notes.
Understanding the reactants helps you predict outcomes: foods rich in proteins and simple sugars brown more readily. For background on the chemistry of amino groups, see amino acids.
Prep and Cook Time
These times assume a standard pan-seared ribeye technique that highlights the Maillard Reaction. Timings vary with cut thickness and pan mass.
Guideline: Heat the pan first, then add oil and the protein; total active cook time is short but requires attention to temperature.
- Preparation: 15 minutes
- Cooking: 20 minutes
- Total Time: 35 minutes
Yield
This recipe and technique target a family portion size while preserving sear quality. Scaling up requires wider pans or batch cooking to avoid crowding.
Serves: 4
Difficulty Level
Technique-focused cooks will find the method approachable; it rewards precise heat control and timing. Beginners can replicate professional results by following core principles.
Level: Medium — requires attention to pan temperature and resting time for best texture.
Ingredients
The ingredients list emphasizes components that support Maillard browning: protein, minimal surface moisture, and a high smoke-point fat. Fresh aromatics and butter finish the flavor but do not drive the reaction.
Substitution notes: choose oils with high smoke points and cuts with good surface protein content for optimal crust development.
- 1 lb (450g) boneless ribeye steak, trimmed and room temperature
- 2 tbsp vegetable oil (grapeseed or canola)
- 1 tsp kosher salt
- ½ tsp freshly ground black pepper
- 2 cloves garlic, crushed
- 1 sprig fresh rosemary
- 2 tbsp unsalted butter, chilled
Instructions
Follow these steps to maximize surface browning while maintaining internal doneness. Each movement has a purpose: dry surface, hot pan, undisturbed contact, and a resting period.
Work quickly once the pan is hot. A well-heated cast-iron or heavy-bottom skillet stores heat and helps sustain the Maillard reaction across the sear.
- Preheat the pan: Heat a skillet over medium-high until very hot but not smoking.
- Dry and season: Pat the ribeye thoroughly and season both sides with kosher salt and pepper.
- Add oil: Swirl oil to coat, then place the steak away from you to avoid splatter.
- Sear undisturbed: Leave the steak for 3–4 minutes to form a deep, golden crust.
- Flip and aromatics: Turn the steak, add garlic and rosemary, and sear the second side for 3 minutes.
- Finish with butter: Reduce heat to medium, add chilled butter, and baste for 2–3 minutes.
- Rest and slice: Use a thermometer (130°F for medium-rare). Rest 5 minutes before slicing against the grain.
Searing checklist
Before you place protein in the pan, confirm three items: no excess moisture, a hot pan, and a single layer of meat without crowding. This preserves surface temperature and prevents steaming.
Use a splatter screen if needed, and reduce heat only if smoke becomes excessive. A steady, hot surface gives the most consistent Maillard browning.
Tips for Success
Small technique tweaks produce outsized flavor gains. Focus on surface dryness, heat management, and uninterrupted contact time to encourage the formation of flavorful compounds.
Choose cuts with ample surface protein and a modest amount of fat. The fat helps carry flavor and enhances perceived juiciness after the Maillard reaction develops a crust.
- Bring meat to room temperature for even internal cooking.
- Pat meats dry; moisture delays browning.
- Use oils with high smoke points to reach searing temperatures safely.
- Avoid overcrowding; crowding traps steam and lowers pan temperature.
Expert Insight
After the tip above, allow the steak to rest briefly before slicing to redistribute juices. Proper resting preserves tenderness and mouthfeel.
Serving Suggestions
Present the sliced ribeye over warm sides that absorb pan juices: mashed potatoes, roasted vegetables, or a simple pan sauce. A light sprinkle of flaky sea salt enhances the crust’s flavor.
Pair bold, structured wines or roasted vegetable sides to complement the Maillard-driven nutty and caramelized notes that emerge from the sear.
Health and Safety Considerations
The Maillard reaction produces desirable flavors but can also generate compounds like acrylamide when starchy foods become overly browned. Controlled cooking keeps flavor high and risky byproducts low.
To minimize potentially harmful compounds, brown to golden rather than black, control temperature, and avoid charring. Balanced technique yields safe and delicious results.
Pro-Caution
Use a thermometer to hit target doneness without overbrowning the exterior. For most home cooks, medium-rare to medium yields the best balance of crust and juiciness.
Nutritional Overview
Below is an approximate nutrient breakdown per serving for the illustrated portion. Values vary by cut, trimming, and finishing ingredients.
| Nutrient | Amount per Serving |
|---|---|
| Calories | 450 kcal |
| Protein | 40 g |
| Carbohydrates | 2 g |
| Fat | 30 g |
For background on related cooking processes and how they differ, review caramelization and steak preparation notes. These sources clarify contrasts with simple sugar browning and typical cuts used for searing.
Final Notes
Mastering the Maillard reaction means managing heat, moisture, and timing to produce predictable flavor. Small, repeatable techniques yield consistent crusts and deeper taste profiles across proteins and vegetables.
Apply these principles across pan-searing, roasting, and grilling to expand your flavor palette. Repetition and observation sharpen your ability to read the pan and control the reaction for repeatable results.
FAQ
What exactly is the Maillard Reaction?
The Maillard Reaction is a chemical interaction between reducing sugars and amino groups in proteins that occurs under heat, producing new flavor molecules and brown pigments. It differs from simple sugar browning by involving amino acids as co-reactants.
Why does the Maillard Reaction matter for flavor?
It generates hundreds of volatile compounds that create savory, toasted, and roasted notes. These compounds make seared meats, toasted bread, and roasted coffee complex and appealing.
At what temperature does the reaction begin?
The Maillard cascade typically begins near 140°C (285°F) and accelerates at higher temperatures. Successful browning requires stable high heat and minimal surface moisture.
How can I encourage good browning without burning?
Pat surfaces dry, use a heavy pan for heat retention, apply a thin coat of high-smoke-point oil, and avoid overcrowding. If smoke appears, reduce heat slightly to prevent bitter charring.
Is Maillard the same as caramelization?
No. Caramelization involves the thermal decomposition of sugars alone and produces sweet, toasty flavors. The Maillard reaction involves sugars and amino acids, yielding savory and nutty notes.
See also: Maillard Reaction
]]>
- Salt raises the boiling point of water slightly, not lowers it.
- The culinary effect is tiny at normal seasoning concentrations.
- Time-to-boil depends far more on pot choice, lid use, and burner power than on salt.
How salt affects boiling water temperature
Dissolving a non-volatile salt like sodium chloride increases a liquid’s boiling point because added ions reduce the solvent’s vapor pressure. This behavior is a classic colligative effect: boiling-point elevation depends on the number of dissolved particles, not their chemical identity.
Quantitatively, you can reference the basic theory in the colligative properties entry, which summarizes how solute concentration drives boiling-point elevation and related phenomena.
Quantifying the change with the ebullioscopic relation
Use ΔTb = Kb · m · i to estimate the boiling-point elevation. Here Kb is water’s ebullioscopic constant, m is the solution molality, and i is the van ‘t Hoff factor that counts dissociated particles per formula unit.
For table salt (NaCl) the van ‘t Hoff factor i ≈ 2 because it dissociates into Na+ and Cl−. Typical culinary doses — for example one tablespoon (~17 g) added to 3.8 kg of water — produce a molality near 0.077 mol/kg and a ΔTb on the order of 0.08 °C. That shift is effectively imperceptible when heating water on household equipment.
Energy and time implications for boiling water in a kitchen
The energy required to heat water increases with the tiny additional temperature rise caused by salt. Compute the extra heat with the specific heat capacity of water: Q = m·c·ΔT. The numbers remain small for normal seasoning levels.
Raising 3.8 kg of water by 0.078 °C uses roughly 1.26 kJ of extra energy. On a 2,000 W burner that extra energy equates to a fraction of a second of additional heating. In practical terms, adding a tablespoon of salt does not make boiling water sooner; physics predicts a negligible delay instead.
Relevant thermodynamic concepts
Two linked concepts are helpful for context: boiling point and vapor pressure. Both determine when a liquid begins sustained phase change at a given ambient pressure.
For concise background on temperature, vapor pressure, and the transition to gas, consult the boiling point page and the vapor pressure entry.
Practical kitchen impact and common misconceptions about boiling water
Cooks sometimes misinterpret what they see. Salted water at a full boil sits at a marginally higher temperature than unsalted water at its boil point. That higher temperature can change cooking chemistry slightly, but it does not shorten the *time* the water needs to reach boiling.
Other effects produce the illusion of faster boiling. For example, stirring when salt dissolves or using a different lid practice changes heat transfer and bubble behavior. Those behavioral or equipment differences explain most anecdotal reports that salt speeds boiling water.
Why recipes say “salt the water”
Recipes recommend salting because salt transfers flavor into starches and proteins during cooking, not because it saves time. When pasta and vegetables absorb salted water, they pick up sodium that improves perceived seasoning.
For properties of the ingredient itself, see the sodium chloride article. It explains why salt dissolves and how it behaves in aqueous solution.
Simple experiment you can run at home with boiling water
You can verify the effect with basic equipment. Use two identical pots, equal water masses, the same burner, and a reliable digital thermometer. One pot stays plain, the other receives a typical culinary dose of salt.
Record the time to the first sustained boil for each pot. Repeat trials multiple times and control lid use and starting temperature. Expect times to match within measurement uncertainty; only larger, laboratory-level salt concentrations produce clearly measurable time differences.
Design tips for valid results
Measure salt by weight to avoid the variability of measuring spoons (kosher versus fine table salt differ in density). Use a digital thermometer and repeat trials to address random noise in household burners.
For a deeper look at heat capacity and related calculations, consult the specific heat capacity resource. That page helps translate temperature shifts into energy and time estimates.
Pro-Caution
When experiments report large time differences, the cause almost always lies in equipment variation, lid use, or measurement error. In controlled conditions, the salt effect on time-to-boil is negligible for culinary concentrations.
Cooking consequences beyond time-to-boil
Although salt does not speed the approach to boiling, it affects final food quality. Salted cooking water seasons pasta and vegetables internally during hydration, which yields a better-balanced final flavor without only salting after cooking.
Small boiling-point elevations can also influence texture slightly. At household concentrations, these thermal differences remain modest, but they may interact with cooking time and agitation to alter the final bite in sensitive preparations.
Expert Insight
Chef’s practical checklist for faster boiling water
Use a lid. Covering a pot traps heat and cuts heat loss dramatically, shortening time to sustained boiling compared with leaving the pot open.
Match pot shape to volume. A wide, shallow vessel brings the same mass of water to near-boil faster than a tall, narrow pot because the surface area exposed to heat is larger.
Choose higher-power heat sources. High-BTU burners or induction elements heat large water masses much quicker than low-power hotplates. These choices move the needle on time-to-boil; salt does not.
FAQ
Does salt ever make water boil at a lower temperature?
No. Dissolved, non-volatile solutes such as sodium chloride raise the boiling point. Only reducing the ambient pressure — for example at high elevation — will lower the boiling temperature.
How much does salt raise the boiling point of water?
It depends on concentration. At culinary levels (a tablespoon in several liters), the rise is a few hundredths to a few tenths of a degree Celsius, negligible for time-to-boil. Laboratory concentrations produce larger, measurable shifts.
Will salt help food cook faster once the pot is boiling?
Technically, food in slightly hotter salted water cooks marginally faster because the liquid can reach a higher equilibrium temperature. However, typical seasoning concentrations give such a small temperature advantage that timing adjustments are unnecessary for most cooks.
Should I add salt before or after boiling?
Add salt when the water approaches a boil or after it boils; both methods season pasta effectively. Adding salt to cold water still seasons food, but the difference in dissolving speed is a practical, not a thermodynamic, factor.
Are there safety or dietary concerns with salting water?
Standard safety applies: avoid splashing and exercise care when adding salt to hot liquids. Also remember that excess salt increases sodium intake; season to taste and consider dietary limits.
Final practical summary
Salt does not make boiling water reach a boil faster. It raises the boiling temperature slightly, which requires a negligible extra energy input and typically delays the time-to-boil by an imperceptible amount.
For cooks seeking shorter wait times, focus on lid use, pot geometry, and burner power. Continue to salt cooking water for flavor benefits, but do not treat it as a time-saving technique.
See also: For reference reading on the underlying physical concepts, consult the linked Wikipedia entries on colligative properties, boiling point, and sodium chloride.
See also: boiling water
]]>There is a kitchen technique that turns a good roast into a great one: carryover cooking. Remove the meat at the right moment and residual heat finishes the job, locking in juices and sharpening the crust.
- Carryover cooking raises internal temperature after the roast leaves the oven.
- Rest meat 15–30 minutes to redistribute juices and complete cooking evenly.
- A reliable meat thermometer and correct pull temperature prevent overcooking.
- Large, dense roasts gain more degrees from residual heat than small cuts.
What Is Carryover Cooking?
Carryover cooking describes how stored thermal energy moves from the outside of a roast to its center after you remove it from heat. The outer layers stay hotter, so heat flows inward and raises the core temperature by several degrees.
This effect depends on heat capacity and mass. Larger roasts retain more thermal energy and thus experience a larger temperature rise while resting.
Why Carryover Cooking Matters
Carryover cooking prevents the roast from drying out by allowing a gentle finish without continued oven exposure. When you pull a roast early by a few degrees, residual heat finishes the cook with less moisture loss.
It also evens the internal temperature. The slow inward heat movement reduces hot spots and yields consistent doneness from edge to center, improving both texture and flavor.
How Size, Shape, and Bone Affect Carryover
Mass and shape determine how much residual heat the roast stores. A dense 4–6 lb prime rib retains more energy than a thinner cut, so expect a larger post-oven rise.
Bones act as heat sinks and change heat flow. Bone-in roasts heat differently, so adjust your pull temperature and resting time to compensate for this thermal behavior.
Thermal principles in practice
Heat transfer follows predictable patterns: conduction moves energy from hot outer layers inward. That same physics explains why larger items show greater carryover rise.
Understanding these basics helps you choose target pull temperatures and resting times with confidence. The result: fewer surprises at the carving board.
Essential Tools and Terms
Use a quality digital probe meat thermometer for real-time accuracy and to track the roast as it cools. A thermometer eliminates guesswork and prevents over- or undercooking.
Terminology you should know: pull temperature (the internal temp when you remove the roast), final temp (target after resting), and tenting (loosely covering meat to retain heat).
For reading on the broader cooking process, see roasting techniques and the Maillard reaction for crust formation.
Prep and Cook Time
Preparation Time: 15 minutes of active work plus any overnight dry-salt brining if used. Dry brining changes surface moisture and improves crust formation.
Cook Time: 1 hour to 1 hour 30 minutes at moderate oven temperatures for a 3–4 lb roast; larger roasts need longer. Rest Time: 20 to 30 minutes to allow carryover cooking and juice redistribution.
Yield and Difficulty
Serves 6 to 8 for a 3–4 lb roast. The technique fits home cooks who can monitor temperature and resist carving too soon.
Difficulty: Medium. The main skills are temperature control, correct pull temperature, and proper resting technique.
Ingredients
Use quality ingredients to complement the carryover process: a trimmed 3–4 lb prime rib, kosher salt, pepper, olive oil, garlic, and fresh herbs. These basics enhance both crust and internal flavor.
Optional: beef broth or pan juices for a simple sauce after resting. Reserve juices and deglaze the roasting pan for a concentrated finishing sauce.
Step-by-Step Instructions
Start by preheating the oven to 450°F (230°C) to build an initial sear and encourage crust development. Place the roast fat side up on a rack in a shallow pan for even airflow.
Rub the roast with oil, kosher salt, and freshly ground black pepper. Press minced garlic and herbs onto the surface to add aromatics that persist through resting.
Insert a probe thermometer into the thickest muscle, avoiding fat pockets and bone. Roast at high heat for 15 minutes to brown the exterior, then lower oven to 325°F (160°C) for steady cooking.
Remove the roast when the probe reads about 5–10°F below your desired final temperature. Tent loosely with foil and rest 20–30 minutes; the internal temp will climb to the final target during this time.
Recommended pull temperatures
For medium-rare, pull at roughly 120–125°F and rest to 125–130°F. For medium, pull near 135°F and rest to 140°F. Adjust pull points based on roast size and whether the cut is bone-in.
Always verify final temp with a second quick-read probe before carving to ensure both safety and desired doneness. For food-safety context, consult the food safety guidance.
Chef’s Notes
Dry brining: Salt the roast a day ahead and refrigerate uncovered to dry the surface. This concentrates flavor and helps the crust brown evenly.
Do not slice too soon. Cutting releases juices and reduces succulence. Let resting and carryover cooking complete before carving.
Boneless roasts simplify temperature control. Bone-in cuts add flavor but require practice because bones alter heat distribution.
Expert Insight
After you rest the roast, reserve pan drippings. Deglaze the pan with a splash of broth and reduce to concentrate flavor for an easy pan sauce.
Pro-Caution
Serving Suggestions
Slice against the grain into uniform pieces to maximize tenderness. Serve on a warm platter and spoon pan sauce sparingly to avoid sogginess.
Pair the roast with mashed potatoes, roasted root vegetables, and a robust red wine if desired. Keep side portions moderate so the roast remains the star.
Practical Troubleshooting
If the roast finishes under target after resting, return it to a moderate oven for short bursts, monitoring temperature closely. Avoid high heat; that causes uneven cooking.
If the crust softens after resting, finish slices briefly under a hot broiler just to re-crisp the edges. Do this sparingly so internal temperatures do not climb further.
Related Reading and Internal Resources
For timing charts and alternatives, see our internal guide on perfect roast timings. That page breaks down pull points by weight and desired doneness.
To refine resting technique and tenting methods, check our practical notes at resting guide for roasts. It covers step-by-step tenting and temperature checks.
Science Links
For technical background, review the general practice of cooking methods. For meat-specific context, consult the meat overview and the meat thermometer entry for thermometer types and accuracy considerations.
At a Glance
Carryover cooking gives you consistent, juicy roasts when you plan pull temperatures and resting time. Use the right thermometer and tent loosely to keep a crisp crust.
Large roasts gain more temperature after the oven. Practice and tracking will help you predict exact rises for your equipment and cuts.
FAQ
What exactly is carryover cooking, and why does it matter?
Carryover cooking is the internal temperature increase that occurs after a roast leaves the oven. It matters because it allows you to stop cooking early and avoid drying the meat while ensuring the roast finishes to the desired doneness.
How long should I rest my roast?
Rest most roasts 15–30 minutes, depending on size. Large, dense roasts need the full 30 minutes to let heat distribute and juices stabilize for even slicing.
Can I speed up resting to serve faster?
Avoid rushing. Shortening rest time sacrifices juiciness and evenness. If time is tight, keep the roast tented and warm, but aim for at least 10–15 minutes for smaller cuts.
Do bones change carryover cooking?
Yes. Bones alter heat flow and act as thermal conductors or sinks, changing how quickly the center gains heat. Adjust pull temperatures and allow extra rest for bone-in roasts.
What temperature should I pull a roast for medium-rare?
Pull most roasts at about 120–125°F, then rest to 125–130°F final. Track your specific oven and roast size to refine those numbers over time.
See also: carryover cooking
]]>
- Predictable results: Control of hydration and fat gives repeatable texture and flavor.
- Simple tools: A scale and probe thermometer remove guesswork.
- Short workflow: Hydrate crumbs, mix gently, shape uniformly, and bake on a hot sheet.
- Food safety: Monitor internal temperature rather than relying on color alone.
The science of texture and moisture
Understanding why baked meatballs turn out juicy or dry starts with protein and water behavior. Heat causes protein denaturation, which firms the matrix and traps juices when done properly.
Fat renders during cooking to lubricate the interior while hydrated binders hold liquid in the center. These physical changes determine chew, collapse resistance, and slice integrity.
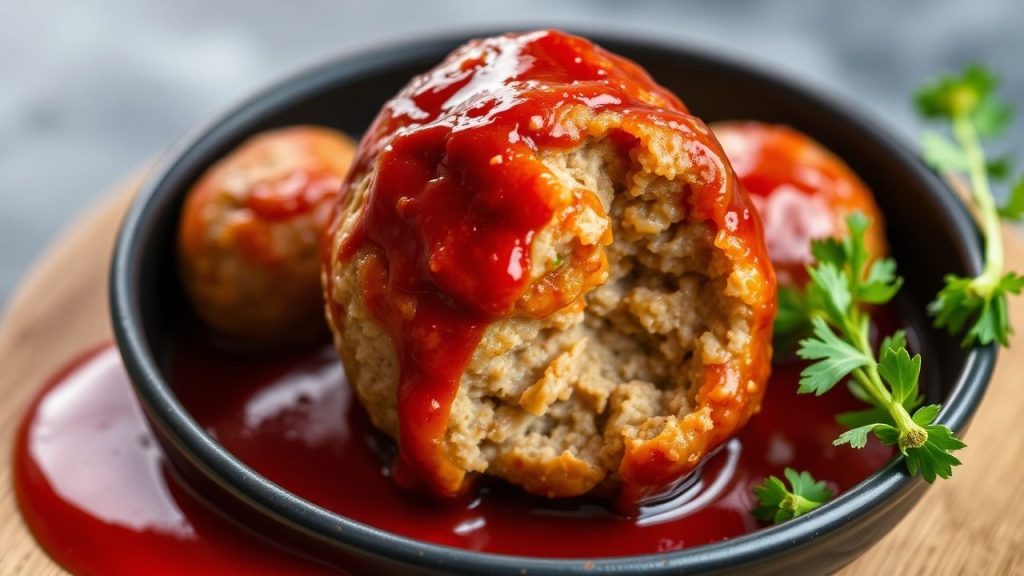
Ingredients for baked meatballs
Choosing the right meat blend gives the baseline for texture. Aim for an 80/20 lean-to-fat proportion in beef paired with a fattier pork to balance structure and juiciness.
Binders like eggs and hydrated breadcrumbs control moisture migration and prevent a dry crumb. Cheese, salt, and aromatics adjust flavor and influence surface browning.
Ingredient list
Assemble measured components to avoid improvisation at the mixing stage. Exact quantities promote uniform results across batches.
- 1 lb ground beef (80% lean)
- 0.5 lb ground pork
- 1/2 cup fresh breadcrumbs
- 1/3 cup whole milk
- 1 large egg, lightly beaten
- 1/4 cup grated Parmigiano-Reggiano
- 2 cloves garlic, finely minced
- 2 tbsp chopped parsley
- 1 tsp kosher salt
- 1/2 tsp freshly cracked black pepper
- 1/2 tsp smoked paprika (optional)
- Olive oil for drizzling
Prep and cook time for baked meatballs
Plan active and passive moments: hydration, shaping, and baking. Efficient sequencing cuts handling time and improves uniformity.
Preparation: 20 minutes. Baking: 20–25 minutes. Total: About 45 minutes for 1.5-inch meatballs at recommended temperature.
Yield and difficulty
This method yields roughly 24 uniform baked meatballs and serves six to eight people depending on portions. The technique rates as intermediate because of ratio attention and thermometer use.
Uniform shaping and measured times beat culinary improvisation. A scale and probe thermometer convert intuition into reproducible results.
Step-by-step baking method for baked meatballs
Follow a sequence that preserves tenderness and encourages even browning. The workflow below limits protein over-development and maximizes internal moisture retention.
Each step contains an action and a short rationale so you can adjust variables according to size and oven behavior.
- Hydrate breadcrumbs: Combine breadcrumbs and milk; let sit 5 minutes. Hydrated crumbs act as internal reservoirs and reduce dryness.
- Combine meats: Place beef and pork in a bowl and fold gently until just combined. Low-energy mixing minimizes protein tightening and chewiness.
- Add binders and seasonings: Fold in the hydrated crumbs, egg, cheese, garlic, parsley, salt, pepper, and smoked paprika until evenly distributed.
- Form balls: Weigh or size into uniform 1.5-inch spheres to ensure predictable heat penetration. Uniformity shortens checking time and improves batch consistency.
- Preheat oven: Heat to 400°F (200°C) so the exterior browns while the interior cooks through. Controlled heat promotes the Maillard reaction and flavor development.
- Bake: Arrange on a parchment-lined sheet, drizzle lightly with oil, and bake 20–25 minutes. Use a probe thermometer and remove meatballs at 160°F (71°C) for safe, juicy results.
- Rest: Let meatballs rest 4–6 minutes to redistribute juices and stabilize texture. Resting reduces immediate moisture loss when cut.
Expert InsightAfter shaping, you can chill meatballs briefly or freeze them on a tray for storage. Bake from frozen but add 5–7 minutes to the time and verify temperature in several pieces.
Tips for success with baked meatballs
Small technique adjustments produce large improvements in final texture and flavor. Focus on binder hydration, gentle mixing, and accurate temperature control.
Avoid overcrowding the tray so convection and browning remain even. Rotate the sheet halfway through the bake to equalize color and heat exposure.
Pro-CautionCommon adjustments and troubleshooting
If meatballs feel dense, you likely overworked the mix. Stop mixing as soon as ingredients appear uniform to retain tenderness.
If the crust overbrowns before the center reaches temperature, lower the oven 25°F and extend time, or start on a hotter sheet then finish on a cooler rack.
Serving suggestions for baked meatballs
Serve these baked meatballs over al dente pasta, creamy polenta, or in toasted buns for sliders. Fresh herbs and a finishing cheese brighten aroma and presentation.
For restaurant-style finish, briefly broil to tighten the crust or glaze lightly with sauce and return to the oven to concentrate flavors. Finish time depends on size and oven intensity.
Nutritional snapshot
A typical serving of three medium baked meatballs contains approximately 320 kcal with a protein-heavy profile and moderate fat. Exact values depend on the meat blend and added toppings.
Use a nutrition calculator when altering meat ratios; leaner mixes lower calories but change mouthfeel and juiciness.
| Nutrient | Per Serving (3 meatballs) |
|---|---|
| Calories | 320 kcal |
| Protein | 22 g |
| Carbohydrates | 7 g |
| Fat | 22 g |
Final notes on reliability and flavor of baked meatballs
A methodical approach removes guesswork and produces repeatable results. Precise hydration, measured ratios, and thermometer use turn a home recipe into a consistent staple.
Respect ingredient function and thermal mechanics and the oven will deliver juicy interiors and caramelized exteriors. Adjust time by size and rely on temperature rather than guesswork.
FAQ
Below are focused answers to common questions about baked meatballs to help troubleshoot and refine your technique quickly.
Each answer gives practical steps and the underlying reason so you can apply the fix immediately.
What oven temperature yields the best browning without drying?
Set the oven to 400°F (200°C) for a balanced result where the exterior browns via the Maillard reaction while the interior cooks through. This temperature promotes efficient browning without excessive time in the oven.
If you see overbrowning before the center reaches 160°F (71°C), reduce oven temperature by 25°F and extend time, or move the tray lower in the oven to slow surface coloring.
How do I prevent meatballs from becoming dense?
Mix ingredients only until evenly distributed and avoid vigorous handling. Hydrating breadcrumbs and using a mix of beef and pork limit shrinkage and compressive toughness during cooking.
Chilling briefly before baking firms shape but avoid extended resting at refrigerator temperature as very cold meat can tighten and reduce tenderness.
Are baked meatballs safer than fried?
Baking reduces added surface oil and allows excess fat to render away from the meatballs on the sheet. For reliable safety, monitor internal temperature rather than cooking method alone.
Target 160°F (71°C) for ground beef and pork blends for safe consumption. Use a probe thermometer to verify temperature in several pieces to avoid undercooked pockets.
Can I scale this recipe for larger meatballs?
Yes. Increase bake time for larger diameters and rely on a probe thermometer to reach the target 160°F (71°C). Larger pieces require slower heat penetration, so monitor temperature rather than time alone.
For very large meatballs, consider lowering oven temperature by 25–50°F and extending bake time, which allows the center to reach temperature without the surface overbrowning.
What role does resting play after baking?
Resting lets juices redistribute and internal temperature stabilize, reducing moisture loss when cut. A brief 4–6 minute rest materially improves perceived juiciness and texture.
Serve immediately after resting for the best balance of warm interior and intact structure. Long resting times will cool the center and slightly firm the texture.
For related technical concepts see meat composition and general food safety guidance to align ratios and temperatures with established standards.
See also: meatball baking techniques and ratio tuning for larger batches.
See also: baked meatballs
]]>
- Basting preserves moisture and delays surface drying for tender results.
- Warm, fat-based bastes improve browning and carry aromatic ingredients.
- Timing matters: baste after initial crust formation and at steady intervals.
- Tools and motion determine coverage and speed without losing oven heat.
The Science Behind Basting: Why Moisture is a breakthrough
Basting affects heat flow and surface chemistry. By reintroducing liquid and fat to the outer layers, you slow surface dehydration while promoting reactions that generate flavor and color.
Specifically, controlled moisture supports the Maillard reaction and limits hard surface formation that blocks even cooking. Both outcomes yield a tender interior and well-browned exterior.
Choosing the Perfect Basting Liquid
Choose a base of fat plus a flavorful carrier. Melted unsalted butter or neutral oil provides lubricity and heat transfer, while stocks or citrus add taste and acidity to balance richness.
When you add sugar or syrups, monitor color closely because sugars accelerate caramelization. Use less sweet ingredients for long profiles and add small amounts near the end for glaze-like gloss.
Tips for Flavorful and Juicy Results
Balance is the goal. Combine fat, acid, and aromatics so each baste layers flavor without overpowering the protein.
- Warm your baste: Keep it at serving temperature to avoid dropping oven heat.
- Add aromatics late: Fresh herbs and citrus zest in the final baste preserve volatile flavors.
- Control sweetness: Use honey or maple sparingly to prevent excessive browning.
Timing and Technique: How to Baste Like a Pro Without Losing Heat
Start basting after the surface has set and a light crust forms. For many roasts that takes 10–20 minutes at moderate oven temperature; for quick sears reduce frequency.
Baste at consistent intervals to maintain surface moisture but avoid continuous wetting that prevents browning. Frequent, brief basting keeps temperatures steady and encourages even color development.
Tools and Motion
Use a long-handled spoon, ladle, or bulb baster to reach into deep pans without tilting the oven or grill excessively. A steady, rhythmic pour covers the surface evenly.
Tilt the pan to gather juices and spoon over the highest points. This motion increases contact between liquid and meat, improving heat transfer and glazing the surface.
Expert Insight
Common Mistakes to Avoid When Basting for Maximum Moisture Retention
Avoid common errors that undo the benefit of basting. The most frequent mistakes are temperature shock, over-basting, and using baste mixtures that interfere with browning.
Cold liquids lower the pan temperature and stall reactions. Opening the oven repeatedly creates heat loss. Excessively watery bastes dilute surface flavors and slow Maillard chemistry.
Pro-Caution
Practical fixes for each mistake
If you see soggy surfaces, reduce basting frequency and raise pan temperature slightly to encourage drying between applications.
For flare-ups on the grill, apply baste quickly and keep a spray bottle of water nearby. Use oil-based bastes sparingly when grilling over direct flame.
Prep and Cook Time
Estimate times based on cut, size, and method. Basting adds minimal time if you plan intervals and keep liquids warm.
Typical guideline: Prep: 10–20 minutes. Cook: 30–90 minutes depending on protein and desired doneness.
- Prep time: 15 minutes
- Cook time: 45 minutes (dependent on dish and size)
Yield
Serves 4–6 as written. Adjust the basting volume proportionally for larger pieces.
For small roasts or poultry, plan 1–1.5 tablespoons of baste per baste cycle; larger cuts may need more to maintain surface coverage.
Difficulty Level
Medium. The technique requires attention to timing, temperature control, and choice of baste. Those skills are transferable to many cooking methods.
Use a probe thermometer to avoid overcooking and to decide when to rest—this preserves moisture and ensures consistent doneness.
Ingredients
The following amounts make a versatile basting liquid for a mid-sized roast or poultry. Scale as needed and keep the mix warm during cooking.
- 4 tbsp unsalted butter, melted
- 1/4 cup chicken broth
- 2 tbsp fresh lemon juice
- 2 cloves garlic, minced
- 2 tbsp fresh rosemary, chopped
- Salt and freshly ground black pepper, to taste
- Optional: 1 tbsp honey or maple syrup for sweetness
Instructions
Follow these steps for consistent results. Each step focuses on preserving moisture while building flavor through controlled heat and repeated glazing.
- Prepare the basting liquid: Gently warm butter, broth, lemon, garlic, rosemary, salt, and pepper in a small saucepan. Hold warm, do not boil.
- Preheat: Set oven or grill to 375°F (190°C) for even caramelization without too-rapid drying.
- Initiate cooking: Place protein or vegetables on a roasting pan and cook uncovered for 10–20 minutes to develop a crust.
- Baste carefully: Use a long-handled spoon or baster to apply warm liquid every 5–15 minutes depending on the item and method.
- Rotate and monitor: Turn the dish midway for even color. Limit door openings to reduce temperature fluctuations.
- Rest before serving: Let the cooked food rest 5–10 minutes to redistribute juices for maximum tenderness.
Chef’s Notes & Tips for Success
Small technique changes produce large improvements. Use these notes to refine your routine and adapt for specific proteins or vegetables.
- Swap chicken broth for a rich vegetable stock for vegetarian options.
- Infuse oil with chili or garlic for a different flavor profile on the grill.
- For delicate fish, baste once or twice near the end to avoid breaking the flesh.
- Prepare the basting liquid a day ahead and rewarm gently to save time on service day.
Serving Suggestions
Finish basted meats with a final spoonful of warm baste and a sprinkle of fresh herbs to brighten the plate. Presentation matters: glossy surfaces signal succulence.
Pair basted proteins with roasted root vegetables or a crisp salad dressed with lemon vinaigrette for contrast. For texture, add toasted nuts or fresh citrus zest as a final touch.
| Nutrient | Per Serving |
|---|---|
| Calories | 220 |
| Protein | 25g |
| Carbohydrates | 3g |
| Fat | 12g |
For additional technique practice, review our internal guides on how to master basting techniques and check the step-by-step notes in our roasting tips collection.
References and Further Reading
For foundational chemistry and cooking science, consult the following resources that explain the reactions and methods discussed above.
- Maillard reaction — the chemical pathway that creates browning and complex flavor.
- Caramelization — sugar-driven browning relevant when using honey or syrups.
- Grilling — method notes for basting over open flame and managing flare-ups.
- Roasting — high-heat, dry-heat technique where basting most often applies.
- Butter — why this fat carries flavor and browns surfaces effectively.
FAQ
How often should I baste different proteins?
Frequency depends on size and method. For large roasts, baste every 10–15 minutes after the crust forms. For quick-roasted poultry, basting every 5–10 minutes during the middle phase works well. Fish benefits from only one or two applications near the end.
Can I use pan drippings as a baste?
Yes. Pan drippings concentrate flavor and natural juices. Strain fat and adjust seasoning. Warm the collected juices before applying to avoid temperature loss.
Will basting make meats too salty?
Basting itself does not increase saltiness unless your baste contains high-sodium stock. Taste your baste and the meat, then adjust salt sparingly to maintain balance.
Is basting necessary for every roast?
No. Slow-roasted, tightly wrapped, or braised dishes retain moisture through other means and may not benefit from frequent basting. Use the technique when you want a glossy finish, layered aromas, and improved browning.
What tools work best for even coverage?
Long-handled spoons, basters, and small ladles provide speed and control. Use a baster for focused application and a spoon for broader coverage. Keep a small heatproof pot near your station to hold warm baste.
Basting is a high-return technique: a modest investment in attention yields visibly better texture and flavor. Apply warm, balanced bastes and consistent motion to preserve juices, enhance browning, and deliver more reliable results across proteins and vegetables.
See also: Basting
]]>Starch drives texture in bread, rice, potatoes, and many sauces. Understanding how starch hydrates and gels gives you predictable outcomes in the kitchen.
- Gelatinization: Heat plus water makes starch thicken.
- Resting: Hydration before cooking improves texture.
- Heat control: Balance browning and full gelatinization.
What is starch and where it lives
Starch is a plant polysaccharide used by plants to store energy. You encounter it daily in potatoes, rice, wheat, and corn.
For a technical overview, see starch on Wikipedia. That page details structure, sources, and industrial uses.
Prep and Cook Time
These timings are typical for the batter-based recipe below: Prep: 15 minutes; Cook: 30 minutes; Total: 45 minutes.
Timing matters because starch gelatinization occurs over a temperature and time window. Short rests and correct heat keep crumb tender and sauces stable.
Yield
This recipe yields servings for four as a satisfying side or breakfast plate. Use it to practice starch control in a small batch.
Scale ingredients proportionally. When you change batch size, keep liquid-to-starch ratios consistent to preserve texture.
Difficulty Level
Medium. The techniques require attention to hydration and temperature but reward you with repeatable results.
Focus on two skills: measuring liquids accurately and managing pan temperature. Those habits influence gelatinization and browning most.
Ingredients
Ingredients include common pantry starches and liquids. Each item plays a specific role in structure, moisture, or browning.
Below is the ingredient list for the example batter. Use a kitchen scale for best consistency.
- 1 cup all-purpose flour, sifted
- 2 tablespoons cornstarch (for starch gelation clarity)
- 1/2 teaspoon baking soda
- 1 teaspoon fine sea salt
- 1 cup whole milk, warmed
- 2 large eggs, at room temperature
- 3 tablespoons unsalted butter, melted
- 1 tablespoon brown sugar (enhances Maillard browning)
- 1 teaspoon vanilla extract
Instructions
Follow these steps in order. Each step protects starch structure to deliver a tender crumb and reliable browning.
Measure and mix with intent. Overworking or rushing heat changes starch behavior and the final texture.
- Combine dry ingredients: In a large bowl, whisk flour, cornstarch, baking soda, and salt until even. Uniform dry mix prevents local overdosing of starch.
- Mix wet ingredients: Beat eggs, then whisk in warm milk, melted butter, brown sugar, and vanilla. Warm milk helps starch granules hydrate more uniformly.
- Combine gently: Fold wet into dry just until moistened. Overmixing strengthens gluten and can make the crumb tough.
- Rest the batter: Let batter sit for 10 minutes at room temperature. This short rest lets starch granules fully absorb water before heat.
- Preheat and grease the pan: Warm a non-stick skillet over medium heat and grease lightly. Proper pan temperature supports even Maillard browning without burning.
- Cook carefully: Pour 1/4 cup of batter per pancake. Cook until bubbles form and edges set, about 2–3 minutes; flip and cook another 2 minutes until golden.
- Repeat and serve: Continue cooking and keep finished pieces on a rack to preserve texture. Stacking traps steam and softens crusts.
Resting and hydration details
Resting hydrates starch granules so they swell evenly when heated. That swelling creates a stable gel instead of isolated gummy patches.
When you hydrate starch in cold or warm liquid, the kinetics differ. For reference on the physical process, consult gelatinization on Wikipedia.
Tips for Success: Mastering Gelatinization and Flavor
Know which starch you use. Cornstarch and potato starch behave differently from wheat flour because of amylose/amylopectin ratios.
Control temperature. Medium heat balances caramelization and full starch gelatinization without burning sugars.
- Know your starches: Cornstarch gelatinizes at a lower temperature than all-purpose flour, giving a smoother finish.
- Temperature matters: Too-hot cooking can brown sugars before starch fully gels, leading to a drier interior.
- Resting is key: Rest batters or doughs to hydrate granules and reduce toughness.
- Use acids sparingly: High acidity can weaken starch gels; add acidic components after thickening when possible.
Expert Insight
If sauces turn gummy, reduce cooking time or use a lower-gelatinization starch. For grainy textures, ensure thorough pre-hydration and even mixing.
Pro-Caution
Serving Suggestions: Elevate the Experience
Plate pancakes freshly cooked to preserve crust contrast. A simple syrup or fruit keeps textures complementary rather than competing.
For savory applications, use a starch-manipulated base such as crispy shredded potatoes for a contrasting crunch. Consider texture contrasts with soft proteins and acidic condiments.
Nutritional Breakdown
The values below are estimates per serving for the example recipe. Adjust values when you scale the recipe or substitute ingredients.
| Nutrient | Per Serving |
|---|---|
| Calories | 210 kcal |
| Protein | 6 g |
| Carbohydrates | 30 g |
| Fat | 7 g |
Practical Troubleshooting
If your batter is gummy, first check hydration. Excess liquid or too-long cooking often causes a pasty result.
If items brown too fast and remain raw inside, lower your heat and allow more time for starch gelatinization. Adjust pan temperature and try again.
Further Reading and Science Links
To explore browning chemistry, see the Maillard reaction entry for mechanisms and flavor outcomes: Maillard reaction on Wikipedia.
For specifics on a common thickener used in these recipes, see the cornstarch article: cornstarch on Wikipedia. These resources provide concise, sourced technical details.
FAQ
What is the best starch for thickening sauces?
Cornstarch gives a clear, glossy result and sets quickly. Use half as much cornstarch by volume compared with flour for the same thickening power.
For high-acid sauces or long-simmered dishes, use stable starches or add them late in the process to preserve gel strength.
Can I substitute potato starch for cornstarch?
Yes. Potato starch often thickens at slightly lower temperatures and yields a silkier mouthfeel. Adjust quantity by feel and desired finish.
Be aware that potato starch can break down under prolonged, vigorous boiling, so add it near the end of cooking when possible.
Why did my sauce separate after cooling?
Separation usually means the gel network weakened. Excess acid, overcooking, or mechanical shear can break the gel and release water.
To rescue a separated sauce, reheat gently and whisk in a small slurry of starch off heat, then warm slowly to re-establish a network.
How does resting affect baked goods?
Resting lets starch absorb moisture uniformly and relaxes gluten slightly. This yields a more tender crumb and consistent structure after baking.
Short rests (10–30 minutes) work well for batter-based items. Longer autolyse periods help yeast breads develop flavor and hydration.
Where can I read more technical background on starch structure?
Consult authoritative references such as the general starch article and the gelatinization entry for polymer behavior under heat: starch on Wikipedia and gelatinization on Wikipedia.
These pages summarize the molecular basis that explains practical kitchen outcomes and point to academic sources for deeper study.
Key Takeaways
Controlling starch hydration, heat, and resting yields predictable textures from sauces to breads. Small technique changes produce large sensory differences.
Practice with simple recipes, measure carefully, and note how starch type and temperature shift outcomes. That disciplined approach gives repeatable, high-quality results.
See also: starch
]]>Fish cooking moves from raw to ready in a fraction of the time required for beef or pork because the tissue architecture, protein chemistry, and water content demand less energy to change state. Chefs and food scientists measure these differences objectively: lower collagen, shorter muscle fibers, and lower denaturation temperatures all speed the process.
- Fish cooking is faster because muscle sheets and less collagen reduce the heat needed to reach tenderness.
- High water content in fish accelerates internal heat transfer and evens temperatures quickly.
- Denaturation thresholds for key proteins are lower, so texture and opacity change at modest internal temps.
Anatomy and composition: the core reasons for fish cooking
Fish muscle consists of short, layered fibers (myomeres) separated by thin connective tissue (myosepta), a layout that fragments into flakes when the proteins denature. This sheet-like architecture shortens the distance heat must travel, so the center of a fillet reaches target temperature quickly.
Fish evolved for buoyancy, not weight-bearing, so their tissues contain much less structural collagen than mammals. Less collagen means less time spent converting tough connective tissue to gelatin, which removes the need for long, slow cooking typical of cuts from land animals.
Muscle structure and collagen
Short fibers and thin myosepta give fish a flaky texture; heat separates those sheets rather than tearing through dense bundles. That mechanical difference is why a fillet flakes at lower temperatures than a steak.
Collagen content in fish is low compared with beef. Consult the authoritative overview on collagen for comparative values and the biochemical role of connective tissue in meat texture.
Protein denaturation temperature
Key muscle proteins in fish begin to denature around 50–60°C (120–140°F), so a fillet turns opaque and firms at modest internal temperatures. This lower thermal threshold explains why brief high-heat searing or short roasting suffices to cook fish through.
Denaturation changes how fibers scatter light and hold water; for technical background see protein denaturation. That explanation links molecular change to the visible cues cooks use every day.
Thermal dynamics and water content for rapid fish cooking
Fish flesh typically contains about 70–80% water, which acts as an efficient heat conductor compared with fat and dense protein. Water conducts heat rapidly by conduction and also buffers the rate of temperature rise through latent heat effects.
As water heats inside the tissue it redistributes energy, helping the interior climb to target temperature with less surface-to-center gradient. For more on the thermal properties of water, see water (molecule).
Fat content and species variation in fish cooking
Not all species cook at identical speeds. Lean white fish such as cod and haddock heat through faster than thick, oil-rich species like salmon or tuna because the former have lower fat volume per unit of tissue.
Fat slows the speed at which internal temperature rises, but it also protects against moisture loss. As a result, fatty fish tolerate slightly longer cooks before becoming dry, even though overall times remain short compared with red meat.
Practical cooking techniques that respect the science of fish cooking
Match method to thickness and fat content. Use high initial heat to form a crust on thin fillets, then reduce or use carryover heat to finish at the target internal temperature without overshooting.
Direct-contact methods such as pan-searing or grilling suit thin pieces and emphasize rapid surface browning. Thicker steaks and whole fish respond well to short roasting, steaming, or a combination of sear-and-oven to ensure even doneness.
Timing and temperature: a practical table for fish cooking
Use a probe thermometer for consistent results; most chefs target 55–60°C (130–140°F) as the sweet spot for texture and juiciness. Adjust times for thickness, starting temperature, and method.
Below is a concise guideline. These are starting points — test with a thermometer and your preferred texture.
| Cut | Method | Time (per side) | Target |
|---|---|---|---|
| Thin fillet (0.5 cm) | Pan-sear | 30–60 sec | 55–60°C |
| Medium fillet (1–2 cm) | Grill / Broil | 2–4 min | 55–60°C |
| Thick steak (2–3 cm) | Roast / Pan & Oven | 4–8 min | 55–60°C |
Texture, flavor, and sensory outcomes in fish cooking
Quick cooking preserves delicate volatile compounds and prevents oil oxidation, which keeps flavor clean and bright. Rapid heating also maintains a tender interior and reduces the risk of the chalky texture that follows overcooking.
Overcooking drives moisture out and collapses protein matrices, producing a dry, firm result. Precision and monitoring are therefore essential when you apply rapid, high-heat methods.
Expert Insight
Resting fish briefly evens the internal temperature and improves juiciness. For thin fillets a short rest of 30–60 seconds is adequate; thicker pieces can rest 2–3 minutes.
How knowing the science improves home fish cooking
Understanding the mechanics behind heat transfer and protein behavior lets you plan cook times and methods that preserve texture and flavor. Choose the technique that matches thickness and fat level to avoid guesswork.
Small, practical steps—patting fillets dry, preheating pans, and using temperature probes—deliver consistent results. These are low-effort changes that yield reliably better fish.
At a molecular glance: why fish cooking completes quickly
At the molecular level, lower denaturation temperatures for sarcoplasmic proteins and less collagen account for a faster structural transition. Heat unfolds proteins more rapidly in fish tissue, changing opacity and firmness earlier in the cook.
These molecular facts explain common observations: thin fillets turning opaque quickly, easy flaking along myomeres, and a delicate mouthfeel when properly timed.
Resources and references
For an anatomy overview that clarifies the sheet-like muscle arrangement in fish, consult fish anatomy. That page helps link structural features to culinary outcomes.
For further reading on the physical chemistry behind cooking and water’s role in heat transfer, the references on water (molecule) and protein behavior provide accessible, authoritative context.
Pro-Caution
FAQ
Does thickness always determine cooking time?
Yes. Thickness is the primary determinant because heat must travel to the center. Thinner pieces cook quickly; thicker cuts need more time or gentler methods to reach even doneness.
Always use a thermometer on thick pieces and adjust methods—sear-and-oven or steam—so the exterior does not overcook before the center reaches target temperature.
Is there a universal internal temperature for fish cooking?
Most chefs and food scientists recommend 55–60°C (130–140°F) as an optimal range for texture and moisture retention. This range works for most fillets and steaks, but some species and safety guidelines differ.
When safety is a concern (for certain species or susceptible populations), follow authoritative food-safety recommendations for higher target temperatures or validated treatments.
Why does fish become opaque when cooked?
Opacity results from protein denaturation and the rearrangement of muscle fibers that changes how light scatters. This visual cue reliably indicates structural change when combined with temperature verification.
Use both visual and temperature checks so you avoid undercooking or overcooking based solely on appearance.
Can I use slow cooking methods for fish cooking?
Yes—gentle poaching and low-temperature sous-vide produce silky textures for delicate species. However, fish does not benefit from long braises meant for high-collagen cuts; those methods are unnecessary and may degrade delicate flavors.
Choose slow methods only when the goal is a particular texture produced at low temperatures, and monitor internal temperature closely.
How do I prevent fish from sticking to the pan?
Pat the surface dry, preheat the pan until it is hot, and use a small amount of oil. Let a crust form before flipping; that crust detaches the flesh and reduces tearing.
Also choose the right tool: a thin, wide spatula helps lift delicate fillets without breaking them.
See also: fish cooking
]]>