- Steaming preserves more water-soluble nutrients and texture.
- Boiling transfers heat quickly but can leach vitamins into cooking water.
- Use parboiling plus steaming to control tenderness without losing structure.
- Energy and water use differ; steaming often needs less water and can be more efficient.
Understanding the physics: boiling versus steaming
Boiling cooks by submerging food in vigorously circulating liquid at its boiling point. The process relies on convective heat transfer where hot water contacts the surface directly, moving heat quickly into the food.
Steaming cooks with phase-change energy: hot vapor condenses on the cooler food surface, releasing latent heat. This method wraps items in humid heat and reduces liquid contact, which slows solute loss and protects delicate structure.
For an authoritative primer on the underlying phenomena, consider the physics of boiling and heat transfer described in basic thermodynamics resources such as Boiling. For culinary steaming techniques and history, see Steaming (cooking).
Prep and Cook Time
Preparation time usually ranges from five to ten minutes for vegetables once they are cleaned and cut. Equipment choice—large pot, steamer basket, or bamboo steamer—affects setup time but not much else.
Cooking time varies by ingredient: thin vegetable slices steam or boil in three to six minutes; denser roots may need 10–20 minutes. Volume matters: a crowded steamer slows steam flow, while a large pot of water maintains boil temperature better.
Yield
A standard recipe with 1 lb of mixed vegetables yields four side servings when plated alongside protein or grains. Steaming and boiling deliver similar mass yield, but steaming often preserves a firmer mouthfeel.
Portion control depends on how you finish the vegetables. Tossing with a pat of butter or a bright vinaigrette changes caloric density and satiety per serving.
Difficulty Level
Both methods rate from easy to moderate for cooks learning timing and doneness cues. Boiling requires attention to prevent over-softening; steaming needs a tight cover and correct water height to maintain steady steam.
Once you master timing charts and fork-tender checks, both become routine. For structured technique drills, consult internal guides like guide to healthy steaming techniques and vegetable prep guide.
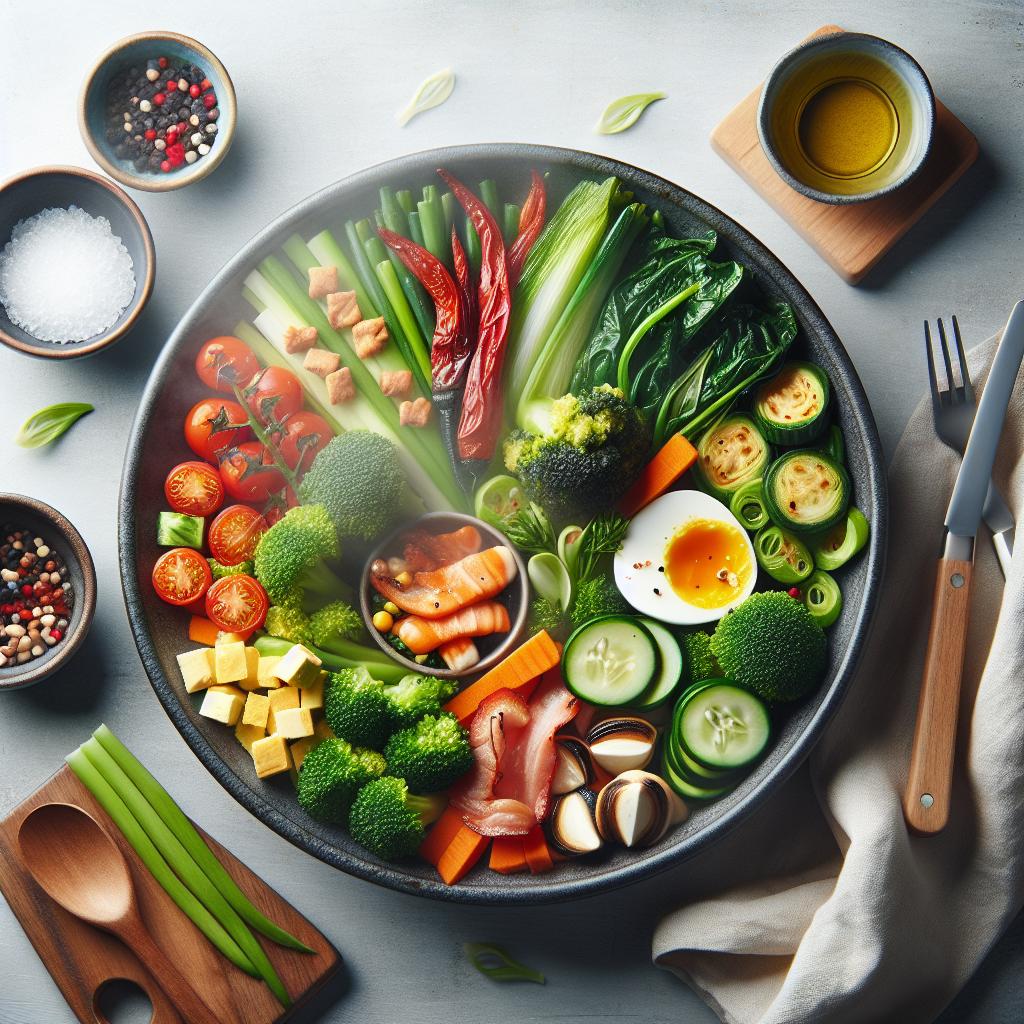
Ingredients
This example list focuses on a mixed vegetable side that highlights method differences. Use fresh, uniformly sized pieces for even heat penetration and consistent results.
- 1 lb fresh broccoli florets, washed and trimmed
- 1 large carrot, peeled and sliced thin
- 1 cup baby green peas, fresh or frozen
- 1 lemon, zested and juiced
- 2 tbsp unsalted butter (optional)
- Salt and freshly ground black pepper, to taste
- 2 cups water (for boiling or to create steam)
- Fresh herbs (tarragon, parsley, or dill) for garnish
Instructions
Follow method-specific steps to achieve ideal texture. Read both approaches before you start so you can prepare the correct equipment and water volumes.
Boiling method
Bring about two cups of water to a rapid boil in a deep pot, add a pinch of salt, and drop in carrots first for three minutes. Add broccoli and peas, then boil for another three to five minutes until vegetables are tender yet still vibrant.
Immediately drain into a colander and plunge the vegetables into an ice bath to stop carryover cooking and lock color. Drain well before finishing with butter, lemon, and herbs.
Steaming method
Fill a saucepan with two inches of water and bring to a gentle simmer. Place vegetables in a single layer in a basket or tray above the water and cover tightly to trap steam.
Steam for six to eight minutes, checking for tenderness with a fork. Remove the basket, pat vegetables dry if needed, then toss with butter, lemon juice, and seasonings immediately while warm.
Note on steam equipment: a bamboo steamer concentrates steam and is excellent for delicate items; a metal basket sits higher above water and speeds up condensation. For nutrient-sparing cookwork, steaming often performs best—see discussion of water-soluble vitamins at Water-soluble vitamins.
 Pro-Caution
Tips for Success
Timing is precise: small changes in minutes alter texture dramatically, so use a timer and test frequently. An ice bath after boiling preserves color and halts further cooking.
 Expert Insight
Choose steaming for fragile foods such as leafy greens and many seafood items because it reduces mechanical agitation and minimizes nutrient leaching. When you need to infuse flavor, boil with aromatics to create a flavored cooking medium that also doubles as stock.
For repeated practice, maintain a small chart of times for common vegetables. That institutional memory increases consistency and shortens prep time across recipes.
Serving Suggestions
Serve steamed or boiled vegetables alongside roasted proteins, poached fish, or grain bowls. A quick drizzle of herbed yogurt or vinaigrette elevates a simple vegetable side into a composed plate.
Garnish with fresh herbs and lemon wedges to add aromatic lift and acidity. For plating tips and pairing ideas, see the general Vegetable overview for common culinary uses.
Nutrition
Cooking changes the bioavailability of some nutrients and reduces others. Water-soluble vitamins (like vitamin C and some B vitamins) are most vulnerable to dissolution in cooking liquid.
Steaming limits water contact and therefore typically preserves more of these nutrients. Boiling can retain nutrients if you reuse the cooking liquid as a broth or sauce.
| Nutrition | Per Serving |
|---|---|
| Calories | 70 |
| Protein | 4g |
| Carbohydrates | 12g |
| Fat | 2g |
Energy use and sustainability
Steaming frequently requires less water and maintains heat inside a covered vessel, which can reduce energy consumption for short cooks. Boiling larger volumes of water to a rolling boil takes more energy.
For efficient practice, use a fitted lid, minimize headspace, and match pot size to ingredient volume. When possible, reuse boiling liquid as a broth to capture leached nutrients and reduce waste.
Combining methods for optimal results
Hybrid approaches often yield the best texture: parboil dense vegetables briefly, then steam to finish. This strategy accelerates internal cooking while protecting outer tissues from over-softening.
Use boiling where hydration or flavor infusion matters—pasta and pulses benefit from full immersion. Reserve steaming for items where crispness and nutrient retention take priority.
FAQ
Is steaming always healthier than boiling?
Steaming generally preserves more water-soluble nutrients because it minimizes direct water contact. However, if you consume the cooking liquid as a broth, boiling can retain those nutrients in the meal.
Choose the method that matches your goals: texture preservation and nutrient retention favor steaming; infusion and stock-making favor boiling.
Can I steam frozen vegetables without thawing?
Yes. Place frozen vegetables in a single layer if possible and extend steaming time by a few minutes. Avoid crowding to ensure uniform steam flow and consistent doneness.
Do not rinse thawed vegetables before steaming; excess surface water increases steaming time and can dilute seasonings.
Does steaming destroy bacteria as effectively as boiling?
Proper steaming reaches temperatures that inactivate most foodborne pathogens, provided the internal temperature gets sufficiently high. A tight lid and adequate time ensure even heat penetration.
For high-risk foods, verify internal temperatures or favor boiling/poaching until you reach recommended safe temperatures for that ingredient.
Will steaming take longer than boiling?
Steaming can be equal to or faster than boiling for small pieces because steam envelops and transfers heat efficiently. For large batches or dense roots, boiling sometimes appears faster due to direct convective contact.
Monitor doneness rather than relying solely on time charts; fork tests and color cues deliver better results than clock-watching alone.
How do I prevent overcooking when boiling?
Follow the shock-cooling method: drain quickly and plunge vegetables into ice water to stop residual heat from continuing to cook the cells. This preserves texture and color effectively.
Maintain high heat only when necessary and reduce to a simmer to finish if you need gentler heat for delicate items.
Final notes
Boiling and steaming both serve clear culinary purposes. Choose boiling when you need rapid heat transfer, infusion, or hydration; choose steaming when you prioritize texture and nutrient retention.
Experiment with hybrid workflows and record times for your pantry staples. Over a few sessions you will refine times, equipment choices, and finishing techniques that produce reliably excellent results.
Explore internal references such as guide to healthy steaming techniques and vegetable prep guide for step-by-step schedules and timing charts that boost consistency in the kitchen.
See also: Steaming
]]>The microwave is the fastest tool in a kitchen, but speed alone does not guarantee good texture or safe results. Mastering microwave power lets you control heat delivery and avoid common problems like dry proteins or cold centers.
- Use the right power for the job: lower power heats evenly, high power heats fast.
- Stir and rest: mid-cycle stirring and short rests reduce hot spots.
- Adjust for wattage: match times to your microwave’s watt rating.
Why Power Levels Matter
Power settings change how the microwave cycles energy, not the frequency of the waves. That difference affects heat distribution inside food and determines texture outcomes.
Understanding this principle reduces overcooking and improves safety. For technical context, read the microwave oven entry for fundamentals on how these appliances emit energy.
Prep and Cook Time
Preparation: 5 minutes for setup and safety checks. Keep tools and thermometer ready.
Cooking: Times vary by recipe and wattage, typically 1 to 10 minutes. Use incremental timing and checks to avoid overcooking.
Yield and Difficulty
Yield is recipe-dependent; most example dishes serve 2–4. Adjust ingredients and times proportionally for larger portions.
Difficulty: Easy to medium. Achieving reliable results requires practice and observing how your microwave responds.
Ingredients and Tools
Use microwave-safe containers, a cover or vented lid, and a thermometer for precise results. Include water or broth for steaming vegetables or maintaining moisture.
Keep paper towels and short-handled utensils on hand to stir or check food. If you want technical reading, consult heat transfer resources for how heat moves through food.
Instructions
Step 1 — Identify your microwave’s wattage and settings. Check the sticker inside the cavity or the manual. Match the appliance wattage to timing charts for accuracy.
Most controls use percentages that represent duty cycle. For example, 50% often means the magnetron runs half the time and rests half the time.
Matching Power Levels to Food Types
Full power (90–100%): Use for boiling water and quick-cook items like thin soups or reheating beverages. High power produces rapid heating that suits low-mass liquids.
Medium (50–70%): Best for casseroles, dense vegetables, and most proteins. Medium power lets heat penetrate without overcooking the exterior.
Low (10–30%): Ideal for defrosting, softening butter, or melting chocolate. Low power prevents partial cooking while thawing or gently warming delicate components.
Practical note: If you drop from 100% to 50%, expect roughly double the time to reach the same internal temperature, but results are gentler and more uniform.
Mid-Cook Habits for Even Results
Pause mid-cycle to stir or rotate food when possible. This habit reduces cold spots and balances moisture distribution across the dish.
Allow a 1–2 minute rest after cooking so residual heat equalizes. The internal temperature will continue to rise slightly during that time.
Chef’s Notes: Practical Techniques
Avoid dense layering of food in a single dish; spread items in a shallow, even layer for uniform exposure to microwave energy. Thicker sections need longer times at lower power.
Place denser items toward the outside of the dish if you want them hotter; center pieces receive less direct energy. Adjust placement and timing based on testing.
Expert Insight
Microwave cookware matters. Glass, ceramic, and labeled microwave-safe plastics perform differently. Avoid metal and untested containers to prevent sparks and uneven heating.
Pro-Caution
Serving Suggestions
Finish microwaved vegetables with a splash of acid or a drizzle of oil to restore brightness and mouthfeel. Small touches improve perceived quality without extra cook time.
For reheated meals, add fresh garnishes such as herbs or grated cheese to refresh aroma and texture. These finishing steps enhance presentation and flavor immediately.
Time and Power Quick Reference
Use the following as a starting point; always test and adjust to your microwave’s wattage. These ranges assume a 1,000 W baseline and standard portion sizes.
Examples: Defrost chicken (30% power, 6–10 minutes per pound, rotate), Reheat rice (70% power, 60–90 seconds), Steam vegetables (70% power, 2–4 minutes with 1 tbsp water).
Common Problems and Fixes
Rubbery eggs often result from high power applied too long; reduce to medium-low power and extend time slightly. Stir eggs mid-cook for even texture.
Cold centers in dense casseroles mean power was too high. Cut cooking into shorter intervals at medium power and stir or rearrange contents between intervals.
Safety and Food Handling
Follow safe handling steps to avoid cross-contamination and undercooking. For meat and poultry, verify internal temperature reaches safe levels before serving.
Refer to authoritative food safety guidance for temperature targets and recommendations; see the food safety overview for general principles and links to standards.
Tools and Accuracy
A digital instant-read thermometer increases reliability when testing meats and casseroles. Thermometers remove guesswork and reduce food waste due to overcooking.
If you want to compare power numerically, check the appliance’s watt sticker and consult the watt unit description for understanding how output relates to time.
Serving Sizes and Nutrition
Nutrition varies widely by recipe; consider portion control and ingredient choices when planning meals. Microwave cooking does not significantly change macronutrient profiles compared to other methods.
Use balanced plates with vegetables, lean protein, and whole grains to ensure a nutritious meal. Microwaving can make quick, healthy meals more accessible with minimal oil.
| Nutrient | Per Serving | Notes |
|---|---|---|
| Calories | Varies | Adjust portion size for control |
| Protein | 10–30 g | Higher for meats, moderate for vegetables |
| Carbohydrates | 15–40 g | Depends on dish type |
| Fat | 5–15 g | Use healthy oils for enhancements |

To build reliable routines, keep a short log of settings and times for favorite dishes. Note container type and portion size so you can replicate results repeatedly.
Visit our internal guides for practical examples and timing charts: microwave meal prepping and microwave wattage and power guide for step-by-step tables you can use with your model.
FAQ
How do I know my microwave’s wattage?
Check the label inside the door or the back of the unit; manufacturers usually list watts there. If no label exists, consult the user manual or model lookup online.
Knowing wattage helps convert published times to your machine. Many timing charts assume 800–1000 W as a baseline.
Can I defrost meat safely in the microwave?
Yes, if you use low power and rotate frequently to prevent partial cooking. Aim for incremental thawing and cook immediately after defrosting.
Always check that meat reaches safe internal temperatures during the subsequent cook step to ensure food safety.
Why does food sometimes heat unevenly?
Uneven heating comes from density differences and microwave standing wave patterns. Stirring and resting help even out temperatures.
Using a turntable and arranging food in a shallow, even layer reduces hot and cold spots significantly.
What containers are safest for microwaving?
Use glass, ceramic labeled microwave-safe, and approved plastics. Avoid metal and containers with metallic trim to prevent arcing.
If unsure, test a container with a short run of 10–15 seconds with a cup of water; if the container stays cool and the water warms, the container is usually safe.
How can I make reheated food taste fresher?
Add moisture before reheating and finish with fresh herbs or acid after heating. Small ingredients like a pat of butter or a squeeze of lemon uplift texture and flavor.
Reheating at 70% power often preserves texture and reduces hot spots, especially for proteins and starchy sides.
Wrapping Up
Power levels give you control. They let you match energy delivery to the food’s needs so texture and safety improve together.
Practice with simple recipes, keep notes, and use a thermometer for critical dishes. Over time, you will consistently achieve better, faster results.
See also: microwave power
]]>A bowl of creamy mushroom soup comforts and signals craftsmanship. Use reliable technique and quality produce to achieve a silky, savory finish every time.
- Layer umami with a blend of mushrooms and optional dried porcini.
- Control moisture by dry-sautéing to concentrate flavor before adding liquid.
- Blend selectively to preserve texture while creating a smooth body.
- Finish gently to protect the emulsion and avoid separation.
At a Glance: Why This Soup Works
This soup rests on three pillars: concentrated mushroom flavor, a stable emulsion for creaminess, and precise seasoning. Each step aims to extract, bind, and balance taste without masking the mushrooms.
Browning enhances flavor through the Maillard reaction, while slow evaporation concentrates savory compounds. Also, the right fat and starch combination preserves mouthfeel.
Prep and Cook Time
Prep Time: 20 minutes. Measure and chop ingredients first to keep stove timing consistent. Mise en place reduces mistakes and speeds the cook.
Cook Time: 35 minutes. Active pan time includes browning and simmering. Total time near 55 minutes yields depth without fuss.
Yield
Serves 6 hearty bowls. Use 1 to 1 1/2 cups per person depending on appetite and sides. Leftovers often taste better after flavors meld overnight.
For meal prep, cool quickly and refrigerate within two hours. Reheat gently and add a splash of stock if the soup tightens up.
Difficulty Level
Medium. The work uses basic techniques: browning, deglazing, and controlled simmering. Each step requires attention more than skill.
The usual errors are adding liquid too soon and boiling after cream addition. Keep heat moderate and taste frequently to avoid these issues.
Ingredients
The list stays compact, but every item plays a clear role: mushrooms for umami and texture, flour for body, and cream for richness. Choose firm, fresh mushrooms for the best results.
Key ingredients include mixed mushrooms, butter, onion, garlic, flour, vegetable stock, heavy cream, fresh thyme, smoked paprika, and olive oil. Truffle oil can be a finishing flourish when used sparingly.
- 600g mixed mushrooms (cremini, shiitake, oyster), cleaned and sliced
- 3 tbsp unsalted butter
- 1 large yellow onion, finely chopped
- 3 garlic cloves, minced
- 1/4 cup all-purpose flour, sifted
- 5 cups vegetable stock, low sodium
- 1 cup heavy cream
- 1 tsp fresh thyme leaves, chopped
- 1/2 tsp smoked paprika
- Salt and freshly cracked black pepper, to taste
- 2 tbsp extra virgin olive oil
- Fresh parsley, chopped, for garnish
- Optional: Dried porcini or a light drizzle of truffle oil
Instructions
Follow this sequence to build flavor: sweat aromatics, concentrate mushrooms, add a measured thickener, then finish with cream. Work deliberately and taste at key moments.
Use a heavy-bottomed pot to maintain even heat. Have an immersion blender or countertop blender ready for controlled puréeing.
- Prepare mushrooms: Choose varieties that balance firmness and earthiness. Wipe caps with a damp cloth to remove debris rather than running them under water to avoid dilution.
- Sweat onions: Heat 2 tbsp butter and 1 tbsp oil in a large pot over medium heat. Add chopped onion and cook until soft and translucent, about 5 minutes, stirring frequently to prevent premature browning.
- Add garlic: Stir in garlic and cook one minute until aromatic. Avoid high heat; burnt garlic tastes bitter and will harm the overall balance.
- Dry-sauté mushrooms: Add mushrooms and raise heat slightly to drive off moisture. Let them release liquid, then continue until edges brown, about 10 minutes. For improved depth, brown dense varieties a little longer.
- Cook in flour: Sprinkle flour over the mushrooms and stir to coat evenly. Cook 2–3 minutes to remove raw starch taste and form a reliable thickening base.
- Deglaze and simmer: Add stock gradually while stirring to avoid lumps. Bring to a gentle simmer and let the soup reduce slightly so the starch binds and flavors concentrate.
- Season and reduce: Add thyme and smoked paprika, then salt and pepper to taste. Simmer uncovered for 12–15 minutes to deepen flavor and meld components.
- Partial purée: Use an immersion blender to purée roughly half the soup for a creamy body while leaving some mushroom pieces intact for texture. Alternatively, blend in batches for a fully smooth finish.
- Finish with cream: Stir in heavy cream and remaining butter. Warm gently for 3–5 minutes without boiling to maintain emulsion and stop before it reaches a simmer point that would risk breaking.
- Adjust and serve: Taste and correct seasoning. Garnish with chopped parsley and, if using, a delicate drizzle of truffle oil. Serve hot with crusty bread or a simple green salad.
Tips for Success
Select fresh mushrooms with firm caps and closed gills where possible. Freshness affects aroma and the structural texture in the finished soup.
Dry-sauté first to evaporate excess moisture and intensify mushroom flavor. This avoids a thin, diluted soup and supports a richer mouthfeel.
Expert Insight
Control texture with partial blending. Purée about half the pot to create body while leaving bite. This produces a satisfying contrast between silk and chew.
Substitute wisely for dairy-free versions. Coconut cream, cashew cream, or blended silken tofu mimic heavy cream. Balance sweeter plant creams with a squeeze of lemon or extra salt.
Pro-Caution
Advanced Flavor Options
For deeper umami, add a small amount of dried porcini or a splash of dry sherry during deglazing. These concentrated elements increase savory complexity with minimal volume.
Also consider a teaspoon of miso or a splash of soy sauce to lift background savoriness. Use sparingly so the mushroom remains the star.
When reducing, taste often and adjust with acid or salt rather than more cream. A touch of brightness balances the weight of fat and starch and keeps the soup lively.
For technical context on taste, see the umami entry. Also consult the mushroom page for varietal notes that affect texture and flavor.
Serving Suggestions
Serve the soup hot in warmed bowls to preserve mouthfeel. Garnish with crisp garlic croutons or a drizzle of herb oil for contrast and visual appeal.
Pair with crusty artisan bread, a light green salad, or a sharp cheddar grilled cheese for a satisfying meal. For a vegetarian main, serve the soup beside a mushroom risotto or roasted root vegetables.
Consider finishing additions like a spoonful of crème fraîche for silkiness or toasted pine nuts for crunch. Small garnishes can elevate both flavor and perceived value.
Nutrition and Portioning
Nutrition varies by dairy and oil choices. This version estimates moderate fat and calories; reduce fat by using lighter dairy or plant alternatives. Track exact values if you need precision.
Approximate per serving: Calories 260, Protein 6g, Carbohydrates 18g, Fat 18g. These values depend on brand and portion size and should be used as a guideline only.
| Nutrient | Per Serving |
|---|---|
| Calories | 260 |
| Protein | 6g |
| Carbohydrates | 18g |
| Fat | 18g |
FAQ
What makes a creamy mushroom soup truly irresistible?
Layered umami from mixed mushrooms and a stable emulsion create depth and silk. Browning and controlled reduction concentrate savory notes without adding excessive salt.
Also, finishing with a small amount of cream or butter at low heat preserves mouthfeel and prevents separation.
Which mushrooms create the richest flavor?
A medley of cremini, shiitake, and porcini gives a balanced profile: cremini for body, shiitake for savory notes, and porcini for earthiness. Use dried porcini sparingly to boost intensity.
Adjust ratios to availability and cost, and remember that texture varies by species, which affects the final mouthfeel.
Can I make this soup dairy-free and still keep the creaminess?
Yes. Coconut cream, cashew cream, or blended silken tofu mimic heavy cream effectively. Each option changes flavor slightly, so taste and adjust seasoning.
For neutral creaminess, blend soaked cashews and strain before stirring into the pot. This keeps the texture rich but subtle.
How can I deepen the soup’s flavor profile?
Slow-caramelize onions, deglaze with dry wine, or roast mushrooms to concentrate natural sugars. These steps intensify savory complexity without adding salt.
Also try a small spoon of miso or a splash of sherry when deglazing for layered, resonant flavor. These boost umami without masking the mushroom character.
Can I prepare this soup ahead of time?
Yes. The soup often tastes better the next day as flavors meld. Cool quickly, refrigerate, and reheat gently while stirring in a splash of stock or cream if the texture tightens.
Freeze in portioned containers for longer storage. Thaw overnight and reheat slowly to preserve emulsion and texture.
Insights and Conclusions
Crafting a standout creamy mushroom soup uses straightforward technique and thoughtful ingredient choices. Focus on browning, moisture control, and selective blending to build complexity and mouthfeel.
Use the recipe framework to adapt mushrooms and finishes to your taste. Test small changes, note results, and refine timing and seasoning for consistent success.
For background on cooking techniques, consult the sautéing entry. For clarification on dairy options, see the cream page.
See also: mushroom soup
]]>Meat protein sits at the core of how any cut behaves under heat, how it accepts seasoning and how tender it becomes on the plate. Readers who learn the key proteins and tissue architecture pick the right method and predict results reliably.
- Know the protein: collagen converts to gelatin with low, slow heat; myosin and actin denature at lower temperatures and control firmness.
- Match cut to method: collagen-rich cuts need braising; fine-grained, marbled cuts respond to fast, high heat.
- Simple tests: probe, rest and slice against the grain to preserve juices and improve perceived tenderness.
- Practical payoff: consistent tenderness, better yield and repeatable flavor from each purchase.
Introduction: Why Meat Protein Structure Matters
Protein arrangement—muscle fibers, connective tissue and intramuscular fat—dictates how a cut reacts to heat and moisture. Recognizing that structure lets you choose searing, roasting, grilling or braising with purpose.
Chefs and butchers read grain, marbling and white connective strands to assign a thermal strategy. That practice reduces guesswork and limits wasted time and ingredients.
Meat Protein: Key Proteins and Their Culinary Effects
Collagen forms the scaffolding that links muscle bundles. With prolonged moist heat it hydrolyzes to gelatin, improving sauce body and mouthfeel; read the biochemical basics at collagen.
Myosin and actin drive contraction and texture. Myosin denatures at lower temperatures than actin; both tighten muscle and expel moisture when overcooked. Consult the structural roles at myosin and actin.
Reading a Cut: Visual and Tactile Clues About Meat Protein
Look at grain direction, visible connective tissue and marbling. Dense white strands signal high collagen content and favor long, moist cooking to convert that collagen to gelatin.
A compact, fine-grained muscle with ample intramuscular fat needs short, intense heat to render fat without over-tightening myosin and actin. Basic anatomy of skeletal muscle supports these observations: skeletal muscle.
Prep and Cook Time: Tie Timing to Protein Makeup
Preparation sets the stage: seasoning, drying the surface and controlled searing improve crust development. Sear to get browning chemistry, then pair time to collagen content, not habit.
Quick steaks typically need 10–30 minutes from prep to plate. Collagen-rich roasts often require 2–4 hours of low, moist heat for full conversion to gelatin. Understand the Maillard reaction for effective searing: Maillard reaction.
Yield and Portioning Considerations
Expect moisture and fat loss during cooking; tougher cuts trimmed and braised yield economical portions with rich flavor. A 3 lb chuck roast typically serves six after shrinkage and trimming.
When you substitute cuts, adjust portion planning. Lean cuts yield less rendered fat but maintain high protein concentration; factor that into nutrition and plate composition.
Difficulty Level and Equipment Needs
Techniques range from basic searing to patient braising. Most methods demand only standard kitchen tools: a heavy pan, a tight-fitting lid or roasting vessel, and a reliable thermometer.
Skill centers on temperature control and timing. Use tactile checks alongside temperature to handle stove and oven variability and to protect against over-denaturation of myosin and actin.
Ingredients that Interact with Meat Protein
Stock, aromatics and acid influence collagen breakdown and flavor extraction during braising. Acids can help tenderize surfaces; avoid high acid levels for extended periods if you want intact muscle texture.
Dried mushrooms and umami-rich components add soluble proteins and glutamates that boost sauce body without changing core muscle proteins. Connective tissue interplay matters; see connective tissue for structural context.
Step-by-Step: Applying Meat Protein Knowledge to Cooking
1. Pat meat dry and season; a dry surface promotes even browning and reduces steaming. Even sears concentrate flavor and seal a better crust.
2. Sear on all sides over medium-high heat until deep color develops, then remove and sweat aromatics. Browning creates complementary flavor compounds to gelatin and rendered fat.
3. Deglaze, add stock and herbs, and return the roast partially submerged for even heat transfer during braising. Maintain a gentle simmer or low oven temperature for collagen conversion.
4. Cook until fork-tender, rest 10–20 minutes, then slice against the grain. Resting redistributes juices and softens the eating texture by allowing partial protein relaxation.
Chef’s Notes and Practical Tips
Protein variations: Choose chuck or brisket for slow braises; both offer high collagen content that becomes silky when converted to gelatin. For quick grilling, pick tenderloin, strip or ribeye.
Substitutions: Bottom round and similar muscles work for longer roasts but give firmer texture. Increase braise time and add moisture where needed to compensate for leaner tissue.
Expert Insight
Common Problems and Troubleshooting
If a roast remains tough, the simplest fix is more time at low temperature; collagen needs sustained heat to hydrolyze. Raising temperature usually tightens surface proteins and worsens chew.
If slices dry out, you overexposed myosin and actin to heat. Lower the hold temperature, shorten exposure time, and use quick-rest techniques to retain moisture.
Pro-Caution
Serving Suggestions and Finishing
Slice braised cuts across the grain to shorten fibers and maximize tenderness. Spoon reduced braising liquid back over slices to reintroduce gelatin and moisture to the plate.
Pair rich meats with soft starches like mashed potato or polenta to balance silky textures and catch savory juices. Acids like a splash of vinegar can brighten a gelatin-rich sauce at service.
Nutritional Snapshot Focused on Meat Protein
Typical braised chuck serving runs near 400–500 kcal with ~40 g protein and variable fat depending on trim. Protein quality stays high across beef cuts; amino-acid profiles remain complete.
Choose cuts for texture and cooking method rather than concerns about protein completeness. Adjust portions and sides for caloric and macronutrient goals.
Further Reading and Resources
Consult butchery primers and muscle anatomy references to sharpen cut selection and yield planning. Anatomy knowledge links directly to predictable cooking outcomes and stocking decisions.
Use professional technique guides to match cuts to thermal profiles. Practical, repeatable workflows raise consistency and reduce ingredient waste over time.
Q&A
What is the main role of collagen in cooking?
Collagen binds muscle bundles and connective tissue. Low, moist heat converts collagen to gelatin, which thickens liquids and softens texture; patience unlocks that transition.
How do myosin and actin impact doneness?
Myosin denatures at lower temperatures than actin and increases firmness as it coagulates. Overcooking concentrates that effect, so monitor temperature and use short rests to reduce moisture loss.
Can I speed up collagen breakdown safely?
Aggressive heat usually tightens outer proteins and leaves inner collagen intact. Use enzymatic marinades, mechanical tenderization or steady low heat to shorten time without sacrificing quality.
Why slice against the grain?
Slicing against the grain shortens muscle fibers, reducing chew and improving tenderness. Identify grain direction visually or by feel before slicing for best results.
Which cuts are best for quick cooking?
Tenderloin, ribeye and strip steaks contain low connective tissue and higher intramuscular fat. They respond well to searing, grilling or pan-roasting where brief, high heat preserves juiciness.
Wrapping Up
Understanding meat protein and tissue architecture turns predictable science into repeatable kitchen results. Match cut characteristics to thermal strategy to reduce waste and increase satisfaction.
Study the muscle, choose the method, and measure rather than guess. That technical approach improves consistency across cooks and kitchens.
See also: meat protein
]]>There is an enchanting alchemy in the kitchen when sugar transforms into molten gold: a glossy, amber-hued elixir known as caramel sauce. This sauce depends on precise temperatures, clear technique, and ingredient control to reach a smooth, stable finish every time.
- Know the target temperature range for clean caramelization and to avoid bitterness.
- Warm dairy first to prevent shocking the hot sugar and seizing the sauce.
- Control crystallization by minimizing early stirring and keeping the pan sides clean.
- Store properly to preserve sheen and pourability.
Understanding why each step matters gives you repeatable results. Below you will find equipment guidance, step-by-step instructions, troubleshooting strategies, and serving ideas grounded in the chemistry of sugar and dairy.
Prep and Cook Time
Prep Time: 5 minutes. Set all ingredients within arm’s reach and warm the cream first to avoid shocking the caramel. Gather a heavy-bottomed saucepan, a heat-resistant spatula, and a reliable thermometer.
Cook Time: About 12–15 minutes active cooking. The active time varies with pan size and heat source, so monitor color and temperature rather than clock alone to prevent burning.
Yield
About 1 cup of caramel sauce. This volume pours well for drizzling and fills small jars for gifting or storing.
Adjust scaling in 25–50% increments. Because sugar behavior changes with mass and surface area, larger batches require slightly more attention to heat control and stirring technique.
Difficulty Level
Medium. The technique tests temperature control and timing more than advanced skills. Precise monitoring prevents graininess and bitterness.
With practice, you will predict color and temperature. Use a thermometer to accelerate learning; visual cues alone take many batches to master.
Ingredients
1 cup granulated sugar
6 tbsp unsalted butter, cubed and at room temperature
1/2 cup heavy cream, warmed
1/4 tsp fine sea salt (optional)
1 tsp pure vanilla extract
Each component has a functional role. Granulated sucrose is the substrate that melts and caramelizes, butter supplies fat and emulsion stability, and cream adds liquid and mouthfeel.
Choose fresh dairy and a fine-grain sugar. Using salted butter or adding fleur de sel at the end changes the final flavor profile without altering technique. For recipe variations, see our Ultimate Decadent Dessert Sauces internal guide.
Instructions
- Prepare tools: Use a heavy-bottomed saucepan for uniform heat. Position ingredients nearby and warm the cream on low so it is just off the boil.
- Melt the sugar: Place sugar in the saucepan over medium heat. Gently swirl the pan rather than stirring aggressively until the sugar melts into a clear amber liquid; minimize early stirring to prevent crystallization.
- Watch color and temperature: Move from pale straw to deep amber. Aim for approximately 320–350°F (160–177°C) depending on desired flavor depth; remove from heat before it smokes.
- Add butter carefully: Whisk in butter cubes a few pieces at a time. Expect vigorous bubbling; continue to whisk until the emulsion forms and the mixture smooths out.
- Incorporate cream: Pour warmed cream slowly while whisking continuously. This cools the caramel, dilutes viscosity, and creates the signature silkiness.
- Finish and cool: Stir in vanilla and salt if using. Transfer to a heatproof jar and let the caramel cool to room temperature; it will thicken as it cools.
When you combine hot sugar and cooler fats or liquids, do so gradually. That staged incorporation prevents separation and promotes a stable emulsion. If you own a candy thermometer, use it to confirm temperatures rather than relying only on color.
For troubleshooting clumps, gently reheat the sauce over low heat and whisk in a splash of warm cream or butter. If crystallization persists, a short straining through a fine sieve removes grainy bits for a smooth final product.
Tips for Success: The Sweet Science Behind Perfectly Smooth Caramel Sauce
Control heat precisely. Use a medium-low, steady flame and do not step away. Small burners and thick pans reduce hot spots and lower the risk of localized burning.
Warm dairy first. Adding cold cream to molten sugar can cause violent bubbling and texture problems. Warming keeps the temperature differential small and helps the mixture emulsify cleanly.
- Use quality ingredients. Fresh butter and pure vanilla contribute to a clean, balanced profile.
- Brush pan sides. Dip a pastry brush in warm water and wipe the interior to dissolve stray crystals.
- Target range. For a classic sweet caramel, aim for the lower end of caramelization; for a deeper, slightly bitter note, reach the higher end.
[COMMENT missing_br during transformation]
Expert Insight
Practice small, controlled batches to build confidence. Write down exact times and temperatures for your stovetop and pan combination; these records help you reproduce successful results.
Troubleshooting and Safety
If the caramel grainy or separates, reheat gently and whisk in warm cream or butter. Persistent graininess indicates that sugar crystals formed and multiplied; straining will improve mouthfeel but won’t fully restore flavor.
Storage: Refrigerate in an airtight jar for up to two weeks. To return to pourable consistency, warm gently in a pan over low heat or microwave in short bursts, stirring frequently.
Pro-Caution
Have a jar of cool water and a first-aid plan for accidents. For professional kitchens, implement glove and splash-guard protocols when working with hot sugar.
Serving Suggestions
Drizzle warm caramel sauce over vanilla ice cream, baked apples, or pound cake for immediate impact. A sprinkle of flaky sea salt brightens flavors and enhances perceived complexity.
Use caramel as a component: swirl into yogurt or coffee, layer in parfaits, or fold into batters for sticky buns. For recipe variations and pairing ideas, consult our dessert sauces guide and the internal storage and reheating article for best practices.
Key Takeaways
Caramel is sugar transformed by controlled heat into a complex flavor matrix; butter and cream create a stable emulsion and soften texture. Monitor both color and temperature to reproduce consistent results.
Preventing crystallization and warming dairy are the most reliable strategies for a glossy finish. Keep written notes and calibrate your tools to build reproducible technique.

FAQ
This FAQ answers the most common technical and practical questions about making caramel sauce. Each response focuses on actionable steps you can apply in your kitchen.
Refer to the links below for deeper reading on the underlying science where applicable.
What causes caramel to turn grainy, and how do I fix it?
Graininess comes from sugar crystallization during cooking or cooling. To fix it, gently reheat the sauce, whisk in warm cream or butter, and strain if necessary; prevention is the best cure.
What temperature should I aim for when making caramel?
Aim roughly for 320–350°F (160–177°C) depending on flavor intensity. Use a thermometer and watch color cues to avoid crossing into a bitter, burnt range; practice calibrates your visual sense.
Can I use different sugars for variations?
Yes. White granulated sugar yields a clean caramel; brown sugar adds molasses notes and moisture. Adjust cooking time and expect slight differences in texture and depth.
How long does homemade caramel keep, and how should I store it?
Store airtight in the refrigerator for up to two weeks. Warm slowly before use to restore pourability; freezing is possible but may alter texture slightly on thawing.
Why should I warm cream before adding it to hot sugar?
Warming cream reduces the thermal shock to the hot sugar, preventing violent bubbling and potential seizing. It supports a smooth emulsion and faster incorporation of fats.
For a deeper look at the chemical process, read about caramelization, and for the physical behavior of sugar during cooking, see the article on sugar crystallization. For ingredient specifics, consult the butter entry.
See also: caramel sauce
]]>
- Recipes give structure, not shackles; use them as starting points.
- Small swaps and timing tweaks deliver predictable, delicious results.
- Understanding technique beats blind obedience to measurements.
Recipes Are Guides, Not Rules
Recipes act as tested frameworks that combine ingredients, technique, and timing to produce reliable outcomes. Think of them as engineered suggestions: they show expected ratios and steps while leaving room for adaptation.
When you treat a recipe as a guide, you reduce anxiety and increase creative control. This approach improves skill because you learn why a substitution or time change works, not just that it does.
Why Recipes Feel Rigid
Certain tasks, especially in baking, require precise ratios for chemical reactions like gluten formation and leavening. In those cases, small changes can drastically alter texture and structure.
Conversely, many stovetop dishes tolerate broad adjustments in liquid, acid, or fat. Familiarity with fundamental methods in cooking lets you adjust with confidence and predictability.
Prep and Cook Time
Prep: 15 minutes | Cook: 25 minutes | Total: 40 minutes. These times are estimates based on standard oven settings and average ingredient temperatures.
Adjust times when you use denser flours, frozen fruit, or different bakeware. A practical gauge is a toothpick test or internal temperature for protein-rich items.
Yield
Serves 4 generously. Yield depends on portion size, accompaniments, and whether you slice thick or thin for serving.
Scale by weight, not by eyeballing, when you need consistent results across batches. Doubling or halving works, but watch bake time and pan size.
Difficulty Level
Medium. This recipe asks you to balance wet and dry ratios and to judge doneness visually and by touch. Those are foundational skills that scale to more complex preparations.
If you are developing intuition, start by making one change at a time. Track results in a simple notebook so you build a reliable personal reference.
Ingredients
1 cup all-purpose flour, sifted (whole wheat can replace some portion for nuttier flavor). Use flour weight for precision when possible.
2 large eggs, beaten (or flax eggs for a vegan option), 1/2 cup milk (dairy or plant-based), 1 tablespoon olive oil, 1 teaspoon baking powder, 1/2 teaspoon salt, 1 teaspoon vanilla extract (optional), 1 cup fresh berries or chopped fruit, and 2 tablespoons sugar (adjust to taste).
Instructions
Preheat your oven to 375°F (190°C) and prepare a baking dish. Proper preheat ensures predictable rise and browning.
Combine dry ingredients, add wet ingredients into a well, stir just until blended, fold in fruit, transfer to the pan, and bake 20–25 minutes until golden and a toothpick comes out clean. Let rest briefly to allow structure to set before slicing.
- Preheat oven and prepare pan with oil or parchment for even heat and easier release.
- Whisk flour, baking powder, salt, and sugar until uniform; this balances rising and texture.
- Create a well, add eggs, milk, oil, and vanilla, then stir gently—do not overmix.
- Fold in berries or fruit to coat and reduce sinking; distribute evenly in the pan.
- Spread batter to a uniform thickness for consistent baking across the dish.
- Bake 20–25 minutes or until top is golden and a tester shows no wet batter.
- Rest a few minutes before serving so the crumb firms and flavors meld.
Pro-Caution
Chef’s Notes: Tips for Success
Ingredient swaps change hydration and structure. For example, oat milk and almond milk vary in fat and soluble solids; adjust wet volume by 5–10% when you first swap.
Temperature of ingredients matters: cold eggs and milk slow rise, while room-temperature components blend more readily. Keep notes and make incremental changes.
- Substitutions: Try applesauce or mashed banana as a binder and natural sweetener for reduced fat and sugar.
- Timing: If using a heavier flour, extend bake time by 3–7 minutes and monitor color and tester results closely.
- Flavor: Add citrus zest for brightness or a pinch of spice to elevate fruit profiles.
- Texture: Fold in nuts or swirl cream cheese for contrast and interest.
Expert Insight
Serving Suggestions
Serve warm with a dollop of whipped cream or a drizzle of honey for a classic presentation. Garnish with extra berries or toasted nuts for visual and textural contrast.
Pair with a crisp salad for brunch or a robust tea for an afternoon treat. For ideas on manipulating crumb and mouthfeel, see our internal guide on baking textures explained and the internal ingredient substitution guide for common swaps.
| Nutrient | Per Serving |
|---|---|
| Calories | 320 kcal |
| Protein | 9 g |
| Carbohydrates | 45 g |
| Fat | 8 g |
How Technique Lets You Adapt
Technique is the lever that converts safe substitutions into reliable outcomes. For example, knowing how gluten develops helps you decide when to reduce mixing or when to add a binder for gluten-free flours.
Similarly, learning how acidity affects color and flavor gives you tools to balance a dish. Read about basic methods in culinary arts to build a practical foundation.
Q&A
Below are practical answers to common concerns about adapting recipes. These address beginners and experienced cooks who want confident results.
Are recipes meant to be followed exactly as written?
No. Recipes are tried methods that guide you to a reliable result, but they invite adaptation. When you understand why steps exist, you can make informed changes.
Why do people assume recipes need precision?
People conflate baking science with all cooking. Baking often demands specific ratios; other techniques tolerate flexibility. Learn the distinctions and apply them per recipe.
How do I start deviating confidently?
Change one element at a time: swap a liquid, adjust sugar by 10–20%, or change fat type. Record changes and results so you develop repeatable skills.
Can every recipe be adapted?
Not every element is flexible. Some desserts depend on exact chemistry. But most everyday recipes benefit from measured, tested adjustments once you grasp the technique.
Final Notes
Recipes give you a tested pathway to delicious meals while leaving room for personal expression. The goal is repeatable pleasure, not slavish compliance.
Embrace controlled experimentation: make small, deliberate changes, record what you learn, and adjust again. Over time your adaptations will become the best recipes you own.
FAQ
How do I choose which ingredients to swap first?
Start with non-structural elements: spices, sweeteners, and flavorings. Then move to liquids and fats. Structural swaps like flour require more testing.
Will substitutions ruin the texture?
They can if you change ratios drastically. Offset a denser flour with a bit more liquid or a binding agent. Test small batches when possible.
How should I track successful changes?
Use a short log: ingredient change, bake time, pan type, and result. Consistent notation helps replicate successes and avoid repeated errors.
Where can I learn standard wet-to-dry ratios?
Reference ratio guides and technique pages in trusted sources. A basic ratio notebook will speed decisions and reduce guesswork.
When should I revert to the original recipe?
If a change produces an undesirable texture or flavor, revert and test a smaller change. Iteration is the practical path to mastery.
See also: Recipes
]]>
- Speed with control: set power and cycles, then stir to develop starch structure.
- Ingredient focus: use the right rice and warm stock to reduce overall cook time.
- Finish for texture: add sautéed mushrooms or a quick pan-sear to introduce color and contrast.
- Safety always: vent covers and careful handling prevent steam burns and preserve texture.
Why the microwave works for microwave risotto
The microwave heats by exciting water molecules, which creates rapid internal heating ideal for moist-heat techniques like steaming and poaching. That rapid, volumetric heat makes the appliance suited to grains and delicate proteins when you manage power and time.
Also, understanding how the appliance delivers energy—along with vessel shape and liquid volume—lets you predict hotspots and finish textures. For technical context, see the microwave oven entry for design and power considerations.
Prep and Cook Time for microwave risotto
Prep: 10 minutes. Precise mise en place saves cycles and reduces reheats. Measure stock, rinse rice, and chop aromatics before you start the microwave sequence.
Cook: about 12 minutes active microwaving across cycles, plus 2 minutes resting time. Resting lets starch hydrate fully and keeps the grain tender without overcooking.
Yield and scaling for microwave risotto
This method yields 4 servings. When you scale, adjust liquid proportionally and expect longer gentle cycles for larger volumes. A wider, shallower bowl shortens the required time per volume.
Keep a cook log for your oven: record power settings and effective cook times for each batch. Over time, that log becomes your calibration chart for consistent microwave risotto results.
Difficulty Level and skill focus
Rated Easy to Medium. The method relies on accurate timing, consistent stirring, and monitoring. Basic knife work and timing discipline are the main skills required.
Advanced cooks can introduce finishing steps such as a hot pan sear or broiler finish to add color and the Maillard note for deeper flavor. For the chemistry behind browning, see Maillard reaction.
Ingredients for microwave risotto
- 1 cup arborio rice, rinsed thoroughly
- 2 ½ cups vegetable broth, warm
- 1 tablespoon olive oil
- 1 small shallot, finely minced
- 1/2 cup white mushrooms, sliced thinly
- 1/4 cup freshly grated Parmesan
- 1 teaspoon garlic powder
- Salt and black pepper, to taste
- 1 tablespoon fresh parsley, for garnish
- 1 tablespoon chilled butter, diced
Choose short-grain rice for its high starch. For example, use arborio rice to get the starch necessary for a creamy microwave risotto. Use warm stock so the rice never cools mid-cycle.
Instructions: cook microwave risotto
1. Prepare the rice base: In a microwave-safe bowl combine rice, olive oil, minced shallot, and garlic powder. Microwave uncovered at full power for 1 minute, then stir to distribute heat evenly.
2. Add broth and cover: Pour warm vegetable broth over the rice so it is submerged. Cover loosely using a vented microwave-safe lid to let steam escape safely.
3. Cook on medium-high: Set power to 70% (medium-high) and microwave for 10 minutes total. At the 5-minute mark, pause and stir briskly to release starch and promote even cooking.
4. Sauté mushrooms: Place mushrooms in a separate microwave-safe dish, add 1 teaspoon olive oil, and microwave on high for 2 minutes, stirring once to encourage browning and reduce excess liquid.
5. Final assembly: Remove the cover carefully away from your face. Stir in the mushrooms, grated cheese, and butter cubes so they emulsify into the rice. Cover and let rest for 2 minutes.
6. Season and serve: Taste and adjust seasoning. Garnish with fresh parsley and serve immediately with a bright salad or crusty bread for balance.
Pro-Caution
Tips for microwave risotto: control and technique
Maintain the 70% power guideline. Higher power causes uneven evaporation and can leave the center undercooked while edges dry out. Medium-high power lets starches gelatinize more slowly and predictably.
Stirring midway is critical. It redistributes heat and suspends starch so the rice binds into a creamy matrix. Record timing for your microwave model to achieve consistent results.
Expert Insight
Serving suggestions for microwave risotto
This microwave risotto works as a vegetarian main or an elegant side. Pair it with quick pan-seared scallops or grilled lemon-herb chicken to balance richness with acidity.
For texture contrast, add toasted nuts or crispy shallots before serving. A light drizzle of finishing oil or a squeeze of lemon brightens the plate and gives a restaurant-style polish.
Nutritional Information
Values below are estimates per serving. Actual values vary by brand and portion size. This estimate assumes the recipe as written with vegetable broth and one tablespoon of butter per batch.
Per serving: about 320 kcal, 8 g protein, 50 g carbohydrates, 7 g fat. Adjust fat and cheese to change calorie and saturated fat totals.
Technique Notes and science for microwave risotto
Microwave heating emphasizes water-mediated energy transfer. That rapid internal heating suits moist methods but limits surface browning. To introduce crust or color, finish briefly under a broiler or in a hot skillet.
For an explanation of browning chemistry and why dry heat produces different flavor compounds, see the Maillard reaction. Use a short, hot finish to develop those browned flavors without overcooking the grain.
Practical adjustments and substitutions for microwave risotto
To make the dish vegan, swap butter for a neutral oil and replace Parmesan with nutritional yeast. Add a small splash of acid like lemon juice at the end to mimic the tang of aged cheese.
If you substitute rice types, expect texture changes. Long-grain rice remains more separate and will not yield classic risotto creaminess; experiment and record times if you adapt the method. For rice varietal context, see rice.
FAQ
Can I use regular long-grain rice instead of arborio for microwave risotto?
Short-grain arborio yields the starch needed for creaminess; long-grain stays separate and yields a pilaf-like texture. You can use long-grain but expect a different mouthfeel and reduce cook time accordingly.
How do I adjust times for a more powerful microwave?
Reduce high-power intervals by approximately 15–25% and keep the 70% guideline where possible. Test with a small batch and log the effective cook time for your unit.
Is it safe to cover with plastic wrap when making microwave risotto?
Use microwave-safe plastic wrap and vent it to avoid pressure build-up. A vented microwave lid is preferable. Remove covers away from your face to avoid steam burns.
How can I add proteins like chicken or fish to microwave risotto?
Thin fish fillets and diced chicken cook through in the same steam environment if you use medium power and monitor internal temperature. Place protein on top or in a separate dish; ensure proteins reach safe internal temperatures.
Where can I learn more about the rice varieties best for risotto?
Study short-grain varieties such as arborio and carnaroli to understand starch profiles and how they influence texture. Reliable reference material on rice varietals helps you select the right grain for microwave risotto.
Closing Notes
With measured liquid, controlled power, and brief stirring, the microwave becomes a dependable tool for a creamy risotto. Keep records of time and power to make repeatable microwave risotto batches.
Apply the same method to other grain-based dishes; this approach rewards technique and good ingredients, turning fast cooking into repeatable quality.
See also: internal resources on microwave technique and recipe collections.
See also: microwave risotto
]]>
- Fat dissolves fat-soluble aroma compounds. These molecules do not travel well in water but move readily when bound to lipids.
- Different fats add distinct notes. Butter, ghee, olive oil, and animal fats each change a dish’s profile under heat.
- Finishing fats amplify mouthfeel and extend the time flavor lingers after swallowing.
Prep and Cook Time
Prep Time: 10 minutes | Cook Time: 20 minutes | Total Time: 30 minutes.
These estimates assume basic mise en place and a properly heated skillet. Adjust time upward for dense mushrooms or slow rendering at low temperature.
Yield
Serves 4 generous portions as a side or 2–3 as a main component. The recipe concentrates flavor, so smaller portions deliver strong impact.
Scale linearly by weight for larger batches, and maintain pan space to avoid steaming the mushrooms and losing Maillard-derived compounds.
Difficulty Level
Medium. The techniques require attention to heat management and timing rather than advanced knife skills.
Practice browning on moderate heat and finishing at low heat separately before combining them to build confidence.
Ingredients
These ingredients show how blending neutral and flavored fats yields depth and clarity. Use quality stock and fresh mushrooms for best results.
- 3 tbsp unsalted butter, softened
- 2 tbsp extra virgin olive oil
- 1 small onion, finely diced
- 2 garlic cloves, minced
- 1 cup sliced wild mushrooms (shiitake, cremini, or porcini)
- 2 tsp soy sauce (for umami boost)
- 1/2 cup chicken or vegetable stock
- Salt and freshly ground black pepper, to taste
- Fresh thyme leaves, for garnish
Instructions
Work in controlled temperature stages: sweat aromatics, brown solids, reduce liquids, then finish with a flavorful fat. Each stage extracts or concentrates distinct classes of compounds.
Use a hot skillet, a wooden spoon to avoid scraping, and taste as you go to adjust seasoning and richness.
Sauté and Brown: Building Base Flavor
Heat 1 tablespoon olive oil in a skillet over medium heat. Add diced onion and sauté until translucent and fragrant, about 3–4 minutes.
Add the minced garlic and cook 30–60 seconds, stirring constantly so the garlic releases aroma without burning. Increase heat slightly and add sliced mushrooms with a pinch of salt to promote water release and browning.
Reduce and Finish: Concentration and Fat Integration
Sauté mushrooms until they release moisture and begin to caramelize, about 7–8 minutes. Drizzle soy sauce, stir, and pour in stock; simmer until reduced by roughly half to concentrate flavor.
In a separate small pan, melt butter with the remaining tablespoon of olive oil over low heat until it becomes nutty and fragrant. Combine browned butter with the mushroom mixture and season to taste. Serve immediately to preserve the glossy finish.
Why Fat Flavor Works (Science Explained)
Many aroma molecules are lipophilic; they dissolve more readily into fat than into water. When fat melts or emulsifies, it carries these molecules into the oral and nasal cavities where perception occurs.
The molecular concept is standard in lipid chemistry. See lipid for the basic classes and solubility behavior of these compounds.
Mechanisms: Solvent, Carrier, Modifier
Fat acts first as a solvent: non-polar aroma compounds partition into the lipid phase. That partitioning increases their volatility at mouth temperature and concentrates scent at the retronasal pathway.
At the same time, fat coats the oral mucosa and slows release, lengthening the time the brain registers flavors. These effects together define practical fat flavor technique.
Browning, Maillard, and Umami Synergy
Browning generates new savory molecules via amino-sugar chemistry. Those Maillard reaction products pair exceptionally well with fat because both increase perceptible intensity.
For technical background on the Maillard reaction, consult Maillard reaction. For how fat amplifies savory notes, see the concept of umami.
Practical Tips to Maximize Fat Flavor
Control pan temperature. Too low and ingredients steam; too high and fats smoke and create bitter off-notes. Adjust heat in stages for browning without burning.
Balance neutral and flavored fats. A neutral oil tolerates higher heat; butter or ghee adds aroma. Use a blend to get high-heat browning with a rich finishing note.
Expert Insight
Bloom spices briefly in fat to extract essential oils; that step unlocks perfume and intensifies impact when combined with other savory components. Fat dissolves many of the same volatile compounds that water cannot.
Pro-Caution
Choose fats with appropriate stability. Clarified butter and high-oleic oils resist breakdown better at higher heat while unrefined oils best serve as finishes.
Serving Suggestions
Pair umami-rich mushrooms with creamy polenta, toasted country bread, or roasted vegetable medley. Finish with a soft fried egg for added richness and silky mouthfeel.
A final drizzle of a flavored oil or a pat of butter immediately before serving increases the perceived intensity and gives a satin sheen.
Nutrition and Portion Notes
Fats supply most of the calories but also provide fat-soluble vitamins and satiety. Moderate portions deliver more flavor per calorie because fat amplifies perception.
Per serving (approximate): 230 kcal, 20 g fat. Reduce butter and oil to lower calories while retaining finishing technique for mouthfeel by using emulsions.
| Nutrient | Per Serving |
|---|---|
| Calories | 230 kcal |
| Protein | 5 g |
| Carbohydrates | 7 g |
| Fat | 20 g |
Visuals
High-resolution photos should show browning levels and the finished shine from finishing fats. Use them to judge color targets and avoid blackening.
Properly integrated fat produces a satin sheen and visible pooling without greasiness. Aim for deep golden-brown color and avoid char.
Mechanistic Notes and Practical Applications
Fat-soluble aroma release explains why finishing a dish with a flavored oil or butter can dramatically change perception. Fat coats the oral cavity and slows release, lengthening flavor duration.
For deeper reference on fatty structures and how chain length affects aroma, consult fatty acid chemistry.
At a Glance
- Fat flavor depends on partitioning of lipophilic aromas into a lipid phase.
- Blend neutral and flavored fats for heat tolerance and finishing aroma.
- Finish with a small amount of high-impact fat to extend flavor linger.
FAQ
Q: Why is fat so effective at carrying flavor?
Fat dissolves lipophilic aroma molecules that water cannot carry. When fat integrates into a sauce or coats ingredients, those dissolved compounds become volatile and perceptible as aroma.
This solubility difference explains why oil-based dressings smell and taste different than water-based broths using the same herbs.
Q: Can I get the same flavor without animal fats?
Yes. Plant fats like olive oil and coconut oil carry aroma and provide mouthfeel. Each fat still introduces its own profile, so choose one that complements the dish.
Use emulsions or nut-based finishes if you need texture without animal-derived components.
Q: How should I choose a fat for high-heat cooking?
Pick fats with higher smoke points for direct high-heat work and reserve butter or ghee for finishing. Blend a neutral high-smoke oil with a small amount of butter to combine heat tolerance and aroma.
Properly rendered animal fat also performs well for searing and sautéing because of lower moisture and improved heat stability.
Q: Will reducing fat ruin a recipe’s taste?
Reducing fat can make a dish taste flatter because you remove the carrier for many aroma compounds. Compensate by concentrating stock, using umami-rich ingredients, or finishing with a small amount of high-impact fat.
Emulsions spread small droplets across the palate and can maintain perceived richness with less total fat.
Q: Are some fats unhealthy to use for flavor?
Use fats judiciously. Avoid repeatedly overheating oils with low smoke points and prefer minimally processed oils when possible. Balance saturated and unsaturated fats within overall diet context.
For culinary choices, prioritize flavor and proper technique rather than avoiding fat entirely; small amounts of the right fat improve satisfaction and reduce overeating tendencies.
Closing Remarks
Fat acts as a chemical solvent, a texture modifier, and a delivery system for aroma and flavor. When used deliberately, it converts ordinary ingredients into more complex, satisfying dishes.
Apply the techniques above—control heat, choose appropriate fats, bloom spices in fat, and finish with a flavorful drizzle—and you will notice immediate improvements in intensity and mouthfeel.
See also: lipid, Maillard reaction, umami
See also: fat flavor
]]>Recipe experiments turn a repeatable roast into a dependable weeknight win. Treat every run as a controlled test: change one variable, record results, and refine methodically.
- Establish a control: Run a base roast and take notes before changing anything.
- Change one variable: Adjust a single element per trial to isolate effects.
- Measure precisely: Use a scale and probe thermometer to collect repeatable data.
- Record sensory notes: Capture texture, aroma, and perceived seasoning after each test.
Why recipe experiments matter
Well-run recipe experiments convert intuition into predictable technique. Reproducible tests reveal how heat, moisture, and seasoning interact on a molecular and sensory level.
For example, browning results come from the Maillard reaction, which depends on surface temperature and moisture. Testing different surface-drying methods or roast-start temperatures shows measurable effects on crust and flavor.
Prep and Cook Time for recipe experiments
Set clear time windows for preparation, high-heat searing, and lower-temperature finish. A consistent schedule helps you compare trials without confounding timing variables.
This technique aligns with fundamentals of roasting, where initial high heat promotes browning and later moderation cooks evenly. Note exact durations and oven behavior for each experiment.
Yield considerations in recipe experiments
This roast yields about six servings when using a 4 lb bird; scaling is linear for major components but not always for aromatics. Keep salt-to-protein ratios consistent to preserve flavor balance when scaling.
When you increase volume, test seasoning on smaller portions first. That keeps a control against over-salting or under-seasoning during scale-up runs.
Difficulty Level and planning recipe experiments
Classify this workflow as medium difficulty: it requires basic trussing, thermometer use, and timing discipline. Those skills let you focus on experimental variables instead of troubleshooting technique problems.
Begin with a single control roast. After a reliable baseline, run short micro-experiments—adjust resting time, swap a spice, or change sear duration—and record the sensory and numeric outcomes.
Ingredients (use for recipe experiments)
Choose dependable basics: quality oil, fresh aromatics, and a sound primary protein. Consistent input materials reduce noise in your test data and clarify the impact of methodic changes.
Use a kitchen scale, measure salts by weight, and keep optional substitutions documented. Accurate ingredient control supports meaningful comparisons between recipe experiments.
- 1 whole chicken (about 4 lbs), patted dry
- 2 tbsp olive oil (preferably extra virgin)
- 1 lemon, zested and quartered
- 4 garlic cloves, minced
- 2 tsp smoked paprika
- 1 tsp ground cumin
- 1 tbsp fresh thyme leaves, chopped
- Salt – 1½ tbsp coarse sea salt, divided
- Freshly ground black pepper – 1 tsp
- 1 small onion, quartered
- 1 cup low-sodium chicken broth
- Optional garnish: chopped fresh parsley and lemon wedges
- Ingredient substitution options:
- For olive oil: avocado or walnut oil for nutty notes
- For smoked paprika: chipotle or sweet paprika for different smoke/sweet profiles
Instructions for controlled recipe experiments
Run the core method first to create a control result. Record weight, oven thermometer reading, and exact timing for every step before changing anything.
Rely on a probe thermometer for internal temperature readings; doneness metrics beat visual cues. Keep a test log with objective numbers and tasting notes for each experiment.
Roast schedule
- Preheat oven to 425°F (220°C). Position rack in the middle for even circulation.
- Loosen the skin to allow seasoning beneath; this increases localized flavor without over-salting the exterior.
- Combine oil, lemon zest, garlic, smoked paprika, cumin, thyme, 1 tbsp salt, and pepper and rub under skin and over the outside to build flavor layers.
- Place lemon and onion in the cavity for aromatics and moisture during roasting.
- Truss the legs to promote even cooking and tidy presentation.
- Transfer chicken to a roasting pan or oven-safe skillet and pour broth in the pan to maintain humidity and collect pan juices for sauce.
- Roast 15 minutes at high heat to crisp skin, then reduce to 350°F (175°C) and roast 45–55 minutes, basting occasionally.
- Check doneness with a thermometer inserted into the thigh; target 165°F (74°C) internal temperature.
- Remove and rest 15 minutes before carving; resting lets fibers relax and juices redistribute.
- Carve and serve with parsley and lemon wedges; spoon pan juices over slices for gloss and moisture.
Resting and carving notes
Do not skip resting; it materially affects juice redistribution and slice quality. Measure resting duration across trials to see how mouthfeel changes with 5–20 minute adjustments.
Carve against the grain for the tenderest pieces and reserve pan juices for a light pan sauce. Use the same carving technique each trial to reduce variance in mouthfeel assessments.
Tips for Success with recipe experiments
Control one variable per experiment: swap a spice, adjust temperature, or change resting time. That discipline turns observations into actionable conclusions.
Record every trial in a bound notebook or digital log. Include oven behavior notes, exact weights, thermometer placement, and tasting impressions for reliable pattern detection.
Expert Insight
Keep skin dry before the high-heat phase to improve crisping. Pat with paper towels and avoid early wet brines unless you intend to test moisture retention as a variable.
Pro-Caution
Keep your thermometer probe clean and avoid bone contact during readings; touching bone gives falsely high results. Place the probe near the bone but not on it to capture accurate muscle temperature.
Serving suggestions and flavor pairing from recipe experiments
Pair the roast with bright, acidic sides to balance richness. A lemony quinoa salad or cooling cucumber-yogurt works well to reset the palate between smoky bites.
Apply pan juices as a finishing sauce for gloss and added flavor. Consider pairing notes using basic flavor principles: contrast saltiness with acidity and provide textural variety.
| Nutritional Information (per serving) | Calories | Protein (g) | Carbs (g) | Fat (g) |
|---|---|---|---|---|
| Roasted Herbed Chicken | 380 | 45 | 2 | 18 |
Recording and analyzing recipe experiments
Standardize your log fields: date, ingredient weights, oven thermometer reading, internal temp, resting time, tasting notes, and a final score. Consistent fields speed comparative analysis.
After three to five runs, aggregate your notes and look for patterns: does a longer rest correlate with juicier legs? Does higher sear temp consistently improve crust without drying the breast? Use small sample statistics to guide decisions.
Key Takeaways
Each controlled test advances your technique and clarifies cause-effect relationships. Methodical recipe experiments reduce guesswork and improve consistency across cooks.
Prioritize precise measurement, single-variable changes, and clear sensory notes. Over time, these habits turn ad-hoc cooking into reproducible results you can teach others.
FAQ
How do I start with recipe experiments if I’m a beginner?
Begin with one control roast and document every step. Make a single, small change per subsequent trial and compare results against your control to learn the effect.
How many trials should I run to trust a result?
Run at least three consistent trials for a pattern to emerge, then expand to five for greater confidence. Repeatability is the primary metric of a reliable recipe experiment.
What tools are essential for useful recipe experiments?
A digital kitchen scale and a calibrated probe thermometer are the two most impactful tools. They convert subjective impressions into measurable data you can reproduce.
Can I test multiple variables at once to save time?
No. Changing multiple variables creates confounding results. Save time by prioritizing the most likely impactful change and test that one factor per run.
Where can I read more about cooking science to support my experiments?
Reference solid technical overviews such as the general cooking concepts and the chemistry behind browning and flavor. These resources help you form hypotheses to test in the kitchen.
See also: recipe experiments
]]>Imagine biting into a perfectly ripe strawberry or inhaling the smoky notes of hot coffee. The experience feels immediate, but behind it lies coordinated biology: receptors at the tongue and nose send patterned signals that the brain translates into a unified flavor percept.
- Flavor arises from combined taste and smell signals integrated by brain networks.
- Timing and temperature alter receptor responses, so cook time changes perceived sweetness or bitterness.
- Memory and emotion bias interpretation, which is why comfort food tastes distinct to each person.
- Small technique changes in a recipe yield big sensory shifts.
Prep and Cook Time
Prep Time: 20 minutes | Cook Time: 15 minutes | Total Time: 35 minutes. These values reflect typical preparation for the rice-based dish featured here and assume mise en place.
Time controls molecular reactions: caramelization, Maillard reactions, and volatile release all depend on how long and how hot ingredients interact. That timing directly affects the chemical cues the chemosensory system detects.
Yield and Difficulty
Serves 4. This recipe is intentionally approachable for cooks with moderate experience but it rewards attention to sensory details.
Difficulty: Medium. The technique focuses on managing aromatics and texture so the brain receives clear, layered inputs instead of muddled signals.
Ingredients
Gather ingredients that provide contrast in taste, aroma, and texture; the brain uses those contrasts to segment flavor components and build a coherent percept. Use fresh aromatics and properly cooled rice to preserve grain separation.
Adjust salt, acid, and fat to tune how receptors fire: salt increases savory signals, acid sharpens contrast, and fat carries volatile aroma compounds.
- 2 cups cooked jasmine rice, cooled
- 1 tbsp coconut oil
- 1 small shallot, finely minced
- 2 cloves garlic, minced
- 1 tsp grated fresh ginger
- 1/2 cup diced pineapple, fresh or canned
- 1/2 cup chopped cashews, toasted
- 1 small red chili, thinly sliced (optional)
- 2 tbsp tamari or soy sauce
- 1 tbsp lime juice, freshly squeezed
- 1 tsp honey or agave nectar
- Fresh cilantro, chopped, for garnish
- Toasted sesame seeds, for garnish
Instructions
Follow sequence and temperature closely so the olfactory and gustatory cues evolve predictably. The goal is to create staggered releases of volatiles and textural contrasts that the brain can parse as distinct elements.
Work with a hot skillet, but avoid burning aromatics; char produces bitter phenols that can dominate receptor responses and mask subtle aromatics.
- Heat coconut oil in a large skillet over medium heat. Add the minced shallot, garlic, and ginger. Sauté until fragrant and golden, about 2-3 minutes, stirring frequently.
- Stir in diced pineapple and cook for another 3 minutes to lightly caramelize sugars and boost sweet volatiles.
- Add the cooked jasmine rice to the skillet, breaking up clumps. Sauté for 5 minutes so each grain heats evenly and releases aroma.
- Toss in toasted cashews and sliced red chili if using. These add crunch and a heat cue that modulates trigeminal sensation.
- Mix tamari or soy sauce, lime juice, and honey in a small bowl. Pour over rice and stir to balance salty, sour, and sweet dimensions; simmer 2 minutes.
- Remove from heat and garnish with fresh cilantro and toasted sesame seeds before serving.
Notes on Technique
Break the recipe into stages: aromatics, sweet component, starch, and finish sauce. Staging preserves the identity of each sensory input so cortical circuits can map components to experience.
Stirring and order affect temperature gradients. Serve immediately in shallow bowls to maximize volatile diffusion and engage retronasal smell, a major contributor to perceived flavor.
Tips for Success
Small adjustments yield outsized perceptual changes because taste pathways respond nonlinearly to concentration shifts. Taste receptors saturate quickly, so balance multiple modalities rather than increasing a single ingredient to compensate.
Test seasoning incrementally. Add acid and salt in stages and taste between additions; your brain marks the change and updates preference rapidly.
- Replace coconut oil with a splash of toasted sesame oil for deeper aroma, but use sparingly because it can dominate the profile.
- Substitute honey with agave or maple for vegan diets without losing sweetness complexity.
- Use day-old rice for better texture: cooled starch separates and highlights grain integrity.
- Adjust chili to personal spice sensitivity; heat recruits trigeminal fibers that alter overall flavor perception.
Expert Insight
Plan to prepare aromatics and dressing ahead for quick assembly. This improves timing control and reduces stress, which can influence salivary flow and taste sensitivity.
Serving Suggestions
Serve with a light cucumber salad or steamed greens to add a cooling, textural counterpoint; the contrast refreshes olfactory receptors between bites. For reference, see the internal recipe map at pineapple fried rice for variations.
Consider plating and portion size: shallow bowls and moderate portions increase retronasal airflow and heighten aroma sampling. Explore related neuroscience notes at the neuroscience of flavor for practical tasting protocols and training exercises.
Nutritional Information
Per-serving nutrition provides a baseline for dietary planning and for understanding how macronutrients modulate flavor perception. Fat carries aroma compounds, carbohydrate provides sweetness, and protein contributes umami—all of which influence receptor activation.
Use the table to match portioning with nutritional goals and to plan modifications that preserve sensory balance while adjusting calories.
| Nutrient | Per Serving |
|---|---|
| Calories | 320 kcal |
| Protein | 7 g |
| Carbohydrates | 45 g |
| Fat | 9 g |
The Neuroscience Behind Flavor Decoding
Taste and smell signals arrive via distinct peripheral receptors and converge in central circuits that assign meaning and valence. The tongue’s receptor cells transduce chemical ligands into electrical signals routed through cranial nerves to brainstem nuclei and onward to cortical and limbic structures.
Smell, in particular, drives much of what we call flavor through retronasal olfaction; the olfactory bulb and higher olfactory cortices integrate with gustatory input to produce a cohesive percept. For technical reference, review the gustatory system at Gustatory system and the fundamentals of Olfaction.
Neural plasticity and prior experience shape these circuits. Repeated exposure alters synaptic weights so that familiar combinations trigger predictive responses, biasing hedonic judgement and memory encoding. See basic mechanisms in Neuroscience.
Pro-Caution
FAQ
Below are concise answers to common questions about flavor decoding and practical implications for cooking and research.
What does it mean that the brain “decodes” flavor?
Decoding refers to the transformation of raw receptor signals into categorical percepts like sweet, salty, bitter, sour, and umami. The brain integrates these signals with olfactory and trigeminal inputs to form a unified flavor representation.
Integration also includes contextual factors such as memory and expectation, which modulate perceived intensity and pleasantness through top-down processing.
How do taste and smell collaborate?
Taste receptors detect nonvolatile compounds while olfactory receptors detect volatile molecules; together they create the multilayered percept we call flavor. Retronasal smell, where volatiles travel from the mouth to the nasal cavity, is crucial for recognizing specific foods.
Therefore, nasal congestion or anosmia dramatically reduces perceived flavor even when basic tastes remain intact.
Are individual differences significant?
Yes. Genetic variation in receptor expression produces broad differences: some people are supertasters with heightened bitter and sweet sensitivity, while others have blunted responses. Cultural exposure and learning further adjust preferences over time.
Behavioral training can change detection thresholds and preference, demonstrating the plasticity of chemosensory systems.
How can cooks use this knowledge?
Cook with sensory intent: balance contrast in taste, temperature, and texture to produce clear, separable cues that the brain can integrate favorably. Small changes in acid or fat can rebalance a dish without increasing salt.
Use staging and timing to stagger volatile release so that each bite reveals a controlled sequence of sensory events.
Where is research headed?
Current work maps flavor perception at neural-circuit resolution and models preference prediction using computational tools. These efforts aim to translate basic mechanisms into clinical and food-industry applications.
For deeper reading on taste and umami chemistry, consult the Wikipedia entries on Taste and Umami.
In Retrospect
Flavor decoding is a coordinated biological process where chemical cues meet neural computation. Understanding this process gives cooks and clinicians practical tools to tune dishes and therapies that leverage sensory integration.
Next time you taste a complex dish, pay attention to how aroma, texture, and timing influence what you perceive; those subtle design choices shape the sensory code your brain writes about food.

See also: Flavor decoding
]]>