- Fresh eggs and gentle heat reduce spread and improve shape.
- Mild acidity speeds coagulation without altering taste.
- Calm water motion and a careful transfer keep the white intact.
- Practice and method beat occasional failures into reliable results.
Overview: Why eggs fall apart
Egg white structure relies on proteins that relax as eggs age; loose whites are more likely to disperse in water. The interaction of temperature, motion, and acidity determines whether the white forms a neat envelope around the yolk.
When you control those variables, you control the outcome. For a technical grounding, consult the poached egg entry for precision terminology and common techniques.
Prep and Cook Time
Preparation: 5 minutes. Cooking: 3–4 minutes per egg for a soft yolk. Allow additional time if you poach multiple eggs in batches.
Keep a thermometer on hand if you want repeatable results; aim for a water temperature around 180°F–190°F (82°C–88°C). This range gives steady coagulation without turbulence that tears the white.
Yield
This recipe quantity targets two servings, roughly one to two eggs per person depending on appetite. Scale the water and pot size to avoid crowding; overcrowding is a common cause of broken shapes.
If you plan to poach larger batches, work in small groups and keep finished eggs warm in a shallow bowl of hot water to preserve texture. For menu planning, note that poached eggs reheat well for short-term service.
Difficulty Level
Poaching sits at an easy-to-medium skill level. The basic technique is simple, but consistency takes practice, especially when you aim for precise yolk set and tidy whites.
Expect a learning curve: minor errors happen even in pro kitchens. Each attempt teaches subtle control of temperature, motion, and timing.
Ingredients
2 large very fresh eggs, ideally refrigerated and not older than seven days for best white cohesion. For background on egg handling and quality, see the egg (food) article.
3 cups filtered water, plus a tablespoon of white vinegar (optional) and salt and pepper to taste. Vinegar provides acidity that helps the protein set quickly without imparting strong flavor; read more on vinegar.
Instructions
Follow a stepwise approach: heat the water, add a little acid, create gentle motion, and transfer the egg close to the surface. Each step minimizes the forces that unravel the white.
Work with one egg at a time until you master the flow; then you can scale up with confidence. Keep a slotted spoon, small ramekin, and a shallow bowl of warm water at hand for finishing.
Step 1: Prepare the water
Use a wide saucepan with enough depth for the egg to float without touching the bottom. Heat to a gentle simmer where small bubbles form on the pot floor and occasional small bubbles rise to the surface.
Maintain that steady temperature; avoid rolling boil. If you need numerical control, aim for 180°F to 190°F (82°C to 88°C) so convective currents stay gentle and predictable.
Step 2: Add acid and position
Add roughly 1 tablespoon of white vinegar per 3 cups of water; this acidity helps the albumen knit quickly around the yolk. The vinegar method works because acid lowers pH and accelerates protein denaturation and coagulation; see the science of protein for more detail.
Crack each egg into a small ramekin or cup first. This prevents shell fragments and lets you slide the egg close to the water surface to minimize drop height and shock to the white.
Step 3: Create a gentle whirlpool and cook
Stir the simmering water once to create a mild vortex, then slide the egg into the center of that swirl. The rotational motion encourages the white to fold inward, wrapping the yolk in a compact shape.
Let the egg cook undisturbed for 3–4 minutes for a soft yolk. Remove with a slotted spoon and rest briefly on paper towel to blot excess water before seasoning.
Tips for Success
Choose very fresh eggs. Fresh albumen stays close to the yolk and resists spreading; older eggs have thinner whites that disperse. Store eggs properly and use them within a week for reliable poaching.
Control water temperature and motion. Gentle simmering and calm stirring reduce tearing. Keep a consistent heat source and avoid adding cold eggs from the refrigerator directly into near-boiling water.
[p]
 Expert Insight
[/p]
Try alternative tools when eggs are fragile: silicone poaching cups, a wide ladle, or small parchment nests provide support. These aids remove the need for a whirlpool and work well for beginners or high-volume service.
[p]
 Pro-Caution
[/p]
Before using a new technique, run a small test egg to adjust timing and method. Minor differences in egg size, altitude, and pot geometry affect the exact cook time.
Serving Suggestions
Serve poached eggs on buttered toasted sourdough with chopped chives or tarragon for a classic presentation. The contrast between crisp bread and velvet egg enhances texture and mouthfeel.
For brunch variations, top eggs with hollandaise, salsa verde, or a light drizzle of olive oil. Pair with sautéed spinach, avocado slices, or roasted asparagus for balanced plates.
Storing and Reheating
You can poach eggs slightly under and chill them in cold water, then store in the refrigerator for up to 24 hours. Keep them submerged to maintain shape and prevent drying.
Reheat in gently simmering water for 30–45 seconds until warm. Avoid microwave reheating; it often overcooks the yolk and alters texture.
Common Problems and Fixes
If whites separate into strands, the egg is likely past its prime or the water was too turbulent. Check egg freshness with a simple float test and calm the heat source if you see heavy movement.
Broken yolks usually result from cracking too close to the water or using a sharp edge. Crack into a cup and slip the egg in low and slow; that small extra control prevents punctures.
Nutrition
One poached large egg provides roughly 70 calories with high-quality protein and essential micronutrients. Poaching keeps added fat minimal compared with frying, making it a lean cooking method.
Pairing eggs with vegetables, whole grains, or healthy fats balances the meal for sustained energy. For a quick reference, use the table below to plan servings.
| Nutrition | Per Egg (approx.) |
|---|---|
| Calories | 70 |
| Protein | 6g |
| Carbs | 0.6g |
| Fat | 5g |
Tools and Alternatives
Use a slotted spoon with wide, shallow holes to lift eggs without tearing. A narrow-lipped ramekin helps you control the release of the egg into the water.
For consistent service, silicone cups or an oven muffin tin with water can produce multiple even poaches at once. If you want more technique options, visit our Guide to Egg Cooking Techniques for step-by-step variations.
For tool recommendations and broader kitchen advice, check our article on Kitchen Tools and Techniques. Those resources pair well with this method to build repeatable results.
FAQ
Why do poached eggs sometimes fall apart?
Egg whites become loose as eggs age, which makes them prone to spreading in the water. Excessive water movement or too-high heat also tears the white, so keep the water calm and the temperature steady.
Is vinegar necessary when poaching eggs?
Vinegar accelerates protein coagulation, which helps the white firm quickly around the yolk. Use a modest amount (about 1 tablespoon per 3 cups of water) to avoid altering taste.
What is the ideal water temperature for poaching?
Target 180–190°F (82–88°C) for a gentle simmer. This range provides steady heat transfer without disruptive currents that can break the egg apart.
Can I poach eggs ahead and reheat them?
Yes. Chill poached eggs in cold water, store refrigerated for up to 24 hours, and reheat in hot water for 30–45 seconds. This preserves texture better than microwave reheating.
What if my poached egg breaks despite careful technique?
Rescue the egg with a slotted spoon by gathering stray whites and draining them well. Serve as a rustic topper over toast, salad, or grains while you practice the refined steps for next time.
With the practical adjustments above, poaching becomes a reliable technique rather than a gamble. Practice controlled heat, fresh eggs, and gentle handling to produce restaurant-quality results. For more methods and step-by-step photos, visit our internal guides linked above.
See also: Poached Eggs
]]>
- Key takeaway: Water ratio and controlled heat shape fluffiness more than gadgets.
- Tip: Rinse and selectively soak to tune stickiness for each dish.
- Tool choice: A calibrated pot or rice cooker improves batch-to-batch consistency.
Why rice chemistry matters for perfect rice
Rice cooks as starch granules swell and redistribute moisture under heat. That physical change, called gelatinization, determines mouthfeel and grain separation.
Different varieties contain distinct starch fractions and bran structure, so chemistry predicts outcomes. For reference on the grain and varieties see rice.
Key variables: grain, water, heat for perfect rice
Grain type sets the amylose-to-amylopectin ratio and the target texture. Long-grain rice tends to have higher amylose for separate grains; short-grain rice has more amylopectin and yields stickier results.
Learn the starch fractions to match rice to your dish. See the entries on amylose and amylopectin for deeper detail.
Prep: rinsing, soaking, and measuring to get perfect rice
Rinsing removes surface starch that causes clumping. Use a fine-mesh sieve and run cold water until it clears mostly; this yields separated grains for dishes like pilaf.
Soaking evens hydration and shortens active cook time. For basmati and other long-grain varieties, 20–30 minutes of soak improves elongation without losing texture.
Ingredients and practical adjustments for perfect rice
Start with baseline ratios, then tune for the grain, age, and elevation. A practical starting point for many aged long-grain varieties is 1 cup rice : 1.25 cups water by volume.
Salt seasons internally when added to the cooking water. Adding a small amount of fat, like butter or neutral oil, reduces surface friction, improves sheen, and aids separate grains without masking aroma.
Stovetop instructions: consistent method to produce perfect rice
Use a medium saucepan with a tight lid and even heat conduction. Bring rice and measured water to a gentle boil, then lower to the smallest flame that sustains a steady simmer.
For typical long-grain basmati, simmer about 15 minutes, then turn off heat and let the pan rest, covered, for 10 minutes. Residual steam finishes gelatinization and firms the grains gently.
Step-by-step checklist
Rinse, measure, bring to boil, reduce to simmer, time accurately, rest covered, then fluff. Each step controls a single variable: surface starch, hydration, heat delivery, and steam finish.
Keep a visible timer and avoid lifting the lid early. Interruptions change internal pressure and extend cook time unpredictably, which harms repeatability.
Tools and alternatives to make perfect rice reliably
Electric rice cookers and pressure cookers automate temperature and steam control to reduce user error. A good rice cooker senses steam and cuts heat to keep grains intact.
If you use a pressure cooker, reduce water slightly and rely on natural pressure release for the resting phase. For pan methods, a heavy-bottomed pot gives even heat and cuts scorching risk.
Rice cooker models vary, so consult manufacturer charts. Still, the same variables—grain, water, heat—apply whether you use a pot or an appliance.
Expert Insight
Chef’s notes: practical tips for consistent perfect rice
Choosing rice: Match grain to the dish. Use basmati for pilafs, jasmine for fragrant sides, and short-grain rice for sushi-style stickiness. Age and milling alter absorption and texture.
Water adjustments: Increase water for softer rice and decrease for firmer rice. Test small batches and record ratios for each brand and pot to build repeatable results.
Safety, storage, and quality control for cooked rice
Cooked rice cools quickly, and improper handling risks bacterial growth. Cool within one hour and refrigerate to limit Bacillus cereus replication.
Store chilled rice for about 3 days. Reheat with a splash of water and cover to restore moisture; reheating does not erase all safety limits, so discard rice stored too long.
Pro-Caution
Serving suggestions and presentation for perfect rice
Serve long-grain rice as a bed for curries and stews to highlight grain separation. For sticky rice presentations, mold with damp hands or a small bowl for clean shapes.
Finish with a touch of fat—clarified butter or toasted sesame oil—for fragrance and sheen. Garnish with herbs or toasted seeds to add a crisp texture contrast.
Nutritional note
Cooked long-grain white rice provides mostly carbohydrate energy. One cup cooked gives about 200 calories with small protein and negligible fat content.
Brown and parboiled options change fiber and micronutrient profiles due to bran retention and parboiling effects. For background on starch and processing see starch.
Recipes, resources, and internal guides
Perfect rice serves as a neutral base for many recipes. Use it in pilafs, grain bowls, and paired sides to simplify weeknight cooking and meal prep.
Record ratios, weights, and times for each brand and pot. Over weeks, that log becomes a compact reference to reproduce perfect rice under different conditions.

| Nutritional Information (per serving) | Calories | Protein | Carbs | Fat |
|---|---|---|---|---|
| Cooked Basmati Rice (1 cup) | 205 kcal | 4.3 g | 45 g | 0.4 g |
FAQ
How does rinsing change texture?
Rinsing removes surface starch that would otherwise gel and glue grains together. For separate grains, rinse until the water runs clearer; for sticky dishes, rinse lightly or skip.
Rinsing also clears residual dust and loose bran; adjust the rinse based on the rice’s processing and the desired finish.
What water ratio should I use for perfect rice?
Start with manufacturer or variety recommendations. A common baseline for many long-grain basmati and jasmine varieties is 1:1.25 by volume, then tweak by 0.05–0.25 cups per cup based on trials.
Record results and convert to weight once you find the preferred ratio for a brand; weight gives the most consistent perfect rice outcomes.
Why does rice stick to the bottom?
Sticking arises from excess heat, uneven pan thickness, or insufficient water early in the cook. Use low sustained heat and a heavy-bottomed pot to improve conduction and reduce hotspots.
A rest period off heat allows grains to firm away from the hot surface and reduces agitation that can scrape grains onto the pan base.
Can I freeze cooked rice?
Yes. Cool rice quickly, portion it, and freeze in airtight containers. Reheat from frozen with a little added moisture for best texture retention.
Label portions and use within one month for quality; frozen rice will soften after extended storage but remains safe when frozen properly.
Does soaking always help?
Soaking benefits long-grain rice by promoting elongation and even hydration and by shortening cook time. For short-grain sushi rice, controlled soaking helps achieve the desired surface hydration for adhesion.
Avoid over-soaking; excessive soak time can over-hydrate the surface and cause splitting or gumminess during cooking.
Final thoughts on perfect rice
Perfect rice comes from controlling the variables: grain selection, water ratio, rinsing, and gentle heat. Test small batches, record weights and times, and standardize your method for repeatable results.
Over time, those notes become a practical playbook that yields consistent perfect rice across brands and equipment.
See also: perfect rice
]]>Searing vegetables concentrates flavor, deepens color, and creates crisp edges that contrast tender interiors. When you control heat, moisture, and surface contact, ordinary produce develops a savory, roasted character that few simple methods match.
- Quick wins: Dry produce, hot pan, and no crowding yield better browning.
- Science: The Maillard reaction and caramelization build complex aromas.
- Tools: Choose a heavy pan and an oil with a stable smoke point.
- Finish: Acid and herbs brighten and balance caramelized notes.
Prep and Cook Time
Preparation: 15 minutes. Trim, slice, and pat vegetables dry for even browning and predictable cook times.
Cooking: 10 minutes. Sear in batches on medium-high heat so each piece makes full contact with the pan surface and browns evenly.
Yield
This recipe serves 4 as a side or component for bowls and grain salads. Adjust quantities while keeping pan space in mind to avoid overcrowding.
Scale oil and salt proportionally. For plating, reserve some seared pieces whole for visual appeal and chop the rest for mixed dishes.
Difficulty Level
Easy to Medium. The technique relies on timing and heat control rather than advanced skills. Home cooks can master consistent results with a few practice runs.
Repeatability matters: same pan, same heat setting, and similar piece sizes produce predictable browning and texture every time.
Ingredients
Use sturdy, low-moisture vegetables for reliable searing. Uniform cut sizes help pieces cook at the same rate and develop an even crust.
Choose a neutral oil with a suitable smoke point and season simply to let the seared flavors shine.
- 2 cups broccoli florets, trimmed and dried
- 1 large zucchini, sliced into ½-inch rounds
- 1 red bell pepper, cut into 1-inch strips
- 3 tablespoons extra virgin olive oil
- 1 teaspoon smoked paprika
- ½ teaspoon garlic powder
- Freshly ground black pepper, to taste
- 1 teaspoon kosher salt, divided
- 1 tablespoon fresh lemon juice
- Fresh thyme or rosemary (optional, for garnish)
Instructions
Prepare vegetables: Trim and slice to uniform sizes, then pat completely dry. Moisture on the surface causes steaming and prevents effective browning.
Preheat pan: Heat a heavy-bottomed cast-iron skillet or stainless-steel pan over medium-high heat until the surface is shimmering.
- Oil and season: Toss vegetables lightly with olive oil and half the salt to coat without pooling excess oil.
- Sear in batches: Add veggies in a single layer; leave undisturbed until a golden crust forms. Flip and brown the opposite side.
- Adjust heat: Reduce slightly if the oil smokes or the crust burns; maintain a high enough temperature to drive the Maillard chemistry.
- Finish: Return all vegetables to the pan, sprinkle remaining salt and pepper, then remove from heat and drizzle lemon juice to lift the flavors.
- Rest and garnish: Let the vegetables rest briefly so juices redistribute, then garnish with fresh herbs.
Pro-Caution
Science of Searing
Searing produces more than color; it creates new flavor molecules. The primary pathway for savory browning is the Maillard reaction, where amino acids and reducing sugars interact under heat to form complex aroma compounds.
Alongside that, simple sugar breakdown—known as caramelization—adds sweet, nutty notes. Together these processes explain the roasted, umami-rich character of well-seared vegetables.
Tips for Success
Control moisture, heat, and surface contact. Pat-dry produce, preheat the pan, and space pieces so each piece touches the metal. These three variables determine whether you brown or steam.
Match vegetable types and cut sizes. Harder vegetables need longer sear time and may tolerate higher heat than delicate ones like zucchini, which can char quickly.
- Vegetable selection: Favor bell peppers, mushrooms, carrots, Brussels sprouts, and broccoli for dependable browning.
- Heat control: Aim for a pan surface that sizzles on contact but does not burn the oil.
- No crowding: Sear in small batches to keep temperatures stable and contact consistent.
- Season after searing: Salt draws moisture; seasoning post-sear preserves texture and crunch.
Expert Insight
Serving Suggestions
Serve seared vegetables hot to showcase contrast between crisp edges and tender centers. A squeeze of bright acid helps balance the richness produced by browning.
Combine seared pieces with grains, roast proteins, or simply top with a sprinkle of cheese or toasted nuts. The texture and flavor elevate simple plates into composed side dishes.

Nutrition
Searing does not add significant calories beyond the oil you use. It can reduce some heat-sensitive nutrients but also increases palatability, which encourages vegetable consumption.
Balance searing with quick steaming or raw components in a meal to preserve vitamins while delivering flavor-rich bites.
| Nutrient | Per Serving |
|---|---|
| Calories | 110 |
| Protein | 3g |
| Carbohydrates | 8g |
| Fat | 8g |
FAQ
What is the difference between searing and roasting?
Searing applies intense direct heat to the surface of small pieces to form a crust quickly. Roasting cooks larger quantities more slowly in an oven, producing even internal tenderness and surface browning over time.
Which oils suit high-heat searing?
Use stable oils with higher smoke points like refined olive oil, avocado, or grapeseed oil. These tolerate searing temperatures without breaking down and keep flavors clean.
Can I sear frozen vegetables?
Frozen vegetables release moisture as they thaw, which promotes steaming instead of searing. Thaw and dry them thoroughly before attempting a proper sear for best results.
Will searing make vegetables healthier or less healthy?
Searing can reduce some heat-sensitive nutrients like vitamin C, but it also increases the availability of certain antioxidants. The main trade-off is flavor and texture, which often improves consumption and nutritional intake indirectly.
How do I avoid bitter char when searing?
Bitter flavors result from burning, not browning. Control heat, avoid prolonged contact at extreme temperatures, and remove pieces as soon as a golden crust forms to prevent charring.
Final Thoughts
Searing is a practical, science-backed method to amplify vegetable flavor through targeted heat and surface contact. When you manage moisture, pan temperature, and timing, the results reward simple ingredients with rich, complex notes.
Practice with familiar produce, note how your stove behaves, and use acid and herbs to balance the caramelized profile. Mastering searing turns routine vegetables into compelling dishes that diners notice and enjoy.
See also: Searing vegetables
]]>MSG—monosodium glutamate—works like a precise flavor amplifier when used correctly. Many home cooks overlook how a measured pinch can enhance savory depth without masking base ingredients.
- Key takeaway 1: MSG boosts umami, not saltiness.
- Key takeaway 2: Use ½ to 1 teaspoon per four servings for balance.
- Key takeaway 3: Add toward the end of cooking to preserve potency.
Understanding MSG starts with its chemistry and culinary role. Read the science on monosodium glutamate to connect basic chemistry to practical kitchen technique.
Quick Prep Summary
Prep: 10 minutes. Cook: 20 minutes. Total 30 minutes. These times assume basic mise en place and a medium-hot skillet or wok.
Yield: Serves 4 generous portions. The recipe scales linearly; adjust MSG proportionally and taste as you go.
Ingredients
Choose fresh aromatics and a neutral oil for a clean savory base. The ingredients below support umami layers while allowing MSG to accent, not dominate.
For vegetarian swaps, use mushroom or vegetable broth and firm tofu to recreate texture and glutamate support from natural ingredients.
- 1 teaspoon MSG (monosodium glutamate) – food-grade crystalline form
- 2 tablespoons soy sauce, low sodium recommended
- 1 cup chicken or vegetable broth
- 1 tablespoon olive or neutral oil
- 1 medium onion, finely chopped
- 3 cloves garlic, minced
- 1 teaspoon freshly ground black pepper
- 200 g chicken breast, thinly sliced (or 200 g firm tofu)
- 1 cup mixed vegetables (bell pepper, mushrooms, snap peas)
- 1 teaspoon grated fresh ginger
- 2 green onions, thinly sliced for garnish
- Cooked jasmine or brown rice, for serving
Essential Technique: Why Timing Matters
MSG dissolves quickly and integrates best late in the cook cycle. Adding it during the simmer step preserves its flavor-enhancing properties and prevents over-extraction or aflat taste changes.
Use MSG like a seasoning adjustment. Add a small amount, taste, and refine. This mirrors the approach used in professional kitchens for consistent results.
Step-by-Step Instructions
These steps produce a balanced, savory stir-style entrée. Work briskly once the pan is hot to seal flavors and preserve vegetable texture.
Follow the order below to develop layers: aromatics, protein, vegetables, liquids, then MSG and finishing seasoning.
- Heat the pan: Warm oil in a large skillet or wok over medium-high heat until shimmering. Add onion and sauté 3-4 minutes until translucent.
- Add aromatics: Stir in garlic and ginger, cooking 30-60 seconds until fragrant to build the flavor base.
- Brown protein: Add sliced chicken or tofu and sear 5-6 minutes until cooked through, turning to get even color.
- Vegetables: Toss in mixed vegetables and cook 3-4 minutes to maintain a tender-crisp bite.
- Liquids: Pour in broth and soy sauce, stir, and bring to a gentle simmer to create a cohesive sauce.
- Add MSG: Sprinkle ½ to 1 teaspoon evenly and stir to dissolve. Taste and adjust. MSG should enhance umami, not overpower the dish.
- Reduce: Let the sauce thicken slightly for 4-5 minutes so it glazes ingredients and concentrates flavor.
- Finish: Season with pepper and, if needed, a light pinch of salt. Remove from heat and garnish with green onions.
- Serve: Spoon over steamed rice and enjoy immediately for best texture.
Tips for Success
Precision matters with MSG. Start smaller than you think, taste, and add more in ¼-teaspoon increments to find the perfect balance.
Combine MSG with glutamate-rich ingredients such as mushrooms, tomatoes, or aged cheeses for compounded umami. See the concept explained via umami.
Expert Insight
Keep notes across trials: record amounts, timing, and tasting outcomes. That log accelerates learning and yields reliable results across recipes.
Practical Substitutions and Variations
For vegetarian versions, opt for mushroom broth and umami-rich add-ins like shiitake or dried porcini. Their natural glutamates complement supplemental MSG.
To boost roast flavors, use a small amount of MSG in pan sauces or gravies. It pairs especially well with caramelized onions and reduced broths.
Safety, Storage, and Sourcing
MSG is a purified sodium salt of glutamic acid, present in many natural foods. Review the biochemical basis on glutamic acid for context on naturally occurring glutamates.
Store MSG like other seasonings: airtight, cool, and dry. Kept properly, it remains stable for years and blends readily into dry mixes.
Pro-Caution
Serving Suggestions
Serve with steamed jasmine or brown rice and a crisp vegetable side to contrast the rich sauce. A few toasted sesame seeds add fragrance and texture.
Pair with lighter beverages to refresh the palate. For alternate serving ideas and plating, see our internal Guide to Umami Flavors and stir-fry techniques page for method variations.
Nutrition Snapshot
This dish is lean on carbohydrates and moderate in protein and fat, depending on the protein choice. The example breakdown estimates 280 kcal with ~25 g protein per serving.
Because MSG contains sodium, factor its contribution when calculating total dietary sodium. You can reduce table salt to keep overall sodium lower while maintaining flavor.
| Nutrient | Per Serving |
|---|---|
| Calories | 280 kcal |
| Protein | 25 g |
| Carbohydrates | 12 g |
| Fat | 10 g |
Evidence and Context
Regulatory agencies and decades of research classify MSG as safe when used in typical culinary amounts. For background on additives and regulatory frameworks, consult the general overview on food additives.
Understanding why MSG works requires no mysticism: it amplifies umami receptors in the tongue, enhancing perceived depth and roundness in savory dishes.
FAQ
What is MSG and how does it work?
MSG is the sodium salt of glutamic acid. It activates umami taste receptors and enhances savory perception in foods, especially broths, sauces, and cooked vegetables.
Is MSG safe to use?
Yes. Scientific literature supports its safety for the general population at normal culinary doses. People with known sensitivity should limit intake and communicate with hosts.
How much MSG should I use?
Start with ½ teaspoon per four servings. Taste and add up to 1 teaspoon if needed. Small adjustments matter more than large additions.
Can MSG replace salt?
MSG enhances perceived saltiness and umami, letting you reduce total salt by 20-30% in many recipes while keeping flavor satisfying.
Where can I learn more about umami and technique?
Explore our internal Guide to Umami Flavors for deeper method work and ingredient pairings. For on-the-pan technique, see stir-fry techniques.
To Wrap It Up
MSG is a precise culinary tool that, when applied with care, elevates savory balance across a wide range of dishes. It helps you get fuller flavor from simple ingredients and can reduce reliance on excess salt.
Practice measured additions, document your results, and combine MSG with natural glutamate sources to build layered, craveable meals. Use the techniques above to bring professional-level umami to everyday home cooking.
See also: MSG
]]>
- Maillard browning creates the crust and concentrated flavor.
- Dry surface and high, steady heat prevent steaming and promote caramelization.
- Fat and pan choice determine how fast and evenly heat transfers to the scallop.
- Timing is the gatekeeper: seconds matter for texture.
Prep and Cook Time
Preparation: 10 minutes. Pat scallops dry thoroughly and remove the side muscle to ensure uniform contact with the pan. Doing this reduces surface moisture, which prevents steaming and lets the Maillard reaction work.
Cooking: 6 minutes. Sear on medium-high heat about 2 minutes per side, then finish with butter basting for 1.5–2 minutes. Resting is minimal; serve immediately for the best texture.
Yield
This recipe yields approximately 16 large sea scallops, serving four people at four scallops each. Adjust portions by scaling ingredients proportionally while preserving pan space to avoid overcrowding.
When increasing batch size, cook in small batches to maintain surface temperature and consistent crust development. Crowding lowers pan temperature and promotes steaming rather than searing.
Difficulty Level
Rated medium: the technique relies on precise heat control and fast, attentive handling. The margin for error is narrow; overcooking turns scallops rubbery while undercooking leaves them raw inside.
Practice and simple tools—an accurate stove setting, heavy skillet and tongs—deliver repeatable results. Understanding the why behind each step speeds skill acquisition.
Ingredients
16 large sea scallops, patted dry with the side muscle removed. Use dry-packed scallops where possible to avoid added water. See the scallop profile on Wikipedia for species and market terms.
2 tbsp grapeseed oil, 2 tbsp unsalted butter, 1 tsp kosher salt, 1/4 tsp black pepper, 1 garlic clove (smashed), 1 sprig thyme, 1 lemon (zested and juiced). Choose a neutral oil with a high smoke point to keep pan temperature stable and allow fast surface browning.
Instructions
Follow a strict sequence. Clean and dry scallops first, season second, then heat the pan until the oil shimmers. That order ensures each scallop hits the hot surface ready to caramelize.
Maintain spacing. Lay scallops into the pan so each has full contact with the surface and at least a finger-width gap between neighbors. Avoid moving them until the crust forms.
- Prepare the scallops: Use paper towels to pat each scallop completely dry. Inspect for residual moisture; remove the side muscle if present to get even contact with the pan.
- Season: Lightly salt and pepper both sides immediately before cooking. Salt drawn on too early can pull moisture to the surface.
- Heat the pan: Use a heavy-bottomed stainless steel or cast-iron skillet over medium-high heat. Add grapeseed oil and heat until it shimmers but does not smoke. The pan should register hot and stable.
- Sear: Place scallops in the pan with space between them. Do not move them for about 2 minutes. When the crust is deep golden, flip once and proceed to butter basting.
- Flip and baste: Add butter, smashed garlic and thyme. Tilt the pan and spoon the melted butter over each scallop for 1.5–2 minutes until firm but springy to the touch. Remove immediately and finish with lemon juice and zest.
- Serve: Plate quickly so scallops retain heat and texture. Garnish as desired and avoid long hold times on warm plates.
Pro-Caution
After the warning above, let the pan recover its heat before starting the next batch. This recovery step restores surface temperature and ensures consistent browning across batches.
Searing sequence (why order matters)
Dry scallops contact a hot surface and immediately begin Maillard browning, which produces new flavor compounds and color. The chemical process behind that browning is the Maillard reaction, and it requires high surface temperature and low moisture.
Butter basting adds flavor and promotes even cooking by surrounding the scallop with hot fat. Use clarified butter if you need a slightly higher smoke tolerance without losing the nutty butter flavor.
Chef’s Notes: Tips for Success
Master texture contrast: A crisp crust plus a tender interior depends on steady heat and a dry surface. If the crust browns too quickly, lower the heat slightly; if it never browns, raise it.
Choosing the right pan: Cast iron and stainless steel store heat and distribute it evenly, which sustains the surface temperature needed for reliable sears. Thin pans lose heat quickly and create uneven results.
Expert Insight
Understand heat transfer. The pan conducts energy into the scallop; a heavy pan minimizes temperature drop when food hits the surface. Read about heat transfer fundamentals on Heat transfer (Wikipedia).
Choose oils with high smoke points like grapeseed or avocado. Avoid extra-virgin olive oil for high-temperature searing because it oxidizes and burns at lower temperatures, adding off-flavors.
Serving Suggestions
Serve seared scallops over a pea purée, citrus risotto, or a light beurre blanc to complement their natural sweetness. Acidic elements like lemon or a wine reduction brighten the palate and balance richness.
Garnish with microgreens or thinly sliced radish for texture contrast and color. For complementary courses or technique cross-training, see our seafood searing guide and check recommended tools at kitchen tools.
Nutritional Information
Per serving (4 scallops): Calories ~150, Protein ~24g, Carbs ~2g, Fat ~5g. Scallops deliver a high protein-to-calorie ratio and provide key micronutrients like selenium and B12.
Adjust serving fats and accompaniments to match dietary goals. For lower fat, omit or reduce butter and finish with a lemon vinaigrette instead.
| Nutrient | Per Serving (4 scallops) |
|---|---|
| Calories | 150 |
| Protein | 24g |
| Carbohydrates | 2g |
| Fat | 5g |
FAQ
Q: Why sear scallops instead of cooking them gently?
Searing creates concentrated surface flavors through the Maillard reaction and yields a contrasting texture between crust and interior. Gentle cooking lacks that crust and often yields a uniform, softer texture.
Q: How do I avoid rubbery scallops?
Work quickly and monitor firmness. Cook until scallops feel firm but still springy—this typically means 2 minutes per side for large scallops, plus a short baste. Overcooking shortens proteins excessively and yields a rubbery bite.
Q: Do scallop types affect searing?
Yes. Dry-packed scallops sear better because they contain less added water. Wet-packed scallops often have retained brine or phosphate solutions that make searing difficult. Inspect packaging and ask your fishmonger when in doubt.
Q: Can I use the same technique for other seafood?
Absolutely. The principles—dry surface, high heat, short cook time—apply to shrimp, tuna steaks and firm white fish. Adjust time and thickness to match each species’ thermal properties.
Q: What is the single most important step for success?
Patting scallops completely dry right before they hit the pan. Moisture prevents proper contact and causes steaming, which defeats crust formation and flavor development.
In Retrospect
Searing scallops combines predictable physical chemistry with simple, repeatable technique. Controlling moisture, maintaining pan temperature and timing each step produces the hallmark golden crust and a tender interior.
Practice a few batches, observe the crust development and adjust heat in small increments. With a disciplined sequence and the tips provided, you will reliably produce perfectly seared scallops.
See also: Seared Scallops
]]>
- Key takeaways: Dry mushrooms and avoid overcrowding to trigger surface browning.
- Use high heat and a sturdy pan to sustain the temperatures needed for Maillard chemistry.
- Balance oil and butter: oil for sear, butter for flavor finish.
- Adjust time and spacing by mushroom variety and thickness.
Prep and Cook Time
Preparation: 10 minutes. This includes cleaning and slicing mushrooms to uniform thickness so they cook evenly.
Cooking: About 12 minutes over medium-high heat in small batches for consistent crust formation. Total time typically runs under 25 minutes.
- Preparation: 10 minutes
- Cooking: 12 minutes
- Total Time: 22 minutes
Yield
This recipe yields a versatile seared mushroom component for mains or sides. A pound of cremini delivers substantial volume once reduced by evaporation.
Serve as a side for four diners or incorporate into salads, bowls, or sandwiches to stretch flavor across dishes.
- Serves 4 as a side dish or ingredient
Difficulty Level
Technically straightforward but timing-sensitive. The technique is easy to learn and repeats reliably when you control moisture and heat.
Beginners should practice one pan at a time, focusing on batch size rather than rushing through the skillet.
- Easy to Medium
Ingredients
Use fresh, firm mushrooms and choose a high-smoke-point oil. Butter adds flavor but lowers the maximum safe pan temperature.
Scale ingredients by portion. For dairy-free versions, replace butter with a neutral oil or a finishing knob of dairy-free butter after searing.
- 1 lb (450g) cremini mushrooms, cleaned and sliced 1/4-inch thick
- 2 tbsp unsalted butter (or olive oil for dairy-free)
- 1 tbsp high-smoke point oil (grapeseed or avocado oil recommended)
- 1/2 tsp kosher salt
- 1/4 tsp freshly ground black pepper
- 2 garlic cloves, finely minced
- 1 tbsp fresh thyme leaves (optional)
- 1 tsp lemon juice (optional, for bright finishing)
Instructions
Follow sequencing: dry, heat, oil, space, sear, season, finish. Each step affects the pan temperature and surface chemistry.
Work in small batches to avoid crowding. Overcrowding traps steam and prevents the surface temperature from rising to Maillard-friendly levels.
- Pat mushrooms dry completely using a clean kitchen towel; moisture inhibits proper searing and stalls the Maillard reaction.
- Preheat a heavy-bottomed skillet (preferably cast iron or stainless) over medium-high heat until it shimmers.
- Add oil and butter, swirling to coat. Use oil for heat tolerance; butter can be added late for flavor.
- Spread mushrooms in a single layer without overcrowding; steam forms if pieces touch densely.
- Cook undisturbed for 5–6 minutes to form a golden crust. Flip when edges are deeply browned.
- Season immediately after flipping to avoid premature moisture extraction.
- Add garlic and thyme once mushrooms are ~75% done; stir for 2–3 minutes to release aroma without burning.
- Finish off heat with a squeeze of lemon to brighten the rich, earthy notes.
- Serve hot to showcase contrast between crisped edges and tender interiors.
Why Chemistry Matters
The key reaction is the Maillard reaction, a set of complex interactions between amino acids and reducing sugars that produces brown pigments and savory compounds. Temperature and dryness dictate if this chemistry proceeds.
Mushrooms also contribute unique flavor precursors. Their umami compounds interact with Maillard products to give the deep, roasted notes you expect from a great sear. Learn more about umami and its role in savory perception.
Key Principles
Three variables control success: moisture, heat, and fat. Tweak each to push surface temperature above water boiling and into Maillard territory.
Understand how mushroom biology affects cooking. The fungal tissues hold water differently by species; adjust spacing and heat accordingly.
Moisture Management
Water prevents surfaces from reaching the ~150°C (300°F) needed for Maillard chemistry because the pan temperature remains tied to water’s boiling point. Dry surfaces brown; wet surfaces steam.
Pat mushrooms dry or brush off dirt rather than rinsing. Also, avoid salting too early because salt draws water out by osmosis and can sabotage crust formation.
Heat and Pan Choice
A cast-iron skillet holds heat best and resists temperature drop when food is added. See the cookware behavior on the cast-iron skillet page for material context.
Preheat thoroughly and use medium-high heat. If the pan smokes immediately, reduce slightly; if it cools when mushrooms hit the surface, work in smaller batches.
Fats and Flavor
Fats transfer heat and coat surfaces to promote even browning. Use a neutral, high-smoke-point oil for initial searing and a knob of butter near the end for aroma.
Butter contains milk solids that brown at lower temperatures; combine fats for performance and flavor control. Adjust amounts to taste and dietary needs.
Expert Insight
Step-by-step technique refinement
Batch size matters. If mushrooms touch, steam pockets form and the surface never dries. Aim for a single, non-overlapping layer.
Timing changes by species: thin chanterelles brown faster; portobellos require slightly longer to release moisture but reward with greater depth of flavor.
Chef’s Notes: Tips for Success
Moisture control: Wipe or brush mushrooms rather than rinsing. If you must rinse, dry thoroughly before cooking to avoid steam formation.
Pan selection: Cast iron or heavy stainless steel is preferred for steady, even heat retention. Non-stick pans rarely reach the temperatures needed for a true sear.
- Heat strategy: Start hot to achieve color, then regulate to prevent burning.
- Make ahead: Sear mushrooms in advance but add fresh herbs and citrus only at service.
- Variations: Match mushroom variety to the dish—for example, shiitake or oyster bring stronger earthiness.
Pro-Caution
Serving Suggestions
Seared mushrooms pair with grilled proteins, roasted vegetables, or toasted bread. Their concentrated flavors act as a high-impact garnish or a main ingredient in vegetarian plates.
Finish with a small scatter of fresh herbs, a dusting of grated cheese, or a calibrated drizzle of acid to balance fat and intensify perception of umami.
Nutrition
Seared mushrooms remain low-calorie while adding savory depth. Fat and salt additions change the nutrition profile more than the mushrooms themselves.
For precise counts, track added fats and finishes; basic seared mushrooms are modest in calories and provide small amounts of protein and fiber.
| Nutrition per serving | Calories | Protein | Carbs | Fat |
|---|---|---|---|---|
| Mushroom Sear | 85 | 3g | 6g | 6g |
Explore related technique articles such as Mastering the Art of Sautéing and our internal Mushroom Searing Guide for recipe variations and plating ideas.
FAQ
Why is searing mushrooms different from searing meat?
Mushrooms contain up to ~90% water and lack the higher fat content found in many meats. That water must evaporate before the surface temperature can rise enough for Maillard browning. The result: mushrooms will steam if not dried and properly spaced.
What chemical reactions create the seared flavors?
The Maillard reaction produces browned pigments and a complex mixture of flavor compounds when amino acids and reducing sugars react at elevated temperatures. The reaction differs from pure sugar caramelization and yields savory, nutty, roasted notes.
How does moisture affect browning?
Exposed water buffers the pan temperature at water’s boiling point, preventing the higher temperatures required for Maillard reactions. Drying prior to pan contact and avoiding early salting are practical controls.
Does mushroom type change technique?
Yes. Different species vary in water content, tissue density and sugar levels. Adjust heat and cook time: delicate varieties brown quickly, while dense caps need longer to release internal moisture.
What role do oil and butter play?
Oil raises the pan’s usable heat range, while butter contributes flavor through its milk solids. Many chefs sear using oil, then add butter at the end for aroma and mouthfeel.
Understanding the science behind searing turns a routine sauté into a repeatable skill. Apply these steps, and the next time you hear that satisfying sizzle you’ll know the chemistry doing the work beneath the surface.
See also: mushroom sear
]]>
- Timing is key: 2–3 minutes in boiling water for large shrimp.
- Brine first: A short salt soak plumps flesh and locks moisture.
- Shock in ice: An ice bath stops carryover cooking instantly.
- Season the liquid: Poaching water builds flavor into the meat.
Why proper technique matters
Shrimp cook very quickly and their proteins tighten as they heat. Therefore, slight timing or temperature errors cause rubbery or underdone results.
Good technique focuses on even heat, the right salt level, and a fast chill after cooking. These three controls deliver consistent, tender meat.
Prep and cook time
Preparation: 15 minutes. Cooking: 2–3 minutes active boiling for large shrimp; 5–7 minutes total including warm-up and shock.
Adjust time for shrimp size: smaller shrimp need less time and jumbo shrimp may take up to 4 minutes. Always measure by visual cues and a timer.
Ingredients at a glance
Use a clean list of aromatics and salt to flavor the poaching liquid. Fresh lemon, crushed garlic, whole peppercorns, a bay leaf, and a full teaspoon of a seafood blend or Old Bay work well.
Buy firm, translucent shrimp with no ammonia smell and uniform size for even cooking. For background on shrimp biology and types, see Shrimp.
- 1 lb large shrimp (16–20), peeled and deveined, tails on
- 6 cups cold water
- 1 lemon, halved, plus wedges
- 3 garlic cloves, crushed
- 1 tbsp kosher salt
- 1 tsp whole peppercorns
- 1 bay leaf
- 1 tsp seafood seasoning
- Fresh parsley for garnish
Step-by-step instructions
Rinse shrimp briefly under cold water and pat dry to remove excess moisture. Prepare a large pot with cold water and add the aromatics and salt to start the poaching liquid.
Bring the liquid to a steady rolling boil, then add the shrimp in a single layer. Set a timer for 2 minutes, check for opaque flesh and a bright pink color, then allow one extra minute only if shrimp are large.
- Build the broth: Combine cold water, salt, garlic, lemon halves, peppercorns, bay leaf, and seasoning. Bring to a rolling boil over high heat.
- Add shrimp: Spread shrimp evenly, then reduce slightly to maintain a gentle boil so water still moves but does not overflow.
- Time precisely: Cook 2–3 minutes until shrimp turn opaque and form a loose “C”. Avoid tight curls.
- Ice shock: Transfer shrimp immediately to an ice bath to stop cooking and set texture.
- Peel and finish: Peel when cool, leaving tails if desired. Serve chilled or gently warmed with sauces.
Tips for consistent results
Selecting shrimp: Choose shrimp with firm flesh, a mild sea scent, and consistent size for even cooking. Ask your fishmonger about catch date and storage.
Starting cold: Begin with cold water to let shrimp heat through evenly; this prevents a cooked outside with a raw center. For technical context on heat transfer and boiling, reference Boiling.
Brining and timing
A short brine of about 1 tablespoon kosher salt per cup of water for 15–30 minutes firms and plumps the meat. Rinse briefly after brining to remove surface salt before poaching.
Use a reliable kitchen timer and check the first shrimp at 90 seconds to learn how your stove and pot behave. Then adjust for future batches.
Expert Insight
Also, use a wide pot so shrimp lay in a single layer; overcrowding lowers the water temperature and changes cook time. If you must cook large amounts, work in batches to preserve consistent results.
Seasoning the poach
Season the water boldly because shrimp absorb flavor during poaching. Add citrus, herbs, and whole spices rather than heavy salt alone for a balanced profile.
Reserve the strained poaching liquid as a stock for soups, risottos, or sauces; it concentrates shrimp flavor. For more on seafood types and handling, see Seafood.
Pro-Caution
Serving suggestions
Chilled boiled shrimp make an elegant appetizer with a classic cocktail sauce or aioli. Arrange on a platter with lemon wedges and fresh herbs for contrast and aroma.
Warm shrimp pair well with pasta, grain bowls, or tacos; toss briefly in melted garlic butter or a bright vinaigrette to enliven the flavor. Also, serve with crusty bread to soak up any juices.
Storage and make-ahead
Cool shrimp in the ice bath, drain well, and store in an airtight container for up to 48 hours in the refrigerator. Keep them chilled on ice when serving to maintain texture and safety.
For long-term storage, freeze cooled shrimp on a tray, then transfer to a sealed bag. Label with date and use within three months to preserve quality.
Common troubleshooting
If shrimp taste rubbery, you likely overcooked them or used water that was too hot before adding shrimp. Reheating cooked shrimp also dries them quickly, so rewarm gently or serve chilled.
If shrimp smell off or have a strong ammonia odor, discard them and choose a different batch. Freshness matters for both flavor and safety when cooking shellfish.
FAQ
How long should I boil shrimp?
Cook large shrimp for 2–3 minutes in gently boiling water, counting from the moment they enter the pot. Use visual cues: opaque flesh and a loose “C” shape signal doneness.
Should I peel shrimp before boiling?
Boiling with shells on preserves flavor and moisture, so many chefs leave the shells during cooking. Peel after chilling for easier handling and presentation.
Does brining make a difference?
Yes. A short brine firms the flesh and enhances juiciness by increasing water retention inside the meat. Rinse briefly after brining to balance surface salt.
How do I avoid rubbery shrimp?
Time precisely, use a rolling but not violent boil, and shock shrimp in ice immediately after cooking. Those three steps prevent overcooking and preserve tenderness.
Can I reuse the poaching water?
Absolutely. Strain and refrigerate the poaching liquid; use it as a flavorful stock for soups, chowders, or sauces. It concentrates shrimp essence and reduces waste.
Final notes
Mastering boiled shrimp relies on a few repeatable controls: uniform size, proper salt, precise timing, and an ice shock. Focus on these areas and you will produce tender, juicy shrimp consistently.
Keep experimenting with aromatics and seasoning levels to match your palate. With practice, you will learn how small adjustments affect texture and flavor for perfect results every time.
See also: boiled shrimp
]]>
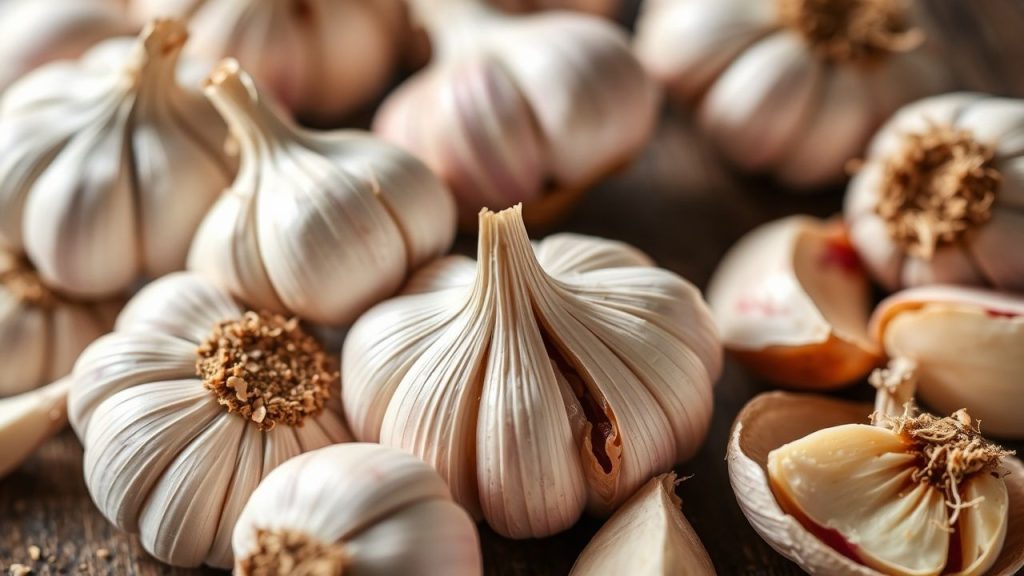
- Allicin forms instantly when garlic is crushed and left to rest.
- Heat destroys some allicin but not all beneficial sulfur compounds.
- Simple prep—crush, wait, then cook briefly—maximizes potency.
- Practical cooking preserves flavor and many healthful properties.
What allicin is and why it matters
Allicin is a sulfur-containing compound produced when garlic cells rupture. The molecule gives freshly crushed garlic its characteristic sharp, spicy aroma.
That aroma links directly to biological activity: allicin is reactive and interacts with microbes and free radicals. For technical context, see allicin on Wikipedia.
How garlic makes allicin
The precursor molecule inside intact garlic is called alliin. When the cell structure breaks, the enzyme alliinase converts alliin into allicin in seconds.
Enzymes drive this conversion, so timing matters. For background on the class of proteins that catalyze these reactions, consult enzyme basics.
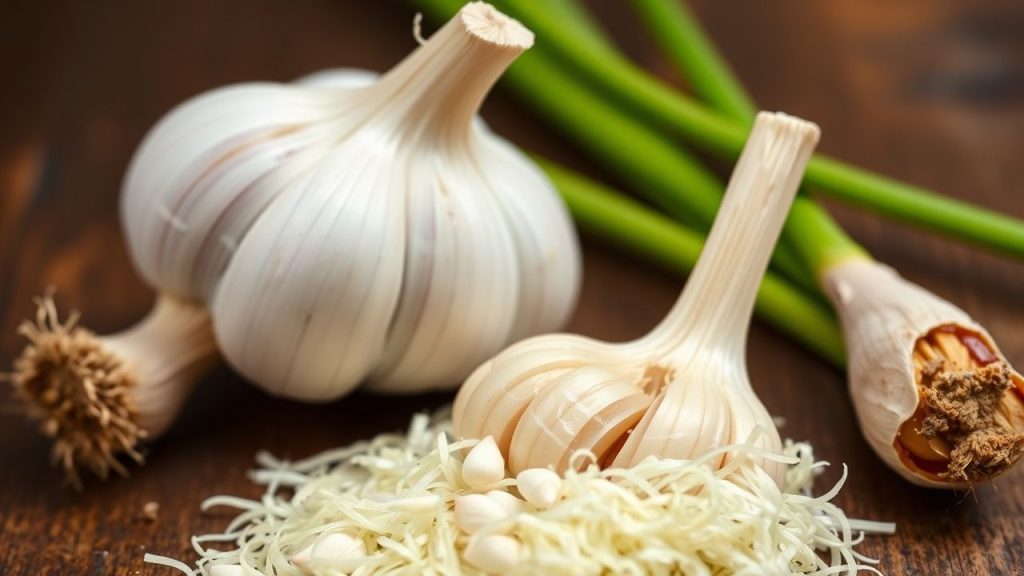
Practical prep: maximize allicin in the kitchen
To unlock allicin efficiently, crush or finely chop garlic and let it sit for 5–10 minutes before applying heat. This pause allows the enzyme to complete conversion and raises immediate allicin levels.
Use moderate heat and add crushed garlic late in cooking when possible. Brief exposure reduces thermal breakdown and preserves more of the pungent profile.
Expert Insight
How heat and time change allicin
Allicin is chemically unstable; heat shifts it into other sulfur compounds. Those breakdown products still have flavor and bioactivity, but they differ from fresh allicin.
Rapid, high heat accelerates breakdown. A short sauté at medium heat preserves more active compounds than prolonged roasting or deep frying.
Recipe: Garlic–Tomato Sauté (allicin-aware)
Prep: 10 minutes | Cook: 15 minutes | Total: 25 minutes. Serves 4. Easy.
Ingredients: 8 large garlic cloves (peeled, crushed or finely chopped), 2 tbsp extra virgin olive oil, 1 medium onion diced, 1 cup cherry tomatoes halved, 1/2 tsp sea salt, 1/4 tsp black pepper, 1 tbsp fresh lemon juice, 2 tsp chopped fresh parsley, optional pinch red chili flakes.
Step-by-step
1. Prepare garlic: Crush or finely chop the cloves to trigger the alliin → allicin conversion. Let the crushed garlic rest 5–10 minutes before cooking.
2. Sauté onion: Heat olive oil over medium heat and cook diced onion until translucent, about 5 minutes. Stir to prevent browning.
3. Add garlic and tomatoes: Stir in the rested garlic. Sauté 1–2 minutes until fragrant but not browned. Add tomatoes, salt, pepper, and optional chili, then cook 5–7 minutes until tomatoes soften.
4. Finish: Remove from heat, stir in lemon juice and parsley. Serve immediately with grilled fish, roasted chicken, or warm pasta.
For more on culinary applications and the health angle, see our internal guides on raw garlic benefits and garlic cooking basics.
Tips for success
Let garlic rest: Allow 5–10 minutes after crushing for maximal allicin formation. This step is simple and impactful.
Control heat: Add garlic toward the end of the cook cycle and avoid intense direct heat that browns and degrades sulfur compounds.
Storage: Store prepared mixtures in an airtight container in the refrigerator and consume within 48 hours to keep flavor and potency.
Pro-Caution
Biological and nutritional context
Besides allicin, garlic contains a matrix of sulfur compounds, vitamins, and minerals that interact biologically. Breakdown products still contribute to antimicrobial and antioxidant activity.
For a broader taxonomic and culinary perspective, review the garlic entry on Wikipedia: Allium sativum. That page summarizes botanical traits, cultivation, and historical use.
Common misconceptions
Claim: Roasted garlic has no benefits. Reality: Roasting reduces allicin but forms other sulfur compounds that still provide flavor and some bioactivity.
Claim: Supplements always match fresh garlic. Reality: Formulation and release mechanism determine whether a supplement delivers allicin; not all do.
Real-world applications
Chefs leverage the timing trick—crush then wait—to build bold raw garlic notes in dressings and finishing sauces. Nutrition professionals use the same step when recommending dietary strategies to preserve active compounds.
In clinical or research settings, standardized preparations are necessary to measure allicin’s effects. The molecule’s instability complicates dosing but not its culinary value.
To wrap practical learning into habit
Adopt two kitchen habits: crush and rest, add garlic late in the cook. These steps require seconds and yield a noticeable uptick in aroma and potential activity.
Keep a small jar of crushed raw garlic for finishing dishes when you want maximum pungency. Use sparingly to control bite and digestive comfort.
FAQ
What is allicin and where does it come from?
Allicin is a volatile sulfur compound produced when garlic cells break and the enzyme alliinase converts alliin into allicin. This reaction occurs within seconds after crushing or chopping.
How can I preserve allicin while cooking?
Crush garlic and let it rest 5–10 minutes before applying heat. Cook on moderate heat and add garlic late to limit thermal degradation.
Does cooked garlic have the same benefits as raw?
Cooked garlic contains different sulfur compounds formed from allicin breakdown. These compounds still add flavor and may retain some health-promoting properties, though they differ from fresh allicin.
Are garlic supplements a good source of allicin?
Some supplements are formulated to release allicin or its precursors, but not all do. Look for products with validated release profiles or consult a healthcare professional.
How much garlic should I use daily?
Moderate culinary amounts—one to three cloves per day—are common in dietary patterns that include garlic. Individual tolerance varies; consult a clinician if you have medical concerns.
Unlocking allicin is a straightforward blend of simple technique and chemical timing. A brief rest after crushing and mindful cooking preserve the pungent punch that makes garlic both a flavor powerhouse and a subject of scientific interest.
See also: Allicin
]]>
- Constant stirring extracts more starch for silkier texture.
- Intermittent stirring preserves a firmer, nuttier bite.
- Broth temperature and rice choice influence results as much as stirring style.
Origins and the role of rice
Risotto traces its roots to northern Italy, where short-grain rice varieties made creamy rice dishes possible long before modern techniques. The dish developed in regions like Lombardy and Piedmont that grew rice suited to slow, wet cooking.
To learn more about the cultural context, see the historical background on risotto. Understanding origin helps you respect traditional technique while experimenting thoughtfully.
Prep, timing, and practical setup
Set yourself up before you begin. Warm the broth, measure ingredients, and use a wide, heavy-bottomed pan so heat spreads evenly across the rice bed.
Prep also includes choosing the rice. Varieties such as Arborio concentrate starch and perform predictably; study the grain differences on the Arborio rice page to match grain behavior to your desired texture.
Ingredients and yield
Keep the list short and precise: short-grain rice, warm stock, a splash of wine if desired, butter, cheese, aromatics, and seasoning. Use quality stock for depth; it contributes directly to the final flavor profile.
This recipe yields four portions. For scalability, maintain the rice-to-broth ratio and the same gradual addition method rather than adding all liquid at once.
Step-by-step instructions
Start by sweating finely diced onion in oil and a tablespoon of butter until translucent. Add rice, toast briefly to coat each grain, then deglaze with wine if using.
After the wine evaporates, add warm broth in ladlefuls, stirring according to your chosen method. Finish with butter and grated hard cheese, like Parmigiano-Reggiano, and rest briefly before serving.
Complete ingredient list
1 ½ cups Arborio rice, rinsed lightly; 5 cups warm low-sodium stock; 3 tbsp butter; 1 small onion, finely chopped; ½ cup dry white wine (optional); ¾ cup freshly grated Parmigiano-Reggiano; 2 tbsp olive oil; salt and freshly ground black pepper; chopped parsley for garnish.
Keep stock warm in a separate saucepan and use a wooden spoon. A wooden spoon reduces friction against grains and gives tactile feedback as the risotto thickens.
Techniques compared: constant vs intermittent
Both methods produce excellent results if executed with control over temperature and liquid addition. The difference lies in how much starch you coax from the grains and how much oxygen you introduce while stirring.
Below, each approach is described so you can match method to desired texture and kitchen tempo.
Constant stirring: mechanics and outcomes
Constant stirring keeps grains in gentle motion. This steady agitation promotes continuous surface abrasion and sustained starch release, producing a cohesive, emulsion-like creaminess.
Use a relaxed wrist and short strokes; aggressive scraping can fracture grains and turn texture gluey. Maintain medium-low heat and add stock gradually, allowing each ladle to be mostly absorbed before the next addition.
Intermittent stirring: mechanics and outcomes
Intermittent stirring reduces agitation and oxygen exposure. You add broth, then let the rice sit undisturbed for moments with occasional gentle swirls to redistribute heat.
This approach tends to yield a firmer core and more pronounced individual grain texture. The result can be slightly denser with a nuttier note since starch release is moderated.
When to choose each method
Choose constant stirring when you want a glossy, cohesive risotto that lightly coats a spoon. Chefs who pursue classic Piedmont- or Lombardy-style risottos often favor this technique.
Opt for intermittent stirring when you need to multitask or when you prefer a textural contrast between the creamy matrix and firmer grains. Both approaches work for professional plating and home service alike.
Pro tips and common pitfalls
Control heat at medium-low to avoid thermal shock that causes uneven cooking. Tasting frequently beats relying on time alone; aim for al dente with a slight cream around each grain.
Salt late in the cooking process; concentrated stock plus cheese can push sodium levels high if you salt early. Keep finishing butter and cheese ready to fold in off heat for optimal emulsification.
Expert Insight
When you stir, do so with a wooden spoon and employ short, controlled movements. That reduces grain damage and helps you sense the change in viscosity as starch gelatinizes.
Pro-Caution
Serving and finishing
Finish with cold butter and freshly grated Parmigiano-Reggiano to enrich mouthfeel and add savory balance. Rest the risotto for 1–2 minutes under a lid before serving to let flavors integrate.
For presentation, spoon onto warmed plates and serve immediately; risotto continues to thicken as it cools, so time service to peak texture. Consider a light vegetable side or a peppery salad for contrast and acidity.
Nutrition snapshot and notes
Per serving values vary with ingredient choices, but a typical home-style risotto with butter and cheese runs near 400–450 kcal per portion. Adjust fat and cheese to meet dietary needs.
For more on Italian pantry essentials and building balanced plates, consult our internal resources: Italian Cooking Basics and our guide on rice selection at Rice Varieties.
| Nutrient | Per Serving |
|---|---|
| Calories | 420 kcal |
| Protein | 12 g |
| Carbohydrates | 55 g |
| Fat | 15 g |
Further reading and reference
To understand rice physiology and starch behavior in more depth, review the general rice overview on rice and consult the entry for Parmigiano-Reggiano to appreciate the finishing flavors that define classic risotto.
Studying grain chemistry and regional technique gives practical intuition for troubleshooting texture issues and tailoring results to taste and service conditions.
FAQ
1. Does stirring risotto make it more or less healthy?
Stirring only affects texture and starch release, not intrinsic nutrition. Healthiness depends on ingredient choices—stock quality, butter, cheese, and portion size.
Reduce fat by trimming finishing butter or replacing part of the cheese with nutritional yeast, but accept some fat is needed to create the classic mouthfeel.
2. How long should I stir for best results?
Overall liquid absorption usually takes 18–22 minutes, with active stirring or periodic swirling during that window. The final 5–7 minutes determine creaminess and require closer attention.
Rely on texture rather than time alone: aim for rice that is tender outside with a slight chew at the center.
3. Can I make risotto ahead?
Partially cook risotto to just short of doneness, cool quickly, and refrigerate. Reheat gently with warm stock, finishing with butter and cheese just before serving.
Do not fully finish risotto early; it will over-thicken and lose the ideal creamy consistency on hold.
4. Is a specific rice required for risotto?
Short-grain varieties with high starch content perform best. Arborio is common; other varieties like Carnaroli excel for their balance of creaminess and firm bite.
Review the grain characteristics on the Arborio page and explore other short-grain types to match texture goals.
5. Should I always use wine?
Wine adds acidity and aromatic lift, but it is optional. If you omit it, a splash of bright acid—like lemon juice at the end—can provide the same counterpoint to richness.
Use small quantities and taste as you go; the goal is balance, not domination of any single ingredient.
Mastering stirring lets you control the final dish. Whether you prefer the meditative rhythm of constant stirring or the lighter touch of intermittent movement, technique plus ingredient quality leads to dependable, delicious risotto.
See also: risotto
]]>Recipe myths shape how many cooks approach the kitchen, often turning adaptable guidance into rigid dogma. Professional cooks treat recipes as tested frameworks; they analyze ingredient function and adjust with intent to improve outcomes.
- Key insight: Recipes serve as adaptable guides, not immutable laws.
- Key insight: Small substitutions preserve texture and flavor when you respect function.
- Key insight: Understanding ingredient roles shortens troubleshooting time and saves batches.
Prep and Cook Time (Practical Notes on Recipe Myths)
Prep Time: 15 minutes. This reflects a straightforward mise en place for a standard adaptable cake and assumes familiarity with basic technique.
Cook Time: 25–30 minutes. Rely on sensory checks: toothpick, spring-back, and crust color rather than strict minutes when you test the claim behind timing-related recipe myths.
Yield (Scaling and Recipe Myths)
Serves: 4 hearty portions. Yield changes with mix-ins and batter volume; the numbers on a recipe are starting points, not fixed outcomes.
Scaling works predictably when you preserve functional ratios. Double ingredients and monitor baking time; expect about 10–20% longer bake when you increase volume, and adjust by sensory checks.
Difficulty Level (How Myths Affect Skill Assessment)
Skill: Medium. This level expects you to experiment with measured substitutions and observe batter behavior rather than follow instructions blindly.
Practicing swaps—small, documented changes—builds competence quickly. That process converts recipe myths into tested techniques you can rely on.
Ingredients
Below are baseline ingredients for a simple adaptable cake and the functional groups they represent: structure, leavening, fat, liquid, binder, and flavor. Recognize roles to test or adjust with confidence and to debunk common recipe myths.
- 2 cups all-purpose flour, sifted — structure
- 1 tbsp baking powder — leavening
- 1 tsp salt — balance
- 3/4 cup granulated sugar — sweetness, moisture regulation
- 1/2 cup unsalted butter, melted — fat for tenderness
- 1 cup whole milk — liquid for consistency
- 2 large eggs — binder and lift
- 1 tsp vanilla extract — flavor anchor
- Optional mix-ins: 1/2 cup berries, chocolate chips, or nuts
When you change one functional group, compensate elsewhere. For example, replacing half the milk with yogurt increases acidity; adjust leavening accordingly to maintain rise and avoid common recipe myths about one-size-fits-all substitutions.
Instructions (Stepwise, with Rationale to Counter Recipe Myths)
1. Preheat: Set oven to 350°F (175°C). Grease and flour a 9-inch pan or line with parchment for clean release. Preheating stabilizes oven environment, debunking the myth that short preheats don’t matter.
2. Combine dry: Whisk flour, baking powder, salt, and sugar to distribute leavening evenly. Even distribution prevents uneven rise and supports predictable results.
3. Mix wet: Beat eggs lightly, then whisk in melted butter, milk, and vanilla until homogeneous. Emulsified fat and liquid create a consistent batter and reduce pockets that cause structural failures.
4. Combine: Fold wet into dry until just combined. Small lumps are fine; overmixing develops gluten and toughens crumb—a frequent source of myths about required mixing time.
5. Add mix-ins: Fold berries or chips gently. Toss heavy or wet add-ins in a dusting of flour to help suspend them and avoid sinking during bake.
6. Bake: Pour batter into pan and bake 25–30 minutes. Tent with foil if the top browns too quickly. Cool 10 minutes in pan, then transfer to a wire rack to finish cooling evenly.
Trust sensory checks rather than strict minutes: altitude, oven variance, and ingredient temperature all influence timing. This approach dissolves timing-related recipe myths into practical checks you can repeat.
Tips for Success
Customize sweetness: Start at 3/4 cup sugar. Reduce by 1–2 tablespoons when using sweet mix-ins or swap part sugar for honey; reduce other liquids as needed to keep texture stable.
Flour swaps: Replace up to 50% all-purpose with whole wheat pastry flour for a nuttier flavor. Higher substitution rates require added hydration or tenderizers to avoid dense crumb and to counter myths that whole grain simply drops in with no change.
Expert Insight
Milk substitutions: Plant milks (almond, oat) work for most quick breads. Expect slight flavor shifts and add 1–2 teaspoons extra fat if the batter feels too thin to maintain mouthfeel.
Pro-Caution
Mix-in caution: Heavy or dense items weigh batter down. Fold them gently and limit to 1/2 cup to preserve lift and crumb structure.
Make-ahead: Wrap cooled cake tightly and store at room temperature overnight to let flavors meld. Refrigerate only if you use perishable toppings to avoid staling and texture change.
Serving Suggestions
Serve slices lightly dusted with powdered sugar or with a drizzle of honey for balance. Fresh berries or a small dollop of whipped cream add contrast and brighten presentation.
For a tangy finish, mix Greek yogurt with lemon zest and a pinch of salt. Pair with tea or coffee to showcase subtle crumb and flavor nuances.
Nutritional Info
Per serving estimate: Calories ~320; Protein 6 g; Carbs 42 g; Fat 12 g. Values shift with substitutions and portion size, so treat these as approximations rather than absolutes.
Nutrition changes when you modify ingredients. Swapping oil for butter alters saturated fat; reducing sugar lowers calories but may affect browning and moisture retention, which are practical trade-offs rather than myths.
Understanding Where Recipe Myths Come From
Many recipe myths originate from tradition, oversimplified instruction, and misapplied science. A step that succeeds in one kitchen can fail in another because of equipment, ingredient quality, or environment.
To evaluate claims, read primary technical resources. For fundamental chemical reactions that affect color and flavor, consult the Maillard reaction explanation on Maillard reaction. For method context, see the general pages on cooking and the more focused baking.
Practical Substitutions and When to Use Them
Substitutions work when you respect ingredient function. Replace fat with another fat, not with a liquid. Replace eggs with a binder unless you intentionally accept a texture change. That practical rule dispels many substitution-related recipe myths.
Examples: swap butter for an equal weight of neutral oil for added moistness; compensate by chilling or adding a touch more flour if the crumb opens up too much. When using applesauce to reduce fat, expect denser texture and reduce liquid slightly.
For deeper background on ingredient behavior, consult reputable food science resources such as the food science overview to connect cause and effect before you test changes.
Common Recipe Myths and the Practical Truths
Myth: You must always measure by weight. Truth: Weight improves precision in baking, but well-tested volume recipes work if you understand the recipe’s tolerances. Use weight when you need high reproducibility.
Myth: Room-temperature eggs always beat air into batter better. Truth: Temperature affects emulsification and structure; adapt technique if the batter or outcome indicates a problem rather than follow temperature dogma blindly.
At a Glance: Key Takeaways on Recipe Myths
- Recipes are frameworks: Learn roles and adjust with purpose.
- Measure functionally: Swap like-for-like (fat for fat, binder for binder).
- Use sensory checks: Rely on texture and color, not just minutes.
- Document experiments: Small, recorded changes dismantle myths efficiently.
FAQ
Why do people treat recipes as unbreakable?
People follow recipes strictly to reduce risk, particularly when learning. Rigid adherence feels safe because it removes variables, but that behavior often perpetuates recipe myths instead of encouraging functional understanding.
When is precision essential?
Baking requires precision for reliable rise and structure. In contrast, many stovetop and roasting dishes tolerate taste-driven adjustments. Assess where precision matters and where it does not.
Which common substitutions work reliably?
Replacing cow milk with most plant milks works for quick breads, though flavor and fat content differ. Replacing butter with oil typically increases moistness but may reduce structure; adjust flour or chilling as needed.
How do I practice safe improvisation?
Start with small, documented tests: reduce sugar by 10–15%, swap 25% of butter for oil, or replace half the flour with whole wheat pastry flour. Record outcomes and refine technique systematically.
Where can I learn the science behind recipes?
Read foundational sources and applied overviews to connect cause and effect. The Wikipedia article on baking and the food science page give accessible technical background you can apply in experiments.
Embracing measured flexibility turns recipe myths into tested strategies. Keep experiments small, document results, and prioritize ingredient function to convert dogma into repeatable technique.
See also: recipe myths
]]>