- Dry skin first: Drying transforms texture and accelerates browning.
- Use small chemistry: Baking powder or cornstarch helps render fat and raise crispness.
- Control heat: Start skin-side down; finish at moderate heat to hit 165°F (74°C).
- Rest and finish: Rest on a rack and finish with flaky salt for texture contrast.
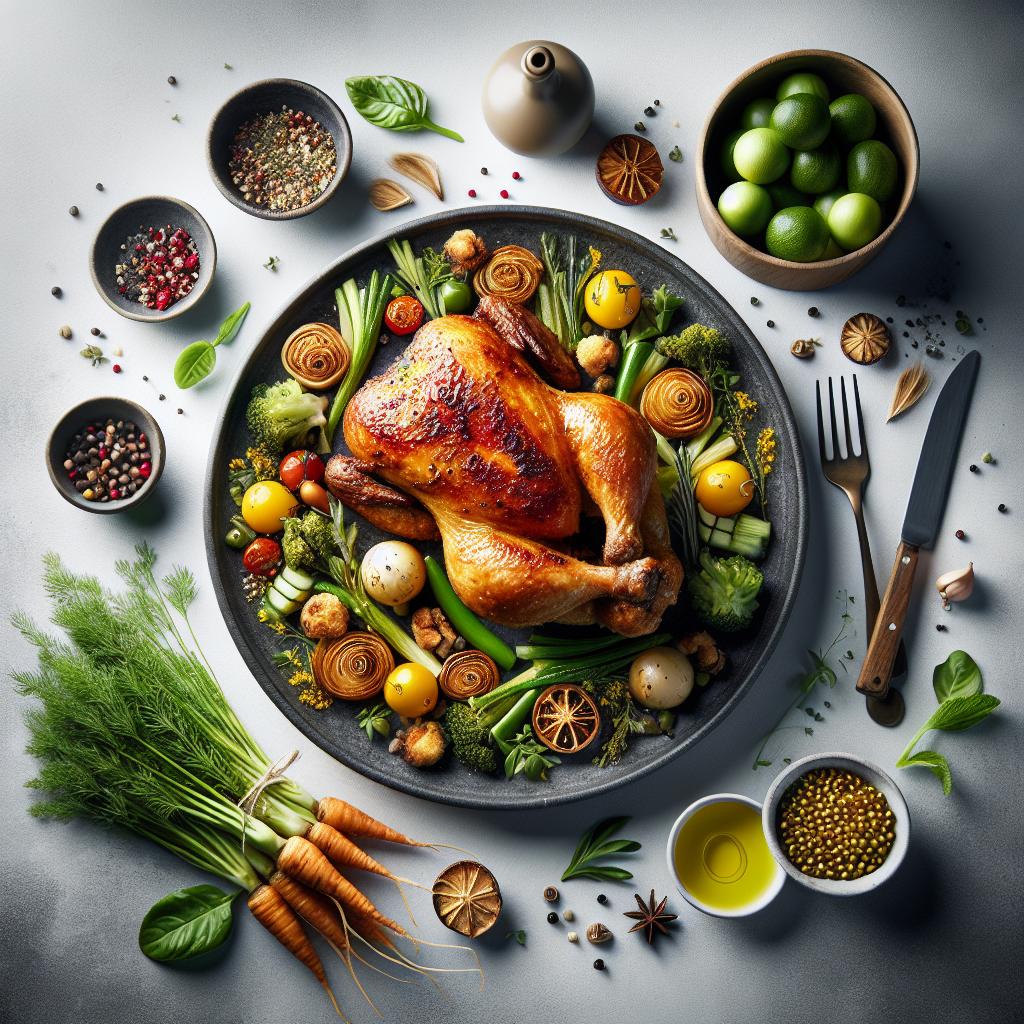
Why skin crispness matters
Texture defines how we perceive a dish. Crisp skin gives a contrast to tender meat, amplifying flavor and mouthfeel in every bite.
Beyond pleasure, crisp skin signals proper fat rendering and browning chemistry, chiefly the Maillard reaction, which generates complex aroma and color during cooking.
Choose the right cut and initial prep
Start with bone-in, skin-on pieces for steady cooking and superior texture. Thighs and legs hold moisture and tolerate longer render times than boneless cuts.
Where available, pick well-raised poultry for firmer skin; learn more about the bird itself at chicken. Trim excess fat or loose skin to avoid uneven blistering.
Drying and seasoning: the mechanics
Pat skin thoroughly with paper towels and, when possible, air-dry uncovered in the fridge for at least one hour. Drying reduces surface moisture and speeds fat rendering.
Use a light dusting of baking powder or cornstarch blended with salt and spices. The alkaline lift from baking powder helps break proteins at the surface, improving crisp formation.
 Expert Insight
Heat control and cooking methods
Heat strategy depends on your chosen method but follows the same principle: render fat slowly, then increase temperature to finish browning. Start skin-side down in a cold pan and let fat release steadily.
Use a heavy pan like cast iron or a hot oven at 425°F (220°C) to finish. For background on broader techniques, consult cooking overviews.
Pan-searing specifics
Preheat the pan until oil shimmers but doesn’t smoke. Press thighs briefly to ensure full skin contact and leave undisturbed to form a uniform crust.
After deep golden color, flip and reduce heat so the interior reaches 165°F (74°C) without burning the skin. An internal thermometer gives consistent safety and quality.
Rendering fat and choosing oils
Render slowly to turn subcutaneous fat into clear liquid. Too-high initial heat seals the surface and keeps fat trapped, yielding chewy skin instead of crispness.
Select a stable cooking medium with a high smoke point. For background on oils, see cooking oil. Clarified butter or neutral oil both work; the pan temperature and time matter most.
Final touches: resting, finishing salt, and serve
After cooking, rest the pieces on a paper towel-lined plate or, better, on a wire rack. Resting allows juices to redistribute while the skin stays crisp.
Finish with flaky sea salt and a bright garnish such as lemon or fresh herbs. The tiny salt crystals add a final crunch and heighten perceived savoriness.
 Pro-Caution
Pro techniques
Small, intentional steps elevate outcomes. Use a light oil spray, remove excess skin pockets, and score tough areas to promote even rendering.
Experiment with spice blends. Smoked paprika and garlic powder pair well with baking powder, but keep the coating thin to avoid insulating the skin from heat.
Chef’s Notes
Variations include using the same method on wings or drumsticks; the technique scales well across cuts. Adjust times: smaller pieces crisp faster, larger pieces need more render time.
Substitutions: if baking powder is unavailable, cornstarch works as a drying aid but gives a slightly different texture. Always test once before scaling for guests.
Practical troubleshooting
If skin remains soft, confirm it actually dried in the fridge and that the pan was hot at contact. Moisture and low heat are the usual culprits for soggy skin.
Watch for excess oil pooling; that indicates incomplete rendering. Increase the initial sear time or briefly finish under a hot broiler to revive a limp surface.
Serving suggestions
Serve crispy thighs on creamy mashed potatoes, a bright slaw, or roasted vegetables to contrast textures. A drizzle of herb yogurt or chimichurri adds acid to cut the fat.
For more recipe pairings, explore our internal guides: crispy chicken recipe collection and a focused pan-searing technique guide. Those pages include step-by-step photos and timing charts.

| Nutrition per Serving | Amount |
|---|---|
| Calories | 320 kcal |
| Protein | 28g |
| Carbohydrates | 1g |
| Fat | 22g |
FAQ
How long should I dry chicken skin in the fridge?
Pat dry, then refrigerate uncovered for at least one hour. For best results, dry overnight; longer drying tightens the skin and improves render.
Can I get crispy skin without oil?
Yes. Dry roasting or using an air fryer can crisp skin without added oil, though a light coating improves heat transfer and color. Oil also carries seasonings for more even flavor.
Is baking powder safe to use on chicken skin?
Yes, use aluminum-free baking powder sparingly. It raises surface pH and helps achieve a crisp exterior without changing taste when used correctly.
What internal temperature ensures safety and juiciness?
Cook to 165°F (74°C) in the thickest part. Use an instant-read thermometer to avoid overcooking while ensuring safe, juicy meat.
Will brining ruin my chances for crispy skin?
Brining improves juiciness but adds moisture to the skin. If you brine, dry the skin thoroughly afterward and refrigerate uncovered to restore dryness before cooking.
Follow these tested steps and you will hit consistent, restaurant-level crispness. The process hinges on drying, measured chemistry, and deliberate heat control. Practice yields reliable, crunchy reward.
See also: chicken skin
]]>
- High heat plus dry skin yields a crisp crust without frying.
- Balance acid and sugar in the marinade to tenderize and caramelize.
- Elevate on a rack to allow air circulation around each piece.
- Rest briefly to lock juices before serving.
Why this method works for baked drumsticks
Baking at high temperature speeds surface moisture loss so the skin can crisp and brown quickly. That browning comes from the Maillard reaction, which creates flavor and color when surface proteins and sugars react under heat.
Marination adds flavor and, when controlled, tenderizes via acids and enzymatic action described in the marination overview. Proper drying and elevated placement prevent the skin from steaming, which preserves the crisp exterior.
Prep and Cook Time for baked drumsticks
Prep Time: 15 minutes active; organize ingredients and tools first to streamline the process. A concise mise en place speeds finishing and reduces handling time before roasting.
Marinating Time: 2–4 hours recommended, or overnight for deeper flavor if you will dry the skin before roasting. Cook Time: 35–40 minutes at 425°F (220°C); confirm doneness with a probe thermometer to ensure food safety.
Yield and Difficulty for baked drumsticks
This recipe yields approximately four servings (two drumsticks each) and scales linearly for larger trays when you keep pieces similar in size. Adjust rack placement rather than overloading the pan to maintain crisping performance for every piece.
Skill level is easy: basic knife work, measuring, and an oven set to the right temperature are sufficient. For guidance on poultry anatomy and common cuts, refer to the chicken overview.
Ingredients for baked drumsticks
Use skin-on, bone-in drumsticks for best texture; the skin crisps and bones help concentrate flavor during roasting. Choose pieces close in size so they cook uniformly and finish together.
- 8 chicken drumsticks, skin-on and bone-in
- 1/4 cup olive oil
- 3 cloves garlic, minced
- 2 tablespoons soy sauce (or tamari)
- 1 tablespoon apple cider vinegar
- 1 tablespoon honey
- 1 teaspoon smoked paprika
- 1 teaspoon kosher salt
- 1/2 teaspoon freshly ground black pepper
- 1/2 teaspoon onion powder
- 1/4 teaspoon cayenne pepper (optional)
- Fresh thyme or rosemary for garnish (optional)
Instructions for baked drumsticks
Follow a tight sequence: prepare the marinade, marinate, pat dry, and roast on an elevated rack for even airflow. Consistency at each step produces predictable crisp skin and juicy meat.
Set timers and use a probe thermometer to avoid overcooking while ensuring safety. Apply any glazes late in the bake to avoid burning sugars and to achieve glossy caramelization.
1. Prepare the Marinade
Combine olive oil, minced garlic, soy sauce, apple cider vinegar, honey, smoked paprika, salt, pepper, onion powder, and cayenne in a bowl. Whisk until emulsified so the oil carries fat-soluble flavors and the acid disperses evenly.
Keep the balance of acid and sugar moderate to prevent excessive darkening during roasting. A well-balanced marinade boosts flavor without compromising crisping performance for baked drumsticks.
2. Marinate the Drumsticks
Place drumsticks and marinade in a resealable bag or covered container and refrigerate for 2–4 hours, or overnight if desired. Turn once mid-marination for even exposure to the seasoning.
If marinating overnight, remove excess marinade and pat skin dry before baking to preserve crispness. Drying is a critical step to allow surface moisture to evaporate rapidly in the oven.
3. Oven Prep and Baking
Preheat the oven to 425°F (220°C) and position a rack in the center for balanced heat. Use a rimmed baking sheet lined with foil and set an oven-safe wire rack on top to lift the drumsticks.
Arrange the drumsticks with space between each piece so hot air circulates freely. For faster crisping use convection mode if available, but standard baking works by extending cook time slightly.
[h2]Placement Note[/h2]
Elevating drumsticks on a rack prevents soggy undersides and encourages uniform browning along the entire skin surface. If you must crowd the pan, flip once at the halfway point to mitigate contact-related steaming.
Remove pieces that finish early to a warm resting area to avoid overcooking the remaining batch. Resting for five minutes allows juices to redistribute while the exterior stays crisp.
Expert Insight
Tips for Success with baked drumsticks
Pat drumsticks dry before roasting to remove surface moisture and prevent steaming. Use paper towels and handle gently to preserve skin integrity while removing excess liquid.
Elevate on a wire rack to permit hot air under the pieces so the underside crisps as well as the top. Space each drumstick to allow airflow; crowding is the most common reason for limp skin.
Pro-Caution
Apply sticky glazes in the final 8–10 minutes to avoid burning sugars and to achieve a glossy finish. For extra browning, use a short broil at the end but watch closely to prevent charring.
Serving Suggestions for baked drumsticks
Serve with bright sides like a lemony salad or roasted vegetables to cut through the rich, caramelized flavors. Fresh herbs such as thyme or rosemary refresh the palate and add visual contrast.
Offer a tangy chimichurri or a light yogurt-based dip for variety and to add acidity to each bite. For leftover handling, re-crisp in a hot oven or air fryer rather than using a microwave to preserve skin texture.
Equipment and Technique Notes for baked drumsticks
A reliable oven and an oven-safe wire rack provide the biggest performance improvements for crisping. Convection mode circulates air and shortens time to crispness, but increase time slightly in conventional ovens for equal results.
Use a probe thermometer for repeatable, safe results and to avoid overcooking. For general oven behavior and heat transfer background, see oven.
Nutrition for baked drumsticks
Per serving (2 drumsticks): values will vary by exact portion and ingredients, but a close estimate helps plan meals. Typical nutrition reflects a protein-forward dish with moderate fat when skin is left on.
| Nutrient | Per Serving (2 drumsticks) |
|---|---|
| Calories | 320 kcal |
| Protein | 28 g |
| Carbohydrates | 6 g |
| Fat | 18 g |
Further Reading and References for baked drumsticks
For safety guidelines on handling and cooking poultry, consult reputable food-safety resources and official guidance. Additional context on poultry cuts and handling can be found in the chicken article.
For broader technical context on browning and dry-heat cookery, review resources on the Maillard reaction and on baking (cooking). These topics explain the chemistry that creates flavor and color during roasting.
See also: Chicken drumsticks and glaze ideas for baked drumsticks.
FAQ
How do I get the crispiest skin without frying?
Pat the drumsticks dry and use a light coating of oil before roasting at high heat (425°F/220°C). Elevate them on a wire rack so air circulates under and around each piece for uniform crisping.
How long should I marinate the drumsticks?
Two to four hours gives clear flavor and some tenderizing while preserving skin texture with a short drying step. Overnight marination deepens flavor but requires careful drying before roasting to maintain crispness.
Do I need to flip the drumsticks while baking?
Flipping is optional when using a wire rack and sufficient spacing between pieces because circulation promotes even browning. If your pan is crowded, flip once halfway through to encourage balanced color and doneness.
Can I use an air fryer for this recipe?
Yes; air fryers accelerate moisture evaporation and crisp the skin efficiently for baked drumsticks. Reduce time and temperature slightly from oven settings and monitor closely to avoid over-browning.
What is the safest way to check doneness?
Use an instant-read or probe thermometer inserted into the thickest part of the meat without touching bone. The recommended safe internal temperature for poultry is 165°F (74°C), which ensures both safety and juiciness.
Applying these seven professional tips will make baked drumsticks a reliable, family-ready option from weeknights to larger gatherings. Practice the drying, rack placement, and timing to repeat crisp results.
See also: baked drumsticks
]]>
- Drying first lets heat brown skin instead of steaming it.
- Salt and air-dry speed moisture removal and improve texture.
- Use high dry heat to render fat and trigger browning reactions.
- Thermometer-led cooking guarantees safe, juicy meat without overcooking.
Understanding the Science Behind Wet Chicken Skin and Cooking Outcomes
Wet skin forces the surface to spend time evaporating water before it can reach the temperatures needed for browning. During that phase, steam forms and softens the skin, which produces a limp texture rather than a crisp one.
Fat under the skin must render and reach 300–320°F localized surface temps to crisp properly, but water must leave first. The Maillard reaction is the key chemistry that creates brown color and savory flavor; it requires a dry, hot surface to activate reliably. See Maillard reaction for the background on browning.
The Impact of Moisture on Crispiness and Texture
When surface moisture is present, the cooking mode shifts from dry-heat browning to wet steaming. Steam keeps the skin temperature near 212°F until most water evaporates, which delays fat rendering and Maillard browning.
Excess moisture also traps heat under skin folds and between pieces. That increases overall cooking time and can lead to uneven doneness if you push heat to compensate. For controlled drying, chilling on a rack in the refrigerator works well; learn more about refrigeration basics at Refrigerator.
Techniques to Achieve Perfectly Crispy Skin When Starting with Wet Chicken
Start by removing surface water. Pat each piece with absorbent paper, then allow air-drying on a wire rack when time permits. Drying reduces the steaming window and gets skin ready to render fat.
Use salt strategically: a short dry brine pulls moisture from the outer layer and seasons the skin. For details on the method, review the general concept at Brining. When you’re short on time, patting and a quick rest in the fridge still helps.
Expert Insight
Best cooking methods
Choose dry-heat techniques like high-heat roasting, pan-searing, or grilling to maximize crisping. These methods expose skin to direct heat that both renders fat and triggers Maillard browning.
When searing, maintain medium-high heat so the skin releases from the pan once browned. Overcrowding causes steam to collect between pieces, so give each piece breathing room for air circulation. For an overview of roasting techniques, see Roasting (cooking).
Practical Tips to Avoid Common Pitfalls and Enhance Flavor
Start with room-temperature chicken when possible. Cold meat increases the time the skin spends exposed to heat before the interior reaches safe temperature, which can make achieving a crisp exterior harder.
Brush skin lightly with oil or melted fat to promote even browning. Infuse that fat with garlic or herbs for extra aroma without adding surface moisture.
Salt timing and marinating
Dry brining (salt and rest uncovered) enhances both texture and flavor by extracting and reabsorbing juices while drying the surface. Wet marinades add moisture, so always pat skin dry after marinating to restore crisp potential.
If you brine overnight, place the chicken uncovered on a rack in the fridge for several hours to let the skin dry. That step significantly improves final texture.
Recipe: Crispy Skin Chicken Thighs (from Wet Start)
Yield: Serves 4. This recipe steps through turning damp skin into a crisp finish using common kitchen techniques.
Difficulty: Medium. You need basic but precise timing and a thermometer to finish correctly.
Ingredients
4 bone-in, skin-on chicken thighs; 1 tsp fine sea salt; 1/2 tsp black pepper; 2 tbsp olive oil or rendered chicken fat; 2 cloves garlic, minced; 1 tsp chopped rosemary; optional lemon zest.
Keep ingredients at hand and preheat the oven to ensure the pan is hot when you begin searing.
Instructions
Pat the thighs thoroughly dry with paper towels. For improved results, place them on a wire rack uncovered in the refrigerator for 2 hours or overnight to evaporate surface moisture.
- Preheat oven to 425°F (220°C).
- Mix oil, garlic, and rosemary; brush over the skin. Season with salt and pepper.
- Heat an oven-safe skillet over medium-high heat until shimmering. Add 1 tbsp oil or fat.
- Place thighs skin-side down, spaced apart. Sear without moving until golden and crisp, about 6–8 minutes.
- Flip thighs and transfer skillet to the oven. Roast uncovered 20–25 minutes until internal temp reads 165°F (74°C).
- Optional: Broil 1–2 minutes to finish crisping, watching closely to prevent burning.
- Rest on a wire rack for 5 minutes before serving; finish with lemon zest.
Use a probe thermometer for accuracy and avoid overcooking. For an expanded method, visit our Perfect Roast Chicken guide for related techniques and variations.
Chef’s Notes and Variations
For extra crunch, finish on a hot grill for 2–3 minutes over indirect heat. Swap rosemary for thyme or smoked paprika to alter the aroma profile.
If time is limited, thorough patting and immediate searing still produce strong results. Leftovers work well cold or reheated gently to preserve skin texture.
Pro-Caution
After resting, serve the thighs on a warm platter with roasted vegetables or a crisp green salad. Garnish with fresh herbs and lemon wedges for brightness.
Nutritional Snapshot
Per serving approximate values: 370 kcal, 30 g protein, 0 g carbs, 27 g fat. Values vary with skin and fat retained.
Keeping the skin on increases fat and calories but preserves moisture and flavor. Use portion control and pair with vegetables for balance.
FAQ
Why does wet skin prevent crisping?
Wet skin creates a steam layer that holds the surface temperature near the boiling point of water. That steam delays fat rendering and stops the Maillard reaction until the moisture evaporates.
Drying the surface first removes the steam and lets direct heat brown the proteins and sugars on the skin.
Can I still get crisp skin if I marinated the chicken?
Yes. Pat the skin dry thoroughly after marinating, then air-dry on a rack if time allows. A brief dry-brine with salt after marinating also helps remove extra surface moisture.
Remember that heavy wet marinades add liquid back to the skin, so plan a drying step before cooking.
How long should I air-dry chicken in the fridge?
Two hours is a practical minimum for noticeable improvement. Overnight drying produces better results when you have the time.
Place the chicken on a wire rack set over a tray to collect drips. For background on refrigeration and food handling, see Food safety.
Does wet skin affect food safety?
Surface moisture itself does not make the chicken unsafe. The risk appears when uneven cooking due to longer cooking times leaves parts below safe temperature. Use a meat thermometer to confirm 165°F (74°C).
Follow standard hygiene and storage practices. For more on safe handling, consult our internal chicken safety resource.
Are there quick hacks if I’m short on time?
Pat dry vigorously and rest uncovered in the fridge for 20–30 minutes if possible. Otherwise, sear on high heat and finish in a hot oven, but monitor closely to prevent burning.
A final one- to two-minute broil can crisp stubborn spots, but keep the bird a safe distance from the element to avoid flare-ups.
Closing Notes
Moisture on chicken skin dictates whether heat browns or steams the surface. Control that moisture with drying, salt, and dry-heat cooking to get predictable, crispy results.
Practice the small steps—patting, resting, and using a thermometer—and you will reliably transform wet-start chicken into a crisp, flavorful dish.
See also: chicken skin
]]>