- Key takeaway: Control surface heat to trigger browning while protecting interior moisture.
- Key takeaway: Simple marinades with salt, acid, and sugar manage tenderness and crust formation.
- Key takeaway: Use a meat thermometer and a two-zone fire for consistent doneness.
- Key takeaway: Resting yields juicier slices and prevents immediate juice loss when serving.
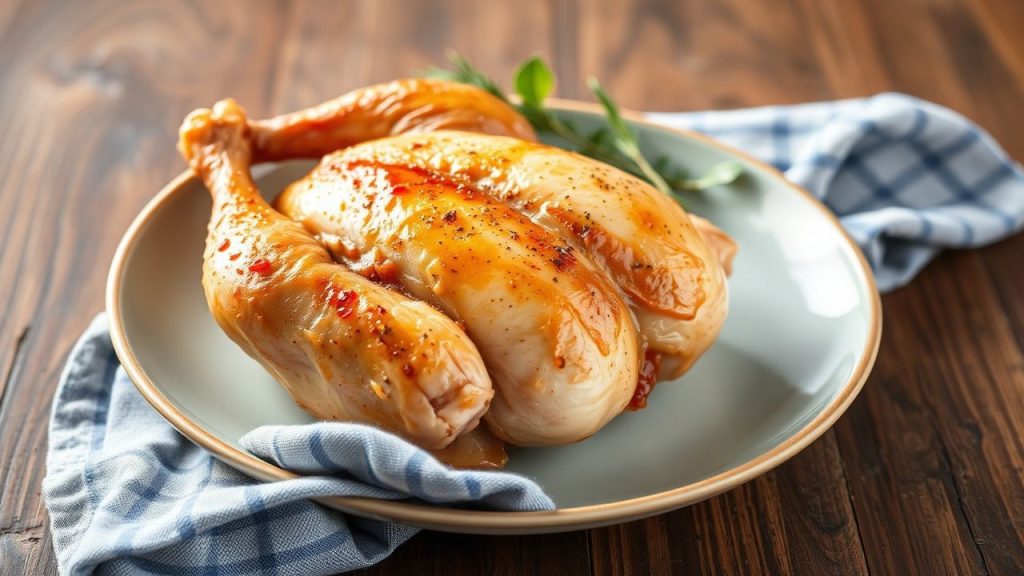
Why the science matters for grilled chicken
Successful grilled chicken depends on reproducible physical and chemical changes. The Maillard reaction creates the deep, savory crust you expect; manage temperature to favor Maillard browning rather than surface burning. Maillard reaction
Control of heat transfer and moisture differentiates dry, tough results from succulent meat. A controlled sear followed by a lower-heat finish manages conduction and convection so the center reaches safe temperature without overcooking the exterior. Grilling
Ingredient choices and marinade chemistry for grilled chicken
Marinades and brines change surface chemistry and water-holding capacity for grilled chicken. Use oil to carry flavor, salt to improve water retention, and modest acid to adjust texture; excessive acid will denature proteins and make meat mushy. Marinade
Brining provides uniform seasoning and better yield for lean cuts used in grilled chicken dishes. Salt interacts with muscle proteins to retain moisture during cooking; plan brine strength and time by cut size and thickness. Brining
Marinade components, dosages, and timing
For thighs, start with 1/4 cup neutral oil, 2–3 tablespoons of salt-based seasoning, 1–2 tablespoons acid, and 1 tablespoon sugar or honey only when you want added crust. Marinate 2–6 hours for thighs; thin breasts need 30–60 minutes to avoid over-tenderizing.
Keep the marinade chilled and never reuse raw marinade as a sauce unless you boil it. Pat chicken dry before placing on the grill to maximize direct surface contact and encourage Maillard browning.
Salt, enzymes, and dry-brine technique for grilled chicken
Dry-brining uses coarse salt rubbed into skin and flesh, followed by refrigeration for several hours to a day to season through. This method dries the skin slightly and improves crisping when you sear for grilled chicken.
Enzymatic tenderizers (papain, bromelain) act quickly; apply sparingly and for limited time to avoid a mushy texture. Use enzymes only when you intentionally target extreme tenderness for dense pieces.
Grill setup and heat management for grilled chicken
Always configure a two-zone fire: a direct high-heat side for searing and an indirect cooler side for finishing. This setup lets you build crust on skin and then move pieces away from direct flame to reach internal temperature without burning the exterior. Grilling
Clean, well-oiled grates reduce sticking and produce reliable sear marks that accelerate crust formation. Preheat the grill until the surface reaches a stable range specific to your cut—375–450°F for many setups—before you put chicken down.
Two-zone fire and flare-up control
Create a hot direct zone for initial sear and a medium indirect zone for finishing; move pieces between zones as they progress. When fat causes flare-ups, transfer meat to the indirect side until flames drop and then return briefly to the sear zone for color touch-up.
Keep a metal lid, grill brush, or spray bottle handy to control flames safely without cooling the grill excessively. Use mild fruitwoods sparingly if you want a delicate smoke note on your grilled chicken.
Step-by-step cooking method for grilled chicken
Remove chicken from refrigeration 20–30 minutes before grilling to reduce cold spots and promote even searing. Season just before cooking so the dry surface remains primed for browning and does not sit wet on the grate.
Place skin side down over direct heat and hold for 5–8 minutes without moving to develop color and crispiness. Flip once and move to indirect heat to finish until a safe internal target is reached.
Searing, finishing, and internal temperature for grilled chicken
Sear to build a crust, then finish at moderate heat until the thickest portion registers 165°F (74°C). Insert a probe thermometer into the deepest portion, avoiding bone contact for accuracy; this eliminates guesswork and prevents overcooking.
After pulling the chicken, tent loosely with foil and rest 5–10 minutes; this step equalizes temperature and redistributes juices. Resting improves perceived juiciness and yields cleaner slices for plating.
Tips for success with grilled chicken
Pick cuts that match your service goals: thighs tolerate more heat and forgiving carry, while breasts need careful timing to stay moist. Group similar sizes on the grate so pieces finish at the same moment and reduce rescue attempts.
Monitor the grill with an infrared surface thermometer or built-in gauge to maintain consistent results across batches. Use internal links to your recipe bank and setup guides for repeated success: grilled chicken recipes and grill setup guide.
 Expert Insight
Trim large fat pockets that cause flare-ups but leave enough fat where you want self-basting. Apply finishing glazes during the last minute to avoid burning sugars; timing keeps both flavor and appearance clean.
 Pro-Caution
Serving, pairing, and presentation for grilled chicken
Use resting time to prepare sides, toss a herb salad, or grill vegetables so plating happens while the meat relaxes. Slice against the grain for consistent tenderness and arrange to display crisp skin and moist interior.
Pair grilled chicken with acidic elements or lightly tannic beverages to cut fat and highlight layers of seasoning. A citrus dressing or herb-forward relish refreshes the palate and balances each bite.
Nutrition and portioning for grilled chicken
Trim excess fat or remove skin to reduce calories when needed; skin-on servings add flavor but increase energy density. A standard portion of 4–6 ounces delivers roughly 25–30 grams of protein depending on the cut.
When you use marinades with oil or sugar, account for those calories in menu planning; light application of glaze adds minimal energy if timed at the end. Archive nutrition facts for repeat recipes to help guests track intake accurately.
FAQ
How do I get both crispy skin and a fully cooked interior on grilled chicken?
Sear skin over direct heat to render fat and create crispness, then move the piece to indirect heat to finish to 165°F (74°C). Use a probe thermometer for repeatable accuracy and avoid guessing by color alone.
Can I use the same marinade for different cuts of grilled chicken?
Yes, but adjust marination time by thickness: thin breasts need 30–60 minutes, thighs 2–6 hours, and bone-in pieces may go longer with careful acid control. Tweak time rather than ingredients for clean outcomes.
What is the best wood for smoky flavor without overpowering grilled chicken?
Choose mild fruitwoods like apple or cherry for a subtle sweet-smoke that complements poultry. Heavy woods (hickory, mesquite) risk dominating delicate seasonings, so use them sparingly if at all.
How do I prevent flare-ups from dripping fat on the grill?
Trim large fat deposits and use a two-zone setup so you can move meat off direct heat when flare-ups start. Keep a metal lid or spray bottle at hand to control flames quickly without losing grill temperature.
Is brining better than a wet marinade for grilled chicken?
Brining improves moisture retention and even seasoning; wet marinades add surface flavor, acid, or sugar for caramelization. Choose brine for consistent juiciness and short marinades for surface flavor or crust development.
Final note: Treat grilling as a sequence of controlled steps: prepare, sear, finish, and rest. Apply these techniques to your grill, monitor core temperature, and you will reproduce high-quality grilled chicken reliably.
See also: grilled chicken

See also: grilled chicken
]]>
- Salt early: dry-brine for flavor and improved muscle relaxation.
- Sear hot: create a Maillard crust to lock flavor and texture.
- Control temp: use an instant-read thermometer and rest before slicing.
- Aging or enzymes: break down collagen for sustained tenderness.
Prep and Cook Time
Preparation: 10 minutes. Bring steaks to room temperature for even cooking and predictable carryover.
Cook Time: 12–15 minutes depending on thickness. Use direct high heat for a short sear, then lower the heat to finish to target temperature.
Yield and Difficulty
Yield: Serves 2 hearty portions. Adjust times when cooking thicker cuts or multiple pieces in one pan.
Difficulty: Medium. The techniques require timing, temperature tracking, and attention to surface moisture for a reliable result.
Ingredients
Gather quality ingredients and simple tools: two 10–12 oz ribeye steaks, kosher salt, freshly ground black pepper, a high smoke-point oil, unsalted butter, fresh thyme, and garlic.
Use a heavy skillet (cast iron preferred) and an instant-read thermometer. Choosing the right cut matters; ribeye offers marbling that improves tenderness and mouthfeel.
- 2 (10-12 oz) ribeye steaks, at room temperature
- 1 tablespoon kosher salt
- 1 teaspoon freshly ground black pepper
- 2 tablespoons high smoke-point oil (canola or avocado)
- 2 tablespoons unsalted butter
- 3 sprigs fresh thyme
- 3 cloves garlic, lightly crushed
Instructions
Step 1 — Dry the surface: Pat steaks thoroughly with paper towels. A dry surface ensures a rapid Maillard reaction and prevents steaming.
Step 2 — Season and rest: Salt both sides generously. Let seasoned steaks sit for 30–120 minutes uncovered in the fridge for a basic dry-brine effect or rest 30 minutes at room temperature if cooking immediately.
- Preheat skillet: Heat a heavy pan over high heat until smoking hot. Add oil and swirl to coat the surface.
- Sear both sides: Place steak away from you to avoid splatter. Sear undisturbed 3–4 minutes per side to build a dark crust, then reduce heat.
- Finish and baste: Lower heat to medium-low, add butter, thyme, and garlic, and spoon melted butter over the steaks to enrich flavor.
- Check doneness: Use an instant-read thermometer: 130°F for medium-rare, 140°F for medium; remember carryover heat raises temperature after removal.
- Rest and slice: Tent loosely with foil and rest 5–10 minutes. Slice against the grain to shorten fibers and maximize tenderness.
Pro-Caution
Science of Tenderness
Meat tenderness depends on three physical elements: muscle fiber structure, connective tissue, and intramuscular fat. Each element responds differently to salt, heat, and time.
Connective tissue like collagen toughens with heat but converts to gelatin under long, low temperatures. Learn more about connective tissue on connective tissue.
Maillard Reaction and Flavor
The Maillard reaction produces the brown crust and dozens of flavor compounds. It requires a dry surface and high heat to proceed efficiently.
Control moisture and maximize surface temperature to favor Maillard products while avoiding burning. For a technical reference, see Maillard reaction.
Enzymes, Aging, and Tenderizing
Aging concentrates flavor and allows endogenous proteolytic enzymes to cleave proteins. Both wet and dry aging promote measurable tenderization.
For background on controlled breakdown processes used in the trade, consult aging of meat.
Chef’s Notes
Cut selection: Choose cuts with appropriate marbling for your cooking method. Ribeye offers intramuscular fat that melts during cooking and improves tenderness.
Temperature control: Use an instant-read thermometer for accuracy. Remove steaks slightly below target temp to account for carryover cooking.
Expert Insight
Variations and Advanced Techniques
For tougher cuts, employ low-and-slow braises to hydrolyze collagen into gelatin. Alternatively, consider sous-vide cooking to hold temperature precisely while enzymes work.
Enzymatic marinades (pineapple, papaya) contain proteases that act on surface proteins. Use them briefly to avoid a mushy surface and to preserve internal texture; read about proteases protease.
Serving Suggestions
Serve sliced steaks with a simple pan jus or herb butter to complement but not mask beef flavor. Sides such as roasted potatoes or a bright arugula salad balance richness.
Finish with flaky sea salt and fresh herbs. A small garnish adds visual contrast and a final aromatic note without overwhelming texture.

Nutrition
Estimate per serving: approximately 680 kcal, 55 g protein, 52 g fat, 0 g carbohydrates. Values vary by cut and trimming.
Trim visible fat to control saturated fat content, or choose leaner cuts when desired. Balance portions with vegetable sides for a complete plate.
FAQ
Why does a properly rested steak taste juicier?
Resting allows muscle fibers to relax and reabsorb some exuded juices. Cutting immediately forces those juices onto the plate, reducing perceived juiciness.
Rest time depends on thickness; 5–10 minutes is common for typical steaks to equalize temperature and retain moisture.
Does salt actually tenderize meat?
Salt initially draws moisture out, then reabsorbs it with dissolved salt molecules that season and slightly alter protein structure. This process, known as dry brining, improves water-holding capacity and texture.
Timing matters: brief salting seasons the surface, while longer salting (30–120 minutes) yields more pronounced tenderizing effects.
How should I use a thermometer for best results?
Insert an instant-read thermometer into the steak’s center, avoiding bone or fat pockets. Aim for 5°F below your target and allow carryover heat to finish cooking during rest.
Verify multiple pieces when cooking several steaks to ensure uniform doneness across the batch.
Are marinades necessary for tenderness?
Marinades add flavor and can alter surface texture. Acidic or enzymatic marinades tenderize mainly at the surface and are less effective on thick cuts without extended time.
For deep tenderization, use aging, mechanical tenderizing, or long, low-temperature cooking methods instead of relying solely on marinades.
What cut should I pick for consistent tenderness?
Select cuts from low-activity muscles for natural tenderness. Filet mignon and ribeye top the list because they have less connective tissue and good marbling.
For leaner preferences, sirloin or strip steak can perform well with careful temperature control and proper slicing against the grain.
Master these steps and you will consistently produce steaks that are tender, flavorful, and texturally satisfying. Science gives you the rules; precise technique delivers the result.
See also: tender steak
]]>
- Drying first lets heat brown skin instead of steaming it.
- Salt and air-dry speed moisture removal and improve texture.
- Use high dry heat to render fat and trigger browning reactions.
- Thermometer-led cooking guarantees safe, juicy meat without overcooking.
Understanding the Science Behind Wet Chicken Skin and Cooking Outcomes
Wet skin forces the surface to spend time evaporating water before it can reach the temperatures needed for browning. During that phase, steam forms and softens the skin, which produces a limp texture rather than a crisp one.
Fat under the skin must render and reach 300–320°F localized surface temps to crisp properly, but water must leave first. The Maillard reaction is the key chemistry that creates brown color and savory flavor; it requires a dry, hot surface to activate reliably. See Maillard reaction for the background on browning.
The Impact of Moisture on Crispiness and Texture
When surface moisture is present, the cooking mode shifts from dry-heat browning to wet steaming. Steam keeps the skin temperature near 212°F until most water evaporates, which delays fat rendering and Maillard browning.
Excess moisture also traps heat under skin folds and between pieces. That increases overall cooking time and can lead to uneven doneness if you push heat to compensate. For controlled drying, chilling on a rack in the refrigerator works well; learn more about refrigeration basics at Refrigerator.
Techniques to Achieve Perfectly Crispy Skin When Starting with Wet Chicken
Start by removing surface water. Pat each piece with absorbent paper, then allow air-drying on a wire rack when time permits. Drying reduces the steaming window and gets skin ready to render fat.
Use salt strategically: a short dry brine pulls moisture from the outer layer and seasons the skin. For details on the method, review the general concept at Brining. When you’re short on time, patting and a quick rest in the fridge still helps.
Expert Insight
Best cooking methods
Choose dry-heat techniques like high-heat roasting, pan-searing, or grilling to maximize crisping. These methods expose skin to direct heat that both renders fat and triggers Maillard browning.
When searing, maintain medium-high heat so the skin releases from the pan once browned. Overcrowding causes steam to collect between pieces, so give each piece breathing room for air circulation. For an overview of roasting techniques, see Roasting (cooking).
Practical Tips to Avoid Common Pitfalls and Enhance Flavor
Start with room-temperature chicken when possible. Cold meat increases the time the skin spends exposed to heat before the interior reaches safe temperature, which can make achieving a crisp exterior harder.
Brush skin lightly with oil or melted fat to promote even browning. Infuse that fat with garlic or herbs for extra aroma without adding surface moisture.
Salt timing and marinating
Dry brining (salt and rest uncovered) enhances both texture and flavor by extracting and reabsorbing juices while drying the surface. Wet marinades add moisture, so always pat skin dry after marinating to restore crisp potential.
If you brine overnight, place the chicken uncovered on a rack in the fridge for several hours to let the skin dry. That step significantly improves final texture.
Recipe: Crispy Skin Chicken Thighs (from Wet Start)
Yield: Serves 4. This recipe steps through turning damp skin into a crisp finish using common kitchen techniques.
Difficulty: Medium. You need basic but precise timing and a thermometer to finish correctly.
Ingredients
4 bone-in, skin-on chicken thighs; 1 tsp fine sea salt; 1/2 tsp black pepper; 2 tbsp olive oil or rendered chicken fat; 2 cloves garlic, minced; 1 tsp chopped rosemary; optional lemon zest.
Keep ingredients at hand and preheat the oven to ensure the pan is hot when you begin searing.
Instructions
Pat the thighs thoroughly dry with paper towels. For improved results, place them on a wire rack uncovered in the refrigerator for 2 hours or overnight to evaporate surface moisture.
- Preheat oven to 425°F (220°C).
- Mix oil, garlic, and rosemary; brush over the skin. Season with salt and pepper.
- Heat an oven-safe skillet over medium-high heat until shimmering. Add 1 tbsp oil or fat.
- Place thighs skin-side down, spaced apart. Sear without moving until golden and crisp, about 6–8 minutes.
- Flip thighs and transfer skillet to the oven. Roast uncovered 20–25 minutes until internal temp reads 165°F (74°C).
- Optional: Broil 1–2 minutes to finish crisping, watching closely to prevent burning.
- Rest on a wire rack for 5 minutes before serving; finish with lemon zest.
Use a probe thermometer for accuracy and avoid overcooking. For an expanded method, visit our Perfect Roast Chicken guide for related techniques and variations.
Chef’s Notes and Variations
For extra crunch, finish on a hot grill for 2–3 minutes over indirect heat. Swap rosemary for thyme or smoked paprika to alter the aroma profile.
If time is limited, thorough patting and immediate searing still produce strong results. Leftovers work well cold or reheated gently to preserve skin texture.
Pro-Caution
After resting, serve the thighs on a warm platter with roasted vegetables or a crisp green salad. Garnish with fresh herbs and lemon wedges for brightness.
Nutritional Snapshot
Per serving approximate values: 370 kcal, 30 g protein, 0 g carbs, 27 g fat. Values vary with skin and fat retained.
Keeping the skin on increases fat and calories but preserves moisture and flavor. Use portion control and pair with vegetables for balance.
FAQ
Why does wet skin prevent crisping?
Wet skin creates a steam layer that holds the surface temperature near the boiling point of water. That steam delays fat rendering and stops the Maillard reaction until the moisture evaporates.
Drying the surface first removes the steam and lets direct heat brown the proteins and sugars on the skin.
Can I still get crisp skin if I marinated the chicken?
Yes. Pat the skin dry thoroughly after marinating, then air-dry on a rack if time allows. A brief dry-brine with salt after marinating also helps remove extra surface moisture.
Remember that heavy wet marinades add liquid back to the skin, so plan a drying step before cooking.
How long should I air-dry chicken in the fridge?
Two hours is a practical minimum for noticeable improvement. Overnight drying produces better results when you have the time.
Place the chicken on a wire rack set over a tray to collect drips. For background on refrigeration and food handling, see Food safety.
Does wet skin affect food safety?
Surface moisture itself does not make the chicken unsafe. The risk appears when uneven cooking due to longer cooking times leaves parts below safe temperature. Use a meat thermometer to confirm 165°F (74°C).
Follow standard hygiene and storage practices. For more on safe handling, consult our internal chicken safety resource.
Are there quick hacks if I’m short on time?
Pat dry vigorously and rest uncovered in the fridge for 20–30 minutes if possible. Otherwise, sear on high heat and finish in a hot oven, but monitor closely to prevent burning.
A final one- to two-minute broil can crisp stubborn spots, but keep the bird a safe distance from the element to avoid flare-ups.
Closing Notes
Moisture on chicken skin dictates whether heat browns or steams the surface. Control that moisture with drying, salt, and dry-heat cooking to get predictable, crispy results.
Practice the small steps—patting, resting, and using a thermometer—and you will reliably transform wet-start chicken into a crisp, flavorful dish.
See also: chicken skin
]]>
- Key takeaway: Brining increases moisture retention and seasons muscle fibers from the inside out.
- Key takeaway: Salt concentration, time, and temperature drive reliable outcomes; aromatics refine the profile.
- Key takeaway: Use wet or dry brines according to desired texture and finish; follow safety and timing guidelines.
How brining works
Brining relies on physical processes—primarily osmosis and diffusion—to move salt and water into tissue. The mechanics are straightforward and predictable when you control concentration and time.
Salt first draws some surface fluids out, which mix with the brine solution and then re-enter the muscle. This exchange alters protein structure and increases the meat’s ability to hold water.
Osmosis and protein interaction
Osmosis explains the initial movement of water; salt gradients cause liquid to shift across membranes until equilibrium forms. Read a concise primer on osmosis for the fundamental physical principle.
At the molecular level, salt partially denatures surface proteins so they bind water more effectively. That slight unfolding creates a network that traps moisture and helps the muscle stay tender during cooking.
Wet brine vs dry brine: choose by finish
Wet brines immerse food in a saltwater solution and are ideal when you want added water and uniform seasoning. They benefit large cuts and whole birds by increasing overall mass and juiciness.
Dry brines use salt rubbed on the surface and rely on the meat’s own juices to dissolve and redistribute salt. Dry brining concentrates flavor and favors crisp skin or crust because it avoids adding extra surface moisture.
For structured guidance on methods and step sequences, consult internal resources like brining techniques which outline equipment and timing for home cooks.
Practical brine recipes and timing
Measure salt by weight for repeatability, not by eye. A reliable starting point: 5-7% salt by weight for wet brines and a thin, even coating for dry brines on whole poultry.
Time scales vary by size. Small cuts need minutes to a few hours, mid-size roasts need several hours, and whole poultry often benefits from 8–24 hours depending on density.
| Item | Salt ratio (wet brine) | Typical time |
|---|---|---|
| Chicken pieces | 5% (50 g salt per liter) | 1–4 hours |
| Whole chicken | 6% (60 g/L) | 8–12 hours |
| Pork chops | 5–6% (50–60 g/L) | 2–6 hours |
| Large roast | 5–6% (50–60 g/L) | 12–24 hours |
Aromatics and flavor add-ins
Simple aromatics—garlic, peppercorns, citrus peel, bay leaf—add volatile compounds that infuse during the soak. Sugar balances salt and supports better browning via the Maillard reaction when roasting; learn more about that process on Maillard reaction.
Use small quantities of strong aromatics to avoid overpowering the primary ingredient. Test combinations on small portions before scaling up for a full roast.
Expert Insight
Start with a baseline recipe and iterate. For example, a basic brine of 50 g kosher salt and 25 g sugar per liter of water covers most poultry and pork cases reliably.
Safety and common mistakes
Keep brining food refrigerated at or below 4 °C (40 °F) to prevent bacterial growth. Always use a non-reactive container, such as food-grade plastic, stainless steel, or glass, to avoid metallic off-flavors.
Rinse only if needed. After wet brining, pat meat dry thoroughly to promote browning. Over-rinsing wastes seasoning; instead, blot and rest before cooking for a correct surface texture.
Pro-Caution
Avoid too-long brine times on delicate proteins like fish; they require far less exposure than tougher cuts. For vegetarian proteins like tofu, use shorter brine times and adjust salt down significantly to prevent collapse.
Mastering texture and finish
To optimize texture, combine brining with appropriate cooking techniques: high heat searing, controlled roasting, or quick frying depending on cut. Brining sets the stage, but technique delivers the finish.
Salt type matters. Table salt, kosher salt, and sea salt differ by density; convert by weight for accuracy. For a quick reference on the mineral, see salt properties and culinary uses.
When crisp skin is the goal, dry-brine and refrigerate uncovered for several hours to dry the surface. When juicy interior trumps crust, wet brine then dry thoroughly before high-heat cooking.
For recipe testing and step-by-step examples, refer to internal guides like brined chicken recipe and staging notes on brine-to-cook transitions.
FAQ
What is brining and why use it?
Brining is soaking food in a salt solution to improve moisture retention and seasoning depth. It modifies protein structure so cooked meat releases less liquid and tastes seasoned through, not just on the surface.
How does the science translate to cooking results?
Salt and water move in predictable ways; proteins hold more water after partial denaturation, and surface seasoning penetrates inward. These measurable changes yield juicier texture and balanced flavor when you control variables.
Which is better: wet brine or dry brine?
Neither is universally better; choose based on desired outcome. Use wet brines to add moisture and even seasoning for large cuts. Use dry brines to concentrate flavor and achieve crisper skin.
How long should I brine different foods?
Times vary: vegetables and small cuts often need minutes to a few hours, poultry and roasts need several to many hours. Use the table above as a starting point and adjust for thickness and salt type.
Are there foods that should not be brined?
Delicate fish and some shellfish can become too soft with prolonged brining; brine cautiously and briefly. Highly processed or pre-salted products (like smoked ham) do not need additional brining unless a recipe explicitly calls for it.
Understanding the physical principles and practicing precise measurements gives you reproducible, restaurant-level results at home. Apply these seven core secrets—control salt by weight, match time to mass, pick the right brine type, add aromatics sparingly, keep food cold while brining, dry surfaces for crispness, and always test on small pieces before scaling up—and you will consistently unlock superior flavor and texture.
See also: Brining
]]>