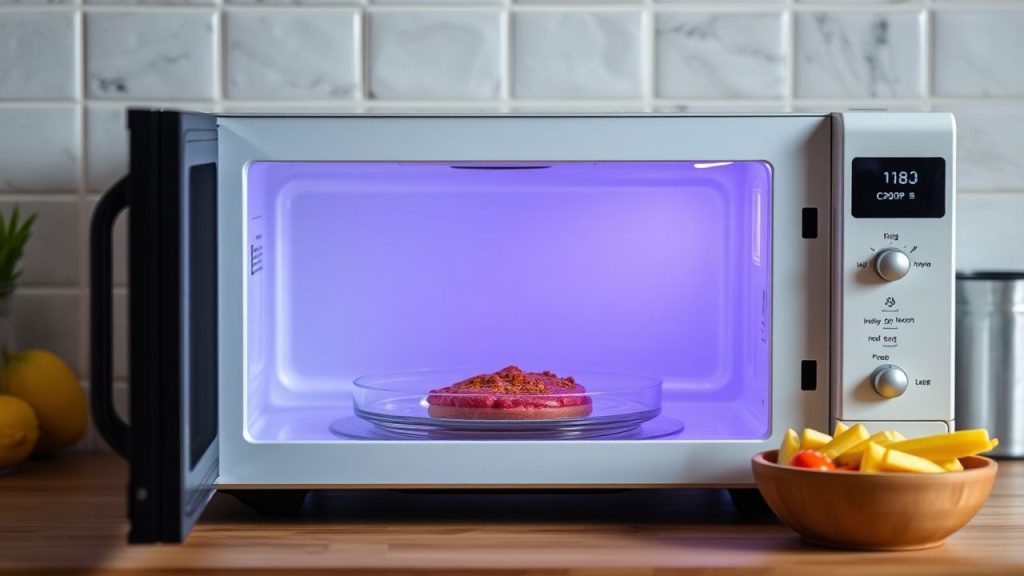
For decades the microwave oven has attracted myths. One persistent myth says microwaves cook food from the inside out.
That claim misunderstands how microwave energy interacts with food. This article explains the physics, practical implications, and how to get even results every time.
- Microwave energy heats surface layers first: penetration depth is limited.
- Conduction moves heat inward: the center warms by transfer, not direct wave heating.
- Stirring and standing time matter: they equalize temperature and reduce cold spots.
- Use correct containers and geometry: shape and material affect evenness.
Prep and Cook Time
Microwave cook times depend on food volume, density, and water content. Typical small vegetable or grain reheats take 3–8 minutes on high, while dense casseroles need longer at lower power.
Plan for short bursts and pauses. Use 30–60 second increments for large portions and allow standing time after heating so heat conducts inward evenly.
- Preparation: 5 minutes
- Cook Time: Typically 3-8 minutes, depending on food type
Yield
This guideline yields 2–4 servings, depending on portion size. Scale ingredients linearly and adjust microwave time accordingly.
When you double a recipe, double the standing and stirring intervals rather than relying on a linear time increase. That reduces cold centers and overcooked edges.
Difficulty Level
Microwave cooking ranges from easy to moderate. Basic reheating is simple; multi-ingredient dishes require attention to layering and stirring.
Practice yields predictable results. Use timers, internal thermometers, and simple technique adjustments to raise repeatability quickly.
Ingredients
These ingredients demonstrate typical microwave-friendly proportions for a quick meal. The list emphasizes moisture and even particle size for predictable heating.
When using leftovers, break up clumps and distribute protein and grains evenly to improve heat transfer during heating and standing time.
- 1 cup fresh vegetables, chopped (broccoli, carrots, bell peppers)
- 2 tablespoons olive oil or melted butter
- Salt and pepper to taste
- 1 teaspoon dried herbs (thyme, basil, or rosemary)
- 1/2 cup cooked protein (chicken, tofu, or beans)
- 1 cup cooked rice or quinoa
- 1/4 cup shredded cheese or nutritional yeast (optional)
- 1 tablespoon lemon juice or vinegar (for freshness)
Instructions
Follow a simple workflow: layer, cover, heat, stir, and allow standing time. These steps minimize hot spots and speed even heating.
Use a microwave-safe dish and break up large pieces before cooking. Rotate or stir midway to redistribute heat.
- Arrange chopped vegetables evenly in a microwave-safe dish. Drizzle with olive oil and season with salt, pepper, and herbs.
- Cover with a vented lid or microwave-safe wrap to trap steam while allowing moisture to escape and avoid sogginess.
- Microwave on high for 2–3 minutes. Pause halfway to stir gently; stirring breaks hot spots and distributes heat more uniformly.
- Add the cooked protein and grains. Stir to combine and promote even temperature throughout the dish.
- Cover and microwave for another 2–4 minutes depending on density. Use shorter bursts for denser mixes and test internal temperature.
- Check doneness with a fork or thermometer. If heat is uneven, stir and microwave in 30-second bursts until uniform.
- Finish with cheese or nutritional yeast and a splash of lemon. Let sit covered for 1 minute to allow heat equalization before serving.
Chef’s Notes: Tips for Success
Microwave penetration varies with water content and thickness. Thin or uniform layers heat faster and more evenly than thick blocks.
Stirring and repositioning reduce the common problem of overheated edges and cold centers. Use a turntable and pause to stir.
- Microwave penetration depth varies with food density and shape; slice large items into thin pieces for better results.
- Use microwave-safe containers with lids to harness steam and control moisture for tender results.
- Avoid metal in the microwave; use silicone or microwave-safe plastic tools for stirring.
- Embrace standing time: internal heat continues to spread after the magnetron stops, improving doneness.
- Reheating leftovers? spread food evenly in a shallow dish to achieve uniform heating without drying edges.
 Expert Insight
The Science Behind Microwave Penetration Depth and Common Misconceptions
Microwaves heat by agitating polar molecules, primarily water, through alternating electromagnetic fields. This process is technically called dielectric heating, and it concentrates energy in outer layers rather than at the core.
Microwave wavelength and material properties determine penetration depth. Typical domestic microwaves deliver energy that penetrates only a few centimeters, so the center warms mainly by thermal conduction.
For readers who want a technical reference, see the microwave oven article on design and operation. For the mechanism of energy absorption, consult dielectric heating.
Remember that the molecular target is water. High-water-content foods absorb energy efficiently, while low-moisture or highly dense foods heat unevenly. Heat then travels inward via thermal conduction, which is slower than direct microwave absorption.
If you want more practical safety recommendations, review our microwave safety guidelines for container selection and temperature targets. Those internal pages show tested approaches for safe reheating.
 Pro-Caution
Tips for Even Cooking and Avoiding Hot Spots
Turntables help rotate food through varying field intensities, reducing persistent hot or cold zones. If your microwave lacks rotation, manually turn the dish during pauses.
Corners and dense lumps concentrate or block microwaves. Use round dishes, and break food into uniform pieces to increase exposed surface area and equalize heating.
- Use a microwave turntable to rotate food consistently during cooking.
- Cut food into uniform pieces to help even energy absorption and conduction.
- Cover food to trap steam which assists internal heating and prevents drying.
- Pause and stir food midway to distribute heat and avoid undercooked sections.
Serving Suggestions
Serve microwave-cooked dishes directly from a warmed container for rustic presentation. Bright herbs and a small acid finish lift flavors that sometimes flatten during reheating.
A drizzle of olive oil or a spoon of yogurt adds mouthfeel. Balance warm microwaved components with a crisp salad or toasted bread for contrast.

FAQ
Below are focused answers to common reader questions. Each entry addresses a single concept and gives actionable advice.
Read the questions that match your use case, and follow the practical steps suggested to improve safety and evenness.
Q1: Do microwaves cook food from the inside out?
No. Microwaves primarily heat outer layers by exciting polar molecules. The center warms through conduction, so the process is outside-in rather than inside-out.
Q2: Why do some foods seem hotter inside after microwaving?
Apparent hot centers arise when microwaves penetrate slightly and deposit energy below a cooler surface, or when dense pockets heat unevenly. Stirring and standing time correct these disparities.
Q3: Can microwaves penetrate all foods evenly?
No. Water content, geometry, and density govern absorption. High-water foods heat more uniformly, while dry or layered dishes need technique adjustments.
Q4: How do I avoid cold spots and ensure food safety?
Stir thick mixtures, use lower power for longer intervals on dense items, and verify temperatures with a food thermometer. Covering and allowing standing time also helps heat spread.
Q5: Are microwaves safe to use for everyday cooking?
Yes. When used with microwave-safe containers and proper procedures, microwaves are a fast, energy-efficient, and safe cooking method. Follow manufacturer guidance and monitored temperatures for high-risk foods.
In Summary
Microwaves do not cook food from the inside out. They deposit energy within limited depths and rely on conduction to warm the center.
Apply simple techniques—cut uniform pieces, stir, use covers, and allow standing time—to get consistent, safe results. For more tips, visit our related internal guide on microwave cooking tips and the microwave safety guidelines page.
See also: Microwaves
]]>
- Choose a container that matches food moisture and portion size for fastest, safest reheating.
- Tempered glass and certain ceramics balance speed and evenness for mixed plates.
- Always test a new container with a cup of water before routine use.
Prep and Cook Time for Microwave Containers
Plan reheating time around portion size and the material of your microwave containers to reduce repeated cycles. Short, repeatable bursts on high plus a brief standing time give the best results.
Typical microwave sessions for single portions run 1–3 minutes depending on power and container choice. Use lower power for dense or layered dishes to avoid cold cores.
Yield for Microwave Containers
Yield scales with container volume and shape; shallower, wider microwave containers heat more uniformly for multiple servings. A larger shallow dish reduces hotspots and shortens total run time compared with deep vessels.
When reheating for several people, split portions between identical microwave containers for even results. This tactic reduces overall time and improves food safety by eliminating cold centers.
Difficulty Level
Using microwave containers correctly is easy and repeatable with basic technique and timing. No specialist equipment is required beyond a reliable microwave-safe thermometer and proper lids.
Mastering container selection takes a few tests and simple rules of thumb that improve results immediately. Follow a consistent method to limit food degradation and protect reheating safety.
Ingredients
This practical comparison uses a representative mixed plate to test container performance under real-world conditions. Use consistent ingredients and portioning so container effects dominate the outcome.
Sample test plate: 1 cup cooked rice or pasta, 1/2 cup mixed vegetables, 1/4 cup protein, 2 tbsp oil or butter, and salt. The fat and water content in this plate reveal differences in conduction and microwave coupling between containers.
The Science Behind Container Choice
Microwave ovens project electromagnetic waves that excite water molecules inside food; containers with low moisture content typically remain cooler. For device fundamentals see microwave oven.
After electromagnetic absorption, heat moves inside food through conduction and convection driven by internal temperature gradients. For a technical primer on these mechanisms see heat transfer.
Material Properties and Heat Response
Glass and many ceramics are largely transparent to microwaves and warm mainly through contact with hot food and conduction. For background on glass as a material see glass.
Plastics vary widely in microwave behavior; some polymers absorb energy and can form hot spots or degrade over time. For polymer basics see plastic.
Instructions for Speedy Microwave Heating with Containers
Standardize portion, cover method, and power setting when comparing microwave containers to get reproducible results. Consistency reveals true material performance rather than operator variance.
Steps: assemble food in an even layer, add a little fat for moisture, cover with a vented lid, heat in short bursts, stir, and rest for 1–2 minutes. This workflow minimizes active microwave time and lowers the chance of cold cores.
Practical Testing Protocol
Test a new container by placing it next to a cup of water and running the microwave for 60 seconds on high. If the container becomes hot while the water remains cool, the vessel is absorbing energy and should not be used for direct reheating.
Document time, power, and temperature profiles for each container to build a quick reference that matches your microwave’s power output. Record the time to reach a safe internal temperature for the center of typical portions.
[having a small spacer paragraph to separate callouts so they are not adjacent]
Use a thermometer that measures center temperature to validate your routine; visual checks can miss cold spots. Accurate measurement prevents underheating and reduces food-safety risk.
[NOTE: The line above is an editorial spacer to separate callouts and ensure proper placement.]
[TESTER BREAK]
Expert Insight
Place the tip into practice by starting with 60–90 second intervals for glass containers, depending on portion size. Then stir and measure; most mixed plates reach serving temperature with fewer cycles in glass than in some plastics.
Safety and Practicality Tips for Microwave Containers
Only use containers labeled microwave-safe and inspect them for warping, cracks, or unusual odors after heating. Replace any container that degrades; degraded polymers can leach chemicals and compromise food safety.
Avoid metallic trims or painted decorations as these elements can arc and damage the oven. For repeated use with fatty or oily foods, prefer glass or certified ceramic to protect plastic longevity and food quality.
Test cookware sensitivity by heating a water cup with the container for 60 seconds; this routine reduces surprises in daily reheating tasks. Implementing a quick test keeps the reheating workflow efficient and safe.
Pro-Caution
When reheating dense, layered dishes in any container, program in intermediate stirring steps to prevent cold cores. Proper stirring and standing time finish heat transfer and improve evenness.
Top Container Picks for Efficiency
Tempered glass containers offer a reliable balance of heat transfer from food contact and resistance to thermal shock. Their predictable behavior often reduces total microwave time compared with some light plastics.
Ceramic vessels with microwave-safe certification retain heat after the cycle ends and excel for soups and stews. For more on ceramic properties see ceramic.
- Tempered glass: durable, even heating, and often oven-safe when rated.
- Ceramic bowls: strong heat retention; watch for metallic glazes.
- BPA-free microwave-safe plastic: lightweight and often fast, but monitor for warping and odors.
- Paper containers labeled microwave-safe: use for brief reheating tasks; expect lower retention.
Chef’s Notes: Tips for Success with Microwave Containers
Vent covers slightly to allow steam escape and encourage even steam circulation inside the container. Steam helps redistribute heat and typically shortens active microwave time.
Arrange dense items at the perimeter and softer items toward the center when possible to balance heating. This layout uses container surface area effectively and reduces reheating cycles.
Serving Suggestions
Transfer reheated food to a ceramic plate for presentation if you prefer higher table retention; the container choice for reheating and the serving plate can be different. A brief rest before serving stabilizes internal temperatures and reduces hot-spot risk.
Garnish with fresh herbs and a small drizzle of olive oil to restore aroma and mouthfeel lost during reheating. Presentation hacks improve perceived freshness and increase satisfaction without extra microwave time.
Data and Practical Metrics
Measure the center temperature and surface temperature to evaluate container performance objectively. Track average time-to-safe-temperature and required stirring steps to build a simple efficiency index for your most-used microwave containers.
Create a quick reference card listing container type, typical time per portion, and recommended power setting. Over time this card reduces trial cycles and extends container life.
FAQ
Why does container material matter when microwaving?
Material controls how a vessel absorbs or transmits microwave energy and how it conducts heat into food. That behavior changes heating speed, evenness, and the number of stirring cycles required.
Which container type heats fastest?
For mixed, moisture-rich plates, tempered glass often gives the best balance of speed and evenness because it does not absorb microwaves and heats primarily via contact. Glass typically reduces the need for repeated short cycles.
Are plastics safe for microwave use?
Use only plastics labeled microwave-safe and monitor them for signs of degradation. Replace plastics that discolor, warp, or emit odors to avoid long-term contamination and structural failure.
Does container shape change heating time?
Yes. Shallow, wide microwave containers expose more surface area and promote even heating, while deep, narrow dishes can create cold cores and require longer times. Choose shape deliberately to match dish geometry and portion size.
How do I test a new container?
Place a cup of water and the empty container in the microwave for 60 seconds on high. If the container becomes hot while the water stays cool, do not use it for reheating; the vessel is likely absorbing microwave energy.
In Retrospect
Selecting the right microwave containers is an efficient habit that cuts active reheating time and improves final texture. Prioritize certified microwave-safe glass or ceramic for mixed plates and reserve plastics for short, low-fat reheats.
Document your microwave’s behavior with each container type and use a simple checklist: test new vessels, vent covers slightly, stir midway, and verify center temperature before serving. Those steps yield safer, faster, and more consistent reheating results.
| Nutrient | Per Serving |
|---|---|
| Calories | 350 kcal |
| Protein | 18 g |
| Carbohydrates | 45 g |
| Fat | 10 g |
Internal Resource: For more on container safety and selection, consult your site’s microwave-safe materials guide and leftover storage recommendations for reheating timelines.

See also: microwave containers
]]>
- Microwaves cook by exciting water molecules, not by making food radioactive.
- Quick cooking often preserves heat-sensitive vitamins better than boiling.
- Uneven heating is a common issue; stirring and standing time reduce it.
- Use only microwave-safe containers to avoid chemical leaching.
How Microwaves Work
Microwave ovens generate electromagnetic waves tuned to agitate polar molecules. These waves primarily target water and other polar components in food, producing heat internally.
The mechanism is well documented in technical literature and summaries on microwave ovens. Electromagnetic principles are the same as in other appliances that use non-ionizing radiation.
Mechanism at the molecular level
Microwave frequency causes dipolar molecules such as water to rotate rapidly. That rotation creates friction and thermal energy that raises the food temperature.
This is distinct from thermal conduction from an external hot surface. The effect is efficient when moisture is present and lower in very dry foods.
Heat Distribution and Common Issues
Microwave fields inside the cavity form standing wave patterns that lead to hot spots and cold spots. Those patterns explain why some bites are scalding while adjacent areas remain cool.
Rotation trays and stirring break up those patterns. Allowing a short standing time after cooking helps residual heat homogenize the meal for safer, tastier results.
Prep and Cook Time
Microwaves reduce hands-on time. Typical dishes go from prep to plate much faster than conventional ovens.
Adjust times to your oven’s wattage and the food’s mass. Test initial runs and add brief increments to avoid overcooking.
- Preparation: 5 minutes
- Cooking: 8-12 minutes, depending on dish and microwave wattage
- Total Time: 13-17 minutes
Yield & Difficulty
This recipe yields roughly four servings in standard portions. It makes a quick weeknight side or light main when paired with protein.
Difficulty is low. The method favors precise timing and brief stirring, not advanced culinary technique.
- Serves 4 comfortably
Ingredients
Use fresh or frozen vegetables for speed and consistent moisture. Frozen mixes often come pre-cut and save prep time.
Adjust grains to preference. Cooked quinoa or brown rice hold up well to gentle microwave reheating and mixing.
- 1 cup fresh or frozen mixed vegetables (carrots, peas, corn)
- 1/2 cup cooked quinoa or brown rice
- 1 tbsp olive oil
- 2 cloves garlic, minced
- 1 tsp dried Italian herbs
- Salt and freshly ground black pepper, to taste
- 1/4 cup shredded low-fat mozzarella or vegan cheese (optional)
Instructions
Use a microwave-safe dish and cover it loosely to trap steam. Steam speeds cooking and helps retain nutrients by reducing water loss.
Stirring once or twice improves uniformity. Allow standing time after cooking to let temperatures equalize throughout the dish.
- Prepare your microwave-safe dish: Lightly grease it with olive oil to prevent sticking and to help flavors coat the vegetables.
- Mix garlic and herbs: Combine minced garlic with dried Italian herbs and olive oil; brush this mixture evenly over the vegetables for aromatic infusion.
- Add the vegetables and grains: Layer fresh or frozen mixed vegetables and cooked quinoa or brown rice in the dish, seasoning with salt and pepper.
- Cover loosely: Use a microwave-safe lid or vented plastic wrap to allow steam to escape, preventing sogginess while ensuring thorough cooking.
- Cook on high power: Microwave for 6 minutes, then stir gently to distribute heat evenly, helping to cook all ingredients uniformly.
- Continue microwaving: Cook for another 4-6 minutes, depending on your microwave wattage and vegetable size, until vegetables are tender but vibrant.
- Add cheese and finish: Sprinkle shredded cheese on top and microwave for an additional 1 minute, creating a creamy, melted finish.
- Rest before serving: Let the dish sit covered for 2 minutes; residual heat enhances flavors while moisture distributes evenly.
Chef’s Notes and Tips for Success
Microwave wattage varies; common ranges are 600–1,200 W. Start with shorter times and increase by 30-second increments to avoid overcooking.
Microwaving uses minimal water and short exposure, which helps retain heat-sensitive vitamins. For more on nutrients, review summaries on nutrition science.
Expert Insight
Always cover food to retain moisture but leave vents. Trapping steam speeds cooking and reduces nutrient loss compared with boiling.
Pro-Caution
If reheating leftovers, add a tablespoon of water to the container for each cup of food. This small step restores moisture and prevents dryness.
Serving Suggestions
Garnish the finished dish with fresh herbs for aroma and visual contrast. A squeeze of citrus brightens flavors and adds vitamin C at the table.
Pair the vegetable and grain mix with grilled protein or a leafy salad. For texture contrast, serve with a crisp side or toasted seeds.
| Nutrient | Per Serving |
|---|---|
| Calories | 210 |
| Protein | 7g |
| Carbohydrates | 28g |
| Fat | 7g |
For safe handling and temperature targets, consult standard food safety summaries on food safety. Those pages outline safe reheating temperatures and bacterial risk factors.
For basic physics background about radiation types relevant to microwaves, review the primer on electromagnetic radiation. This clarifies why microwaves are non-ionizing and do not make food radioactive.
Q&A
Below are concise answers to common microwave concerns. These responses reflect consensus in food science and appliance safety.
They address safety, nutrients, containers, and reheating best practices based on documented mechanisms.
Q1: Are microwaves cooking food with radiation? Should I be worried?
Microwaves use non-ionizing electromagnetic waves. They heat by agitating polar molecules and do not induce radioactivity.
Q2: Does microwaving destroy nutrients in my food?
Rapid cooking with little water tends to preserve vitamins like vitamin C better than prolonged boiling. The overall nutrient loss depends on time, temperature, and water exposure.
Q3: Can microwaving create toxins?
Microwaving does not create unique toxins distinct from other cooking methods. Overheating or burning any food can produce undesirable compounds, regardless of the heat source.
Q4: Why does food sometimes heat unevenly?
Field distribution and food geometry cause uneven heating. Stirring, rotating, and standing time reduce temperature gradients for safer consumption.
Related Resources
Read our practical safety guide for device-specific tips: Microwave Safety Tips Every Cook Should Know. That page lists safe practices for container choice and reheating targets.
For appliance comparisons and buying guidance, see our overview: Kitchen Appliances Guide. It helps you select a suitable microwave by wattage and features.
FAQ
Is food cooked from the inside out in a microwave?
Microwave energy penetrates a few centimeters and heats water molecules directly. Dense or layered foods may heat from surfaces as conduction follows the initial microwave heating.
Can I sterilize jars or containers in a microwave?
Microwaving can sanitize moist containers but does not reliably sterilize them. Use proper sterilization methods for canning to ensure safety and longevity.
Are microwave-safe plastics truly safe?
Only use plastics labeled microwave-safe. Independent testing shows that approved materials remain stable under normal microwave conditions, while untested plastics can deform or leach.
Does microwaving kill bacteria?
Microwave heating can kill bacteria if the food reaches uniform, safe internal temperatures. Uneven heating may leave pockets at unsafe temperatures, so stir and check with a thermometer.
Will microwaving alter food flavor or texture?
Microwaving preserves moisture but does not produce browning reactions like the Maillard reaction. Textural changes occur; crunchy surfaces often become soft unless finished by other methods.
See also: microwave
]]>
- Map heat visually before cooking to avoid scorch points.
- Use thermometry at multiple points for repeatable results.
- Adjust the heat source and repeat tests until readings stabilize.
Prep and Cook Time
Preparation: 10 minutes. Gather tools and pick the heat source you normally use to get realistic data.
Testing and Monitoring: 20 minutes. Run multiple short tests and record readings to spot patterns instead of single anomalies.
Yield and Difficulty
This procedure suits a single fondue pot and supports 4–6 servings when used as part of normal meal prep. Testing does not change your recipe; it only ensures even heating during service.
Difficulty is medium because accurate mapping needs patience and consistent measurement. Anyone comfortable with a probe thermometer and basic kitchen safety can perform these checks.
Ingredients and Tools
Use common items: a digital probe thermometer, small drops of vegetable oil, aluminum foil strips, and optionally thermochromic paint or liquid for visual mapping. These let you observe surface behavior and measure temperature gradients.
Choose a test medium such as 2 cups of water to simulate fondue fluid without wasting ingredients. Water prevents immediate burning and transmits heat in the same way cheese or chocolate does, giving useful comparative results.
Instructions
Run the sequence slowly and repeat each subtest once or twice to confirm findings. Keep notes and label any consistent hot zones on the pot rim or base.
Work with the same heat source settings you will use for service to ensure test results translate to real cooking conditions. Small changes in flame or electric setting create large differences in hotspot behavior.
Set up and baseline
Place the cleaned fondue pot on your usual heat source and add 2 cups of room-temperature water to cover the bottom. Insert a digital probe in the center and wait for the readout to reach a steady baseline for five minutes.
Record the center temperature and then place the probe 1–2 cm from the side to capture an edge reading. Repeat at opposite edges to build a simple thermal map of the pot interior.
Visual mapping methods
Scatter a few small drops of vegetable oil across the water surface and watch where the oil drifts; oil moves toward warmer areas and reveals circulation patterns. Oil tests are nondestructive and fast, useful for spotting lateral heat flow toward a hotspot.
For clearer visual cues, lay small strips of aluminum foil flat on the cooled interior before reheating; brighter discoloration or faster darkening indicates hotter zones. This method produces durable marks you can reference in future sessions.
Thermometric mapping
Probe temperatures at the center, mid-radius, and edge every five minutes during a controlled heat cycle. Log the data and look for consistent deltas greater than 5–8 °C, which usually indicate meaningful hotspots that affect melting.
If you use thermochromic paint or liquid for a heat map, apply it in thin sections and watch for color shifts during heating. Thermochromism gives immediate, high-resolution feedback on temperature differences across the interior surface; refer to the chemistry at thermochromism for how color change correlates to temperature.
Recording and adjustment
Log times, set points, and locations in a simple table so you can repeat tests and compare results. Consistent documentation turns one-off checks into a maintenance plan you can follow before each service.
When hotspots appear, try a diffuser plate, lower the heat setting, or shift the pot slightly on the burner and retest. For electric bases, change power settings incrementally and rerun mapping until readings converge within an acceptable band.
Tips for Success
Test in short intervals and avoid long continuous runs during the diagnostic phase to prevent accidental scorching. Short cycles expose transient hotspots and let you adjust faster without wasting ingredients.
Keep a small notebook for repeated checks and add dates so you can track changes after seasoning or maintenance work. Repeated tests after cleaning or seasoning confirm whether adjustments had the intended effect.
Expert Insight
Maintenance and Safety
Maintain pot surfaces through proper cleaning and recommended seasoning routines to avoid residue that alters heat transfer. Residue and build-up act as insulators and can produce false hotspot patterns over time.
Use a silicone mat under fuel burners and stabilize the pot on the heat source to prevent tipping and uneven contact. Stable, repeatable positioning reduces the chance of localized overheating caused by gaps or angular contact.
Pro-Caution
Serving Suggestions
Once you achieve even heating, use that stability to focus on texture control and timing during service. Consistent thermal behavior lets you keep cheese or chocolate at ideal viscosity without frequent stirring.
Pair your fondue with a curated set of dippers so guests can enjoy variety without crowding the pot. Overloading the pot can change thermal balance quickly, so serve in batches if you expect heavy traffic.
Pot Types and Heat Behavior
Different materials heat and hold temperature in distinct ways; consult material properties when choosing mitigation strategies. For an overview of the dish and its history, see fondue.
Cast iron retains and spreads heat more evenly once hot, while thin-wall stainless steel can develop hotspots faster due to lower thermal mass. For more on cast-iron behavior, read cast-iron insights and consider a heavier base to smooth peaks.
Thermal conduction and convection within the pot drive hotspot patterns; understanding basic heat transfer helps you select tests and interpret results. See heat transfer for the governing principles that predict how energy moves through fluids and solids.
Internal Resources
For related upkeep steps, consult our internal guide on kitchen tool care. That page outlines cleaning, seasoning, and storage practices that influence heating behavior.
To align testing with everyday cooking, review our basic fondue techniques before guests arrive so you test under real service conditions. Internal consistency between tests and service yields reliable results.
FAQ
What are hot spots and how do they form?
Hot spots are localized areas of higher temperature inside the pot where energy concentrates. They form from uneven contact with the heat source, variable wall thickness, or insulating build-up on the interior surface.
Which quick test is most reliable without special tools?
The oil drift test plus a shallow water boil gives fast, nondestructive feedback and highlights circulation and point heating. Combine that with foil strips to create a durable visual record.
Can seasoning or cleaning change hotspot patterns?
Yes, surface condition affects heat transfer significantly. Proper cleaning and seasoning remove insulating residue and improve thermal contact, often reducing apparent hotspots.
When should I use a diffuser plate?
Use a diffuser plate when persistent hotspots appear along one side or when using thin-walled pots on high-intensity burners. A diffuser spreads flame or element heat more evenly across the pot base.
How often should I retest my pot?
Run a quick check after any major cleaning, after long storage, or before important service events. Regular spot-checks keep your heat profile predictable and prevent surprises during service.
Applying these methods turns hotspot detection from guesswork into a routine check that fits into normal prep. Use measured tests, document results, and adjust heat sources until thermal readings match the ideal profile for smooth, consistent fondue.
See also: fondue pot
]]>