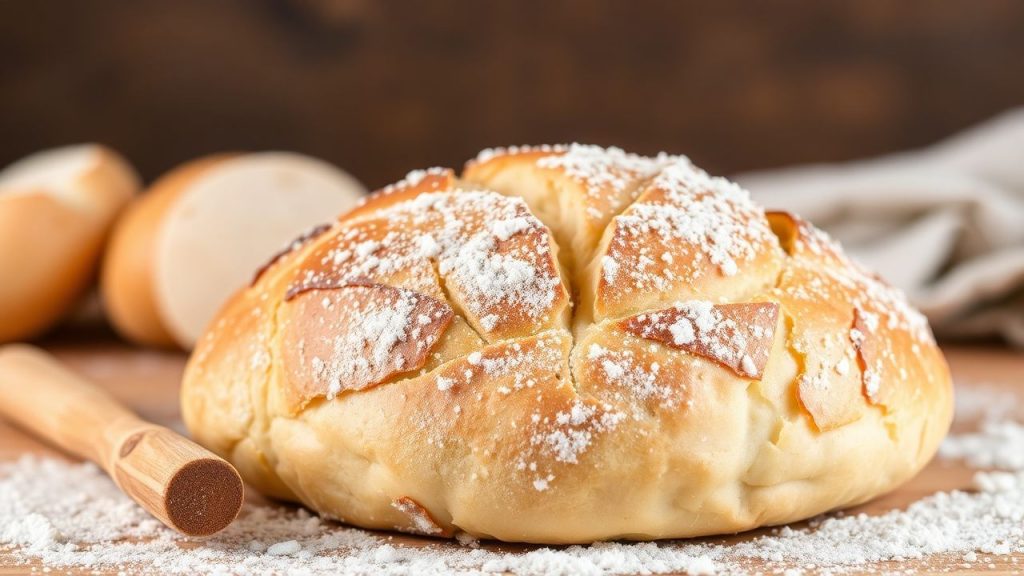
- Bread browning forms when heat transforms sugars and amino acids into dozens of flavorful compounds.
- Temperature, moisture, and ingredient mix determine the balance between caramelization and the Maillard reaction.
- Simple technique changes—steam, scoring, small amounts of sugar or honey—sharply alter crust color and taste.
- Controlling fermentation and flour protein improves both crumb and browning potential.
The chemistry behind bread browning
Bread browning stems from two main reactions: the Maillard reaction and sugar caramelization. The Maillard reaction requires amino acids and reducing sugars and produces a wide set of aroma compounds that bakers prize for toasty and nutty notes.
The Maillard reaction is well described in scientific literature. For technical background, see Maillard reaction. Caramelization, a separate thermal breakdown of sugars, also contributes to darker color and sweet-toasty tones; details appear on Caramelization.
Key factors that control browning
Four variables govern browning intensity: temperature, surface moisture, sugar availability, and protein content. Bakers adjust these to reach preferred crust color without burning.
Temperature speeds up chemical reactions, while moisture slows them until surface water evaporates. Protein level (gluten-forming proteins) supplies amino acids for Maillard pathways; learn more about gluten chemistry at Gluten.
Recipe, timing and ingredient roles
Preparation-active time and ingredient ratios influence the bread’s browning potential. A well-planned timeline yields consistent color and flavor.
Below are practical details for a standard loaf that highlights browning techniques while maintaining good crumb structure.
Prep and Cook Time
Preparation: 20 minutes. Keep hands efficient when mixing and kneading to retain temperature control.
Rising: 1 hour 30 minutes. Fermentation creates sugars and gases that shape flavor and surface reactions.
Baking: 30–35 minutes. Use an initial burst of steam, then finish in dry heat for crust development.
Total: About 2 hours 25 minutes depending on room temperature and dough strength.
Yield and Difficulty
Yield: 1 large loaf, serves 8–10. This scale produces a single surface area suited for controlled browning.
Difficulty: Medium. The methods require attention to fermentation and oven management, but they are reproducible with practice.
Ingredients
- 3 ½ cups bread flour, sifted
- 1 ¼ cups warm water (≈110°F)
- 2 tsp active dry yeast
- 1 tbsp granulated sugar
- 2 tsp fine sea salt
- 2 tbsp olive oil, plus extra for greasing
- 1 tbsp honey (adds fermentable sugars for better crust color)
Instructions
- Activate the yeast: Combine warm water, yeast and sugar. Wait 5–7 minutes until frothy; this confirms active fermentation.
- Mix dough: Combine flour and salt, then add the yeast mix, oil and honey. Stir until a rough mass forms; the honey boosts surface sugars that help caramelize.
- Knead: On a lightly floured board, knead 8–10 minutes until elastic and smooth. Kneading develops the gluten network so the crumb supports even browning.
- First rise: Oil a bowl and place dough inside. Cover and let rise in a warm spot about 1 hour, until doubled. Fermentation creates flavor precursors for Maillard chemistry.
- Shape and second rise: Punch down gently, shape into a boule, and place on parchment. Cover and rest 30–45 minutes for final proofing; avoid overproofing to keep surface sugars available.
- Preheat and prepare: Heat oven to 450°F (230°C). Place a pan on the lower rack to create steam during the first 15 minutes of baking.
- Score and bake: Slash the top to control expansion. Add hot water to the lower pan to generate steam, bake 15 minutes with steam, then remove pan and bake 15–20 minutes until deep golden.
- Cool: Transfer to a wire rack and cool at least 30 minutes before slicing; cooling completes interior setting and allows flavors to stabilize.
How technique alters chemistry
Steam delays crust setting and keeps the surface moist long enough for internal expansion. After steam ends, the surface dries and undergoes browning reactions more rapidly.
Scoring increases surface area and directs where the crust will expand, which affects heat exposure and browning patterns. Small changes in oven placement change localized temperatures and color development.
Techniques to enhance browning
Use honey or a small sugar addition in the dough to increase reducing sugar content. Brushing with egg wash or milk before baking adds proteins and fats that encourage more intense browning.
High initial heat followed by a slight drop can create a crisp, dark crust without burning the crumb. Monitor the oven and rotate the loaf if your oven has hot spots.
 Expert Insight
Experiment with flour blends. Adding 5–10% whole wheat or rye increases soluble sugars after fermentation and can deepen crust tone. However, whole grains absorb more water; adjust hydration accordingly.
 Pro-Caution
Chef’s notes and troubleshooting
Temperature control: Use an oven thermometer to verify real temperature. Many home ovens run 10–25°F off the dial, which alters browning rates significantly.
Moisture balance: If you get pale crusts, reduce hydration slightly on the surface or shorten initial steam time. If crusts burn before crumb finishes, lower the rack or reduce initial temperature.
For longer flavor development, try a cold overnight proof. Extended refrigeration increases enzymatic sugar release and improves browning potential when baked. Read our in-depth guide on bread baking chemistry for lab-style explanations and practice protocols.
For technique primers, see our starter guide at basic bread techniques, which covers kneading, shaping and scoring drills useful for consistent crusts.
Serving suggestions and presentation
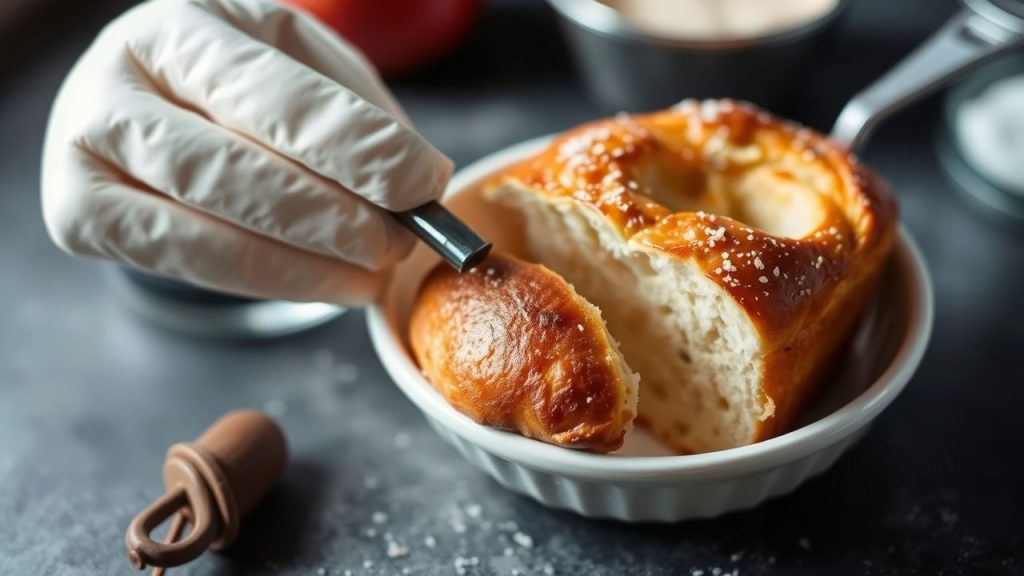
Slice warm for the best aroma and mouthfeel. A pat of butter highlights Maillard-derived savory notes, while herb oils pair well with toasty flavors.
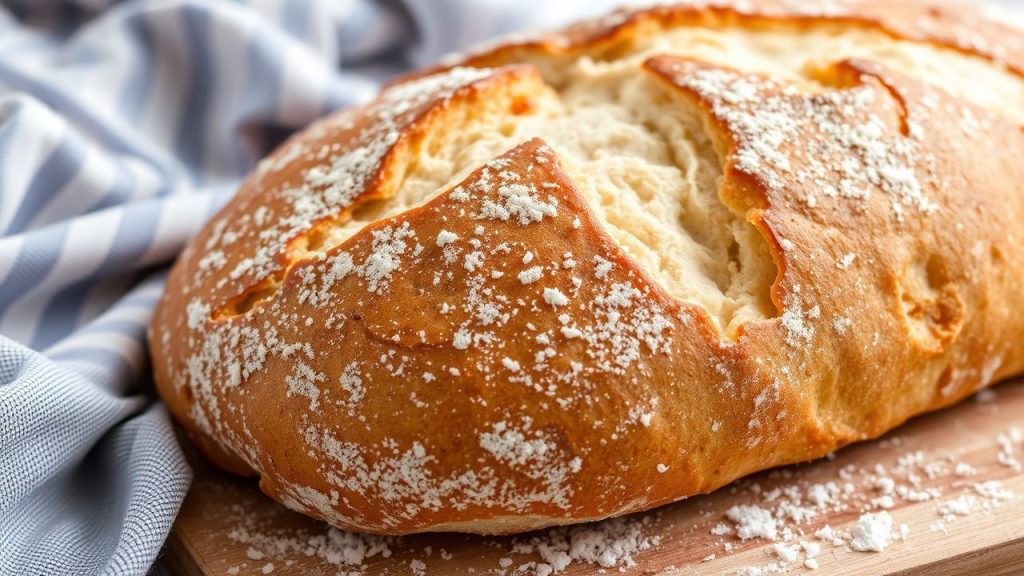
For a rustic finish, dust lightly with flour before baking and sprinkle few grains of coarse sea salt immediately on removal. Those small finishing touches increase sensory contrast and visual appeal.
| Nutrient | Per Serving (1 slice) |
|---|---|
| Calories | 140 kcal |
| Protein | 4 g |
| Carbohydrates | 28 g |
| Fat | 2 g |
Further reading and science links
For foundational context on bread as a cultural and chemical staple, consult the general overview at Bread. To explore fermentation mechanics that produce fermentable sugars, see Fermentation.
These sources clarify the basic science behind the processes discussed here and help you plan controlled experiments at home or in a test kitchen.
FAQ
What exactly causes the golden-brown crust?
The golden-brown crust results mainly from the Maillard reaction, where amino acids and reducing sugars react under heat to form browning pigments and dozens of flavor molecules. Caramelization of sugars also adds sweet, toasty notes at higher surface temperatures.
Does adding sugar always make bread browner?
Adding small amounts of sugar increases reducing sugars available for browning, which often darkens the crust. However, too much sugar raises the risk of burning, so use modest additions and adjust oven time and temperature accordingly.
How does moisture affect browning?
Moisture delays browning because water must evaporate before surface temperatures rise enough to trigger Maillard and caramelization pathways. Steam initially helps the loaf expand, then removing steam allows rapid browning.
Will different flours change crust color?
Yes. Higher-protein flours supply more amino acids for Maillard reactions, often producing richer crusts. Whole grains contribute additional sugars and phenolic components that can deepen color and add complexity.
How do I avoid a burnt crust while still getting good color?
Use high heat for a short initial period with steam, then lower or remove direct heat and continue in dry conditions. Monitor visually and rotate the loaf if your oven heats unevenly; keep a thermometer handy to ensure consistent results.
Mastering bread browning lets you control both appearance and layered flavor. With practice you will predict how small changes in ingredients and technique alter the chemistry and produce reliably delicious crusts.
See also: bread browning
]]>
- Short process control: proof and boil timing determine structure and chew.
- Flour and hydration: high-protein flour and ~62% hydration deliver chew and handling strength.
- Boil then bake: boiling gelatinizes starches and locks moisture for a firm crust.
- Cold retard for flavor: overnight refrigeration tightens crumb and improves taste.
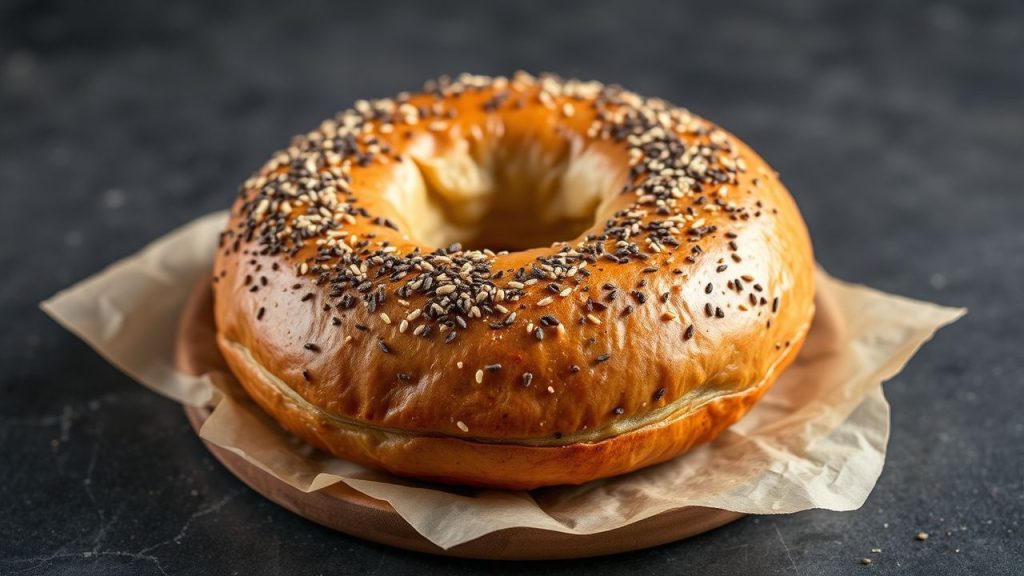
Why a Chewy Bagel Crust Matters
A true chewy bagel stands apart by bite, sheen, and density. The exterior forms when surface starches gelatinize in the boil and then brown in the oven, producing a glossy, resilient crust.
That structure relies on a strong gluten network and controlled Maillard browning. Read about bagel history and how technique shapes texture, or consult Maillard reaction basics to understand crust color.
Prep and Cook Time for Chewy Bagels
Plan for about two hours of active work for a same-day batch: mixing, kneading, first proof, shaping, short bench rest, boiling, and baking. Ambient temperature and ingredient coldness will change timelines, so measure and note times.
If you prefer deeper flavor, retarding the shaped dough overnight adds 8–18 hours but only a few minutes of active work. Cold retard tightens crumb and concentrates fermentation flavors in the chewy bagel.
Yield and Size Guidance for Chewy Bagels
This formula yields eight medium bagels at roughly 4 inches each. Scaling is linear; double ingredients to produce 16 bagels while keeping fermentation and boil times consistent for chew uniformity.
For larger or smaller bagels, adjust shaping and bake time by 2–5 minutes. Larger bagels need slightly longer in the oven to build a deep, even color without burning the crust.
Difficulty Level and Tools for Chewy Bagel Success
Rated medium: the method requires basic dough handling and timing discipline rather than advanced equipment. A digital scale and a timer produce consistent outcomes more quickly than guesswork.
Key tools: mixing bowl, bench scraper, slotted spoon, baking stone or steel, and a thermometer if you track fermentation precisely. Use a scale to hit hydration and flour weight targets every batch.
Ingredients for Chewy Bagel Dough
Core ingredients create structure, flavor, and crust. Use a reliable bread or high-gluten flour to develop the required gluten network for chew.
Typical roles: flour builds gluten; yeast ferments sugars into gas and flavor; salt controls fermentation; and barley malt or sugar aids browning. For background on protein and elasticity, consult gluten fundamentals and yeast basics.
- 4 cups bread flour (high-protein; weigh for accuracy)
- 1 ½ teaspoons instant yeast
- 1 ¼ cups warm water (about 110°F/43°C)
- 2 tablespoons granulated sugar
- 1 tablespoon salt
- 1 tablespoon barley malt syrup (or substitute honey for similar browning)
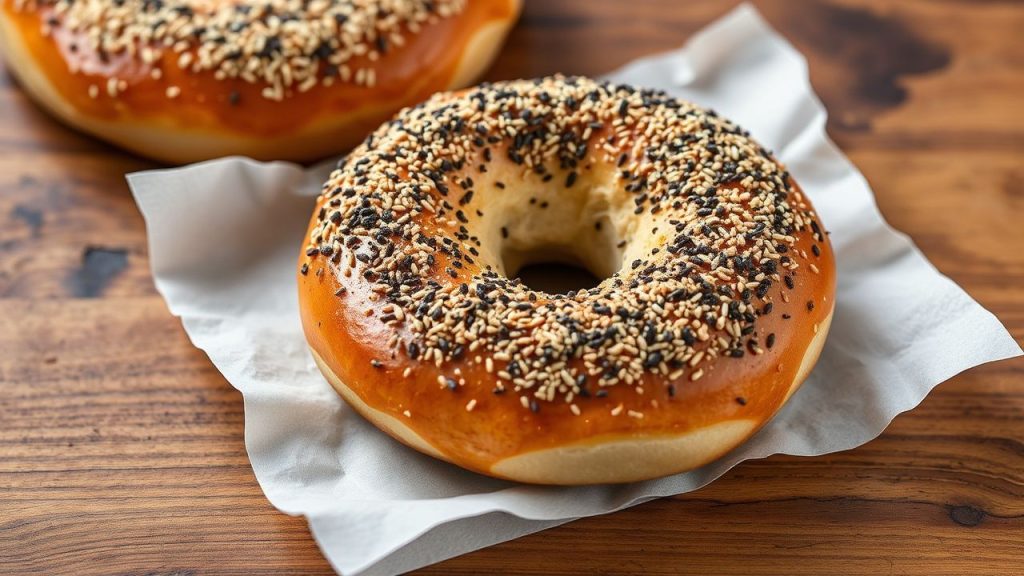
- Optional toppings: sesame, poppy, minced onion, everything seasoning
- For boiling: 2 quarts water, 2 tablespoons baking soda, 1 tablespoon barley malt syrup
Flour, Yeast, and Hydration Details
Select bread flour or high-gluten flour to reach the elasticity needed for a chewy bagel. Replace up to 10–15% with whole wheat for flavor but reduce hydration slightly to compensate for bran absorption.
Instant yeast delivers a predictable rise; active dry yeast will work if rehydrated. Maintain roughly 62% hydration for this formula and weigh ingredients to hit that target repeatedly.
Instructions to Make a Chewy Bagel
Follow the sequence: mix, develop gluten, ferment, shape, rest, boil, and bake. Each step affects gluten alignment and gas retention; omitting any stage changes final texture and chew.
Read the full set of numbered steps before you begin so the shaping and boiling proceed smoothly and you manage timing for each batch of bagels.
- Mix dry ingredients. Combine flour, yeast, sugar, and salt in a large bowl. Whisk to distribute and break up clumps.
- Add liquid and malt. Add warm water and barley malt syrup; mix until a rough dough forms. Scrape the bowl to ensure even hydration.
- Knead the dough. Knead 8–10 minutes by hand until smooth, elastic, and slightly tacky. Proper gluten development delivers the desired chew.
- First proof. Place dough in a lightly oiled bowl, cover, and let rise in a warm spot until doubled — roughly 1 hour depending on room temperature.
- Shape bagels. Divide into 8 equal pieces, pre-shape into tight balls, then form a hole with your thumb and stretch to about 3 inches diameter.
- Second proof. Rest shaped bagels on a parchment-lined tray, covered lightly, for 20 minutes to puff slightly before boiling.
- Prepare the boil. Bring 2 quarts water to a rolling boil. Add baking soda and barley malt syrup to raise pH and encourage color and sheen.
- Boil bagels. Lower bagels into boiling water two or three at a time. Boil 60 seconds per side to gelatinize surface starches and seal moisture.
- Drain and top. Remove with a slotted spoon, drain briefly on a rack, then add toppings while the surface is still tacky so they adhere and toast.
- Bake until golden. Preheat the oven to 425°F (220°C). Bake 20–25 minutes on a preheated stone or steel until evenly golden, rotating if needed for color consistency.
- Cool and serve. Cool briefly to finish interior set, then slice and serve warm to display the chewy bagel crust and tender crumb.
Using a preheated stone or steel improves bottom heat transfer and helps develop a crisp exterior without overbrowning the top. Consult baking resources for heat transfer basics if you want to optimize equipment choices.
Pro-Caution
Drain bagels well and apply toppings quickly; damp but not dripping surfaces produce the best adhesion and even toasting in the oven.
If bagels collapse in the oven, reduce proof time or knead a bit longer to strengthen gluten. Small adjustments often solve common issues.
Tips for Chewy Bagel Success
Small adjustments yield large improvements. Weigh flour and water for consistent hydration and test one bagel as a control to refine boil time and oven spring for your setup.
Cold retardation after shaping improves flavor and tightens crumb. Remove shaped bagels from the fridge and let them come closer to room temperature before boiling to reduce shock.
Expert Insight
Try mixing a small portion of high-gluten flour into bread flour for extra elasticity. If your bagels taste flat, check yeast freshness and fermentation temperature first.
Serving Suggestions for Chewy Bagels
Serve warm with traditional spreads: plain or herbed cream cheese, butter, or smoked fish. The chewy bagel crust stands up to heavy toppings without becoming soggy when prepared correctly.
Toast leftovers briefly to refresh the crust and warm the interior. Light toasting revives chew and releases aromas from toasted toppings like sesame or onion flakes.
Nutritional Snapshot for Chewy Bagels
Per bagel, expect roughly 280 kcal, 11 g protein, 57 g carbohydrates, and 1.5 g fat. Exact values vary with flour brand, toppings, and bagel size.
To reduce calories, make smaller bagels or increase whole-grain content for added fiber. Changes to flour type and size will alter hydration and bake time, so adjust method accordingly.
Q&A
What creates the bagel’s chewy crust?
A strong gluten network and a short boil produce the chew. Gluten gives elasticity; boiling gelatinizes surface starches and seals moisture before the crust browns.
How long should I boil each bagel?
Boil 60 seconds per side for this formula. Longer boils increase density; shorter boils yield a softer crust. Time consistently and work in small batches for uniform results.
Can I make bagels without barley malt?
Yes. Sugar or honey will help browning, but barley malt provides a characteristic flavor and sheen. Expect a slightly different color and flavor without malt.
Why do my bagels become too airy?
Overproofing or weak gluten structure causes excess airiness. Control proof time and temperature; the dough should double but not become excessively puffy or bubbled.
How should I store bagels to preserve chew?
Cool fully, then freeze if not consumed soon. For short-term storage, use a paper bag to prevent moisture build-up and toast before serving to re-crisp the crust.
Wrapping Up
Consistent chewy bagels come from measured flour choice, accurate hydration, managed proofing, and a disciplined boil before a hot bake. Each variable affects chew and crust in predictable ways.
Practice one batch, record adjustments, and refine timing. With careful control of ingredients and process you will replicate bakery-style chewy bagels reliably in your kitchen.
See also: bagel topping ideas and artisan techniques referenced throughout this guide for method crossover and variations.
See also: Chewy Bagel
]]>
- Key takeaway: Clean technique and the right ingredients yield reliable kombucha batches.
- Key takeaway: Fermentation time controls sweetness, acidity, and carbonation in kombucha.
- Key takeaway: Secondary fermentation lets you add flavor and build fizz safely.
- Key takeaway: Reserve starter liquid and a healthy SCOBY to maintain continuous kombucha production.
Selecting the Perfect Tea and Sweetener for Optimal Kombucha Fermentation
Choose a high-quality tea because it supplies the nutrients the kombucha culture consumes during fermentation. Use plain black, green, or white tea; avoid oils and flavored sachets that can stress the SCOBY.
Use sucrose (standard cane sugar) as the primary fermentable for consistent kombucha results. You may trial alternatives like honey or maple in small, controlled pilot batches and track the SCOBY response carefully.
For background on the beverage and its microbial context, consult the kombucha reference on kombucha. For fermentation science, see the fermentation (food) entry.
Crafting the Ultimate SCOBY: Tips for Healthy Kombucha Culture Growth
A healthy SCOBY (symbiotic culture of bacteria and yeast) begins with unpasteurized starter liquid and stable, warm conditions. Keep brewing equipment sanitized and provide a breathable cover so gas exchange can occur while keeping dust and insects out.
Expect a thin pellicle to form in 7–14 days under good conditions; thickness increases through subsequent cycles. Store a spare SCOBY in starter tea between batches to maintain viability and reduce failure risk.
Expert Insight
Balancing Flavor Profiles Through Controlled Kombucha Fermentation Times
Fermentation time dictates sweetness, acidity, and the live culture profile in kombucha. Short primary ferments (7–10 days) leave more residual sugar and a milder acidity; longer ferments (12–21 days) produce tangier, less sweet kombucha.
Taste daily after day seven using a clean spoon or straw to map sweetness versus sharpness. Adjust batch length seasonally to compensate for ambient temperature shifts and to reach your target flavor consistently.
Innovative Additions and Bottling Techniques to Elevate Your Kombucha Brew
Secondary fermentation lets you safely add fruit, herbs, or spices to build aroma and natural carbonation in kombucha. Use airtight bottles rated for pressure and monitor pressure daily to avoid over-pressurization hazards.
Add about 1–2 tablespoons of puree or grated flavoring per 16 oz (approx. 500 ml) bottle for predictable results, then refrigerate when the desired carbonation arrives. Label bottles with flavor and date so you can track performance.
Prep and Cook Time for Kombucha
Preparation for a standard gallon batch takes roughly 15 minutes to brew tea and dissolve sugar. Primary fermentation ranges from 7 to 21 days depending on taste and ambient temperature.
Secondary carbonation typically adds 2–5 days; plan staggered bottles for testing so you can chill the first bottles and evaluate carbonation safely. Use sturdy glass bottles rated for carbonated beverages during secondaries.
Yield for Kombucha Batches
A typical home batch yields about one gallon of kombucha per jar. Reserve 2 cups of starter liquid at bottling to start the next batch immediately and maintain culture continuity.
Label jars with the batch date and flavor to monitor shelf life and carbonation performance. Keeping consistent records improves reproducibility and reduces wasted product.
Difficulty Level for Kombucha Home Brewing
Home kombucha brewing rates as medium difficulty: it requires routine sanitation, environmental control, and tasting to dial in flavor. The process follows repeatable steps; attention to detail reduces failed batches.
Invest in basic equipment—accurate scale, clean glass jars, breathable covers, and pressure-rated bottles—and you will reduce variability. Over time you will develop a predictable rhythm and fewer surprises.
Ingredients for Reliable Kombucha
Measure accurately. Consistent kombucha outcomes depend on precise water volume, tea mass, and sugar weight for each batch.
- 8 cups water
- 5 tea bags black or green (or 1 tablespoon loose leaf)
- 1 cup cane sugar
- 2 cups raw kombucha (starter)
- 1 SCOBY
- Optional: ginger, hibiscus, berries, lavender for secondary ferment
Use filtered water when municipal chlorine or chloramine levels are high, since those compounds can impede the culture. Record any deviations and their effects in your brewing journal.
Instructions: Step-by-Step Kombucha Brewing
Boil water and steep tea for 10 minutes to extract tannins and nutrients. Remove leaves or bags and dissolve sugar fully while the tea remains hot.
Cool the sweet tea to room temperature before adding starter liquid and the SCOBY. Pour the cooled sweet tea into a clean glass jar, add starter kombucha and the SCOBY, then cover with a breathable cloth and secure with a band.
- Place jar in a warm (75–85°F / 24–29°C) spot out of direct sunlight to ferment for 7–21 days.
- When the balance suits your taste, remove the SCOBY and reserve 2 cups starter for the next batch.
- For secondary fermentation, add flavoring to bottles, cap tightly, ferment 2–5 days, then chill to halt yeast activity.
Monitor pressure during secondary fermentation by opening a test bottle daily. Always use bottles designed for carbonation and discard any container that shows cracks or bulging.
Chef’s Notes for Consistent Kombucha
Blend tea types for a rounded kombucha profile; for example, use three parts black to one part green for body and brightness. White tea yields a delicate profile and may speed pellicle growth in some climates.
When trying alternative sweeteners, run 1-liter pilot batches to observe SCOBY reaction before scaling. Store and layer SCOBYs carefully; peel discolored layers if desired, as darker layers can indicate tannin buildup rather than spoilage.
Serving Suggestions for Kombucha
Serve chilled with citrus slices, mint, or a thin fruit wedge to enhance aroma and presentation. Kombucha pairs well with salads, grilled dishes, and spicy foods to refresh the palate.
For gatherings, pre-chill bottles and offer tasting pours so guests compare flavors and carbonation. Keep backup bottles refrigerated to prevent over-fermentation during service.
FAQ
What is kombucha?
Kombucha is a fermented tea beverage produced by a symbiotic culture of bacteria and yeast acting on sweetened tea. The beverage contains organic acids, trace alcohol, and live cultures that contribute to its tang and effervescence.
How long does it take to make kombucha?
Primary fermentation typically takes 7–21 days depending on temperature and desired acidity. Secondary fermentation for carbonation adds an additional 2–5 days in sealed bottles.
What is a SCOBY and how do I care for it?
SCOBY stands for symbiotic culture of bacteria and yeast and forms a cellulose pellicle on the surface of the brew. Keep a SCOBY in starter tea between batches at room temperature short-term or refrigerated for longer storage.
How can I safely carbonate my kombucha?
Use bottles designed for carbonation and add measured flavoring to feed yeast during secondary fermentation. Check pressure daily by opening a test bottle to prevent over-pressurization and always refrigerate when desired carbonation is reached.
Where can I learn more about tea and probiotics?
Consult reliable references on tea to understand polyphenols and extraction, and read about probiotics for context on live culture benefits and limitations. These sources provide solid background for home kombucha practice.
Brew Bliss emphasizes repeatable technique, precise measurement, and deliberate observation. Those practices convert trial-and-error into a dependable kombucha brewing rhythm.
Follow these steps, keep records, and adjust variables deliberately; over a few batches you will build consistent flavor, controlled carbonation, and confidence in your home kombucha practice.
Pro-Caution
See also: kombucha
]]>
- Yogurt tang originates mainly from lactic acid and fermentation-derived volatiles.
- Culture selection, time, temperature, fat, and concentration let makers tune tang precisely.
- Analytical measures and sensory panels together provide reliable control over tang intensity.
What creates yogurt tang?
The core sharpness of yogurt tang results when fermenting bacteria convert lactose into organic acids. That acid pool lowers pH and produces the immediate tart sensation on the palate.
Secondary metabolites amplify and color that acidity. Compounds such as diacetyl, acetic acid, and short peptides interact with acids to yield the multi-layered yogurt tang many consumers recognize.
Microbiology of fermentation
Starter cultures drive the biochemical pathway that creates yogurt tang. Typical pairings include Lactobacillus strains and Streptococcus thermophilus, which coordinate lactose breakdown and affect acid kinetics.
Cultures differ in enzyme sets and metabolic fluxes, so two starters can produce the same pH yet different aromatic profiles and tang intensity.
Key bacterial contributors
Lactobacillus species contribute sustained acid production and proteolysis that shape mouthfeel and tang. For background on genus-level traits see Lactobacillus.
Streptococcus thermophilus speeds initial acidification and acts synergistically with lactobacilli. Technical details are available at the Streptococcus thermophilus entry: Streptococcus thermophilus.
Flavor chemistry: more than acid
Acid concentration sets the baseline, but volatile compounds form the timbre of yogurt tang. Diacetyl adds buttery notes while acetic acid adds a sharp flicker on top of lactic acid.
These volatiles arise from amino-acid catabolism and sugar fermentation. Their ratios, not just total acidity, determine whether tang feels clean, grassy, or savory.
Important volatiles and their effects
Diacetyl contributes buttery and rounded flavors; at controlled levels it balances acidity. See the diacetyl reference for structure and sensory notes: Diacetyl.
Acetic and other short-chain acids increase perceived sharpness even at low concentrations. Producers manipulate these by selecting strains and managing fermentation dynamics.
Role of fermentation time and temperature
Fermentation duration controls how far lactose converts to acid; longer incubation raises titratable acidity and intensifies yogurt tang. Time is the simplest lever for tang control.
Temperature adjusts microbial growth rates and enzyme kinetics. Standard incubation near 43°C (110°F) balances acid production with desirable texture; lower or higher temperatures shift acid curves and volatile synthesis.
Factors that change yogurt tang
Ingredient composition affects how humans perceive the same chemical acidity. Fat content, solids-not-fat, and protein state change mouth coating and the perceived sharpness of yogurt tang.
Processing variables such as inoculation level, incubation profile, and post-fermentation handling also change tang. Producers combine these variables to reproduce a target tang across batches.
For home bakers and small-scale makers, standardize milk treatment and starter handling to reduce variation. See internal guidance on technique in our How to make yogurt primer.
Expert Insight
How fat and texture influence yogurt tang
Fat modulates perceived acidity by coating taste receptors and adding richness. Full-fat yogurt tends to taste smoother and less sharp than low-fat versions at equal pH.
Concentrating solids, as in strained or Greek-style yogurts, concentrates acids and volatiles, which can make yogurt tang feel both creamier and more pronounced.
Health and preservation benefits
Lowered pH from fermentation inhibits many spoilage organisms and pathogens, extending shelf stability relative to raw milk. That acid barrier underpins the expected shelf-life of yogurt products.
Yogurt can deliver live microbes that interact with gut ecology when strains are properly characterized. For a general reference on microorganisms marketed as beneficial see Probiotic.
Pro-Caution
If experimenting, check pH near target values and cool promptly to stop acid development. Small, repeatable experiments yield the most reliable adjustments.
Practical steps for home yogurt makers
To decrease tang, increase starter ratio or shorten incubation by 15–30 minutes. Rapid cooling after incubation halts microbial activity and preserves a milder tang.
To increase tang, reduce inoculation or extend fermentation under controlled temperature. Track titratable acidity or pH to avoid overshooting the desired yogurt tang level.
Standardize milk preparation—heat treatment, cooling, and homogenization—so batches reproduce the same tang. For term clarity, consult our internal dairy science glossary.
Analytical approaches and measurement
Professionals quantify tang using pH and titratable acidity. pH measures hydrogen activity while titratable acidity reports total acid equivalents that better correlate with perceived sourness.
Sensory panels capture human perception metrics that chemistry alone cannot. Combining chemical metrics with trained sensory data gives the most reliable control over yogurt tang.
Common misconceptions
Many assume any sourness signals spoilage. Controlled sourness usually indicates intended fermentation; spoilage adds off-odors, visible mold, or sliminess rather than isolated tartness.
Another misconception is that adding acid post-fermentation reproduces authentic yogurt tang. Acid additions can match pH but not recreate fermentation-derived volatiles and textural changes.
Analogy: how concentration and chemistry combine
Think of yogurt tang like a music chord. Acid is the root note; volatiles and peptides are harmonics that change timbre without altering the root frequency.
Shifting culture, time, or composition alters harmonic content and thus perceived tang, explaining differences between artisan and industrial products.
At-home troubleshooting for unwanted tang
If yogurt is too sharp, reduce incubation time by 15–30 minutes or increase starter level slightly. Cool the batch promptly at target pH to stop further acidification.
If off-flavors appear, check starter freshness and sanitation. Contaminants can produce atypical volatiles that distort yogurt tang and overall aroma.
FAQ
What gives yogurt its tangy flavor?
The tang primarily comes from lactic acid produced by fermenting bacteria. Secondary metabolites such as diacetyl and acetic acid add brightness and complexity to yogurt tang.
Do different bacteria change the taste?
Yes. Different strains produce distinct ratios of acids, volatiles, and peptides. Producers select cultures to achieve consistent yogurt tang, aroma, and texture.
Can I make yogurt less tangy at home?
Yes. Reduce incubation time, increase fat content, or raise starter levels to shorten the acidification window. Rapid cooling after incubation preserves a milder tang.
Is tanginess a sign of spoilage?
Not by itself. Increased sourness can mean continued fermentation rather than spoilage. Look for mold, rancid smells, or textural collapse before declaring spoilage.
Why do some commercial yogurts taste sweeter despite fermentation?
Producers often add sweeteners or use culture blends that produce less acid. They may also balance tang by adding fruit or flavorings after fermentation, changing perceived yogurt tang without altering pH significantly.
Each spoonful of yogurt reflects linked biochemical events managed by microbes and makers. Understanding acids, microbes, and processing allows you to shape yogurt tang to preference while maintaining quality and safety.
See also: lactic acid, diacetyl, Lactobacillus
See also: yogurt tang
]]>
- Gluten forms when water hydrates glutenin and gliadin, then mechanical action aligns them.
- Hydration and time often matter more than forceful kneading; temperature speeds enzyme and yeast activity.
- Flour choice sets the baseline: higher protein flours yield stronger gluten.
- Tests and techniques—windowpane, stretch-and-fold, and fermentation control—ensure consistent results.
What Is Gluten and How It Works
Gluten describes the protein network formed mainly from glutenin and gliadin when wheat flour meets water. These proteins bond and create an elastic, extensible matrix that traps carbon dioxide produced by yeast.
Understanding gluten chemistry helps you choose the right methods. For core background on the proteins and structure, see gluten on Wikipedia and use that foundation when you test dough performance.
Key Factors That Develop Gluten
Three variables control gluten strength: hydration, mechanical action, and time. You must balance these elements according to the flour, recipe, and desired crumb.
Adjust any variable to tune dough. For example, increase hydration to develop gluten with gentle handling, or increase kneading time for lower-hydration doughs to reach similar strength.
Hydration: Percentage and Feel
Hydration equals water weight divided by flour weight. Typical ranges: 55–65% for sandwich loaves, 65–75% for artisan loaves.
Higher hydration creates a more extensible gluten network but makes handling trickier. Use wet-hand techniques and stretch-and-fold to manage higher-hydration doughs.
Kneading vs. Time: Methods Compared
Traditional kneading aligns proteins quickly through mechanical action. However, long, slow fermentation can achieve similar gluten structure with minimal kneading.
Use the no-knead approach for hands-off dough, or employ short, periodic stretch-and-folds to build strength while preserving gas and flavor.
Practical Techniques: Tests, Tools, and Timing
Use objective checks rather than guesswork. The windowpane test and a tactile assessment of dough elasticity tell you when gluten has developed enough for shaping.
Temperature control also counts. Aim for a final dough temperature around 24–27°C (75–80°F) to balance yeast activity and enzyme action for most yeasted breads.
Windowpane Test and Benchmarks
Pinch a golf-ball-size piece and stretch it thin. If it forms a translucent, stretchable membrane without tearing, gluten is ready for bulk fermentation.
If it tears, rest the dough for 10–20 minutes and test again. Often, a short autolyse (rest after mixing flour and water) dramatically improves windowpane results.
Tools and Additives
Use a bench scraper, dough hook, or your hands depending on batch size. Bakers sometimes add vital wheat gluten to strengthen weak flours.
Rely first on technique: hydration, autolyse, and fold cycles deliver the best flavor and structure. Reserve additives when you cannot change flour sources.
| Bread Type | Hydration |
|---|---|
| Sandwich loaves | 55–65% |
| Artisan boules | 65–75% |
| Ciabatta | 75–85%+ |
Flour Choice and Its Impact
Protein content dictates potential gluten strength. Bread flour typically contains 12–14% protein, while all-purpose ranges 10–12%. Whole grain flours include bran that can cut gluten strands, yielding denser crumbs.
Blend flours to balance nutrition and texture. For weak flours, a small addition of high-protein flour or vital wheat gluten brings structure without overworking the dough.
Refer to the flour overview at flour on Wikipedia for technical details about milling and protein levels.
Troubleshooting Common Problems
Density, lack of oven spring, and tearing all point to gluten issues or fermentation errors. Diagnose by re-checking hydration, knead time, and proofing temperature.
For instance, dense crumb often means underdeveloped gluten or short fermentation. Conversely, open crumb with large uneven holes can indicate overproofing or very high hydration without sufficient surface tension.
Pro-Caution
After resting the dough, re-evaluate elasticity. Often a controlled, cool bulk ferment fixes structural issues and improves flavor through slower enzyme activity.
Specific Techniques: Stretch-and-Fold, Autolyse, and No-Knead
Stretch-and-fold builds alignment without aggressive kneading. Lift a portion of dough, stretch it over itself, and rotate. Repeat every 20–30 minutes during early bulk fermentation.
Autolyse—mixing water with flour and resting 20–60 minutes before adding salt and yeast—improves hydration and reduces kneading time. The method enhances extensibility and flavor.
Expert Insight
The no-knead method relies on long fermentation to develop gluten passively. It suits high-hydration doughs and yields excellent flavor due to extended enzyme and yeast interaction.
For hands-on guidance, find practical walkthroughs on internal pages like baking techniques and recipe-specific adjustments at bread recipes on this site.
Temperature, Fermentation, and Yeast Control
Yeast performance depends on dough temperature. Warmer dough accelerates fermentation but shortens flavor development. Cooler dough slows activity and improves complexity.
Target dough fermentation temperatures (final dough temp) will vary with your schedule. For baseline reading on yeast species and handling, see baker’s yeast on Wikipedia.
Practical Temperature Ranges
Room-temperature bulk fermentation typically runs 1–4 hours depending on dough strength and yeast amount. Retarding in the fridge overnight yields deeper flavor and easier shaping.
Use a thermometer to calculate water temperature for your mixing target. Control variables and reproduce results reliably across bakes.
Final Shaping and Oven Spring
Proper shaping builds surface tension, which supports oven spring. Tight shaping reduces degassing and helps the loaf rise vertically in the oven.
Score loaves to control expansion. For crust and crumb balance, add steam in the first 10 minutes of baking to delay crust set and maximize oven spring.
FAQ
How do I know when gluten is strong enough?
Perform the windowpane test. If the dough stretches thin and translucent without tearing, it has sufficient gluten. Also check that it holds gas and feels springy when poked.
Can I improve gluten in whole wheat dough?
Yes. Use higher hydration, autolyse, and slightly longer fermentation. Sifted dough or added vital wheat gluten can also improve structure while preserving whole-grain flavor.
Is vigorous kneading always better?
No. Vigorous kneading builds strength fast but can overheat the dough and damage structure. Often, gentle folding and time produce better flavor and an open crumb.
When should I add salt and why does timing matter?
Add salt after autolyse and with yeast if using direct methods. Salt tightens gluten and slows enzyme activity, so adding it too early can reduce extensibility during initial development.
What if my dough never forms a windowpane?
Check flour quality, add short rests (autolyse), and increase hydration slightly. If needed, use small additions of high-protein flour or vital wheat gluten and extend fermentation time.
For additional technical context about fermentation and enzymatic action, consult fermentation (food) on Wikipedia.
Armed with these techniques—controlled hydration, deliberate resting, and measured mechanical action—you can unlock gluten consistently so your loaves rise, slice, and taste like professional-baked bread. Practice the tests, monitor temperature, and adjust flour blends to match your goals. Happy baking and precise measuring yield reliable results.
See also: gluten
]]>