- Weigh not guess: aim for 1.5–3% salt by weight of prepared vegetables.
- Use additive-free salt: coarse sea salt or kosher salt avoids off-flavors and cloudiness.
- Submerge fully: keep veg under brine to prevent aerobic spoilage organisms.
- Adjust by veg: leafy greens need less salt than dense roots for optimal crunch.
Unlocking the Science Behind Salt Fermentation
Salt fermentation works by selecting for salt-tolerant lactic acid bacteria that produce acid and preserve food. This selective ecology reduces spoilage organisms and yields stable, tangy ferments.
Osmosis and salt-driven water movement concentrate sugars and cells inside plant tissues and help form brine quickly. For core science, see fermentation and osmosis for concise background.
Choosing the Right Salt for Salt Fermentation
Pick plain, additive-free salts for reliable salt fermentation. Coarse sea salt and kosher salt provide consistent crystal size and dissolve predictably into brine.
A salt’s mineral profile gives subtle taste and mouthfeel differences, but anti-caking agents and iodine can cause cloudiness or off-odors. For reference on the compound itself, review salt.
Mastering Salt Ratios for Different Vegetables and Salt Fermentation Timing
Use a scale for reproducible salt fermentation: 1.5% to 3% salt by weight of prepared vegetables is a practical range. For most cabbage ferments, 2% is reliable; raise toward 2.5–3% for roots to slow fermentation and keep crunch.
Calculate by weight: 1,000 g vegetables = 20 g salt for 2%. Adjust within the 1.5–3% window based on texture goals and temperature. Track temperature because salt and heat combine to set fermentation speed.
Troubleshooting Common Salt-Related Issues in Salt Fermentation
Mushy texture, off-odors, or pale brine commonly trace back to incorrect salt percentage or poor submersion. Low salt lets spoilage organisms grow; excessive salt stalls acid producers and delays souring.
When fermentation stalls, verify the salt percentage and storage temperature first. Check for aerobic exposure and make small corrections—adjust salt on new additions or repack under fresh brine if needed.
Identifying Too-Little Salt
Low-salt ferments can produce strong, putrid odors and rapid softening of vegetables. If you detect rotten smells or widespread surface mold, discard the batch safely and review measurements.
Use a calibrated kitchen scale to avoid guesswork. Rework procedures and sanitation to prevent repeat failures and maintain predictable salt fermentation outcomes.
Dealing with Over-Salty Jars
Excess salt slows microbial activity and yields a bland, under-soured product. Rescue strategies include diluting with unsalted vegetables or rinsing and repacking at a lower percent, then ensuring full submersion under brine.
Adjust timing and temperature on subsequent batches to prevent repeats. Record exact weights and environmental conditions to build consistent behavior from jar to jar.
 Pro-Caution
Clean, but avoid harsh sterilization that strips native microbes from vegetables. The right balance relies on measurement and technique rather than sterile conditions.
Recipe Framework and Practical Steps for Reliable Salt Fermentation
This framework yields about 1 quart and scales linearly by weight. The method emphasizes measurement: weigh, salt, pack, and fully submerge to control the microbial environment.
Tools matter. Use a digital kitchen scale and a fermentation weight or suitable substitute to maintain consistent submersion. For a primer on lactic acid organisms active in this process, consult lactic acid bacteria.
Prep and Timings
Preparation typically takes about 20 minutes; fermentation ranges from 5 to 14 days at 65–72°F (18–22°C) depending on desired acidity. Cooler temps slow activity and preserve crunch.
Check jars every 2–3 days and move to refrigeration once you reach the target flavor and texture. Cold storage slows bacterial action and extends shelf life.
Ingredients and Ratios
Example for 1 lb (approx 450 g) trimmed vegetables: use 2% salt by weight (about 9 g salt for 450 g veg). Scale up or down with the same percentage rule.
Typical ingredients: fresh vegetables, 1.5–3% non-iodized coarse salt by weight, filtered water if needed, and optional aromatics like garlic or caraway. Measure salt precisely to maintain consistent salt fermentation results.
 Expert Insight
Packing, Submersion, and Fermentation Management
Pack vegetables evenly and press to remove air pockets so brine covers the produce by at least 1 inch. Consistent pressure and a good weight reduce aerobic pockets and limit spoilage.
Use a lid that allows CO2 escape or an airlock. Record the date, salt percentage, and ambient temperature on each jar to learn what works for your space.
Temperature Control
Temperature governs speed: higher heat accelerates acid production but can soften texture. Aim for 65–72°F for balanced progress; move jars to the fridge once the desired acidity forms.
Log observations. Small adjustments in salt percentage and temperature produce predictable changes in timing and texture over successive batches.
Serving, Storage, and Shelf Life for Salt Fermentation
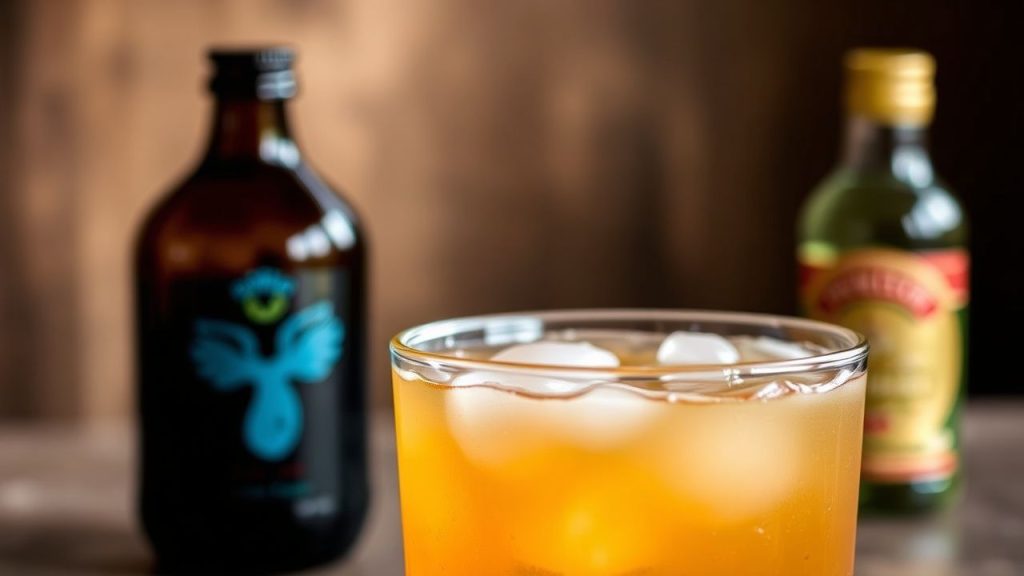
Serve ferments as a crisp condiment or ingredient. A small spoonful brightens rich dishes and adds savory complexity to salads and bowls.
After reaching your target profile, refrigerate to slow fermentation and preserve texture. Properly salted ferments stored cold can remain quality for months with periodic visual and smell checks.
| Nutrient | Per Serving (1/2 cup) |
|---|---|
| Calories | 35 |
| Protein | 1g |
| Carbohydrates | 7g |
| Fat | 0g |
| Salt (Sodium) | 400mg |
FAQ
Why is salt important in salt fermentation?
Salt restricts non-desirable microbes and selects for lactic acid bacteria that produce acid and preserve the food. Proper salinity yields stable ferment, improved texture, and predictable flavor.
How much salt should I use for reliable results?
Common guidance is 2% salt by weight of prepared vegetables. Adjust within a 1.5–3% range based on vegetable density and the desired fermentation speed and texture.
Can I use any salt for salt fermentation?
Use plain, additive-free salt. Iodized and anti-caking salts may cloud brine or alter fermentation behavior. Coarse sea salt and kosher salt are dependable choices.
My ferment smells off. What now?
Pungent rotten or putrid odors or pervasive mold indicate spoilage. Discard unsafe batches and review salt percentage, submersion, and sanitation before retrying.
How long should I ferment before refrigerating?
Taste every 2–3 days. Most jars reach a pleasant balance between 5 and 14 days at 65–72°F. Refrigerate once you like the acidity and texture to slow further change.
Mastering salt fermentation depends on consistent measurement, the right salt, and controlled temperatures. Use the percentage rules above, keep records, and refine technique to suit your vegetables and personal taste.
See also: salt fermentation
]]>
- Wild microbes craft distinct flavors: location and season matter.
- Lacto-fermentation preserves and enriches: enzymes and probiotics form naturally.
- Simple rules keep fermentation safe: salt ratio, submersion, and clean tools.
The Science Behind Wild Fermentation and Its Health Benefits
Wild fermentation relies on indigenous microorganisms—bacteria and yeasts—naturally present on produce and in the environment. These microbes break down sugars into acids, alcohols, and gases, creating the flavor, texture, and preservation we seek.
For a concise overview of the biochemical process, see fermentation on Wikipedia. That entry frames why low-oxygen, salted environments favor desirable lactic acid bacteria over spoilage organisms.
Microbial Players
Most vegetable ferments depend on lactic acid bacteria. These organisms produce lactic acid that lowers pH and preserves the food. They include genera such as Lactobacillus and Leuconostoc.
Learn more about these organisms at the Lactic acid bacteria page. Understanding which microbes dominate helps you diagnose a ferment that’s progressing well versus one that needs attention.
Health Effects
Fermented foods can increase bioavailability of nutrients and introduce live microbes that support the gut ecosystem. Many people notice improved digestion and greater flavor complexity from fermented condiments.
For context on beneficial organisms used in food, review probiotic science summaries. Use these findings to make informed choices about portion size and diversity of fermented foods in the diet.
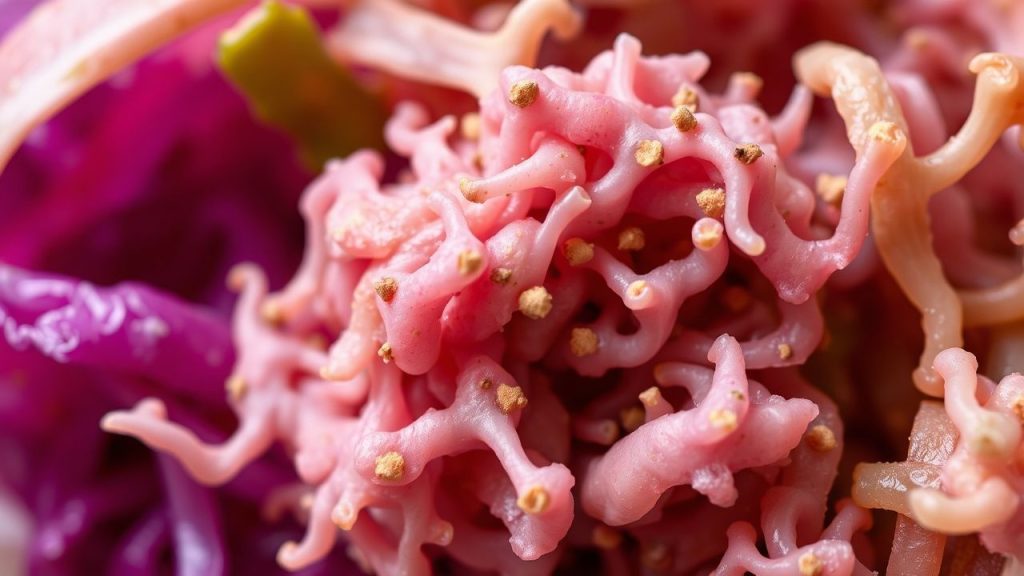
A Practical Sauerkraut Recipe: How to Ferment Cabbage at Home
This sauerkraut recipe demonstrates wild fermentation principles you can apply to other vegetables and blends. It emphasizes salt, pressure, and cleanliness rather than exotic starters.
Follow these steps and observe your jar daily. Taste often after day three to select the acidity and texture you prefer.
Prep and Cook Time
Preparation: 15 minutes active. Fermentation: 5–14 days, depending on ambient temperature and personal taste.
Warmer kitchens speed fermentation. Cooler rooms slow it, yielding crisper kraut over a longer period.
Yield and Difficulty
Yield: about 1 quart. Difficulty: Easy to medium; suitable for beginners with attention to basic safety steps.
Keep a fermentation notebook: note salt ratios, temperature, and taste changes to refine future batches.
Ingredients
- 1 medium organic cabbage (about 1.5 lbs), chopped or shredded
- 1 tablespoon fine sea salt (non-iodized)
- Filtered water to top up brine if needed (~1 cup)
- Optional: 2 garlic cloves sliced, 1 tsp caraway seeds, 1 small grated carrot
Instructions
- Prepare: Rinse and thinly shred the cabbage. Combine cabbage and any optional flavorings in a large bowl.
- Salt and Massage: Sprinkle salt and massage for 8–10 minutes until juices release and the cabbage softens.
- Pack: Press the cabbage tightly into a clean glass jar to remove air pockets. Pour released juices over the cabbage.
- Add Brine if Needed: Top with filtered water so vegetables remain submerged; this reduces mold risk.
- Weight and Cover: Use a fermentation weight or a small jar inside the larger jar to keep solids below brine. Cover with a cloth or an airlock lid.
- Ferment: Store at 65–75°F out of direct sunlight. Taste after 3 days; move to refrigeration when flavor is right.
Tips for Success
Control salt precisely. Too little salt invites spoilage; too much stalls fermentation. For most cabbages, 1–2% salt by weight is typical.
Use filtered water free of chlorine and clean, non-reactive jars. Metal can leach; glass or food-grade plastic is preferable.
Expert Insight
Maintain submersion. A pressed headspace and an appropriate weight create an anaerobic environment that favors lactic acid bacteria and prevents mold formation.
[h3 style=”display:none”]Spacer[/h3]
Common Pitfalls and Pro-Cautions
White film (kahm yeast) can form on the surface. It is usually harmless but changes flavor; skim it away and ensure solids remain submerged.
Black, green, or fuzzy molds mean you should discard the batch. These organisms indicate oxygen exposure or poor hygiene and are not safe to consume.
Pro-Caution
When you detect off-odors, review temperature and salt. Often, adjustments and improved hygiene prevent recurrence in subsequent batches.
Serving Suggestions and Pairings
Use sauerkraut as a condiment for grilled meats, roasted vegetables, and sandwiches. Its acidity cuts through fat and adds savory depth to simple dishes.
Try it with hearty grains and cheeses for balanced plates. Also experiment with seasonal herbs and fruits to layer flavors.
Explore more techniques and recipes in our comprehensive fermentation techniques guide. If you want recipe variations, see our sauerkraut recipes page for spicier or milder profiles.
Quality, Safety, and Further Reading
Fermentation is empirical; you must observe smell, texture, and acidity. Trust bright, tangy aromas and pleasant savory notes as signs of a successful ferment.
Read authoritative summaries and foundational biology at reputable sources such as sauerkraut and sourdough pages to compare processes across fermented foods.
Record batch conditions and tasting notes. Over time, you will calibrate fermentation time to temperature and personal taste.
FAQ
What exactly is wild fermentation?
Wild fermentation uses the natural microorganisms present on produce and in the environment to ferment food. It does not rely on added commercial starters; instead, it harnesses ambient microbes to produce acids and gases that preserve and flavor food.
Is wild fermentation safe at home?
Yes, when you follow simple controls: correct salt, submersion, clean tools, and appropriate temperatures. Observe each batch; bright, acidic aromas and the absence of fuzzy mold indicate safety.
How long should I ferment sauerkraut?
Fermentation time varies by temperature and taste. Most home batches develop a pleasant tang in 5–14 days. Cooler environments extend the process and often yield crisper kraut.
Can I ferment other vegetables the same way?
Yes. Carrots, cucumbers, beets, and many greens ferment with the same basic method. Adjust salt slightly and experiment with spices to match texture and flavor goals.
How do I store fermented foods?
Once the desired flavor is reached, seal the jar tightly and refrigerate to slow fermentation. Properly made ferments can keep for months in cool storage while continuing to evolve slowly.
Wild fermentation connects technique with local microbial ecology. With precise salt, clean tools, and patient tasting, you can reliably produce vibrant, nutritious ferments that reflect your kitchen and season.

See also: wild fermentation
]]>Beneath the tang of sauerkraut, the aroma of sourdough, and the smoothness of yogurt are live microbes doing precise biochemical work. These starter cultures direct fermentation, producing acids, enzymes, and aroma compounds that define flavor and safety.
- Starter cultures provide predictable flavor and preservation.
- They speed fermentation and reduce risk from undesirable microbes.
- Specific strains shape texture—from creamy yogurt to crisp pickles.
Prep and Cook Time
Preparation: Expect about 15 minutes to select a starter and set up vessels. Preparation includes weighing ingredients and sanitizing tools for consistent results.
Fermentation: Typical fermentation ranges from 1 to 7 days depending on temperature and starter strength. Warmer conditions speed activity; cooler slows it.
Yield
Yield varies with recipe and ingredient density; a small batch often produces 4–6 servings. Scale proportionally while keeping salt and starter ratios consistent to preserve safety.
Commercial starters are dosed by colony-forming units (CFU) for reproducibility; home fermenters approximate by tablespoons or teaspoons of active brine. Use the same source starter to keep flavor stable across batches.
Difficulty Level
Intermediate: you need basic hygiene, temperature awareness, and sensory checks. The techniques are learnable; practice increases success and confidence.
Learning to read smell, texture, and pH will reduce errors and help you adjust fermentation time for desired tang and texture. A simple pH strip or meter speeds troubleshooting.
Ingredients
Core ingredients depend on the fermentation target. For vegetable ferments use fresh produce, non-iodized salt, and chlorine-free water to avoid inhibiting starter bacteria.
For dairy ferments choose unpasteurized or properly heated milk and a reliable dairy starter. Use measured starter amounts for consistent acidity and texture.
- 1 cup unpasteurized milk (for dairy ferments)
- 2 tablespoons active vegetable brine (as inoculant)
- 1 teaspoon dried kefir grains (optional)
- 1 tablespoon sea salt (non-iodized)
- Base ingredient such as 1 head cabbage or 2 cups diced cucumbers
- Filtered water (chlorine-free)
Instructions
Follow these steps to start a reliable vegetable ferment. Use clean glass jars and weigh salt to water ratios for reproducible lacto-fermentation.
- Prepare your base: Wash vegetables, remove damaged leaves, and slice to uniform thickness so microbes act evenly.
- Create your brine: Dissolve 1 tablespoon sea salt in 2 cups filtered water. The salt concentration helps lactic acid bacteria dominate the environment.
- Introduce starter: Add 2 tablespoons of active brine or a measured culture to speed and standardize fermentation.
- Pack and submerge: Pack vegetables tight in a sterilized jar and pour brine to fully cover; air exclusion favors lactic acid bacteria.
- Cover and ferment: Fit a cloth or fermentation lid; keep at ~20°C (68°F) out of direct sun and check daily for bubbles and aroma.
- Monitor: Press produce down to keep submerged and skim benign surface films if they form.
- Finish and refrigerate: When acidity suits your taste (often 3–7 days), refrigerate to slow fermentation and preserve flavor.
Chef’s Notes: Tips for Success
Select quality starters. Use live brines or commercial starters designed for the food type to achieve predictable outcomes. Consistent starter quality equals consistent final product.
Sanitation reduces competition. Sterilize tools and vessels to minimize unwanted organisms. Proper sanitation keeps the starter culture in control of the process.
Temperature control matters. Maintain 65–72°F (18–22°C) for stable activity; warmer speeds acids but may reduce crispness. Track ambient temperature and adjust fermentation time accordingly.
Experiment methodically. Change one variable at a time—salt, temperature, or starter dose—to learn how each affects flavor and texture. Record each batch for repeatability.
Pro-Caution
Many home fermenters maintain a small ‘mother’ batch to seed new jars; this preserves a favored microbial profile. Store starter material cold to slow activity between uses.
Expert Insight
Serving Suggestions
Serve ferments as condiments, side dishes, or components in composed plates. Acidic ferments cut through rich or fatty foods and balance texture on the plate.
Pair fermented vegetables with cheeses or grilled proteins; use fermented brine in vinaigrettes to add depth. Small amounts of ferment dramatically increase perceived flavor in recipes.
Understanding the Role of Starter Cultures in Flavor and Preservation
Starter cultures consist mostly of lactic acid bacteria and selected yeasts that metabolize sugars into organic acids, alcohols, and aromatic molecules. This biochemical activity creates the tang and aroma we associate with fermented foods.
Acid production lowers pH and, together with anaerobic conditions, suppresses spoilage and pathogenic organisms. That preservation mechanism explains why fermentation was historically used to store food safely.
Different strains produce distinct metabolites: some increase umami, others yield lactic acid for brightness or extracellular polysaccharides for creaminess. Selecting a strain set allows producers to tune texture and flavor precisely.
For technical context see fermentation and read about key microbes at lactic acid bacteria. For product examples consult topics such as sourdough and yogurt.
Practical Troubleshooting
If fermentation stalls, check temperature, salt concentration, and starter viability. Low activity often results from cold conditions or inactive inoculum.
Cloudy brine or a thin white pellicle (kahm yeast) can be benign; remove the film and monitor pH. Discard and sanitize if you find foul odors or colored molds.
Resources and Next Steps
To build a routine, keep a log of time, temperature, and starter source for each batch. Over a few cycles you will develop predictable timing and flavor targets.
Explore our detailed recipes and step-by-step guides for specific ferments at Ultimate Guide to Homemade Fermented Veggies and review starter fundamentals at Starter Cultures Basics for deeper technique notes.

| Nutrient | Per Serving |
|---|---|
| Calories | 45 kcal |
| Protein | 2 g |
| Carbohydrates | 6 g |
| Fat | 0.2 g |
Q&A
What exactly are starter cultures?
Starter cultures are selected microorganisms—bacteria, yeasts, or molds—used to initiate and guide fermentation. They deliver consistent biochemical pathways that define a product’s flavor, acidity, and texture.
Why use starter cultures instead of wild fermentation?
Starters give reproducibility and speed. Wild fermentations can produce complex results but vary with environment; starters standardize outcome and lower contamination risk.
How do starter cultures affect safety?
They produce acids and antimicrobial metabolites that create hostile conditions for pathogens. When properly used, starters are a primary factor in the safety of fermented foods.
Can I cultivate a starter at home?
Yes. Many home fermenters maintain ‘mother’ brines or sourdough discs to inoculate new batches. Preserve a small, active starter in the fridge for repeated use.
Which tools improve reliability?
Use clean glass jars, a reliable salt scale, and a pH meter or strips. Temperature control and written batch logs are the simplest steps that improve repeatability.
Concluding Remarks
Starter cultures are practical tools that give both home cooks and producers control over flavor, texture, and safety. By understanding strain behavior and process variables, anyone can create consistent, delicious ferments.
Respect the microbiology, monitor pH and temperature, and keep clear records. These habits turn trial-and-error into a repeatable craft that yields better food and less waste.
See also: starter cultures
]]>