- Balance acidity and salt to activate flavors.
- Use technique (browning, toasting) to build depth.
- Add umami or bitterness to round a single-note profile.
- Finish with fresh elements for lift and clarity.
Prep and Cook Time
Prep Time: 15 minutes. I recommend mise en place: measure and ready everything before heat goes on. Prepared timing avoids under-seasoning or rushed technique that flattens flavor.
Cook Time: 30 minutes. Use controlled heat and staging to develop aromatics and brownings; fast, uneven cooking often yields a single muted note.
Yield
Serves 4. This estimate assumes standard portions and moderate seasoning levels to preserve balance across servings. When scaling, taste at each step because salt and acid do not scale linearly.
For larger batches, reduce initial salt and acid by 10-15% and season incrementally. Reheat gently; resting can harmonize components and deepen integration.
Difficulty Level
Medium. The techniques here demand attention to timing and seasoning rather than specialized equipment. You need to practice tasting and adjusting through the process.
Focus on heat control, proper browning, and finishing touches like acid and fresh herbs. Those small moves separate flat dishes from layered ones.
Ingredients
Use quality basic ingredients and treat them intentionally. Small upgrades—fresh citrus, ripe tomatoes, correctly toasted spices—amplify each layer of taste.
- 2 tbsp olive oil, extra virgin for finishing and gentle flavor depth
- 1 medium onion, finely chopped
- 3 cloves garlic, minced
- 1 tsp smoked paprika, adds warmth and aroma
- 1 tsp ground cumin, for earthy undertones
- 1/2 tsp sea salt, balances and amplifies
- 1/4 tsp freshly ground black pepper, for mild heat
- 1 cup crushed tomatoes, ripe acidity to cut richness
- 1 cup vegetable broth, low sodium gives control
- 1 tbsp fresh lemon juice, brightens and lifts
- 1 tbsp fresh chopped parsley, fresh herbaceous finish
If you want more body, add a splash of soy or miso for umami; add sparingly and taste. Fresh herbs belong at the finish to preserve vibrancy.
Instructions
Good technique converts simple components into layered flavor. Move deliberately: heat, aromatics, seasoning, liquid, simmer, finish.
- Heat the olive oil in a heavy skillet over medium until shimmering but not smoking.
- Add the finely chopped onion and sauté until translucent and slightly golden, about 7 minutes. Proper caramelization releases sugars and builds savory backbone.
- Incorporate the minced garlic and cook 1 minute until fragrant; avoid burning to prevent bitterness.
- Sprinkle smoked paprika, cumin, salt, and black pepper and toast 30 seconds to bloom the spices and increase aroma.
- Pour in crushed tomatoes and vegetable broth and stir. Simmer uncovered on low for 15 minutes until the sauce reduces and flavors concentrate.
- Stir in fresh lemon juice at the end to brighten and balance richness just before serving.
- Taste and adjust with salt, acid, or a pinch of sugar. Small, deliberate tweaks correct flatness faster than large, late additions.
- Remove from heat and garnish with fresh parsley and a light drizzle of olive oil for aroma and color.
Always sample at stages: after browning, after spices, mid-simmer, and before plating. That habit trains your palate and prevents a flat final result.
Why Dishes Taste Flat
A flat dish lacks contrast and layered stimuli. When a recipe presents only one dominant note—salty, sweet, or spicy—the brain perceives monotony rather than complexity.
Flavor depends on a combination of taste, aroma, and texture. If an element like acid, salt, or umami is missing, the ensemble feels incomplete.
Core Taste Elements
Balance involves the five basic tastes: sweet, sour, salty, bitter, and umami. A missing pole makes the dish swing toward one-dimensionality.
Study the five and practice adding small doses of the absent taste. Use taste perception concepts when you assess a dish.
Building Aroma and Texture
Aroma drives much of flavor. Toasting spices, browning aromatics, and using fresh herbs create multi-layered smells that the brain interprets as complexity.
Textural contrast—crisp elements against creamy bases—keeps the palate engaged. Add toasted seeds, quick-pickled vegetables, or fresh crunch at the finish.
Chef-Proven Fixes to Rescue Flat Dishes
When a plate reads flat, use targeted interventions rather than more of the same. A single corrective move often restores balance without overpowering the dish.
Here are seven practical fixes you can apply quickly during cooking or at the last minute to revive lackluster flavor.
1. Add Controlled Acid
A burst of acid brightens flavors and separates muddled notes. Use lemon, vinegar, or a citrus-based finishing element to lift the overall profile.
Add acid gradually and taste. A final touch of acid can transform a heavy sauce into a lively one without altering its body.
2. Layer Salt Strategically
Salt does more than make food salty; it enhances perception of other tastes and binds flavors. Salt early and in stages to help ingredients develop fully.
Prefer finishing salt for contrast and texture. If the dish tastes flat, add a very small pinch, stir, and taste again.
3. Unlock Umami
Umami adds savory roundness and depth. Ingredients like aged cheeses, mushrooms, soy, or a spoonful of miso provide concentrated umami when used sparingly.
Use umami to fill gaps where a dish lacks body. Read about the specific concept of umami to understand its role in savory balance.
4. Use Browning and Maillard Reaction
Proper browning yields complex, roasted notes that lift flatness. Sear proteins and caramelize vegetables to create new aromatic compounds through the Maillard reaction.
Control heat to avoid burning; char tastes bitter and can counter the desired depth. Toast spices briefly to renew their aromatic oils.
5. Introduce Bitterness and Herbaceous Notes
Bitterness and green notes add tension and intrigue. Charred greens, radicchio, or a scattering of fresh herbs give contrast to fatty or sweet elements.
Use sparingly. A measured bitterness or herbaceous burst makes other flavors pop instead of dominating them.
[having-space-for-tip]
Apply the next fix only after tasting; random additions can create imbalance instead of rescue.
 Expert Insight
6. Adjust Texture and Temperature
Temperature and mouthfeel shape flavor perception. A colder element or a hot sauce can shift how tastes register on the tongue.
Add textural contrast—crunchy garnishes, creamy swirls, or acidic slaws—to refresh the palate and prevent monotony.
 Pro-Caution
7. Finish with Freshness
Fresh herbs, citrus zest, or a finishing oil restore brightness and aromatic lift. Add them at the end to preserve volatile flavors and scents.
A final herbaceous or acidic note tells the palate that the dish is intentional and complete. That perception alone raises the eating experience.
Tips for Success
Layer your seasoning: Apply salt and spices at different stages to let flavors develop fully. Immediate seasoning and a final taste-and-fix create depth.
Heat control matters: Use medium heat for caramelization and high heat for quick sears. Wrong heat often yields bitterness or underdeveloped sugars.
- Use fresh herbs and acids at the finish: Bright notes fade with long cooking.
- Avoid over-salting early: Salt can mask subtle layers if added too soon.
- Add crunch: Toasted nuts, seeds, or fried shallots create exciting textural contrast.
- Make-ahead benefit: Many sauces taste better after a day; resting harmonizes flavors.
Serving Suggestions
This versatile sauce pairs with grains, roasted vegetables, or grilled proteins. Presentation matters: contrast a rich base with a bright, fresh garnish.
Consider toasted seeds for crunch, a citrus wedge for on-plate finishing, and a simple green salad to cleanse the palate between bites.
Nutritional Snapshot
Per serving values vary with exact ingredients and portion size. The table below provides a rough caloric and macronutrient guide.
| Nutrient | Per Serving |
|---|---|
| Calories | 180 kcal |
| Protein | 3 g |
| Carbohydrates | 15 g |
| Fat | 12 g |
FAQ
Why does my dish taste flat even if I followed the recipe?
Followed recipes assume ingredient quality and technique. If you skip stages like browning or under-season early, the dish can lack layered development and thus taste flat.
Taste at key points and correct with small amounts of acid, salt, or umami. That practice fixes most shortcomings.
What does one-dimensional mean in cooking terms?
One-dimensional cooking highlights a single dominant taste while lacking counterpoints. Without contrast—sweet vs. sour, soft vs. crunchy—the overall impression becomes monotonous.
Introduce at least two contrasting elements; even a small acidic note or crunchy garnish adds perceived complexity.
Can technique really change flavor that much?
Yes. Techniques like searing, roasting, and toasting create new aromatic compounds through chemical processes such as the Maillard reaction. Those compounds deliver roasted, savory, and caramelized notes that raw ingredients lack.
Apply heat intentionally to transform base ingredients into richer flavor carriers.
How do I train my palate to detect missing elements?
Taste components individually: plain cooked salt, acid, and a pure umami ingredient like soy. Compare them to a mixed dish and learn which quality it lacks.
Practice with small, controlled adjustments to build sensitivity and confidence in quick fixes.
What’s the fastest last-minute fix for a flat dish?
A splash of acid—lemon juice or a mild vinegar—usually revives a flat plate instantly. Add in increments and re-taste to avoid over-brightening the dish.
Finish with a small amount of fresh herb or a crunchy element to restore aromatic lift and textural interest.
Final note: Flavor is a system. Apply technique, balance tastes, and finish smartly to move a dish from flat to memorable.
See also: Flavor
]]>
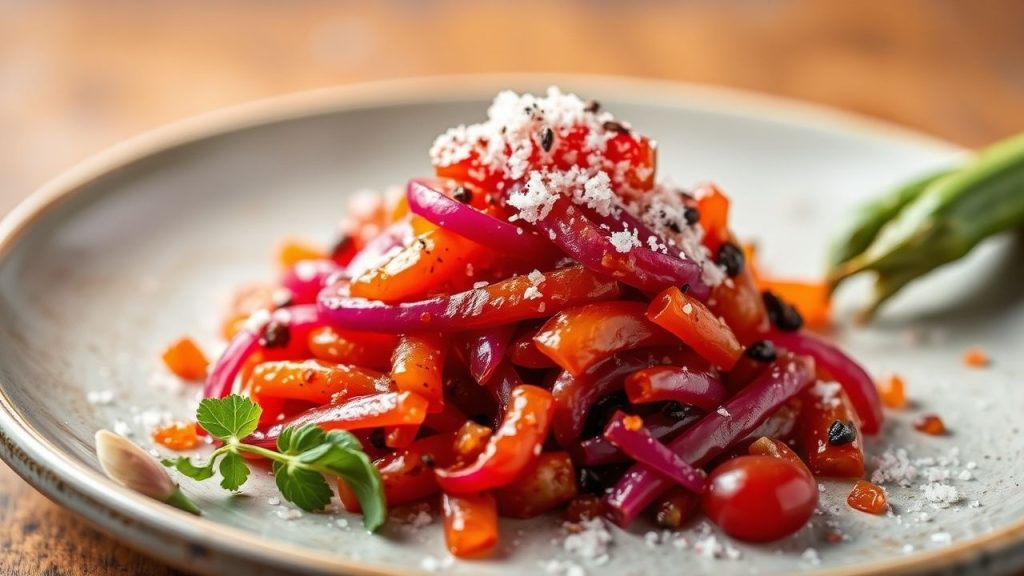
- Balance is additive: combine small amounts of sweet, acid, fat, and salt to tame bitterness.
- Texture matters: contrast soft bitter leaves with crunchy elements for greater appeal.
- Cook intentionally: heat and caramelization change bitter compounds into pleasant notes.
- Test and adjust: taste often and change one variable at a time.
Prep and Cook Time
Time management affects bitterness. Quick, high-heat techniques preserve bright bitterness; gentle, longer cooking softens it into depth. Choose your timing to match the role bitterness will play in the plate.
Prep: 20 minutes | Cook: 35 minutes | Total: 55 minutes
Yield
This recipe is written to serve four people as a side dish. The volume suits family meals and provides leftovers that actually improve with resting.
If scaling up, adjust the acid and sweeteners in small increments; they scale non-linearly compared to bulk ingredients.
Difficulty Level
Medium. The techniques are straightforward, but the judgment calls on seasoning require tasting and small adjustments. This is a great recipe to practice sensory calibration.
With basic knife skills and timing control, cooks of intermediate ability will reproduce consistent results. I recommend one trial before serving to guests.
Ingredients
Choose fresh, firm leaves and ripe fruit. For example, radicchio delivers tight, bitter flavors when raw and becomes complex when cooked.
Quality matters: use a good olive oil and a balanced vinegar for predictable acidity. For background on bitter taste and perception, see bitterness and taste (sensation).
- 1 medium radicchio, chopped (bitterness base)
- 2 tablespoons olive oil
- 1 small red onion, thinly sliced
- 2 cloves garlic, minced
- 1 large apple, peeled and diced (sweetness enhancer)
- 1 tablespoon balsamic vinegar (acidity booster)
- 1 teaspoon honey
- 1/2 teaspoon fresh thyme leaves (herb complement)
- 1/4 teaspoon ground cumin (spice complement)
- Salt and freshly ground black pepper, to taste
- 2 tablespoons toasted walnuts, chopped (textural contrast)
- Fresh parsley for garnish
Instructions
Follow the sequence closely: extract sweetness, layer bitterness, then finish with acid and fat. Small timing changes alter the outcome significantly, so keep techniques consistent.
Taste between steps and adjust. Use the listed order to coax the best interplay between sugar, acid, and tannin-driven bitterness.
- Heat olive oil in a large skillet over medium heat. Add the red onion and sauté until soft and translucent, about 5 minutes. This draws out sugars that will counterpoint the radicchio.
- Add garlic and sauté for 30 seconds until fragrant, being careful not to burn it. Burnt garlic introduces acrid notes that clash with delicate bitter flavors.
- Stir in the radicchio and toss to coat with oil, onion, and garlic. Cook until just wilted but still vibrant, about 4 minutes. Keep stirring intermittently to ensure even heat and prevent charring.
- Add diced apple, balsamic vinegar, honey, thyme, and cumin. The apple’s sugars and honey moderate bitterness while vinegar adds brightness. For more on vinegar types, consider how aged varieties affect sweetness and acidity.
- Simmer the mixture on low for 10-12 minutes, allowing flavors to meld and bitterness to soften into a layered profile. Low heat promotes gentle breakdown of bitter compounds without losing texture.
- Season with salt and black pepper. Salt enhances perceived sweetness and reduces the sharpness of bitter compounds. Adjust gradually and taste after each addition.
- Remove from heat and transfer to a serving dish. Sprinkle toasted walnuts for crunch and fresh parsley for a clean herb counterpoint. Nuts provide a welcome textural contrast to tender greens.
- Serve warm or at room temperature, letting the nuanced bitterness reveal itself gradually across bites. Leftovers may develop more cohesion as acids integrate with sugars.
Chef’s Notes: Tips for Success
Patience matters: cook radicchio until tender but not limp to keep bitterness poised rather than aggressive. Overcooking destroys desirable texture and can flatten the flavor profile.
Swaps work well: honey can be replaced by maple syrup, and a splash of aged balsamic will read sweeter than a quick vinegar. Be deliberate with substitutes and taste as you go.
Substitutions & Flavor Layering
When substituting, match the functional role: if replacing acid, maintain similar pH and aromatic profile; if replacing sweet, match viscosity and caramel notes. This preserves the balance between elements.
Layer herbs and spices selectively. A small pinch of smoked paprika or toasted coriander can add complexity without obscuring bitterness. Use spices sparingly to avoid masking primary flavors.
Expert Insight
Serving Suggestions
Pair the dish with proteins that supply fat and umami to complement bitterness. It works well alongside roasted chicken or grilled fish where the savory elements counterbalance the greens.
Serve as a topping for toasted sourdough or alongside grains for a composed plate. For additional serving ideas and technique notes, see our internal guide at how to balance flavors in cooking and try a composed plate recipe at radicchio salad variations.
For color and contrast, add thin ribbons of carrot or scatter toasted seeds. Visual contrast encourages tasting and helps diners accept more assertive flavors.
Pro-Caution
Nutrition
Radicchio and apple provide fiber and micronutrients while the oil and walnuts supply healthy fats. This side is moderate in calories and delivers a balanced nutritional profile for a vegetable accompaniment.
Adjust portion size and added sweeteners to meet dietary needs. For example, swap honey for a lower-glycemic sweetener if required.
| Nutrition | Per Serving |
|---|---|
| Calories | 150 kcal |
| Protein | 3 g |
| Carbohydrates | 18 g |
| Fat | 8 g |
Practical Applications
Use these techniques across bitter ingredients: leafy greens, coffee-forward sauces, bitter herbs, and certain roots. The same balancing framework—sweet, acid, fat, salt—applies consistently.
Experiment with one variable at a time. For instance, add acid in 1/4-teaspoon increments while tasting to avoid overshooting the brightening effect.
FAQ
Why do some dishes taste bitter, and is bitterness always a flaw?
Bitterness comes from compounds such as flavonoids and tannins found in many plants. It is not inherently a flaw; used judiciously, it adds contrast and sophistication to dishes.
Proper balance ensures bitterness complements other tastes rather than dominating them. When managed, bitterness enhances memorability and structure.
What is the first step to mastering bitterness in cooking?
Understand the ingredient’s raw and cooked profiles by tasting at each stage. That direct sensory feedback guides how much sweetener, acid, or fat you need to add.
Create a small test batch when trying new bitter components; this reduces waste and speeds learning.
How can sweetness help tame bitterness?
Sweetness counteracts perceived bitterness by altering taste receptor balance and providing contrast. Natural sugars from fruit, honey, or caramelization work well.
Add sweet elements incrementally and prefer complex sweeteners that also carry flavor, such as maple syrup or aged balsamic.
Are acids effective in balancing bitterness?
Yes. Acid brightens and lifts bitter flavors, renewing the palate between bites. Lemon, vinegar, or tart fruit are effective options.
Apply acids at the end of cooking when possible so their volatile aromatics remain vibrant and assertive.
Can bitterness be used as a central theme in dishes?
Certain recipes celebrate bitterness as a leading note—classic examples include bitter aperitifs and regional vegetable preparations. When bitterness is the theme, build supporting elements to showcase it.
Balance becomes about accompaniment rather than suppression: pair bitter mains with bright, fatty, and textural contrasts to keep the plate engaging.
For more technical context on vinegars and aging, consult balsamic vinegar and for natural sweeteners refer to honey. These resources help you choose components that behave predictably under heat.
See also: bitterness
]]>
- Balance matters: Salt, umami, and a touch of sweetness steer the flavor profile.
- Texture wins attention: Controlled moisture and structure create lasting crunch.
- Science guides craft: Maillard reactions and water activity management shape aroma and crispness.
The Role of Texture and Flavor Balance in Snack Appeal
The Science Behind Crafting the Perfect Savory Snack begins with two interdependent variables: texture and flavor balance. A snack that delivers contrast—crisp exterior with a tender crumb or an initial crunch followed by a coating of seasoning—creates a layered sensory experience.
Texture signals quality and freshness to the eater, and it directly affects flavor perception. Food scientists quantify texture through measures such as fracture force and acoustic response, and chefs translate those metrics into process controls like bake time and particle size.
Why contrast matters
Contrast in mouthfeel amplifies flavor perception because the brain registers changes more distinctly than monotony. Engineers and sensory scientists use that principle to design snacks that feel dynamic bite after bite.
To build contrast, combine components with different water content, fat levels, or structural matrices. A deliberate contrast reduces sensory fatigue and increases dwell time—people keep eating when each bite reveals something new.
Chemistry of Browning and Aroma
Controlled browning drives complex aromas through the Maillard reaction. This reaction between amino acids and reducing sugars produces hundreds of volatile compounds that we perceive as roasted, nutty, or caramelized notes.
Temperature, pH, and available reactants determine which aroma families dominate. Low-and-slow baking yields different volatiles than high-heat roasting; small formula tweaks change the dominant aroma compounds in measurable ways.
Managing burners and ovens
Use even heat distribution and monitor surface temperature rather than relying on oven dial settings alone. Thermal imaging or an infrared thermometer helps ensure repeatable browning across batches.
When scaling a recipe, track surface temperature, not just time. Surface chemistry follows thermodynamics, so a uniform surface temperature produces consistent Maillard products and predictable aroma profiles.
Seasoning Adhesion and Flavor Layering
Seasoning must stick to the snack long enough to survive handling and release when chewed. Adhesion depends on surface oil, particle size of the seasoning, and the snack’s surface energy.
Binders such as a light oil, egg white, or a sugar syrup increase adhesion by creating a tacky surface during baking. Use minimal binder to avoid sogginess—microfilm coatings suffice to hold powders in place.
Umami elevates savory snacks by increasing perceived savoriness and satiety. Incorporate controlled umami sources rather than excess salt: yeast extracts, aged cheese powders, or dehydrated mushroom concentrates add depth without pushing sodium to unhealthy levels. For background on umami science see umami.
Expert Insight
Sprinkling finishing salt after thermal processing preserves crystallinity and delivers a sharper salt burst. That microburst increases perceived saltiness while allowing overall sodium reduction.
Moisture Control and Crunch
Crunch equals controlled water removal. The metric food scientists use to predict crispness is water activity (aw). Lower aw often correlates with longer-lasting crispness and slower staling.
Drying kinetics depend on particle thickness, porosity, and heat transfer. Thin, porous structures dry faster and reach the target aw without overcooking the interior matrix.
Practical moisture strategies
Use pre-bake docking or perforation to speed moisture escape in flat snacks. For fried items, control oil uptake by optimizing batter viscosity and frying temperature to minimize water retention.
Post-bake conditioning (cooling on a single layer at ambient humidity) stabilizes the structure. Store fully cooled snacks in airtight containers with desiccants or barrier packaging to lock in crispness.
Practical Recipe and Process (Time, Yield, Difficulty)
This section preserves the original recipe framework while clarifying process control points. Follow the times and temperatures but monitor texture and surface temperature for consistent results.
Prep: 15 minutes. Cook: 20 minutes. Total: 35 minutes. Yield: ~4 servings. Difficulty: Medium—requires attention to texture and seasoning timing.
Ingredients
- 1 ½ cups rolled oats, finely ground
- ½ cup almond flour, or swap for chickpea flour
- 1 teaspoon smoked paprika
- ½ teaspoon garlic powder
- ½ teaspoon onion powder
- 1 teaspoon sea salt
- ½ teaspoon freshly cracked black pepper
- 2 tablespoons olive oil
- 1 tablespoon honey or maple syrup
- 1 egg white
Instructions
- Preheat oven to 350°F (175°C). Line a baking sheet with parchment for even heat contact.
- Combine ground oats and almond flour in a bowl. Adjust grind size to control final snap.
- Whisk olive oil, honey, and egg white until smooth; this thin binder promotes surface adhesion and glossy browning.
- Mix spices into dry ingredients and fold in the wet mixture until cohesive but not soggy.
- Spread thinly on the sheet and press to a uniform thickness to ensure even drying.
- Bake 15–20 minutes, rotating midway. Remove when edges brown and aroma develops.
- Cool completely on the sheet; cooling completes crisping as residual moisture equilibrates.
Chef’s Notes & Tips for Success
Ingredient swaps change texture and flavor chemistry. Chickpea or sunflower-seed flour increases protein and alters water-binding; expect a firmer matrix.
For extra crunch, sprinkle intact seeds like sesame or pumpkin before baking. They act as micro-structural anchors that fracture audibly on bite.
- Flavor variations: Add cayenne for heat or rosemary for aromatics.
- Storage: Keep fully cooled snacks in airtight containers up to one week.
- Seasoning balance: Blend a small sample with oil and taste on a neutral cracker before scaling.
Pro-Caution
When reformulating for lower sodium, increase aromatic herbs and umami components to preserve perceived intensity. Adjust the binder or bake time if you alter fat content.
Serving Suggestions
Pair these savory snacks with acidic or creamy dips to create contrast. Acid brightens flavors while fat in dips increases mouthfeel and satiation.
For entertaining, arrange with cheeses and olives on a board. A variety of salt crystals and textures encourages guests to sample more and extend dwell time.
Q&A
Below are concise, evidence-aligned answers to common technical and practical questions about savory-snack design.
These responses draw on sensory science and food-technology fundamentals to give actionable guidance.
What makes a savory snack irresistibly tasty?
Irresistibility arises from calibrated balance among salt, fat, umami, and texture. A crisp bite with layered seasonings stimulates multiple sensory channels and extends eating pleasure.
How does salt do more than season?
Salt suppresses bitterness and boosts perceived sweetness and umami. It also influences protein denaturation and water movement, which affects texture during baking or frying.
Why is texture critical?
Texture governs the timing and release of aroma compounds and flavors. Acoustic and mechanical feedback from a crunchy bite increases perceived freshness and flavor intensity.
What is the ‘bliss point’ in snacks?
The bliss point results from a tuned combination of salt, fat, and sugar that maximizes palatability. Manufacturers use sensory testing to approximate that optimal region for repeat consumption.
FAQ
Quick, practical answers to common formulation and process questions for home cooks and product developers.
How can I reduce sodium without losing flavor?
Cut total salt and add umami-rich ingredients like mushroom powder or yeast extract. Increase aromatic herbs and texture contrast to preserve perceived saltiness.
Can I make these snacks gluten-free?
Yes. Use certified gluten-free rolled oats and swap wheat-based binders for egg white or xanthan gum to maintain structure.
What’s the best way to test crispness?
Measure by sensory bite tests and by observing fracture patterns. For technical labs, use texture analyzers that record fracture force and acoustic emissions.
How do I scale this recipe for larger batches?
Scale ingredients linearly but validate heat transfer and surface-to-volume ratios. Consider convection ovens or conveyor systems to keep surface temperature consistent.
Where can I read more about the science discussed here?
Background science resources: Maillard reaction, umami, and water activity. For ingredient specifics, see rolled oats.
For practical seasoning techniques and additional texture-focused recipes, explore internal resources like mastering savory spices and snack texture guide for deeper step-by-step guidance.
As you experiment, document small changes and sensory outcomes. That disciplined approach turns intuition into repeatable, high-quality snack production.
See also: savory snack
]]>
- At a glance: Short, focused practice builds lasting palate memory.
- Key method: Use tasting flights that isolate one variable.
- Daily habit: Log sensory notes and small corrections each time.
Why Chefs Taste Differently: Pro tasting techniques
Professional cooks treat tasting as a diagnostic process. They use precise tasting techniques to find imbalance and plan targeted fixes.
First, chefs take small, controlled bites and compare versions. Then, they repeat and document results so adjustments become predictable.
Taste Components and Aroma (core tasting techniques)
Flavor arises from the five basic tastes plus aroma and mouthfeel. For technical context, see taste perception which explains sweet, salty, sour, bitter and umami.
Aroma drives most perceived flavor because smell links to memory and emotion. Read about olfaction to understand retronasal effects that change with temperature.
Umami and savory depth
Umami adds richness and persistence without simply increasing salt. Ingredients high in glutamates—aged cheese, ripe tomato, fermented soy—raise savory depth; consult umami for examples and physiology.
When applying tasting techniques to umami, use incremental additions and retaste. A small lift often produces balance without masking other notes.
Temperature and texture
Temperature changes perceived sweetness and aroma release. Warmth increases volatile release and perceived sweetness, while cold tightens fat and mutes aromatics.
Texture controls flavor release through coating and dissolution. Compare a soft emulsion to a crisp roast to observe how the rate of release alters seasoning perception.
Palate Training Exercises for consistent tasting techniques
Train the palate with short, repeatable drills rather than long sessions. Ten to fifteen minutes of focused work beats sporadic, unfocused tasting.
Start with single-ingredient flights, then progress to composed plates. Use blind tasting and controlled carriers to isolate variables like salt, acid or fat.
Expert Insight
Keep a concise taste journal. Record principal tastes, aroma words, texture and one specific correction you would apply next time.
Tasting Workflow for Home Cooks using chef tasting techniques
Adopt a clear, step-by-step workflow so tasting becomes repeatable. Visual cues, focused smelling and small-portions tasting work together to inform exact fixes.
Step 1: Look for browning, gloss and separation. Step 2: Smell the dish and name dominant volatile notes. Step 3: Taste in small portions and assess balance across taste categories.
Practical sequencing
Taste from mild to intense to preserve sensitivity through a session. Use neutral carriers—plain rice, bread or crackers—to keep texture consistent while the variable shifts.
Reset between samples with room-temperature water or a neutral cracker. Then compare a modified spoonful to the original to quantify change.
Seasoning Troubleshooting with tasting techniques
If a dish tastes flat, introduce a small acid increment to brighten top notes. Citrus, vinegar or a restrained acidic reduction can clarify muddled components quickly.
If the flavor feels harsh, soften with a touch of fat or a hint of sweetness. Make only one small change at a time and retaste to measure effect.
Pro-Caution
Keep a troubleshooting log of what you add and why. Over weeks, those notes form a compact library you can consult during busy service or home cooking sessions.
Designing Effective Tasting Flights
Flights let you compare variables in parallel, which makes impact obvious. Design each flight so only one element—salt, acid or fat—changes across samples.
Limit flights to four to six samples to avoid sensory overload. Arrange samples from mild to strong and use neutral carriers for consistency.
Structured comparison
Label samples and record immediate impressions for each one. Then score intensity and balance; over time, these scores reveal sensitivity trends and learning plateaus.
For formal methods and scoring systems, consult structured sensory practice in food science such as sensory evaluation. It supplies protocols you can adapt for home practice.
Practical Tools and Habits to support tasting techniques
Gather tasting spoons, sample bowls, a notebook and neutral palate cleansers. These small investments make daily practice low friction and highly repeatable.
Schedule micro-practices: five minutes of spice flights before dinner or a brief aroma drill while prepping. Habitual, short drills compound into clear improvement.
Peer feedback and calibration
Work with a partner or small group to exchange blind feedback. A second pair of trained senses exposes blind spots and accelerates calibration.
Combine practice with reference listening and targeted reading to broaden context. Use anchored examples—standardized samples you can recreate—rather than random tasting.
Final Thoughts on adopting tasting techniques
Tasting like a chef is a learnable skill when you apply structured methods and repeatable workflows. Focus, short sessions and clear notes produce steady, measurable progress.
Use the workflows here to make objective adjustments and to train reliable memory for flavors. Over weeks and months, your tasting decisions will become faster and more accurate.
FAQ
How long does palate training take?
Most learners see sensitivity gains in weeks with consistent micro-sessions. Typically, four to eight weeks of regular practice yields noticeable calibration.
Keep sessions short and focused, and track progress in a simple scorecard to confirm gains objectively.
Can anyone develop chef-level tasting?
Genetics set baseline sensitivity, but technique and training determine practical ability. Many cooks achieve professional-grade accuracy with disciplined practice.
Use structured tasting techniques and repeatable flights to overcome individual differences and build usable skill.
What are quick tests for over-salted food?
Add small, measured amounts of acid, fat or sweetness and retaste after each change. Alternatively, dilute with neutral starch to lower perceived salt without losing flavor context.
Always compare the corrected spoonful to the original to confirm the scale of change.
How do I avoid palate fatigue during long sessions?
Limit sessions to under an hour and include neutral breaks. Rest, hydration and bland palate cleansers maintain sensitivity longer.
Rotate sensory tasks—smelling, then tasting, then scoring—to rest receptor pathways and keep judgments reliable.
Where can I practice structured tasting?
Practice at home with simple flights or join local workshops and tasting groups. Use a notebook to replicate exercises and track improvement.
For reference materials that explain sensory terms and testing protocols, consult general resources such as taste perception and sensory evaluation.
See also: tasting techniques
]]>
- Balance matters: salt, acid, sweetness, and umami form the core of rounded flavor.
- Texture counts: body and mouthfeel change perceived taste more than most cooks expect.
- Finish strong: a final acid, fat, or herb can transform a dull broth quickly.
Why Soup Feels “Off”—Core Causes
Most complaints—flat, watery, limp vegetables, or a dull finish—trace to a deficit in one of four flavor axes: salt, acid, sweetness, and umami. Each axis performs a distinct role: salt enhances, acid brightens, sweetness balances bitterness, and umami adds savory depth.
Ingredient quality and technique also matter. Poorly roasted bones, underdeveloped mirepoix, or an early boil that strips aromatics can leave a broth weak. For an overview of broth and stock fundamentals, refer to soup basics.
Quick Fixes: Salt, Acidity, Sweetness, Umami
Start by tasting with a neutral spoon and evaluating. Add salt in measured increments; it unlocks other flavors without making the soup “salty” if you proceed carefully. Use fine salt for fast dissolving and consistent seasoning.
If salt alone does not solve the issue, test for brightness. A small splash of vinegar or a squeeze of lemon at the end can lift a flat broth immediately. For background on acids and their effect on flavor chemistry, see acid chemistry.
Salt and Seasoning
Season in stages: sweat aromatics, season the base, then taste and adjust near the end. If you only add salt at the start, the soup will taste under-seasoned after reduction or dilution.
Use finishing salts sparingly to sharpen the last layer of taste. If unsure, add one-quarter teaspoon at a time and wait a minute between adjustments for flavors to equilibrate.
Acidity, Sweetness, and Umami
Acidity brightens; sweetness calms harsh edges; umami builds a savory backbone. Small amounts work best: a teaspoon of honey or a splash of vinegar can balance bitterness, while a tablespoon of miso or tomato paste can supply concentrated umami.
For a technical note on savory taste, consult the umami entry. If you want ready ideas, see our internal umami boosts collection for chef-tested ingredients and dosages.
Expert Insight
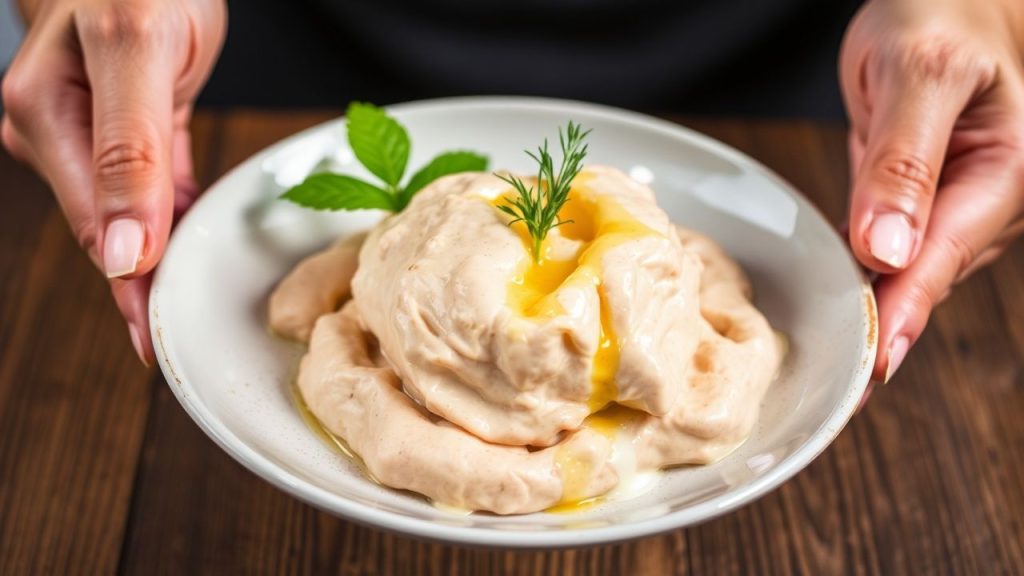
Texture and Mouthfeel Adjustments
Texture drives satisfaction. A thin broth can read as tasteless, while an overly thick soup can register as cloying. To add body, puree a portion of the soup or add a cooked starchy element like potato, rice, or blended beans.
Alternatively, finish with a swirl of cream, butter, or a nut-based emulsion to increase perceived richness without adding salt. If you want a systematic approach, our soup texture guide outlines ratios and timing for common thickeners.
Finishing Touches and Creative Rescues
Finishing layers change the whole bowl. Fresh herbs add vibrancy; toasted seeds or crispy shallots add contrast. A final drizzle of quality oil or a small spoon of aged cheese delivers aroma and fat that persist on the palate.
For deeper missteps—like a broth that tastes one-note—use concentrated umami agents: reduced stock, a Parmesan rind, dried mushrooms, or a hint of fish sauce. These options increase complexity without overtly altering the recipe.
If herbs are muted, add them at the last minute. If aromas dissipated during long cooking, a short rapid simmer with a fresh herb bouquet can revive the profile. Remember that some finishes, like citrus or herbs, should come late to preserve their volatile compounds.
Pro-Caution
Practical Rescue Checks: A Short Checklist
Work down this checklist while tasting at serving temperature. First, verify salt level. Second, check for brightness with acid. Third, assess body and mouthfeel. Fourth, evaluate savory depth and finish with herbs or fat.
If the soup remains unsatisfying after these steps, concentrate it by gentle reduction or add a concentrated element like a reduced stock or purée. For step-by-step recipes to apply these principles, visit our internal soup fixes hub.
FAQ
Why does my soup taste bland even with salt?
Salt enhances—but it cannot replace missing acids or umami. If salt doesn’t solve the issue, add a finishing acid for brightness or an umami source for depth. Also test mouthfeel: thin soups often read as bland regardless of seasoning.
How much acid should I add?
Start with one teaspoon of vinegar or half a teaspoon of lemon juice per liter, then taste and increment in small steps. Acids concentrate as soup reduces, so add finishing acid near service time.
What are safe umami boosters for vegetarian soups?
Use miso paste, dried shiitake powder, roasted tomato paste, or a small amount of soy sauce. These ingredients add glutamates and nucleotides that increase savory perception without overpowering other notes.
How can I fix a greasy or overly fatty soup?
Chill the soup briefly and skim congealed fat from the surface, or absorb excess oil with a paper towel. A small splash of acid can also cut perceived richness and restore balance.
Will resting the soup overnight help?
Yes. Resting allows flavors to meld and can reveal deficits more clearly. Reheat gently and reassess seasoning and brightness before serving, then finish with fresh herbs or a final fat if needed.
See also: soup fix
]]>