- Key takeaway: Slow, low heat yields creamy beans without collapsing skins.
- Key takeaway: Balancing sugar and acid controls caramelization and brightness.
- Key takeaway: Proper soaking and initial simmer shorten final cook time and equalize texture.
- Key takeaway: Maillard browning and tomato paste boost savory depth.
The scientific foundation
Beans are seeds from plants in the legume family, and their structure drives how they cook. The outer skin, cell walls, and internal starch matrix change at different temperatures and with moisture, so technique matters.
When you control temperature and time, you control hydration and starch gelatinization. These factors produce a bean that is tender yet intact and a sauce that clings without becoming gluey.
Ingredient overview
Choose beans and supporting ingredients that contribute texture and flavor in predictable ways. Beans with thin skins and moderate starch content, neutral oils, acids, and sugars build the classic baked-bean profile.
Below are the ingredients commonly used. Quantities and options follow the recipe style that emphasizes balance between sweetness, acid, fat, and umami.
- 2 cups dry navy beans, rinsed and soaked overnight
- 6 cups water, plus extra for soaking
- 4 slices thick-cut bacon, diced (optional)
- 1 large yellow onion, finely chopped
- 3 cloves garlic, minced
- 1/4 cup maple syrup
- 1/4 cup molasses
- 1/4 cup tomato paste
- 2 tablespoons Dijon mustard
- 1 tablespoon apple cider vinegar
- 1 teaspoon smoked paprika
- 1 teaspoon kosher salt
- 1/2 teaspoon freshly ground black pepper
- 1/4 teaspoon ground cayenne pepper (optional)
- 2 cups low-sodium chicken or vegetable broth
- 2 tablespoons olive oil
Prep and cook time
Preparation: 20 minutes. Soaking: 8 hours or overnight. Cold-water soak hydrates beans uniformly and reduces cooking time.
Cooking: 2 hours 30 minutes slow simmer. Total time: Approximately 11 hours including soaking. Plan a long, low simmer rather than a short, hot boil.
Instructions
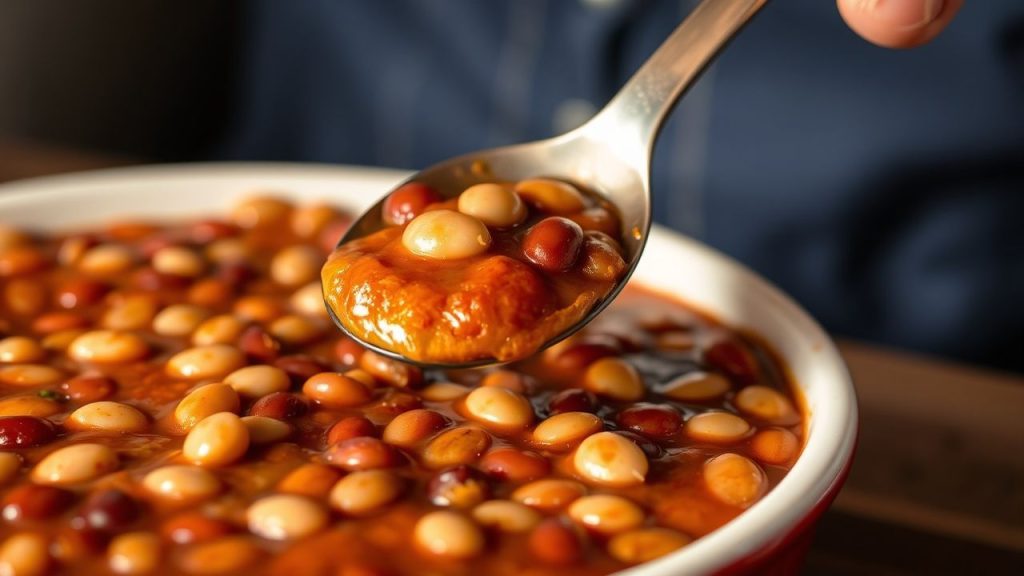
1. Drain and rinse the soaked navy beans. Place them in a large pot, cover with fresh water, bring to a boil, then reduce to a gentle simmer and cook until just tender, about 45–60 minutes.
2. Build flavor by preheating a Dutch oven over medium heat, then sautéing diced bacon until crisp and removing it with a slotted spoon, leaving the rendered fat. Add olive oil if needed and cook the onions and garlic until golden, about 5 minutes, to create caramelized base notes.
3. Layer and simmer by stirring in tomato paste and cooking it briefly to deepen flavor through browning reactions. Add the sweeteners, mustard, vinegar, smoked paprika, salt, pepper, and broth; return the beans and bacon, reduce to low, and simmer partially covered for 1 hour, stirring gently every 15 minutes.
4. Adjust texture by monitoring sauce thickness and adding small splashes of broth when it becomes too thick. Taste near the end and brighten with a touch more vinegar or salt to balance sweetness and deepen overall flavor.
 Pro-Caution
Science of texture and flavor
Starch gelatinization occurs as beans absorb water and heat, transforming rigid granules into a gel-like network that thickens sauce. The timing of gelatinization depends on bean variety, soaking time, and heat level.
Proteins in beans soften and free amino acids that participate in browning reactions with sugars. These reactions add savory, nutty notes that we attribute to depth and complexity.
Starch gelatinization and cell walls
Gelatinization begins when internal bean temperature rises, typically between 60–80°C, depending on starch composition. Controlled heating ensures starches swell enough to thicken the sauce without collapsing bean structure.
Cell wall strength and pectin content determine how well a bean holds together. Soaking and low, steady heat help the cell walls hydrate and yield a tender interior while keeping the outer skin intact.
Maillard reaction and caramelization
The Maillard reaction generates brown pigments and dozens of aroma compounds when amino acids meet reducing sugars under heat. Encourage these reactions on onion, bacon, and tomato paste to create savory backbone flavors.
Separately, sugar caramelization adds sweetness and toffee-like notes. Balance caramelization with acid—such as vinegar or mustard—to avoid cloying sweetness and to lift the final dish.
Read more about the Maillard process at Maillard reaction. For background on plant categories and seeds, see legume and the general bean entry. For starch science, consult starch.
Tips for success
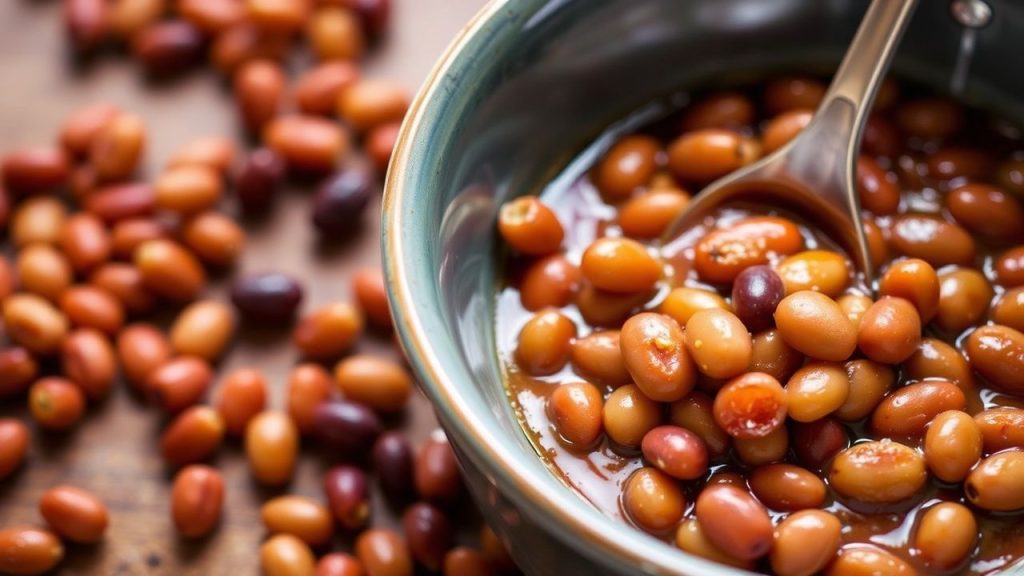
Bean selection matters. Navy and great northern beans typically produce a creamy interior and delicate skins that take sauce well. Use firmer varieties like pinto if you prefer more texture.
Soak overnight to rehydrate evenly and remove some oligosaccharides that contribute to digestive discomfort. Use the soaking water for compost rather than cooking to reduce flatulence compounds.
 Expert Insight
Variations and substitutions
To make a vegetarian version, omit bacon and use mushroom or vegetable broth plus smoked paprika for smokiness. You can also swap maple syrup with brown sugar or honey while adjusting vinegar slightly to maintain balance.
If you need lower sodium, use low-sodium broth and add salt late in cooking to control final seasoning. For spicier beans, add chili powder or cayenne in measured increments and taste as flavors concentrate.
Serving suggestions
Baked beans pair well with cornbread, grilled sausages, or roasted pork shoulder, and they also function as a hearty topping for baked potatoes. Garnish with chopped parsley or scallions for freshness and color contrast.
A dollop of sour cream or a sprinkling of sharp cheddar can add a cooling contrast to the sauce’s richness. For a chilled salad application, let the beans cool and use a vinaigrette to brighten the mix.
Nutrition per serving
The recipe yields a balanced mix of protein and complex carbohydrates. A typical serving offers substantial fiber and plant protein, making baked beans a satisfying, energy-dense option.
| Nutrient | Per Serving |
|---|---|
| Calories | 280 kcal |
| Protein | 15 g |
| Carbohydrates | 40 g |
| Fat | 7 g |
Common pitfalls and remedies
Overcooking at high heat breaks skins and produces a paste-like texture. If you notice excessive breaking, reduce heat, add more liquid, and avoid vigorous stirring to let beans recover.
Undercooking leaves a chalky interior and thin sauce. If beans remain firm after the recommended time, continue simmering gently and test frequently to avoid overshooting the ideal texture.
Troubleshooting: Sauce too thin or thick
If the sauce is too thin, simmer uncovered to concentrate flavors and thicken naturally. If it becomes too thick, stir in small amounts of warm broth until it reaches the desired cling and shine.
Also, account for chilling: beans will thicken as they cool, so slightly loosen the sauce just before serving if you plan to reheat or chill leftovers.
Pro-Caution
FAQ
What makes baked beans so flavorful?
Slow heat lets sugars caramelize and amino acids react, creating complex savory and sweet notes. Layered ingredients like tomato paste, smoked paprika, and rendered fat provide concentrated flavor foundations.
Do I have to soak beans overnight?
Soaking improves even hydration and reduces cooking time, but you can use a quick soak method if needed. Quick soaking involves boiling beans briefly then letting them stand for an hour before draining and cooking.
How do I keep beans tender but intact?
Use a gentle simmer, soak beans first, and avoid vigorous stirring. Test a few beans periodically; stop the final cook when they are tender but still hold shape.
Can I use canned beans?
Yes. Canned beans offer convenience and reduce total cook time. Adjust liquids and simmer time to allow flavors to meld without overcooking the canned beans.
Why add acid like vinegar or mustard?
Acid brightens and balances sweetness, preventing the sauce from tasting flat or overly sweet. Add acid in small amounts near the end to preserve brightness and acidity perception.
For technical reading on seeds and crop categories, see legume. For starch mechanics, consult starch. For browning chemistry, visit Maillard reaction.
See also: Baked beans
]]>Culinary espumas are light, flavor-intense foams created by stabilizing a liquid matrix and entrapping air. Chefs control acidity, viscosity and stabilizers to make foams that hold form and deliver concentrated taste.
- Quick takeaway: stable espumas rely on the right stabilizer and correct siphon technique.
- Balance: acidity, salt and fat determine perceived flavor in an espuma.
- Tools matter: a chilled siphon and correct cartridge use create fine bubbles and consistent texture.
- Practice: start with small batches and adjust gelatin or cream ratios for density.
Mastering Flavor Balancing Techniques for Memorable Espumas
Flavor balance in an espuma differs from sauces because the foam amplifies volatile aromatics while muting some textures. Therefore, taste the base hot and cold; acidity and salt behave differently as temperature and aeration change.
Use small adjustments: add acid or soy in drops, and re-test after chilling. Also, pair an espuma with contrasting textures to highlight its ephemeral character.
Prep, Yield, Difficulty & Ingredients
Time and skill: Prep takes about 15 minutes; chilling and setting add roughly 1 hour. The recipe yields around four servings and rates medium difficulty because it requires precise balance and a siphon.
Ingredients (core):
- 1 cup heavy cream (cold)
- 1/2 cup stock (vegetable or chicken, strained)
- 2 tbsp lemon juice (fresh)
- 1 tsp soy sauce (adjust for umami)
- 1 tbsp sugar (or adjust to taste)
- 1/2 tsp salt
- 1 tbsp gelatin sheets or 1 tsp powdered gelatin
- Optional: herbs or spices (fresh thyme, black pepper)
Instructions
Follow a methodical workflow: bloom stabilizer, combine flavour base, cool, then incorporate cream and siphon. Keep temperatures controlled and strain for a satin texture.
- Bloom gelatin: Soak sheets in cold water for 5 minutes or sprinkle powdered gelatin over 2 tbsp cold water. Squeeze and set aside.
- Prepare the base: Warm stock, lemon, soy, sugar and salt gently until dissolved. Do not boil; just warm enough to dissolve solids.
- Add gelatin: Remove from heat, stir in bloomed gelatin until fully dissolved and smooth.
- Cool: Allow the base to drop to room temperature before adding cream to avoid breakdown of emulsion.
- Fold in cream: Slowly incorporate cold heavy cream to retain body and prevent over-dilution of fat.
- Strain: Pass the mixture through a fine mesh sieve into a cold siphon to remove solids or coagulated bits.
- Charge: Insert one N2O cartridge, shake 10-15 times; test texture and add a second cartridge only if necessary for density.
- Chill and set: Refrigerate the charged siphon at least 1 hour. Gelatin will stabilize the foam and extend holding time.
- Dispense: Hold the siphon upside down and release in controlled bursts to place the espuma cleanly on the dish.
After dispensing, observe the bubble size and mouthfeel. If bubbles are coarse, reduce over-agitation or lower the gas charge next time.
Chef’s Notes: Tips for Success
Start light: under-season and under-acid initially; you can always adjust but cannot remove excess once set. This approach preserves the delicate aroma profile that espuma emphasises.
Expert Insight
Work in small batches and keep records: note gelatin weight, cream percentage and cartridge count. This log speeds repeatability in a professional or home kitchen.
- Gelatin vs agar: gelatin creates a creamier mouthfeel; agar works for vegetarian options but produces a different bite.
- Texture fixes: if too dense, slightly reduce gelatin. If it collapses, increase stabilizer or lower liquid ratio.
- Aeration control: shake moderately. Over-shaking makes large bubbles and a coarse texture.
Science Behind Foams and Stability
Small bubbles create a silkier espuma because a higher surface-area-to-volume ratio stabilises aroma release and mouthfeel. Surface properties, proteins and hydrocolloids form films around bubbles that prevent rapid coalescence.
For deeper reading on the physics, see surface tension and for molecular context consult molecular gastronomy. Both explain why temperature and pH affect foam life.
Equipment, Safety and Storage
Use a quality siphon and check seals before charging. Understand the role of nitrous oxide for foaming; it dissolves in fat and releases as tiny bubbles when dispensed.
Store charged espumas in the refrigerator and use within 4 hours for peak texture. If stored longer, recheck pressure and recharge carefully to avoid over-pressurization.
Pro-Caution
When handling stabilizers, note gelatin properties on the ingredient card and consult the gelatin page for bloom strength guidelines. For cartridge chemistry, review nitrous oxide basics.
Serving Suggestions
Serve espumas over purees, fish, salads, or desserts where a light foam can lift flavors without adding weight. Contrast with a crunchy element—like toasted seeds or brioche crumbs—for textural interplay.
For pairing ideas and the science of mouthfeel, see our internal resource on texture and flavor science. For step-by-step siphon handling, reference siphon usage guide.
FAQ
What exactly is an espuma?
An espuma is an aerated foam made from a flavored liquid that is stabilized to hold air. It concentrates aroma and lightens mouthfeel, acting both as garnish and flavour vehicle.
Can I make espumas without a siphon?
You can create foams with immersion blenders or whipped cream machines, but a siphon yields the most consistent micro-bubble structure and control. For fine, restaurant-quality texture, the siphon is the recommended tool.
Which stabilizers work best?
Gelatin and lecithin are common; gelatin provides creamy stability while hydrocolloids like xanthan or agar serve vegetarian needs. Choose based on desired mouthfeel and serving temperature.
How long do espumas hold their shape?
Holding time depends on stabilizer and temperature. Gelatin-stabilized espumas often hold for several hours when chilled; lighter, cream-only foams collapse faster.
Are espumas suitable for sweet and savory dishes?
Yes. The technique adapts to both profiles—savory umami foams and sweet fruit foams both use the same technical principles with tailored flavor bases and stabilizers.
The Conclusion
Espumas pair culinary intuition with precise technique to create memorable, airy additions. Control of stabilizers, temperature and gas yields repeatable results that elevate both flavor and presentation.
Practice the recipe, keep a preparation log, and adjust gelatin and cream ratios to match your ingredient list. With focused repetition, you will consistently produce refined espumas that enhance dishes.
See also: culinary espumas
]]>
- Bitters add depth: a few drops can increase perceived complexity.
- They adjust balance: bitters temper sweetness and lift rich dishes.
- Variety matters: citrus, aromatic, and herbal bitters each play distinct roles.
- Start small: taste incrementally to learn how they shift flavors.
What are bitters?
Bitters are concentrated tinctures made by macerating botanicals—roots, barks, peels, and spices—in alcohol or glycerin. Producers then reduce and bottle the extract so a dash delivers intense flavor without adding volume.
Historically, they served medicinal and digestive purposes before entering mixology. Modern craft producers treat bitters as culinary tools, and you can find examples documented on the Angostura bitters page for reference.
How bitters modify flavor
Bitterness interacts with other taste modalities to reshape perception. When you add bitters, they suppress certain sweet or fatty sensations while revealing underlying aromatics, a process connected to basic taste science described on the taste (sensation) article.
Mixologists use bitters to lengthen finish, create contrast, and glue disparate ingredients together. Chefs leverage the same principle to cut richness in creams, reduce cloying sugar in desserts, and highlight herbal notes in sauces.
Types of bitters and common botanicals
Bitters fall into categories: citrus, aromatic, herbal, spiced, and specialty (chocolate, coffee, floral). Each type brings specific volatile oils and bitter compounds that pair predictably with food and drinks.
Core botanicals include gentian root, cinchona bark, citrus peels, cardamom, and orange flower. Many of these are common herbs and spices; read more about botanical ingredients on the herb and spice reference pages.
Common varieties
Citrus bitters deliver bright, zesty oils that lift vinaigrettes and sparkling cocktails. They pair well with seafood, salads, and fruit desserts.
Aromatic bitters use warm spices and bitter barks to deepen aged spirits and heavy meats. Use them when you need a long, warm finish.
Citrus vs aromatic—quick guide
Citrus bitters focus on top-note volatility; they make flavors pop immediately. Aromatic bitters emphasize mid- and back-palate elements such as clove and cinnamon, which add body and warmth.
Choose citrus to brighten and aromatic to ground. When in doubt, taste a drop with the dish or cocktail base before committing.
Practical uses: cocktails and cooking
Mixologists add 1–3 dashes to correct imbalance, enhance aroma, or provide a counterpoint to sugar. In cocktails, bitters act like seasoning: they enable smaller adjustments with large sensory effects.
In the kitchen, chefs use bitters in vinaigrettes, pan sauces, marinades, and even desserts. A few drops of herbal bitters can cut through cream or caramel without adding liquid or sugar.
- Dressings: Add 1 drop per 1/2 cup vinaigrette to lift acids.
- Sauces: Stir into pan sauce after deglazing for complexity.
- Chocolate desserts: Pair chocolate bitters with dark bases to enhance cocoa notes.
Small table: botanicals and flavor roles
| Botanical | Flavor role | Typical use |
|---|---|---|
| Gentian root | Pure bitter backbone | Aperitifs, digestive bitters |
| Orange peel | Citrus brightness | Cocktails, dressings |
| Cinchona bark | Quinine bitterness | Classic aromatics |
| Cardamom | Warm spice, floral lift | Savory sauces, chai-style drinks |
Expert Insight
To practice, try a simple experiment: add a dash of citrus bitters to sparkling water, then a dash of aromatic bitters to the same glass. Note how each alters aroma, sweetness perception, and finish. This low-risk test highlights the targeted power of bitters.
Pro-Caution
Making and storing bitters
At-home bitters require a neutral spirit, botanicals, and time. Macerate ingredients for one to four weeks, strain, and bottle. Small-batch recipes allow precise control over bitterness and aromatic balance.
Store bitters in a cool, dark place. Properly made bitters last years because alcohol preserves the extract, but volatile top notes decline over months, so rotate bottles you use often.
Practical pairing rules
Use these rules when pairing bitters with food: match intensity, complement dominant notes, and consider temperature. Warm dishes tolerate stronger aromatic bitters; chilled preparations favor citrus or floral options.
Also, think about role: do you want to lift, to cut, or to anchor? Lifting requires volatile oils; cutting needs bitter backbone; anchoring benefits from warm spices or bark-derived bitterness.
Resources and internal guides
For further guidance, consult our internal primers on how to taste and match bitters: the about bitters page explains production techniques and the bitters recipes section offers tested formulas and pairings.
Return to these pages while experimenting. They give step-by-step methods that reduce trial-and-error and improve results quickly.
FAQ
Are bitters alcoholic?
Most commercial bitters use a high-proof spirit as the extraction medium and therefore contain alcohol. However, you can find or make glycerin-based bitters that are alcohol-free.
How much bitters should I use in food?
Start with one drop per tablespoon for sauces and one dash per cocktail. Taste after each increment to avoid overpowering a dish.
Can bitters replace salt or acid?
Bitters do not replace salt or acid, but they help balance them. They can reduce the need for extra sugar or fat by creating contrast and heightening perceived complexity.
Do bitters expire?
Alcoholic bitters keep for years, but aromatic top notes fade. Store bottles in cool, dark conditions and label batches with the make date to track freshness.
Where can I learn more about botanical ingredients?
Start with botanical references and culinary herb guides. For quick background, check the herb and spice pages. For historical context, revisit the bitters entry.
Final note: Bitters reward curiosity and restraint. Use internal guides like About Bitters and Bitters Recipes while you build confidence. Taste deliberately, record results, and you’ll expand your flavor toolkit steadily.
See also: Bitters
]]>
- Practice isolation: learn to recognize a single taste without aroma or texture confounds.
- Train a reliable log: record three descriptive words and intensity to track progress.
- Balance with tools: acid, salt, sugar, and glutamate adjust perception in predictable ways.
Understanding the Five Tastes
The human gustatory system classifies chemical sensations into five core categories: sweet, sour, salty, bitter, and umami. Each category corresponds to receptor interactions at the tongue and oral cavity that generate distinct perceptual signatures.
For concise reference, review the physiology behind taste and oral receptors as summarized on Taste and the cellular sensing units described in Taste bud. These pages clarify why isolated sampling produces reproducible sensations.
Why these experiments matter for cooks
Training to identify the five tastes improves seasoning decisions and reduces guesswork at the stove. When you can reliably spot a dominant deficit—acid, salt, sweetness, or savory—you respond with a targeted correction instead of trial and error.
Chefs layer tastes to create depth and memory. Practicing controlled trials helps you choose finishing actions: a squeeze of citrus, a pinch of salt, a touch of sugar, or an umami boost. For applied seasoning strategies, see the internal note on seasoning basics.
Setting Up Your At-Home Taste Lab
Use small, neutral tasting spoons or cups, a glass of still water, plain crackers, and tightly measured samples of representative ingredients. Use teaspoons or droppers to control dose and prevent cross-contamination.
Standardize conditions: sit upright, avoid strong fragrances, and test with a clean palate at least two hours after eating. For technical context on sensory pathways consult the Gustatory system overview.
Step-by-Step Experiments
Run each test singly and cleanse between samples using water and a plain cracker. Record immediate impressions and aftertaste duration on paper to build a consistent log.
Keep sample sizes small. Use roughly 1/4 teaspoon or a single drop for concentrated items like vinegar or soy to avoid temporary sensory fatigue and to ensure safety.
Sweet: Simple sugar vs natural sweeteners
Place a pea-sized amount of granulated sugar on your tongue and note onset speed and mouthfeel. Compare that to a small taste of honey to detect aromatic and textural differences.
Test how a tiny pinch of salt changes perceived sweetness. That contrast demonstrates how salt elevates sweet notes in sauces and baked goods and trains you to use finishing salt deliberately.
Sour: Citrus and acid balance
Taste a single drop of lemon juice and then a diluted vinegar sample. Focus on sharpness, where the sensation appears on the tongue, and the length of the puckering effect.
Next, add a trace of sugar or a small amount of oil to see how sourness moderates. Acid is a primary brightener; learning dose control prevents an overly aggressive finish.
Salty: Salt types and intensity
Compare a tiny pinch of table salt with the same mass of flaky sea salt. Notice perceived intensity and how crystal shape affects dissolution and immediate delivery of flavor.
Place salt on a plain cracker to feel how texture alters perception. These trials teach when to season in stages and when to apply finishing salt for maximum effect.
Bitter: Controlled tasting of bitter notes
Taste a small piece of dark chocolate or a leaf of kale to sample bitter character. Observe how quickly bitterness appears and how long the bitter finish persists.
Add a drop of acid or a pinch of salt to the bitter sample to note reduction in harshness. Bitterness provides complexity when balanced; training helps you use bitterness intentionally.
Umami: Recognizing savory depth
Try a tiny flake of aged Parmesan or a diluted splash of low-sodium soy sauce to sense umami’s round, mouth-coating quality. Umami often feels persistent and broad rather than sharp.
Compare umami from aged cheese with a light mushroom broth to detect glutamate-driven depth. For a scientific overview of this taste category consult Umami.
Expert Insight
After single-taste trials, combine two tastes to observe interaction effects. For example, taste sweet then sour and notice how one alters the perception of the other.
Also evaluate aroma by sniffing before you taste; much of what we call flavor derives from retronasal olfaction. For more on smell and taste interaction, see Flavor.
Interpreting Results and Applying Findings
Translate sensory notes into targeted adjustments: add acid to brighten, salt to enhance, sweetness to round edges, or umami to deepen the impression. Match corrections to specific descriptors in your log.
Apply small, incremental changes in recipes. If tomato sauce tastes flat, a squeeze of lemon or a splash of low-sodium soy can lift it without masking other ingredients. Use your recorded patterns to shortcut decision-making.
Safety, Hygiene, and Troubleshooting
Sanitize tasting implements and use small sample sizes. Rinse with water and a plain cracker between tests to preserve accuracy across trials.
A sudden shift in taste perception can result from medications, smoking, or illness. If you notice persistent loss or distortion of taste or smell, seek clinical evaluation for anosmia or dysgeusia.
Pro-Caution
Practical Tips for Ongoing Palate Training
Practice weekly with different sources for the same taste—another cheese for umami or a different citrus for sour. Variation builds pattern recognition and transferable skills for recipe work.
Work with a partner to compare notes; labeling sensations aloud improves accuracy and memory. Over time you will calibrate seasoning decisions faster and with more confidence.
FAQ
How long does it take to notice improvement?
Most people detect measurable progress within two to four weeks of weekly practice. Sensory memory strengthens quickly when you record and review observations.
Can children participate in these experiments?
Yes, with supervision. Use mild samples and avoid excessive salt or concentrated acid. Keep sessions brief, controlled, and enjoyable.
Are these tests reliable if I have a cold?
No. Nasal congestion reduces retronasal smell and will blunt perceived flavor. Reschedule testing for when congestion clears for accurate results.
How do I use umami without adding sodium?
Choose natural glutamate sources such as tomatoes, dried mushrooms, and aged cheeses used sparingly. Use low-sodium miso or soy in small quantities to add depth with minimal additional salt.
What if I can’t taste bitterness at all?
Genetic variation affects sensitivity to some bitter compounds. Track patterns in your log and rely on acid and salt to add perceived balance when bitterness seems weak.
With consistent practice you will convert these experiments into a reliable seasoning strategy. The more you test and record, the faster you will identify and correct flavor imbalances in cooking.

See also: Five Tastes | Seasoning Basics