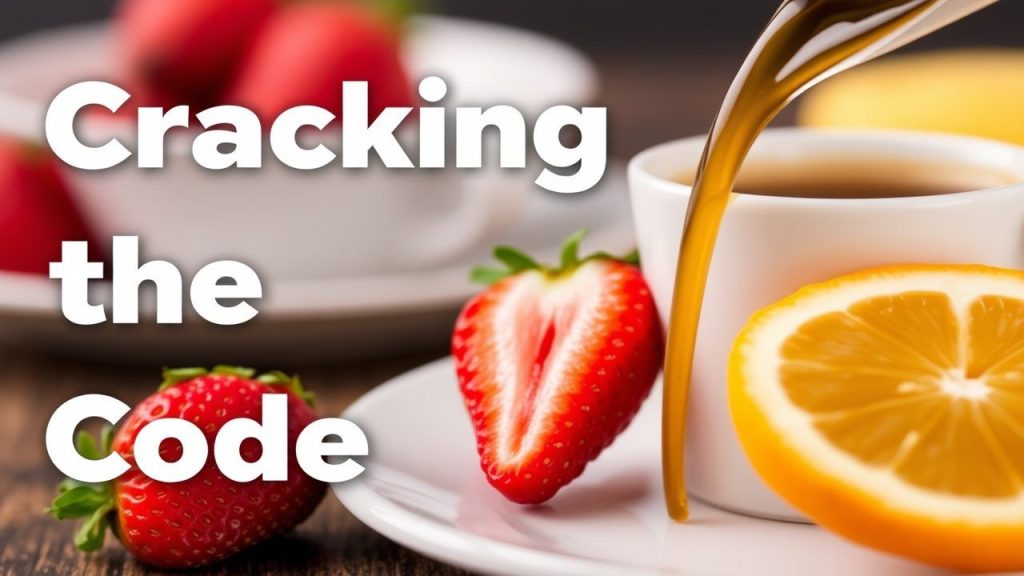
Flavor science explains how chemistry and precise technique produce aroma, taste, and texture. When you apply flavor science to heat, time, and ingredient choices, you move from guesswork to predictable, repeatable results.
- Control browning to increase savory aroma and depth.
- Balance acid and fat for perceived brightness and richness.
- Respect time: resting and slow extraction change texture and release tastants.
- Test methodically and record outcomes to improve consistency.
Why Flavor Science matters
Applying flavor science turns culinary practice into a set of controlled experiments. You focus on variables—temperature, surface dryness, acidity—that consistently change outcomes.
That repeatability reduces waste, improves yield, and raises the quality of dishes in both home and professional kitchens. Use simple measurements and sensory checks to track improvements.
Foundational Flavor Science: key reactions and concepts
The Maillard reaction and caramelization create many volatile and nonvolatile compounds that we recognize as roasted, toasty, and sweet-browned notes. Control surface temperature and dryness to maximize positive compounds without burning.
Umami compounds concentrate through gelatin extraction and aging. Read about Umami to understand how glutamates and nucleotides layer into savory depth. Combine these concepts to design flavors rather than merely chase them.
Prep and Cook Time driven by Flavor Science
Preparation: 15 minutes | Cooking: 45 minutes | Total Time: 1 hour. These targets balance surface flavor development with internal doneness for bone-in chicken thighs.
Plan a short rest after cooking so juices redistribute and flavors equilibrate. Resting is a low-effort step with a high return in texture and perceived juiciness.
Yield and scaling with Flavor Science
Serves 4 as a main course. When scaling, maintain searing surface area and liquid ratios to preserve concentration of extracted compounds.
Measure critical ingredients by weight where precision matters. Weight-based measurement reduces variance that undermines reproducible flavor outcomes.
Difficulty Level: practical flavor science application
Medium — this recipe prioritizes heat control, browning management, and timed simmering. It rewards technique rather than specialized equipment.
Home cooks will succeed by following temperature cues and observing visual indicators such as a deep golden crust and reduced pan sauce viscosity.
Ingredients
These components combine protein, aromatics, and acid to build layered flavor. Choose bone-in cuts for gelatin, aromatics for volatile lift, and acid for brightness.
- 2 lbs bone-in chicken thighs, skin on
- 1 tbsp olive oil
- 1 tsp kosher salt
- ½ tsp freshly ground black pepper
- 1 medium yellow onion, finely chopped
- 3 cloves garlic, minced
- 1 tsp smoked paprika
- ½ tsp ground cumin
- 1 cup low-sodium chicken broth
- 1 tbsp tomato paste
- 1 tsp lemon zest
- 2 tbsp fresh parsley, chopped (for garnish)
- Juice of 1 lemon
Use fresh ingredients and measure by weight when practical. Precision supports consistent results when you apply flavor science principles.
Instructions — sequence guided by Flavor Science
Follow the sequence to maximize surface browning, bloom spices, and extract gelatin and collagen from bones and pan fond. Each step targets a defined chemical or physical change.
Work efficiently: prep mise en place, set heat levels before adding ingredients, and use visual cues like color, aroma, and pan fond to judge progress.
Searing and developing aroma
1. Prep the chicken: Pat thighs dry to remove surface moisture. Season both sides evenly with salt and pepper so the skin can reach the dryness needed for crust formation.
2. Sear: Heat oil in a heavy skillet until shimmering. Place chicken skin-side down and press to maintain contact. Sear until deep golden brown, about 6–8 minutes, then flip and sear 2–3 minutes more.
Sautéing aromatics and blooming spices
Remove chicken and set aside. Reduce heat, add onions, and cook until translucent and fragrant, about 4–6 minutes. Then stir in garlic, paprika, and cumin and cook 30–60 seconds to bloom spices and release their volatile oils.
Short, controlled cooking prevents bitter burnt notes while unlocking aroma. Blooming spices at moderate heat increases their solubility into the sauce.
Building and finishing the sauce
Stir in tomato paste and cook 1–2 minutes to deepen flavor. Add broth and scrape the pan fond; those browned bits concentrate Maillard compounds that enrich the sauce.
Return chicken skin-side up, add lemon zest, cover, and simmer gently for 30 minutes. Finish with lemon juice and a brief reduction to balance richness and concentrate savory notes.
Chef’s Notes: applied Flavor Science
Dry the skin: Surface moisture prevents reliable browning. Blot thoroughly before seasoning and searing to maximize Maillard-driven aroma.
Control heat: High heat builds aroma compounds quickly but can scorch spices. Lower heat after searing while you sauté aromatics to maintain clean flavors.
 Expert Insight
Use bones for depth: Bone-in cuts release gelatin and mineral cues under heat, which boost mouthfeel and perceived umami. That concentrated mouthfeel often reads to diners as deeper flavor.
Make ahead: This dish often improves after a few hours or overnight as flavors equilibrate. Reheat gently to preserve texture and avoid drying the meat.
Serving Suggestions guided by Flavor Science
Pair with basmati rice or creamy polenta to absorb sauce and balance textures. Both starches act as neutral carriers that highlight the chicken’s savory profile.
A crisp green salad with a citrus vinaigrette adds acidity and freshness to cut richness. Finish with chopped parsley and a lemon wedge for visual contrast and immediate brightness.
 Pro-Caution
Nutrition per serving
Approximate nutrition helps plan portions and dietary balance. Values assume typical ingredients and standard serving sizes.
Per serving: ~370 kcal, 32 g protein, 6 g carbohydrates, 24 g fat. Adjust ingredients to fit specific dietary needs.
Science links and resources for Flavor Science study
To extend technique into reliable practice, consult accessible scientific summaries. These sources provide frameworks for hypothesis-driven recipe tests and systematic adjustments.
Start with summaries in food chemistry and the mechanisms of taste perception. Use these concepts to design controlled tests at the stove.
FAQ
What is flavor science?
Flavor science studies how molecules, heat, and time interact to produce aroma, taste, and mouthfeel. It translates chemical reactions into culinary technique.
Practically, it means selecting methods that reliably produce the compounds you want—like Maillard-derived aroma—rather than hoping for them by chance.
How does the Maillard reaction improve flavor?
The Maillard reaction forms hundreds of compounds when amino acids react with reducing sugars under heat. These compounds produce roasted, savory, and toasty notes we associate with well-browned foods.
Control surface temperature and dryness to favor desirable Maillard products while avoiding bitter burnt byproducts. Visual and olfactory cues guide timing in real kitchens.
Can I use sous-vide techniques with this recipe?
Yes. Sous-vide gives precise temperature control to reach uniform doneness. Finish by searing to develop surface aroma through Maillard chemistry.
Dry the skin thoroughly before finishing with high heat to recreate the crust and volatile aroma compounds typical of pan-seared poultry.
What simple habits deliver the biggest flavor gains?
Start with three habits: salt ahead of time, control searing heat, and finish with acid. Those steps respectively improve seasoning penetration, build aroma, and balance richness.
Run small, controlled tests—change one variable at a time—and record sensory outcomes to identify the highest-impact adjustments.
How does texture influence perceived flavor?
Texture controls how flavors release and how saliva carries soluble tastants to receptors. Gelatin-rich sauces coat the palate and prolong taste, while crisp textures create contrast and perceived brightness.
Design textures deliberately by understanding starch gelatinization and protein coagulation to amplify the overall eating experience.
Key Takeaways
Flavor science gives you a toolbox: control browning, manage acidity, and respect time. These interventions target known chemical pathways that determine aroma, taste, and texture.
Apply small, testable changes and log results. This iterative, measurable approach delivers consistent, repeatable flavor improvements across recipes.

For hands-on practice, run a simple experiment: cook two thighs with different salting times or sear temperatures and note aroma, crust, and juiciness. Systematic comparison trains your senses to detect technique-driven differences quickly.
See also: Flavor Science and CookOrbit home
Recommended Reading:
]]>Imagine biting into a perfectly ripe strawberry or inhaling the smoky notes of hot coffee. The experience feels immediate, but behind it lies coordinated biology: receptors at the tongue and nose send patterned signals that the brain translates into a unified flavor percept.
- Flavor arises from combined taste and smell signals integrated by brain networks.
- Timing and temperature alter receptor responses, so cook time changes perceived sweetness or bitterness.
- Memory and emotion bias interpretation, which is why comfort food tastes distinct to each person.
- Small technique changes in a recipe yield big sensory shifts.
Prep and Cook Time
Prep Time: 20 minutes | Cook Time: 15 minutes | Total Time: 35 minutes. These values reflect typical preparation for the rice-based dish featured here and assume mise en place.
Time controls molecular reactions: caramelization, Maillard reactions, and volatile release all depend on how long and how hot ingredients interact. That timing directly affects the chemical cues the chemosensory system detects.
Yield and Difficulty
Serves 4. This recipe is intentionally approachable for cooks with moderate experience but it rewards attention to sensory details.
Difficulty: Medium. The technique focuses on managing aromatics and texture so the brain receives clear, layered inputs instead of muddled signals.
Ingredients
Gather ingredients that provide contrast in taste, aroma, and texture; the brain uses those contrasts to segment flavor components and build a coherent percept. Use fresh aromatics and properly cooled rice to preserve grain separation.
Adjust salt, acid, and fat to tune how receptors fire: salt increases savory signals, acid sharpens contrast, and fat carries volatile aroma compounds.
- 2 cups cooked jasmine rice, cooled
- 1 tbsp coconut oil
- 1 small shallot, finely minced
- 2 cloves garlic, minced
- 1 tsp grated fresh ginger
- 1/2 cup diced pineapple, fresh or canned
- 1/2 cup chopped cashews, toasted
- 1 small red chili, thinly sliced (optional)
- 2 tbsp tamari or soy sauce
- 1 tbsp lime juice, freshly squeezed
- 1 tsp honey or agave nectar
- Fresh cilantro, chopped, for garnish
- Toasted sesame seeds, for garnish
Instructions
Follow sequence and temperature closely so the olfactory and gustatory cues evolve predictably. The goal is to create staggered releases of volatiles and textural contrasts that the brain can parse as distinct elements.
Work with a hot skillet, but avoid burning aromatics; char produces bitter phenols that can dominate receptor responses and mask subtle aromatics.
- Heat coconut oil in a large skillet over medium heat. Add the minced shallot, garlic, and ginger. Sauté until fragrant and golden, about 2-3 minutes, stirring frequently.
- Stir in diced pineapple and cook for another 3 minutes to lightly caramelize sugars and boost sweet volatiles.
- Add the cooked jasmine rice to the skillet, breaking up clumps. Sauté for 5 minutes so each grain heats evenly and releases aroma.
- Toss in toasted cashews and sliced red chili if using. These add crunch and a heat cue that modulates trigeminal sensation.
- Mix tamari or soy sauce, lime juice, and honey in a small bowl. Pour over rice and stir to balance salty, sour, and sweet dimensions; simmer 2 minutes.
- Remove from heat and garnish with fresh cilantro and toasted sesame seeds before serving.
Notes on Technique
Break the recipe into stages: aromatics, sweet component, starch, and finish sauce. Staging preserves the identity of each sensory input so cortical circuits can map components to experience.
Stirring and order affect temperature gradients. Serve immediately in shallow bowls to maximize volatile diffusion and engage retronasal smell, a major contributor to perceived flavor.
Tips for Success
Small adjustments yield outsized perceptual changes because taste pathways respond nonlinearly to concentration shifts. Taste receptors saturate quickly, so balance multiple modalities rather than increasing a single ingredient to compensate.
Test seasoning incrementally. Add acid and salt in stages and taste between additions; your brain marks the change and updates preference rapidly.
- Replace coconut oil with a splash of toasted sesame oil for deeper aroma, but use sparingly because it can dominate the profile.
- Substitute honey with agave or maple for vegan diets without losing sweetness complexity.
- Use day-old rice for better texture: cooled starch separates and highlights grain integrity.
- Adjust chili to personal spice sensitivity; heat recruits trigeminal fibers that alter overall flavor perception.
Expert Insight
Plan to prepare aromatics and dressing ahead for quick assembly. This improves timing control and reduces stress, which can influence salivary flow and taste sensitivity.
Serving Suggestions
Serve with a light cucumber salad or steamed greens to add a cooling, textural counterpoint; the contrast refreshes olfactory receptors between bites. For reference, see the internal recipe map at pineapple fried rice for variations.
Consider plating and portion size: shallow bowls and moderate portions increase retronasal airflow and heighten aroma sampling. Explore related neuroscience notes at the neuroscience of flavor for practical tasting protocols and training exercises.
Nutritional Information
Per-serving nutrition provides a baseline for dietary planning and for understanding how macronutrients modulate flavor perception. Fat carries aroma compounds, carbohydrate provides sweetness, and protein contributes umami—all of which influence receptor activation.
Use the table to match portioning with nutritional goals and to plan modifications that preserve sensory balance while adjusting calories.
| Nutrient | Per Serving |
|---|---|
| Calories | 320 kcal |
| Protein | 7 g |
| Carbohydrates | 45 g |
| Fat | 9 g |
The Neuroscience Behind Flavor Decoding
Taste and smell signals arrive via distinct peripheral receptors and converge in central circuits that assign meaning and valence. The tongue’s receptor cells transduce chemical ligands into electrical signals routed through cranial nerves to brainstem nuclei and onward to cortical and limbic structures.
Smell, in particular, drives much of what we call flavor through retronasal olfaction; the olfactory bulb and higher olfactory cortices integrate with gustatory input to produce a cohesive percept. For technical reference, review the gustatory system at Gustatory system and the fundamentals of Olfaction.
Neural plasticity and prior experience shape these circuits. Repeated exposure alters synaptic weights so that familiar combinations trigger predictive responses, biasing hedonic judgement and memory encoding. See basic mechanisms in Neuroscience.
Pro-Caution
FAQ
Below are concise answers to common questions about flavor decoding and practical implications for cooking and research.
What does it mean that the brain “decodes” flavor?
Decoding refers to the transformation of raw receptor signals into categorical percepts like sweet, salty, bitter, sour, and umami. The brain integrates these signals with olfactory and trigeminal inputs to form a unified flavor representation.
Integration also includes contextual factors such as memory and expectation, which modulate perceived intensity and pleasantness through top-down processing.
How do taste and smell collaborate?
Taste receptors detect nonvolatile compounds while olfactory receptors detect volatile molecules; together they create the multilayered percept we call flavor. Retronasal smell, where volatiles travel from the mouth to the nasal cavity, is crucial for recognizing specific foods.
Therefore, nasal congestion or anosmia dramatically reduces perceived flavor even when basic tastes remain intact.
Are individual differences significant?
Yes. Genetic variation in receptor expression produces broad differences: some people are supertasters with heightened bitter and sweet sensitivity, while others have blunted responses. Cultural exposure and learning further adjust preferences over time.
Behavioral training can change detection thresholds and preference, demonstrating the plasticity of chemosensory systems.
How can cooks use this knowledge?
Cook with sensory intent: balance contrast in taste, temperature, and texture to produce clear, separable cues that the brain can integrate favorably. Small changes in acid or fat can rebalance a dish without increasing salt.
Use staging and timing to stagger volatile release so that each bite reveals a controlled sequence of sensory events.
Where is research headed?
Current work maps flavor perception at neural-circuit resolution and models preference prediction using computational tools. These efforts aim to translate basic mechanisms into clinical and food-industry applications.
For deeper reading on taste and umami chemistry, consult the Wikipedia entries on Taste and Umami.
In Retrospect
Flavor decoding is a coordinated biological process where chemical cues meet neural computation. Understanding this process gives cooks and clinicians practical tools to tune dishes and therapies that leverage sensory integration.
Next time you taste a complex dish, pay attention to how aroma, texture, and timing influence what you perceive; those subtle design choices shape the sensory code your brain writes about food.
See also: Flavor decoding
]]>
- Key takeaway: Browning arises from interactions between sugars and amino acids, not simple caramelization.
- Timing matters: High, dry heat with good surface contact produces the best sear.
- Safety balance: Manage temperature to minimize unwanted compounds while maximizing flavor.
- Practical tip: Pat meats dry and use a high-smoke-point oil for a reliable crust.
Science of the Maillard Reaction
The Maillard reaction occurs when reducing sugars react with free amino acids under heat, producing hundreds of flavor compounds and brown pigments called melanoidins. This cascade begins around 140°C (285°F) and accelerates as temperature rises, producing savory, roasted and nutty notes.
Understanding the reactants helps you predict outcomes: foods rich in proteins and simple sugars brown more readily. For background on the chemistry of amino groups, see amino acids.
Prep and Cook Time
These times assume a standard pan-seared ribeye technique that highlights the Maillard Reaction. Timings vary with cut thickness and pan mass.
Guideline: Heat the pan first, then add oil and the protein; total active cook time is short but requires attention to temperature.
- Preparation: 15 minutes
- Cooking: 20 minutes
- Total Time: 35 minutes
Yield
This recipe and technique target a family portion size while preserving sear quality. Scaling up requires wider pans or batch cooking to avoid crowding.
Serves: 4
Difficulty Level
Technique-focused cooks will find the method approachable; it rewards precise heat control and timing. Beginners can replicate professional results by following core principles.
Level: Medium — requires attention to pan temperature and resting time for best texture.
Ingredients
The ingredients list emphasizes components that support Maillard browning: protein, minimal surface moisture, and a high smoke-point fat. Fresh aromatics and butter finish the flavor but do not drive the reaction.
Substitution notes: choose oils with high smoke points and cuts with good surface protein content for optimal crust development.
- 1 lb (450g) boneless ribeye steak, trimmed and room temperature
- 2 tbsp vegetable oil (grapeseed or canola)
- 1 tsp kosher salt
- ½ tsp freshly ground black pepper
- 2 cloves garlic, crushed
- 1 sprig fresh rosemary
- 2 tbsp unsalted butter, chilled
Instructions
Follow these steps to maximize surface browning while maintaining internal doneness. Each movement has a purpose: dry surface, hot pan, undisturbed contact, and a resting period.
Work quickly once the pan is hot. A well-heated cast-iron or heavy-bottom skillet stores heat and helps sustain the Maillard reaction across the sear.
- Preheat the pan: Heat a skillet over medium-high until very hot but not smoking.
- Dry and season: Pat the ribeye thoroughly and season both sides with kosher salt and pepper.
- Add oil: Swirl oil to coat, then place the steak away from you to avoid splatter.
- Sear undisturbed: Leave the steak for 3–4 minutes to form a deep, golden crust.
- Flip and aromatics: Turn the steak, add garlic and rosemary, and sear the second side for 3 minutes.
- Finish with butter: Reduce heat to medium, add chilled butter, and baste for 2–3 minutes.
- Rest and slice: Use a thermometer (130°F for medium-rare). Rest 5 minutes before slicing against the grain.
Searing checklist
Before you place protein in the pan, confirm three items: no excess moisture, a hot pan, and a single layer of meat without crowding. This preserves surface temperature and prevents steaming.
Use a splatter screen if needed, and reduce heat only if smoke becomes excessive. A steady, hot surface gives the most consistent Maillard browning.
Tips for Success
Small technique tweaks produce outsized flavor gains. Focus on surface dryness, heat management, and uninterrupted contact time to encourage the formation of flavorful compounds.
Choose cuts with ample surface protein and a modest amount of fat. The fat helps carry flavor and enhances perceived juiciness after the Maillard reaction develops a crust.
- Bring meat to room temperature for even internal cooking.
- Pat meats dry; moisture delays browning.
- Use oils with high smoke points to reach searing temperatures safely.
- Avoid overcrowding; crowding traps steam and lowers pan temperature.
Expert Insight
After the tip above, allow the steak to rest briefly before slicing to redistribute juices. Proper resting preserves tenderness and mouthfeel.
Serving Suggestions
Present the sliced ribeye over warm sides that absorb pan juices: mashed potatoes, roasted vegetables, or a simple pan sauce. A light sprinkle of flaky sea salt enhances the crust’s flavor.
Pair bold, structured wines or roasted vegetable sides to complement the Maillard-driven nutty and caramelized notes that emerge from the sear.
Health and Safety Considerations
The Maillard reaction produces desirable flavors but can also generate compounds like acrylamide when starchy foods become overly browned. Controlled cooking keeps flavor high and risky byproducts low.
To minimize potentially harmful compounds, brown to golden rather than black, control temperature, and avoid charring. Balanced technique yields safe and delicious results.
Pro-Caution
Use a thermometer to hit target doneness without overbrowning the exterior. For most home cooks, medium-rare to medium yields the best balance of crust and juiciness.
Nutritional Overview
Below is an approximate nutrient breakdown per serving for the illustrated portion. Values vary by cut, trimming, and finishing ingredients.
| Nutrient | Amount per Serving |
|---|---|
| Calories | 450 kcal |
| Protein | 40 g |
| Carbohydrates | 2 g |
| Fat | 30 g |
For background on related cooking processes and how they differ, review caramelization and steak preparation notes. These sources clarify contrasts with simple sugar browning and typical cuts used for searing.
Final Notes
Mastering the Maillard reaction means managing heat, moisture, and timing to produce predictable flavor. Small, repeatable techniques yield consistent crusts and deeper taste profiles across proteins and vegetables.
Apply these principles across pan-searing, roasting, and grilling to expand your flavor palette. Repetition and observation sharpen your ability to read the pan and control the reaction for repeatable results.
FAQ
What exactly is the Maillard Reaction?
The Maillard Reaction is a chemical interaction between reducing sugars and amino groups in proteins that occurs under heat, producing new flavor molecules and brown pigments. It differs from simple sugar browning by involving amino acids as co-reactants.
Why does the Maillard Reaction matter for flavor?
It generates hundreds of volatile compounds that create savory, toasted, and roasted notes. These compounds make seared meats, toasted bread, and roasted coffee complex and appealing.
At what temperature does the reaction begin?
The Maillard cascade typically begins near 140°C (285°F) and accelerates at higher temperatures. Successful browning requires stable high heat and minimal surface moisture.
How can I encourage good browning without burning?
Pat surfaces dry, use a heavy pan for heat retention, apply a thin coat of high-smoke-point oil, and avoid overcrowding. If smoke appears, reduce heat slightly to prevent bitter charring.
Is Maillard the same as caramelization?
No. Caramelization involves the thermal decomposition of sugars alone and produces sweet, toasty flavors. The Maillard reaction involves sugars and amino acids, yielding savory and nutty notes.
See also: Maillard Reaction
]]>
- Key insight: Free glutamate and nucleotides produce the core umami sensation.
- Processing matters: Heat and drying trigger Maillard chemistry that adds nutty notes.
- Use it smart: Combine with fats, acid, or heat to amplify cheesiness.
- Store properly: Cool, dry, airtight storage preserves flavor and vitamins.
The Molecular Magic Behind Nutritional Yeast’s Savory Appeal
Nutritional yeast is a deactivated form of yeast commonly used for its savory, cheese-like flavor and dense nutrient profile. Many producers use strains of Saccharomyces cerevisiae, grown to yield protein and B vitamins and then heat-inactivated and dried.
The key flavor drivers are free amino acids and flavor-enhancing nucleotides. Together, these molecules stimulate umami receptors and create the perception of a tangy, nutty, and savory note that we often label as “cheesy.”
Glutamic Acid and Umami Synergy
Glutamic acid, present as free glutamate in processed yeast, directly activates umami taste receptors. This mirrors the same receptor activation that gives aged cheeses and broths their savory depth.
What intensifies the effect is synergy with nucleotides such as inosinate and guanylate. These compounds amplify the perceived intensity of glutamate, so smaller amounts of yeast can deliver a pronounced savory hit.
Nucleotides: Inosinate and Guanylate
Nucleotides like inosinate naturally form during yeast cell breakdown and drying. They do not taste intensely savory on their own, but they boost glutamate’s potency through a well-described biochemical synergy.
For readers who want the biochemical context, see the nucleotide overview at inosinate. That page explains how these molecules contribute to savory taste when paired with glutamate.
Maillard Reaction and Volatile Notes
Drying and mild heating during processing trigger Maillard reactions between amino acids and sugars. This set of reactions produces pyrazines and other volatiles that add roasted, nutty, and slightly sweet aroma notes.
These Maillard products round out the flavor, giving nutritional yeast that roasted, Parmesan-adjacent character without dairy. For more on the chemistry, refer to Maillard reaction.
Practical Recipe: Umami Lentil Mix (Uses Nutritional Yeast)
This simple lentil mix demonstrates how to coax the cheese-like quality from nutritional yeast using heat, acid, and fat. Follow the cooking steps to maximize flavor development while keeping the preparation approachable.
Prep time and yield suit weeknight cooking and meal prep. The recipe scales easily for bowls, toasts, or as a protein-rich side.
Prep and Cook Time
- Prep time: 5 minutes
- Cook time: 10 minutes
- Total time: 15 minutes
Yield and Difficulty
Serves: 4
Difficulty: Easy
Ingredients
- 1/4 cup nutritional yeast flakes
- 2 tbsp olive oil
- 1 medium shallot, minced
- 2 cloves garlic, minced
- 1 cup cooked lentils (green or brown)
- 1 tsp smoked paprika
- 1/2 tsp sea salt
- Freshly ground black pepper, to taste
- 1 tbsp fresh lemon juice
- 2 tbsp chopped fresh parsley
Instructions
- Heat the oil in a skillet over medium heat. Add minced shallot and sauté until translucent, about 2 minutes.
- Add garlic and cook 30 seconds, stirring to prevent browning.
- Toss in lentils and smoked paprika. Warm through for 3–4 minutes, stirring to meld flavors.
- Sprinkle nutritional yeast evenly and stir to coat. Cook 1–2 minutes to release savory compounds.
- Finish with salt, pepper, and lemon juice. Remove from heat and fold in parsley.
- Serve over toasted bread, steamed greens, or grain bowls.
Chef’s Notes and Serving Suggestions
Small changes affect perceived cheesiness. Adding a splash of plant milk or a teaspoon of miso increases creaminess and umami without masking the yeast’s character.
Try serving ideas such as toasted seeds for crunch or a balsamic drizzle for acidity. These contrasts highlight the nutty, tangy elements of the yeast.
- Substitute smoked paprika with a pinch of cayenne for heat.
- If fresh garlic is unavailable, use 1/2 tsp garlic powder to avoid bitterness.
- Make-ahead: store in an airtight container for up to 3 days.
Expert Insight
For additional uses and pairing options, consult our internal guides. Explore the guide to natural umami ingredients and the lentil and nutritional yeast recipe for variations and side ideas.
Pro-Caution
Storage, Processing, and Shelf Life
Proper storage preserves both flavor and nutrient content. Keep flakes in a cool, dry, airtight container away from heat and light to limit oxidative loss of volatile compounds.
Processing choices alter flavor. Longer drying times and higher temperatures can increase Maillard products but may reduce heat-sensitive B vitamins. Brands vary, so sample products to match your flavor preference.
FAQ
What exactly is nutritional yeast?
Nutritional yeast is a deactivated yeast commonly sold as yellow flakes or powder. Producers typically grow it for nutrient yield and then heat-inactivate and dry it to create a stable, savory ingredient.
Why does it taste “cheesy” if there is no dairy?
The cheesy impression comes from a mix of free glutamate, nucleotides, and Maillard-derived aromatics. These molecules mimic the savory and nutty notes associated with aged cheeses.
How can I make its flavor stronger in recipes?
Use gentle heat, a little fat, and a splash of acid. Heat releases volatile aromatics, fat carries them on the palate, and acid brightens the overall profile to emphasize the cheesy notes.
Are there nutritional benefits beyond flavor?
Yes. Nutritional yeast offers protein, fiber, and B-complex vitamins in many formulations. Fortified varieties provide vitamin B12, which is valuable for those on plant-based diets.
How should I choose a product?
Compare flavor intensity, fortification, and processing notes on packaging. If you prefer a roasted character, look for descriptions that mention toasty or nutty notes; for a milder, creamier profile, choose finer flakes.
For readers seeking the biochemical backdrop of taste receptors, the concept of umami is well covered at umami. For amino acid context, see glutamic acid.
Harnessing nutritional yeast effectively requires simple technique and awareness of chemistry. Use heat, fat, and acid strategically, and store flakes correctly to keep that cheesy, savory note bright and consistent.
See also: nutritional yeast
]]>
- Heat boosts aroma release and often increases perceived sweetness.
- Cold mutes bitterness and firms fats and proteins for different textures.
- Temperature contrast adds complexity when chefs pair hot and cold elements.
The Science Behind Temperature and Taste Interaction
Temperature influences flavor through physical chemistry and human sensory biology. When a dish warms, volatile molecules evaporate faster and reach olfactory receptors more readily; this increases perceived aroma and flavor intensity.
Conversely, colder temperatures slow evaporation and reduce receptor activation while changing the mechanical properties of fats and proteins. These shifts alter mouthfeel, release patterns of taste molecules, and ultimately how the brain integrates taste and smell.
Thermal effects on sensory receptors
Thermoreceptors in the mouth and skin modify how taste receptors signal the brain. This interaction explains why warm broth can taste richer even when its chemical composition mirrors a cold broth.
For background on sensory mechanisms, see thermoreception and taste on Wikipedia for accessible summaries.
How Heat Amplifies Aromas and Sweetness
Heat increases the vapor pressure of volatile aroma compounds, pushing them into the air above food. That stream of odorants reaches the nose and enhances flavor via retronasal olfaction.
At the same time, heat breaks down complex carbohydrates and denatures proteins in ways that can release simple sugars and soluble flavor precursors. The Maillard reaction also forms hundreds of new aroma compounds that make roasted and seared foods taste deeper and more savory; read about the Maillard reaction for technical context.
Practical kitchen examples
Warm fruit releases floral esters and feels sweeter; a warm apple slice often tastes sweeter than the same slice straight from the fridge. Bakers exploit this by serving pies and crumbles warm to highlight aroma and sugar breakdown.
Chefs also warm sauces slightly to boost aroma volatility without overheating fat-rich components that could separate. Warming a vinaigrette briefly mellows raw acidity and frees aromatic oils from herbs.
Chilling Effects on Bitterness and Texture Perception
Cold reduces the solubility and mobility of many flavor molecules, which dampens certain taste notes such as sweetness and some aromatics. Bitterness often becomes less perceptible when the mouth and food are cold, producing a smoother impression.
Chilling firms fats and proteins, which changes bite and mouth-coating properties. That mechanical change can make chilled dishes feel crisper and more refreshing, a reason why salads and ceviches benefit from low service temperatures.
When cold helps balance a plate
Chefs use chilled elements to cut perceived richness and reduce harshness in fatty or intensely spiced dishes. A cold herb oil or chilled acid can create a relief point on the palate after a warm, fatty bite.
For the science of smell and how temperature affects retronasal perception, reference olfaction for foundational concepts.
Practical Tips for Serving Food and Drinks at Optimal Temperatures
Temperature control matters at plating and service. Adjusting service temperatures by only a few degrees dramatically changes aroma release and mouthfeel.
Use these rules to get predictable results and to guide pairing choices during service.
- Warm dishes: Serve stews, roasted vegetables, and grilled meats hot to maximize aroma and perceived sweetness. For more on aroma interplay, see Explore aroma.
- Cold preparations: Chill salads, ceviche, and sorbets to emphasize crisp textures and mute harsh notes.
- Wine and beverages: Serve whites and rosés cooler than reds; small differences (5–10°F / 3–6°C) can shift perceived acidity and fruitiness.
- Contrast: Combine hot and cold elements to create dynamic bites, such as warm crab cakes with a chilled lemon aioli.
Service mechanics and timing
Serve hot items on warmed plates and cold items on chilled plates when possible to preserve temperature contrast at the table. This practice preserves aroma release and expected texture for longer during service.
Train staff to time service so that heated components leave the line last and chilled items are kept on ice until plating. Small procedural controls prevent rapid temperature drift during service.
Recipe: Warm Roasted Carrots with Chilled Apple Salad
This simple recipe demonstrates how temperature contrast highlights sweetness, crunch, and aroma simultaneously. It pairs warm, caramelized vegetables with crisp, chilled fruit for a balanced side.
Follow short prep and cook steps to preserve the intended contrasts and textures in each component.
Prep and Cook Time
Prep: 10 minutes | Cook: 20 minutes
Yield
Serves 4
Difficulty Level
Medium
Ingredients
- 2 cups roasted carrots, warm, cut into bite-sized pieces
- 1 cup crisp green apple, chilled and diced
- 1/4 cup toasted walnuts, roughly chopped
- 3 tbsp honey, warmed (maple syrup for vegan)
- 2 tbsp fresh lemon juice, chilled
- 1 tsp ground cinnamon
- Salt and black pepper, to taste
- Fresh mint leaves, for garnish
Instructions
- Preheat oven to 400°F (200°C). Toss carrots with salt, pepper, and half the honey. Roast until tender and lightly caramelized, about 18–22 minutes.
- While carrots roast, dice the apple and toss with chilled lemon juice to preserve crispness and prevent browning.
- Mix remaining honey with cinnamon in a small bowl for a warm drizzle.
- Combine warm carrots with chilled apple in a serving bowl. Add walnuts and drizzle the honey-cinnamon blend over the top.
- Toss gently and garnish with mint. Serve immediately to maximize temperature contrast and flavor interplay.
Chef’s Notes
Roasting intensifies natural sweetness through caramelization and the Maillard reaction; keep an eye on color for the best flavor development. Cooling the apple beforehand preserves crunch and highlights contrast with warm carrots.
For a vegan option, substitute maple syrup for honey and warm gently to maintain texture. To explore plating temperatures in depth, see Serving temperatures.
Expert Insight
Adjust the salt level last; temperature changes affect salt perception. Taste at service temperature to balance seasoning correctly.
Pro-Caution
Serving Suggestions
Pair this dish with a lightly chilled aromatic white wine or a citrus-forward rosé to echo the salad’s brightness. The chilled beverage accentuates the fruit’s crispness while the wine’s aromatics complement warm roasted notes.
Serve alongside grilled chicken or a rich, warm grain for a composed plate that plays hot and cold against each other. For more ideas on aroma and pairing, visit Explore aroma.
| Nutrition | Per Serving |
|---|---|
| Calories | 180 kcal |
| Protein | 3 g |
| Carbohydrates | 26 g |
| Fat | 8 g |
FAQ
Can the temperature of food or drink actually change its flavor?
Yes. Temperature alters volatile release, receptor sensitivity, and mouthfeel, which changes the integrated perception we call flavor. Those physical and physiological changes produce clear, repeatable differences when we taste the same item at different temperatures.
Why does ice cream taste different when it softens versus straight from the freezer?
Frozen ice cream numbs taste receptors and suppresses aroma volatility; as it warms, sweetness and creaminess register more strongly. The melting process releases fats and aroma molecules that broaden the flavor profile.
How does temperature influence bitterness and spiciness?
Cold tends to mask bitterness, and warm temperatures often amplify pungency and spice. That is why a chilled beer or yogurt can soothe capsaicin heat, while warm foods feel spicier and more penetrating.
Are temperature effects universal across cuisines?
The underlying sensory physics are universal, but cultural practices shape how chefs and consumers use temperature. Regional traditions determine whether hot or cold preparations dominate and how contrast gets applied on a plate.
What simple experiments can home cooks try?
Taste single ingredients at two temperatures: try fruit at fridge temperature versus room temperature, or sip the same tea hot and iced. Note differences in sweetness, aroma, and mouthfeel to train your palate.
Temperature acts as an active tool in the kitchen. Use it deliberately to highlight aroma, balance bitterness, and create memorable contrasts that guide the eater’s experience.

See also: Temperature
]]>Two common seasonings—monosodium glutamate (MSG) and table salt—deliver sodium and shape flavor in different ways. Chefs and dietitians choose one or both to control taste and total sodium load without losing depth. This piece compares their chemistry, culinary use, and practical tips for lowering sodium while keeping food satisfying.
- MSG supplies umami while adding less sodium per gram than salt.
- Table salt (sodium chloride) provides direct saltiness and preserves texture.
- Combining modest MSG with reduced salt can lower total sodium and improve flavor.
- Use measured techniques to keep dishes balanced and health-aware.
Quick Recipe Snapshot
Prep: 10 minutes | Cook: 25 minutes | Total: 35 minutes. This practical stir-fry demonstrates how small MSG amounts boost depth so you can reduce table salt.
Yield: 4 servings. Difficulty: Easy to Medium. The method fits home cooks who want clear steps and modest ingredient control.
Chemical profiles and what they mean
Table salt is primarily sodium chloride, an ionic compound that provides straightforward saltiness and affects water activity in food. It dissolves quickly, seasons uniformly, and contributes to texture in bread and cured foods.
MSG is sodium bound to the amino acid glutamate, most commonly produced by fermentation. See the reference entry on monosodium glutamate for production and history. Glutamate activates the umami taste receptors and amplifies savory perception without only increasing salty notes.
Sodium content and health context
By weight, typical table salt contains about 39% sodium, while MSG contains roughly 12% sodium. That means you can often reach the same perceived savory intensity with less sodium when you use MSG strategically alongside reduced salt.
Sodium itself is an essential electrolyte; read the basic biochemistry at the sodium entry. For patients with hypertension or heart failure, clinicians recommend lowering total sodium intake. Substituting part of the salt with MSG is one evidence-aligned strategy to reduce sodium while preserving palatability. Always coordinate dietary changes with a healthcare provider for clinical conditions.
Culinary roles: what each seasoning does
Salt brightens overall flavor, reduces bitterness, and promotes the typical ‘salty’ sensation. It affects mouthfeel and can bring forward aromatics in a dish. It also acts as a preservative and texture modifier in many recipes.
MSG enhances umami, a distinct taste often described as savory or brothy. The umami concept is documented on its overview page at Umami. Use MSG to deepen meatiness, add roundness to broths, and make vegetables taste fuller without adding fat or excessive salt.
Ingredients for the example stir-fry
Below is the ingredient list used in the example. The quantities balance protein, aromatics, and seasonings to show how small MSG additions work in practice.
Keep an internal reference to our practical resources for further umami tips: Guide to umami flavors and for sodium control strategies see Sodium reduction guide.
- 1 lb boneless chicken thighs, cut into bite-size pieces
- 1 tbsp vegetable oil
- 1 medium onion, finely chopped
- 3 cloves garlic, minced
- 1 tsp grated ginger
- 1 cup diced bell peppers
- 1 tbsp low-sodium soy sauce
- ½ tsp table salt (adjust)
- ¼ tsp MSG (optional, umami boost)
- ½ tsp freshly ground black pepper
- 2 tbsp chicken broth or water
- 2 green onions, sliced; 1 tsp toasted sesame seeds (optional)
Instructions
These steps reinforce technique: use heat control, avoid overcrowding, and add seasonings in stages so you can taste and adjust. Small changes in timing and order affect final flavor sharply.
Follow the numbered process below and taste as you go. The goal is to show a practical workflow for reducing salt and incorporating a modest MSG dose when desired.
- Heat oil in a large skillet over medium-high. Add onions and sauté until translucent, about 3 minutes.
- Stir in garlic and ginger; cook 1 minute to release aroma but avoid browning them to the point of bitterness.
- Add chicken pieces in a single layer; brown on all sides about 6–8 minutes. Avoid crowding; work in batches if needed.
- Toss in diced bell peppers and sauté 2–3 minutes for color and slight crunch.
- Pour soy sauce and broth; bring to a simmer and scrape browned bits from the pan for flavor.
- Season with the listed table salt and a small pinch of MSG if using. Stir and simmer 4–5 minutes for flavors to meld.
- Finish with black pepper, garnish with green onions and sesame seeds, and serve over rice or grain of choice.
Chef’s notes and practical adjustments
Use MSG as a targeted enhancer, not a blanket replacement. Reduce table salt incrementally—start by cutting 25% and add ¼ tsp MSG to compensate, then taste and refine. This approach helps maintain familiarity while lowering sodium.
For vegetarian swaps, replace chicken with firm tofu and use vegetable broth. For smoky or spicy profiles, add a dash of smoked paprika or chili flakes, but keep the seasoning additions measured to control total sodium.
Expert Insight
When you adjust salt levels, give the dish a short rest off heat; flavors continue to meld and you can reassess saltiness before serving. This resting period reduces the risk of oversalting.
Pro-Caution
Nutritional notes and serving suggestions
This recipe example aims for balanced macros and controlled sodium. Portion control, low-sodium broth, and reduced salt usage all contribute to a lower per-serving sodium load.
Serving suggestions include jasmine rice, quinoa, or steamed greens. Fresh herbs added at the end lift the dish without adding sodium.
| Nutrient | Per Serving |
|---|---|
| Calories | 280 kcal |
| Protein | 32 g |
| Carbohydrates | 8 g |
| Fat | 12 g |
FAQ
What is the core difference between MSG and table salt?
Table salt is primarily sodium chloride and gives direct saltiness. MSG supplies glutamate, which triggers umami receptors and enhances savory notes. They act differently on taste receptors, so chefs use them for distinct effects.
Does MSG reduce total sodium in a dish?
Because MSG contains less sodium by weight, substituting some salt with MSG can lower overall sodium while maintaining perceived flavor. Practical reductions require tasting and incremental adjustments to find the balance.
Is MSG safe for most people?
Regulatory bodies and decades of research consider MSG safe for the general population when used in typical culinary amounts. Individual sensitivities are rare; consult a healthcare professional if you suspect an adverse reaction.
Can I use MSG in baking or desserts?
MSG is primarily useful in savory applications to boost umami. It has limited use in sweet baking unless you deliberately pair it with salty or savory elements to create contrast.
How should I store MSG and salt for best quality?
Store both in cool, dry containers to prevent clumping and moisture uptake. Keep them away from heat and strong odors so they retain their free‑flowing character and flavor integrity.
For deeper technical reading on the chemistry of sodium and glutamate, consult the cited Wikipedia entries and follow internal practical guides linked above for recipe variations and sodium-control strategies.
See also: MSG
]]>