- Key takeaway: Controlled fermentation and salt ratios govern safety and taste.
- Flavor driver: Free amino acids, especially glutamate, deliver the umami punch.
- Time matters: Extended aging smooths harsh notes and increases complexity.
- Practical tip: Clean technique and temperature control prevent off-flavors.
Chemical Foundations of Fish Sauce
Fish sauce is a concentrated solution of amino acids, organic acids, and small nitrogenous compounds produced when salted fish break down over time. The principal transformation occurs through natural fermentation, where endogenous enzymes and tolerant microbes act on proteins and lipids.
The salt concentration selects which microbes survive and which reactions dominate. High salt suppresses spoilage organisms while enabling proteolysis, the enzymatic cleavage of proteins into free amino acids and peptides that define taste and mouthfeel.
Amino Acids, Peptides and Umami
Free amino acids, notably glutamate, drive umami sensation in fish sauce. Analytical work on fermented seafood links rising levels of free amino acids to perceived savoriness, confirming the central role of glutamic acid in flavor intensity.
Peptides contribute body and slow-release flavor, while small organic acids add brightness and balance. Together, these molecules create the layered profile chefs rely on to round savory dishes.
Ingredients and Ratios: The Science of Balance
Ingredient choice shapes chemical outcomes. Small oily fish such as anchovies supply a consistent protein matrix and fat profile that ferment into flavorful compounds; traditional producers often use local anchovies for their predictable results.
Salt ratio matters more than exotic spices. A common working standard is ~30% salt by weight of fish to slow unwanted microbes while preserving enzymatic activity. Deviating from that range accelerates spoilage or stalls proteolysis.
Step-by-Step Fermentation Process
Start with fresh fish that are cold and firm to avoid early breakdown by spoilage bacteria. Rinse lightly, remove large impurities, but retain bones and skin—these tissues hold proteases that catalyze protein breakdown during aging.
Layer fish and salt in a clean, inert container, crush slightly to release fluids, and weigh contents so they remain submerged. Anaerobic microenvironments and continuous immersion reduce oxidation and favor desirable yeast and halotolerant bacterial activity.
- Layer fish and salt; include optional small amounts of sugar to modulate flavor.
- Cover with filtered water if necessary to ensure submersion and apply a weight.
- Store at controlled temperature and allow months of maturation; check monthly.
- When the liquid tastes harmonized, strain and bottle; age further if desired.
Time and Temperature Control
Temperature governs reaction rates: warmer conditions speed enzymatic cleavage but risk off-flavor formation if too hot. Keep fermentation in a stable range approximately 20–25 °C for consistent development.
Time converts simple savory notes into complex aroma. Short fermentations yield raw saltiness and sharpness; extended fermentation (six months to a year) increases soluble amino acids and mellows harsh volatile compounds.
Practical Recipe and Scheduling
For a reliable home batch: use 1 kg fresh small fish, 300 g sea salt (≈30%), and an optional tablespoon of palm or brown sugar. Adjust water only to cover; excessive dilution reduces enzymatic concentration and slows maturation.
Ferment in a food-grade container with occasional degassing and visual checks. Taste samples after 6 months; if flavor remains aggressive, continue aging. Strain through fine cloth and decant into sterilized bottles.
Safety, Microbial Control and Quality Checks
Salt provides the first line of microbial control but does not sterilize. Monitor visual signs: clear liquid with settled solids and no surface pellicle indicates a controlled fermentation. Off odors such as putrid, rotten-sulfur notes indicate contamination; discard any suspect batch.
Use good hygiene: sterilize jars, work with cold fish, and avoid introducing non-salted ingredients early in fermentation. If you detect unusual gas, foaming, or colored films, separate the liquid and assess; when in doubt, do not consume.
 Pro-Caution
After bottling, keep fish sauce refrigerated once opened to preserve freshness and slow any late-stage chemical changes. Properly salted and aged fish sauce is shelf-stable unopened for long periods, but labeling date and batch notes help trace quality.
Tips to Maximize Flavor and Consistency
Control variables: use the same fish source, maintain consistent salt percentage, and keep a stable temperature to reproduce successful batches. Minor changes shift the chemical trajectory of flavor development.
When using fish sauce in cooking, taste early and adjust. Because it concentrates umami, use sparingly and layer with acid and sweet elements to unlock complexity without overpowering dishes.
 Expert Insight
Experimentation is useful, but controlled trials work best: change one variable per batch to understand its effect. For example, test two salt ratios side-by-side to see how proteolysis and flavor diverge over six months.
Serving, Storage and Nutritional Notes
Fish sauce functions as a concentrated seasoning—use it to finish soups, vinaigrettes, marinades, and dipping sauces. Pair it with citrus, sugar, and aromatics to create balanced condiments that stretch a little goes a long way.
Packaged fish sauce is high in sodium; small amounts deliver a large flavor payoff. People with sodium-restricted diets should treat it as a potent seasoning and adjust other salt sources accordingly.
| Nutrient (per 1 tbsp / 15 ml) | Amount |
|---|---|
| Calories | ≈10 |
| Protein (soluble) | ≈1.4 g |
| Carbohydrate | ≈0.2 g |
| Fat | 0 g |
| Sodium | ~900 mg |
FAQ
How does fermentation create umami in fish sauce?
Endogenous enzymes break fish proteins into free amino acids and small peptides. These molecules, especially glutamate, stimulate umami receptors and intensify perceived savory taste.
What salt ratio ensures safe and effective fermentation?
About 25–35% salt by weight of fish is a reliable window for home practice. This range suppresses many spoilage organisms while allowing halotolerant enzymes and microbes to generate desirable flavor compounds.
How long should I age fish sauce for the best flavor?
Maturation for at least six months yields baseline umami development. Extending to 9–12 months typically produces smoother aromas and deeper complexity, depending on temperature and fish type.
Can I speed up fermentation without harming flavor?
Raising temperature accelerates reactions but increases the risk of off-flavors. It is better to allow time at a steady, moderate temperature than to force rapid fermentation.
Which fish produce the most consistent results?
Small, oily, protein-dense species like anchovies give predictable, concentrated results because their tissue and oil content ferment into classic savory compounds. Regional variations will still influence nuance.
For deeper reading on the scientific terms used here, review authoritative references on fermentation, umami, and enzymes to strengthen practical practice with theory.

See also: fish sauce
]]>
- Plan storage: Keep perishables cold and separate from ready-to-eat foods.
- Verify temps: Use an instant-read thermometer and maintain food at safe temperatures.
- Manage fluids: Hydration and alcohol pacing reduce accidents and heat-related issues.
- Organize space: A simple layout prevents crowding and cross-contamination.
Core Principles of Tailgate Safety
Tailgate safety rests on three pillars: food control, hydration management, and crowd logistics. Focusing on these areas reduces common risks at outdoor events.
Adopt a checklist mindset: assign tasks, set temperature checks, and confirm contingency plans before guests arrive. Use a simple layout to minimize cross-traffic and keep cooking zones separate.
Prep and Cook Time (Event Planning)
Plan realistic prep and cook windows to avoid rushed handling that causes errors. For example, allow 20 minutes for prep and roughly 15 minutes for active grilling to match typical burger workflows.
Time buffers also help with food-safety steps like chilling, resting, and verifying internal temperatures. Building those minutes into your plan keeps food safe and service steady.
Ingredients and Cold-Chain Management
Keep perishable items at or below 40°F (4°C) until you cook them, and move cooked items to a separate clean platter immediately. Maintaining the cold chain prevents bacterial growth on protein-rich foods.
Use an insulated cooler and rotate ice packs rather than loose ice when possible. If you expect delays, pre-chill containers and monitor temps with a dedicated thermometer to ensure safety.
Grilling Instructions: Practical, Safe Execution
Heat your grill to medium-high and target surface heat near 375°F (190°C) for even searing. Form patties evenly, oil lightly, and season just before they hit the grate to control flare-ups and carryover cooking.
Cook ground beef to an internal temperature of 160°F (71°C) measured with an instant-read thermometer. Toast buns briefly on the grill and assemble burgers on a clean surface using separate utensils for raw and cooked items.
Safety Strategies
Divide the safety strategies into actionable habits: temperature control, cross-contamination prevention, and guest-flow management. Each habit reduces a specific failure mode at tailgate events.
Assign one person to temperature checks and one to sanitation so responsibilities stay clear. Clear roles ensure tasks like checking coolers, monitoring cooked food, and refilling water remain consistent throughout the event.
Food Handling and Cross-Contamination
Use separate cutting boards, tongs, and plates for raw and cooked foods to prevent transfer of pathogens. Cross-contamination explains many foodborne outbreaks; strict separation limits this risk.
Sanitize surfaces with a bleach solution or food-safe disinfectant between uses. For background reading, consult the food safety entry on Wikipedia for definitions and principles.
Hydration, Heat, and Alcohol Management
Encourage water intake and offer electrolyte options when temperatures rise or physical activity increases. Dehydration impairs judgment and increases heat-strain risk during long outdoor events.
Set a clear alcohol policy for drivers and establish a ride-share plan or designated drivers early. For science on dehydration, reference dehydration (physiology).
Expert Insight
Keep a visible schedule of when to rotate ice packs and when to check internal food temps. This small, visible cue dramatically raises compliance with safe handling routines.
Pro-Caution
Make thermometer checks routine: every batch, every grill rotation, every 30–60 minutes for foods kept warm. This habit cuts uncertainty and improves guest safety.
Tools and Gear Checklist
Pack essentials: an instant-read thermometer, separate platters for raw/cooked foods, a first-aid kit, a trash plan, and a backup light source. Proper gear reduces improvisation and error during the event.
Bring spill-control supplies and heavy-duty trash bags to keep the space safe and slip-free. A minimal toolkit prevents small incidents from escalating into injuries or food contamination issues.
Serving Suggestions and Waste Management
Serve hot foods immediately and refrigerate leftovers within two hours to limit bacterial growth. Use covered containers and ice when refrigeration is unavailable for extended periods.
Label allergen-containing items and set up a clear waste-disposal flow to reduce tripping hazards and contamination. Composting or separated recycling also keeps the area tidy and reduces safety risks.
Logistics: Crowd Flow and Site Layout
Position grills downwind and away from tents, seating, and footpaths. A compact, numbered layout helps guests move predictably and avoids accidental contact with hot equipment.
Designate an entrance and exit for the food zone and use signage or cones to guide traffic. This approach reduces congestion and gives cooks uninterrupted space to work safely.
Nutrition and Portioning
Plan portions based on guest counts and typical consumption to avoid excessive leftovers that risk sitting at unsafe temperatures. A serving size estimate keeps you efficient and responsible.
Offer smaller plates to reduce waste and encourage variety without overserving. Balanced sides like salads and grilled vegetables reduce reliance on high-risk items and broaden safe choices.
Q&A
How should I store raw meat at a tailgate?
Keep raw meat on the bottom layer of a cooler in sealed packaging and monitor the cooler temperature to remain at or below 40°F (4°C). Use ice packs and replace them regularly to maintain the cold chain.
What internal temperatures should I use for common proteins?
Grind-to burgers should reach 160°F (71°C); whole cuts like steaks can be cooked to lower temps depending on preference, but follow safety guidance for vulnerable guests. Use an instant-read thermometer for verification.
How can I reduce alcohol-related incidents at a tailgate?
Set clear drinking windows, provide water stations, and arrange alternative rides for anyone who plans to drink. A visible alcohol plan and designated driver system reduce risk and liability.
When should I discard perishable leftovers?
Discard perishable foods left out longer than two hours, or one hour if ambient temperatures exceed 90°F (32°C). Rapid cooling, labeled containers, and prompt refrigeration extend safety for kept items.
Where can I find official guidance on handling outdoor-food events?
Consult authoritative summaries and science articles; for an overview of food-safety concepts, see Wikipedia’s cross-contamination and related entries. These pages provide definitions and references to primary sources.
Insights and Next Steps
Tailgate safety depends on routine, clearly assigned roles, and reliable tools. When teams adopt repeatable checks for temperature and sanitation, events become predictable and low-risk.
Practice the setup before game day and refine your checklist with each event. For additional practical guidance, visit internal resources like safe grilling tips and the tailgate checklist to standardize your approach.
| Nutrition | Per Serving |
|---|---|
| Calories | 420 kcal |
| Protein | 28 g |
| Carbohydrates | 32 g |
| Fat | 22 g |
Celebrate smart and keep these routines simple: cooler checks, thermometer reads, and a visible plan for hydration and transport. These steps make the next tailgate both memorable and safe.

See also: Tailgate safety
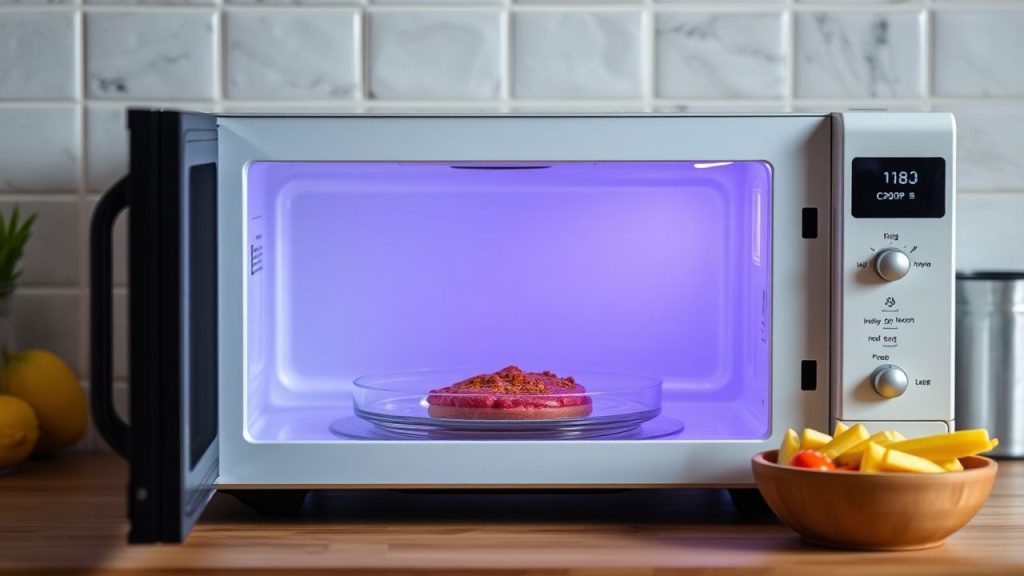
]]>The microwave is the fastest tool in a kitchen, but speed alone does not guarantee good texture or safe results. Mastering microwave power lets you control heat delivery and avoid common problems like dry proteins or cold centers.
- Use the right power for the job: lower power heats evenly, high power heats fast.
- Stir and rest: mid-cycle stirring and short rests reduce hot spots.
- Adjust for wattage: match times to your microwave’s watt rating.
Why Power Levels Matter
Power settings change how the microwave cycles energy, not the frequency of the waves. That difference affects heat distribution inside food and determines texture outcomes.
Understanding this principle reduces overcooking and improves safety. For technical context, read the microwave oven entry for fundamentals on how these appliances emit energy.
Prep and Cook Time
Preparation: 5 minutes for setup and safety checks. Keep tools and thermometer ready.
Cooking: Times vary by recipe and wattage, typically 1 to 10 minutes. Use incremental timing and checks to avoid overcooking.
Yield and Difficulty
Yield is recipe-dependent; most example dishes serve 2–4. Adjust ingredients and times proportionally for larger portions.
Difficulty: Easy to medium. Achieving reliable results requires practice and observing how your microwave responds.
Ingredients and Tools
Use microwave-safe containers, a cover or vented lid, and a thermometer for precise results. Include water or broth for steaming vegetables or maintaining moisture.
Keep paper towels and short-handled utensils on hand to stir or check food. If you want technical reading, consult heat transfer resources for how heat moves through food.
Instructions
Step 1 — Identify your microwave’s wattage and settings. Check the sticker inside the cavity or the manual. Match the appliance wattage to timing charts for accuracy.
Most controls use percentages that represent duty cycle. For example, 50% often means the magnetron runs half the time and rests half the time.
Matching Power Levels to Food Types
Full power (90–100%): Use for boiling water and quick-cook items like thin soups or reheating beverages. High power produces rapid heating that suits low-mass liquids.
Medium (50–70%): Best for casseroles, dense vegetables, and most proteins. Medium power lets heat penetrate without overcooking the exterior.
Low (10–30%): Ideal for defrosting, softening butter, or melting chocolate. Low power prevents partial cooking while thawing or gently warming delicate components.
Practical note: If you drop from 100% to 50%, expect roughly double the time to reach the same internal temperature, but results are gentler and more uniform.
Mid-Cook Habits for Even Results
Pause mid-cycle to stir or rotate food when possible. This habit reduces cold spots and balances moisture distribution across the dish.
Allow a 1–2 minute rest after cooking so residual heat equalizes. The internal temperature will continue to rise slightly during that time.
Chef’s Notes: Practical Techniques
Avoid dense layering of food in a single dish; spread items in a shallow, even layer for uniform exposure to microwave energy. Thicker sections need longer times at lower power.
Place denser items toward the outside of the dish if you want them hotter; center pieces receive less direct energy. Adjust placement and timing based on testing.
Expert Insight
Microwave cookware matters. Glass, ceramic, and labeled microwave-safe plastics perform differently. Avoid metal and untested containers to prevent sparks and uneven heating.
Pro-Caution
Serving Suggestions
Finish microwaved vegetables with a splash of acid or a drizzle of oil to restore brightness and mouthfeel. Small touches improve perceived quality without extra cook time.
For reheated meals, add fresh garnishes such as herbs or grated cheese to refresh aroma and texture. These finishing steps enhance presentation and flavor immediately.
Time and Power Quick Reference
Use the following as a starting point; always test and adjust to your microwave’s wattage. These ranges assume a 1,000 W baseline and standard portion sizes.
Examples: Defrost chicken (30% power, 6–10 minutes per pound, rotate), Reheat rice (70% power, 60–90 seconds), Steam vegetables (70% power, 2–4 minutes with 1 tbsp water).
Common Problems and Fixes
Rubbery eggs often result from high power applied too long; reduce to medium-low power and extend time slightly. Stir eggs mid-cook for even texture.
Cold centers in dense casseroles mean power was too high. Cut cooking into shorter intervals at medium power and stir or rearrange contents between intervals.
Safety and Food Handling
Follow safe handling steps to avoid cross-contamination and undercooking. For meat and poultry, verify internal temperature reaches safe levels before serving.
Refer to authoritative food safety guidance for temperature targets and recommendations; see the food safety overview for general principles and links to standards.
Tools and Accuracy
A digital instant-read thermometer increases reliability when testing meats and casseroles. Thermometers remove guesswork and reduce food waste due to overcooking.
If you want to compare power numerically, check the appliance’s watt sticker and consult the watt unit description for understanding how output relates to time.
Serving Sizes and Nutrition
Nutrition varies widely by recipe; consider portion control and ingredient choices when planning meals. Microwave cooking does not significantly change macronutrient profiles compared to other methods.
Use balanced plates with vegetables, lean protein, and whole grains to ensure a nutritious meal. Microwaving can make quick, healthy meals more accessible with minimal oil.
| Nutrient | Per Serving | Notes |
|---|---|---|
| Calories | Varies | Adjust portion size for control |
| Protein | 10–30 g | Higher for meats, moderate for vegetables |
| Carbohydrates | 15–40 g | Depends on dish type |
| Fat | 5–15 g | Use healthy oils for enhancements |

To build reliable routines, keep a short log of settings and times for favorite dishes. Note container type and portion size so you can replicate results repeatedly.
Visit our internal guides for practical examples and timing charts: microwave meal prepping and microwave wattage and power guide for step-by-step tables you can use with your model.
FAQ
How do I know my microwave’s wattage?
Check the label inside the door or the back of the unit; manufacturers usually list watts there. If no label exists, consult the user manual or model lookup online.
Knowing wattage helps convert published times to your machine. Many timing charts assume 800–1000 W as a baseline.
Can I defrost meat safely in the microwave?
Yes, if you use low power and rotate frequently to prevent partial cooking. Aim for incremental thawing and cook immediately after defrosting.
Always check that meat reaches safe internal temperatures during the subsequent cook step to ensure food safety.
Why does food sometimes heat unevenly?
Uneven heating comes from density differences and microwave standing wave patterns. Stirring and resting help even out temperatures.
Using a turntable and arranging food in a shallow, even layer reduces hot and cold spots significantly.
What containers are safest for microwaving?
Use glass, ceramic labeled microwave-safe, and approved plastics. Avoid metal and containers with metallic trim to prevent arcing.
If unsure, test a container with a short run of 10–15 seconds with a cup of water; if the container stays cool and the water warms, the container is usually safe.
How can I make reheated food taste fresher?
Add moisture before reheating and finish with fresh herbs or acid after heating. Small ingredients like a pat of butter or a squeeze of lemon uplift texture and flavor.
Reheating at 70% power often preserves texture and reduces hot spots, especially for proteins and starchy sides.
Wrapping Up
Power levels give you control. They let you match energy delivery to the food’s needs so texture and safety improve together.
Practice with simple recipes, keep notes, and use a thermometer for critical dishes. Over time, you will consistently achieve better, faster results.
See also: microwave power
]]>
- Model practice: The Food Code serves as a non-binding model adopted and adapted by states and local agencies.
- Temperature control: It defines cold holding, hot holding, and time-temperature controls to limit pathogen growth.
- Prevention-focused: Personal hygiene, cross-contamination barriers, and sanitation procedures form the core controls.
- Implementation: Businesses need training, monitoring tools, and record-keeping to convert rules into daily habits.
Decoding Key Provisions of the FDA Food Code
The Food Code lays out operational requirements that affect every food-contact step. It emphasizes temperature control, employee hygiene, cross-contamination prevention, and sanitation protocols as primary defenses.
Temperature rules include cold holding below 41°F (5°C) and hot holding above 135°F (57°C), plus defined cook and cooling regimes. These limits reduce bacterial replication and are core to safe daily operations.
Temperature Control and Time-Temperature Management
Operators must use calibrated thermometers at critical control points: cooking, cooling, reheating, and holding. Accurate, logged readings support corrective actions and demonstrate compliance during inspections.
Handle time as a control where temperature alone cannot. Time-based limits for ambient cooling or display reduce risk when cold-holding is not possible. Digital sensors and automated logs help enforce these limits consistently.
Personal Hygiene and Employee Practices
The Food Code requires handwashing at key moments and mandates policies for illness exclusion and glove use. Effective programs spell out when to change gloves, wash hands, and report symptoms to supervisors.
Staff training and visible signage reinforce hygiene habits. Supervisors should verify that procedures are active and document corrective actions when breaches occur.
Prep and Implementation: Turning Rules into Routine
Adopting the Food Code starts with a gap assessment and a targeted implementation plan. Identify weak points—temperature logs, storage layout, or training—and sequence fixes by risk and feasibility.
Use simple monitoring tools: calibrated thermometers, checklists, and daily logs. Assign clear responsibilities so staff know who records temperatures, who signs off on cleaning, and who acts on deviations.
Storage Zoning and Cross-Contamination Controls
Design storage to separate raw from ready-to-eat foods using designated shelving, color-coded containers, or labeled zones. Clear physical barriers stop droplet and drip transfer between items.
Sanitation of shared equipment and dedicated utensils for allergen or raw-protein work reduces risk. Implement procedures for cleaning, sanitizing, and verifying surface safety before reuse.
Sanitation Protocols and Chemical Use
Sanitizer concentration, contact time, and approved chemicals are part of the Food Code’s sanitation framework. Follow manufacturer directions and verify concentrations with test strips or meters.
Document cleaning schedules and verification checks. Records that show routine cleaning and corrective actions strengthen inspection outcomes and reduce microbial buildup over time.
[h3>Training, Documentation, and Continuous Review
Effective training blends classroom instruction, visual job aids, and hands-on practice. Create short modules for handwashing, temperature checks, and cleaning to match shift schedules and turnover rates.
Maintain training logs, corrective action records, and maintenance histories. Well-kept documentation speeds inspections and demonstrates a culture focused on safety rather than minimal compliance.
Expert Insight
Digital tools can automate alerts and archive logs, but staff must still understand the why behind each control. Combine technology with regular competency checks and spot audits to keep skills current.
Pro-Caution
After a corrective action, verify the outcome and record the resolution. Repeat failures point to system gaps—training, equipment, or layout—rather than individual negligence.
Chef’s Notes: Practical Tips for Kitchen Leaders
Cross-reference the Food Code with your state or local health department rules to align policies and avoid conflicts. Local adoptions can vary; treat the Food Code as the model and local law as the operative rule where you work.
Use visual cues: posters for handwashing, charts for temperature zones, and color-coded utensils for allergen control. Visual systems reduce reliance on memory and make expectations explicit for new hires.
Run internal mock inspections quarterly to stress-test systems. Focus these drills on record completeness, time-temperature tracking, and staff adherence to hygiene steps.
Invest in bite-sized multimedia training that staff can replay between shifts. Short, focused modules improve recall and limit service disruption compared with long classroom sessions.
Serving Suggestions: Culture, Recognition, and Technology
Frame the Food Code as a daily practice, not a one-time checklist. Celebrate staff who maintain logs and exhibit consistent safe behavior to reinforce a safety-first culture.
Leverage technology where it reduces human error: wireless probes, automated alarms, and electronic logs with audit trails. These tools save time and provide reliable evidence for inspectors.
Pair operational controls with customer-facing transparency. Basic signage about temperature practices or allergy policies reassures patrons and demonstrates accountability.
For practical routines, review related internal guides such as Kitchen Safety Best Practices and staff development pages like Food Safety Training. These internal resources help translate code language into daily tasks.

| Key Provision | Importance | Impact on Safety |
|---|---|---|
| Temperature Control | Prevent pathogen growth | Minimizes foodborne illness risk |
| Personal Hygiene | Blocks contamination sources | Maintains food integrity |
| Cross-Contamination Prevention | Separates raw and ready-to-eat foods | Ensures safe handling |
| Sanitation Procedures | Keeps surfaces and tools clean | Prevents microbial buildup |
| Employee Training | Builds food safety culture | Promotes consistent compliance |
For the authoritative federal perspective on the Food Code’s development and publications, consult the U.S. Food and Drug Administration: United States Food and Drug Administration. The FDA authors the model code and posts current editions and annex materials.
To understand risk pathways and the public health impact, see the overview on Foodborne illness. That page summarizes common pathogens and trends that drive Food Code revisions.
For core prevention principles that underpin the Food Code, review topics on Food safety. This background clarifies why controls like time-temperature and hygiene hold high priority.
Hazard analysis and critical control concepts align with Food Code intent; see the primer on HACCP for systematic hazard identification and control strategies used in many food sectors.
Q&A — Unlocking Safety: What Is the FDA Food Code?
Q1: What is the FDA Food Code, and why should I care?
A: The Food Code is a science-based model that outlines safe food handling in retail and food service. Businesses rely on it to minimize bacterial growth, control cross-contamination, and meet inspection expectations.
Q2: Who develops the Food Code, and how often is it updated?
A: The U.S. Food and Drug Administration prepares the Food Code and typically revises it on a multi-year cycle to incorporate recent science and practical experience. States and local agencies then adopt or adapt the model.
Q3: Is the Food Code law?
A: The Food Code itself is a model, not a federal law. Jurisdictions adopt it into local regulations, so compliance requirements can vary by state or municipality. Always follow local health department rules where you operate.
Q4: How does the Food Code protect consumers?
A: It sets actionable requirements for temperature control, hygiene, sanitation, and monitoring. These steps interrupt contamination routes and reduce the incidence of foodborne illness.
Q5: Who uses the Food Code?
A: Health inspectors, restaurant managers, caterers, food safety trainers, and policy makers use it as a technical reference to set and evaluate safe practices.
Wrapping Up
The FDA Food Code offers a practical, evidence-based approach for reducing food safety risk in food service and retail environments. Systems that combine clear procedures, regular training, and reliable monitoring deliver the best protection.
Operators who align daily practice with Food Code principles reduce contamination incidents and improve inspection performance. Use the Food Code as a blueprint, adapt it to local law, and document your actions to show consistent, science-based control.
FAQ
How do I know which version of the Food Code applies to my facility?
Check with your state or local health department to learn which edition they have adopted. Local agencies post their adopted code version and any amendments on official websites and guidance documents.
What basic tools should every kitchen have to meet Food Code checks?
At minimum: calibrated thermometers, sanitizer test strips, temperature logs, cleaning checklists, and documented training records. These items verify performance and speed corrective response.
How often should thermometers and sensors be calibrated?
Calibrate probes daily when in heavy use and at least monthly for routine equipment. Follow manufacturer instructions and record each calibration event for audit trails.
What is the fastest way to reduce cross-contamination risk?
Implement physical separation: dedicated prep tables and color-coded tools for raw protein and ready-to-eat items. Combine that with strict handwashing policies and frequent surface sanitation.
Where can I find official training resources tied to the Food Code?
Local health departments and accredited food safety training providers offer modules aligned with the Food Code. Use these programs along with site-specific SOPs to ensure staff competence.
See also: Food Code
]]>
- High heat plus dry skin yields a crisp crust without frying.
- Balance acid and sugar in the marinade to tenderize and caramelize.
- Elevate on a rack to allow air circulation around each piece.
- Rest briefly to lock juices before serving.
Why this method works for baked drumsticks
Baking at high temperature speeds surface moisture loss so the skin can crisp and brown quickly. That browning comes from the Maillard reaction, which creates flavor and color when surface proteins and sugars react under heat.
Marination adds flavor and, when controlled, tenderizes via acids and enzymatic action described in the marination overview. Proper drying and elevated placement prevent the skin from steaming, which preserves the crisp exterior.
Prep and Cook Time for baked drumsticks
Prep Time: 15 minutes active; organize ingredients and tools first to streamline the process. A concise mise en place speeds finishing and reduces handling time before roasting.
Marinating Time: 2–4 hours recommended, or overnight for deeper flavor if you will dry the skin before roasting. Cook Time: 35–40 minutes at 425°F (220°C); confirm doneness with a probe thermometer to ensure food safety.
Yield and Difficulty for baked drumsticks
This recipe yields approximately four servings (two drumsticks each) and scales linearly for larger trays when you keep pieces similar in size. Adjust rack placement rather than overloading the pan to maintain crisping performance for every piece.
Skill level is easy: basic knife work, measuring, and an oven set to the right temperature are sufficient. For guidance on poultry anatomy and common cuts, refer to the chicken overview.
Ingredients for baked drumsticks
Use skin-on, bone-in drumsticks for best texture; the skin crisps and bones help concentrate flavor during roasting. Choose pieces close in size so they cook uniformly and finish together.
- 8 chicken drumsticks, skin-on and bone-in
- 1/4 cup olive oil
- 3 cloves garlic, minced
- 2 tablespoons soy sauce (or tamari)
- 1 tablespoon apple cider vinegar
- 1 tablespoon honey
- 1 teaspoon smoked paprika
- 1 teaspoon kosher salt
- 1/2 teaspoon freshly ground black pepper
- 1/2 teaspoon onion powder
- 1/4 teaspoon cayenne pepper (optional)
- Fresh thyme or rosemary for garnish (optional)
Instructions for baked drumsticks
Follow a tight sequence: prepare the marinade, marinate, pat dry, and roast on an elevated rack for even airflow. Consistency at each step produces predictable crisp skin and juicy meat.
Set timers and use a probe thermometer to avoid overcooking while ensuring safety. Apply any glazes late in the bake to avoid burning sugars and to achieve glossy caramelization.
1. Prepare the Marinade
Combine olive oil, minced garlic, soy sauce, apple cider vinegar, honey, smoked paprika, salt, pepper, onion powder, and cayenne in a bowl. Whisk until emulsified so the oil carries fat-soluble flavors and the acid disperses evenly.
Keep the balance of acid and sugar moderate to prevent excessive darkening during roasting. A well-balanced marinade boosts flavor without compromising crisping performance for baked drumsticks.
2. Marinate the Drumsticks
Place drumsticks and marinade in a resealable bag or covered container and refrigerate for 2–4 hours, or overnight if desired. Turn once mid-marination for even exposure to the seasoning.
If marinating overnight, remove excess marinade and pat skin dry before baking to preserve crispness. Drying is a critical step to allow surface moisture to evaporate rapidly in the oven.
3. Oven Prep and Baking
Preheat the oven to 425°F (220°C) and position a rack in the center for balanced heat. Use a rimmed baking sheet lined with foil and set an oven-safe wire rack on top to lift the drumsticks.
Arrange the drumsticks with space between each piece so hot air circulates freely. For faster crisping use convection mode if available, but standard baking works by extending cook time slightly.
[h2]Placement Note[/h2]
Elevating drumsticks on a rack prevents soggy undersides and encourages uniform browning along the entire skin surface. If you must crowd the pan, flip once at the halfway point to mitigate contact-related steaming.
Remove pieces that finish early to a warm resting area to avoid overcooking the remaining batch. Resting for five minutes allows juices to redistribute while the exterior stays crisp.
Expert Insight
Tips for Success with baked drumsticks
Pat drumsticks dry before roasting to remove surface moisture and prevent steaming. Use paper towels and handle gently to preserve skin integrity while removing excess liquid.
Elevate on a wire rack to permit hot air under the pieces so the underside crisps as well as the top. Space each drumstick to allow airflow; crowding is the most common reason for limp skin.
Pro-Caution
Apply sticky glazes in the final 8–10 minutes to avoid burning sugars and to achieve a glossy finish. For extra browning, use a short broil at the end but watch closely to prevent charring.
Serving Suggestions for baked drumsticks
Serve with bright sides like a lemony salad or roasted vegetables to cut through the rich, caramelized flavors. Fresh herbs such as thyme or rosemary refresh the palate and add visual contrast.
Offer a tangy chimichurri or a light yogurt-based dip for variety and to add acidity to each bite. For leftover handling, re-crisp in a hot oven or air fryer rather than using a microwave to preserve skin texture.
Equipment and Technique Notes for baked drumsticks
A reliable oven and an oven-safe wire rack provide the biggest performance improvements for crisping. Convection mode circulates air and shortens time to crispness, but increase time slightly in conventional ovens for equal results.
Use a probe thermometer for repeatable, safe results and to avoid overcooking. For general oven behavior and heat transfer background, see oven.
Nutrition for baked drumsticks
Per serving (2 drumsticks): values will vary by exact portion and ingredients, but a close estimate helps plan meals. Typical nutrition reflects a protein-forward dish with moderate fat when skin is left on.
| Nutrient | Per Serving (2 drumsticks) |
|---|---|
| Calories | 320 kcal |
| Protein | 28 g |
| Carbohydrates | 6 g |
| Fat | 18 g |
Further Reading and References for baked drumsticks
For safety guidelines on handling and cooking poultry, consult reputable food-safety resources and official guidance. Additional context on poultry cuts and handling can be found in the chicken article.
For broader technical context on browning and dry-heat cookery, review resources on the Maillard reaction and on baking (cooking). These topics explain the chemistry that creates flavor and color during roasting.
See also: Chicken drumsticks and glaze ideas for baked drumsticks.
FAQ
How do I get the crispiest skin without frying?
Pat the drumsticks dry and use a light coating of oil before roasting at high heat (425°F/220°C). Elevate them on a wire rack so air circulates under and around each piece for uniform crisping.
How long should I marinate the drumsticks?
Two to four hours gives clear flavor and some tenderizing while preserving skin texture with a short drying step. Overnight marination deepens flavor but requires careful drying before roasting to maintain crispness.
Do I need to flip the drumsticks while baking?
Flipping is optional when using a wire rack and sufficient spacing between pieces because circulation promotes even browning. If your pan is crowded, flip once halfway through to encourage balanced color and doneness.
Can I use an air fryer for this recipe?
Yes; air fryers accelerate moisture evaporation and crisp the skin efficiently for baked drumsticks. Reduce time and temperature slightly from oven settings and monitor closely to avoid over-browning.
What is the safest way to check doneness?
Use an instant-read or probe thermometer inserted into the thickest part of the meat without touching bone. The recommended safe internal temperature for poultry is 165°F (74°C), which ensures both safety and juiciness.
Applying these seven professional tips will make baked drumsticks a reliable, family-ready option from weeknights to larger gatherings. Practice the drying, rack placement, and timing to repeat crisp results.
See also: baked drumsticks
]]>
- Look, smell, touch: use senses first to spot obvious spoilage.
- Verify temperature: check internal and cold-hold temps for high-risk foods.
- Inspect packaging: broken seals or swollen containers signal danger.
- Act decisively: discard doubtful items rather than risk illness.
Meal Safety: Prep and Cook Time
Prep Time: set aside 10 minutes for a systematic look-over. Make these checks habitual so they take less time and become automatic.
Inspection & Safety Check: allow 5 minutes to verify temperature, packaging, and visible spoilage. A brief routine prevents long recovery from illness.
- Prep Time: 10 minutes
- Inspection & Safety Check: 5 minutes
Meal Safety: Yield
This method produces one full inspection session that you can repeat for multiple servings. Apply the same steps to single plates, leftovers, and packaged items.
Use the routine for home-cooked meals, takeout, or groceries. Consistent checks reduce risk and build confidence in food handling decisions.
Meal Safety: Difficulty Level
Easy. The checks need minimal equipment and a short routine before serving. Anyone can learn them and apply them reliably.
Natural light and a thermometer improve accuracy, but you can perform basic visual and olfactory checks without specialized tools.
Ingredients for a Safe Meal Inspection
Assemble a small toolkit: clean hands, good lighting, and a thermometer when possible. These items let you confirm visual cues and verify temperatures quickly.
Optional tools like a magnifier help detect subtle mold or packing defects on vacuum-sealed items and high-risk foods such as poultry.
- Clean hands for handling and smelling
- Bright light for accurate color checks
- Magnifying glass (optional) to detect tiny spots or mold
- Food thermometer to check internal temperatures
- Paper towels for drying surfaces
- Trash bin nearby for immediate disposal
Instructions: How to Check Your Food for Safety
Follow a short, stepwise inspection routine before you eat. Systematic checks reduce guesswork and increase the chance you catch hazards early.
Rely on multiple indicators: appearance, smell, texture, packaging, and temperature. Combine signals; no single cue is definitive.
- Observe visual cues: examine color, texture, and appearance. Look for discoloration like brown or green spots, slimy surfaces, or unusual dryness.
- Sniff for freshness: bring the item close and breathe in briefly. Sour, rancid, or chemical odors often indicate spoilage.
- Feel the texture: press surfaces with clean hands. Mushy spots, excessive stickiness, or unusually dry areas are warning signs.
- Check packaging and labels: inspect seals, fill level, and date marks. Puffy containers, dents, or leaks can harbor bacteria or gas from spoilage.
- Measure temperatures: use a food thermometer for cooked meats and casseroles. Aim for at least 165°F (74°C) for poultry; keep cold items at <40°F (4°C).
- Trust your judgment: if something feels off, discard it. Err on the side of safety, especially for vulnerable people.
When you inspect packaged foods, check the inner lining and fill level for tiny bubbles or residue that might indicate microbial activity. Also confirm printed dates and storage instructions.
Remember that certain pathogens do not change smell or appearance. Therefore, follow safe handling and proper cooking even when food looks normal.
Expert Insight
Short, repeatable routines reduce lapses. If you routinely cook for older adults, infants, or people with weakened immunity, adopt conservative thresholds and verify temperatures every time.
Meal Safety: Why These Checks Matter
Foodborne illness affects millions each year. Small inspection steps lower the chance you become affected and limit spread within households.
Understand common failure points: poor refrigeration, incomplete cooking, and cross-contamination. Prioritize checks that address these failure modes.
For basic standards and definitions, see food safety. For cross-contamination guidance, consult cross-contamination.
Meal Safety: Practical Tips for Success
Implement small habits that fit into meal prep and serving. These habits yield a high reduction in contamination risk for minimal effort.
Keep separate cutting boards for raw proteins and produce, label and date leftovers, and cool large batches quickly before refrigeration.
- Store perishables promptly: refrigerate leftovers within two hours of cooking (one hour above 90°F ambient).
- Practice hygiene: wash hands with soap and water for at least 20 seconds before handling food and after raw proteins.
- Avoid cross-contamination: use separate utensils and sanitize surfaces after contact with raw meat.
- Use your senses with verification: sight, smell, touch, and temperature guide decisions.
When cooling large pots, divide contents into shallow containers to speed chilling and limit bacterial growth. This step matters for high-volume cooking and batch meals.
Common Temperature Targets
Know and use the right numbers. Poultry should reach 165°F (74°C), ground meats 160°F (71°C), and most leftovers should reach a steaming hot 165°F when reheated.
Keep refrigerators at or below 40°F (4°C) and freezers at 0°F (-18°C) to limit bacterial growth during storage.
Pro-Caution
When serving vulnerable people, use stricter margins. Reheat to recommended temperatures and avoid marginal items that would be acceptable for healthy adults.
Meal Safety: Serving Suggestions
After confirming safety, present food to preserve quality and reduce risk. Use chilled plates for salads and warm plates for hot entrées when feasible.
Garnishes and acid (lemon or vinegar) enhance perceived freshness but do not eliminate pathogens. Always complete core safety checks before plating.
Meal Safety: Nutritional Snapshot
Nutrition and safety overlap but serve different goals. Choose nutrient-dense items, and then verify safety before serving or consuming.
Use freshness as one factor for quality; then rely on the inspection routine to confirm that the meal is safe to eat.
| Nutrient | Fresh Produce | Cooked Meat |
|---|---|---|
| Calories | 40 per cup | 250 per 3 oz |
| Protein | 2g | 22g |
| Carbohydrates | 9g | 0g |
| Fat | 0g | 15g |

FAQ
How can I tell if my meal is safe before taking a bite?
Trust a short checklist: look for unusual colors, off smells, odd textures, and verify temperature for high-risk foods. Combine these checks to reach a decision.
If still unsure, discard the portion. The cost of waste is small compared with the consequences of foodborne illness.
What are subtle signs that food might be spoiled?
Subtle signs include faint discoloration, a sour or metallic odor, tiny bubbles in sealed packages, or swollen packaging. Any anomaly warrants closer inspection.
Always cross-check with how long the item has been stored and under what conditions before you decide to eat it.
Do expiration dates accurately indicate safety?
Expiration and best-by dates guide storage, but they do not guarantee safety. Temperature abuse and cross-contamination can make food unsafe earlier than a printed date.
Use dates with sensory checks and storage history. For more on dating conventions, see expiration date.
Are leftovers safe after a few days?
Leftovers kept at or below 40°F (4°C) are generally safe for 3–4 days. Reheat thoroughly to steaming hot before serving to reduce microbial risk.
Divide large batches into shallow containers when cooling to speed refrigeration and limit growth during the cooling window.
What should I do if I suspect food poisoning?
If symptoms such as nausea, vomiting, diarrhea, or fever occur hours to days after eating, rest and keep hydrated. Seek medical care for severe, persistent, or bloody symptoms.
Report suspected outbreaks to local public health authorities so they can trace and control broader exposure. For symptom patterns and causes, see foodborne illness.
Final Thoughts
A short, consistent inspection routine makes meals safer without adding much time. Prioritize visual checks, smell, texture, packaging integrity, and temperature verification.
When you combine these checks with good storage and hygiene, you reduce the risk of illness and increase confidence in the food you serve. For preservation techniques, consult food preservation.
See also: Meal Safety
See also: meal safety
]]>Food safety often reads like a foreign language to people who distrust institutions or have picked up conflicting advice. Practical, measurable steps remove that barrier and let people test rules for themselves. This article explains the science, the practices, and the best ways to talk about them with skeptical audiences.
- Clear rules beat fear: measurable temperatures and separation reduce risk.
- Small habits matter: consistent handwashing and thermometers prevent outbreaks.
- Transparency builds trust: explain what you did and why in plain terms.
- Technology helps: inexpensive thermometers and timers change outcomes.
Core Principles of Food Safety
Food safety rests on a few repeatable principles: control temperature, prevent cross-contamination, maintain hygiene, and use reliable verification. These principles reflect decades of laboratory and field evidence and apply anywhere food is handled.
Temperature control slows or stops bacterial growth; hot holding above 140°F (60°C) and cold holding below 40°F (4°C) are common benchmarks. Different pathogens behave differently, so follow specific target temperatures for final cooking and hot-holding.
Understanding pathogens helps communication. For example, foodborne illness covers infections caused by bacteria and viruses that multiply on improperly handled food. Naming familiar organisms makes advice concrete.
Many skeptics respond to named examples. Mentioning organisms such as Salmonella or Listeria helps anchor abstract rules to observable harms.
Prep and Cook Time, Yield, Difficulty
Preparation: 10 minutes. Cooking: varies; often no extra cook time for assembled items. Total time: 10–30 minutes depending on verification steps like temperature checks.
Yield: guidance applies to households of 1–6 people; scale the practices to your context. Difficulty: Easy. Most actions need little equipment beyond a digital thermometer and clean tools.
Practical Steps for Home Kitchens
Adopt simple, verifiable controls. Use a calibrated digital thermometer to read internal temperatures, keep raw proteins separate from ready-to-eat foods, and wash hands and surfaces frequently. These are low-effort steps that produce measurable safety gains.
Keep cold food at or below 40°F (4°C) and hot food at or above 140°F (60°C). For poultry, verify a minimum internal temperature of 165°F (74°C). For other proteins and leftovers, follow recognized target temperatures and time limits while hot-holding or cooling.
Temperature and Tools
Buy a cheap digital probe thermometer and test it with an ice bath (should read ~32°F / 0°C) and boiling water adjusted for altitude. A reliable reading beats visual cues every time.
Use timers to manage cooling. Rapid cooling through shallow containers and refrigeration reduces the window where bacteria can multiply. Document what you did if you are serving others; transparency reduces doubt.
Expert Insight
When you teach someone a new habit, demonstrate it. Show the thermometer reading, explain why that number matters, and compare meats cooked to different temperatures so the skeptic can see results.
Pro-Caution
Ingredients (Practical Checklist)
- 1 cup awareness of common pathogens and safe temperatures.
- 2 tablespoons separation practices: dedicated cutting boards for raw proteins and produce.
- 1 teaspoon critical thinking—question advice that cannot be measured or tested.
- 3 cups clear communication: label, announce, and document steps when serving others.
- 4 ounces tools: digital probe thermometer, clean containers, timers.
- Pinch of curiosity: consult reliable technical references and primary guidance when needed.
Instructions — Step-by-Step
Separate raw from ready-to-eat foods. Use color-coded boards and clean utensils after raw meat contact. This prevents cross-contamination, the most common household lapse that leads to illness.
Wash hands for at least 20 seconds before and after handling raw items. Soap breaks down oils and removes microbes. Dry hands with a clean towel or single-use paper towel to reduce recontamination.
Measure temperatures in the thickest part of the food, avoiding bones and fat. For ground beef aim for 160°F (71°C); poultry 165°F (74°C); whole cuts like steaks often 145°F (63°C) with a rest time. When in doubt, follow conservative targets.
Keep hot foods hot and cold foods cold during holding and service. Use insulated carriers, chafing dishes, or refrigeration. Time matters: the standard danger zone between 40°F and 140°F is where bacteria multiply most rapidly.
Tips for Success
Make measurement visible. Place a small note card that lists cooked temperatures and handling steps when you serve buffet-style meals. Visible facts reduce speculation and foster trust.
Label leftovers with the date and the internal temperature at cooling. That practice helps with safe reuse and communicates care to others in the household. It also creates a habit of verification.
Practice a post-service debrief. Ask guests if they noticed anything that worried them and answer plainly. Open conversations with facts and a demonstration of the checks you performed can convert skeptics into allies.
Use internal references to reinforce habits. See our Kitchen Hygiene Best Practices and Food Storage Tips pages for checklists and printable labels.
Serving Suggestions
Present food on clean, chilled platters when needed and keep hot items on heated surfaces. Small signals like a thermometer card on the table show intentional safety practices and reassure diners.
Announce allergen information and handling steps before serving. When people know how you handled food, they judge the process rather than rely on hearsay. Clear statements reduce fear in skeptical audiences.
Evidence and Why It Works
Control of time and temperature traces back to microbial growth kinetics. Heating kills microbes at rates tied to temperature and exposure time. Cooling reduces reproduction rates and can stop growth when stored properly.
Preventing cross-contamination reduces the chance that a small number of pathogens transfers from a raw surface to a ready-to-eat food. Regular hygiene interrupts transmission chains and reduces overall risk.
Modern traceability tools and sensors contribute to rapid responses during outbreaks, increasing confidence in the system that supports home practices. Understanding these tools helps when discussing larger supply-chain issues.
FAQ
Why do some people remain skeptical about food safety?
Skepticism often comes from mixed messages, personal anecdotes, or distrust of institutions. Translating rules into observable actions helps bridge the gap and gives people evidence they can verify themselves.
What practical behaviors reduce risk most effectively at home?
Use a probe thermometer, separate raw and ready-to-eat foods, wash hands and surfaces, and cool leftovers quickly. These steps target the most common transmission routes and are simple to perform consistently.
How should I explain temperatures to someone who doubts guidelines?
Demonstrate. Cook two samples at different temperatures and show the readings. Explain the numbers and the safety margin, and let them see how the thermometer provides objective proof.
Are organic or natural foods safer by default?
No. All food can carry pathogens if handled improperly. The same hygiene and temperature controls apply regardless of production method. Emphasize consistent practices rather than product labels.
Where can I read authoritative background material?
For concise, technical overviews, reference educational materials and major public-health resources. For background on the organisms and illnesses discussed, see the Wikipedia articles on food safety, Salmonella, and Listeria.
Converting skepticism into confidence requires measurable practices, repeatable demonstrations, and clear communication. When people can test rules themselves, trust follows. Keep instructions simple, use tools to verify, and explain actions plainly.
See also: Food Safety
]]>
- Short marinating brightens surface flavor and adds quick umami lift.
- Medium marinating improves tenderness while preserving texture.
- Long marinating deeply infuses dense proteins but can break down delicate ones.
- Temperature and container matter for safety and consistent results.
How marinating works: the science behind time and taste
Marinating relies on chemical and physical processes to change flavor and texture. Acids, enzymes, salts, and oil interact with muscle fibers and surface fats to alter how food tastes and feels.
For a technical overview, consult marinade chemistry on Wikipedia. Enzymes such as proteases accelerate breakdown; read more about enzymes and protein action for context.
Prep and cook time
Plan your workflow. Effective marination requires scheduling: prep, chill, and cook slots must align to get the texture you expect. Short on time? Target quick infusions that still improve surface taste.
Below are practical windows that balance safety and flavor. These ranges work across home kitchens when you store items properly at refrigeration temperatures.
- Preparation time: 15 minutes
- Marination time: 30 minutes to 24 hours (depends on protein density)
- Cooking time: 10-30 minutes (varies by method)
Ingredients and ratios
Use a balance of acid, oil, umami, aromatics, and salt for consistent results. For many proteins, a simple rule: 3 parts oil to 1 part acid gives flavor without over-tenderizing.
Adjust components for the protein type. For example, add a salty element like soy to increase umami; read more about umami to understand its effect on perceived savoriness.
- 1/2 cup extra virgin olive oil
- 1/4 cup fresh lemon juice or vinegar
- 3 cloves garlic, minced
- 2 tbsp soy sauce or miso
- 1 tbsp honey or sugar
- 1 tsp smoked paprika, 1 tsp black pepper, 1 tsp salt
- 1 tbsp fresh rosemary or thyme
- Proteins: chicken breasts, flank steak, firm fish, or tofu
Step-by-step instructions
Whisk oil, acid, aromatics, salt, and sweetener until you achieve a light emulsion. Add herbs last to preserve volatile aromas and store the marinade chilled until use.
Pat proteins dry and score dense cuts to increase penetration. Use resealable bags or non-reactive containers to coat items evenly; remove excess marinade before cooking to promote caramelization.
Timing tips for proteins
Match time to density. Thin, delicate items need minutes; dense muscles need hours. Adjust times based on thickness rather than strictly by ingredient name.
- Chicken breasts: 1–4 hours for juiciness without mushy texture
- Flank steak: 6–12 hours to enhance flavor and reduce chew
- Firm fish (salmon, tuna): 30 minutes to 1 hour to avoid protein breakdown
- Tofu: 30 minutes to 2 hours to absorb flavors without disintegrating
Tips for success: balancing patience and practicality
Use acids like lemon or vinegar with care; they tenderize by altering proteins but can over-soften tissue. Oils and herbs slow acid contact and add complexity, so include them for longer marinades.
Control temperature and container: always marinate in the refrigerator and use glass, stainless steel, or food-grade plastic. This practice limits bacterial growth and helps maintain consistent infusion.
- Adjust by thickness: thicker cuts need longer contact time than thin ones.
- Avoid metal bowls with high-acid marinades: reactive metals can alter flavor and color.
- Reserve some fresh herbs for finishing: heat reduces volatile aromas.
Expert Insight
Serving suggestions and pairings
Serve marinated proteins on neutral grains like jasmine rice or quinoa to let the marinated flavors stand out. Add a bright acid finish such as a squeeze of citrus to lift richness right before serving.
Garnish with fresh herbs, a drizzle of quality oil, or a dollop of chimichurri for contrast. For texture, sprinkle toasted seeds or nuts to add crunch and visual appeal.
Food safety and storage
Store all marinating items in the refrigerator at or below 4 °C (40 °F). This temperature control reduces microbial growth while the marinade changes flavor and texture.
Never reuse marinade that held raw protein unless you boil it for at least 1–2 minutes to destroy pathogens. For formal guidance, review food safety resources.
Pro-Caution
Resources and further reading
For technique-focused articles, see internal guides such as best marinades for grilling and practical storage tips at marinade safety guide. These pages offer recipe variations and quick reference timing charts.
To expand your technical knowledge, consult broader topics such as umami and the role of enzymes in food transformation. Those entries contextualize why specific ingredients change texture and flavor.
FAQ
How long should I marinate chicken?
Marinate chicken breasts for 1–4 hours to gain flavor while preserving a firm, juicy texture. Thin cutlets need less time; thick pieces benefit from longer contact up to four hours.
Can acidic marinades ‘cook’ fish?
Yes. High-acid marinades denature proteins and firm the flesh, which can mimic a cooked texture. Limit time to 30–60 minutes for firm fish to avoid an over-firm or mushy result.
Does marinating change nutrition?
Marinating primarily alters flavor and texture, not macronutrient totals. However, adding sugar or oil increases calories; herbs and spices can add antioxidants and micronutrients in small amounts.
Is it safe to marinate at room temperature?
No. Marinate in the refrigerator to keep food below 4 °C (40 °F). Warm environments increase bacterial risk even when acids are present.
Can I freeze proteins in marinade?
Yes. Freezing in marinade locks in flavor and saves time on thaw. Thaw under refrigeration and cook promptly for best safety and quality.
See also: marinating time
]]>
- Microwaves cook by exciting water molecules, not by making food radioactive.
- Quick cooking often preserves heat-sensitive vitamins better than boiling.
- Uneven heating is a common issue; stirring and standing time reduce it.
- Use only microwave-safe containers to avoid chemical leaching.
How Microwaves Work
Microwave ovens generate electromagnetic waves tuned to agitate polar molecules. These waves primarily target water and other polar components in food, producing heat internally.
The mechanism is well documented in technical literature and summaries on microwave ovens. Electromagnetic principles are the same as in other appliances that use non-ionizing radiation.
Mechanism at the molecular level
Microwave frequency causes dipolar molecules such as water to rotate rapidly. That rotation creates friction and thermal energy that raises the food temperature.
This is distinct from thermal conduction from an external hot surface. The effect is efficient when moisture is present and lower in very dry foods.
Heat Distribution and Common Issues
Microwave fields inside the cavity form standing wave patterns that lead to hot spots and cold spots. Those patterns explain why some bites are scalding while adjacent areas remain cool.
Rotation trays and stirring break up those patterns. Allowing a short standing time after cooking helps residual heat homogenize the meal for safer, tastier results.
Prep and Cook Time
Microwaves reduce hands-on time. Typical dishes go from prep to plate much faster than conventional ovens.
Adjust times to your oven’s wattage and the food’s mass. Test initial runs and add brief increments to avoid overcooking.
- Preparation: 5 minutes
- Cooking: 8-12 minutes, depending on dish and microwave wattage
- Total Time: 13-17 minutes
Yield & Difficulty
This recipe yields roughly four servings in standard portions. It makes a quick weeknight side or light main when paired with protein.
Difficulty is low. The method favors precise timing and brief stirring, not advanced culinary technique.
- Serves 4 comfortably
Ingredients
Use fresh or frozen vegetables for speed and consistent moisture. Frozen mixes often come pre-cut and save prep time.
Adjust grains to preference. Cooked quinoa or brown rice hold up well to gentle microwave reheating and mixing.
- 1 cup fresh or frozen mixed vegetables (carrots, peas, corn)
- 1/2 cup cooked quinoa or brown rice
- 1 tbsp olive oil
- 2 cloves garlic, minced
- 1 tsp dried Italian herbs
- Salt and freshly ground black pepper, to taste
- 1/4 cup shredded low-fat mozzarella or vegan cheese (optional)
Instructions
Use a microwave-safe dish and cover it loosely to trap steam. Steam speeds cooking and helps retain nutrients by reducing water loss.
Stirring once or twice improves uniformity. Allow standing time after cooking to let temperatures equalize throughout the dish.
- Prepare your microwave-safe dish: Lightly grease it with olive oil to prevent sticking and to help flavors coat the vegetables.
- Mix garlic and herbs: Combine minced garlic with dried Italian herbs and olive oil; brush this mixture evenly over the vegetables for aromatic infusion.
- Add the vegetables and grains: Layer fresh or frozen mixed vegetables and cooked quinoa or brown rice in the dish, seasoning with salt and pepper.
- Cover loosely: Use a microwave-safe lid or vented plastic wrap to allow steam to escape, preventing sogginess while ensuring thorough cooking.
- Cook on high power: Microwave for 6 minutes, then stir gently to distribute heat evenly, helping to cook all ingredients uniformly.
- Continue microwaving: Cook for another 4-6 minutes, depending on your microwave wattage and vegetable size, until vegetables are tender but vibrant.
- Add cheese and finish: Sprinkle shredded cheese on top and microwave for an additional 1 minute, creating a creamy, melted finish.
- Rest before serving: Let the dish sit covered for 2 minutes; residual heat enhances flavors while moisture distributes evenly.
Chef’s Notes and Tips for Success
Microwave wattage varies; common ranges are 600–1,200 W. Start with shorter times and increase by 30-second increments to avoid overcooking.
Microwaving uses minimal water and short exposure, which helps retain heat-sensitive vitamins. For more on nutrients, review summaries on nutrition science.
Expert Insight
Always cover food to retain moisture but leave vents. Trapping steam speeds cooking and reduces nutrient loss compared with boiling.
Pro-Caution
If reheating leftovers, add a tablespoon of water to the container for each cup of food. This small step restores moisture and prevents dryness.
Serving Suggestions
Garnish the finished dish with fresh herbs for aroma and visual contrast. A squeeze of citrus brightens flavors and adds vitamin C at the table.
Pair the vegetable and grain mix with grilled protein or a leafy salad. For texture contrast, serve with a crisp side or toasted seeds.
| Nutrient | Per Serving |
|---|---|
| Calories | 210 |
| Protein | 7g |
| Carbohydrates | 28g |
| Fat | 7g |
For safe handling and temperature targets, consult standard food safety summaries on food safety. Those pages outline safe reheating temperatures and bacterial risk factors.
For basic physics background about radiation types relevant to microwaves, review the primer on electromagnetic radiation. This clarifies why microwaves are non-ionizing and do not make food radioactive.
Q&A
Below are concise answers to common microwave concerns. These responses reflect consensus in food science and appliance safety.
They address safety, nutrients, containers, and reheating best practices based on documented mechanisms.
Q1: Are microwaves cooking food with radiation? Should I be worried?
Microwaves use non-ionizing electromagnetic waves. They heat by agitating polar molecules and do not induce radioactivity.
Q2: Does microwaving destroy nutrients in my food?
Rapid cooking with little water tends to preserve vitamins like vitamin C better than prolonged boiling. The overall nutrient loss depends on time, temperature, and water exposure.
Q3: Can microwaving create toxins?
Microwaving does not create unique toxins distinct from other cooking methods. Overheating or burning any food can produce undesirable compounds, regardless of the heat source.
Q4: Why does food sometimes heat unevenly?
Field distribution and food geometry cause uneven heating. Stirring, rotating, and standing time reduce temperature gradients for safer consumption.
Related Resources
Read our practical safety guide for device-specific tips: Microwave Safety Tips Every Cook Should Know. That page lists safe practices for container choice and reheating targets.
For appliance comparisons and buying guidance, see our overview: Kitchen Appliances Guide. It helps you select a suitable microwave by wattage and features.
FAQ
Is food cooked from the inside out in a microwave?
Microwave energy penetrates a few centimeters and heats water molecules directly. Dense or layered foods may heat from surfaces as conduction follows the initial microwave heating.
Can I sterilize jars or containers in a microwave?
Microwaving can sanitize moist containers but does not reliably sterilize them. Use proper sterilization methods for canning to ensure safety and longevity.
Are microwave-safe plastics truly safe?
Only use plastics labeled microwave-safe. Independent testing shows that approved materials remain stable under normal microwave conditions, while untested plastics can deform or leach.
Does microwaving kill bacteria?
Microwave heating can kill bacteria if the food reaches uniform, safe internal temperatures. Uneven heating may leave pockets at unsafe temperatures, so stir and check with a thermometer.
Will microwaving alter food flavor or texture?
Microwaving preserves moisture but does not produce browning reactions like the Maillard reaction. Textural changes occur; crunchy surfaces often become soft unless finished by other methods.
See also: microwave
]]>The kitchen is where food chemistry and sanitation meet to protect immune health. A few deliberate chemical choices in cleaning and cooking yield measurable benefits for nutrient retention and microbial control.
- Target pH and temperature to deactivate pathogens without destroying nutrients.
- Choose materials and cleaners that reduce microbial load while minimizing toxic residues.
- Preserve antioxidants through gentle cooking and short contact with water.
- Leverage fermentation for probiotic support and stable food preservation.
Why kitchen chemistry matters
Chemistry governs how food, microbes, and cleaning agents interact. Understanding basic chemical principles lets you design processes that favor nutrient preservation and microbial safety.
For example, food safety relies on controlling temperature and pH to prevent microbial growth and toxin formation. For a technical overview of microbes in food, consult Food microbiology.
Cleaners, disinfectants, and pH
Detergents, acids, and alcohol-based disinfectants work by altering surface tension or disrupting cell membranes. Soaps emulsify fats and oils, which helps lift microbes from surfaces; acids such as vinegar lower surface pH and can inhibit some organisms.
Choose cleaning agents with documented efficacy and follow label contact times. Household vinegar (acetic acid) has utility for light cleaning and odor control, but for high-risk situations use EPA-registered disinfectants; read the technical details on vinegar for its chemistry and limits.
Practical concentrations and materials
Simple aqueous solutions work when used correctly: warm soapy water for washing, and diluted alcohol for short contact surface disinfection. Metals such as copper and stainless steel have intrinsic antimicrobial properties from ion release or surface chemistry, which helps reduce bioburden on handles and tools.
Avoid reactive cookware finishes that can leach metals under acidic conditions. When you select materials, prioritize inert surfaces for food contact and proven antimicrobial surfaces for high-touch areas.
[h2]Preserving nutrients during cleaning and cooking[/h2]
Cooking methods profoundly affect nutrient retention. Methods that use less water and shorter heat exposure—such as steaming or quick sautéing—preserve vitamin C and polyphenols better than prolonged boiling.
Antioxidants neutralize free radicals by electron transfer; their stability depends on temperature, oxygen exposure, and pH. For a concise primer on antioxidant chemistry, review Antioxidant.
Expert Insight
Cross-contamination control and utensil chemistry
Cross-contamination is a vector-based risk where microbes transfer from raw to ready-to-eat foods. Chemically, this spreads infectious agents that can multiply under favorable conditions.
Design your workflow to separate raw and cooked stations, sterilize cutting surfaces with approved cleaners, and implement color-coded utensils. These are simple, chemically sensible barriers to pathogen transfer.
Elixir recipe: Cleanse & Nourish (practical tonic)
The tonic below combines mild antimicrobial and anti-inflammatory ingredients with a focus on safe preparation and nutrient retention. Prepare it in a cleaned area using filtered water and sanitized utensils.
Follow refrigeration and storage guidance to avoid microbial growth after preparation; consume within 24 hours if refrigerated in a sealed container to maintain quality and safety.
Ingredients
- 4 cups filtered water
- 2 tablespoons fresh lemon juice (source of vitamin C)
- 1 tablespoon raw honey (flavor and mild antimicrobial activity)
- 1 teaspoon grated fresh ginger (anti-inflammatory compounds)
- 1 teaspoon apple cider vinegar (acidity for flavor and digestive support)
- 1 cinnamon stick
- 3 whole cloves
- Fresh mint leaves for garnish (optional)
Instructions
- Bring the filtered water to a gentle boil in a sanitized saucepan. Reduce heat to low and add the cinnamon stick and cloves, simmering five minutes to extract volatile compounds.
- Remove from heat and stir in grated ginger, lemon juice, and apple cider vinegar. Allow the infusion to cool slightly before adding honey to prevent enzyme degradation.
- Strain through a fine sieve into heat-safe cups. Serve warm or chill quickly and refrigerate in a sealed container for up to 24 hours.
Chef’s notes and serving suggestions
Substitute Manuka honey if you prefer stronger antibacterial activity, but verify provenance and quality. Keep utensils and containers dry before filling to reduce contamination risk.
Serve the elixir in clear glass to monitor clarity; pair with fresh berries or a small portion of fermented vegetables to complement gut-targeted immune support. For fermentation principles, see Fermentation.
Pro-Caution
Practical resources and internal guides
Maintain a cleaning schedule and document products and concentrations that work in your kitchen. Good records reduce errors and help you standardize safe practices.
For step-by-step procedures, consult our internal cleaning protocols and fermentation overview: Natural Kitchen Cleaning Guide and Fermentation Basics. These resources provide checklists tailored to home kitchens.
FAQ
How does kitchen chemistry influence immune health?
Kitchen chemistry controls exposure to pathogens and preserves nutrients that support immune function. Proper temperature control and cleaning lower infection risk while preserving vitamins and antioxidants needed by immune cells.
Which cleaners are safe to use around food?
Use dish soap and warm water for food-contact surfaces, and approved disinfectants for non-food-contact areas. Rinse surfaces that touch food after disinfection, and always follow manufacturer instructions for contact time.
Can cookware materials affect food safety?
Yes. Inert materials like stainless steel and glass minimize leaching, while worn or untreated metals can release ions under acidic conditions. Replace or recoat cookware that shows degradation to limit contamination.
How should I preserve antioxidants when cooking?
Use quick methods that limit heat and water exposure, such as steaming, blanching briefly, or sautéing. Add delicate ingredients like lemon juice after cooking to conserve vitamin C and volatile compounds.
Is fermentation a reliable way to support immunity?
Fermentation produces stable bioactive compounds and live microbes that can benefit gut immunity when produced and stored safely. Follow tested recipes and hygiene practices to avoid spoilage and pathogen growth.
Final note: Implementing chemistry-based practices—controlled pH, correct temperatures, appropriate materials, and documented cleaning—translates to safer food and stronger nutritional support for immune health. Small, consistent adjustments in the kitchen yield measurable improvements in safety and nourishment.
See also: Kitchen Chemistry
]]>