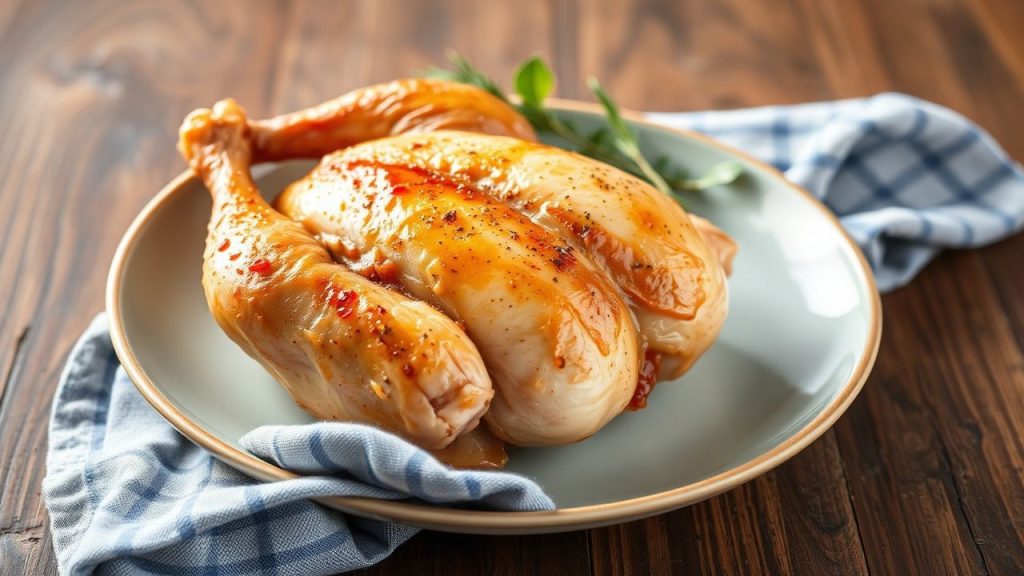
- Cook whole: bones and skin add moisture and flavor.
- Use low heat: gentle roasting breaks down collagen for tenderness.
- Rest and reserve juices: redistribute fluids and preserve juiciness.
- Use a thermometer: accuracy prevents overcooking and food-safety risks.
Why cook a whole chicken for shredding?
Cooking an entire bird gives you access to richer flavor and more consistent moisture than isolated cuts. The bones and skin release juices and soluble collagen as they heat, which improves mouthfeel and yield when you shred the meat.
For background on how chicken behaves during cooking, see the chicken (food) entry. That context explains why whole-bird methods often outperform boneless pieces for pulled-style dishes.
Key techniques that lock in juiciness
Brining, controlled oven temperature, and proper resting form the core of reliable results. Each step manipulates moisture retention and protein structure to preserve tenderness and flavor.
Brine combines salt and water to increase the bird’s water-holding capacity; basic science on the process is summarized at Brine. When you pair brining with heat management you convert collagen into gelatin without pushing muscle proteins into a dry state.
Temperature and timing
Use lower oven temperatures for longer periods when targetting shreddable meat. Slow, steady heat encourages collagen breakdown in connective tissue while preventing the muscle fibers from tightening and expelling moisture.
Always confirm doneness with a reliable thermometer. Refer to the practical guidance on measurement tools at food thermometer, and aim for safe internal temperature while letting residual heat finish the job.
Step-by-step roast and shred
Start by seasoning or brining the bird, then roast breast-side up on a rack above a shallow pan. The rack boosts air circulation and helps the skin crisp while the pan collects juices you can later use to rehydrate shredded meat.
After roasting, tent the bird and rest it for 10–20 minutes. Resting lets muscle fibers relax and reabsorb juices; this step directly affects how moist your final shreds will be.
Equipment and small techniques
Use an instant-read thermometer, a roasting rack, and tongs. For fast shredding, a stand mixer on low with the paddle or two forks works well for consistent strand size.
Save the pan drippings and strain them. Skim excess fat and reserve the flavorful liquid; a splash over shredded meat restores juiciness and intensifies flavor without watering the dish down.
Practical recipe outline
Preheat oven to 375°F (190°C) for a balanced roast that yields crispy skin and tender meat. Rub the bird with oil and a salt-forward spice mix, then roast until a thermometer reads 165°F (74°C) in the thigh.
Let the bird rest, then remove skin and bones and shred meat into strands. Toss the shredded meat with a few tablespoons of strained pan juices or low-sodium broth to keep each bite moist and flavorful.
 Expert Insight
Flavor routes and use-cases
Shredded chicken is a universal building block. Adjust spices to fit tacos, sandwiches, salads, soups, or casseroles depending on cuisine and desired profile.
For acidic brightness, add a squeeze of lemon or vinegar at the finish. For a smoky profile, add smoked paprika or finish the shredded meat briefly under a broiler to introduce char notes.
 Pro-Caution
Serving, storage, and yield management
Store shredded chicken in airtight containers with a splash of reserved juices to keep it from drying. Refrigerate up to 3–4 days or freeze in portions for up to three months.
Plan for roughly 3–4 ounces of cooked shredded chicken per sandwich and 4–6 ounces per main course serving. Whole-bird cooking typically yields more usable meat and better value than buying pre-cut pieces.
Tips for success
Use a two-stage approach: initial high heat to set the skin, then lower temperatures to finish. This combination preserves crisp skin if you plan to serve it while converting connective tissue for shredding.
Rotate or baste during roasting if your oven has hot spots. Monitor internal temperature near the thickest part of the thigh rather than the breast to avoid overcooking lower-moisture areas.
| Nutrient | Per Serving (approx.) |
|---|---|
| Calories | 210 kcal |
| Protein | 28 g |
| Carbs | 0 g |
| Fat | 10 g |
For additional guidance on roasting technique, see our internal Roast Chicken Perfection Guide. To learn more about salt handling and brining options, consult our Brining Guide.
FAQ
The FAQ below answers common practical questions about whole-bird shredding and storage. Each answer focuses on actionable steps you can use in the kitchen immediately.
These questions cover cooking choices, safety, texture, and shortcuts that preserve quality without extra effort.
How long should I brine a whole chicken?
Brine times depend on bird size and salt concentration. For a 3–4 lb chicken, 3–6 hours in a basic brine delivers noticeable tenderness and even seasoning.
Longer brines intensify salt uptake; keep the bird refrigerated and avoid over-brining to prevent a mealy texture.
What internal temperature guarantees safety and juiciness?
Target 165°F (74°C) in the thickest part of the thigh for safe consumption. Use an instant-read thermometer to avoid guesswork.
Remove the bird at target temperature and rest it; carryover heat will stabilize the final internal temperature while juices redistribute.
Should I remove the skin before cooking?
Leave the skin on while roasting to shield the meat and trap moisture. Remove it after resting if you prefer skinless shredded meat or want to crisp it separately for garnish.
Keeping the skin on improves both flavor and moisture retention during the cook, especially for longer low-temperature roasts.
Can I use a slow cooker or pressure cooker?
Yes. A slow cooker on low for 6–8 hours or a pressure cooker on high for ~25–30 minutes (then natural release) yields tender meat that shreds easily.
Adjust seasonings because slow and pressure cooking concentrate or dilute flavors differently; reserve some cooking liquid to correct final moisture and taste.
How do I reheat shredded chicken without drying it?
Warm shredded chicken gently in a skillet with a splash of broth or reserved pan juices over low heat. Use short bursts in the microwave covered with a damp paper towel when time is tight.
Avoid high heat and long reheating intervals because muscle proteins tighten and eject moisture when overheated.
See also: shredded chicken
]]>
- Look, smell, touch: use senses first to spot obvious spoilage.
- Verify temperature: check internal and cold-hold temps for high-risk foods.
- Inspect packaging: broken seals or swollen containers signal danger.
- Act decisively: discard doubtful items rather than risk illness.
Meal Safety: Prep and Cook Time
Prep Time: set aside 10 minutes for a systematic look-over. Make these checks habitual so they take less time and become automatic.
Inspection & Safety Check: allow 5 minutes to verify temperature, packaging, and visible spoilage. A brief routine prevents long recovery from illness.
- Prep Time: 10 minutes
- Inspection & Safety Check: 5 minutes
Meal Safety: Yield
This method produces one full inspection session that you can repeat for multiple servings. Apply the same steps to single plates, leftovers, and packaged items.
Use the routine for home-cooked meals, takeout, or groceries. Consistent checks reduce risk and build confidence in food handling decisions.
Meal Safety: Difficulty Level
Easy. The checks need minimal equipment and a short routine before serving. Anyone can learn them and apply them reliably.
Natural light and a thermometer improve accuracy, but you can perform basic visual and olfactory checks without specialized tools.
Ingredients for a Safe Meal Inspection
Assemble a small toolkit: clean hands, good lighting, and a thermometer when possible. These items let you confirm visual cues and verify temperatures quickly.
Optional tools like a magnifier help detect subtle mold or packing defects on vacuum-sealed items and high-risk foods such as poultry.
- Clean hands for handling and smelling
- Bright light for accurate color checks
- Magnifying glass (optional) to detect tiny spots or mold
- Food thermometer to check internal temperatures
- Paper towels for drying surfaces
- Trash bin nearby for immediate disposal
Instructions: How to Check Your Food for Safety
Follow a short, stepwise inspection routine before you eat. Systematic checks reduce guesswork and increase the chance you catch hazards early.
Rely on multiple indicators: appearance, smell, texture, packaging, and temperature. Combine signals; no single cue is definitive.
- Observe visual cues: examine color, texture, and appearance. Look for discoloration like brown or green spots, slimy surfaces, or unusual dryness.
- Sniff for freshness: bring the item close and breathe in briefly. Sour, rancid, or chemical odors often indicate spoilage.
- Feel the texture: press surfaces with clean hands. Mushy spots, excessive stickiness, or unusually dry areas are warning signs.
- Check packaging and labels: inspect seals, fill level, and date marks. Puffy containers, dents, or leaks can harbor bacteria or gas from spoilage.
- Measure temperatures: use a food thermometer for cooked meats and casseroles. Aim for at least 165°F (74°C) for poultry; keep cold items at <40°F (4°C).
- Trust your judgment: if something feels off, discard it. Err on the side of safety, especially for vulnerable people.
When you inspect packaged foods, check the inner lining and fill level for tiny bubbles or residue that might indicate microbial activity. Also confirm printed dates and storage instructions.
Remember that certain pathogens do not change smell or appearance. Therefore, follow safe handling and proper cooking even when food looks normal.
Expert Insight
Short, repeatable routines reduce lapses. If you routinely cook for older adults, infants, or people with weakened immunity, adopt conservative thresholds and verify temperatures every time.
Meal Safety: Why These Checks Matter
Foodborne illness affects millions each year. Small inspection steps lower the chance you become affected and limit spread within households.
Understand common failure points: poor refrigeration, incomplete cooking, and cross-contamination. Prioritize checks that address these failure modes.
For basic standards and definitions, see food safety. For cross-contamination guidance, consult cross-contamination.
Meal Safety: Practical Tips for Success
Implement small habits that fit into meal prep and serving. These habits yield a high reduction in contamination risk for minimal effort.
Keep separate cutting boards for raw proteins and produce, label and date leftovers, and cool large batches quickly before refrigeration.
- Store perishables promptly: refrigerate leftovers within two hours of cooking (one hour above 90°F ambient).
- Practice hygiene: wash hands with soap and water for at least 20 seconds before handling food and after raw proteins.
- Avoid cross-contamination: use separate utensils and sanitize surfaces after contact with raw meat.
- Use your senses with verification: sight, smell, touch, and temperature guide decisions.
When cooling large pots, divide contents into shallow containers to speed chilling and limit bacterial growth. This step matters for high-volume cooking and batch meals.
Common Temperature Targets
Know and use the right numbers. Poultry should reach 165°F (74°C), ground meats 160°F (71°C), and most leftovers should reach a steaming hot 165°F when reheated.
Keep refrigerators at or below 40°F (4°C) and freezers at 0°F (-18°C) to limit bacterial growth during storage.
Pro-Caution
When serving vulnerable people, use stricter margins. Reheat to recommended temperatures and avoid marginal items that would be acceptable for healthy adults.
Meal Safety: Serving Suggestions
After confirming safety, present food to preserve quality and reduce risk. Use chilled plates for salads and warm plates for hot entrées when feasible.
Garnishes and acid (lemon or vinegar) enhance perceived freshness but do not eliminate pathogens. Always complete core safety checks before plating.
Meal Safety: Nutritional Snapshot
Nutrition and safety overlap but serve different goals. Choose nutrient-dense items, and then verify safety before serving or consuming.
Use freshness as one factor for quality; then rely on the inspection routine to confirm that the meal is safe to eat.
| Nutrient | Fresh Produce | Cooked Meat |
|---|---|---|
| Calories | 40 per cup | 250 per 3 oz |
| Protein | 2g | 22g |
| Carbohydrates | 9g | 0g |
| Fat | 0g | 15g |

FAQ
How can I tell if my meal is safe before taking a bite?
Trust a short checklist: look for unusual colors, off smells, odd textures, and verify temperature for high-risk foods. Combine these checks to reach a decision.
If still unsure, discard the portion. The cost of waste is small compared with the consequences of foodborne illness.
What are subtle signs that food might be spoiled?
Subtle signs include faint discoloration, a sour or metallic odor, tiny bubbles in sealed packages, or swollen packaging. Any anomaly warrants closer inspection.
Always cross-check with how long the item has been stored and under what conditions before you decide to eat it.
Do expiration dates accurately indicate safety?
Expiration and best-by dates guide storage, but they do not guarantee safety. Temperature abuse and cross-contamination can make food unsafe earlier than a printed date.
Use dates with sensory checks and storage history. For more on dating conventions, see expiration date.
Are leftovers safe after a few days?
Leftovers kept at or below 40°F (4°C) are generally safe for 3–4 days. Reheat thoroughly to steaming hot before serving to reduce microbial risk.
Divide large batches into shallow containers when cooling to speed refrigeration and limit growth during the cooling window.
What should I do if I suspect food poisoning?
If symptoms such as nausea, vomiting, diarrhea, or fever occur hours to days after eating, rest and keep hydrated. Seek medical care for severe, persistent, or bloody symptoms.
Report suspected outbreaks to local public health authorities so they can trace and control broader exposure. For symptom patterns and causes, see foodborne illness.
Final Thoughts
A short, consistent inspection routine makes meals safer without adding much time. Prioritize visual checks, smell, texture, packaging integrity, and temperature verification.
When you combine these checks with good storage and hygiene, you reduce the risk of illness and increase confidence in the food you serve. For preservation techniques, consult food preservation.
See also: Meal Safety
See also: meal safety
]]>
- Drying first lets heat brown skin instead of steaming it.
- Salt and air-dry speed moisture removal and improve texture.
- Use high dry heat to render fat and trigger browning reactions.
- Thermometer-led cooking guarantees safe, juicy meat without overcooking.
Understanding the Science Behind Wet Chicken Skin and Cooking Outcomes
Wet skin forces the surface to spend time evaporating water before it can reach the temperatures needed for browning. During that phase, steam forms and softens the skin, which produces a limp texture rather than a crisp one.
Fat under the skin must render and reach 300–320°F localized surface temps to crisp properly, but water must leave first. The Maillard reaction is the key chemistry that creates brown color and savory flavor; it requires a dry, hot surface to activate reliably. See Maillard reaction for the background on browning.
The Impact of Moisture on Crispiness and Texture
When surface moisture is present, the cooking mode shifts from dry-heat browning to wet steaming. Steam keeps the skin temperature near 212°F until most water evaporates, which delays fat rendering and Maillard browning.
Excess moisture also traps heat under skin folds and between pieces. That increases overall cooking time and can lead to uneven doneness if you push heat to compensate. For controlled drying, chilling on a rack in the refrigerator works well; learn more about refrigeration basics at Refrigerator.
Techniques to Achieve Perfectly Crispy Skin When Starting with Wet Chicken
Start by removing surface water. Pat each piece with absorbent paper, then allow air-drying on a wire rack when time permits. Drying reduces the steaming window and gets skin ready to render fat.
Use salt strategically: a short dry brine pulls moisture from the outer layer and seasons the skin. For details on the method, review the general concept at Brining. When you’re short on time, patting and a quick rest in the fridge still helps.
Expert Insight
Best cooking methods
Choose dry-heat techniques like high-heat roasting, pan-searing, or grilling to maximize crisping. These methods expose skin to direct heat that both renders fat and triggers Maillard browning.
When searing, maintain medium-high heat so the skin releases from the pan once browned. Overcrowding causes steam to collect between pieces, so give each piece breathing room for air circulation. For an overview of roasting techniques, see Roasting (cooking).
Practical Tips to Avoid Common Pitfalls and Enhance Flavor
Start with room-temperature chicken when possible. Cold meat increases the time the skin spends exposed to heat before the interior reaches safe temperature, which can make achieving a crisp exterior harder.
Brush skin lightly with oil or melted fat to promote even browning. Infuse that fat with garlic or herbs for extra aroma without adding surface moisture.
Salt timing and marinating
Dry brining (salt and rest uncovered) enhances both texture and flavor by extracting and reabsorbing juices while drying the surface. Wet marinades add moisture, so always pat skin dry after marinating to restore crisp potential.
If you brine overnight, place the chicken uncovered on a rack in the fridge for several hours to let the skin dry. That step significantly improves final texture.
Recipe: Crispy Skin Chicken Thighs (from Wet Start)
Yield: Serves 4. This recipe steps through turning damp skin into a crisp finish using common kitchen techniques.
Difficulty: Medium. You need basic but precise timing and a thermometer to finish correctly.
Ingredients
4 bone-in, skin-on chicken thighs; 1 tsp fine sea salt; 1/2 tsp black pepper; 2 tbsp olive oil or rendered chicken fat; 2 cloves garlic, minced; 1 tsp chopped rosemary; optional lemon zest.
Keep ingredients at hand and preheat the oven to ensure the pan is hot when you begin searing.
Instructions
Pat the thighs thoroughly dry with paper towels. For improved results, place them on a wire rack uncovered in the refrigerator for 2 hours or overnight to evaporate surface moisture.
- Preheat oven to 425°F (220°C).
- Mix oil, garlic, and rosemary; brush over the skin. Season with salt and pepper.
- Heat an oven-safe skillet over medium-high heat until shimmering. Add 1 tbsp oil or fat.
- Place thighs skin-side down, spaced apart. Sear without moving until golden and crisp, about 6–8 minutes.
- Flip thighs and transfer skillet to the oven. Roast uncovered 20–25 minutes until internal temp reads 165°F (74°C).
- Optional: Broil 1–2 minutes to finish crisping, watching closely to prevent burning.
- Rest on a wire rack for 5 minutes before serving; finish with lemon zest.
Use a probe thermometer for accuracy and avoid overcooking. For an expanded method, visit our Perfect Roast Chicken guide for related techniques and variations.
Chef’s Notes and Variations
For extra crunch, finish on a hot grill for 2–3 minutes over indirect heat. Swap rosemary for thyme or smoked paprika to alter the aroma profile.
If time is limited, thorough patting and immediate searing still produce strong results. Leftovers work well cold or reheated gently to preserve skin texture.
Pro-Caution
After resting, serve the thighs on a warm platter with roasted vegetables or a crisp green salad. Garnish with fresh herbs and lemon wedges for brightness.
Nutritional Snapshot
Per serving approximate values: 370 kcal, 30 g protein, 0 g carbs, 27 g fat. Values vary with skin and fat retained.
Keeping the skin on increases fat and calories but preserves moisture and flavor. Use portion control and pair with vegetables for balance.
FAQ
Why does wet skin prevent crisping?
Wet skin creates a steam layer that holds the surface temperature near the boiling point of water. That steam delays fat rendering and stops the Maillard reaction until the moisture evaporates.
Drying the surface first removes the steam and lets direct heat brown the proteins and sugars on the skin.
Can I still get crisp skin if I marinated the chicken?
Yes. Pat the skin dry thoroughly after marinating, then air-dry on a rack if time allows. A brief dry-brine with salt after marinating also helps remove extra surface moisture.
Remember that heavy wet marinades add liquid back to the skin, so plan a drying step before cooking.
How long should I air-dry chicken in the fridge?
Two hours is a practical minimum for noticeable improvement. Overnight drying produces better results when you have the time.
Place the chicken on a wire rack set over a tray to collect drips. For background on refrigeration and food handling, see Food safety.
Does wet skin affect food safety?
Surface moisture itself does not make the chicken unsafe. The risk appears when uneven cooking due to longer cooking times leaves parts below safe temperature. Use a meat thermometer to confirm 165°F (74°C).
Follow standard hygiene and storage practices. For more on safe handling, consult our internal chicken safety resource.
Are there quick hacks if I’m short on time?
Pat dry vigorously and rest uncovered in the fridge for 20–30 minutes if possible. Otherwise, sear on high heat and finish in a hot oven, but monitor closely to prevent burning.
A final one- to two-minute broil can crisp stubborn spots, but keep the bird a safe distance from the element to avoid flare-ups.
Closing Notes
Moisture on chicken skin dictates whether heat browns or steams the surface. Control that moisture with drying, salt, and dry-heat cooking to get predictable, crispy results.
Practice the small steps—patting, resting, and using a thermometer—and you will reliably transform wet-start chicken into a crisp, flavorful dish.
See also: chicken skin
]]>
- Key insight: The 40°F–140°F danger zone accelerates microbial growth.
- Timing: Refrigerate perishables within two hours (one hour over 90°F).
- Verification: Use a calibrated thermometer to confirm safe internal temperatures.
Prep and Cook Time: Food Temperature Control
Plan prep and cook steps so foods move quickly through the danger zone. For safe handling, make sure mise en place, chilled serviceware, and an accurate thermometer are ready before you heat or chill food.
Also, verify internal temperatures rather than guessing from time alone. For reference on measurement devices, consult the thermometer entry for device types and calibration basics.
Yield: Food Temperature for Different Batch Sizes
The same temperature rules apply whether you serve two or two hundred. Larger volumes hold heat and require subdivision into shallow containers to accelerate cooling.
Always label and rotate stock using first-in, first-out practices. Controlling food temperature during storage reduces cumulative risk and preserves product quality.
Difficulty Level: Food Temperature Practices for Home Cooks
Most food temperature controls rank easy to medium in skill. With training and routine checks, households can reach commercial-level safety without complex equipment.
Train handlers on handwashing, separation of raw and ready-to-eat items, and timed cooling steps. These steps improve consistency and limit exposure to the danger zone.
Ingredients for Safe Food Handling: Food Temperature Sensitivity
Treat ingredients as temperature-sensitive from purchase to plate. Move raw proteins and dairy into chilled transport immediately to maintain safe food temperature limits.
High-moisture foods need tighter control because moisture supports growth. Also, use airtight packaging and shallow containers to speed heat transfer during cooling.
- Fresh produce: wash, dry, and refrigerate after cutting to maintain safe food temperature.
- Raw proteins: refrigerate immediately and separate from ready-to-eat foods to avoid cross-contamination.
- Digital thermometer: instant-read and probe models give quick, accurate readings.
- Ice packs and coolers: hold food cold during transport to preserve safe food temperature.
- Shallow, clean containers: encourage fast cooling and reduce time in the danger zone.
- Sanitizer: keep prep surfaces and utensils hygienic.
Instructions: Mastering Safe Temperature Handling
Control both time and temperature to reduce microbial risk. Aim to keep perishables below 40°F (4°C) or above 140°F (60°C) as standard practice for safe food temperature management.
Document critical control points during cooking, cooling, storage, and reheating. Use a calibrated device to confirm targets and keep simple logs for verification.
- Recognize the danger zone: Keep perishables out of 40°F–140°F (4°C–60°C).
- Chill promptly: Refrigerate leftovers within 2 hours, or within 1 hour if ambient temperature exceeds 90°F.
- Verify cooking temps: Reach minimum safe temps—165°F (74°C) for poultry; 145°F (63°C) for whole cuts—with an instant-read or probe thermometer.
- Divide large portions: Use shallow containers to speed cooling and avoid warm cores.
- Reheat correctly: Heat to at least 165°F (74°C) before serving, stirring to eliminate cold spots.
- Avoid cross-contamination: Use separate boards and sanitize surfaces after raw protein handling.
- Keep cold foods cold: Hold at or below 40°F in a refrigerator or insulated cooler during transport.
- Plan storage: Label and date leftovers; follow first-in, first-out rotation to prevent expired food risks.
Expert Insight
Well-documented routines improve consistency and traceability. For example, record cooling start times for large pots, and verify cores fall below 70°F within two hours and below 40°F within four hours when you manage food temperature for big batches.
Pro-Caution
Tips for Success: Smart Cooking and Cooling Strategies
Small process changes yield measurable safety gains. Pre-chill serving dishes, use multiple shallow pans, and avoid refrigerator overcrowding to maintain airflow and efficient cooling.
Plan batch sizes to match refrigerator capacity. Large, dense volumes take longer to cool and increase the time food spends in the danger zone unless you use targeted temperature controls.
- Pre-chill plates: keep cold dishes colder during service.
- Insulated carriers: maintain hot foods above 140°F en route to service.
- Batch cooking: small batches cool faster and reduce risk.
- Marinate in fridge: never at room temperature to preserve safe food temperature.
- Label leftovers: date, time, and use-by limits to track safe storage durations.
Serving Suggestions: Maintain Safe Food Temperature
Serve foods at safe temperatures for both flavor and safety. Keep hot items hot and cold items chilled; monitor holding equipment and replace food on buffets frequently.
Use heat sources that maintain at least 140°F for hot holding, and place cold condiments on ice to keep them below 40°F. These steps prevent drift into the danger zone during service.
Nutrient Impact Table: Food Temperature and Food Types
Different nutrient profiles change how foods respond to temperature. Proteins and high-moisture items typically need faster cooling and closer monitoring to maintain safe food temperature.
Use the table to prioritize handling steps for ingredients that support rapid bacterial growth and spoilage when exposed to the danger zone.
| Nutrient | Impact on Food Safety | Temperature Range | Recommended Handling |
|---|---|---|---|
| Protein | Bacterial growth accelerates without prompt cooling. | 40°F–140°F (4°C–60°C) | Cook thoroughly; refrigerate promptly in shallow containers to maintain safe food temperature. |
| Carbohydrates | Offer substrates that bacteria use for growth. | Danger zone | Store sealed under 40°F and reheat to safe temps. |
| Fat | Can oxidize or spoil when warm. | Above 40°F | Keep refrigerated or maintain hot holding above 140°F. |
| Water Content | High moisture encourages bacterial growth. | Danger zone | Control temperature tightly during prep and storage. |
Practical Resources and Further Reading
Follow authoritative guidance for temperature targets and holding times published by public health agencies. Read technical background on foodborne illness to understand pathogens and risk factors.
Review refrigeration basics and storage design at the refrigerator entry. For microbiology context on growth dynamics, the bacteria page explains replication and environmental needs.
Insights and Conclusions: Sustainable Food Temperature Control
Temperature control and elapsed time form the backbone of safe handling. When you limit how long food stays between 40°F and 140°F, you narrow the window for pathogenic growth and toxin production.
Adopt simple controls: a calibrated thermometer, shallow storage, clear labeling, and routine logs. These practical steps preserve both safety and flavor so meals stay fresh and trustworthy while you manage food temperature effectively.

FAQ
What exactly is the Food Temperature Danger Zone?
The Food Temperature danger zone is 40°F–140°F (4°C–60°C), where many bacteria multiply rapidly. Controlling time in this range cuts the chance of foodborne illness.
How fast do bacteria multiply in the danger zone?
Bacterial populations can double in as little as 20 minutes under optimal conditions. For more detail on organisms and replication, see the bacteria resource.
How should I safely cool large batches of hot food?
Divide large volumes into shallow containers and use ice-water baths or rapid-chill equipment. The goal is to move the core temperature below 140°F quickly and then below 40°F within recommended time windows.
Does freezing kill bacteria?
Freezing stops growth but does not reliably kill all organisms or neutralize toxins. Thaw safely in the refrigerator, cold water, or microwave and then cook to proper temperatures to manage risk.
When should I discard leftovers?
Discard leftovers held above 40°F for longer than recommended, or older than 3–4 days when stored properly below 40°F. When in doubt, remove the risk and dispose of suspect food.
See also: food temperature
]]>
- Accurate doneness: Remove guesswork for consistent results.
- Food safety: Reach temperatures that kill harmful bacteria.
- Texture control: Prevent dry meat and undercooked centers.
- Versatility: Use on grilling, roasting, baking, and candy work.
What a food thermometer is and how it works
A food thermometer is an instrument that measures the internal temperature of food. Most modern devices use a metal probe with a sensor that converts heat to an electrical signal and displays a temperature value.
Thermometers calibrated for cooking read quickly and give a reliable value within a few seconds for instant-read types, or monitor continuously for probe-style units. Learn more about the underlying device technology on thermometer.
Why you should use one every time
Using a thermometer removes guesswork and reduces waste. You stop overcooking proteins and preserve juiciness by targeting precise internal temperatures for each food type.
Food safety improves because you can confirm lethal temperatures for pathogens rather than relying on color or time alone. For background on illness prevention and temperature control, see food safety.
Key temperature targets to memorize
Memorize a short list of internal temperatures to speed decisions in the kitchen. Common safe targets include: poultry 165°F (74°C), pork 145°F (63°C), fish 140°F (60°C), and beef ranges where medium-rare is 130–135°F (54–57°C).
Rest time matters: carryover cooking raises internal temperature after removal. For large roasts allow 10–20 minutes rest depending on size; smaller cuts need less time. That final rise yields juicier results and predictable doneness.
Types of food thermometers
Thermometers fall into clinical groups by use case: instant-read, leave-in probe, and smart wireless devices. Choose based on cooking method, response time, and whether you need continuous monitoring.
Each type has trade-offs: instant-read gives speed, probe units give long-term monitoring, and wireless options free you to multitask while the probe watches the roast.
Instant-read thermometers
Instant-read models deliver temperatures in seconds and suit quick checks while searing or finishing a steak. Use them for thin cuts and when you need fast, actionable feedback.
They are not designed to stay in the oven for long. For slow roasts or smoking, pair instant-read checks with a leave-in probe to monitor progress between checks.
Probe and leave-in thermometers
Probe thermometers are ideal for roasts, whole birds, and smokers where continuous monitoring matters. Insert the probe into the thickest part and route the cable through the oven door or use a wireless base for remote reads.
These units help you track temperature curves and predict when to remove food and begin resting. They improve precision for large cuts and low-and-slow techniques.
How to use a food thermometer correctly
Always insert the probe into the thickest part of the food, avoiding bone, gristle, or excess fat. For steaks and fillets insert sideways to reach the center; for whole poultry target the breast and thigh junction.
Allow the display to stabilize before recording the reading. For instant reads wait the manufacturer-specified time, usually 2–10 seconds. For leave-in probes confirm the steady reading over several minutes to detect temperature stalls.
Follow recommended targets for each protein and consider carryover rise when timing removal from heat. Use a consistent probe insertion point for repeated checks so your notes remain comparable.
Pro-Caution
Calibration, maintenance, and best practice
Calibrate thermometers periodically. The ice-point method (probe in crushed ice water at 32°F/0°C) and the boiling-point method (probe in rolling water, adjusted for altitude) require simple checks to ensure accuracy.
Clean and sanitize the probe between uses with hot, soapy water or alcohol wipes. Store in a protective sheath to avoid bending or damaging the sensor, which spoils accuracy.
Chef’s notes and practical tips
Choose the right tool for the task: a fast-response instant-read for thin cuts and a wired probe for roasts. Battery life, response speed, and probe length matter in daily use.
Keep a small kitchen log. Note temperatures, oven setup, and resting time for recurring recipes so you replicate success and learn from variation. Cross-referencing results shortens the learning curve.
Expert Insight
Serving suggestions and finishing touches
Rested proteins yield juicier slices and better mouthfeel. Slice against the grain for tender cuts and present on warmed plates so food keeps heat at the table.
Use finishing elements—compound butter, pan jus, or a light sauce—to add gloss and depth. These touches highlight the precise doneness your thermometer helped secure.
| Nutrient | Per Serving (Avg.) |
|---|---|
| Calories | 250 kcal |
| Protein | 28 g |
| Carbohydrates | 5 g |
| Fat | 12 g |
For trusted safety guidance and temperature charts consult authoritative resources. Pair your reading practice with technique guides to build confidence and reduce waste.
Explore related content like Mastering Grilling Temperatures and Kitchen Tools Guide for deeper practical steps and product recommendations.
FAQ
What is the best temperature for chicken?
Cook chicken to an internal temperature of 165°F (74°C) in the thickest part. This target ensures harmful bacteria are reduced to safe levels while keeping meat moist when combined with proper resting time.
Can I leave a thermometer in the oven?
Only use leave-in thermometers designed for continuous high-heat exposure. Instant-read devices usually cannot withstand long oven exposure. Check the manufacturer’s specifications before leaving any probe inside.
How often should I calibrate my thermometer?
Check accuracy every few months or after a drop. Use the ice-point or boiling-point methods to confirm. Frequent professional use or rough handling calls for more frequent checks.
Do thermometers work for baking and candy?
Yes. Use probe thermometers for bread and custards to verify doneness and candy thermometers for sugar stages where precise temperature defines texture. Each task requires the correct thermometer type.
Where can I learn more about cooking science?
Read focused references on technique and science. The cooking and meat pages explain fundamentals that link temperature to texture. Combine that knowledge with hands-on practice and a log of results.
Final thoughts
A food thermometer is a compact investment that upgrades results across grilling, roasting, and baking. It saves time, reduces waste, and protects health by giving you concrete temperature data instead of guesswork.
Adopt consistent probe technique, maintain your device, and keep a short set of target temperatures by memory. Your food will reward that small habit with better texture, flavor, and reliability every time.
See also: food thermometer
]]>