- Fast searing maximizes flavor by expanding surface contact and driving the Maillard reaction.
- 80/20 ground beef balances crust formation and juiciness for consistent results.
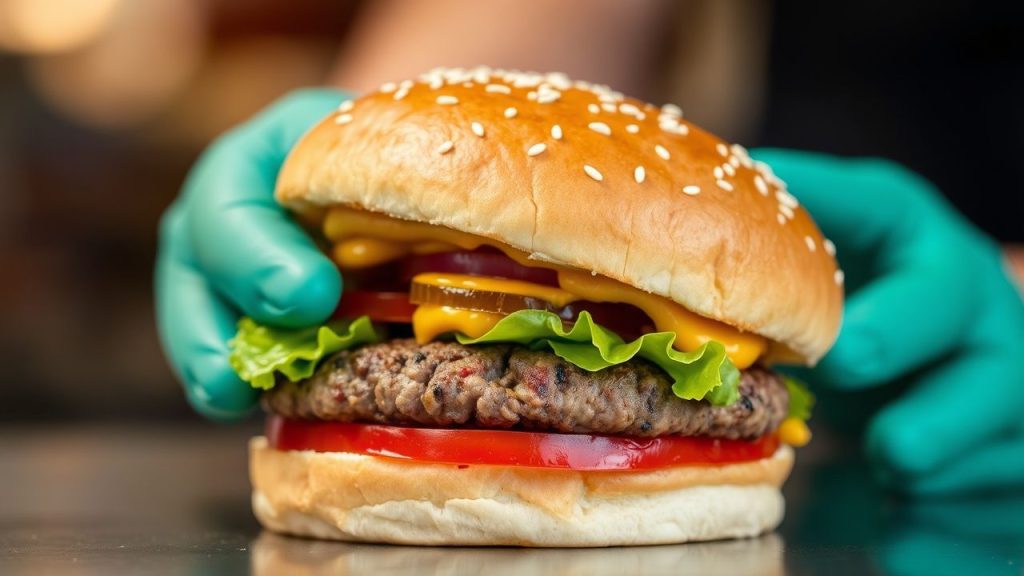
- Timing and pressure determine texture—smash firmly, flip at the right moment.
As a professional chef and food scientist, I write from direct kitchen testing and documented culinary chemistry. I describe measurable technique, heat management, and ingredient choices that consistently produce premium smash burgers.
Prep and Cook Time
Prep Time: 10 minutes. Preparation focuses on portioning and chill time for predictable handling.
Cook Time: 8 minutes. Each patty sears quickly on very high heat and finishes in under three minutes per side.
Yield
Makes 4 smash burgers when using 1 lb of ground beef and portioning into four equal balls. Portion size affects thickness and cooking dynamics.
Scale the recipe up by multiples of 1 lb and stagger cooking to avoid crowding the pan, which harms crust development.
Difficulty Level
Medium. The technique demands timing and confident, quick motions more than advanced knife work.
With practice, home cooks quickly master consistent thickness, flip timing, and cheese melt control.
Ingredients
Use freshly ground ground beef at an 80/20 lean-to-fat ratio for optimal juiciness and crust formation. Fat renders during searing and bastes the patty.
Other essentials: brioche buns, a neutral oil with a high smoke point, coarse salt, and freshly ground black pepper. Keep toppings simple to highlight the meat’s flavor.
- 1 lb ground beef (80/20 blend)
- 4 brioche buns, toasted with butter
- 4 slices cheddar cheese (optional)
- Salt and freshly ground black pepper, to taste
- 1 tbsp vegetable oil or other high-smoke-point oil
- Leafy lettuce, sliced tomato, pickles, and onions for topping
Instructions
Divide the meat into four equal, loosely packed balls without overworking. Gentle handling preserves tenderness and prevents a dense patty.
Heat a heavy pan until very hot. Use a cast-iron pan or steel griddle for best heat retention and consistent sear across the surface.
- Place a meat ball on the hot surface. Use a sturdy, flat spatula or a specialized burger press and press down quickly to about 1/4 inch thickness.
- Season immediately with salt and pepper. Allow the patty to cook undisturbed for 2-3 minutes to develop a dark brown crust.
- Flip once the edges brown and juices appear on top. Add cheese after the flip for a perfect melt, and cook another 1-2 minutes.
- Toast buns in butter until golden, then assemble with toppings and condiments.
Tips for Success
Maintain very high surface temperature for quick searing; this maximizes browning without overcooking the interior. A hot pan creates a fast, flavorful crust.
Do not overcrowd the pan. Overcrowding drops surface temperature and creates steam instead of a dry, caramelized crust.
 Expert Insight
Allow patties to rest briefly on a cooling rack after cooking if assembling many burgers. Brief rest evens internal temperature and retains juices during service.
For consistent shape and height, chill meat balls for 15–30 minutes before smashing. Chilled meat releases less fat immediately and shapes reliably under pressure.
Serving Suggestions
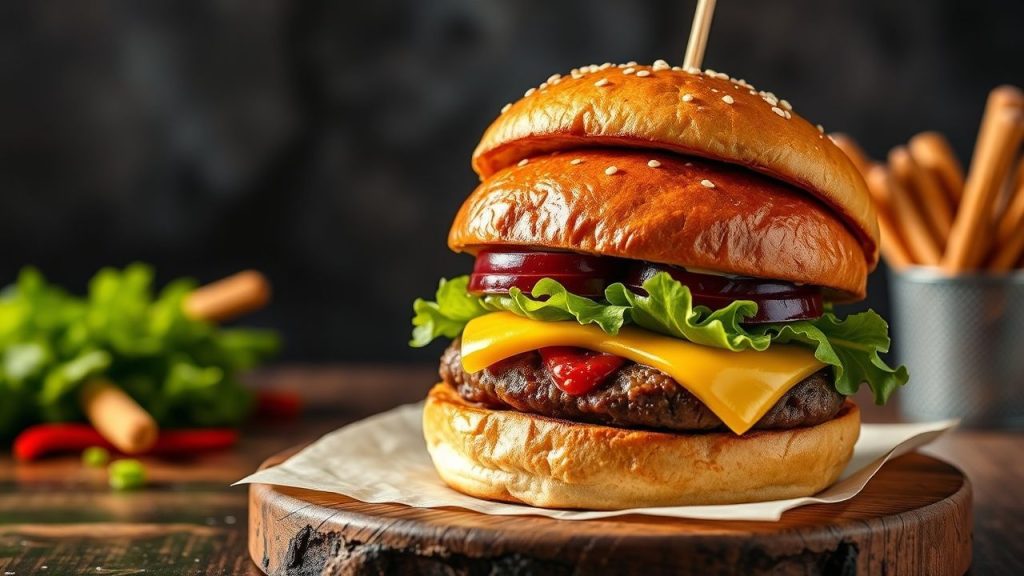
Serve smash burgers on toasted brioche with minimal toppings to emphasize the seared beef flavor. Classic pairings include sliced dill pickles and thin-sliced onions.
Offer fries, coleslaw, or a light green salad alongside to balance richness. Pair with an effervescent beverage to cut through fat and refresh the palate.
Science of the Smash
The smash technique deliberately increases surface area contact between meat and hot metal to accelerate chemical reactions that create flavor. Greater contact equals more browning per unit mass.
That browning is the Maillard reaction, where amino acids and reducing sugars reorganize under heat to form hundreds of flavor compounds. These compounds produce the savory, roasted notes we associate with great burgers.
Maillard Reaction and Crust
The Maillard reaction begins above roughly 285°F (140°C) and intensifies with higher temperatures and drier surfaces. Thin patties reach these conditions rapidly, creating a deeply flavored crust before the interior overcooks.
Chemical complexity rises as more surface area browns; that is why thin, smashed patties taste disproportionately beefier than thicker ones cooked the same time.
Heat Management and Texture
Use a heavy pan for even heat. Cast iron stores thermal energy and releases it steadily, helping each patty experience the same searing conditions.
Applying firm pressure spreads the meat thin and flattens fat pockets, promoting uniform rendering. Quick searing locks flavors and keeps the interior tender when using the right fat ratio.
 Pro-Caution
Nutrition
Typical nutrition for an 80/20 smash burger with bun and cheese runs around 550 kcal per serving. Fat content is significant due to the high-fat blend that makes smash burgers juicy.
Adjust portions or topping choices to meet dietary goals. Using leaner blends will reduce calories but can compromise the characteristic crust and juiciness.
| Nutrition | Per Serving |
|---|---|
| Calories | 550 kcal |
| Protein | 35 g |
| Carbohydrates | 35 g |
| Fat | 32 g |
Additional Resources
For technique drills and step-by-step visuals, review our internal guide on perfect burger techniques. Practicing controlled pressure will improve consistency quickly.
If you focus on griddle setup and maintenance, see our internal page on griddle techniques for heat distribution and pan care tips that preserve searing performance.

FAQ
What makes a smash burger different from a regular burger?
The smash method uses an initial forceful press to create a thin patty with a large surface area. That thin profile produces an intense sear and a distinctive crisp edge compared with thicker, formed patties.
Why is the timing of the flip so important?
Flip timing controls crust depth and internal doneness. Flip too early and the crust remains pale; flip too late and you risk overcooking the interior or breaking the patty when lifting.
How does fat ratio affect the result?
An 80/20 lean-to-fat mix is a reliable balance for flavor and moisture. Higher fat improves juiciness and basting action, while leaner blends can produce dry, less flavorful patties.
Can I make smash burgers on an outdoor grill?
You can if you have a solid, flat cooking surface like a griddle plate on the grill. Direct grate cooking reduces surface contact and limits the consistent crust that defines a smash burger.
What pan is best for consistent searing?
A heavy cast-iron pan or a steel griddle works best because they retain and distribute heat evenly. Even thermal mass ensures each patty sees consistent searing conditions every time.
Final note: Mastery comes from repetition. Practice consistent portioning, maintain high surface heat, and apply a confident, quick press. These three variables reproducibly create smash burgers with maximum flavor and ideal texture.
See also: Smash Burger
]]>
- Choose the right cut for your cooking method to balance tenderness and flavor.
- Build seasoning around cumin and smoked paprika for authentic depth.
- Sear, then simmer to develop crust and retain juiciness.
- Layer textures with fresh toppings and a creamy element for balance.
Choosing the Perfect Cut: Understanding Beef Varieties for Tender Tacos
Beef selection drives flavor and mouthfeel. For classic ground tacos, an 80/20 ground chuck offers the marbling needed to stay juicy under heat.
For sliced or shredded tacos, consider cuts that suit their method: quick-sear steaks like flank steak or skirt steak, and braising cuts like chuck or brisket for shredding. Use the right cut and you will waste less time fixing texture issues.
Lean cuts dry out quickly; avoid extra-lean ground beef when you want succulence. When braising, collagen in tougher cuts breaks down and yields tender, shreddable meat with concentrated flavor.
Working knowledge of beef anatomy helps you predict results. For a broad overview of the protein you are working with, see beef, which explains common cuts and cooking properties.
Unlocking Authentic Flavors: Crafting the Ultimate Taco Seasoning Blend
Seasoning sets the tone: a few well-chosen spices deliver more impact than a long ingredient list. Start with ground cumin and smoked paprika as your backbone and add chili powder for warmth and mild heat.
A basic dry blend of cumin, smoked paprika, chili powder, garlic powder, onion powder, and dried oregano will cover most bases. Fresh components like minced garlic and diced jalapeño improve aroma and immediate flavor when added while cooking.
For reference on two key spices, review the history and uses of cumin and paprika. Both contribute earthy, slightly smoky notes essential to taco meat.
Pre-made mixes work, but crafting your own seasoning lets you calibrate salt and spice levels to suit your household. Freshly ground spices will always outperform aged jarred blends.
Step by Step to Taco Perfection: Preparing and Cooking Beef Like a Pro
Start with dry meat. Patting beef dry before it hits the pan reduces surface moisture and encourages the Maillard reaction that creates a savory crust.
Heat matters: use a heavy-bottomed pan or a hot frying surface to get even browning. A hot surface creates a crisp exterior while keeping interior juices locked in.
- Prep: Pat the meat dry and measure spices. Pre-chopped toppings save time and prevent overcooking while you assemble.
- Heat the skillet: Use medium-high heat and add a tablespoon of oil when pan is hot.
- Sear: Add beef without crowding; allow it to brown on one side for 3-4 minutes to form a crust.
- Season: Sprinkle your blend evenly, toss, and continue to cook until the meat is fully browned, about 6-8 minutes for ground beef.
- Simmer: Add 2-4 tablespoons of broth or water, reduce heat, and simmer for 3-5 minutes to marry flavors while keeping moisture.
- Rest: For sliced or shredded beef, rest briefly before slicing thin or shredding with forks to preserve juices.
Searing then simmering gives you both a flavorful crust and a moist interior. That sequence matters more than exotic ingredients for reliable results.
If you use a cast-iron or heavy skillet, it retains heat well and promotes even browning; read more about the tool in general cooking use at frying pan.
Elevate Your Tacos: Creative Toppings and Sides to Complement Every Bite
Topping choices change the profile of a taco instantly. Classic combinations—onion, cilantro, lime—brighten the meat and balance fat with acid and herbaceous notes.
Add creamy elements like Mexican crema, sour cream, or avocado to tame heat and add a velvety contrast to crisp garnishes such as radish or pickled jalapeños.
Try a selection of salsas: verde for tang, chipotle for smoke, and fruit-based salsas like mango for sweet contrast. Serving a small array encourages diners to customize and increases meal satisfaction.
Expert Insight
Pair tacos with sides that mirror central flavors. Roasted corn seasoned with chili and lime or a simple black bean salad complements beef without competing.
Use fresh lime juice at the end of assembly to brighten flavors; the acid lifts spices and adds perceived freshness to the entire taco.
Tips for Success and Practical Variations
Temperature control is a common failure point. Keep the pan hot enough for browning but not so hot that spices burn. Adjust heat after adding seasoning to maintain even cooking.
Make-ahead strategies improve weeknight performance: cook and cool seasoned beef, then refrigerate for up to three days or freeze for up to one month in airtight containers.
Small swaps broaden appeal. Choose ground turkey or plant-based crumbles and apply the same seasoning ratios for a similar flavor profile with less fat.
When converting recipes, preserve the ratio of cumin to chili powder and adjust salt after tasting. That conserves the intended flavor balance across proteins.
Pro-Caution
Prep and Cook Time
Preparation: 15 minutes. Gather and measure spices, chop toppings, and warm tortillas just before serving.
Cooking: 20 minutes. Browning and a short simmer deliver depth and juiciness without long braising times for ground beef.
Yield
This recipe yields about 12 tacos, serving four to six people depending on appetite and side dishes. Scale ingredients proportionally for larger groups.
For a family meal, double the batch and hold half refrigerated for a quick reheat and assembly later in the week.
Difficulty Level
Easy. The techniques here rely on timing and seasoning rather than advanced skills. Home cooks gain consistency by following a clear sear-simmer-rest routine.
Once you control heat and seasoning, you can customize toppings and proteins to suit taste confidently.
Ingredients
- 1 lb ground chuck beef (80/20 recommended)
- 1 tbsp olive oil
- 1 tsp ground cumin
- 1 tsp smoked paprika
- 1 tsp chili powder
- 1/2 tsp garlic powder
- 1/2 tsp onion powder
- 1/4 tsp cayenne pepper (optional)
- 1/2 tsp dried oregano
- Salt and freshly ground black pepper, to taste
- 1/4 cup beef broth or water
- 12 small tortillas
- Fresh cilantro, lime wedges, diced onion, and optional jalapeños
- Crema or sour cream, and avocado or guacamole
Instructions
- Heat oil in a large skillet over medium-high heat until shimmering.
- Add ground beef and let it sit undisturbed for 3 minutes to form a sear, then break it up and continue browning until no pink remains.
- Sprinkle the seasoning mix evenly and stir to combine, cooking another 1-2 minutes to bloom the spices.
- Pour in the broth, reduce heat to medium-low, and simmer for 3-5 minutes until the liquid reduces slightly and coats the beef.
- Warm tortillas on a hot skillet for 10-20 seconds per side, wrap them in a towel to keep warm and pliable.
- Assemble: spoon beef into tortillas, top with cilantro, onion, crema, and a squeeze of lime. Serve immediately.
Serving Suggestions and Nutrition
Present tacos on a warm board or platter and offer a small selection of salsas to increase engagement and dwell time at the table. A variety encourages guests to experiment with flavor combinations.
For a balanced plate, add a side salad or roasted vegetables and keep portions moderate to control calorie density without sacrificing satisfaction.
| Nutrient | Per Serving (2 tacos) |
|---|---|
| Calories | 320 kcal |
| Protein | 22 g |
| Carbohydrates | 18 g |
| Fat | 18 g |

FAQ
What makes a classic beef taco unforgettable?
Balance. Juicy, well-seasoned meat paired with acidic and crunchy toppings creates contrast. That interplay of textures and brightening acids like lime defines a memorable taco.
Which cut of beef is best for tacos?
Ground chuck (80/20) is the most straightforward choice for pan tacos. For sliced tacos, skirt or flank steaks provide beefy flavor and a good sear when sliced thin against the grain.
How can I prevent soggy tortillas?
Toast tortillas briefly on a hot, dry skillet and keep them wrapped in a towel to retain warmth and flexibility. Add very wet toppings sparingly and assemble just before serving.
Can I make the beef mixture ahead of time?
Yes. Store cooked, cooled beef in an airtight container for up to three days in the refrigerator or freeze for up to one month. Reheat gently with a splash of broth to restore moisture.
How do I adjust the spice level without losing flavor?
Reduce cayenne and jalapeños, then balance with more smoked paprika or a touch of sweet paprika for depth without heat. Add fresh lime juice or crema when serving to soften perceived heat.
Now you have a clear, practical path to consistent, flavorful beef tacos. Apply the sear-simmer-rest sequence, choose the right cut, and layer bright toppings to make each taco satisfying and memorable.
See also: beef tacos
]]>
- Precise seasoning transforms simple ground beef into a layered, savory filling.
- Quick prep and a 45-minute cook time make this a reliable weeknight option.
- Topping contrast—acid, crunch, and cream—gives every bite balance.
- Make-ahead filling deepens flavor and speeds assembly on service day.
Prep and Cook Time
Preparation: 20 minutes. Cooking: 25 minutes. This recipe reliably finishes in about 45 minutes, making it practical for dinner plans.
Timing depends on skillet heat and whether you brown fresh beef or reheat a pre-made filling. Planning mise en place—chopped onion, measured spices, and warmed tortillas—keeps the cook time efficient.
Yield
This recipe serves 4–6 people, yielding roughly 12–18 tacos depending on portion size. It scales easily if you need to feed more guests.
Portion 3 tacos per adult for a standard serving; adjust for sides or appetites. Leftover filling stores well for 2–3 days refrigerated and freezes cleanly for up to 3 months.
Difficulty Level
Rated Medium: the steps are straightforward but require attention to spice balance and proper browning. Home cooks with basic skillet technique can execute this recipe well.
Key control points are heat management and seasoning adjustments. If you master those, you’ll produce consistent results every time.
Ingredients
Use quality ingredients for the best flavor: 1 lb ground beef (80% lean), aromatics, a focused spice blend, and modest tomato base. Small details—olive oil temperature and when you add acid—affect mouthfeel and depth.
Below is a concise ingredient list ready for prep. Swap proteins without changing technique if needed.
- 1 lb ground beef (80% lean for juiciness)
- 1 tbsp olive oil
- 1 small onion, finely chopped
- 3 cloves garlic, minced
- 1 tsp ground cumin — see how cumin impacts aroma: cumin
- 1 tsp smoked paprika (or regular paprika for milder smoke)
- 1/2 tsp chili powder
- 1/2 tsp dried oregano
- 1/4 tsp cayenne pepper (optional)
- 1/2 cup tomato sauce
- 1/4 cup beef broth or water
- Salt and freshly ground black pepper to taste
- 12 small corn or flour tortillas — refresh your knowledge of tortilla types: tortilla
- Fresh cilantro, chopped (for garnish)
- 1 lime, cut into wedges
Ideal Toppings
Top tacos with ingredients that provide contrast: acid, fat, texture, and temperature. These contrasts make each bite memorable.
Choose a few toppings rather than overloading each taco. Typical options include cheese, salsa, avocado, and pickled elements.
- 1 cup shredded sharp cheddar or Monterey Jack
- 1/2 cup diced red onion
- 1 avocado, sliced or mashed—see background on guacamole: guacamole
- 1/2 cup fresh salsa or pico de gallo
- 1/4 cup sour cream or Mexican crema
- Pickled jalapeños for briny heat
Step-by-Step Instructions
Follow these steps to build a deeply flavored beef filling with a balanced texture. Clean technique—hot pan, frequent movement, and measured liquids—yields the best results.
Work on a medium-high flame for browning and lower the heat for simmering to concentrate flavors without drying the meat. Assemble quickly once fillings and toppings are ready.
- Heat olive oil in a large skillet over medium heat. Add the finely chopped onion and sauté until translucent, about 5 minutes, stirring so the onion softens evenly.
- Add minced garlic and cook for 1 minute until fragrant, keeping the garlic from browning to avoid bitterness.
- Increase heat to medium-high and crumble in the ground beef. Cook, stirring occasionally, until well browned, about 8–10 minutes; aim for small, evenly sized pieces for consistent texture.
- Sprinkle in the spices—cumin, smoked paprika, chili powder, oregano, and cayenne. Stir to coat the beef and toast the spices briefly, 1–2 minutes, to boost aroma.
- Pour in tomato sauce and broth, reduce heat to low, and simmer 8–10 minutes until thickened. Adjust seasoning with salt and black pepper to taste.
- Warm tortillas on a dry skillet 30 seconds per side until soft and pliable; keep them wrapped in a towel to retain heat while you assemble.
- Assemble tacos by spooning beef onto each tortilla and finishing with chosen toppings—cheese, onion, avocado, salsa, and a squeeze of lime.
- Serve immediately to preserve contrast between warm filling and fresh toppings. Offer lime wedges and hot sauce at the table for personal adjustments.
Chef’s Notes and Tips for Success
Small adjustments can elevate the dish: a splash of acid, a touch of smoke, or a quick finish with fresh herbs. Test-season as you go to avoid over-salting early in the cook.
For texture, leave the beef pieces slightly coarse rather than over-mashing them. That produces a meatier bite that stands up to toppings and holds well in the tortilla.
Expert Insight
Allow at least one short rest period before adding finishing acids like lime. Rest lets the heat redistribute and prevents the toppings from steaming the tortillas.
Pro-Caution
Serving Suggestions
Present tacos on a colorful platter and pair with sides that contrast richness. A crisp slaw or acid-forward rice complements the beef without repeating flavors.
Suggested pairings include traditional Mexican rice and a bright cabbage slaw. For a creamy side, try a simple guacamole from our guacamole recipe to add cool, fatty balance.
To create a fiesta-style spread, set out bowls of chopped onion, cilantro, lime wedges, and cheeses for guests to build tacos to their taste. This approach keeps tortillas from becoming soggy and encourages interaction.
| Nutrient | Per Serving (3 Tacos) |
|---|---|
| Calories | 450 kcal |
| Protein | 28 g |
| Carbohydrates | 30 g |
| Fat | 22 g |

FAQ
What makes these beef tacos stand out?
The combination of properly toasted spices, correct fat level in the beef, and balanced toppings creates depth and contrast. Each element—acid from lime, cream from avocado, and crunch from onion—works to highlight the savory meat.
Which cut or type of beef is best?
Ground chuck (80% lean) gives the right fat ratio for juicy filling. If you prefer steak, skirt or flank steak sliced thinly and quickly seared offers a more textural, charred profile.
How can I adjust heat and smoke?
Control heat with cayenne and chili powder amounts and add smoky depth via smoked paprika or a spoonful of chipotle in adobo during simmering. Taste incrementally to avoid over-spicing.
Can I make the filling ahead?
Yes. Cook and cool the filling, then refrigerate up to 48 hours. Reheat gently on low heat with a splash of broth to loosen the texture before serving.
Are there good substitutions for dietary needs?
Use ground turkey or a plant-based beef alternative for lower saturated fat or vegetarian diets. Swap dairy toppings for plant-based options and choose corn tortillas for a gluten-free meal.
See also: Beef Tacos
]]>
- Pressing often sacrifices juiciness for marginal contact gains.
- Surface contact helps sear, but heat transfer depends on material and temperature.
- Light, brief presses can help thin patties—but avoid sustained pressure.
- Resting and fat ratio matter more for flavor retention than repeated pressing.
Prep and Cook Time
Preparation: 10 minutes. Cook time: 8–12 minutes. These windows assume 3/4″ to 1″ patties and a preheated cast-iron or grill surface.
Start with a hot surface to maximize searing speed and efficient heat transfer. For technical background on how heat moves through food, see heat transfer.
Yield
This recipe yields four burgers when you divide 1 lb (450 g) of 80/20 ground beef into four even portions. Even weight and thickness give consistent cook times and doneness across patties.
Small adjustments to patty thickness change cook time significantly. Therefore, keep thickness between 3/4″ and 1″ when aiming for an 8–12 minute cook window.
Difficulty Level
Level: Medium. The skill elements are patty shaping, heat control, and knowing when to press (or not). Each factor influences final texture and moisture.
Basic tools include a spatula, instant-read thermometer, and a sturdy pan or grill. Use a thermometer to confirm internal temperature rather than guessing.
Ingredients
Use 1 lb (450 g) ground beef, 80/20 for reliable juiciness. Salt and pepper remain essential to flavor and crust development.
Other items: 1 tsp kosher salt, 1/2 tsp black pepper, 1 tsp smoked paprika (optional), 4 buns, cheese slices, and preferred condiments. For more on ground beef varieties, see ground beef.
Instructions
Form four equal patties about 3/4″ thick and press a shallow dimple in the center to reduce doming. Handle the meat lightly—looser packing helps retain juices and yields a lighter texture.
Preheat a heavy pan or grill to medium-high. A properly preheated surface produces a rapid sear, which promotes the Maillard browning that creates flavor; reference: Maillard reaction.
- Season: Salt and pepper both sides immediately before cooking.
- Sear undisturbed: Place patties on the hot surface and let them cook for about 3 minutes to develop a crust.
- Decide on pressing: For thin patties (under 1/2″), a single, light 10–15 second press can improve contact. For typical 3/4″ patties, avoid pressing beyond a brief contact test.
- Flip once: Flip after 3–4 minutes, then cook another 3–5 minutes to reach about 160°F (71°C) for a safe, juicy finish.
- Cheese and rest: Add cheese after flipping if desired, then rest patties briefly off heat for 2 minutes before serving.
How pressing affects heat and juice
Pressing increases the immediate surface contact area, which slightly improves conduction at the moment of contact. However, meat is a porous, moisture-rich matrix; when pressure displaces liquid, the patties lose internal moisture and heat-carrying fat.
Removing juice lowers the patty’s ability to transfer heat inward via convection of melted fat and liquid. Consequently, sustained pressing can paradoxically slow internal temperature rise and produce dryer texture.
Expert Insight
Also, the seared crust forms rapidly through molecular reactions on the surface; that crust acts as a partial barrier, so further pressure after searing simply forces flavorful juices out. Good searing comes from heat and timing rather than repeated force.
Pro-Caution
Chef’s Notes: Tips for Success
Fat ratio matters: An 80/20 blend tolerates brief pressing better than lean blends. The extra fat preserves mouthfeel even if some rendering occurs.
Use an instant-read thermometer: Target 160°F (71°C) for well-done ground beef safety. Measure the center to avoid undercooked zones.
- Patty shaping: Avoid overworking; gentle forming improves texture.
- Resting: Allow patties to rest 1–2 minutes to redistribute juices.
- Surface choice: Cast iron or a hot grill plate gives the best, consistent crust.
Serving Suggestions
Serve on toasted buns for textural contrast and add moisture with condiments rather than relying on rendered meat juices. Vegetables and acid (tomato, pickles) cut richness and brighten flavor.
For a complete grilling workflow, pair this technique with side timing and bun toasting from other guides on the site. See our full method in Ultimate Burger Grilling Techniques and check resting and serving notes at Burger Resting Tips.
Nutrition Snapshot
Per burger estimate: ~430 kcal, 28 g protein, 25 g carbs, 28 g fat. These values vary with bun choice and added toppings. Use the nutrient snapshot to plan portions and sides.
If you reduce fat or use a low-calorie bun, expect a lower calorie count but also a firmer mouthfeel. Adjust seasoning and resting times to maintain an appealing texture.
FAQ
Q: What exactly is burger pressing?
Burger pressing is applying downward force on a patty with a spatula or press while it cooks. Cooks use it to increase surface contact and attempt faster searing.
However, pressing also squeezes out juices and fat, changing both flavor concentration and moisture levels.
Q: Does pressing make burgers cook faster?
Only slightly in limited cases, such as very thin or uneven patties. Initial increased contact gives a momentary conduction boost, but the tradeoff is moisture loss.
Over a full cook cycle, sustained pressing can slow internal heating by removing insulating fat and moisture, which reduces thermal conductivity into the core.
Q: Will pressing improve browning?
A brief press can help thin sections sear more evenly. Browning primarily depends on surface temperature, moisture removal at the surface, and correct timing.
Deep, repeated pressing tends to force out the fats that aid caramelization, producing a less flavorful result despite a flatter appearance.
Q: Are there times pressing helps?
Yes. For thinner patties or those that are irregular in shape, one short press early helps ensure even contact. Use gentle pressure for 10–15 seconds only.
For standard 3/4″ patties and higher-fat blends, avoid pressing entirely and rely on a hot surface and correct timing for the best texture.
Q: How do I keep burgers juicy without pressing?
Control fat ratio (80/20 recommended), avoid overworking the meat, sear on high heat, flip once, and rest briefly after cooking. These steps preserve juices and maximize flavor retention.
Also consider bun-to-meat balance and sauce placement to keep each bite moist without relying on internal juices alone.
Wrapping Up
Pressing burgers is a tactical choice with clear tradeoffs: short-term contact gains versus long-term moisture and flavor loss. Use a light, deliberate press only when patties are thin or uneven, and never as a routine during the entire cook.
Prioritize proper patty shaping, fat ratio, and surface temperature to achieve reliable sears and juicy interiors. For expanded grilling techniques, visit Ultimate Burger Grilling Techniques to refine your workflow and timing.
See also: Pressing burgers
]]>
- At a glance: smash burgers rely on surface contact, high heat, and the right fat ratio.
- Crust formation: the Maillard reaction produces complex savory compounds.
- Technique matters: quick smashing, minimal handling, and proper seasoning drive results.
Why smash works: surface, heat, and chemistry
The smash burger technique maximizes surface contact between meat and hot metal to force rapid browning. That browning is the Maillard reaction, a chemical process that turns simple amino acids and sugars into dozens of flavorful compounds.
High temperature and thin thickness permit quick crust formation without overcooking the interior. That contrast between a crisp exterior and a tender center creates the defining mouthfeel of a great smash burger.
Key elements that control flavor
Fat content, grind size, and meat temperature determine both flavor intensity and juiciness. Use freshly ground beef at roughly an 80/20 lean-to-fat ratio for balanced flavor and effective rendering.
Equipment also matters: a heavy flat surface gives even heat transfer. A seasoned cast-iron skillet or steel griddle stores heat and resists temperature drop when patties hit the surface.
Ingredients and prep: what to choose and why
Select quality ground chuck or an appropriate blend labeled for burgers; the small amount of connective tissue and intramuscular fat improve flavor release during cooking. For reference, see general notes on ground beef composition and labeling.
Keep meat cold until the moment you cook it. Cold fat holds its shape until it hits the hot surface, allowing controlled rendering and reducing premature flare-ups. Form loose portions; do not compact them.
Cooking technique: step-by-step operational details
Preheat the pan until it is very hot. A hot surface initiates browning immediately and prevents the patty from sticking; maintain a consistent heat source throughout the cook.
Place loosely formed balls of meat on the surface and press firmly with a sturdy, flat spatula to achieve about 1/4-inch thickness. Hold pressure briefly to increase contact area and then release; the patty should not be continuously compressed during the full cook time.
Seasoning and timing
Season the exposed surface immediately after smashing; salt helps extract surface moisture that then aids the Maillard reaction. Avoid salting too long in advance, which can draw excessive moisture into the meat.
Cook the first side undisturbed for 2 to 3 minutes, until the edges brown and crispen. Flip once, add cheese if desired, and finish for another 1 to 2 minutes for medium to medium-rare, depending on thickness.
Cheese and assembly
Place cheese on the patty immediately after flipping to encourage rapid melting into the crusted surface. Use thin-sliced cheeses that melt quickly to preserve the burger’s short cook time and textural contrast.
Toast buns in butter until lightly crisp to add a fat barrier that keeps the bun from sogging. Layer acidic elements—pickles or a tangy sauce—to cut through fat and sharpen perceived flavor.
Tips for success
Handle meat minimally; overworking protein creates dense texture. Form loose portions that will compress when smashed, preserving interior moisture.
Use a firm, flat spatula and apply even pressure. A second spatula or a specialized press helps maintain flatness without tearing the crust.
Expert Insight
Keep the pan hot between batches. If the surface cools too much, the patties will steam rather than sear and the crust will suffer. Allow the pan to regain temperature for 30–60 seconds between batches.
Pro-Caution
Variation ideas and experimentation
Try different blend ratios or introduce a small percentage of brisket or short rib to increase flavor complexity. Test cheeses like sharp cheddar, smoked gouda, or pepper jack for different melting profiles and taste notes.
Adjust smash pressure and hold time to tune crispness. Heavier pressure yields more crust and less interior thickness; lighter pressure retains slightly more juiciness but reduces the characteristic sear.
Serving suggestions and pairing
Keep toppings minimal to let the crusted patty remain the star. Classic pairings include thin-sliced red onion, pickles, and a tang-forward sauce that balances fat.
Serve with fries, coleslaw, or a simple green side to add texture contrast. A cold, acidic beverage works well to cut through the burger’s richness and refresh the palate.
Practical recipe snapshot
Prep time: 10 minutes. Cook time: 8 minutes total for 4 patties. This timing assumes a very hot pan and thin smash thickness.
Yield: Four 4-inch smash patties. Use 1 lb (450 g) ground chuck at 80/20 for optimal fat rendering and mouthfeel.
Nutrition (per serving)
| Nutrient | Per Serving |
|---|---|
| Calories | 650 kcal |
| Protein | 38 g |
| Carbohydrates | 40 g |
| Fat | 38 g |
For techniques on handling beef and grinding at home, visit our internal guide on Ultimate Beef Cooking Guide. To practice pressing and timing, see our step-by-step drills on smash burger techniques.
FAQ
What makes a smash burger different from a regular burger?
Smash burgers use high heat and immediate pressure to create a thin patty with extensive surface contact. This method favors rapid Maillard browning, which produces intense crust flavors not typical of thicker patties.
What fat ratio should I use?
Around 80/20 lean-to-fat gives the best balance of flavor and juiciness for smash burgers. Higher fat renders more liquid fat that bastes the meat and deepens flavor, while too-lean blends can dry out quickly.
When should I season the meat?
Season the exposed surface immediately after smashing. Salt applied at that moment helps surface moisture promote browning without drawing out excessive internal juices before cooking.
Can I make smash burgers on a griddle at home?
Yes. Use a heavy griddle or a well-seasoned cast-iron skillet and preheat until very hot. Maintain temperature between batches and use a sturdy spatula for consistent pressure.
How do I keep the bun from getting soggy?
Toast buns in butter until crisp and serve hot. A light barrier of melted butter or a thin sauce layer helps prevent moisture migration from the patty into the bun.
The way forward
Understanding the interaction of heat, surface area, and fat transforms how you approach burger building. Small technique adjustments yield large flavor gains.
Practice timing, maintain heat, and treat each smash as a focused experiment in surface chemistry. With deliberate technique you can consistently reproduce restaurant-quality smash burgers at home.
See also: smash burger
]]>