- High heat, fast cook: Sear to brown while preserving interior texture.
- Sauce balance: Use soy, oyster, sugar, and a cornstarch slurry for gloss and cling.
- Mise en place: Slice beef thin, blanch broccoli, and stage aromatics to speed wok work.
- Serve hot: Plate quickly over rice or noodles to preserve texture.
Beef stir-fry: Overview and What You Gain
This beef stir-fry pairs thinly sliced beef with crisp broccoli in a glossy, savory sauce designed to cling. The method emphasizes searing technique, sauce chemistry, and timing to maintain color and bite.
Stir-frying demands controlled high heat and rapid movement to get ideal texture. For background on the core technique, review the stir-frying method on stir-frying.
Prep and Cook Time for Beef stir-fry
Preparation: 15 minutes. Cooking: 10 minutes. Short cooking keeps broccoli vibrant and beef juicy.
Work in mise en place: slice meat, mix the sauce, and blanch broccoli before you heat the wok. This sequencing prevents rushed mistakes during the high-heat portion.
Yield and Difficulty for Beef stir-fry
This recipe yields four portions suitable for family dinners or meal prep. Portions scale easily when you increase protein and vegetables proportionally.
Difficulty rates as medium because timing and high-heat technique require attention. With practice, these steps become intuitive and repeatable.
Ingredients
Use fresh, high-quality ingredients to get the clearest flavors. Substitute mindfully if you change key components like soy or oyster sauce.
For context on main components, consult the beef and broccoli references.
- 12 oz flank steak, thinly sliced against the grain
- 4 cups fresh broccoli florets
- 3 tbsp vegetable oil, divided
- 2 cloves garlic, finely minced
- 1 tsp fresh ginger, grated
- 1/4 cup low sodium soy sauce
- 2 tbsp oyster sauce
- 1 tbsp toasted sesame oil
- 1 tbsp brown sugar
- 1 tsp cornstarch, dissolved in 3 tbsp water (slurry)
- 1/4 tsp crushed red pepper flakes (optional)
- 2 green onions, sliced diagonally for garnish
- 1 tsp toasted sesame seeds (optional)
- Steamed jasmine rice or cooked noodles, for serving
Instructions: How to Build a Reliable Beef stir-fry
Execute the recipe in clear stages: marinate, blanch, sear, aromatics, combine, and finish. Each stage isolates a single variable so results remain consistent.
Keep ingredients at hand and operate at high heat only once the pan and oil are properly hot. Timing is the main control knob for final textures.
Step-by-step Method
Marinate the beef: Toss sliced flank with 1 tbsp soy sauce and 1 tsp cornstarch. Let rest 10 minutes to tenderize and help the meat accept the sauce later.
Prepare the sauce: Whisk the remaining soy sauce, oyster sauce, toasted sesame oil, brown sugar, and red pepper flakes. Reserve until needed.
Blanch the broccoli: Boil in salted water for 1–2 minutes until bright green. Shock in ice water to halt cooking and preserve color and crispness.
Stir-fry the beef: Heat 2 tbsp oil until shimmering. Add beef in a single layer and sear quickly until browned but still slightly pink inside, about 2–3 minutes. Work in batches to avoid steaming.
Sauté aromatics: Add remaining oil, then garlic and ginger. Stir 20–30 seconds until fragrant but not burnt.
Combine and finish: Return beef and broccoli to the wok. Pour sauce over and toss to coat evenly. Stir the cornstarch slurry and add it slowly while stirring until the sauce becomes glossy and clings to the ingredients, about one minute.
Garnish and serve: Remove from heat and sprinkle green onions and sesame seeds. Serve immediately over jasmine rice or noodles to preserve texture.
Technique Notes for Beef stir-fry
Searing completes browning through the Maillard reaction. Hold the pan hot and avoid crowding to maintain high surface temperature and caramelization.
Use a neutral oil with a high smoke point for searing, and add toasted sesame oil at the end for aroma rather than primary cooking oil. This preserves flavor and prevents burnt sesame notes.
Tips for Success with Beef stir-fry
Small adjustments improve reproducibility: uniform slices, a dry surface on the beef, and a fully pre-heated pan are essential. These steps reduce steam that prevents proper searing.
Adjust the sauce ratio to taste. If you prefer less salt, use a lower-sodium soy or reduce the soy by a tablespoon and compensate with a touch more oyster sauce or sweetener.
- Cut thin and against the grain: Short fibers give a tender bite.
- Do not overcrowd: Cook in batches to maintain surface temperature and good browning.
- Control the slurry: Add cornstarch mix gradually to avoid over-thickening.
- Blanch first: Preserves color and reduces final wok time.
 Expert Insight
Rest briefly between tips and the cautionary note to keep workflow safe and practical. Keep kitchen tools dry and a towel handy for quick cleanups.
 Pro-Caution
Serving Suggestions and Pairings for Beef stir-fry
Serve this stir-fry immediately to preserve texture and temperature. Hot rice or noodles soak up the sauce and complete the dish.
Pair with light sides such as a quick cucumber salad or pickled vegetables for acid contrast. A warm jasmine tea complements the savory profile.
For additional context on common seasonings used here, consult the soy sauce article.
Related recipes: try other protein variations on this technique via internal recipe pages: Beef and Broccoli recipe and the curated tag collection Beef Stir-Fry tag.
Nutrition per Serving
This recipe offers lean protein and vitamin-rich broccoli; calories vary with rice or noodles added. You can lower fat by reducing the oil and omit sugar for fewer carbs.
Adjust oil and sugar to match dietary goals. For accurate tracking, weigh ingredients and use a nutrition calculator tied to your portions.
| Nutrient | Per Serving |
|---|---|
| Calories | 320 kcal |
| Protein | 28g |
| Carbohydrates | 15g |
| Fat | 14g |
FAQ
What cut of beef should I use?
Use quick-cooking, relatively lean cuts such as flank, skirt, or sirloin. These cuts take a thin slice well and remain tender when cooked fast.
Slice against the grain to shorten muscle fibers and improve bite. Partially chilling the meat helps you slice thin and uniform pieces.
How do I keep the broccoli bright green?
Blanch florets 1–2 minutes in boiling water, then shock them in ice water immediately. This preserves color and stops carryover cooking.
Finish by tossing the blanched broccoli briefly in the wok; avoid overcooking during the final toss to maintain crispness.
Can I make this gluten-free?
Yes. Use tamari or a certified gluten-free soy sauce and ensure your oyster sauce is gluten-free or substitute with a mushroom-based umami alternative. Check labels on all condiments due to formulation differences.
For soy-free options, reduce soy, add extra oyster or mushroom umami, and taste as you go to maintain balance.
How do I get a glossy sauce that clings?
A cornstarch slurry added at the end gives a glossy, clingy finish. Stir the slurry before adding and pour it slowly while stirring to control thickness.
Cook the slurry just until it becomes translucent and glossy; overcooking breaks down the starch and thins the sauce.
Can I swap beef for another protein?
Yes. Thinly sliced chicken, pork, or firm tofu work well with the same method; adjust cook time to match the protein. For tofu, press to remove moisture and pan-fry until golden before adding sauce.
Keep the same staging and high-heat finish to preserve texture across protein swaps. The technique translates directly when you maintain sear and slurry timing.
With these seven pro techniques, you can reliably produce a savory, restaurant-style beef and broccoli stir-fry at home. Practice the timing and heat control; the method rewards repetition with consistent, flavorful results.
See also: beef stir-fry
]]>
- Even cuts produce uniform cooking and consistent browning.
- High heat (425°F/220°C) encourages caramelization while preserving moisture.
- Single-layer roasting prevents steaming and yields crispy edges.
- Finish bright with acid or fresh herbs to lift roasted richness.
Roasted Vegetables: Fundamentals and science
Roasting concentrates vegetable flavor by driving off surface moisture and enabling browning reactions. Proper heat and surface contact encourage both sugar-driven caramelization and amino-acid reactions that change aroma and taste.
Understanding the physical chemistry helps predict outcomes. For quick reference on the cooking method, see roasting for an overview you can trust.
Key techniques that change results
Start with dry produce; excess moisture inhibits browning and encourages steaming. Pat vegetables dry after washing and use a light coating of oil so each surface reaches searing temperature rapidly.
Use a rimmed metal baking sheet for direct conduction and steam escape. Avoid covered dishes, which trap moisture and slow crust formation.
Prep and Cook Time
Preparation: 15 minutes of focused work achieves uniform sizes and balanced seasoning for consistent results. Consistent piece size equals consistent doneness for your roasted vegetables.
Cooking: 30–40 minutes at 425°F (220°C) typically works for a mixed medley. Dense roots may need a 10–15 minute head start; monitor from 25 minutes to prevent burning.
- Total: 45–55 minutes
- Serves: 4–6 as a side
- Difficulty: Easy — repeatable across skill levels
Ingredients and smart swaps
Choose firm, seasonal produce for the best texture and flavor. A typical base includes broccoli florets, rainbow carrots, bell peppers, golden beets, and red onion for variety and color.
Begin with 3 tbsp extra virgin olive oil as a baseline, then add a balanced spice mix: smoked paprika, garlic powder, cumin, sea salt, and freshly ground black pepper. Read about oil types and stability at olive oil.
- 2 cups broccoli florets
- 2 cups rainbow carrots, peeled and cut
- 1 cup red bell pepper, 1-inch chunks
- 1 cup golden beets, peeled and cubed
- 1 medium red onion, thick wedges
- 3 tbsp extra virgin olive oil
- 1 tsp smoked paprika
- 1/2 tsp garlic powder
- 1/2 tsp ground cumin
- 1 tsp sea salt, adjust to taste
- Black pepper, freshly ground
- 2 tbsp chopped fresh parsley, optional
Instructions
Follow a clear sequence: preheat, size cuts uniformly, toss with oil and seasonings, spread in a single layer, then roast until edges caramelize. This workflow minimizes guesswork and maximizes browning for roasted vegetables.
Work on a rimmed sheet pan with parchment or a light oil coating for even heat. If vegetables crowd, use a second pan or roast in batches to preserve airflow and crisping.
Preheat and oven rationale
Set the oven to 425°F (220°C) to promote surface browning while keeping interiors tender. High, steady heat accelerates crust formation without long drying times.
For faster searing, place an empty sheet pan in the oven while it heats; add the oiled vegetables to the pre-heated pan to increase conduction on contact. See more on conduction and surface heat in standard cooking references.
Cutting, sizing, and staging
Chop vegetables into uniform pieces; similar mass equals similar cook time. For dense roots, make pieces slightly smaller or give them a head start so the mix finishes at the same moment.
Group vegetables by density when tossing. If using sweet potatoes or beets, consider a 10-minute head start before adding softer items like peppers and zucchini to the pan.
Tossing, spacing, and roasting
Mix oil and dry seasonings in a large bowl, then toss vegetables so every surface receives a light coat. Too much oil inhibits browning; too little leaves pieces dry and uneven.
Spread the vegetables into a single layer with space between pieces. Roast for 30–40 minutes, stirring once halfway through to ensure even color and texture for the roasted vegetables medley.
Resting and finishing
Remove the pan when pieces show golden, crispy edges and a tender center. Let the tray rest for 3–5 minutes to let flavors settle and juices redistribute.
Finish with a bright element: a squeeze of lemon or a splash of aged balsamic lifts roasted depth. Fresh herbs added after roasting retain vibrancy and avoid wilting.
Tips for success
Choose produce that is firm, dry, and colorful; ripeness impacts sugar content and browning. Overripe vegetables release extra moisture and can steam instead of roast.
Cut pieces into consistent shapes to achieve uniform doneness. Mixing crisp and soft textures creates contrast on the plate and improves appeal for diners.
Expert Insight
Spice variations: Try a Mediterranean mix with oregano and lemon zest, or a North African profile with cumin and coriander. Small changes shift the dish profile dramatically.
Toast crushed nuts or seeds and sprinkle them just before serving for crunch. For creaminess, add a dollop of labneh, yogurt, or hummus on the side to balance textures.
Expert Insight
Make-ahead strategy: roast, cool on a rack, refrigerate, then reheat in a hot oven for 8–10 minutes to restore crisp edges. This approach saves time while preserving texture.
Pro-Caution
Pro-Caution
Serving suggestions
Serve the medley over warm grains like quinoa or farro for a complete vegetarian main. The texture of roasted vegetables pairs well with chewy grains and a bright finishing acid.
For a composed plate, add toasted almonds, pumpkin seeds, or crumbled feta. A finishing drizzle of high-quality olive oil or a light acid brightens the entire dish.
Explore internal resources for recipe variations and pairing ideas: see our Roasted Vegetables recipes collection and the roasting techniques guide for step-by-step visuals.
Nutritional snapshot
Roasted vegetables deliver fiber, vitamins, and phytonutrients while remaining moderate in calories when prepared with controlled oil. The roasting method preserves many heat-stable nutrients while increasing palatability.
Per serving values vary by mix, but a typical side provides roughly 140 kcal, 4 g protein, and beneficial micronutrients. Include diverse colors to maximize nutrient variety; see general produce information at vegetable.
| Nutritional Info (per serving) | Amount |
|---|---|
| Calories | 140 |
| Protein | 4g |
| Carbohydrates | 18g |
| Fat | 7g |
Technique focus: caramelization and flavor chemistry
Caramelization of natural sugars yields sweet, toasty notes and color development on vegetable surfaces. The rate depends on sugar concentration and surface temperature for each vegetable type.
Combine sugar-driven caramelization with the Maillard reaction to produce complex savory flavors. For mechanism specifics, consult caramelization for temperature guidance.
Finishing touches and presentation
Serve the medley on a warm platter and scatter fresh herbs to inject aromatic freshness. Contrast of color and a final acid lift make dishes look composed and balanced to the eye and palate.
Use a shallow bowl or rustic board for family-style presentation. Garnish strategically to highlight texture and avoid overloading the plate with sauce that masks crisp edges.
FAQ
How do I prevent soggy roasted vegetables?
Use a single layer on a hot sheet pan and avoid overcrowding the pan. Lightly coat pieces with oil and ensure they are dry before roasting to promote browning rather than steaming.
Which vegetables should I roast together?
Group by density: roast root vegetables together and add tender vegetables later. Alternately, cut dense items smaller or give them a 10–15 minute head start in the oven for even finishing.
Can I roast frozen vegetables?
Frozen vegetables release extra moisture when thawed; pat them dry and increase oven temperature slightly. Roast on a hot, well-oiled pan and expect a shorter final cook time and slightly different texture.
What oils and seasonings work best?
Choose oils with a smoke point above your roasting temperature for stability. Olive oil is standard; experiment with spices like smoked paprika or herbs like rosemary to match your meal profile.
Are roasted vegetables healthy?
Yes. Roasting preserves many nutrients while enhancing flavor, which can increase vegetable intake. Use moderate oil amounts and pair with whole grains or legumes for balanced macronutrients.
Final notes
Roasting is a reliable technique to transform simple vegetables into a memorable dish. Small adjustments in cut size, heat, and seasoning deliver predictable, repeatable outcomes for roasted vegetables.
Practice with seasonal produce, experiment with spice blends, and apply the timing principles above. With these fundamentals, any cook can elevate roasted vegetables from a side to the meal’s highlight.

See also: Roasted Veggies
See also: roasted vegetables
]]>There is a precise transformation when vegetables hit a very hot pan and develop a golden, savory crust. Searing concentrates sugars and amino acids, producing deeper aromas and a satisfying texture that elevates simple vegetables into standout components of a meal.
- Key control points: heat, moisture, and surface contact.
- Best vegetables: dense, low-moisture types that brown, not steam.
- Tools matter: heavy pans retain heat and deliver even searing.
This guide focuses on reliable techniques, backed by culinary chemistry, to help cooks achieve consistent caramelization and balanced browning. The aim is practical mastery: predictable results, repeatable textures, and bold flavor with everyday ingredients.
Prep and Cook Time
Preparation: 15 minutes. Cooking: 10–12 minutes. These windows reflect typical batch sizes and moderate pan load for even color development.
Plan for about 25–30 minutes total when you include staging and resting. Allowing a little extra time for pan heating and batch cooking prevents crowding and ensures reliable searing.
Yield and Difficulty
Yield: Serves 4 as a side dish. Portioning depends on vegetable density; high-water veggies yield less final weight after searing.
Difficulty: Medium. The technique requires confident heat control and timing, but the learning curve is short with consistent practice.
Ingredients
Gather uniform pieces for even cooking. Use dense vegetables such as carrots, Brussels sprouts, eggplant, bell peppers, and zucchini, cut into consistent sizes to ensure a single sear cycle often suffices.
Use a high smoke-point oil such as refined olive oil or avocado oil, sea salt, freshly ground black pepper, and optional sweeteners like a light drizzle of honey or maple syrup for enhanced surface gloss. Fresh garlic and thyme are common finishers.
Why Searing Works: Science in Practice
Searing relies primarily on two chemical paths: caramelization of sugars and the Maillard reaction between amino acids and reducing sugars. Both produce aromatic compounds and brown pigments that create flavor depth.
Understanding these reactions helps you control variables: higher surface temperature speeds browning, while moisture inhibits it. Read more about the science of caramelization and the Maillard reaction for detailed mechanisms and temperature ranges.
Tools and Equipment
Choose a heavy-bottomed pan to stabilize surface temperature; a well-seasoned cast-iron skillet or heavy stainless pan works best. Thin pans lose heat when you add cold vegetables and promote steaming instead of searing.
Use tongs or a flexible spatula to turn pieces with minimal disturbance. A thermometer is useful for training your eye: aim for a pan surface temperature in the medium-high range so the oil shimmers without smoking.
Ingredients — Detailed Notes
Vegetable selection: Favor low-moisture, firm vegetables that hold shape under high heat. Mushrooms, asparagus, and root vegetables bloom under searing when cut to uniform thickness.
Oils and fats: Use oils with stable smoke points; refined olive oil and avocado oil tolerate the heat needed for a clean sear. Butter adds flavor but use it near the end to avoid burning.
Instructions
1. Prepare the vegetables by washing, drying thoroughly, and cutting into uniform pieces. Drying removes surface moisture that would otherwise steam the surface and prevent browning.
2. Preheat your skillet on medium-high for 2–4 minutes. The pan should be hot enough that oil shimmers immediately on contact but not so hot that it smokes persistently; maintain steady medium-high heat.
3. Add oil and swirl to coat the surface, then introduce vegetables in a single layer without overcrowding. Crowding traps steam; cook in batches if needed to preserve surface contact and heat.
4. Let vegetables sit undisturbed for 3–5 minutes to form a deep, fragrant crust, then flip or toss to brown remaining sides. Add aromatics such as garlic and thyme during the final 1–2 minutes so they perfume the dish without burning.
Stepwise Tips for Each Phase
Drying and cutting: Uniform pieces equalize cooking time. Slice denser items thinner when needed to match softer items.
Finishing: If you want a glossy glaze, add a light drizzle of maple syrup or honey at the last minute and toss gently; heat will encourage surface caramelization without becoming cloying.
Technique Enhancements
Control three variables: surface temperature, pan load, and moisture. Keep the pan hot, give pieces breathing room, and pre-dry vegetables to prevent steaming. These controls yield consistent caramelization across batches.
When reheating seared vegetables, use a hot oven or a hot pan to revive the crust quickly. Avoid microwaving, which will soften surfaces and degrade the caramelized layer.
Expert Insight
After the tip, give yourself a moment to let flavors settle before finishing. A brief rest off heat helps volatile aromatics mellow and harmonize with the caramelized notes on the surface.
Pro-Caution
Tips for Success
Pat vegetables dry: Moisture is the main inhibitor of browning; use a clean towel or paper towels to remove surface water before oiling. Less water equals more direct heat contact and faster browning.
Patience pays: Resist frequent stirring. Let pieces remain in contact with the hot surface until a golden crust forms. Turn only when a clear, brown edge has developed.
Heat Control and Oil Choice
Adjust heat as needed: ramp up to start, then stabilize to sustain even browning without burning. Use oils with neutral flavor and high smoke points for the initial sear; add butter later if you want richness.
For delicate vegetables, sear on slightly lower heat and finish in a warm oven to gently equalize internal temperature without compromising the exterior.
Serving Suggestions
Serve seared vegetables immediately for best texture and visual impact. Finish with a bright squeeze of lemon juice or a scatter of fresh herbs to contrast the deep, caramelized notes.
Pair seared vegetables with roasted proteins, grain bowls, or salads. A sprinkle of toasted nuts or a crumble of tangy cheese can add contrast and elevate the dish into a composed course.
Nutritional Snapshot
The following table provides a quick per-serving estimate for a mixed vegetable side. Values vary by vegetable mix and added oil; this table assumes moderate oil use and common vegetables.
Use portion control and fresh ingredients to keep calories and fat aligned with your meal plan while maximizing fiber and micronutrients from the vegetables.
| Nutrient | Per Serving |
|---|---|
| Calories | 110 kcal |
| Protein | 2 g |
| Carbohydrates | 15 g |
| Fat | 6 g |
FAQ
What is the difference between caramelization and the Maillard reaction?
Caramelization breaks down sugars under heat and yields sweet, nutty flavors and brown pigments. The Maillard reaction involves amino acids and reducing sugars and produces more savory, complex aromas.
Both occur during high-heat searing but at different temperatures and contribute distinct flavor layers that together create the browned character of seared vegetables.
Which vegetables will not sear well?
High-water-content vegetables like cucumbers and lettuce will not sear effectively; they release water and steam instead of forming a crust. Use dense or moderately firm vegetables when you want reliable browning.
When you have softer vegetables, consider roasting or grilling where dry heat over time removes moisture and concentrates sugars more gradually.
Can I use butter for searing?
Use butter for flavor but add it late in the cook to avoid burning. Start with a high smoke-point oil for the initial sear, then finish with a pat of butter for aroma and richness in the final minute.
This hybrid approach balances heat stability and the desirable flavor compounds found in browned butter without introducing bitter burnt notes.
How do I prevent blackened bits that taste bitter?
Black burned bits result from excessive heat or extended contact after sugars and proteins have charred. Lower the heat slightly, reduce contact time, or remove burnt pieces promptly to avoid bitterness.
Scrape the pan between batches and maintain a hot but not smoking surface to get deep color without burning.
Is searing vegetables healthy?
Searing concentrates flavor and reduces the need for heavy sauces or excessive salt, which can support healthier meals. Use measured oil and pair seared vegetables with lean proteins and whole grains for balanced nutrition.
Choose high-quality oils and keep portions mindful to combine deliciousness with sensible macro balance.
Insights and Closing Thoughts
Searing vegetables creates concentrated flavor with a satisfying texture when you control heat, moisture, and surface contact. The technique rewards precision: consistent cuts, a hot pan, and restrained handling deliver repeatable results.
Practice batch control and experiment with finishing elements—acid, herbs, or a modest sweetener—to build complexity. With a few focused trials you will gain reliable timing and flavor intuition to make seared vegetables a reliable staple in your cooking repertoire.
See also: vegetable searing
]]>
- Ready in 25 minutes: Fast prep and high-heat cooking preserve color and texture.
- Tender beef: Slice against the grain and use a short marinade to protect juiciness.
- Glossy sauce: A cornstarch slurry gives that restaurant-style sheen and cling.
- Work in batches: Avoid overcrowding to keep the pan hot and promote caramelization.
Exploring Beef Varieties for Beef Stir-Fry Tenderness
Pick a cut that sears quickly and slices thinly for the best beef stir-fry results. Flank, sirloin, and eye of round are common, affordable choices that work well when cut against the grain.
Buy well-chilled meat and remove silverskin for cleaner slices and more even cooking. For technical context on meat cuts, consult beef on Wikipedia.
Quick Facts for Beef Stir-Fry
This beef stir-fry completes in about 25 minutes: roughly 15 minutes to prep and 10 minutes to cook. The method scales easily for 2 to 6 servings without changing technique.
Keep mise en place finished before heating the pan since the sequence runs fast once the wok is hot. A screaming-hot pan gives sear and flavor instead of steam.
Prep and Cook Time
Preparation: 15 minutes. Slice beef thinly, blanch broccoli, and measure the sauce to keep the process smooth. Chilling the beef 20–30 minutes makes slicing cleaner.
Cooking: 10 minutes. Sear beef quickly, stir-fry aromatics, then finish with the sauce and slurry to glaze the dish.
Yield
Serves 4 as a main with rice or noodles. Increase protein and vegetables proportionally for larger groups to keep flavor balance.
Leftovers keep one day refrigerated. Reheat briefly over medium heat to avoid drying the beef and to preserve the sauce’s texture.
Difficulty Level
Easy–Medium: The method requires attention to timing and pan temperature but uses straightforward steps. Beginners benefit from practicing thin slicing and hot-pan control.
After a few tries, you can vary vegetables and sauces while retaining the same sear-and-toss approach for consistent beef stir-fry outcomes.
Ingredients for Beef Stir-Fry
Use the ingredients below for balanced flavor and a glossy finish. Cornstarch serves both in the marinade and as a finishing slurry to improve sauce adhesion.
Substitutions work well: tamari for gluten-free soy, low-sodium broth to control salt, and hoisin or mushroom-based sauces for depth when oyster sauce is unavailable.
- 12 ounces beef (flank steak or sirloin), thinly sliced against the grain
- 4 cups fresh broccoli florets
- 3 tablespoons vegetable oil, divided
- 3 cloves garlic, minced
- 1 tablespoon fresh ginger, finely grated
- ¼ cup low-sodium soy sauce
- 2 tablespoons oyster sauce (or hoisin for vegetarian)
- 1 tablespoon cornstarch
- ½ cup beef broth (or water)
- 1 teaspoon toasted sesame oil
- 1 teaspoon brown sugar
- 1 teaspoon cornstarch mixed with 2 tablespoons water (slurry)
- Optional garnish: toasted sesame seeds and sliced scallions
Step-by-Step Instructions for Beef Stir-Fry
Follow the sequence below to preserve texture and pace. Prep everything in small bowls to move quickly once the pan is hot for a consistent beef stir-fry every time.
Keep the slurry separate and add it at the end to achieve that glossy restaurant glaze. Work in batches if needed to avoid lowering pan temperature.
- Marinate the Beef: Toss thin beef strips with 1 tablespoon soy sauce, 1 teaspoon cornstarch, and a pinch of black pepper. Rest 10 minutes to tenderize and season the surface.
- Blanch the Broccoli: Boil water and blanch florets 1–2 minutes until bright green. Shock in ice water to halt cooking and preserve crunch, then drain well.
- Prepare the Sauce: Whisk remaining soy sauce, oyster sauce, beef broth, brown sugar, and sesame oil. Keep this nearby for quick access while cooking.
- Sizzle the Beef: Heat 2 tablespoons oil in a wok or heavy skillet until shimmering. Add beef in a single layer and sear 1 minute without stirring to build crust. Toss and finish 1–2 minutes until nearly done, then remove to rest.
- Stir-Fry Aromatics and Broccoli: Add remaining oil, then garlic and ginger; cook 20 seconds. Add broccoli and stir-fry 1–2 minutes so the florets pick up aromatics but stay crisp.
- Combine and Thicken: Return beef to the pan, pour in the sauce, then the cornstarch slurry. Stir until the sauce thickens and glazes the ingredients, about 1–2 minutes.
- Final Touch: Remove from heat and garnish with sesame seeds and scallions. Serve hot over rice or noodles to catch the sauce.
Chef’s Notes and Tips for Beef Stir-Fry
Cut Against the Grain: Slicing against the grain shortens muscle fibers and yields a tender bite. Use a very sharp knife and chill the steak briefly for cleaner slices.
High Heat Matters: A screaming-hot pan gives caramelization rather than steam. Preheat the wok or skillet for several minutes and add oil only when the pan is hot.
Expert Insight
When you cook in batches, each piece gets even heat and builds flavor. Overcrowding reduces temperature and yields steamed rather than seared beef.
Pro-Cautions for Beef Stir-Fry
Do not add wet ingredients too early; extra water drops the pan temperature and causes steaming. Always drain blanched vegetables thoroughly and add them after aromatics have sizzled.
Use a thermometer only if unsure: oil should shimmer and the pan should give an audible sizzle when ingredients hit the surface. That sound is a reliable cue for correct heat.
Pro-Caution
Serving Suggestions for Beef Stir-Fry
Serve this beef stir-fry over steamed jasmine or brown rice to soak up the sauce. For a lighter plate, use cauliflower rice or quick-cooked soba noodles.
Add a crisp side like cucumber salad or an Asian slaw to introduce acid and contrast. Garnish with sesame seeds and scallions for texture and visual appeal.
Nutrition and Variations for Beef Stir-Fry
This dish balances protein and vegetables with moderate carbohydrates from rice. Use reduced-sodium soy and broth to keep sodium in check while preserving umami.
Swap vegetables freely: snow peas, snap peas, or bell peppers work well. For gluten-free options, use tamari and check oyster sauce labels for hidden wheat.
| Nutrient | Per Serving |
|---|---|
| Calories | 320 kcal |
| Protein | 28g |
| Carbohydrates | 15g |
| Fat | 15g |
For ingredient science on thickening agents and gelatinization, see cornstarch. For equipment differences and care, consult the wok reference.
Related Techniques and Background for Beef Stir-Fry
Stir-frying depends on rapid heat transfer and uniform bite-sized pieces to cook food evenly and quickly. The method uses high heat, continuous motion, and short cook times to protect texture.
Further reading on the technique is available at the stir-frying entry, and botanical notes on the vegetable selection are in the broccoli article.
For practical recipes and related options on this site, see our internal collections: Beef Stir-Fry recipes and Stir-fry techniques. These internal pages expand on variations and step photos.
FAQ
What cut of beef is best for stir-fry?
Flank steak and sirloin give a good balance of flavor and fast cooking. Eye of round works when marinated and sliced thinly, but avoid very fatty cuts for this method.
Slicing thin and against the grain reduces chew and makes the beef stir-fry feel more tender even with leaner cuts.
How do I keep broccoli crisp and bright?
Blanch florets 1–2 minutes and shock them in ice water to stop cooking. Drain thoroughly and stir-fry briefly on high heat so florets stay crunchy and vibrant.
Draining well is essential; excess water causes steaming and dulls color while reducing surface temperature for browning.
Can I prepare components ahead of time?
Yes. Marinate and slice beef up to 2 hours ahead and keep refrigerated. Chop vegetables and mix the sauce in advance to speed the final assembly.
Store components separately so you reheat only what needs warming and avoid soggy vegetables before tossing in the hot pan.
What should I do if my pan steams the food instead of searing?
Heat the pan longer, remove excess moisture from ingredients, and avoid overcrowding. Work in batches and ensure oil shimmers before adding protein.
The correct indicator is an immediate sizzle and rapid browning; if you hear no sizzle, increase heat and wait before adding food.
How do I make the sauce gluten-free?
Replace soy sauce with tamari and use a gluten-free oyster sauce or mushroom-based alternative. Cornstarch is naturally gluten-free and still thickens effectively.
Check labels on packaged sauces for hidden wheat and choose certified gluten-free products when needed for strict diets.
See also: explore the beef stir-fry recipe index on this site for variations and step-by-step photos.
See also: beef stir-fry
]]>Savor a warm plate of chicken fried rice that balances tender chicken, separated grains, and a vibrant mix of vegetables. Follow focused technique and timing to get consistent texture and bold, balanced flavor every time.
- Use chilled, day-old rice for non-sticky grains and a better sear.
- High heat and quick tossing prevent steaming and encourage light caramelization.
- Prep everything first so movement at the wok stays deliberate and fast.
- Adjust sauces at the end to control salt and color without overcooking.
Prep and Cook Time
Preparation: 15 minutes. Focus on cutting vegetables to uniform size and trimming chicken into consistent bite-sized pieces for even cooking.
Cooking: 20 minutes. Work on high heat with a wide pan to allow steam to escape and to develop light browning on the rice and protein.
Yield
Serves 4. This recipe produces roomy portions suitable for a family meal or for packing into meal-prep containers for lunches.
Scale confidently. Double the rice and vegetables for larger batches and cook protein in separate batches to avoid overcrowding the pan.
Difficulty Level
Easy. The method relies on simple stir-fry technique rather than advanced knife work or rare ingredients, making it accessible to home cooks.
Beginner-friendly. Keep timing strict and ingredients prepped to remove guesswork and deliver a reliable result each time.
Ingredients
Gather ingredients that cook at similar rates and provide contrast: crisp vegetables, juicy protein, and dry, separated rice. Use a neutral oil for searing and a finishing oil for aroma.
Key items include 2 cups cooked jasmine rice (best when chilled), 1 lb boneless chicken, eggs, mixed vegetables, and sauces for seasoning. For background on rice variety, see jasmine rice.
- 2 cups cooked jasmine rice (preferably day-old, chilled)
- 1 lb boneless, skinless chicken breast, cut into small bite-sized pieces (chicken)
- 1 tablespoon vegetable oil (for searing the chicken)
- 2 tablespoons sesame oil (for stir-frying and flavor)
- 1 cup finely chopped carrots
- 1 cup diced red bell pepper
- 1 cup green peas (fresh or thawed)
- 3 green onions, thinly sliced, whites and greens separated
- 3 cloves garlic, minced
- 2 large eggs, lightly beaten
- 3 tablespoons low-sodium soy sauce (adjust to taste; see background on soy sauce)
- 1 tablespoon oyster sauce (optional)
- ½ teaspoon freshly ground black pepper
- Salt to taste
- 1 teaspoon fresh grated ginger (optional)
Instructions
Use a hot wok or a large, wide skillet for best results. Proper sequence and heat control create clean texture and a slight wok-nutty note.
Keep tools at hand: spatula, plate for resting cooked chicken, and a bowl for beaten eggs. Confirm each step before you start to avoid rushing when heat is high.
- Prepare the chicken: Heat vegetable oil over medium-high until shimmering. Season chicken with salt and pepper and sear in a single layer until golden and cooked through, about 5–7 minutes. Remove and rest on a warm plate.
- Sauté vegetables: Add sesame oil to the same pan and toss in garlic and ginger. Stir briefly until fragrant, then add carrots, bell pepper, and peas. Stir over high heat until vegetables are tender-crisp, about 3–4 minutes.
- Cook the eggs: Push vegetables to one side and pour beaten eggs into the cleared area. Scramble lightly until just set, then fold eggs into the vegetables for even distribution.
- Add rice and seasoning: Break up cold rice with your spatula and add it to the pan. Stir and toss continuously to heat through and to separate grains. Drizzle soy sauce and oyster sauce evenly and toss to coat every grain.
- Return the chicken: Add cooked chicken back to the wok and stir-fry together for 1–2 minutes to combine flavors and heat through.
- Finish and garnish: Remove from heat, drizzle a small spoon of sesame oil for aroma, and scatter sliced green onion greens. Taste and adjust seasoning with more soy sauce or salt if necessary, then serve hot.
Quick Protein Prep
Marinate pieces briefly in a light mix of soy sauce, a touch of sesame oil, and minced garlic for 10–20 minutes to boost savory depth and improve moisture retention. This step is optional but effective for juicier bites.
If you favor thighs for richer flavor, trim excess fat and cut uniformly. Thigh meat tolerates higher heat and slightly longer cooking without drying out.
Tips and Tricks for a Veggie-Packed Fried Rice
Swap vegetables freely: snap peas, baby corn, or broccoli add texture and seasonal flexibility. Aim for similar-sized cuts to ensure even cooking and a consistent mouthfeel.
Use toasted sesame oil sparingly at the end to preserve its aroma. If you like heat, add crushed red pepper flakes or a splash of toasted chili oil at the finish to avoid burning delicate aromatics.
Expert Insight
Keep the rice dry and cold. If you only have freshly cooked rice, spread it on a tray and chill briefly to release steam and excess moisture before frying.
Chef’s Notes
Mise en place prevents rushed decisions while cooking. Measure sauces, slice vegetables, and have the beaten eggs ready so you can move steadily through the high-heat steps.
Cook chicken in a single layer and avoid overcrowding; if necessary, cook in two batches. Reintroducing rested chicken to the hot wok finishes it without drying out the protein.
Pro-Caution
Small flavor tweaks elevate the dish: add a teaspoon of toasted sesame seeds, chopped cilantro, or a squeeze of lime to brighten the final plate. These finishing touches add contrast and freshness.
Serving Suggestions
Serve this fried rice as a main course with simple sides that complement its savory profile. A crisp cucumber salad or steamed dumplings provides contrast in texture and temperature.
Offer condiments at the table such as chili garlic sauce or lime wedges so guests can fine-tune salt and acidity. Pair with a light broth or a green vegetable side for a coherent menu.

Nutrition (Approx.)
Per serving estimates assume typical portions and ingredients. Variations in oil amount, chicken cut, or rice will alter totals.
Store leftovers in an airtight container for up to 3 days. Reheat gently in a skillet to retain texture and add a splash of water or oil if needed to loosen any clumps.
| Nutrition | Per Serving (Approx.) |
|---|---|
| Calories | 420 kcal |
| Protein | 30 g |
| Carbohydrates | 45 g |
| Fat | 10 g |
Q&A
What makes this chicken fried rice stand out?
This recipe emphasizes texture control: chilled rice, high heat, and tight timing. Those elements yield separated grains and crisp vegetables while keeping protein juicy.
Intentional seasoning and a brief resting step for the chicken add depth without complicating the method.
Can I use leftover rice for this dish?
Yes. Day-old rice reduces surface moisture and clumping, which helps achieve an ideal stir-fried texture. If you use fresh rice, cool it on a tray to release steam before frying.
Cold rice lets the pan sear rather than steam the grains, producing a cleaner bite and better separation.
Which vegetables create a “loaded” feel?
Combine vegetables that offer color, crunch, and mild sweetness: bell peppers, carrots, peas, corn, and green onions create balance. Add broccoli or snap peas for additional bite and texture variety.
Cut vegetables uniformly to ensure even cooking and consistent mouthfeel across the dish.
How can I keep the chicken tender?
Marinate briefly in soy sauce, garlic, and sesame oil and sear over high heat. Remove the chicken once cooked and reintroduce it at the end to finish in the hot pan.
Cooking protein in small batches prevents pan temperature drop and helps form a quick sear that locks in juices.
Is this recipe adaptable for dietary restrictions?
Yes. Swap soy sauce for tamari or coconut aminos for gluten-free needs, and replace chicken with firm tofu for a vegetarian option. Use cauliflower rice for a low-carb choice.
Adjust seasoning and cook times according to the alternative protein choice to maintain texture and safety.
Enjoy building this vegetable-forward chicken fried rice as a reliable weeknight go-to. Focus on heat, timing, and a finishing touch of sesame oil to create a balanced, satisfying plate every time.
For technique background on rapid high-heat cooking, see stir-frying methods and their practical applications.
FAQ
How do I make rice less sticky for fried rice?
Use day-old chilled rice and break up any clumps before frying. If using fresh rice, spread it on a tray and cool to remove steam before cooking.
Dry, cold rice allows the pan to sear grains instead of steaming them, which improves texture.
Can I swap chicken for another protein?
Yes. Shrimp, sliced pork, firm tofu, or diced beef all work. Adjust cooking times: shrimp cooks quickly, while pork and beef may need slightly longer searing.
Always keep protein pieces uniform in size for even cooking and safety.
What rice variety works best?
Medium- to long-grain rice gives the best separated texture; jasmine rice is common for its aroma and grain shape. See background on jasmine rice.
Avoid short-grain sushi rice for this preparation because it tends to clump and becomes stickier when fried.
Do I need a wok to get good results?
A wide, heavy skillet works fine if you don’t have a wok. However, a properly seasoned carbon-steel wok heats quickly and encourages the classic wok hei effect. See the wok entry for details.
Whatever pan you use, keep it hot and avoid overcrowding to preserve high-heat contact and fast evaporation of moisture.
How do I prevent a soggy final dish?
Start with chilled rice, use high heat, and avoid adding too much sauce at once. Toss continuously to promote evaporation and keep components separate.
Finish with a light drizzle of sesame oil for aroma rather than extra liquid. That keeps the texture clean while enhancing flavor.
See also: fried rice
]]>
- At a glance: Dry the fillet thoroughly, use a heavy pan, sear mostly skin-side down, finish with butter for flavor and gloss.
- Timing tip: For a 1-inch fillet, expect about 6–8 minutes skin-side down and 2–3 minutes on the flesh side.
- Pan care: Work in batches to avoid steam and maintain surface temperature for repeatable crisping.
Choosing Fish and Tools for Crispy Skin
Pick a fresh, skin-on fillet to maximize the chance of crisping. Fresh salmon has firm flesh and a taut skin that responds predictably to high-heat contact.
Use a heavy-bottomed skillet to hold steady heat and create an even crust. A cast-iron or thick stainless pan resists temperature drop; see the mechanics of good cookware on cast-iron cookware.
Prep and Timing for Crispy Skin
Effective prep focuses on removing surface moisture and tempering the fish. Pat fillets completely dry, salt just before cooking, and let the skin air-dry briefly on a rack to improve contact.
Time is variable by thickness, but the method is constant: long skin-side contact, short flesh-side finish. Visual cues—color change from the edge inward—give more reliable results than rigid timers.
Yield, Difficulty, and Batch Management for Crispy Skin
Plan yield by fillet size and pan capacity so you do not overcrowd the surface. Overcrowding lowers pan temperature and creates steam that defeats crisping.
Difficulty is moderate because the technique depends on temperature control and timing. With practice and consistent mise en place, the steps become routine and reproducible.
Ingredients That Build Crispy Skin
Keep the ingredient list short and functional: a neutral high smoke-point oil, a small finishing amount of butter, coarse salt, and pepper. The oil handles sear heat while butter adds gloss late in the cook.
Use oils suited to searing heat and flavor goals; compare options on the cooking oil overview. Choose avocado or grapeseed for neutral flavor and high smoke point.
Instructions to Achieve Crispy Skin
Follow a fixed sequence: dry, season, preheat pan, add oil, sear skin-side down, flip, baste, rest, and serve. Each step isolates a single variable—moisture, heat, contact, or finish—so you can troubleshoot precisely.
Heat the pan until it retains heat well and the oil shimmers but does not smoke. For a 1-inch fillet, press the skin briefly to ensure contact, sear skin-side down for 6–8 minutes, then flip and finish for 2–3 minutes.
Step-by-step details
Pat the skin until it feels tack-free and season immediately before cooking to avoid extracting excess moisture. If you must salt early, re-pat the fillet before it hits the pan.
Add oil and heat to a visible shimmer; this reduces sticking and encourages Maillard reaction for a golden crust. Avoid moving the fillet while the crust forms; the fish will release when the crust is ready.
After flipping, lower the heat and add a small amount of butter to baste for 30–60 seconds. Basting adds flavor without burning when used at the end of the cook.
Rest the cooked fillet briefly on a warm plate for 1–2 minutes to let carryover heat equalize the interior. Serve skin-side up to preserve and showcase the crisp texture.
Pro-Caution
When working multiple fillets, wipe the pan between batches and reheat the oil so each piece hits the optimal surface temperature. That reset preserves consistent results across servings.
Techniques and Physics Behind Crispy Skin
The goal is direct conduction of heat to the skin to drive Maillard browning while limiting steam formation. Surface dryness and firm contact remove insulating air pockets, enabling even browning.
Press the fillet at initial contact to flatten edges and eliminate air pockets. Maintain a stable pan temperature to sustain conduction; erratic heat produces uneven browning or burning.
Pan-frying mechanics
Pan-frying relies on sustained surface contact and the oil’s heat capacity to transfer energy into the skin. For deeper context on frying techniques, review frying.
Use a thin metal fish spatula for precise flipping. A careful flip preserves the crust and avoids tearing the skin.
Tips for Crispy Skin Success
Dryness matters: Even light surface moisture prevents crusting. Pat dry well and let fillets rest uncovered briefly if needed to remove residual dampness.
Temperature control: Start at medium-high for initial sear, then drop to medium-low after flipping to finish the flesh without burning the skin. This sequencing protects both texture and flavor.
Expert Insight
Use fats with high smoke points for the main sear and reserve butter as a finishing agent. Butter browns quickly and contributes desirable nutty notes when added late in the cook.
Work in single layers and avoid overcrowding so each fillet cooks in consistent, dry heat. If you must cook in batches, reheat the pan and oil to maintain a strong sear surface.
Serving Crispy Skin Salmon
Plate the fillet skin-side up to preserve the crunch and show off the color contrast between skin and flesh. A late squeeze of lemon and a sprinkle of flaky sea salt sharpen the perception of crispness.
Pair the salmon with something creamy, like mashed potatoes or a yogurt-based sauce, to amplify mouthfeel contrast. Bright sides, such as sautéed greens, cut richness and refresh the palate.
Common Problems and Troubleshooting for Crispy Skin
If the skin sticks, the pan or oil was not hot enough or the skin still held moisture. Reheat the pan and wait until the oil shimmers before trying again.
If the skin chars before the flesh cooks, reduce initial heat slightly and lengthen the finish on the flesh side at lower temperature. Use a thermometer to confirm internal temperature when precision is required.
FAQ
How does moisture affect crispy skin?
Moisture creates steam between skin and pan, preventing direct contact and browning. Dry thoroughly and, if needed, air-dry fillets briefly to eliminate surface dampness.
Salt draws moisture out of flesh; salt immediately before cooking or re-pat the fish if you salted earlier to maintain dryness for crisping.
Which oil is best for crispy skin pan-searing?
Choose a neutral oil with a high smoke point like avocado or grapeseed. These oils tolerate searing heat and preserve oil integrity during the sear phase.
Add a small knob of butter near the end for flavor and gloss, but avoid using butter as the primary searing fat because it browns and smokes quickly.
Why does the skin sometimes stick to the pan?
Sticking typically indicates the pan or oil wasn’t hot enough or the skin retained moisture. Heat the pan correctly and avoid moving the fish until the crust forms.
A properly formed crust releases naturally; forceful flipping risks tearing the skin and compromising crispness.
Can frozen salmon produce crispy skin?
Yes, but only if fully thawed and dried thoroughly. Frozen fillets often retain more water, so extend drying time and consider patting and air-drying before searing.
Fresh fillets give the most predictable results, but careful handling of thawed fish can still yield satisfying crispy skin.
How do I judge doneness without overcooking?
Look for an opaque band moving from the edge toward the center and a slightly translucent core for medium doneness. Use a gentle lift with a thin spatula to inspect doneness without piercing the flesh.
Remove the fillet while a slight translucence remains; carryover heat during the short rest will finish the center without drying out the fish.
See also: Technique references on searing and pan tools support repeatable results across kitchens. Practice and controlled technique produce consistent crispy skin every time.

For repeatable outcomes, focus on surface dryness, pan heat retention, and fat selection. Those three levers determine whether you get a crisp, golden skin or a soggy surface.
Adopt a checklist approach—dry, season, preheat, sear, finish—to reduce variation and increase success on the first try.
See also: crispy skin
]]>Searing vegetables concentrates flavor, deepens color, and creates crisp edges that contrast tender interiors. When you control heat, moisture, and surface contact, ordinary produce develops a savory, roasted character that few simple methods match.
- Quick wins: Dry produce, hot pan, and no crowding yield better browning.
- Science: The Maillard reaction and caramelization build complex aromas.
- Tools: Choose a heavy pan and an oil with a stable smoke point.
- Finish: Acid and herbs brighten and balance caramelized notes.
Prep and Cook Time
Preparation: 15 minutes. Trim, slice, and pat vegetables dry for even browning and predictable cook times.
Cooking: 10 minutes. Sear in batches on medium-high heat so each piece makes full contact with the pan surface and browns evenly.
Yield
This recipe serves 4 as a side or component for bowls and grain salads. Adjust quantities while keeping pan space in mind to avoid overcrowding.
Scale oil and salt proportionally. For plating, reserve some seared pieces whole for visual appeal and chop the rest for mixed dishes.
Difficulty Level
Easy to Medium. The technique relies on timing and heat control rather than advanced skills. Home cooks can master consistent results with a few practice runs.
Repeatability matters: same pan, same heat setting, and similar piece sizes produce predictable browning and texture every time.
Ingredients
Use sturdy, low-moisture vegetables for reliable searing. Uniform cut sizes help pieces cook at the same rate and develop an even crust.
Choose a neutral oil with a suitable smoke point and season simply to let the seared flavors shine.
- 2 cups broccoli florets, trimmed and dried
- 1 large zucchini, sliced into ½-inch rounds
- 1 red bell pepper, cut into 1-inch strips
- 3 tablespoons extra virgin olive oil
- 1 teaspoon smoked paprika
- ½ teaspoon garlic powder
- Freshly ground black pepper, to taste
- 1 teaspoon kosher salt, divided
- 1 tablespoon fresh lemon juice
- Fresh thyme or rosemary (optional, for garnish)
Instructions
Prepare vegetables: Trim and slice to uniform sizes, then pat completely dry. Moisture on the surface causes steaming and prevents effective browning.
Preheat pan: Heat a heavy-bottomed cast-iron skillet or stainless-steel pan over medium-high heat until the surface is shimmering.
- Oil and season: Toss vegetables lightly with olive oil and half the salt to coat without pooling excess oil.
- Sear in batches: Add veggies in a single layer; leave undisturbed until a golden crust forms. Flip and brown the opposite side.
- Adjust heat: Reduce slightly if the oil smokes or the crust burns; maintain a high enough temperature to drive the Maillard chemistry.
- Finish: Return all vegetables to the pan, sprinkle remaining salt and pepper, then remove from heat and drizzle lemon juice to lift the flavors.
- Rest and garnish: Let the vegetables rest briefly so juices redistribute, then garnish with fresh herbs.
Pro-Caution
Science of Searing
Searing produces more than color; it creates new flavor molecules. The primary pathway for savory browning is the Maillard reaction, where amino acids and reducing sugars interact under heat to form complex aroma compounds.
Alongside that, simple sugar breakdown—known as caramelization—adds sweet, nutty notes. Together these processes explain the roasted, umami-rich character of well-seared vegetables.
Tips for Success
Control moisture, heat, and surface contact. Pat-dry produce, preheat the pan, and space pieces so each piece touches the metal. These three variables determine whether you brown or steam.
Match vegetable types and cut sizes. Harder vegetables need longer sear time and may tolerate higher heat than delicate ones like zucchini, which can char quickly.
- Vegetable selection: Favor bell peppers, mushrooms, carrots, Brussels sprouts, and broccoli for dependable browning.
- Heat control: Aim for a pan surface that sizzles on contact but does not burn the oil.
- No crowding: Sear in small batches to keep temperatures stable and contact consistent.
- Season after searing: Salt draws moisture; seasoning post-sear preserves texture and crunch.
Expert Insight
Serving Suggestions
Serve seared vegetables hot to showcase contrast between crisp edges and tender centers. A squeeze of bright acid helps balance the richness produced by browning.
Combine seared pieces with grains, roast proteins, or simply top with a sprinkle of cheese or toasted nuts. The texture and flavor elevate simple plates into composed side dishes.

Nutrition
Searing does not add significant calories beyond the oil you use. It can reduce some heat-sensitive nutrients but also increases palatability, which encourages vegetable consumption.
Balance searing with quick steaming or raw components in a meal to preserve vitamins while delivering flavor-rich bites.
| Nutrient | Per Serving |
|---|---|
| Calories | 110 |
| Protein | 3g |
| Carbohydrates | 8g |
| Fat | 8g |
FAQ
What is the difference between searing and roasting?
Searing applies intense direct heat to the surface of small pieces to form a crust quickly. Roasting cooks larger quantities more slowly in an oven, producing even internal tenderness and surface browning over time.
Which oils suit high-heat searing?
Use stable oils with higher smoke points like refined olive oil, avocado, or grapeseed oil. These tolerate searing temperatures without breaking down and keep flavors clean.
Can I sear frozen vegetables?
Frozen vegetables release moisture as they thaw, which promotes steaming instead of searing. Thaw and dry them thoroughly before attempting a proper sear for best results.
Will searing make vegetables healthier or less healthy?
Searing can reduce some heat-sensitive nutrients like vitamin C, but it also increases the availability of certain antioxidants. The main trade-off is flavor and texture, which often improves consumption and nutritional intake indirectly.
How do I avoid bitter char when searing?
Bitter flavors result from burning, not browning. Control heat, avoid prolonged contact at extreme temperatures, and remove pieces as soon as a golden crust forms to prevent charring.
Final Thoughts
Searing is a practical, science-backed method to amplify vegetable flavor through targeted heat and surface contact. When you manage moisture, pan temperature, and timing, the results reward simple ingredients with rich, complex notes.
Practice with familiar produce, note how your stove behaves, and use acid and herbs to balance the caramelized profile. Mastering searing turns routine vegetables into compelling dishes that diners notice and enjoy.
See also: Searing vegetables
]]>
- Choose refined searing oils with smoke points above 400°F to prevent off-flavors.
- Neutral oils preserve the ingredient’s taste; nutty oils add subtle aroma.
- Prep and pan technique—dry proteins, preheat pans, and avoid overcrowding—matter as much as the oil.
- Finish smartly with butter or a delicate finishing oil after the sear for gloss and flavor.
Prep and Cook Time for Searing Oils
Preparation: 5 minutes. Cooking: 10–15 minutes. Use searing oils to reach and hold high surface temperatures for fast caramelization.
Total Time: 20 minutes. Plan mise en place so you add proteins to a fully preheated pan and keep tools ready for immediate basting and resting.
Yield and Protein Notes
This searing method serves 4 people when using four chicken thighs or equivalent proteins. Scale oil volume proportionally for larger batches.
Apply the same oil strategy to steaks, fish fillets, or tofu; adjust sear time to thickness and target internal temperature while using the same heat-stable searing oils.
Difficulty Level
Difficulty: Medium. You must manage pan temperature and timing precisely, but the method is repeatable with practice and the right searing oils.
Practice develops feel for crust formation. Choosing proper searing oils reduces variability and improves predictability across pans and stoves.
Ingredients
Below are recommended searing oils and a basic protein list. Use refined versions for searing and reserve delicate oils for finishing touches.
- 2 tablespoons refined avocado oil (high smoke point, neutral)
- 1 tablespoon grapeseed oil (light, clean flavor)
- 4 boneless skin-on chicken thighs or equivalent protein
- Salt and freshly ground black pepper, to taste
- 4 sprigs fresh thyme (optional)
- 1 clove garlic, smashed (optional)
- 1 tablespoon unsalted butter (for finishing)
Store refined searing oils in cool, dark places to slow oxidation and preserve their smoke-point reliability.
Instructions
Follow these steps to build a crisp, caramelized crust. Timing and minimal disturbance determine success when using searing oils.
- Preheat the skillet: heat a heavy-bottom pan over medium-high until it shimmers. Cast iron or stainless steel maintain steady heat for even browning.
- Dry the protein: pat pieces thoroughly. Surface moisture creates steam and prevents proper Maillard browning.
- Season: salt and pepper each side immediately before cooking to avoid drawing moisture out prematurely.
- Add oil: pour a thin layer of refined avocado or grapeseed oil and swirl to coat; avoid pooling so the oil makes direct contact for fast crust formation.
- Sear skin-side down: place protein away from you and resist moving it for 5–6 minutes to let stable contact produce a uniform crust.
- Flip and finish: turn pieces, add butter, thyme, and garlic if using, and baste for 3–5 minutes until the interior reaches safe temperatures.
- Rest: transfer to a warm plate and rest 5 minutes so juices redistribute before slicing and serving.
Why Searing Oils Matter
Choosing the right searing oils lets you reach target surface temperatures without the oil breaking down and creating acrid flavors. High smoke points help protect both taste and pan seasoning.
Moreover, searing oils influence heat transfer and the chemistry of browning. The Maillard reaction progresses cleanly when oils remain stable at searing temperatures.
Top Searing Oils for High Heat
Below are nine practical searing oils ranked for smoke point, flavor neutrality, and cost-effectiveness. Match oil choice to the protein and desired flavor lift.
Use refined variants for searing; keep delicate, unrefined oils for finishing to retain their aromatic profiles.
Refined Avocado Oil (Recommended)
Refined avocado oil offers one of the highest smoke points and a neutral, slightly buttery profile that suits long sears and pan roasting.
It performs predictably in a hot pan and pairs with robust proteins. For background on production, see avocado oil.
Grapeseed Oil
Grapeseed oil provides a light mouthfeel and respectable smoke point. Chefs favor it for quick, high-heat contact browning when a neutral taste is required.
Its clean flavor keeps pan sauces bright and avoids masking subtle ingredients during finishing.
Refined Peanut and Safflower Oils
Refined peanut oil adds a restrained nutty character while still tolerating intense heat, making it a solid option for pan-frying and wok work.
Refined safflower oil remains neutral and cost-effective for high-volume searing. Choose refined forms; unrefined variants smoke at lower temperatures.
Refined Canola and Sunflower Oils
High-oleic canola and refined sunflower oils resist heat and cost less for frequent use. They offer neutral flavors and steady heat transfer for consistent crusts.
When purchasing, look for labels indicating refined or high-oleic formulations to ensure higher smoke points during searing.
Olive Oil Notes for Seared Dishes
Extra virgin olive oil has a lower smoke point and a pronounced flavor, so reserve it for finishing or medium-heat cooking rather than high-temperature searing.
Light or refined olive oil tolerates higher heat and can work for searing. See more on olive oil varieties and processing.
How to Sear with Searing Oils
Three fundamentals control a perfect sear: heat, dryness, and spacing. Master these and the searing oils will complement the technique instead of compensating for errors.
Use a thermometer to confirm surface and internal temperatures. Consistency comes from measured heat management and deliberate oil choice.
Heat: Get the Pan Ready
Start with a hot pan and add oil only once the surface reaches temperature. A properly heated pan requires less oil and minimizes sticking.
Test with a few drops of water; they should dance. If oil smokes immediately, reduce the heat to protect the searing oil’s integrity.
Dry: Remove Surface Moisture
Pat proteins dry; a dry surface browns faster and reduces the period oil spends overheating while moisture evaporates.
Season immediately before searing to avoid drawing moisture out during resting and keep crust formation efficient.
Space: Avoid Overcrowding
Leave room between pieces so the pan temperature recovers after each addition. Overcrowding causes steaming and prevents caramelization.
Work in batches and keep finished items warm in a low oven while completing the rest to preserve texture and crispness.
Tips and Cautions
Smoke point practice: choose searing oils with smoke points above your working temperature, typically above 400°F for aggressive searing.
Refined searing oils resist breakdown better than unrefined oils. Store all oils away from heat and light to slow oxidation and preserve performance.
Expert Insight
Use a thin film of oil so the food, not the oil, contacts the pan directly. Excess oil pools and reduces the speed at which the crust forms.
Pro-Caution
Always keep a lid or splatter screen on hand and never leave an overheated pan unattended. A thermometer reduces guesswork and improves safety during prolonged searing tasks.
Serving Suggestions
Pair seared proteins with bright vegetables and acid to cut through richness. The caramelized crust benefits from contrasts such as lemon, pickled shallots, or herb chimichurri.
Finish with a small pat of butter or a drizzle of delicate finishing oil to add gloss and flavor without dulling the crust formed by your searing oils.
| Nutrient | Per Serving |
|---|---|
| Calories | 320 |
| Protein | 28g |
| Carbohydrates | 0g |
| Fat | 22g |
Further Reading and Resources
Understand how oils behave and why refined searing oils perform better by reviewing technical resources on cooking fats and heat reactions. For general background, see cooking oil.
For technique references and professional tips, consult trusted guides on searing and pan care. For additional study, review the fundamentals of frying processes at frying.
See also: searing oils and searing technique.
FAQ
Why does oil choice matter when searing?
Oil selection affects heat tolerance and flavor transfer. Using proper searing oils lets you reach high surface temperatures without creating burnt flavors or degrading fats.
Stable oils maintain heat transfer efficiency and help form an even crust across the protein surface.
What exactly is a smoke point and why is it crucial?
The smoke point denotes when an oil visibly smokes and begins chemical breakdown. Past that point, oils produce off-flavors and potentially undesirable compounds.
For searing, select oils whose smoke point exceeds the temperature you plan to use, typically above 400°F for robust searing work.
Can blending oils improve high-heat performance?
Blending a high-smoke-point refined oil with a small amount of a flavorful lower-smoke oil can balance heat tolerance and aroma. Add the lower-smoke oil after the main sear to keep its flavor intact.
Keep blends minimal to avoid dropping the effective smoke point of the mix and monitor for early signs of breakdown.
Is extra virgin olive oil suitable for searing?
Extra virgin olive oil generally has a lower smoke point and strong flavor; it suits medium heat and finishing. For high-heat searing, prefer refined or light olive oils if you want olive character without rapid smoking.
Consider flavor impact: robust extra virgin olive oil can mask delicate proteins when used at intense searing temperatures.
How do I tell if an oil is breaking down during cooking?
Watch for continuous smoke, acrid or sour odors, or sticky residues. Those signs indicate oxidation and breakdown; lower the heat or replace the oil immediately.
Using a thermometer and staying present while searing prevents ruined flavor and reduces safety risks when working at high temperatures.
See also: searing oils
]]>
- Controlled high heat triggers the Maillard reaction to create a savory crust.
- Dry surface and room temperature speed consistent browning and even cooking.
- Appropriate fat and pan mass prevent sticking and preserve surface temperature.
- Resting redistributes juices and finishes texture without overcooking.
Science of Searing
Searing converts amino acids and reducing sugars on the meat surface into hundreds of flavorful compounds in a process known as the Maillard reaction. That reaction requires temperatures well above simple warming, which is why intense pan heat matters.
Heat also drives rapid evaporation of surface moisture; this prevents steaming and lets browning proceed. Understanding these two mechanisms—chemical transformation and moisture control—lets you manipulate flavor predictably.
Prep and Cook Time
Plan the workflow: seasoning, resting at room temperature, searing, and resting after cooking. Each stage contributes to even heat penetration and flavor development.
Preparation: 15 minutes
Cooking: 10–12 minutes
Total Time: 25–27 minutes
Yield and Difficulty
This method yields four well-seared portions with a medium-rare target. It suits cooks with basic pan technique and timing control.
Serves: 4
Difficulty: Medium — requires attention to pan temperature and timing.
Ingredients
Ingredient choice focuses on meat quality, salt for surface seasoning, and a neutral oil with a high smoke point. These elements create a favorable surface chemistry for browning.
Use firm cuts with some marbling for both crust and juiciness; trim only large silver skin or excess fat that might cause uneven splatter.
- 4 ribeye steaks, about 1-inch thick, brought to room temperature
- 2 tsp kosher salt
- 1 tsp freshly ground black pepper
- 2 tbsp high-smoke-point oil (e.g., grapeseed or avocado)
- 2 tbsp unsalted butter
- 3 cloves garlic, gently crushed
- 2 sprigs fresh thyme or rosemary
Equipment and Heat
Choose heavy cookware that stores and transfers heat evenly. A massy pan holds temperature when meat hits the surface, which preserves the conditions needed for browning.
A classic choice is a cast-iron skillet or a heavy stainless steel pan. For more pan comparisons, see our internal guide on best pans for searing.
Step-by-Step Instructions
Follow a consistent sequence: dry, season, preheat, oil, sear, finish, and rest. This order controls moisture and surface temperature so the Maillard reaction proceeds efficiently.
Execute deliberate timing rather than guessing: measure pan temperature visually (thin wisps of smoke) or use an infrared thermometer for repeatability.
- Pat dry and season: Use paper towels to remove visible surface moisture. Salt both sides evenly and wait 10–15 minutes at room temperature to let the salt begin surface penetration.
- Preheat the pan: Heat the heavy pan over medium-high until it becomes visibly hot and starts to smoke lightly. The goal is roughly 400–500°F surface temperature to trigger rapid browning.
- Oil the pan: Add 2 tablespoons of high-smoke-point oil and swirl to coat. The oil provides a conduction layer and prevents sticking while tolerating high heat.
- Sear without crowding: Lay steaks in the pan with space between pieces. Do not move them during the first 3–4 minutes to allow an intact crust to form. Flip and repeat on the second side.
- Finish with butter and aromatics: Lower heat to medium, add butter, crushed garlic, and herbs. Tilt the pan and spoon melted butter over the surface to promote even browning and add flavor compounds.
- Check doneness: Use an instant-read thermometer. Aim for 125°F (52°C) for medium-rare after carryover. Adjust time for thicker cuts or different target temperatures.
- Rest the meat: Transfer to a warm plate, tent loosely with foil, and rest 5–7 minutes. Juices redistribute rather than pouring out when sliced.
After resting, slice against the grain and serve with pan juices. Proper slicing keeps fibers short and improves perceived tenderness.
Pro-Caution
Tips for Success
Small adjustments make large differences. Control surface moisture, maintain pan temperature, and measure doneness rather than relying on timing alone.
Practice with one cut and note exact times and temperatures; replicate those settings for similar thicknesses and pan types next time.
- Room temperature meat sears more evenly than straight-from-fridge cuts.
- Patting dry is essential; water must evaporate before the Maillard reaction can occur efficiently.
- Do not overcrowd—crowding drops pan temperature and causes steaming rather than searing.
- Use an instant-read thermometer for reliable doneness, especially with thick cuts.
Expert Insight
Serving Suggestions
Pair seared steaks with simple sides that contrast texture and acidity. Acidic condiments cut the richness while starchy sides add comfort and balance.
Try roasted seasonal vegetables, a bright chimichurri, or creamy mashed potatoes. Finish with flaky sea salt and microgreens for visual and textural lift.
Nutritional Information
Estimating nutrition requires portion size and added fats. The table below reflects a typical serving prepared with butter and oil.
Adjust calories and macronutrients by trimming fat or altering added fats during finishing.
| Nutrient | Per Serving |
|---|---|
| Calories | 450 kcal |
| Protein | 38 g |
| Carbohydrates | 1 g |
| Fat | 36 g |
For more technique variety and extended meat-handling protocols, consult our internal guide to meat cooking techniques which expands on searing, braising, and roasting methods.
FAQ
What exactly happens when meat hits a hot pan?
Surface proteins and sugars react at high heat to form new flavor molecules through the Maillard reaction. Simultaneously, moisture evaporates rapidly, which prevents steaming and allows browning.
These combined effects create the crust and concentrated flavors associated with expertly seared meat.
Does searing lock in juices?
Searing does not physically seal juices like an impermeable barrier. Instead, it forms a flavorful crust that changes mouthfeel and flavor perception.
Juiciness depends on internal temperature control and resting; carryover cooking and redistribution of juices determine final moisture levels.
How hot should my pan be for a proper sear?
Surface temperatures between roughly 400°F and 500°F (204–260°C) initiate fast browning and efficient evaporation of surface moisture. Use visual cues and thermometers for accuracy.
Heavy pans such as a cast-iron skillet hold heat better and recover temperature quickly after contact with meat.
Can searing improve cheaper cuts?
Searing adds concentrated flavor to any cut, which makes economical cuts more palatable. However, searing alone does not tenderize dense connective tissue.
Pair searing with braising or slow-cooking when working with very tough cuts to combine flavor development and tenderness.
How long should I rest steak after searing?
Rest steaks 5–7 minutes for typical 1-inch cuts. This pause lets internal juices redistribute and reduces moisture loss during slicing.
Longer rests suit thicker roasts; shorter rests are acceptable for thin cuts if carryover cooking considerations are small.
To Wrap It Up
Searing succeeds when you control surface moisture, maintain pan temperature, and apply measured finishing techniques. Those actions let chemistry and heat produce a deep, savory crust.
Approach searing as a repeatable technique: track times, use a thermometer, and refine sauce and garnish choices to complement the crust. Practice yields consistent, flavorful results every time.

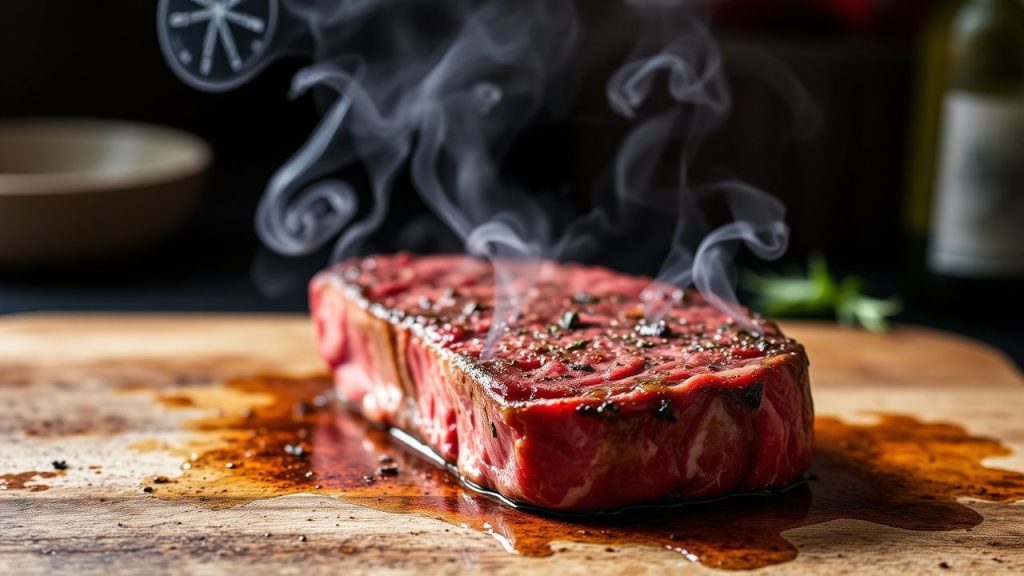
See also: Searing
]]>