- Quick heat, short time: High surface temperature sparks the Maillard reaction without overcooking the center.
- Dry surface matters: Remove moisture to prevent steaming and promote browning.
- Right fat and pan: Use a high smoke-point oil and a heat-retaining pan for consistent crust.
- Finish with fat and rest: Add butter late and rest briefly to lock juices and boost flavor.
The science behind the golden crust
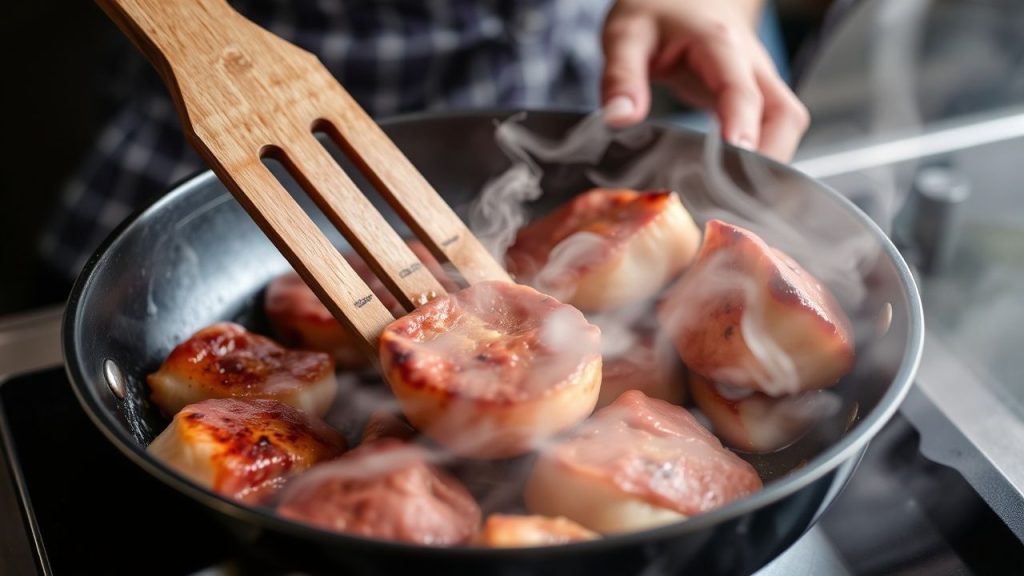
The brown, flavorful layer on a perfectly seared scallop forms because of a chemical process that chefs exploit intentionally.
When proteins and reducing sugars hit high heat, they undergo the Maillard reaction, producing dozens of aromatic compounds and the deep color we seek. Maillard reaction
What the Maillard reaction does for scallops
The reaction builds savory, nutty and caramel-like notes on the scallop’s surface, concentrating taste in every bite.
Because scallops contain amino acids and trace sugars, they brown rapidly when dry and exposed to searing temperatures. Amino acids
Why moisture and heat balance matter
Water becomes steam and prevents direct contact between scallop and pan, so surface moisture inhibits browning.
Using intense surface heat sears the exterior quickly and limits heat penetration, preserving a tender center while forming a crust. Cooking
Ingredients and equipment that change outcomes
Choose the right scallops, fat, and cookware before you heat the stove; these choices determine control and final texture.
Service-quality sears come from combining a dry scallop surface, a high smoke-point oil, and a pan that holds temperature steadily. Smoke point
Which scallops to buy
Look for firm, translucent adductor muscles with no ammonia smell; large sea scallops sear more predictably than small bay scallops.
Frozen scallops can work if properly thawed and dried; otherwise, moisture from thawing ice crystals complicates browning.
Best pans and fats
Cast iron and heavy stainless steel transfer and retain heat, creating the stable surface you need for a clean crust.
Use grapeseed, refined avocado, or clarified butter for heat resilience, then finish with a knob of butter for flavor without burning it early.
Step-by-step technique for a flawless sear
Small differences in preparation and timing make the difference between a pale scallop and a spectacular one.
Follow these steps precisely and you’ll reproduce the same golden result consistently, even under busy service conditions.
1. Prep: dry and season
Pat each scallop thoroughly with paper towels until the surface appears slightly tacky rather than wet.
Season lightly on both sides with fine salt and freshly cracked pepper just before searing to avoid drawing out moisture too early.
2. Heat and oil
Preheat your pan until very hot on medium-high to high heat; a drop of water should sizzle and evaporate instantly.
Add just enough high smoke-point oil to coat the base; wait for the oil to shimmer but not smoke before adding scallops.
3. Sear without fuss
Place scallops in a single layer with at least 1 inch between them; overcrowding cools the pan and produces steam instead of a crust.
Let them sear undisturbed for about 1.5–2 minutes per side until a deep golden-brown forms, then flip carefully with tongs. Time, not curiosity, wins here.
4. Finish and rest
After flipping, add a small spoon of butter with a smashed garlic clove and a sprig of thyme if you like aromatics.
Tilt the pan and baste for 30–60 seconds, then transfer scallops to a warm plate and rest for one to two minutes to redistribute juices.
Chef’s notes: common pitfalls and pro fixes
Many home cooks overcook scallops by mistiming or using the wrong pan and fat; avoid these mistakes to get a tender center and crisp edge.
Also, remember that seasoning early can draw moisture; season just before searing to keep the surface dry long enough for the Maillard reaction to begin.
 Expert Insight
Adding butter too early leads to burn and bitter notes; reserve butter until the second side and baste briefly to boost richness without overheating the fat.
 Pro-Caution
Serving ideas and flavor matches
Serve scallops immediately on a warm plate to preserve the contrast between crust and interior.
Pair them with bright acidic elements—lemon, a vinaigrette, or a tomato relish—and textural sides like smooth purée or crisp vegetables for balance.
Finishing sauces and garnishes
Browned butter with lemon and chives or a simple beurre blanc complements the caramel notes from the sear without overpowering the scallop.
A light dusting of smoked paprika or microherbs adds color and a subtle flavor lift right before serving.
FAQ
How dry should scallops be before searing?
Pat them until the surface feels tacky, not drenched; remove as much visible moisture as possible for a clean sear.
Excess moisture creates steam and prevents the Maillard reaction, so keep towels handy and dry both sides thoroughly.
What temperature should the pan reach?
Aim for a surface temperature that causes oil to shimmer but not smoke—roughly 350–400°F on heavy pans—so the scallops sear quickly.
If the oil smokes immediately, reduce heat slightly; if it sputters and cools, the scallops will steam instead of searing.
Can I use butter for the entire sear?
Pure butter burns quickly at searing temperatures, producing bitter flavors, so use clarified butter or oil for the initial sear.
Add a small amount of whole butter at the end to finish and baste for flavor without exposing butter to prolonged high heat.
How do frozen scallops compare to fresh?
Frozen scallops can sear well if fully thawed and dried, but they often release more moisture from ice crystals, which requires extra drying time.
When possible, buy fresh dayboat or recently thawed scallops for more consistent searing results and texture.
How can I tell when a scallop is perfectly cooked?
The interior should feel firm yet springy, not rubbery; a gentle press will return slightly without collapsing completely.
Visual cues help: the center shifts from translucent to opaque, but the true test is texture—tender and slightly giving.
Mastering the sear turns scallops from ordinary to exceptional. Use heat intentionally, control moisture, and choose the right tools to repeat the result reliably.
See also: seared scallops
]]>This skillet recipe centers on thinly sliced beef seared at high heat and crisp broccoli tossed in a glossy umami sauce for a quick restaurant-style dinner at home. The method borrows from classic stir-frying technique and emphasizes fast cook windows to preserve color and bite.
- Ready in 35 minutes: Quick prep and rapid cook time ideal for weeknights.
- Restaurant-style finish: High-heat searing for caramelized crust and a clingy sauce.
- Simple mise en place: Blanch and sear to keep broccoli bright and beef tender.
Prep and Cook Time
Prep Time: 15 minutes. Efficient mise en place shortens active cook time and keeps the pan hot for an optimal sear on the beef.
Cook Time: 20 minutes. Once the pan is hot, the skillet sequence moves quickly—have sauce and slurry ready before you start.
Yield and Difficulty
This recipe yields four generous servings and fits well into family meal rotation or a small dinner party menu. It scales easily: double the beef and broccoli, sear in batches to avoid crowding the pan and losing heat.
Difficulty: Easy to Medium. The key technical points are thin slicing and high-heat control; both are manageable with a sharp knife and a heavy skillet. Follow the timing cues to preserve texture.
Ingredients
Use fresh, minimally processed components for best results. Prioritize lean, thinly sliced beef and firm, vibrant broccoli for a satisfying texture contrast.
Gather these items before you start to keep the workflow smooth: a sharp knife, a large heavy skillet, and a small bowl for the cornstarch slurry.
- 1 lb beef sirloin or flank, thinly sliced against the grain
- 4 cups fresh broccoli florets, washed and dried
- 2 tbsp vegetable oil, divided
- 3 cloves garlic, minced
- 1 tbsp fresh ginger, grated
- 1/4 cup low-sodium soy sauce or tamari
- 2 tbsp oyster sauce (or mushroom sauce for a veggie-forward option)
- 1 tbsp cornstarch mixed with 2 tbsp cold water (slurry)
- 1 tbsp honey or maple syrup
- 1/2 tsp crushed red pepper flakes (optional)
- 1/4 cup beef broth or water
- Sesame seeds and thinly sliced green onions for garnish
Instructions
Follow a staged approach: prep, blanch, sear, build the sauce, then finish. Each stage moves quickly, so keep tools and ingredients within reach.
These instructions break the workflow into short windows. Maintain a hot pan for proper Maillard development on the beef and a quick blanch to retain broccoli color.
Prepare the Beef
Remove the beef from the refrigerator and pat slices dry with paper towels; surface moisture prevents a good sear. Season lightly with salt and freshly ground black pepper to accentuate natural beef flavor without masking the sauce.
Slice thin and against the grain to shorten muscle fibers and yield a tender bite after quick cooking. If needed, freeze the beef for 10–15 minutes to firm it for cleaner slicing.
Blanch the Broccoli
Bring a pot of heavily salted water to a rolling boil and blanch florets for 1–2 minutes until they turn bright green and are just crisp-tender. Immediately plunge the broccoli into an ice bath to halt cooking and set the color.
Drain and dry the broccoli thoroughly before returning it to the skillet. Excess water will dilute the sauce and reduce gloss; drying preserves a shiny coating on the finished dish.
Sear the Beef
Heat 1 tablespoon of oil in a large heavy skillet or cast-iron pan until shimmering and near smoking. Add beef in a single layer and let it sear without moving for 2–3 minutes to develop color, then flip and cook 1–2 minutes more.
Work in batches to avoid overcrowding; crowded meat steams rather than sears. Remove seared beef to a warm plate and tent loosely to keep heat while you make the sauce.
Pro-Caution
Make the Sauce
Return the skillet to medium heat and add remaining oil. Sauté garlic and ginger briefly—20–30 seconds—until fragrant but not browned to avoid bitterness.
Add soy sauce, oyster-style sauce, honey, and broth, stirring to combine. Increase heat slightly and slowly whisk in the cornstarch slurry to create a glossy sauce that clings to beef and broccoli.
Reintroduce and Finish
Return the beef and drained broccoli to the skillet and toss gently to coat with sauce. Heat through for 1–2 minutes so flavors marry while the broccoli retains bite.
Remove from heat, then garnish with sesame seeds and sliced green onions for texture and aroma. Serve immediately over rice or noodles to capture every drop of sauce.
Expert Insight
Tips for Success
Small refinements yield big results: dry the meat, control pan temperature, and time the blanch precisely to maintain crunch and color. These steps build layered texture and flavor quickly.
Adjust seasoning just before serving; a light squeeze of citrus or a teaspoon of toasted sesame oil brightens the finished dish. Taste the sauce and tweak acidity or sweetness as needed.
Selecting the Beef
Choose flank, skirt, or sirloin for lean cuts that handle quick, high-heat searing. Marbled cuts like ribeye add flavor but release more fat; drain excess if using fattier cuts.
For recipe variations and additional beef techniques, see our internal collection of beef recipes and the skillet searing guide. These pages show practical adjustments for different cuts and pan types.
Serving Suggestions and Sides to Elevate Your Skillet Feast
Serve the skillet over steamed jasmine or basmati rice to soak up the sauce and balance the savory profile. The rice acts as a neutral base that highlights the beef and broccoli.
Alternatively, toss hot garlic butter noodles with scallions for a richer accompaniment or present a crisp cucumber salad dressed with sesame and rice vinegar to cut richness with acidity.
Nutritional Info
Estimated nutrition per serving varies by cut of beef and specific ingredients, but a typical portion delivers high protein, moderate fat, and controlled carbohydrates. This recipe supports balanced meal plans emphasizing protein and vegetables.
To reduce sodium, use low-sodium soy alternatives, tamari, or coconut aminos and swap oyster sauce for a mushroom-based umami sauce. These swaps reduce salt while keeping savory depth.
| Nutritional Info (Per Serving) | Calories | Protein | Carbs | Fat |
|---|---|---|---|---|
| Sizzling Beef & Broccoli Skillet | 320 kcal | 32 g | 15 g | 12 g |
Technique Notes and Science
High-heat searing relies on the Maillard reaction to build complex savory flavors and a crisp crust on the beef. Control the pan temperature so you get surface browning without burning the aromatics.
The blanch-and-shock method preserves broccoli color and texture; rapid cooling stops enzyme activity and prevents overcooking. For deeper context on the chemistry of browning, consult the Maillard reaction and its role in seared meats.
FAQ
What cut of beef works best for this skillet?
Flank and skirt steak work very well because they cook quickly and hold flavor. Sirloin offers a balance of tenderness and beef flavor; slice thin against the grain to minimize chew.
How do I get the broccoli bright green and crisp?
Blanch in heavily salted boiling water for 1–2 minutes, then plunge into an ice bath to stop cooking. Drain and pat dry thoroughly before adding to the skillet so the sauce stays concentrated and glossy.
Can I make this gluten-free?
Yes. Substitute regular soy sauce with tamari or coconut aminos and replace oyster sauce with a verified gluten-free mushroom sauce. These swaps keep the savory profile intact while removing gluten.
How should I reheat leftovers to preserve texture?
Reheat gently on the stovetop over medium-low heat with a splash of water or broth to loosen the sauce. Avoid high heat, which can dry the beef and overcook the broccoli; a brief stir-fry finish restores gloss and warmth.
Can I swap the broccoli for another vegetable?
Yes. Broccolini, green beans, or snap peas make good substitutes. Adjust blanch time for denser vegetables and add them to the skillet in the correct sequence to preserve bite and color.
For additional background on the primary ingredients, see the Wikipedia entries on beef, broccoli, and soy sauce for sourcing and composition details.

See also: internal guide to beef broccoli recipes for variations and batch-cook strategies.
See also: beef
]]>
- Key takeaways: Dry mushrooms and avoid overcrowding to trigger surface browning.
- Use high heat and a sturdy pan to sustain the temperatures needed for Maillard chemistry.
- Balance oil and butter: oil for sear, butter for flavor finish.
- Adjust time and spacing by mushroom variety and thickness.
Prep and Cook Time
Preparation: 10 minutes. This includes cleaning and slicing mushrooms to uniform thickness so they cook evenly.
Cooking: About 12 minutes over medium-high heat in small batches for consistent crust formation. Total time typically runs under 25 minutes.
- Preparation: 10 minutes
- Cooking: 12 minutes
- Total Time: 22 minutes
Yield
This recipe yields a versatile seared mushroom component for mains or sides. A pound of cremini delivers substantial volume once reduced by evaporation.
Serve as a side for four diners or incorporate into salads, bowls, or sandwiches to stretch flavor across dishes.
- Serves 4 as a side dish or ingredient
Difficulty Level
Technically straightforward but timing-sensitive. The technique is easy to learn and repeats reliably when you control moisture and heat.
Beginners should practice one pan at a time, focusing on batch size rather than rushing through the skillet.
- Easy to Medium
Ingredients
Use fresh, firm mushrooms and choose a high-smoke-point oil. Butter adds flavor but lowers the maximum safe pan temperature.
Scale ingredients by portion. For dairy-free versions, replace butter with a neutral oil or a finishing knob of dairy-free butter after searing.
- 1 lb (450g) cremini mushrooms, cleaned and sliced 1/4-inch thick
- 2 tbsp unsalted butter (or olive oil for dairy-free)
- 1 tbsp high-smoke point oil (grapeseed or avocado oil recommended)
- 1/2 tsp kosher salt
- 1/4 tsp freshly ground black pepper
- 2 garlic cloves, finely minced
- 1 tbsp fresh thyme leaves (optional)
- 1 tsp lemon juice (optional, for bright finishing)
Instructions
Follow sequencing: dry, heat, oil, space, sear, season, finish. Each step affects the pan temperature and surface chemistry.
Work in small batches to avoid crowding. Overcrowding traps steam and prevents the surface temperature from rising to Maillard-friendly levels.
- Pat mushrooms dry completely using a clean kitchen towel; moisture inhibits proper searing and stalls the Maillard reaction.
- Preheat a heavy-bottomed skillet (preferably cast iron or stainless) over medium-high heat until it shimmers.
- Add oil and butter, swirling to coat. Use oil for heat tolerance; butter can be added late for flavor.
- Spread mushrooms in a single layer without overcrowding; steam forms if pieces touch densely.
- Cook undisturbed for 5–6 minutes to form a golden crust. Flip when edges are deeply browned.
- Season immediately after flipping to avoid premature moisture extraction.
- Add garlic and thyme once mushrooms are ~75% done; stir for 2–3 minutes to release aroma without burning.
- Finish off heat with a squeeze of lemon to brighten the rich, earthy notes.
- Serve hot to showcase contrast between crisped edges and tender interiors.
Why Chemistry Matters
The key reaction is the Maillard reaction, a set of complex interactions between amino acids and reducing sugars that produces brown pigments and savory compounds. Temperature and dryness dictate if this chemistry proceeds.
Mushrooms also contribute unique flavor precursors. Their umami compounds interact with Maillard products to give the deep, roasted notes you expect from a great sear. Learn more about umami and its role in savory perception.
Key Principles
Three variables control success: moisture, heat, and fat. Tweak each to push surface temperature above water boiling and into Maillard territory.
Understand how mushroom biology affects cooking. The fungal tissues hold water differently by species; adjust spacing and heat accordingly.
Moisture Management
Water prevents surfaces from reaching the ~150°C (300°F) needed for Maillard chemistry because the pan temperature remains tied to water’s boiling point. Dry surfaces brown; wet surfaces steam.
Pat mushrooms dry or brush off dirt rather than rinsing. Also, avoid salting too early because salt draws water out by osmosis and can sabotage crust formation.
Heat and Pan Choice
A cast-iron skillet holds heat best and resists temperature drop when food is added. See the cookware behavior on the cast-iron skillet page for material context.
Preheat thoroughly and use medium-high heat. If the pan smokes immediately, reduce slightly; if it cools when mushrooms hit the surface, work in smaller batches.
Fats and Flavor
Fats transfer heat and coat surfaces to promote even browning. Use a neutral, high-smoke-point oil for initial searing and a knob of butter near the end for aroma.
Butter contains milk solids that brown at lower temperatures; combine fats for performance and flavor control. Adjust amounts to taste and dietary needs.
Expert Insight
Step-by-step technique refinement
Batch size matters. If mushrooms touch, steam pockets form and the surface never dries. Aim for a single, non-overlapping layer.
Timing changes by species: thin chanterelles brown faster; portobellos require slightly longer to release moisture but reward with greater depth of flavor.
Chef’s Notes: Tips for Success
Moisture control: Wipe or brush mushrooms rather than rinsing. If you must rinse, dry thoroughly before cooking to avoid steam formation.
Pan selection: Cast iron or heavy stainless steel is preferred for steady, even heat retention. Non-stick pans rarely reach the temperatures needed for a true sear.
- Heat strategy: Start hot to achieve color, then regulate to prevent burning.
- Make ahead: Sear mushrooms in advance but add fresh herbs and citrus only at service.
- Variations: Match mushroom variety to the dish—for example, shiitake or oyster bring stronger earthiness.
Pro-Caution
Serving Suggestions
Seared mushrooms pair with grilled proteins, roasted vegetables, or toasted bread. Their concentrated flavors act as a high-impact garnish or a main ingredient in vegetarian plates.
Finish with a small scatter of fresh herbs, a dusting of grated cheese, or a calibrated drizzle of acid to balance fat and intensify perception of umami.
Nutrition
Seared mushrooms remain low-calorie while adding savory depth. Fat and salt additions change the nutrition profile more than the mushrooms themselves.
For precise counts, track added fats and finishes; basic seared mushrooms are modest in calories and provide small amounts of protein and fiber.
| Nutrition per serving | Calories | Protein | Carbs | Fat |
|---|---|---|---|---|
| Mushroom Sear | 85 | 3g | 6g | 6g |
Explore related technique articles such as Mastering the Art of Sautéing and our internal Mushroom Searing Guide for recipe variations and plating ideas.
FAQ
Why is searing mushrooms different from searing meat?
Mushrooms contain up to ~90% water and lack the higher fat content found in many meats. That water must evaporate before the surface temperature can rise enough for Maillard browning. The result: mushrooms will steam if not dried and properly spaced.
What chemical reactions create the seared flavors?
The Maillard reaction produces browned pigments and a complex mixture of flavor compounds when amino acids and reducing sugars react at elevated temperatures. The reaction differs from pure sugar caramelization and yields savory, nutty, roasted notes.
How does moisture affect browning?
Exposed water buffers the pan temperature at water’s boiling point, preventing the higher temperatures required for Maillard reactions. Drying prior to pan contact and avoiding early salting are practical controls.
Does mushroom type change technique?
Yes. Different species vary in water content, tissue density and sugar levels. Adjust heat and cook time: delicate varieties brown quickly, while dense caps need longer to release internal moisture.
What role do oil and butter play?
Oil raises the pan’s usable heat range, while butter contributes flavor through its milk solids. Many chefs sear using oil, then add butter at the end for aroma and mouthfeel.
Understanding the science behind searing turns a routine sauté into a repeatable skill. Apply these steps, and the next time you hear that satisfying sizzle you’ll know the chemistry doing the work beneath the surface.
See also: mushroom sear
]]>
- Maillard reaction is responsible for browning and complex flavor development.
- High, dry heat and good surface contact drive the best sear.
- Drying, seasoning, and resting are practical controls every cook can use.
- Small adjustments in pH, fat, and time change flavor outcomes dramatically.
What is the Maillard reaction?
The Maillard reaction is a non-enzymatic chemical reaction between amino acids and reducing sugars that takes place when food reaches elevated temperatures. For a technical overview, see the Maillard reaction on Wikipedia.
This reaction creates hundreds of volatile and non-volatile compounds that build the savory, roasted, and caramel-like notes we recognize. The basic players are proteins (amino acids) and sugars; read more on amino acids to understand why meat develops such varied flavors.
How searing triggers Maillard chemistry
Searing supplies the surface with sufficient heat to dry and activate the reaction pathways that produce browned crusts. Surface temperatures above the boiling point of water allow the Maillard pathways to outcompete steaming, so the pan must be hot and the surface dry.
Contact, heat flux, and time determine how deep and complex the crust becomes. Cast iron and other heavy pans deliver high, even heat; see the construction and use of a cast-iron skillet for practical guidance.
Prep and Cook Time
Allow focused time for preparation and searing to control each variable that affects browning. Good timing reduces guesswork and produces repeatable results.
Preparation: 10 minutes. Cooking: 8–12 minutes depending on thickness. Total: ~20 minutes for typical ribeyes.
Yield
Recipe quantities below serve four people with generous portions. The yield depends on steak weight and side pairing choices.
Scale ingredients linearly for more servings, but keep pan space and heat consistent to avoid steaming instead of searing.
Difficulty Level
Intermediate: the method is straightforward but requires attention to heat, seasoning, and timing. These factors change results more than exotic equipment does.
With practice you will gain reliable control over crust color and internal doneness. Use a thermometer for precision and consistent outcomes.
Ingredients
Choose quality cuts and keep ingredients simple to highlight Maillard flavors. Marbling and surface dryness are more important than exotic rubs.
Keep the following on hand and measured before you start to prevent rushed adjustments at the pan.
- 4 boneless ribeye steaks (1–1½ inches thick, ~8 oz each)
- 2 tbsp high-smoke point oil (grapeseed or refined avocado oil)
- 1 tbsp unsalted butter
- 4 cloves garlic, smashed
- 3 sprigs fresh thyme
- Salt and freshly ground black pepper, to taste
- Optional: fine dusting of baking soda (¼ tsp per steak) to raise pH and speed browning
Instructions
Follow these steps to control surface moisture, contact, and heat—three primary variables that govern the Maillard reaction. Small, deliberate actions produce a deep, even crust without burning.
Do not rush the preheat and do not overcrowd the pan; both common mistakes reduce browning and create uneven results.
- Bring steaks to room temperature (about 30 minutes). Even starting temperature shortens cook time variability and supports consistent searing.
- Pat steaks dry with paper towels to remove surface moisture; moisture inhibits browning by forcing the surface to stay near boiling point.
- Season generously with salt and pepper. If using baking soda, apply sparingly to avoid a soapy note; baking soda raises pH and accelerates Maillard pathways.
- Preheat a heavy skillet over medium-high heat until very hot. Heavy pans maintain temperature under load and deliver steady contact; learn more about maintenance of cast iron on the linked guide above.
- Add oil and heat until it shimmers. The oil facilitates even heat transfer and prevents sticking while tolerating high surface temperatures.
- Place steaks in the pan without overcrowding. Leave space so each steak receives full, uninterrupted contact with the hot surface.
- Sear undisturbed 3–4 minutes until a dark golden crust forms. Resist flipping too soon; crust formation requires uninterrupted contact time.
- Flip and add butter, garlic, and thyme. The butter and aromatics add depth; baste for 3–5 minutes to build layers while monitoring internal temperature.
- Thermometer check: 130°F (54°C) for medium-rare. Remove a few degrees early to account for carryover cooking while resting.
- Rest loosely tented 5–10 minutes to allow juices to redistribute and the crust to stabilize. Cutting too early causes moisture loss and a less juicy finish.
For technique expansion, consult our internal guide to perfect pan sear techniques which covers heat management and utensil selection. That page includes additional steps for reverse sears and thick-cut steaks.
Tips for Success
Small procedural choices affect flavor far more than complex ingredient lists. Focus on surface dryness, steady heat, and a brief rest for best results.
Use the following practical tips during prep and cooking to increase the likelihood of professional results at home.
- Pick cuts with good marbling—fat carries and amplifies Maillard-derived flavors.
- Do not overcrowd the pan; moisture from crowded meat quickly halts browning.
- Control heat rather than chase color—if edges blacken before a deep brown crust forms, lower the heat.
- Use a thermometer to remove subjectivity from doneness; color is unreliable for thick cuts.
Expert Insight
Apply butter and aromatics late in the process so their flavors infuse without burning. A quick baste with melted butter improves crust gloss and aroma.
Pro-Caution
Serving Suggestions
Slice across the grain and plate warm to preserve texture and mouthfeel. Pairings should complement the concentrated, savory crust without overpowering it.
Try a bright chimichurri or a silky mushroom pan sauce. For internal resources on carrying and resting meat techniques, visit our resting meat guide.
Nutrition
Per-serving nutrition varies by cut and trim level; the figures below apply to ribeye portions with minimal trimming. Consider side dishes when calculating meal totals.
| Nutrient | Per Serving |
|---|---|
| Calories | 520 kcal |
| Protein | 48 g |
| Carbohydrates | 1 g |
| Fat | 36 g |
Q&A
The following questions address common technical points about browning, heat control, and texture. These concise answers are grounded in culinary science and practical experience.
They will help you apply the Maillard concepts directly during home searing sessions.
What exactly is the Maillard reaction?
The Maillard reaction is a series of chemical processes between amino acids and reducing sugars that produce brown pigments and flavor compounds. These changes occur when surface temperatures exceed the boiling point of water and continue as heat increases.
Read a technical overview at Maillard reaction for mechanistic details and compound pathways.
How does surface moisture impact browning?
Moisture keeps the surface at or near 100°C (212°F) until it evaporates, which delays the Maillard pathways that require higher temperatures. Thorough patting and short resting periods eliminate this obstacle.
Dry surfaces achieve higher contact temperatures quickly, enabling efficient crust development without prolonged heat exposure that can overcook interiors.
Can I speed up browning without burning the meat?
Yes—raising pH slightly with a minimal dusting of baking soda accelerates browning, as does ensuring a very hot pan and proper fat contact. However, the margin for error narrows as you increase reactivity.
Shorter, hotter sears with immediate resting produce a deep crust while preserving internal juiciness; practice and a thermometer help find the ideal window for each cut.
Does searing seal in juices?
Searing does not physically “seal” juices, but it creates a flavorful crust and changes surface texture that improves perceived juiciness. True moisture retention depends on total cook time and internal temperature control.
Resting post-sear reduces immediate juice loss by allowing muscle fibers to relax and reabsorb some expelled liquids, improving final tenderness.
Can vegetarian foods experience Maillard browning?
Absolutely. Any protein- or sugar-containing food—mushrooms, tofu, bread, and many vegetables—can undergo Maillard reactions when exposed to sufficient dry heat. The result is richer, more complex flavors in plant-based ingredients.
Experiment with higher heat and dry surfaces for vegetables and protein substitutes to develop the same roasted notes commonly associated with meat.
Understanding and controlling the Maillard reaction turns searing into a precise, repeatable technique. Apply these principles consistently to improve crust, aroma, and overall flavor in every cook.
For background on culinary browning processes, consult the general overview of browning (cooking) and ensure your pan selection matches the task.
See also: Maillard reaction
]]>
- Key takeaways:
- High, stable surface heat creates the Maillard crust that builds flavor.
- Dry surface, correct oil, and minimal flipping deliver even browning.
- Resting and temperature control preserve juiciness and texture.
Prep and Cook Time
Preparation: 10 minutes. Bring cuts to room temperature, pat dry, and pre-measure aromatics for efficient basting. A short prep prevents surprise moisture that ruins the crust.
Cooking: 15 minutes. A properly preheated pan shortens sear time and improves crust development. The actual sear window is brief; plan your timing and tools before you heat the skillet.
Yield
Serves 4 when using roughly 2 lbs of ribeye or equivalent protein. Portion sizes and thickness change cook times, so adjust the resting guidance accordingly.
Scale ingredients and sear times for smaller pieces or multiple batches. Searing in controlled batches keeps pan temperature consistent and ensures an even crust on each piece.
Difficulty Level
Medium. Searing requires attention to heat and timing, but it relies on repeatable technique rather than advanced culinary maneuvers. Anyone who follows the sequence and monitors temperature will succeed.
Key skills include seasoning, surface-drying, managing pan heat, and using an instant-read thermometer. These tasks are straightforward and teachable for regular home cooks.
Ingredients
Use clean, focused ingredients to let the sear shine. For a classic seared steak, use a 1-inch ribeye or similar steak brought to room temperature and fully patted dry.
Essential items: a high-smoke-point oil, coarse salt, fresh cracked black pepper, butter, and aromatics for basting. Adjust herbs and aromatics to match the protein.
- 2 lbs beef ribeye steak, about 1-inch thick, room temperature
- 2 tbsp high smoke point oil (refined avocado oil or refined grapeseed oil)
- 1 tsp kosher salt
- 1/2 tsp freshly ground black pepper
- 2 tbsp unsalted butter
- 3 cloves garlic, crushed
- 2 sprigs fresh thyme
Instructions
Select a heavy-bottomed stainless steel or cast iron skillet for the best heat retention and even browning. Cast-iron provides the sustained hot surface that helps form a consistent crust; consult an internal guide for pan care and seasoning if needed: Pan Selection Guide.
Follow these steps in order to sear with control and repeatability. Keep tools — tongs, spoon for basting, and an instant-read thermometer — within reach before you heat the pan.
- Preheat the pan: Place the skillet over medium-high heat for 4–6 minutes until it is visibly smoking at the edge. A hot, dry surface is non-negotiable for a good sear.
- Pat the steak dry: Press a few paper towels across the surface to remove moisture. A dry surface contacts the pan directly and browns efficiently.
- Season: Generously season both sides with kosher salt and cracked black pepper. Press the seasoning lightly so it adheres without drawing moisture.
- Add oil: Add 2 tablespoons of your high-smoke-point oil and swirl to coat the bottom of the pan. The oil should shimmer, not smoke aggressively.
- Sear without disturbance: Place the steak in the pan and leave it undisturbed for 3–4 minutes, or until a dark golden-brown crust forms. Flip once using tongs to preserve the crust.
- Baste with butter and aromatics: Add butter, garlic, and thyme immediately after flipping. Tilt the pan and spoon the melted butter over the top for 2–3 minutes to finish, aiming for 125–130°F for medium-rare final temp after resting.
- Rest: Remove the steak to a warm plate, tent loosely with foil, and rest 5–10 minutes. Resting allows internal temperature to equalize and juices to redistribute.
Tips to Sear It Right: Mastering Temperature Control
Surface temperature governs the Maillard reaction — the chemical browning that produces complex savory flavors. A steady surface temp between roughly 400°F and 450°F promotes ideal crust formation without burning the fat.
Use an infrared or contact thermometer to gauge pan temperature. If the pan temperature dips after adding protein, pause between batches so the surface regains heat to avoid steaming instead of searing.
For background on the chemical process that creates browned flavor, read more about the Maillard reaction: Maillard reaction. Understanding the reaction helps you time the sear for maximum flavor.
Choosing the Right Pan and Oil for Maximum Flavor
Cast iron and heavy stainless steel excel because they hold heat when food hits the surface. A pan that cools significantly on contact will steam the food and prevent proper browning.
For technical reading on pan types and material properties, consult the cast iron reference: Cast-iron skillet. Good pan selection reduces hot spots and improves control.
Select oils with smoke points above 450°F for high-heat searing. These oils allow sustained surface temperatures without producing off flavors from burnt oil.
Chef’s Notes – Tips for Success
Patience matters: Resist constant flipping. Allow the crust to develop undisturbed for a clean sear. Frequent movement breaks the surface contact needed for the Maillard reaction.
Avoid overcrowding: Sear in batches to keep surface temperature stable. Crowding traps steam and yields pale, uneven browning.
- Swap herbs: Replace thyme with rosemary if you prefer a piney aroma during basting.
- Internal temp guide: Aim for 125–130°F for medium-rare after resting; adjust to taste.
Expert Insight
Do not skip the resting step; it is short but critical for texture. Cutting too soon lets flavorful juices run out and diminishes the eating experience.
Pro-Caution
Serving Suggestions
Slice the steak against the grain for tender bites and plate over creamy mashed potatoes or grilled seasonal vegetables. Simple sides let the seared flavors remain the focal point.
Finish with a sprinkle of flaky sea salt and a spoonful of pan jus or herb butter to add shine and immediate flavor contrast. For related preparation techniques, see our internal Ultimate Guide to Cooking Steaks.
| Nutrient | Per Serving |
|---|---|
| Calories | 580 kcal |
| Protein | 54 g |
| Carbohydrates | 1 g |
| Fat | 42 g |
Practical Notes and Techniques
Vegetables sear differently than meats; they release water and often require a hotter pan and drier surface. Give vegetables space and use direct contact to concentrate sugars into caramelization.
When using grill grates, you still rely on the same principles: high, direct heat and dry contact. For a primer on outdoor searing techniques, see the grilling resource: Grilling.
FAQ
What does it mean to sear food, and why is it important?
Searing applies high, dry heat to a food surface to create a brown, flavorful crust. This browning occurs via the Maillard reaction and amplifies savory flavors while adding texture contrast to the dish.
Does searing seal in juices?
Searing does not physically ‘seal’ juices, but a good crust slows moisture loss during further cooking. The crust improves perceived juiciness by preserving interior moisture and adding concentrated surface flavor.
Can I sear vegetables the same way as steak?
Yes—apply the same principles: dry surface, very hot pan, and minimal overcrowding. Vegetables benefit from high heat to caramelize sugars, producing complex, sweet-savory notes.
Is cast iron better than stainless steel for searing?
Both work well. Cast iron holds heat longer and provides steady contact; heavy stainless heats faster and offers fine control. Choose the pan that matches your workflow and heat source.
How do I know when to flip?
Flip when the protein releases easily and shows a deep golden-brown crust. If it resists, give it more time; forcing a flip too early will tear the developing crust.
For a basic overview of cooking science and techniques that inform searing decisions, consult this foundational resource: Cooking. Understanding the why helps you apply the how consistently.
Embrace the heat, control the contact, and let a reliable sequence of temperature, timing, and rest produce repeatable results. Searing rewards precision and a small set of reliable habits.
See also: Searing
]]>