- Key takeaway: Cold fat and minimal handling yield a flaky crust.
- Key takeaway: Balance sugar and acid to keep a glossy, non-watery filling.
- Key takeaway: Proper chilling and oven placement preserve crumb texture.
Why This Recipe Works
This recipe separates process into three focused elements: crust, filling, and crumb topping. Each element receives targeted technique to control moisture, texture, and bake behavior.
Understanding ingredient function helps you troubleshoot on the fly. For example, cherries vary widely in water content, and that affects thickening strategy.
Prep and Cook Time
Preparation: 30 minutes active time, with a 1-hour dough chill. This schedule gives time for efficient mise en place and dough relaxation.
Cooking: 50 minutes at 375°F (190°C), plus a 2-hour cool-down for the filling to set. The full process yields dependable results when you follow timing and temperature.
Yield & Difficulty
Yield: One 9-inch pie, about 8 generous slices. That portioning aligns with standard pie-serving sizes for calorie and nutrition estimates.
Difficulty: Medium. The project suits home bakers who can manage dough handling, temperature control, and attentive baking.
Ingredients
The ingredient list below separates components so you prep each element without cross-contamination. Keep cold ingredients chilled until use to protect texture.
Use the exact amounts for predictable chemistry; small swaps work, but adjust liquid or starch accordingly.
- For the Filling:
- 5 cups fresh sweet cherries, pitted and halved
- 1 cup granulated sugar
- 2 tablespoons cornstarch
- 1 tablespoon fresh lemon juice
- 1 teaspoon vanilla extract
- 1/4 teaspoon almond extract (optional)
- For the Flaky Pie Crust:
- 2 1/2 cups all-purpose flour, sifted
- 1 teaspoon salt
- 1 tablespoon granulated sugar
- 1 cup (2 sticks) unsalted butter, cold and cubed
- 6-8 tablespoons ice water
- For the Crumb Topping (Streusel):
- 1 cup all-purpose flour
- 3/4 cup packed light brown sugar
- 1/2 cup rolled oats
- 1 teaspoon ground cinnamon
- 1/4 teaspoon salt
- 7 tablespoons unsalted butter, melted
Instructions
Work deliberately and keep ingredients cold where indicated. Temperature control and minimal handling are the two biggest levers to predictable flakiness.
Follow the sequence: make dough, chill, prepare filling, top with streusel, then bake. Each step reduces a single failure mode: sogginess, shrinkage, or burnt topping.
Prepare the Pie Crust
In a large bowl, whisk together flour, salt, and sugar. Add cold, cubed butter and cut it in until the mixture shows pea-size butter pockets; these pockets create steam channels for layers.
Sprinkle ice water a tablespoon at a time and toss until the dough barely holds together. Overworking develops gluten and reduces flakiness, so stop as soon as cohesive dough forms.
Chill and Roll
Divide the dough, form two disks, wrap tightly, and refrigerate for at least one hour. Chilling firms the butter and relaxes the dough so it rolls without shrinking aggressively.
Roll one disk into a 12-inch circle on a floured surface and fit into a 9-inch pie plate, leaving about a 1-inch overhang. Trim excess and flute the edge or crimp as desired.
Make the Cherry Filling
Combine cherries, sugar, cornstarch, lemon juice, and extracts in a bowl and toss gently to coat evenly. For best results, taste and adjust sugar depending on cherry sweetness and acidity.
If cherries are particularly juicy, consider briefly macerating and draining half the excess liquid; reserve a tablespoon or two of syrup to return for flavor without excess moisture. For technical context, cornstarch gelatinizes during baking and thickens juices, a process well documented for fruit fillings (cornstarch).
Assemble and Top
Pour the cherry mixture into the prepared crust and level it gently with a spoon. Make the crumb topping by mixing flour, brown sugar, oats, cinnamon, and salt, then add melted butter and toss until clumps form.
Scatter the crumb topping evenly over cherries. If you prefer a decorative lattice, roll the second disk and weave strips, then sprinkle crumbs into gaps for hybrid texture.
 Pro-Caution
Chill the assembled pie for 15 minutes to firm the crust and topping; this step limits spreading and helps the pie hold shape during the initial oven heat spike.
Bake and Cool
Place the pie on a baking sheet to catch any overflow and bake at 375°F (190°C) for 45–55 minutes until the topping is golden and the filling bubbles. If the edges brown too quickly, shield with foil during the last 10–15 minutes.
Cool the pie for at least two hours on a wire rack to allow the filling to set. Slicing too soon yields runny centers; patience delivers clean slices and better texture.
Tips for Success
Ingredient handling: Keep butter and water ice-cold. Cold fat produces discrete pockets that steam and separate layers during baking, which yields flakiness.
Filling balance: Adjust sugar and cornstarch to match cherry juiciness. Tart cherries need more sugar; very juicy fruit needs more thickener.
 Expert Insight
For texture variation, add toasted nuts to the crumb mix or swap some oats for finely chopped almonds. These small changes add crunch and a toasted flavor profile without altering bake chemistry significantly.
Serving Suggestions
Serve slices warm, topped with high-quality vanilla ice cream or lightly sweetened whipped cream. The contrast between hot filling and cold cream amplifies perceived sweetness and mouthfeel.
Garnish sparingly with whole cherries or a mint sprig for presentation. For a restrained finish, drizzle a teaspoon of dark chocolate over the plate rather than the pie to avoid soggy spots.
Nutritional Information
Estimated per-serving values depend on portion size and ingredient choices. Use the table below as a reference and adjust if you substitute butter or sugar alternatives.
| Nutritional Information (Per Serving) | Calories | Protein | Carbohydrates | Fat |
|---|---|---|---|---|
| Slice of Cherry Crumb Pie | 350 kcal | 4 g | 50 g | 15 g |
For substitutions like a gluten-free crust, use a tested commercial blend and know that hydration may differ. Replace cornstarch with an equal amount of arrowroot if you prefer a clearer filling, but test for thickening strength.
Resources and Further Reading
Learn more about fruit characteristics and baking science through reliable references. These sources offer context on ingredient behavior and traditional recipes.
Explore background on the dessert form at Cherry pie, the general pastry category at Pie, and topping technique at Streusel. These entries clarify terminology and history relevant to this recipe.
FAQ
What makes a cherry crumb pie different from a traditional cherry pie?
Cherry crumb pie finishes with a buttery streusel instead of a top crust or full double crust. That topping adds a crunchy contrast to the juicy fruit below and concentrates sweetness on the surface.
Which cherries should I use?
Use firm, ripe cherries for best texture. Mixing tart and sweet varieties balances acidity and sugar; frozen cherries work but may require extra thickener due to released juices.
How can I keep the crumb topping crisp?
Bake uncovered to allow moisture to escape and avoid excess syrup on top. Chill the assembled pie before baking and avoid over-piling crumbs, which can trap steam and soften the surface.
Can I prepare this pie ahead of time?
Yes. Bake fully, cool, then wrap and refrigerate. Reheat gently in a moderate oven to revive crispness, and add fresh ice cream when serving for the best experience.
How do I troubleshoot a runny filling?
Allow a longer cool-down period to let starch fully gel. Next time, increase cornstarch by 1/2 tablespoon for very juicy fruit or briefly macerate and drain excess liquid before adding starch.
Final Notes
Follow temperature, timing, and handling guidance for consistent results. Small adjustments based on cherry type and oven behavior let you iterate toward a personal best pie.
With careful chilling, correct thickener ratios, and attentive baking, you can achieve a golden crumb, a flaky crust, and a glossy, set cherry filling every time.
See also: Cherry Pie
]]>
- Short process control: proof and boil timing determine structure and chew.
- Flour and hydration: high-protein flour and ~62% hydration deliver chew and handling strength.
- Boil then bake: boiling gelatinizes starches and locks moisture for a firm crust.
- Cold retard for flavor: overnight refrigeration tightens crumb and improves taste.
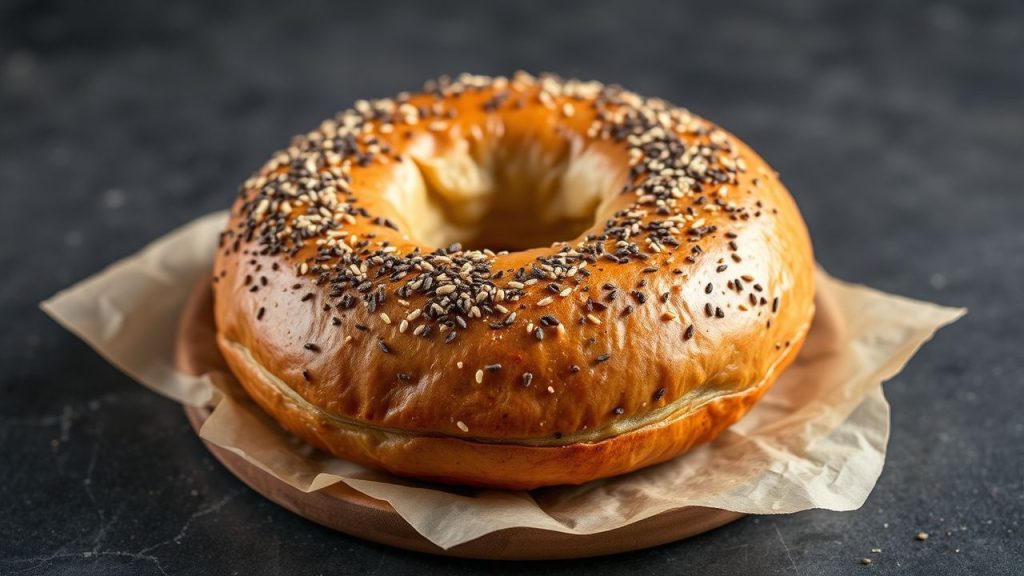
Why a Chewy Bagel Crust Matters
A true chewy bagel stands apart by bite, sheen, and density. The exterior forms when surface starches gelatinize in the boil and then brown in the oven, producing a glossy, resilient crust.
That structure relies on a strong gluten network and controlled Maillard browning. Read about bagel history and how technique shapes texture, or consult Maillard reaction basics to understand crust color.
Prep and Cook Time for Chewy Bagels
Plan for about two hours of active work for a same-day batch: mixing, kneading, first proof, shaping, short bench rest, boiling, and baking. Ambient temperature and ingredient coldness will change timelines, so measure and note times.
If you prefer deeper flavor, retarding the shaped dough overnight adds 8–18 hours but only a few minutes of active work. Cold retard tightens crumb and concentrates fermentation flavors in the chewy bagel.
Yield and Size Guidance for Chewy Bagels
This formula yields eight medium bagels at roughly 4 inches each. Scaling is linear; double ingredients to produce 16 bagels while keeping fermentation and boil times consistent for chew uniformity.
For larger or smaller bagels, adjust shaping and bake time by 2–5 minutes. Larger bagels need slightly longer in the oven to build a deep, even color without burning the crust.
Difficulty Level and Tools for Chewy Bagel Success
Rated medium: the method requires basic dough handling and timing discipline rather than advanced equipment. A digital scale and a timer produce consistent outcomes more quickly than guesswork.
Key tools: mixing bowl, bench scraper, slotted spoon, baking stone or steel, and a thermometer if you track fermentation precisely. Use a scale to hit hydration and flour weight targets every batch.
Ingredients for Chewy Bagel Dough
Core ingredients create structure, flavor, and crust. Use a reliable bread or high-gluten flour to develop the required gluten network for chew.
Typical roles: flour builds gluten; yeast ferments sugars into gas and flavor; salt controls fermentation; and barley malt or sugar aids browning. For background on protein and elasticity, consult gluten fundamentals and yeast basics.
- 4 cups bread flour (high-protein; weigh for accuracy)
- 1 ½ teaspoons instant yeast
- 1 ¼ cups warm water (about 110°F/43°C)
- 2 tablespoons granulated sugar
- 1 tablespoon salt
- 1 tablespoon barley malt syrup (or substitute honey for similar browning)
- Optional toppings: sesame, poppy, minced onion, everything seasoning
- For boiling: 2 quarts water, 2 tablespoons baking soda, 1 tablespoon barley malt syrup
Flour, Yeast, and Hydration Details
Select bread flour or high-gluten flour to reach the elasticity needed for a chewy bagel. Replace up to 10–15% with whole wheat for flavor but reduce hydration slightly to compensate for bran absorption.
Instant yeast delivers a predictable rise; active dry yeast will work if rehydrated. Maintain roughly 62% hydration for this formula and weigh ingredients to hit that target repeatedly.
Instructions to Make a Chewy Bagel
Follow the sequence: mix, develop gluten, ferment, shape, rest, boil, and bake. Each step affects gluten alignment and gas retention; omitting any stage changes final texture and chew.
Read the full set of numbered steps before you begin so the shaping and boiling proceed smoothly and you manage timing for each batch of bagels.
- Mix dry ingredients. Combine flour, yeast, sugar, and salt in a large bowl. Whisk to distribute and break up clumps.
- Add liquid and malt. Add warm water and barley malt syrup; mix until a rough dough forms. Scrape the bowl to ensure even hydration.
- Knead the dough. Knead 8–10 minutes by hand until smooth, elastic, and slightly tacky. Proper gluten development delivers the desired chew.
- First proof. Place dough in a lightly oiled bowl, cover, and let rise in a warm spot until doubled — roughly 1 hour depending on room temperature.
- Shape bagels. Divide into 8 equal pieces, pre-shape into tight balls, then form a hole with your thumb and stretch to about 3 inches diameter.
- Second proof. Rest shaped bagels on a parchment-lined tray, covered lightly, for 20 minutes to puff slightly before boiling.
- Prepare the boil. Bring 2 quarts water to a rolling boil. Add baking soda and barley malt syrup to raise pH and encourage color and sheen.
- Boil bagels. Lower bagels into boiling water two or three at a time. Boil 60 seconds per side to gelatinize surface starches and seal moisture.
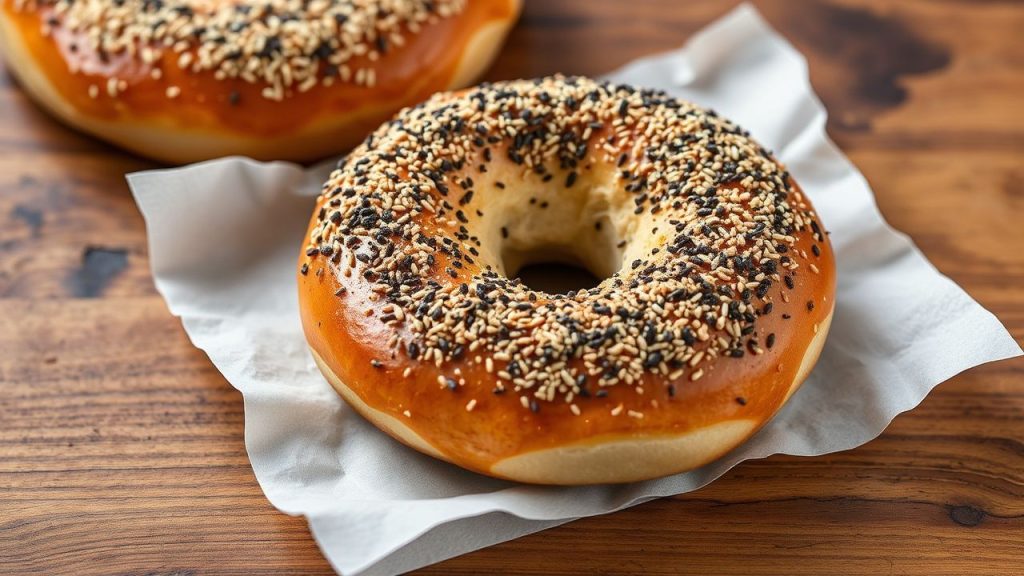
- Drain and top. Remove with a slotted spoon, drain briefly on a rack, then add toppings while the surface is still tacky so they adhere and toast.
- Bake until golden. Preheat the oven to 425°F (220°C). Bake 20–25 minutes on a preheated stone or steel until evenly golden, rotating if needed for color consistency.
- Cool and serve. Cool briefly to finish interior set, then slice and serve warm to display the chewy bagel crust and tender crumb.
Using a preheated stone or steel improves bottom heat transfer and helps develop a crisp exterior without overbrowning the top. Consult baking resources for heat transfer basics if you want to optimize equipment choices.
Pro-Caution
Drain bagels well and apply toppings quickly; damp but not dripping surfaces produce the best adhesion and even toasting in the oven.
If bagels collapse in the oven, reduce proof time or knead a bit longer to strengthen gluten. Small adjustments often solve common issues.
Tips for Chewy Bagel Success
Small adjustments yield large improvements. Weigh flour and water for consistent hydration and test one bagel as a control to refine boil time and oven spring for your setup.
Cold retardation after shaping improves flavor and tightens crumb. Remove shaped bagels from the fridge and let them come closer to room temperature before boiling to reduce shock.
Expert Insight
Try mixing a small portion of high-gluten flour into bread flour for extra elasticity. If your bagels taste flat, check yeast freshness and fermentation temperature first.
Serving Suggestions for Chewy Bagels
Serve warm with traditional spreads: plain or herbed cream cheese, butter, or smoked fish. The chewy bagel crust stands up to heavy toppings without becoming soggy when prepared correctly.
Toast leftovers briefly to refresh the crust and warm the interior. Light toasting revives chew and releases aromas from toasted toppings like sesame or onion flakes.
Nutritional Snapshot for Chewy Bagels
Per bagel, expect roughly 280 kcal, 11 g protein, 57 g carbohydrates, and 1.5 g fat. Exact values vary with flour brand, toppings, and bagel size.
To reduce calories, make smaller bagels or increase whole-grain content for added fiber. Changes to flour type and size will alter hydration and bake time, so adjust method accordingly.
Q&A
What creates the bagel’s chewy crust?
A strong gluten network and a short boil produce the chew. Gluten gives elasticity; boiling gelatinizes surface starches and seals moisture before the crust browns.
How long should I boil each bagel?
Boil 60 seconds per side for this formula. Longer boils increase density; shorter boils yield a softer crust. Time consistently and work in small batches for uniform results.
Can I make bagels without barley malt?
Yes. Sugar or honey will help browning, but barley malt provides a characteristic flavor and sheen. Expect a slightly different color and flavor without malt.
Why do my bagels become too airy?
Overproofing or weak gluten structure causes excess airiness. Control proof time and temperature; the dough should double but not become excessively puffy or bubbled.
How should I store bagels to preserve chew?
Cool fully, then freeze if not consumed soon. For short-term storage, use a paper bag to prevent moisture build-up and toast before serving to re-crisp the crust.
Wrapping Up
Consistent chewy bagels come from measured flour choice, accurate hydration, managed proofing, and a disciplined boil before a hot bake. Each variable affects chew and crust in predictable ways.
Practice one batch, record adjustments, and refine timing. With careful control of ingredients and process you will replicate bakery-style chewy bagels reliably in your kitchen.
See also: bagel topping ideas and artisan techniques referenced throughout this guide for method crossover and variations.
See also: Chewy Bagel
]]>