- Key outcome: Silky broccoli soup texture without heaviness.
- Timing: Ready in about 55 minutes for six servings.
- Cheese mix: Aged cheddar, Gruyère, and Parmesan for balanced melt and flavor.
- Storage: Freeze the base before adding cheese; reheat gently to restore creaminess.
Velvety Texture Secrets for the Perfect Broccoli Soup Blend
Achieving a truly velvety broccoli soup requires controlled starch gelatinization and careful dairy integration. Begin with a pale roux and hydrate it with warm stock to build body without lumps.
When pureeing, use an immersion blender for incremental control so you can leave small pieces for texture. For a short reference on the thickening technique, see the roux article.
Broccoli Soup: At-A-Glance Prep and Yield
Prep: 20 minutes. Cook: 35 minutes. Total roughly 55 minutes for six servings. These times assume fresh broccoli florets and room-temperature dairy.
Yield: Serves 6 generous bowls. Plan 1 to 1.5 cups per serving depending on appetite and whether you pair it with bread or salad.
Broccoli Soup Ingredients
Use fresh, firm broccoli for the best color and nutrient retention. Frozen broccoli works if handled carefully, but it can release more water and yield a milder green hue than fresh florets.
Below are precise ingredient amounts to reproduce reliable results. Substitute full-fat oat milk for a dairy-free option and follow the same tempering steps to avoid graininess.
- 4 cups fresh broccoli florets, chopped into bite-sized pieces
- 1 tablespoon unsalted butter
- 1 tablespoon olive oil
- 1 medium yellow onion, finely diced
- 3 cloves garlic, minced
- 3 tablespoons all-purpose flour, sifted
- 4 cups low-sodium vegetable broth
- 2 cups whole milk, warmed (or full-fat oat milk)
- 1 cup sharp white cheddar cheese, shredded
- 1 cup Gruyère cheese, shredded
- ½ cup Parmigiano-Reggiano, finely grated
- Salt and freshly ground black pepper, to taste
- Pinch of freshly grated nutmeg
- Fresh chives, chopped (for garnish)
Broccoli Soup Instructions
Follow a structured sequence to prevent curdling and to layer flavors. Soften aromatics, build a pale roux, and add broth gradually to control thickness and prevent lumps.
1. Heat butter and olive oil over medium heat. Sauté the diced onion and garlic until translucent, about 5 minutes, stirring to avoid browning.
2. Sprinkle the flour over the softened aromatics and stir constantly to form a smooth paste. Cook 2–3 minutes to remove the raw flour flavor while keeping the roux pale.
3. Slowly whisk in the warm vegetable broth so the base stays lump-free. Bring to a gentle simmer; this helps the flour hydrate and thicken consistently.
4. Add the chopped broccoli and simmer uncovered for 10–12 minutes until tender but still bright green. A moderate simmer preserves color and nutrients; for detailed broccoli nutrient context, see broccoli.
5. Use an immersion blender to puree most of the soup to a silky consistency while leaving some texture. Alternatively, blend in batches with a high-speed blender for an ultra-smooth finish.
6. Reduce heat to low and stir in warmed milk. Add shredded cheeses in small batches, stirring until fully melted and smooth before adding more. Tempering warm dairy prevents protein shock and separation.
7. Season with salt, pepper, and nutmeg to taste. Keep the soup below simmering after cheese addition to prevent oil separation and graininess.
8. Serve warm in bowls and finish with chopped chives for visual contrast and a fresh, mild onion note.
 Pro-Caution
Chef’s Notes and Cheese Strategy for Broccoli Soup
Choosing the correct cheese profile matters more than adding extra cheese. A sharp aged cheddar supplies bite, Gruyère adds nuttiness, and Parmigiano-Reggiano gives savory umami that pulls the flavor together. For background on each cheese, consult the respective resources on Cheddar cheese, Gruyère, and Parmigiano-Reggiano.
Grate cheeses fresh from a block whenever possible. Pre-shredded cheese often contains anti-caking agents that can inhibit smooth melting and contribute to a slightly grainy mouthfeel.
 Expert Insight
Texture and Flavor Adjustments for Broccoli Soup
To increase silkiness, blend a larger portion of the soup until the desired viscosity is reached. To preserve bite, reserve one cup of chopped florets and stir them back in after pureeing.
Adjust seasoning in small increments. Cheese contributes salt and umami, so taste after each addition and fine-tune. A tiny pinch of nutmeg brightens dairy notes without overtaking the broccoli.
Broccoli Soup: Make-Ahead, Storage, and Reheating
This soup thickens when chilled due to gelatinized starch and congealed fats. Reheat gently and whisk in a splash of warm milk or broth to restore a smooth consistency before serving.
Freeze the base before adding cheese to limit textural breakdown. Store in airtight containers for up to two months and thaw overnight in the refrigerator for best results.
Broccoli Soup Serving Suggestions
Pair the soup with crusty sourdough, a warm baguette, or a crisp green salad to balance texture and richness. A grilled cheese sandwich complements the bowl and provides additional chew and flavor contrast.
For garnish, sprinkle with extra shredded cheese, cracked black pepper, and chopped chives. A light drizzle of extra-virgin olive oil or crispy shallots adds texture and visual appeal.
Explore related recipes and variations on the site: broccoli soup recipes and cheesy soup variations offer quick swaps and presentation ideas.
Broccoli Soup Nutrition Snapshot
Estimate per-serving values to help with meal planning. Nutrition varies with ingredient brands and portion sizes, so treat the numbers as an informed approximation.
Calories: ~290 kcal. Protein: ~16 g. Carbohydrates: ~20 g. Fat: ~15 g. These values assume whole milk and the cheese quantities listed above.
Broccoli supplies fiber, vitamin C, and folate. Cooking reduces some heat-sensitive vitamins; quick simmering preserves most of the nutrient profile compared with extended boiling, and the vegetable remains a strong source of micronutrients. For cultivar and nutrient detail, refer to broccoli.
Images

FAQ
What makes this broccoli soup a comfort classic?
The balance of creamy dairy and bright, slightly bitter broccoli provides contrast that feels familiar and satisfying. Texture plays a major role: a smooth, glossy soup with small vegetable bites triggers a pleasing mouthfeel.
Simple, recognizable ingredients and straightforward technique also support the classic status. Small adjustments to cheese and blending deliver consistent comfort every time.
How do you keep the soup rich without it feeling too heavy?
Use whole milk rather than heavy cream to reduce calorie density while keeping mouthfeel. Pureeing part of the broccoli adds body without additional fat.
Control portion size and serve with a light salad to balance the meal. Adjust the cheese ratio for perceived richness without oversalting.
Can I make this broccoli soup dairy-free or vegan?
Yes. Replace milk with full-fat oat or almond milk and swap butter for olive oil. Use fortified plant-based milks and commercial vegan cheeses or blended cashews to achieve creaminess.
Remember that melting behavior and flavor will change. Test small batches and adjust seasoning before serving to guests.
How should I freeze and reheat the broccoli soup for best results?
Freeze the soup base before adding any shredded cheese to reduce separation. Store in airtight containers for up to two months and thaw overnight in the refrigerator.
Reheat gently over low heat and whisk in warm milk or broth to revive texture. Add shredded cheese only after reheating for the best melt quality.
What are simple ways to elevate the soup for guests?
Serve in mini bread bowls or ramekins, garnish with truffle oil or crispy pancetta, and offer homemade croutons on the side. Fresh herbs and a finely grated finishing cheese add polish.
Keep presentation neat: wipe bowl rims and add a small herb sprig to signal care and craftsmanship. Small touches increase perceived value without much effort.
See also: broccoli soup
See also: broccoli soup
]]>
- Roast for depth: Slow-roasting concentrates sugars and adds caramelized complexity.
- Basil timing matters: Add most basil late to preserve aroma and avoid bitterness.
- Texture control: Use an immersion blender for a velvety finish or reserve chunks for a rustic profile.
- Vegan swap: Coconut cream or blended cashews deliver creaminess without dairy.
Prep and Cook Time
Preparation: 15 minutes. Roasting: 40 minutes. These times optimize caramelization without drying the fruit.
Simmering and finishing: 20 minutes. Altogether you will spend about 1 hour 15 minutes from start to table with minimal active hands-on time.
Yield and Difficulty
This recipe yields about 6 generous bowls, suitable for family meals or a small dinner party. The method scales well: double the tomatoes and broth to serve more people.
Difficulty level: Medium. The techniques are straightforward, but attention to roasting and seasoning delivers professional results.
Ingredients
Gather fresh, quality ingredients for maximum flavor. Use ripe tomatoes, good olive oil, fresh basil, and a reliable vegetable broth for the best outcome.
- 3 lbs ripe Roma tomatoes, halved
- 4 tbsp extra virgin olive oil
- 1 large yellow onion, finely chopped
- 4 cloves garlic, minced
- 2 cups vegetable broth
- 1 cup fresh basil leaves, loosely packed
- 1/2 cup heavy cream (or coconut cream for dairy-free)
- 1 tbsp tomato paste
- 1 tsp sea salt (adjust)
- 1/2 tsp freshly ground black pepper
- 1 tsp sugar (optional)
- Fresh basil leaves for garnish
The Art of Roasting Tomatoes for Maximum Tomato Soup Flavor
Roasting drives browning reactions and sugar concentration to deepen the tomato’s profile. Arrange tomatoes cut-side up with space between them so heat circulates evenly and juices concentrate.
Roast at 400°F (200°C) until edges caramelize and juices concentrate. This focused roasting step produces the savory-sweet backbone of the tomato soup and complements the fresh herb notes.
For technical context, consult the Roasting process on roasting and consider how Maillard chemistry shapes flavor via the Maillard reaction.
Crafting the Perfect Basil Infusion for Tomato Soup
Basil contributes volatile oils that provide the soup’s signature perfume. Add most basil during the final simmer to release aroma without stressing the leaf into bitterness.
For a smoother, integrated herb note, briefly simmer basil in broth before pureeing. Save some leaves for garnish to preserve fresh color and a burst of aroma at service.
Reference basil varieties and aromatic profiles on the basil page when selecting Genovese versus Thai basil for different flavor directions.
Balancing Creaminess and Acidity in Tomato Soup
Roasted tomatoes deliver natural acidity that brightens the dish. Counterbalance this acidity with gradual additions of cream or an emulsifying ingredient like blended white beans for a dairy-free option.
Stir cream in off heat and gently rewarm to prevent curdling. If the tomato soup reads too tart, small adjustments with sugar or a splash of balsamic vinegar tame acidity while preserving tomato clarity.
Use top-quality fats, such as extra virgin olive oil, to build mouthfeel and carry flavor.
Serving Suggestions and Pairings for Tomato Soup
Serve hot with a swirl of cream and a scattering of fresh basil leaves for contrast. Add crunchy elements like toasted pine nuts or artisan croutons for texture contrast.
Pair the tomato soup with grilled cheese made from sharp cheddar or creamy mozzarella for a classic combination. For lighter menus, a crisp green salad with lemon vinaigrette refreshes the palate.
Pro-Caution
Step-by-Step Instructions
Follow the sequence for dependable, repeatable results. Read all steps before you begin to time the roasting and finishing phases effectively.
Organize mise en place: chop onions, measure broth, and pick basil so you maintain control during hot steps and keep the timeline tight.
Preparation
Preheat oven to 400°F (200°C). Arrange halved Roma tomatoes cut-side up on a baking sheet, drizzle with 2 tablespoons olive oil, and season with salt.
Roast until deeply caramelized, about 35–40 minutes. Avoid overcrowding; good spacing ensures even browning and consistent flavor concentration for the tomato soup base.
Cooking and Finishing
Meanwhile, heat remaining olive oil in a large saucepan over medium heat. Sauté chopped onion until translucent, then add garlic and tomato paste and cook briefly to awaken aromatics.
Add roasted tomatoes with their juices and 2 cups vegetable broth, then stir in 1 1/2 cups basil leaves. Simmer 15 minutes to build the infusion, then purée with an immersion blender until smooth.
Return to heat, stir in heavy cream gradually, and rewarm without boiling. Adjust salt and pepper to taste and finish with a few torn basil leaves for fresh contrast.
- Preheat oven and roast tomatoes cut-side up at 400°F (200°C) until caramelized.
- Sauté onion, add garlic and tomato paste, cook until fragrant.
- Add roasted tomatoes and broth; simmer and add basil.
- Blend to desired texture, then finish with cream and final seasoning.
- Serve hot with basil garnish and optional toasted pine nuts or croutons.
Chef’s Notes: Tips for Success
Tomato selection: Choose firm, ripe Roma or plum tomatoes for balanced acidity and sweetness. Overripe fruit can become overly watery when roasted and dilute the tomato soup concentration.
Make-ahead: Roast tomatoes a day ahead and refrigerate. Reheat with broth to speed service without losing flavor and preserve the roasted character of the soup.
Expert Insight
Nutritional Information
This soup delivers a moderate calorie count and a comforting fat profile from olive oil and cream. It also supplies vitamins A and C from tomatoes and basil, and can adapt to lower-fat or vegan diets.
Per serving: approximately 180 kcal, 3g protein, 14g carbs, 12g fat (estimates vary with ingredient substitutions). These estimates change when you swap cream for coconut cream or cashew purée in the tomato soup.
| Per Serving | Calories | Protein | Carbs | Fat |
|---|---|---|---|---|
| Roasted Tomato Basil Soup | 180 kcal | 3g | 14g | 12g |
FAQ
Can I use canned tomatoes instead of fresh?
Yes. High-quality canned whole tomatoes work well, especially out of season. However, fresh roasted tomatoes give a brighter aroma and a more layered roasted character to the tomato soup.
How do I make this soup vegan without losing creaminess?
Substitute heavy cream with coconut cream or soaked, blended cashews. Also, blending a portion of white beans adds body and protein without altering the savory profile of the tomato soup.
How do I store leftovers safely?
Cool to room temperature, then refrigerate in an airtight container for up to four days. Freeze portions for up to three months and reheat gently on the stove to preserve texture.
What is the best way to adjust acidity in tomato soup?
Taste and adjust with a pinch of sugar or a splash of balsamic vinegar. Add gradually and re-taste, because small amounts shift the balance significantly.
Can I make this gluten-free?
Yes. The soup is inherently gluten-free. Just pair it with gluten-free bread or avoid croutons if you require a strict gluten-free meal.
Insights and Conclusions
Roasting transforms tomatoes into a concentrated flavor base while a careful basil infusion lifts the tomato soup with fresh, aromatic notes. The technique yields a restaurant-quality bowl that remains approachable at home.
Follow timing and seasoning guidelines, experiment with texture and cream alternatives, and scale the recipe confidently. With minimal effort, you can produce a memorable, flavorful tomato soup that showcases simple, seasonal ingredients.

See also: Tomato soup and Roasted tomato basil
See also: Tomato Soup
]]>
- At a glance: Roast or sauté mushrooms to concentrate umami and deepen flavor.
- Texture tip: Puree while warm and finish with cream off the boil to preserve a silky emulsion.
- Dairy-free option: Use full-fat coconut milk or cashew cream to retain richness.
- Storage: Freeze portions for up to three months and re-emulsify gently when reheating.
Prep and Cook Time
Preparation: 15 minutes; Cooking: 30 minutes; Total: 45 minutes. These estimates assume pre-cleaned mushrooms and standard home equipment.
Short, focused cooking preserves mushroom flavor while minimizing nutrient loss. For efficiency, multitask by chopping aromatics while mushrooms sweat to reduce hands-on time.
Yield
This recipe yields four generous bowls of mushroom soup, ideal as a starter or a main paired with a side salad. Scale ingredients linearly: doubling components doubles yield without changing technique.
For batch plans, the mushroom soup freezes well in individual portions for up to three months. Thaw overnight in the refrigerator and re-emulsify gently before serving to restore the original mouthfeel.
Difficulty Level
Easy to moderate: the skills are straightforward but benefit from attention to browning and seasoning. Precise timing during the sauté and simmer phases produces measurable improvements in depth and mouthfeel.
Home cooks with basic knife skills and an immersion blender will find the recipe manageable. Professional tips later accelerate learning and improve consistency for every batch of mushroom soup.
Ingredients
Use a mix of mushroom types for a layered flavor profile; combining varieties increases natural glutamates and perceived umami. For more on the savory taste mechanism, consult umami.
Core ingredients:
- 1 lb mixed mushrooms (cremini, shiitake, oyster), cleaned and sliced
- 3 tbsp unsalted butter (or vegan butter)
- 1 medium onion, finely chopped
- 3 cloves garlic, minced
- 1 tsp fresh thyme leaves
- 4 cups vegetable broth (low sodium)
- 1 cup heavy cream or full-fat coconut milk
- 2 tbsp all-purpose flour (or cornstarch for gluten-free)
- Salt and freshly ground black pepper, to taste
- 1 tbsp olive oil
- Fresh parsley or chives, finely chopped for garnish
When choosing a cream substitute, prioritize full-fat alternatives to maintain mouth-coating viscosity. For background on dairy fat and structure, see cream.
Instructions
Follow the sequence: sauté mushrooms, build aromatics, thicken, simmer, blend, and finish with cream. Each step either develops flavor or stabilizes texture, so avoid skipping any phase.
Use an immersion blender for a seamless process, or work in batches with a standing blender while venting the lid to release steam. Keep a ladle nearby to skim foam and adjust seasoning as you blend the mushroom soup.
Prepare the Mushrooms
Heat olive oil in a wide, heavy-bottomed pot over medium heat and add mushrooms in a single layer; crowding causes steaming rather than browning. Sear until moisture releases and mushrooms turn golden brown, about 7–8 minutes, stirring occasionally.
Browning concentrates flavor through the Maillard reaction, which builds savory compounds and increases perceived richness. For technical context, refer to Maillard reaction.
Cook Aromatics
Lower heat, then add butter, chopped onion, and garlic; sweat until translucent and fragrant, about 4–5 minutes. Stir in fresh thyme to release volatile oils and anchor the soup with herbaceous notes.
Thyme complements mushrooms because its terpenes and low sugar content pair with savory profiles. Use the reserved sautéed slices as a garnish to provide texture contrast at service.
Thicken and Simmer
Sprinkle flour over the mushroom-aromatic base and cook for 1–2 minutes to remove raw starch taste. Slowly whisk in vegetable broth to create a smooth slurry, then simmer gently for 12–15 minutes to meld flavors.
Alternatively, use a cornstarch slurry for a gluten-free option by whisking cornstarch into cold broth before adding. Maintain a gentle simmer rather than a rolling boil to avoid breaking dairy emulsions later.
Blend and Finish
Puree the soup using an immersion blender until fully smooth, or transfer in batches to a standing blender, venting the lid to release steam safely. Return to low heat, then stir in cream or coconut milk off the boil to preserve emulsion stability.
Adjust seasoning with salt and pepper in small increments, tasting between additions to avoid over-salting concentrated stocks. For extra silkiness, pass the finished mushroom soup through a fine sieve before service.
Tips for Success
Choose mushrooms with varied textures and flavor intensities for complexity rather than relying on a single variety. Dry-mushroom browning and briefly roasting a portion of the mix will elevate depth without adding excess fat.
Reserve a few sautéed slices for garnish to add visual contrast and texture at service. Reheat gently, stirring and adding a splash of broth if the soup thickens after refrigeration.
[TESTIMONIAL NOTE: Fast, repeated browning cycles yield more complex flavor and reduce water retention in the pan. Try a wide pan for best results.]
Expert Insight
Also, for recipe variation, consult related mushroom soup recipes and explore technique notes in our browning technique guide. These internal references help refine your process across batches.
Storage and Make-Ahead
Cool the soup quickly in an ice bath before refrigerating to preserve quality and safety. Freeze in shallow containers to speed freezing and reduce cell rupture that alters texture.
When reheating frozen portions, thaw overnight and warm gently while whisking to re-emulsify. If the soup separates, remove from heat and whisk in a tablespoon of cold liquid to reincorporate the emulsion.
Pro-Caution
Store refrigerated portions in airtight containers for 3–4 days. For extended shelf life, freeze in single-serving containers for up to three months and relabel with the preparation date.
Serving Suggestions to Elevate Your Cozy Bowl Experience
Serve the mushroom soup in warmed bowls to maintain temperature and mouthfeel throughout the meal. Add finishing touches like chopped herbs, a drizzle of high-quality olive oil, or toasted seeds for contrast.
Pair with crunchy elements such as garlic-rubbed sourdough croutons or a crisp green salad for balance. For wine pairing, choose a dry white such as an unoaked Chardonnay to match the soup’s buttery texture.
Nutrition
The approximate nutrition profile per serving reflects a creamy preparation: roughly 280 kcal with 24 g fat, 12 g carbohydrates, and 6 g protein. Variations depend on cream versus coconut milk and added fat amounts.
To reduce calories, use half cream and half stock or swap in lower-fat dairy, while monitoring texture and mouthfeel. Always calculate nutrition from your exact ingredient brands for precise values when managing diets.
| Nutrient | Per Serving (Approx.) |
|---|---|
| Calories | 280 kcal |
| Protein | 6 g |
| Carbohydrates | 12 g |
| Fat | 24 g |

FAQ
The following questions address texture, substitutions, storage, and simple upgrades. Each answer focuses on actionable technique and sound culinary reasoning.
What makes a mushroom soup silky smooth and creamy?
Silkiness comes from fully pureeing the cooked base and finishing with fat that coats the palate. Puree while warm and add cream off the boil to preserve a stable emulsion in the mushroom soup.
Which mushrooms produce the best flavor for this soup?
Use a mix of cremini, shiitake, and oyster mushrooms to combine nutty, meaty, and delicate notes. Blending varieties delivers greater complexity than a single type, amplifying natural glutamates and umami.
Can I make this soup dairy-free or vegan?
Yes. Full-fat coconut milk or cashew cream provides the body and mouthfeel that heavy cream offers. Use vegan butter or extra olive oil for richness and adjust seasoning because plant milks can taste slightly sweeter.
How do I avoid a grainy or broken texture?
Puree thoroughly while the soup is still warm and strain if necessary to remove fibrous bits. Avoid boiling after adding cream and re-emulsify gently if separation occurs by whisking in a small amount of cold liquid.
How long does homemade mushroom soup keep?
Refrigerate in airtight containers for 3–4 days; freeze in portions for up to three months. Thaw slowly in the fridge and reblend or whisk gently when reheating to restore smoothness.
For additional reading on fungi and edible varieties, see the general overview at mushroom. These resources support ingredient choices and technique decisions for consistent mushroom soup results.
Closing Remarks
This silky mushroom soup rewards small technical investments like proper browning, gentle simmering, and careful emulsification. Follow the sequence provided to convert modest pantry items into a reliably comforting bowl with refined texture.
Experiment with garnishes and mushroom blends to make the recipe your own, while preserving the core steps that define the soup’s silkiness. Enjoy a repeatable process that yields rich comfort without unnecessary complexity.
See also: mushroom soup
]]>
- Balance matters: oil, emulsifiers, and acid must integrate slowly and evenly.
- Temperature control: room-temperature ingredients reduce the risk of breaking.
- Tools count: an immersion blender or whisk plus patience yields reliable results.
- Rescue strategies: you can often repair a broken emulsion with a fresh yolk or warm water.
Understanding the Science Behind Emulsification in Mayonnaise
Mayonnaise is a classic oil-in-water emulsion where tiny oil droplets suspend inside a water phase. Lecithin and other phospholipids in egg yolks act as surface-active agents that stabilize those droplets.
For a technical primer, see the chemistry on emulsion and the role of lecithin. These pages explain droplet dynamics and how emulsifiers lower interfacial tension.
Choosing the Ideal Ingredients for Creamy and Stable Results
Start with fresh, high-quality egg yolks. The yolk provides natural emulsifiers and proteins that bind oil and vinegar into a cohesive texture; read more about the yolk structure at egg yolk.
Use a neutral vegetable oil or a light olive oil for flavor balance. Add acid—white wine vinegar or lemon juice—in measured amounts. Also, include a small amount of Dijon mustard to strengthen initial emulsification.
Ingredient checklist
2 large egg yolks, room temperature.
1 cup neutral oil (grapeseed or light olive oil preferred). Add a tablespoon of acid and a teaspoon of mustard for stability.
Techniques and Tools to Achieve Flawless Mayonnaise Every Time
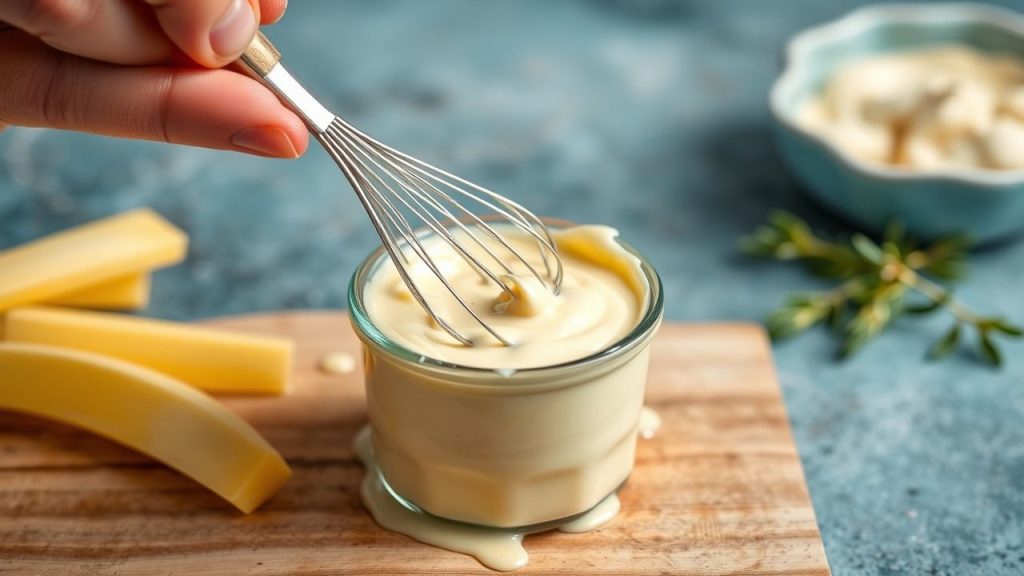
Technique dictates success. Begin by whisking yolks, mustard, and acid until smooth. Then add oil extremely slowly at first to build a stable matrix.
An immersion blender in a tall jar speeds the process and reduces arm strain. Alternatively, a steady hand with a balloon whisk works well; focus on small, consistent additions of oil and even motion.
Hand method vs. blender
When whisking by hand, adopt a wide, steady stroke and keep the bowl tilted slightly toward you. That creates consistent shear and helps form uniform oil droplets.
With an immersion blender, pulse briefly and lift as the emulsion thickens to incorporate more air and prevent overprocessing. Both methods require patience.
Expert Insight
Between the hand and blender methods, choose the one that matches your comfort level. Both deliver professional-quality mayo when you respect speed and temperature variables.
Troubleshooting Common Emulsion Failures and How to Fix Them
A broken emulsion means the oil droplets aggregated and the continuous phase no longer binds them. Most failures result from adding oil too fast or from temperature mismatch.
To rescue a split mayo, place a fresh yolk in a clean bowl and add the broken mayo dropwise while whisking. Alternatively, whisk in a teaspoon of warm water to loosen texture and re-integrate phases.
Common problems and quick fixes
- Broken: Start a new yolk and slowly whisk in the broken mix.
- Too thin: Add oil dropwise while whisking until it thickens.
- Too thick: Whisk in warm water by the teaspoon to reach desired consistency.
Also, remember that acid level affects stability and taste. If separation recurs, check your acid proportion and room-temperature status of ingredients.
Pro-Caution
If a rescue fails, start over with a new yolk and gradually reincorporate the failed batch. This method restores emulsifying capacity reliably.
Chef’s Notes and Tips for Success
Consistency beats improvisation. Keep your motions steady and your pour controlled. Smaller initial oil additions create the emulsion scaffold you need to add larger volumes later.
Experiment with flavored oils or infused vinegars after you form the base. Add chopped herbs, roasted garlic, or lemon zest at the end so that these ingredients don’t interfere with emulsification during the build stage.
Vegan alternatives
Use aquafaba—the cooking liquid from chickpeas—as an egg-free emulsifier. Apply the same slow-oil addition and steady whisking principles to achieve a similar texture.
Note that plant-based mayo may differ slightly in mouthfeel but still performs well in dressings and dips when stabilized properly.
Serving Suggestions and Storage
Homemade mayo enhances sandwiches, salads, and sauces. Use it as a base for aioli, tartar sauce, or creamy dressings that benefit from its fresh flavor and texture.
Store mayonnaise in a clean jar and keep refrigerated. Use within one week for best safety and flavor. Bring to room temperature briefly before serving to recover silkiness if chilled too long.
For more technique notes and related recipes, see our internal guide on Culinary Emulsions: Techniques and Tips and explore variations at Mayonnaise Variations and Flavor Ideas.
At-Home Equipment and Safety
Use a tall jar with an immersion blender or a deep bowl with a whisk. Avoid reactive metal bowls when using acid; choose glass, ceramic, or food-safe plastic instead.
Handle raw eggs with standard food-safety precautions. While many cooks use raw yolks safely, consider pasteurized eggs if you serve vulnerable populations.
FAQ
The following questions address common points that home cooks ask when making mayonnaise. Each answer focuses on practical, tested steps.
Read these carefully and keep the rescue techniques in mind when experimenting.
What causes mayonnaise to break?
Mayonnaise breaks when oil droplets coalesce and the continuous phase fails to hold them apart. Rapid oil addition and cold ingredients are common causes. Slow addition and room temperature balance reduce this risk.
How do I repair a broken emulsion?
Start a fresh yolk in a clean bowl and whisk the broken mixture in slowly, drop by drop. Alternatively, whisk in a teaspoon of warm water to loosen and rebind phases. Both methods restore emulsifier function.
Can I use different oils?
Yes. Neutral oils like grapeseed deliver a clean flavor. Light olive oil works if you prefer some olive character. Avoid strong-flavored oils until after the emulsion forms.
Are there vegan options that match the texture?
Aquafaba mimics egg yolk’s emulsifying properties well. Use the same slow-oil addition and whisking technique. Textural differences are minor when you follow standard emulsification steps.
How long does homemade mayonnaise keep?
Refrigerated in a sealed jar, homemade mayonnaise lasts up to one week. For safety, use pasteurized eggs if serving elderly, pregnant, or immunocompromised guests.
Mastering mayonnaise transforms a simple condiment into a flexible tool in your kitchen. With controlled technique, informed ingredient choices, and rescue methods on hand, you can produce stable, silky mayo repeatedly.
| Nutrient | Per 1 Tbsp |
|---|---|
| Calories | 94 |
| Protein | 0.1 g |
| Carbohydrates | 0.2 g |
| Fat | 10 g |
See also: Mayonnaise
]]>
- Fast results: Cold cream + chilled tools = whipped peaks in under 5 minutes.
- Controlled texture: Use short pulses to stop at soft or stiff peaks.
- Stability options: Add cream cheese or gelatin to extend hold for cakes.
- Versatile uses: Sweet and savory applications expand what whipped cream can do.
Whipping Cream Wonders: Texture and Consistency Mastered with Your Immersion Blender
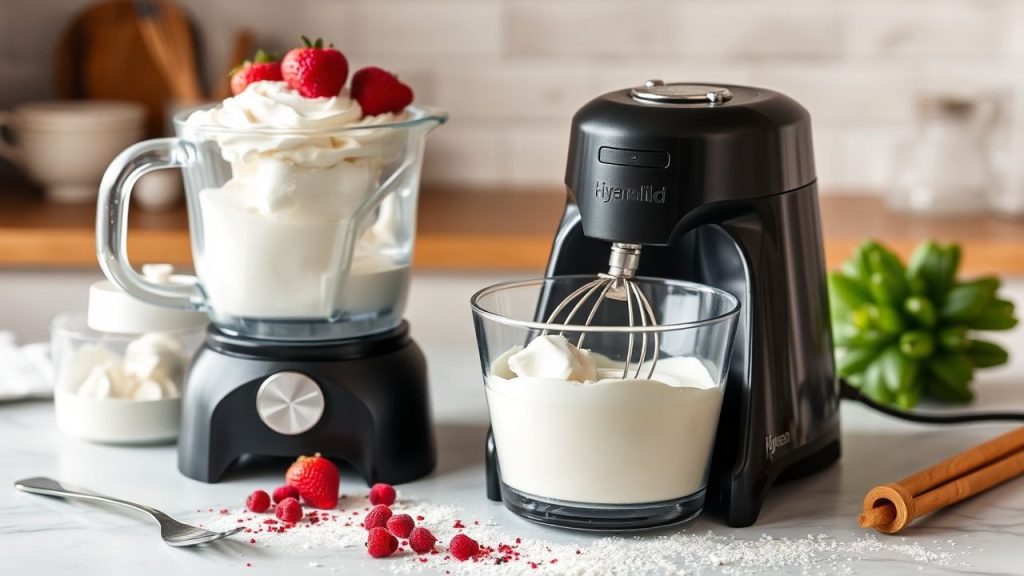
Using an immersion blender gives you a high-speed, compact option to aerate cream. It works best when you combine equipment, temperature, and motion to build stable air cells.
Start with heavy cream that lists at least 35% milk fat for reliable volume. Learn the mechanics behind aeration to choose soft or stiff peaks with confidence. See heavy cream for composition details.
Prep and Timing
Prep time: 5 minutes. Whipping time: 3–5 minutes depending on batch and temperature. These are practical numbers from repeated kitchen tests.
Chill everything. Place the immersion blender attachment and container in the fridge or freezer for at least 10 minutes. Cold tools reduce heat transfer and speed coagulation of fat globules.
Prep and Cook Time
- Preparation: 5 minutes
- Whipping: 3–5 minutes
- Total: 8–10 minutes
Ingredients and Equipment
Use a tall, narrow container designed for immersion blenders. The shape concentrates the motor action and traps air. A deep jar or a dedicated beaker works best.
For ingredients keep it simple: chilled heavy cream, powdered sugar for sweetness, and vanilla if desired. For longer hold, add a teaspoon of cream cheese or a small amount of gelatin. Read about cream cheese if you plan to stabilize this way.
Yield
About 1 cup heavy cream yields roughly 2 cups whipped cream. This amount serves 4–6 as a topping, depending on usage and piping losses.
Difficulty Level
Easy. The technique fits cooks of all skill levels. Control comes from observing peaks rather than relying on timers alone.
Ingredients
- 1 cup heavy cream, chilled
- 2 tbsp powdered sugar, sifted
- 1 tsp vanilla extract, optional
- Pinch of salt to brighten flavor
Step-by-step Instructions
Set up cold equipment and a tall container. Pour the chilled cream into the container and add sugar and flavoring if used.
Attach the immersion blender and start on medium-high speed. Move the wand gently up and down to incorporate air and avoid splatter. The motion should be controlled and brief rather than frantic.
- Chill tools: Refrigerate the whisk attachment and container for 10 minutes.
- Pour cream: Add cream to a tall container to minimize splatter and air loss.
- Add sugar and flavor: Add powdered sugar and vanilla as the cream begins to thicken.
- Whip: Immerse and pulse on medium-high until soft peaks form, about 3 minutes. Continue to stiff peaks if needed, checking every 10–15 seconds.
- Stop on time: Once stiff peaks hold, stop. Overwhipping turns cream grainy as fat coalesces into butter.
- Store: Refrigerate in an airtight container for up to 24 hours. Re-whisk gently before serving if it loses volume.
Tips for Success
Cold is crucial. Cold cream and chilled equipment trap air faster and reduce whipping time. This lowers the risk of passing from peaks to butter.
Container shape matters. A narrow, tall vessel keeps the aeration focused. It also reduces splatter and lets the blade reach the full column of cream.
- Pulse don’t blast: Short bursts give you control over peak formation.
- Watch the texture: Soft peaks look glossy and fall back slowly. Stiff peaks hold shape when the whisk lifts.
- Stabilizers: Add a teaspoon of cream cheese or a small amount of gelatin for longer hold, useful for cakes.
- Fat content: Use cream with at least 35% fat for reliable structure.
For mechanical context, review the device specifics at the immersion blender entry. It explains motor and blade design and why container geometry matters. See immersion blender.
Expert Insight
When stabilizing with gelatin, bloom a small amount in cold water and warm gently before adding. Dissolve completely so you do not create strings in the foam.
Pro-Caution
If overwhipping begins, you can sometimes rescue the cream by adding a tablespoon of fresh cold cream and gently whipping to bring it back. This does not always work if the process moves too far toward butter.
Creative Uses Beyond Desserts
Whipped cream can balance heat and acidity in savory dishes. Fold in herbs and lemon zest for a bright, airy garnish on grilled fish or roasted vegetables.
Try herbed whipped cream as a dollop on soups or as a spread for brunch breads. The texture adds richness without weight, and the technique scales easily for small batches.
Use whipped cream to build layered parfaits, frost small cakes, or pipe decorations on cupcakes. For stability over long service, link to our detailed guide on dessert toppings and stabilizers at Homemade Dessert Toppings.
For more on kitchen tools and setup, see Kitchen Tools & Setup to optimize your workspace and tools for fast, clean whipping sessions.
Nutrition and Portioning
Whipped cream is calorie-dense. Two tablespoons typically contain about 50 kcal and several grams of fat. Use measured portions to manage calories and flavor balance in plated dishes.
For nutritional context consult general dairy composition references. The protein and carbohydrate values remain low; fat drives the texture and mouthfeel. For related reading see whipped cream.
| Nutrient | Per 2 tbsp serving |
|---|---|
| Calories | 52 kcal |
| Protein | 0.3 g |
| Carbohydrates | 0.4 g |
| Fat | 5.5 g |
For a science-focused read on aeration, consult resources on food structure and stabilizers. If you plan to use gelatin as a stabilizer, review its properties at gelatin.
FAQ
Can you really whip cream with an immersion blender?
Yes. An immersion blender can produce soft or stiff peaks quickly when you use chilled cream and the right container. It performs especially well for small batches and quick touch-ups.
How does an immersion blender compare with a hand mixer?
A hand mixer offers fine speed control and can be gentler on larger batches. An immersion blender provides compact speed and fast results for small to medium portions. Choose based on batch size and finish quality desired.
What is the secret to achieving perfect peaks?
Cold cream, chilled equipment, a tall container, and controlled pulsing. Stop early, check texture, and avoid continuous full-speed runs to prevent overwhipping.
Which containers work best?
Tall, narrow jars or beakers concentrate the whipping action and reduce splatter. Wide bowls force you to move the wand more and lose aeration efficiency.
How do I stabilize whipped cream for cakes?
Add a teaspoon of cream cheese or dissolve a small amount of gelatin and incorporate it while whipping. Both increase holding time and resistance to weeping under warm conditions.
Final Notes
An immersion blender is a practical, fast tool for mastering whipped cream. With temperature control and measured pulses you can achieve consistent, stable peaks.
Experiment with flavors and stabilizers to match your recipes. Use the internal guides linked above to expand technique and tool selection. Practical tests and consistency checks will make your whipped cream reliably excellent.
See also: whipped cream
]]>
- Key takeaway: Stable foams need proper emulsifiers, temperature control, and gentle aeration.
- Tool focus: An immersion blender or siphon yields repeatable results when used correctly.
- Troubleshooting: Adjust emulsifier levels and aeration speed rather than adding more air.
- Versatility: Use foams for soups, desserts, and cocktails to add texture and aroma.
Foam Mastery: Understanding the Science Behind Stable Foams
Foam forms when gas becomes trapped inside a liquid film and those films resist rupture. Two physical properties dominate: surface tension and the strength of the film formed by proteins or surfactants.
Proteins and emulsifiers create networks that slow bubble coalescence and drainage. For a tactical overview of the culinary approach that uses these principles, consult molecular gastronomy, which frames practical lab techniques for the kitchen.
Prep and Cook Time
Plan a short hands-on window for foaming; most methods concentrate work into a few focused minutes. Preparing cold equipment and pre-measured ingredients shortens active time and improves consistency.
Follow predictable timing to manage expectations: cooling, hydration of stabilizers, and active aeration each take fixed intervals that you can train to repeat reliably.
- Preparation: 10 minutes
- Foaming process: 5–7 minutes
- Total time: 15–20 minutes (including chill time)
Yield and Difficulty
A single batch using the proportions below produces about 1 cup of foam, enough to top four servings. Scale up cautiously; larger volumes often demand incremental adjustments to aeration technique and stabilizer percentage.
Skill level: intermediate. You need awareness of texture, timing, and temperature to achieve repeatable results. Practice refines the eye for bubble size and gloss.
- Makes approximately 1 cup of stable foam (1/4 cup per serving)
- Difficulty: Intermediate — experience helps but the method is accessible
Ingredients
Select components with structure in mind: proteins and emulsifiers provide film strength, fats adjust mouthfeel, and acidity affects stability. Keep ingredients cold when possible to slow bubble drainage.
Below are practical choices and why they matter in the foam matrix. Use high-quality, fresh liquids and measure emulsifiers accurately for consistent results.
Emulsifiers and Stabilizers
Soy lecithin and gelatin function differently: lecithin lowers surface tension and stabilizes thin films, while gelatin forms a gel network that traps air for longer hold. See lecithin for technical details.
Egg white and aquafaba (chickpea liquid) provide protein networks but need immediate use; their stability decreases with time and temperature changes. Adjust technique rather than overloading with additives.
Liquids, Fats, and Flavor
Milk, broths, fruit purées, and coffee all foam differently because of their protein, sugar, and fat content. Higher protein content usually yields firmer foam; fats can make films more flexible but may weaken them if excessive.
Use neutral oils sparingly to modify mouthfeel. Balance seasoning after foaming when possible so salts and acids don’t prematurely break films.
Step-by-Step Instructions
Follow a disciplined sequence: chill tools, hydrate stabilizers, combine liquids, then aerate at the surface. That order preserves film integrity while building fine bubbles.
Work deliberately and observe change. Visual cues—sheen, bubble size, and body—tell you when to stop aeration and transfer the foam to service vessels.
- Chill bowl and whisk or immersion blender head. Cold contact surfaces reduce bubble collapse during formation.
- Pour the liquid into a wide, shallow container. Wider surface area encourages consistent surface aeration.
- Sprinkle the lecithin across the surface and let it hydrate for 1–2 minutes. Hydration disperses the emulsifier and strengthens the surface film.
- Add a small amount of neutral-flavored oil and a pinch of salt, and stir gently to avoid breaking the developed surface film.
- Position the immersion blender or whisk just below the surface and begin aeration slowly. Increase speed as stable microbubbles appear, then stop once a glossy, cloud-like foam forms.
- Skim the foam gently with a slotted spoon and transfer to the plate or glass immediately. Prompt transfer keeps the foam intact and attractive.
Chef’s Notes: Tips for Success
Small adjustments create big improvements: reduce aeration speed if bubbles become coarse, or increase emulsifier by small increments when foams weaken. Keep logs of each batch for repeatability.
Temperature control is non-negotiable. Cold ingredients slow drainage and extend hold time; warm liquids accelerate coalescence and collapse.
- Ingredient choice: Favor higher-protein milks or broths for structure.
- Lecithin timing: Hydrate before aeration; avoid adding it to steaming liquids.
- Substitutions: Use aquafaba or egg whites when lecithin is not available, but serve quickly.
Expert Insight
A Deeper Dive: Techniques and Tools for Effortless Foam Perfection
An immersion blender with a narrow, high-speed head gives control for most home and professional kitchens. For ultra-fine bubbles, whipped siphons deliver superior texture but require practice and precise recipes.
Use a shallow vessel to maximize the gas-liquid interface and favor surface aeration over deep mixing. For tool selection guidance, consult our kitchen tools guide to match gear to volume and desired bubble size.
Consider the science behind tools: mechanical shear affects bubble size distribution, while pressure-based methods change nucleation and bubble formation. Cross-reference technique choices with ingredient profiles for the best outcomes.
Troubleshooting Common Challenges in Foam Creation
Diagnose problems by observing bubble size, sheen, and drainage. Those cues map directly to root causes—emulsifier level, aeration method, or temperature.
Apply small corrections and test again; avoid large one-off changes that obscure which variable fixed the issue. Keep notes to speed learning.
- Foam collapses too quickly: Check temperature and hydration of stabilizers; using slightly more lecithin often helps.
- Large, unstable bubbles: Slow down aeration and reduce oil percentage; large bubbles reveal weak films.
- Foam sinks immediately: Verify emulsifier dispersion and avoid deep mixing that breaks the surface network.
- Muted flavor: Adjust seasoning after foaming or use more concentrated base liquids.
If a siphon or charger is involved, verify seals and charge technique. Equipment failure can mimic formula problems, so confirm hardware is working before changing recipes.
Pro-Caution
Nutrition Snapshot
Foams add negligible calories per serving when used sparingly, but ingredient choices alter macros. For example, increased oil raises fat and energy density significantly.
Use the nutritional frame to decide foam portions in plated dishes or cocktails, and adjust base liquids for dietary requirements.
| Nutrient | Per serving (1/4 cup) |
|---|---|
| Calories | ~35 kcal |
| Protein | ~1.2 g |
| Carbohydrates | ~2.8 g |
| Fat | ~2.0 g |
Further Reading and References
For deeper technical context on foams and surfactants, see foundational references on emulsifiers and foam physics. Those entries summarize the core phenomena that govern culinary foams.
Explore related recipes and technique pages, including our molecular gastronomy techniques hub for applied examples and tested formulas.
FAQ
The following short answers address common operational questions and offer quick fixes. Each response focuses on a single actionable step to help you progress fast.
What is culinary foam and why use it?
Culinary foam traps gas in thin liquid films to add texture and aroma without heavy calories. Chefs use foam to enhance mouthfeel, concentrate flavor delivery, and create visual contrast.
How do I make foam last longer?
Use effective stabilizers like lecithin or gelatin, keep ingredients chilled, and aerate gently at the surface. Small increases in stabilizer concentration usually extend hold time more reliably than added air.
Which liquids produce the best foams?
Proteins-rich liquids such as milk, broths, and certain fruit purées foam well. Liquids high in oil or sugar need formulation tweaks, like added emulsifier or reduced fat, to behave predictably.
Can I flavor and color foams safely?
Yes; infuse herbs, spices, or concentrated juices, but add potent oils or pigments sparingly because they can disrupt film strength. Always test the stability after any flavor addition.
What tools should a beginner buy first?
Start with a quality immersion blender and a set of chilled bowls. Move to a siphon once you understand formulation and can reproduce textures consistently with basic tools.
Mastering foam technique rewards precision and repetition. Use the troubleshooting cues and tool guidance above to refine your approach, and consult linked references for scientific context. Practice with consistent measurements and you will obtain reliable, elegant foams every service.
See also: culinary foam
]]>