- Key control: distance and motion determine sear quality.
- Safety first: proper storage and extinguisher readiness prevent accidents.
- Technique: combine pan searing with torch finishing for optimal crusts.
- Tool choice: pick a refillable, adjustable torch for repeatable results.
The torch extends classic techniques like pan searing and oven roasting by delivering spot heat where you need it. Culinary professionals use this tool to trigger the Maillard reaction and to add nuanced char to vegetables, seafood, and proteins.
Prep and Cook Time
Preparation: 10 minutes. Preparing steaks and mise en place keeps the torch stage efficient and safe.
Cooking: 15 minutes. Quick searing and a brief torch finish speed service without sacrificing crust quality.
Yield
Serves 4 people. This method suits family service or a small dinner party where each portion gets individualized finishing.
Scale up by torch-finishing in batches, keeping finished steaks on a warm tray to rest before serving.
Difficulty Level
Medium. This technique requires control of flame distance and an understanding of searing basics, but cooks with pan-searing experience pick it up quickly.
Complete beginners can learn safely with supervision and by practicing on non-food items to sense flame behavior before applying it to food.
Ingredients
- 4 thick-cut ribeye steaks (1.5-inch thick, room temperature)
- 2 tablespoons olive oil
- 2 teaspoons kosher salt
- 1 teaspoon freshly cracked black pepper
- 4 sprigs fresh rosemary
- 4 cloves garlic, smashed
- 2 tablespoons unsalted butter
Use high-quality ingredients and allow protein to come to room temperature for consistent results. A dry surface on the meat yields a better initial sear and improves how the torch browns the surface.
If you prefer leaner cuts, reduce torch time and rely more on pan searing to protect the center from overcooking.
Instructions
- Season steaks generously with kosher salt and black pepper on both sides. Pat dry with paper towels to ensure your sear will be crisp and flavorful.
- Heat a heavy skillet (cast iron recommended) over high heat until smoking hot. Add olive oil and quickly place steaks in the pan to sear for 2 minutes per side and build an initial crust.
- Remove steaks from the pan and rest briefly on a cutting board. That pause helps juices redistribute before the finishing torch pass.
- Use your culinary torch about 3 inches from the surface, moving steadily to produce even browning. Keep the torch moving to avoid one-zone burning and to build a deep mahogany crust.
- Flip steaks and repeat torch finishing on the opposite side until the desired crust forms, roughly 2 to 3 minutes total of torching depending on flame setting.
- Return steaks to the skillet with butter, rosemary, and garlic. Baste briefly to infuse aromatics, then rest for 5 minutes before slicing against the grain to serve.
For precise doneness, monitor internal temperature with a probe. Torch finishing adds surface color while preserving the mid-rare interior when used sparingly.
Practice torch movement and distance on a scrap piece of meat to calibrate flame intensity and avoid scorch marks during service.
Tips for Success
Keep the torch moving at a steady rate and maintain a consistent distance. A 45-degree angle often yields even caramelization across a curved surface.
Dry the food surface thoroughly before torching; moisture inhibits browning and creates steam that dulls crust formation.
 Expert Insight
Use a torch with adjustable flame control; high flame works for fast sears, while a low flame gives gentle toasting for delicate items like meringue or fruit slices.
Practice on vegetables or small proteins before torching premium cuts to build confidence without waste.
Recommended Tools and Fuel
Select a refillable torch with a safety lock and an ergonomic grip. Quality materials and reliable ignition reduce downtime and increase service speed.
Understand fuel properties: many torches use butane, so follow manufacturer refill instructions and handle canisters carefully. Read more on the fuel chemistry at the butane page.
Why tool choice matters
A torch with adjustable flame and a steady nozzle produces a cleaner, more controlled sear. Cheap models can sputter or clog, causing uneven heat application.
For heavy-duty use, prefer models designed for culinary tasks rather than generic hardware blowtorches. See the tool family described at the blowtorch article for context on variations and safety standards.
Essential Safety and Maintenance
Always review the manufacturer’s safety recommendations before first use. Keep a class B/C fire extinguisher or a box of baking soda nearby when torching indoors.
Store fuel canisters in a cool, ventilated area away from direct sunlight and heat sources. Follow refill protocols to prevent leaks and nozzle blockages.
 Pro-Caution
Clean the torch nozzle periodically to prevent residue buildup. A clogged nozzle reduces flame quality and can lead to uneven finishes.
Service your torch according to the manufacturer’s schedule and replace seals or filters if you detect inconsistent ignition or sputtering.
Serving Suggestions
Plate steaks with a simple herb-butter finish and restrained garnishes to let the torch-derived crust shine. A citrusy salad can cut through the richness for balance.
Try crispy roasted potatoes or quick-charred asparagus finished with the torch for matching textures. For a classic pairing, select a bold red wine that complements char and richness.
Presentation and Finishing Uses
Use the torch to finish cheese toppings, char peppers for easy peeling, or add a controlled blaze to desserts like custard toppings. The tool expands finishing options beyond protein alone.
For delicate tasks like toasting meringue, set the flame lower and keep rapid motion to avoid overheating the interior. Professionals often practice on small reserves to tune intensity.
Further Reading and Internal Resources
Expand technique knowledge with our internal guides: see the Guide to Kitchen Flame Techniques for additional recipes and torch applications.
Review safety drills and storage best practices in our internal safety primer at Safety: Torch Basics to ensure compliant workplace habits and home kitchen readiness.
| Nutrient | Per Serving |
|---|---|
| Calories | 520 kcal |
| Protein | 45 g |
| Carbohydrates | 1 g |
| Fat | 38 g |
FAQ
What is a culinary torch and how does it differ from a blowtorch?
A culinary torch is a handheld butane tool designed for culinary finishes and small-scale heating tasks. Unlike industrial blowtorches, culinary torches feature ergonomic grips, finer nozzles, and safety locks tailored for food use.
Consult the blowtorch entry for historical context and distinctions between tool classes.
Can I use a torch on all cuts of meat?
You can torch most cuts, but adjust technique by thickness and fat content. Thick, marbled cuts benefit from combined pan sear and torch to build a robust crust without overcooking the center.
Lean cuts require gentler flame application to avoid drying the protein. Always monitor internal temperature for food safety.
Is using a culinary torch safe at home?
Yes, when you follow safety steps: adequate ventilation, a clear workspace, a fire extinguisher nearby, and manufacturer operating guidance. Training and attention reduce risks significantly.
Store fuel properly and inspect the torch before each use. Replace or service faulty components immediately.
How do I maintain a consistent torch finish?
Control comes from consistent distance, steady sweeping motion, and the correct flame setting. Practice creates muscle memory for uniform results across multiple portions.
Use a thermometer to confirm internal doneness; the torch should modify surface color, not substitute for proper cooking when precise temperatures matter.
Where can I learn advanced torch techniques?
Progress from simple caramelization and cheese melting to controlled charring and aburi-style applications. Our internal guide outlines progression drills and sample recipes for staged learning.
Study the chemistry behind browning via the Maillard reaction to understand how heat and time influence flavor development.
Mastery of the culinary torch hinges on disciplined practice, respect for heat, and consistent safety habits. Use the tool to refine texture and boost aroma, then let balanced plating and sensible seasoning finish the dish.

See also: culinary torch
]]>Teaching children practical food safety skills builds healthy habits and reduces the risk of foodborne illness. Use playful, evidence-based activities to make hygiene, safe handling, and basic kitchen rules clear and memorable.
- Short, repeatable rituals like singing during handwashing improve compliance.
- Hands-on practice helps kids internalize separation of raw and ready-to-eat foods.
- Visual aids and role play turn invisible risks into tangible learning moments.
Why teach food safety to kids?
Early instruction gives children the language and routines they need to avoid contamination and common hazards in the kitchen. Teaching food safety reduces the likelihood of mishandling food and builds lifelong competence.
You can link concepts to everyday tasks: washing produce, storing leftovers, and recognizing when food looks or smells off. These concrete routines turn abstract microbiology into manageable actions.
Getting started: planning a short session
Plan activities that last 30–45 minutes and require minimal equipment. Keep group sizes small (4–6 children) to maximize practice and supervision.
Gather simple props: shaped bread, sliced veggies, paper plates, soap, and storytelling cards. Use bright visuals to hold attention and provide immediate feedback during each activity.
Core activities that work
Choose 3–4 simple stations so children rotate and stay engaged. Each station practices one skill: handwashing, safe handling, separation, or tasting with consent.
Introduce each station with a quick demo, then let kids practice while you observe and correct technique gently. Praise accurate behavior to reinforce learning.
Handwashing demo and practice
Teach the mechanics: wet, lather for 20 seconds, rinse, and dry. Sing a short song to time the scrub and repeat the steps until confident.
Explain why soap removes germs using a simple visual—oil and water demonstrations or glitter on hands—to show how washing lifts contaminant particles away. For background on the practice, see hand washing.
Germ Detective: spotting contamination
Place small paper “germs” on surfaces and ask children to find and remove them with a paper towel. This tactile game teaches them to check surfaces rather than assume cleanliness.
Follow with a discussion about high-touch spots and why dry, clean surfaces matter. Link this idea to the broader concept of avoiding foodborne harm with a reference to foodborne illness.
Safe handling and separation
Use colored play pieces or felt to represent raw meat and ready-to-eat items. Ask children to sort items onto separate plates and explain why they must not mix.
Practice with different cutting boards and utensils so children see the safety benefit. For technical background on the hazard, review cross-contamination.
Classroom setup and materials
Arrange child-sized stations with clear labels and one adult per two to three children. Keep a visible handwashing station and disposable towels nearby.
Provide printed storytelling cards that illustrate characters like Captain Clean Hands and the steps they perform. Visual cues help children follow procedures without repeated verbal prompts.
Explore related classroom plans to adapt sessions for larger groups or multi-day programs. For focused practice at home, see our handwashing activities guide.
Expert Insight
After a few practice rounds, encourage children to reflect by drawing or labeling what they learned. Drawing consolidates memory and provides a take-home prompt for caregivers.
Pro-Caution
Assessment and reinforcement
Use quick, playful quizzes or show-and-tell rounds to check understanding. Ask children to demonstrate handwashing or explain why two cutting boards help keep food safe.
Give immediate, specific praise for correct behaviors. Reinforcement increases retention and encourages children to transfer skills to home and school settings.
Serving suggestions and caregiver engagement
Serve snacks on clean, colorful plates to model attractive, safe presentation. Invite parents to observe or participate so home routines align with classroom habits.
Send short takeaway cards summarizing key steps—handwashing, rinsing produce, and separate storage—to help caregivers continue reinforcement between sessions.
Links to trusted context and source material
For a concise primer on hygiene concepts that support these activities, see the hygiene overview. These entries can help educators explain why routines matter at a biological level.
Keep content practical and localize any health guidance to your public health authority. Wikipedia entries provide reliable background but do not replace official public health recommendations.
FAQ
How long should a food safety session for kids last?
Keep sessions to 30–45 minutes for preschool and early elementary groups. Short, focused activities preserve attention and allow repeated practice within a single visit.
What age is appropriate for these activities?
Most activities scale from 3 to 10 years. Simplify tasks for toddlers and add challenge—timed handwashing, sorting accuracy—for older children.
How do I measure whether kids learned the steps?
Use quick demonstrations, drawings, or brief role-play scenarios to observe skills. Check for three behaviors: correct handwashing duration, separation of raw and ready-to-eat foods, and asking an adult about unsafe items.
Can these lessons increase food curiosity rather than fear?
Yes. Emphasize empowerment: safety skills let children explore food confidently. Celebrate tasting and safe cooking as positive experiences, not warnings against food.
Where can I find more activities and printable materials?
Many community health departments and educational sites provide printable lesson plans and coloring pages. Also see our internal guides at food-safety-fun-for-families and handwashing-activities for ready-to-use resources.
Final note: Consistency matters. Short, repeated practice and caregiver involvement produce measurable behavior change. Make safety playful, repeatable, and rewarding to build habits that last.
See also: Food Safety
]]>
- Speed with control: set power and cycles, then stir to develop starch structure.
- Ingredient focus: use the right rice and warm stock to reduce overall cook time.
- Finish for texture: add sautéed mushrooms or a quick pan-sear to introduce color and contrast.
- Safety always: vent covers and careful handling prevent steam burns and preserve texture.
Why the microwave works for microwave risotto
The microwave heats by exciting water molecules, which creates rapid internal heating ideal for moist-heat techniques like steaming and poaching. That rapid, volumetric heat makes the appliance suited to grains and delicate proteins when you manage power and time.
Also, understanding how the appliance delivers energy—along with vessel shape and liquid volume—lets you predict hotspots and finish textures. For technical context, see the microwave oven entry for design and power considerations.
Prep and Cook Time for microwave risotto
Prep: 10 minutes. Precise mise en place saves cycles and reduces reheats. Measure stock, rinse rice, and chop aromatics before you start the microwave sequence.
Cook: about 12 minutes active microwaving across cycles, plus 2 minutes resting time. Resting lets starch hydrate fully and keeps the grain tender without overcooking.
Yield and scaling for microwave risotto
This method yields 4 servings. When you scale, adjust liquid proportionally and expect longer gentle cycles for larger volumes. A wider, shallower bowl shortens the required time per volume.
Keep a cook log for your oven: record power settings and effective cook times for each batch. Over time, that log becomes your calibration chart for consistent microwave risotto results.
Difficulty Level and skill focus
Rated Easy to Medium. The method relies on accurate timing, consistent stirring, and monitoring. Basic knife work and timing discipline are the main skills required.
Advanced cooks can introduce finishing steps such as a hot pan sear or broiler finish to add color and the Maillard note for deeper flavor. For the chemistry behind browning, see Maillard reaction.
Ingredients for microwave risotto
- 1 cup arborio rice, rinsed thoroughly
- 2 ½ cups vegetable broth, warm
- 1 tablespoon olive oil
- 1 small shallot, finely minced
- 1/2 cup white mushrooms, sliced thinly
- 1/4 cup freshly grated Parmesan
- 1 teaspoon garlic powder
- Salt and black pepper, to taste
- 1 tablespoon fresh parsley, for garnish
- 1 tablespoon chilled butter, diced
Choose short-grain rice for its high starch. For example, use arborio rice to get the starch necessary for a creamy microwave risotto. Use warm stock so the rice never cools mid-cycle.
Instructions: cook microwave risotto
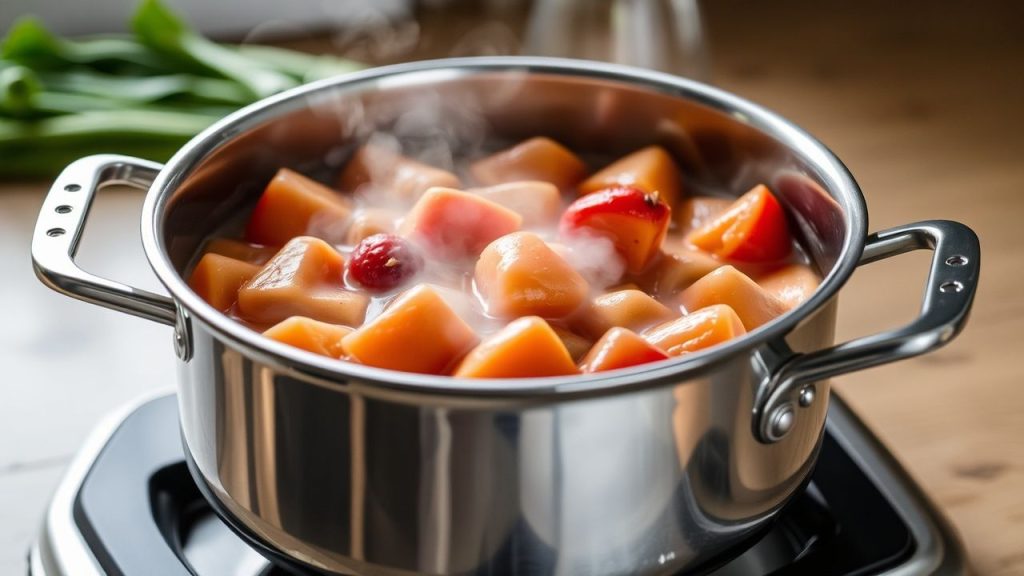
1. Prepare the rice base: In a microwave-safe bowl combine rice, olive oil, minced shallot, and garlic powder. Microwave uncovered at full power for 1 minute, then stir to distribute heat evenly.
2. Add broth and cover: Pour warm vegetable broth over the rice so it is submerged. Cover loosely using a vented microwave-safe lid to let steam escape safely.
3. Cook on medium-high: Set power to 70% (medium-high) and microwave for 10 minutes total. At the 5-minute mark, pause and stir briskly to release starch and promote even cooking.
4. Sauté mushrooms: Place mushrooms in a separate microwave-safe dish, add 1 teaspoon olive oil, and microwave on high for 2 minutes, stirring once to encourage browning and reduce excess liquid.
5. Final assembly: Remove the cover carefully away from your face. Stir in the mushrooms, grated cheese, and butter cubes so they emulsify into the rice. Cover and let rest for 2 minutes.
6. Season and serve: Taste and adjust seasoning. Garnish with fresh parsley and serve immediately with a bright salad or crusty bread for balance.
Pro-Caution
Tips for microwave risotto: control and technique
Maintain the 70% power guideline. Higher power causes uneven evaporation and can leave the center undercooked while edges dry out. Medium-high power lets starches gelatinize more slowly and predictably.
Stirring midway is critical. It redistributes heat and suspends starch so the rice binds into a creamy matrix. Record timing for your microwave model to achieve consistent results.
Expert Insight
Serving suggestions for microwave risotto
This microwave risotto works as a vegetarian main or an elegant side. Pair it with quick pan-seared scallops or grilled lemon-herb chicken to balance richness with acidity.
For texture contrast, add toasted nuts or crispy shallots before serving. A light drizzle of finishing oil or a squeeze of lemon brightens the plate and gives a restaurant-style polish.
Nutritional Information
Values below are estimates per serving. Actual values vary by brand and portion size. This estimate assumes the recipe as written with vegetable broth and one tablespoon of butter per batch.
Per serving: about 320 kcal, 8 g protein, 50 g carbohydrates, 7 g fat. Adjust fat and cheese to change calorie and saturated fat totals.
Technique Notes and science for microwave risotto
Microwave heating emphasizes water-mediated energy transfer. That rapid internal heating suits moist methods but limits surface browning. To introduce crust or color, finish briefly under a broiler or in a hot skillet.
For an explanation of browning chemistry and why dry heat produces different flavor compounds, see the Maillard reaction. Use a short, hot finish to develop those browned flavors without overcooking the grain.
Practical adjustments and substitutions for microwave risotto
To make the dish vegan, swap butter for a neutral oil and replace Parmesan with nutritional yeast. Add a small splash of acid like lemon juice at the end to mimic the tang of aged cheese.
If you substitute rice types, expect texture changes. Long-grain rice remains more separate and will not yield classic risotto creaminess; experiment and record times if you adapt the method. For rice varietal context, see rice.
FAQ
Can I use regular long-grain rice instead of arborio for microwave risotto?
Short-grain arborio yields the starch needed for creaminess; long-grain stays separate and yields a pilaf-like texture. You can use long-grain but expect a different mouthfeel and reduce cook time accordingly.
How do I adjust times for a more powerful microwave?
Reduce high-power intervals by approximately 15–25% and keep the 70% guideline where possible. Test with a small batch and log the effective cook time for your unit.
Is it safe to cover with plastic wrap when making microwave risotto?
Use microwave-safe plastic wrap and vent it to avoid pressure build-up. A vented microwave lid is preferable. Remove covers away from your face to avoid steam burns.
How can I add proteins like chicken or fish to microwave risotto?
Thin fish fillets and diced chicken cook through in the same steam environment if you use medium power and monitor internal temperature. Place protein on top or in a separate dish; ensure proteins reach safe internal temperatures.
Where can I learn more about the rice varieties best for risotto?
Study short-grain varieties such as arborio and carnaroli to understand starch profiles and how they influence texture. Reliable reference material on rice varietals helps you select the right grain for microwave risotto.
Closing Notes
With measured liquid, controlled power, and brief stirring, the microwave becomes a dependable tool for a creamy risotto. Keep records of time and power to make repeatable microwave risotto batches.
Apply the same method to other grain-based dishes; this approach rewards technique and good ingredients, turning fast cooking into repeatable quality.
See also: internal resources on microwave technique and recipe collections.
See also: microwave risotto
]]>
- Gentle heat preserves texture: indirect steam prevents burning and seizing.
- Consistent results: precise simmering keeps chocolates and custards smooth.
- Low-tech, high-value: create a bain-marie with common kitchen equipment.
- Safety first: control water level and avoid direct contact with flames.
Overview: What a Bain-Marie Does and Why It Matters
The bain-marie uses a lower vessel of simmering water to heat an upper bowl indirectly. This method stabilizes temperature and reduces thermal shock when compared with direct heat.
Chefs rely on this technique for sensitive preparations such as chocolate and custard, where small temperature swings cause grainy texture or broken emulsions. The approach improves consistency across batches and scales well from home to professional kitchens.
How It Works: Physics and Practical Control
The bain-marie transfers heat by steam and radiant energy, not by direct conduction. As a result, the upper bowl never sees the rapid temperature spikes that a pan over flame would produce.
Maintain a gentle simmer to keep the water temperature below boiling point and avoid steam splashes. For precision, monitor temperature with an accurate probe thermometer and adjust heat in small increments.
Equipment & Setup: Tools, Alternatives, and Best Practices
Use a wide, heatproof mixing bowl that nests over a saucepan without touching the water. A snug fit improves stability and concentrates the gentle heating effect where you need it.
If you lack a purpose-built double boiler, place a metal or glass bowl over a saucepan of simmering water; ensure the bowl is dry underneath. For professional settings, use a dedicated bain-marie pot to maintain even water distribution and ease of handling.
Expert Insight
Classic Ganache Recipe: Ingredients and Step-by-Step
This simple ganache balances flavor, texture, and temperature for versatile use as a glaze, filling, or frosting. The proportions here work well for a glossy glaze or a whipped mousse once chilled and aerated.
Prep time: 5 minutes. Melt time: 10–20 minutes depending on batch size and heat control.
Ingredients for Classic Double Boiler Chocolate Ganache
- 8 oz high-quality dark chocolate, chopped
- 1 cup heavy cream
- 1 tbsp unsalted butter, room temperature
- Pinch of fine sea salt (optional)
Instructions
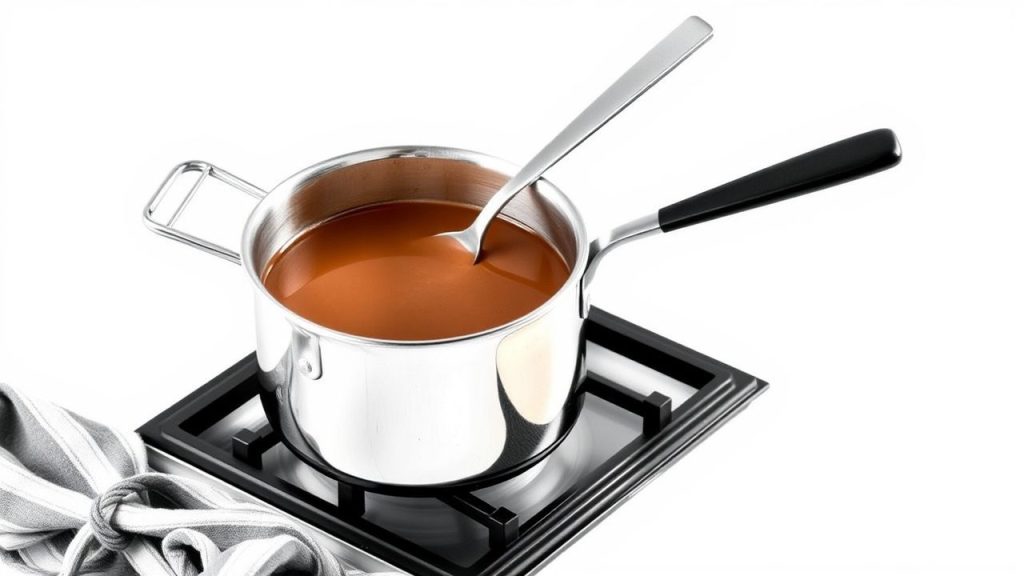
- Fill the bottom pot with about 2 inches of water and bring to a gentle simmer over medium-low heat.
- Place chopped chocolate in the upper bowl and set it over the simmering water. Make sure the bowl does not touch the water.
- Pour the warm cream into the chocolate and stir gently with a silicone spatula until smooth; expect roughly 10 minutes for full incorporation.
- Stir in the butter and salt, then remove from heat promptly to avoid overheating.
- Use the ganache warm as a glaze or cool and whip for fillings and frostings.
Temperature Control Techniques for Reliable Results
Control the water level, adjust flame in small steps, and stir frequently for an even melt. These small controls reduce the risk of chocolate seizing or eggs curdling in custards.
For reliable targets, keep chocolate melts below about 110°F (43°C). For egg-based custards, maintain a steady, low temperature and test curd set by gently coating a spoon.
Chef’s Notes: Troubleshooting, Variations, and Storage
If chocolate begins to seize, remove the bowl from heat and add a teaspoon of warm cream or neutral oil while stirring to re-emulsify. Recovering a broken emulsion requires patience and small additions of liquid.
For dairy-free alternatives, substitute coconut cream or a nut cream; the bain-marie preserves their smooth texture. Store leftover ganache in an airtight container and warm gently using the same method to re-melt without scorching.
Pro-Caution
Serving Suggestions and Presentation
Use warm ganache to glaze cakes for a shiny, even finish, or cool and whip it to make a lighter filling. It pairs well with fresh berries, citrus accents, and toasted nuts for contrast in texture and brightness.
For elegant plating, spoon a warm ganache swoosh across the plate and top with a sprinkle of flaky salt. Small touches such as citrus zest or toasted seeds enhance both aroma and mouthfeel.
Common Uses Beyond Chocolate
The bain-marie also supports emulsified sauces like hollandaise, terrines, and gentle reheating of delicate foods. Its moist heat reduces the risk of overcooking and preserves delicate textures.
Professional kitchens use bain-marie units to keep soups and custards at holding temperatures safely. At home, a simple setup gives you the same control for many sensitive culinary tasks.
Explore related equipment and calibration techniques on our kitchen equipment page. For focused strategies on heat management, see our Temperature Control Guide for stovetop and oven methods.
Nutrition Snapshot
Per serving, a typical ganache portion contains approximately 250 kcal with modest protein and higher fat content due to chocolate and cream. Use portion control and flavor accents like fruit to balance richness.
For specific dietary adjustments, swap heavy cream for plant-based creams and choose chocolates with varied cacao percentages to change sugar and fat profiles.
FAQ
What is the difference between a bain-marie and a regular double boiler?
A bain-marie is the general technique of indirect moist heating; a double boiler is a common implementation. Both use water to moderate temperature but the terms sometimes overlap in culinary use.
Can I use any bowl for a bain-marie?
Use heatproof glass or stainless steel bowls that fit securely over the pot. Avoid plastic or thin materials that can deform or release unwanted compounds when heated.
How do I prevent chocolate from seizing?
Keep temperatures low, add warm cream gradually, and stir gently. If seizing occurs, remove from heat and add small amounts of liquid to re-establish a smooth emulsion.
Is a bain-marie safe for eggs and custards?
Yes. The bain-marie provides a stable, low-temperature environment ideal for gently cooking egg-based custards without curdling. Monitor temperature and stir gently to ensure even cooking.
Can I scale bain-marie techniques for large batches?
Scale by using larger, wider vessels and controlling water volume to maintain even heating. Commercial kitchens often use bain-marie units or circulating warm water baths for consistent results at scale.
See also: Bain-Marie
]]>