There is a precise, mechanical relationship between egg whites, sugar, and air that determines whether a meringue becomes lofty or flat. As a pastry professional, I treat sugar timing as a controllable variable; incorrect timing consistently yields undersized, weepy meringue.
- Key takeaway: Wait for soft peaks before adding sugar to allow proteins to unfold and trap air.
- Rescue tip: Gentle warming or extended whipping can dissolve early-added sugar in some cases.
- Tool choice matters: Use clean metal or glass bowls and a balloon whisk for best volume.
Why timing matters: the protein and water balance
Egg whites are mostly water and several functional proteins that unfold and form a network when agitated. This network traps pockets of air; therefore, the proteins must unfold freely before the sugar interacts significantly with the mixture.
When sugar enters too early it competes for water and increases the mixture’s viscosity. As a result, proteins struggle to stretch and form elastic films, so the foam contains fewer, larger bubbles and loses stability quickly.
What happens when sugar is added too soon
Early sugar binds water and creates a syrupy environment that slows protein interactions. Consequently, you see slower volume gain, a grainy texture from undissolved crystals, and peaks that collapse almost immediately.
Microscopically, the denser medium restricts bubble growth and causes coalescence; the foam fails to develop a fine, stable structure. For technical context see protein denaturation and how heat or chemical changes affect protein structure.
Symptoms to watch for during whipping
Recognize early failure modes quickly. If volume stalls, the whites remain glossy but runny, or peaks droop, you have likely added sugar prematurely or introduced fat or contamination.
Other signs include a grainy mouthfeel and rapid weeping after baking. These are practical indicators a foam has an incomplete protein scaffold and insufficiently dissolved sugar crystals.
Rescue strategies: how to fix over-sugared or under-whipped whites
First, evaluate: if you detect only graininess and the foam still gains some body, continue whipping at medium speed while keeping the bowl cool. Extended whipping sometimes dissolves small crystals and strengthens the foam.
If graininess persists, try gentle heat by placing the bowl over a warm water bath and whisking until crystals dissolve; be careful to avoid cooking the proteins. This mimics the controlled approach used in some Italian meringue techniques.
Warm-bath method (step-by-step)
Set a saucepan of simmering water and rest the mixing bowl above it so steam warms the whites indirectly. Whisk continuously while monitoring temperature; keep the mixture below 50°C (122°F) to avoid coagulation.
Once the sugar has dissolved and the foam becomes glossy, remove the bowl and continue whipping to stiff peaks. This method preserves protein structure while removing undissolved crystals.
Rewhip and reconstitute
If the mixture collapsed but has not been contaminated with yolk, you can often salvage volume by whisking in a fresh egg white, one at a time. This introduces new protein surface area to rebuild the network.
Use this approach sparingly and only with clean tools. If contamination with fat occurred, discard and restart to avoid food-safety issues and persistent failure.
 Expert Insight
Preventive technique: step-by-step whipping protocol
Begin with perfectly separated whites in a clean, grease-free bowl, preferably metal or glass. Start whisking at medium speed until soft peaks appear, then add sugar slowly—one tablespoon at a time—while continuing to whip.
Slow addition lets sugar dissolve fully and gradually increases viscosity so the protein network strengthens rather than stalls. For more advanced tips, consult our Perfect Meringue Techniques internal guide.
Equipment, sugar type, and environmental factors
Equipment choice changes results. Plastic bowls can retain oils and undermine foaming, while a balloon whisk or whisk attachment on a stand mixer produces ideal shear for bubble formation.
Sugar crystal size also matters; superfine (caster) sugar dissolves faster and reduces the risk of grainy meringue. Additionally, humidity increases the propensity to weep; bake or whip on lower-humidity days when possible.
When different meringue styles change the rules
Italian and Swiss meringues use cooked or tempered sugar, which changes the timeline. For example, Italian meringue involves hot sugar syrup added to partially whipped whites; this creates a stable, pasteurized foam.
By contrast, French meringue depends on powdered or caster sugar added after soft peaks. Choose your method based on required stability and usage—Swiss and Italian types handle piping and storage better.
Common mistakes and how to avoid them
Typical errors include adding sugar too fast, using cold whites, introducing yolk or grease, and using coarse sugar. Each error reduces trapped air and undermines stability.
Prevent these issues with ritual: separate eggs one at a time, wipe bowls with vinegar if doubt of oil exists, and measure sugar for a slow, steady addition. For troubleshooting specific failures see our Meringue Troubleshooting page.
 Pro-Caution
Practical examples and test comparisons
I recommend testing variables in small batches to understand local behavior. Whip one batch where sugar is added at soft peaks and another where sugar is present from the start to see volume and texture differences clearly.
Document temperature, mixer speed, sugar type, and humidity for each trial. This controlled approach builds repeatable skill and prevents repeated failures during service or showpiece bakes.
Science links and further reading
For a technical foundation, refer to entries on meringue and the role of sugar in confectionery. These summaries align with practical pastry methods and explain broader culinary contexts.
Explore mechanisms underlying protein behavior through protein folding and sugar chemistry. For egg-white specific detail see egg white (albumen).
Serving and finishing suggestions
When you reach stiff, glossy peaks, move quickly to bake or combine into a dessert. Use a low, even oven to dry pavlovas and small kisses; reserve higher heat for browned finishes like baked Alaska or torched tops.
Garnish with contrasting textures—crisp nuts, citrus curd, or fresh berries—to emphasize the meringue’s airy mouthfeel. Proper timing and finishing yield a dessert that looks and performs professionally.
FAQ
How do I tell a soft peak from a stiff peak?
Soft peaks form when the whipped white holds a point that gently folds over. Stiff peaks stand straight and glossy when you lift the whisk, indicating the foam can support structure for piping or baking.
Can I use granulated sugar instead of caster?
Granulated sugar has larger crystals and can produce a grainy texture unless fully dissolved. Use superfine or caster sugar for faster dissolution unless you plan to cook the sugar into a syrup first.
Is there ever a reason to add sugar at the start?
Not for French meringue. However, Italian meringue intentionally mixes hot syrup with whipping whites, which changes timing rules and yields a more stable, pasteurized foam.
How does humidity affect my meringue?
Moist air encourages sugar to absorb water and the finished meringue to weep. Bake and store meringues on dry days when possible and use airtight containers to limit moisture exposure.
What is the quickest rescue for slightly grainy whites?
Continue whipping while gently warming the bowl over a bain-marie to dissolve sugar crystals, then cool and finish whipping to stiff peaks. Use this only when contamination is not present.
See also: meringue
]]>
- Allicin forms instantly when garlic is crushed and left to rest.
- Heat destroys some allicin but not all beneficial sulfur compounds.
- Simple prep—crush, wait, then cook briefly—maximizes potency.
- Practical cooking preserves flavor and many healthful properties.
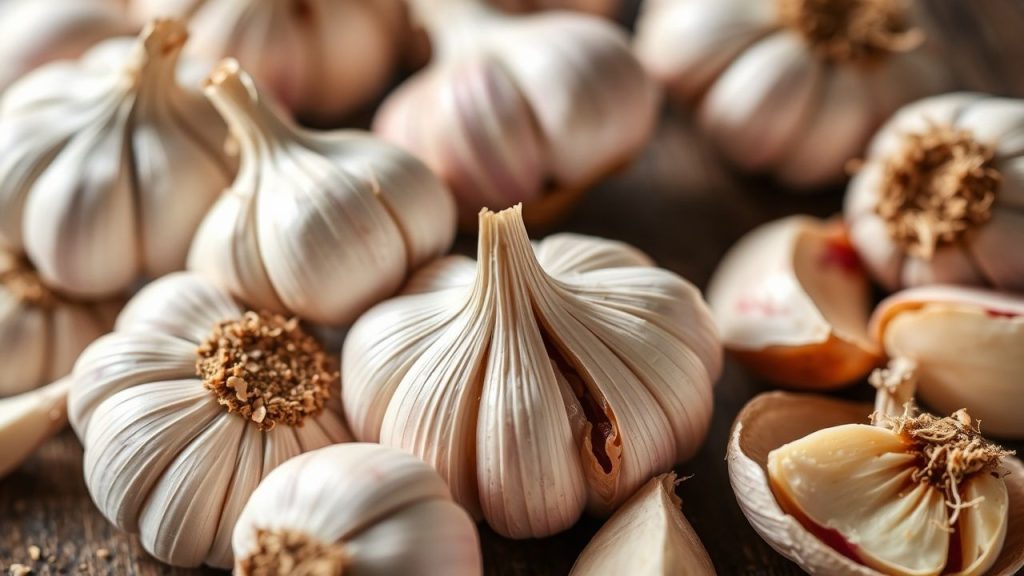
What allicin is and why it matters
Allicin is a sulfur-containing compound produced when garlic cells rupture. The molecule gives freshly crushed garlic its characteristic sharp, spicy aroma.
That aroma links directly to biological activity: allicin is reactive and interacts with microbes and free radicals. For technical context, see allicin on Wikipedia.
How garlic makes allicin
The precursor molecule inside intact garlic is called alliin. When the cell structure breaks, the enzyme alliinase converts alliin into allicin in seconds.
Enzymes drive this conversion, so timing matters. For background on the class of proteins that catalyze these reactions, consult enzyme basics.
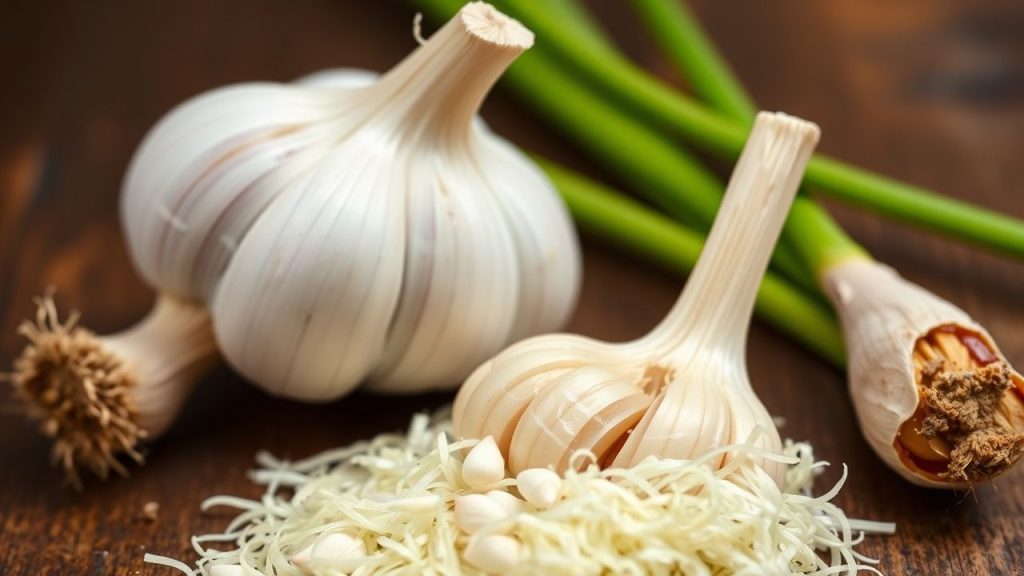
Practical prep: maximize allicin in the kitchen
To unlock allicin efficiently, crush or finely chop garlic and let it sit for 5–10 minutes before applying heat. This pause allows the enzyme to complete conversion and raises immediate allicin levels.
Use moderate heat and add crushed garlic late in cooking when possible. Brief exposure reduces thermal breakdown and preserves more of the pungent profile.
Expert Insight
How heat and time change allicin
Allicin is chemically unstable; heat shifts it into other sulfur compounds. Those breakdown products still have flavor and bioactivity, but they differ from fresh allicin.
Rapid, high heat accelerates breakdown. A short sauté at medium heat preserves more active compounds than prolonged roasting or deep frying.
Recipe: Garlic–Tomato Sauté (allicin-aware)
Prep: 10 minutes | Cook: 15 minutes | Total: 25 minutes. Serves 4. Easy.
Ingredients: 8 large garlic cloves (peeled, crushed or finely chopped), 2 tbsp extra virgin olive oil, 1 medium onion diced, 1 cup cherry tomatoes halved, 1/2 tsp sea salt, 1/4 tsp black pepper, 1 tbsp fresh lemon juice, 2 tsp chopped fresh parsley, optional pinch red chili flakes.
Step-by-step
1. Prepare garlic: Crush or finely chop the cloves to trigger the alliin → allicin conversion. Let the crushed garlic rest 5–10 minutes before cooking.
2. Sauté onion: Heat olive oil over medium heat and cook diced onion until translucent, about 5 minutes. Stir to prevent browning.
3. Add garlic and tomatoes: Stir in the rested garlic. Sauté 1–2 minutes until fragrant but not browned. Add tomatoes, salt, pepper, and optional chili, then cook 5–7 minutes until tomatoes soften.
4. Finish: Remove from heat, stir in lemon juice and parsley. Serve immediately with grilled fish, roasted chicken, or warm pasta.
For more on culinary applications and the health angle, see our internal guides on raw garlic benefits and garlic cooking basics.
Tips for success
Let garlic rest: Allow 5–10 minutes after crushing for maximal allicin formation. This step is simple and impactful.
Control heat: Add garlic toward the end of the cook cycle and avoid intense direct heat that browns and degrades sulfur compounds.
Storage: Store prepared mixtures in an airtight container in the refrigerator and consume within 48 hours to keep flavor and potency.
Pro-Caution
Biological and nutritional context
Besides allicin, garlic contains a matrix of sulfur compounds, vitamins, and minerals that interact biologically. Breakdown products still contribute to antimicrobial and antioxidant activity.
For a broader taxonomic and culinary perspective, review the garlic entry on Wikipedia: Allium sativum. That page summarizes botanical traits, cultivation, and historical use.
Common misconceptions
Claim: Roasted garlic has no benefits. Reality: Roasting reduces allicin but forms other sulfur compounds that still provide flavor and some bioactivity.
Claim: Supplements always match fresh garlic. Reality: Formulation and release mechanism determine whether a supplement delivers allicin; not all do.
Real-world applications
Chefs leverage the timing trick—crush then wait—to build bold raw garlic notes in dressings and finishing sauces. Nutrition professionals use the same step when recommending dietary strategies to preserve active compounds.
In clinical or research settings, standardized preparations are necessary to measure allicin’s effects. The molecule’s instability complicates dosing but not its culinary value.
To wrap practical learning into habit
Adopt two kitchen habits: crush and rest, add garlic late in the cook. These steps require seconds and yield a noticeable uptick in aroma and potential activity.
Keep a small jar of crushed raw garlic for finishing dishes when you want maximum pungency. Use sparingly to control bite and digestive comfort.
FAQ
What is allicin and where does it come from?
Allicin is a volatile sulfur compound produced when garlic cells break and the enzyme alliinase converts alliin into allicin. This reaction occurs within seconds after crushing or chopping.
How can I preserve allicin while cooking?
Crush garlic and let it rest 5–10 minutes before applying heat. Cook on moderate heat and add garlic late to limit thermal degradation.
Does cooked garlic have the same benefits as raw?
Cooked garlic contains different sulfur compounds formed from allicin breakdown. These compounds still add flavor and may retain some health-promoting properties, though they differ from fresh allicin.
Are garlic supplements a good source of allicin?
Some supplements are formulated to release allicin or its precursors, but not all do. Look for products with validated release profiles or consult a healthcare professional.
How much garlic should I use daily?
Moderate culinary amounts—one to three cloves per day—are common in dietary patterns that include garlic. Individual tolerance varies; consult a clinician if you have medical concerns.
Unlocking allicin is a straightforward blend of simple technique and chemical timing. A brief rest after crushing and mindful cooking preserve the pungent punch that makes garlic both a flavor powerhouse and a subject of scientific interest.
See also: Allicin
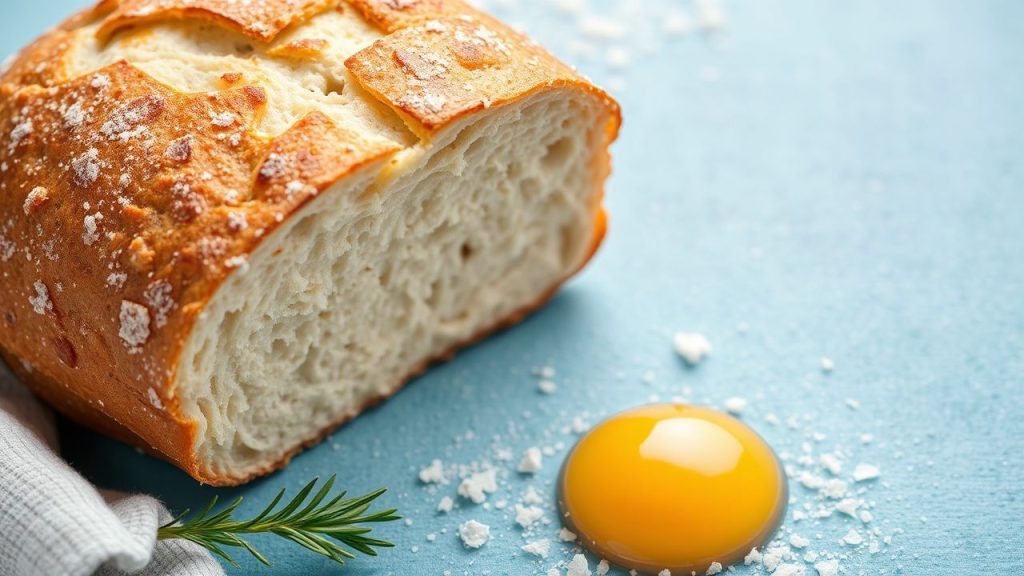
]]>Starch drives texture in bread, rice, potatoes, and many sauces. Understanding how starch hydrates and gels gives you predictable outcomes in the kitchen.
- Gelatinization: Heat plus water makes starch thicken.
- Resting: Hydration before cooking improves texture.
- Heat control: Balance browning and full gelatinization.
What is starch and where it lives
Starch is a plant polysaccharide used by plants to store energy. You encounter it daily in potatoes, rice, wheat, and corn.
For a technical overview, see starch on Wikipedia. That page details structure, sources, and industrial uses.
Prep and Cook Time
These timings are typical for the batter-based recipe below: Prep: 15 minutes; Cook: 30 minutes; Total: 45 minutes.
Timing matters because starch gelatinization occurs over a temperature and time window. Short rests and correct heat keep crumb tender and sauces stable.
Yield
This recipe yields servings for four as a satisfying side or breakfast plate. Use it to practice starch control in a small batch.
Scale ingredients proportionally. When you change batch size, keep liquid-to-starch ratios consistent to preserve texture.
Difficulty Level
Medium. The techniques require attention to hydration and temperature but reward you with repeatable results.
Focus on two skills: measuring liquids accurately and managing pan temperature. Those habits influence gelatinization and browning most.
Ingredients
Ingredients include common pantry starches and liquids. Each item plays a specific role in structure, moisture, or browning.
Below is the ingredient list for the example batter. Use a kitchen scale for best consistency.
- 1 cup all-purpose flour, sifted
- 2 tablespoons cornstarch (for starch gelation clarity)
- 1/2 teaspoon baking soda
- 1 teaspoon fine sea salt
- 1 cup whole milk, warmed
- 2 large eggs, at room temperature
- 3 tablespoons unsalted butter, melted
- 1 tablespoon brown sugar (enhances Maillard browning)
- 1 teaspoon vanilla extract
Instructions
Follow these steps in order. Each step protects starch structure to deliver a tender crumb and reliable browning.
Measure and mix with intent. Overworking or rushing heat changes starch behavior and the final texture.
- Combine dry ingredients: In a large bowl, whisk flour, cornstarch, baking soda, and salt until even. Uniform dry mix prevents local overdosing of starch.
- Mix wet ingredients: Beat eggs, then whisk in warm milk, melted butter, brown sugar, and vanilla. Warm milk helps starch granules hydrate more uniformly.
- Combine gently: Fold wet into dry just until moistened. Overmixing strengthens gluten and can make the crumb tough.
- Rest the batter: Let batter sit for 10 minutes at room temperature. This short rest lets starch granules fully absorb water before heat.
- Preheat and grease the pan: Warm a non-stick skillet over medium heat and grease lightly. Proper pan temperature supports even Maillard browning without burning.
- Cook carefully: Pour 1/4 cup of batter per pancake. Cook until bubbles form and edges set, about 2–3 minutes; flip and cook another 2 minutes until golden.
- Repeat and serve: Continue cooking and keep finished pieces on a rack to preserve texture. Stacking traps steam and softens crusts.
Resting and hydration details
Resting hydrates starch granules so they swell evenly when heated. That swelling creates a stable gel instead of isolated gummy patches.
When you hydrate starch in cold or warm liquid, the kinetics differ. For reference on the physical process, consult gelatinization on Wikipedia.
Tips for Success: Mastering Gelatinization and Flavor
Know which starch you use. Cornstarch and potato starch behave differently from wheat flour because of amylose/amylopectin ratios.
Control temperature. Medium heat balances caramelization and full starch gelatinization without burning sugars.
- Know your starches: Cornstarch gelatinizes at a lower temperature than all-purpose flour, giving a smoother finish.
- Temperature matters: Too-hot cooking can brown sugars before starch fully gels, leading to a drier interior.
- Resting is key: Rest batters or doughs to hydrate granules and reduce toughness.
- Use acids sparingly: High acidity can weaken starch gels; add acidic components after thickening when possible.
Expert Insight
If sauces turn gummy, reduce cooking time or use a lower-gelatinization starch. For grainy textures, ensure thorough pre-hydration and even mixing.
Pro-Caution
Serving Suggestions: Elevate the Experience
Plate pancakes freshly cooked to preserve crust contrast. A simple syrup or fruit keeps textures complementary rather than competing.
For savory applications, use a starch-manipulated base such as crispy shredded potatoes for a contrasting crunch. Consider texture contrasts with soft proteins and acidic condiments.
Nutritional Breakdown
The values below are estimates per serving for the example recipe. Adjust values when you scale the recipe or substitute ingredients.
| Nutrient | Per Serving |
|---|---|
| Calories | 210 kcal |
| Protein | 6 g |
| Carbohydrates | 30 g |
| Fat | 7 g |
Practical Troubleshooting
If your batter is gummy, first check hydration. Excess liquid or too-long cooking often causes a pasty result.
If items brown too fast and remain raw inside, lower your heat and allow more time for starch gelatinization. Adjust pan temperature and try again.
Further Reading and Science Links
To explore browning chemistry, see the Maillard reaction entry for mechanisms and flavor outcomes: Maillard reaction on Wikipedia.
For specifics on a common thickener used in these recipes, see the cornstarch article: cornstarch on Wikipedia. These resources provide concise, sourced technical details.
FAQ
What is the best starch for thickening sauces?
Cornstarch gives a clear, glossy result and sets quickly. Use half as much cornstarch by volume compared with flour for the same thickening power.
For high-acid sauces or long-simmered dishes, use stable starches or add them late in the process to preserve gel strength.
Can I substitute potato starch for cornstarch?
Yes. Potato starch often thickens at slightly lower temperatures and yields a silkier mouthfeel. Adjust quantity by feel and desired finish.
Be aware that potato starch can break down under prolonged, vigorous boiling, so add it near the end of cooking when possible.
Why did my sauce separate after cooling?
Separation usually means the gel network weakened. Excess acid, overcooking, or mechanical shear can break the gel and release water.
To rescue a separated sauce, reheat gently and whisk in a small slurry of starch off heat, then warm slowly to re-establish a network.
How does resting affect baked goods?
Resting lets starch absorb moisture uniformly and relaxes gluten slightly. This yields a more tender crumb and consistent structure after baking.
Short rests (10–30 minutes) work well for batter-based items. Longer autolyse periods help yeast breads develop flavor and hydration.
Where can I read more technical background on starch structure?
Consult authoritative references such as the general starch article and the gelatinization entry for polymer behavior under heat: starch on Wikipedia and gelatinization on Wikipedia.
These pages summarize the molecular basis that explains practical kitchen outcomes and point to academic sources for deeper study.
Key Takeaways
Controlling starch hydration, heat, and resting yields predictable textures from sauces to breads. Small technique changes produce large sensory differences.
Practice with simple recipes, measure carefully, and note how starch type and temperature shift outcomes. That disciplined approach gives repeatable, high-quality results.
See also: starch
]]>