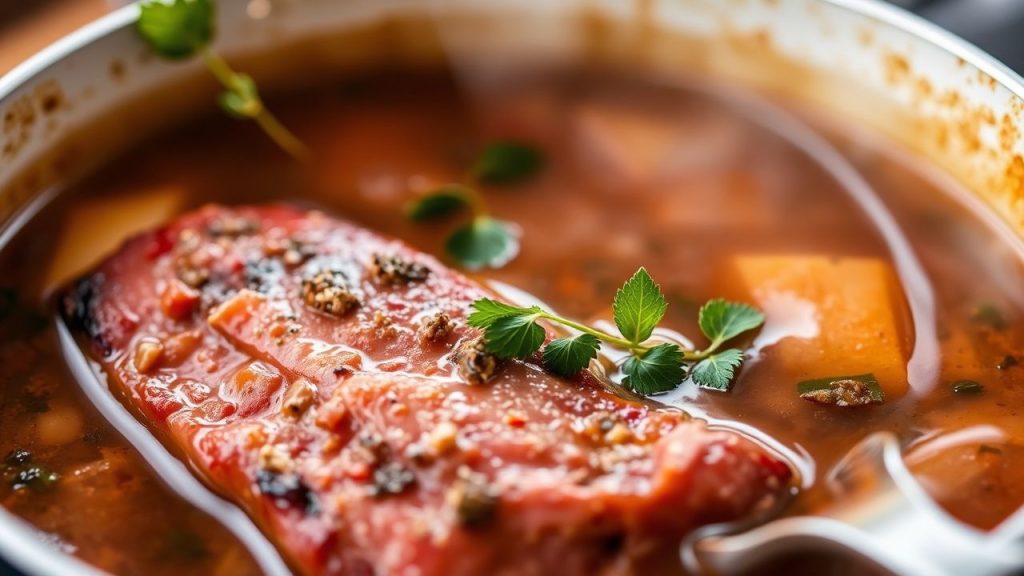
- Slow cooking converts collagen into gelatin, creating moist, silky meat.
- Control of temperature and time matters more than exact seasonings.
- Sear first to build flavor, then finish low and slow for tenderness.
- Rest and slice against the grain for the best mouthfeel.
Understanding Connective Tissue and Its Transformation
Tough cuts are tough because they contain dense connective tissue and more collagen. These proteins give muscles structure for movement, which is why shoulder, shank and brisket are economical but firm.
When you apply steady, low heat, collagen denatures and becomes gelatin. That gelatin dissolves into the cooking liquid, improving mouthfeel and moisture retention.
The Role of Collagen Breakdown in Tenderizing Tough Cuts
Collagen is the structural protein that keeps fibers bound. Over hours at low temperatures, collagen hydrolyzes into gelatin, which feels silky and coats meat fibers.
As gelatin forms, it also thickens the braising liquid and traps juices close to the meat. That dual effect both tenderizes and boosts savory depth.
Optimal Temperature and Timing for Maximum Flavor Extraction
Temperature control is decisive. Aim for steady heat that allows collagen to dissolve without drying muscle fibers; typically that means oven or slow-cooker ranges where liquid simmers gently.
For many large cuts, plan on 6–12 hours depending on size and connective tissue. Use an instant-read thermometer and focus on feel: when the meat yields easily to a fork, collagen has softened sufficiently.
Choosing the Right Cuts and Enhancing Flavor
Select cuts with visible connective tissue and a tone of marbling: beef brisket, chuck roast, pork shoulder, lamb shanks and oxtail perform predictably. Those cuts respond to low heat and long time because they have the collagen to convert.
Marinades with moderate acid—vinegar or citrus—help tenderize the surface before cooking. Also, apply a dry rub and sear to develop the Maillard reaction for deeper flavor; learn more about the Maillard reaction to use heat to your advantage.
Practical Recipe & Timing Details
This section converts the science above into a practical plan for a classic slow-cooked brisket. Follow the sequence: season, sear, braise slowly, rest, then slice against the grain.
For more technique notes, visit our internal guide on slow-cooking basics and check a related brisket build at brisket recipes. These pages expand on tools and vessel choice.
Prep and Cook Time
Preparation: 20 minutes for trimming and assembling a rub. Reserve time if you plan to marinate overnight.
Marinating (optional): 4–12 hours. Cooking: 6–8 hours on low heat; larger pieces need up to 12 hours.
Yield & Difficulty
Serves 6–8 depending on side dishes. Expect some shrinkage during cooking as moisture concentrates.
Difficulty: Medium. The work is front-loaded. After searing and setup, most of the time is hands-off.
Ingredients
The ingredient list below supports a classic savory brisket. Quantities are scalable.
- 3 lb beef brisket, trimmed
- 1 cup beef broth
- 1/2 cup apple cider vinegar
- 2 tbsp olive oil
- 1 tbsp smoked paprika
- 2 tsp garlic powder
- 1 tsp ground cumin
- 1 tsp black pepper
- 1 tsp kosher salt
- 1 large onion, sliced
- 4 cloves garlic, smashed
- 2 bay leaves
Instructions
Follow a three-stage sequence: build flavor, denature collagen, and finish to serve. Each step affects final texture and sauce quality.
- Mix the rub: Combine vinegar, olive oil, smoked paprika, garlic powder, cumin, pepper, and salt. The rub both seasons and primes the surface for searing.
- Apply and rest: Rub the brisket thoroughly. For deeper penetration, refrigerate 4–12 hours. Bring meat to near room temperature before searing.
- Sear: Brown brisket on all sides in a hot skillet until a rich crust forms. This step creates flavor compounds that enrich the braise.
- Set up to braise: Place sliced onion and smashed garlic in the bottom of a Dutch oven or slow cooker. Nestle the seared brisket on top, add bay leaves, and pour beef broth around—not over—the meat to preserve the crust.
- Slow cook: Maintain a gentle simmer or use the low setting on a slow cooker. Cook 6–8 hours, or until the meat pulls apart with minimal resistance.
- Rest and slice: Rest 10–20 minutes before slicing against the grain. Resting redistributes juices and improves texture.

 Expert Insight
Finishing touches matter. A light sprinkle of fresh herbs or a squeeze of acid at service can brighten the rich sauce and cut perceived fattiness.
 Pro-Caution
Storage is straightforward: refrigerate leftovers in an airtight container up to 3 days or freeze portions for longer storage. Reheat gently to preserve texture.
Chef’s Notes & Troubleshooting
If meat remains firm after the recommended time, extend the cook rather than increase the heat. Low, additional hours allow collagen to finish breaking down.
Use a fork to test for correct pull: when the fork slides in with little resistance and the meat flakes loosely, it is ready. Overcooking can make thin portions stringy, so consider slicing larger pieces thicker for service.
Variations
Swap proteins to change flavor: pork shoulder and lamb shank behave similarly due to collagen content. Adjust cook time to account for bone-in pieces and shape.
Try adding aromatic vegetables, mushrooms, or a splash of fortified wine to the braising liquid for flavor variation while maintaining the same low-and-slow approach.
Serving Suggestions
Pair slow-cooked brisket with creamy mashed potatoes, polenta, or buttered noodles to match the sauce’s richness. Add a crisp vegetable or a bright slaw for contrast.
Garnish with parsley and a light dusting of smoked paprika to make plates pop visually and to add a final aromatic lift.
| Nutrient | Amount (per serving) |
|---|---|
| Calories | 410 kcal |
| Protein | 38 g |
| Carbohydrates | 6 g |
| Fat | 24 g |
FAQ
Why does slow cooking transform tough cuts into tender meat?
Slow cooking exposes collagen to steady, moderate heat so it can hydrolyze into gelatin. That gelatin lubricates and softens fibers, producing a tender mouthfeel and richer sauce.
What temperatures and internal doneness should I aim for?
Maintain a gentle simmer or use a slow-cooker low setting. Rather than a single internal temperature, judge doneness by tenderness: when a fork meets little resistance and meat pulls apart, it is done.
Are there cuts that should not be slow-cooked?
Lean, tender cuts such as tenderloin or sirloin lack connective tissue and can dry out with prolonged cooking. Reserve slow methods for collagen-rich cuts and use quick, high-heat techniques for lean steaks.
Does searing matter if I plan to cook the meat for many hours?
Yes. Searing builds flavor via surface browning and creates compounds that enrich the braising liquid. The extra 5–10 minutes of searing translates to a deeper finished flavor.
How should I store and reheat leftovers to retain texture?
Cool brisket quickly, then refrigerate in an airtight container up to 3 days. Reheat gently in a low oven with a splash of braising liquid or in a covered skillet to avoid drying the meat.
Embrace the process: time and controlled heat will transform inexpensive cuts into meals with complex aroma and luxurious texture. Use technique, test by feel, and trust patient cooking.
See also: Slow cooking
]]>Roasting a thick cut well requires controlled heat, timing, and simple technique. When you handle each step deliberately, the result becomes a reliably tender, evenly cooked roast that impresses guests.
- Slow, steady heat yields uniform doneness through the center.
- Thermometer use removes guesswork and prevents overcooking.
- Resting locks juices and improves sliceability.
Why thickness changes everything
Thick cuts behave differently from thin steaks because heat must travel farther to reach the center. That creates a risk of a well-browned exterior with an undercooked core unless you manage temperature and time carefully.
Understanding heat transfer in meat helps you plan the roast. The surface browns via the Maillard reaction, while internal temperature rises by conduction; balance both for best results.
At the range: Prep and cook time
Allow at least one hour for the meat to come to near-room temperature; this reduces the gap between exterior and core temperatures. For many 2–4 inch roasts, plan a long, low roast of 1.5 to 3 hours followed by a short rest and a finish sear if desired.
Temperature targets matter. Pull roasts several degrees below your final target to allow for carryover heat during resting and to hit the desired doneness precisely.
Ingredients and equipment checklist
Gather a reliable probe thermometer, a sturdy roasting rack, a rimmed pan, and a heavy skillet for searing. Use coarse kosher salt, freshly cracked black pepper, whole garlic, and fresh herbs for classic flavor.
Choose marbled cuts such as ribeye or sirloin for natural basting from fat. If you prefer pork or lamb, apply the same principles: steady low heat, accurate temperature checks, and adequate resting time.
Step-by-step instructions
1. Bring to temperature: Remove meat from refrigeration at least 45–60 minutes before cooking. This reduces shock from cold and promotes even heat penetration.
2. Score and season: Pat dry, then score the fat cap lightly. Season generously with salt and pepper; for deeper seasoning, salt the roast several hours ahead and refrigerate uncovered to dry the surface for a crisper crust.
Oven method
Preheat the oven to a low setting (around 275°F / 135°C) for gradual cooking. Insert a probe thermometer into the thickest section and place the roast on a rack to allow air circulation underneath.
Roast slowly until the internal temperature reaches 5–10°F below your final target. For medium-rare, remove at about 125°F (52°C) and finish with a brief high-heat sear if you want a deeper crust.
Sear-first (reverse sear vs. traditional sear)
For maximum crust control, use the reverse-sear: roast low, then sear hot at the end. This method produces a consistent edge-to-edge color and precise doneness with a caramelized exterior.
Alternatively, sear first in a hot skillet, then finish at low oven temperature. Both methods work; choose based on available time and the crust intensity you prefer.
Basting, aromatics, and moisture control
Basting every 20–30 minutes keeps the surface moist and adds flavor, but avoid overbasting and cooling the roast with cold liquids. Use warm stock or pan juices when basting to maintain oven temperature.
Tuck sprigs of thyme and rosemary alongside the roast rather than directly under the meat to infuse aroma without burning. For added moisture retention, consider a light brine for pork or a dry-brine for beef; both techniques adjust protein structure to hold more juices.
Learn more about brining techniques from a concise reference on brining.
Resting and carving: finish like a pro
Resting is non-negotiable. Tent the roast loosely with foil and rest 15–25 minutes depending on size; this lets juices redistribute and allows carryover temperature to settle.
Slice against the grain in even 1/4-inch to 1/2-inch cuts to maximize tenderness. Use a long, sharp slicing knife or a carving knife and a steady sawing motion for clean edges.
Expert Insight
After resting, serve immediately to preserve the ideal texture. If you must hold slices, place them loosely in a shallow pan and cover; reheat gently at low oven heat to avoid further cooking.
Pro-Caution
Flavor variations and rubs
Create a rub with smoked paprika, garlic powder, and mustard powder for a savory crust. For herbed profiles, press chopped rosemary and thyme into the fat after scoring for direct infusion.
When using acidic marinades, limit contact time for tougher cuts to prevent breakdown of surface proteins that can lead to a mushy exterior. Salt-based dry rubs remain safest for long roasts.
Serving suggestions and pairings
Serve the roast with creamy mashed potatoes, roasted root vegetables, and a glossy pan jus for classic balance. Bright garnishes such as chimichurri or a lemon-herb vinaigrette cut through richness and refresh the palate.
For wine, select full-bodied reds like Cabernet Sauvignon or Malbec to match the roast’s intensity. Also consider bold beers or fortified wines for contrast.
Explore practical roasting variations in our internal guides: perfect beef roast guide and roasting techniques for step-by-step photos and timing charts.
Nutrition snapshot
Approximate nutrition per serving varies by cut and trimming level. A 4 oz serving of a trimmed ribeye roast typically contains significant protein and fat; balance portions with vegetables for a complete plate.
Use nutrition calculators or product labels for precise dietary planning, and adjust serving sizes to meet caloric goals for your meal.
| Nutrient | Per Serving (approx.) |
|---|---|
| Calories | 520 kcal |
| Protein | 45 g |
| Carbohydrates | 2 g |
| Fat | 38 g |
Final notes on mastering thick cuts
Focus on temperature control, a reliable thermometer, and patient timing to tame thick cuts. When you combine those elements, you create repeatable results and a roast that cuts clean and tastes consistent.
Study the science behind browning and moisture management, then practice on different muscles to learn how each cut responds. For more reading on cooking techniques, review the general overview of roasting.
FAQ
How long should I roast a 4 lb ribeye for medium-rare?
Roast at 275°F (135°C) and remove at about 125°F (52°C) internal temperature. Expect roughly 1.5–2.5 hours depending on oven stability and roast shape, then rest 15–20 minutes.
Do I need to sear before roasting?
Searing is optional but recommended for deeper crust and flavor via the Maillard reaction. You can sear first or use a reverse-sear after a low roast to achieve similar results with more precise internal doneness.
Can I brine a beef roast?
Dry-brining with salt works well for beef; it enhances flavor and surface dryness for better crust. Wet brining suits leaner proteins like pork; adjust times to avoid over-salting.
What temperature is safe for consuming beef?
Food safety guidelines note that ground beef requires higher internal temperatures than whole-muscle cuts. For whole cuts, target temperatures for doneness (rare to well-done) align with preferred texture and safety; use a thermometer to verify the internal temperature before resting.
How do I keep the roast moist if I need to reheat it?
Reheat gently in a covered dish at low oven heat (about 250°F / 120°C) with a splash of stock to recreate moisture. Avoid microwave reheating for large slices, as it drives out juices and creates uneven texture.
Consistent practice and careful use of tools reward you with predictable, tender results. Master these steps, and thick meat will become your most reliable centerpiece.
See also: Thick meat
]]>
- Gentle, even heat preserves moisture and develops deep flavors.
- Two-zone grilling lets you sear, then finish without overcooking.
- Temperature control and patience produce consistent results.
Understanding the science behind indirect heat
Heat moves by conduction, convection, and radiation. Knowing how these modes interact explains why indirect heat cooks food evenly while minimizing surface burning.
Use this principle to control texture and flavor. For technical background on energy transfer, see heat transfer.
Why indirect heat matters for flavor and texture
Collagen in connective tissue converts to gelatin at sustained temperatures between about 160–205°F (70–96°C). Slow heat lets that process finish without drying the muscle fibers.
For smoking or long roasts, indirect heat also promotes uniform smoke absorption and Maillard reactions on the exterior while keeping the interior succulent. See the cooking contexts like grilling and roasting for common applications.
Practical setups: two-zone grilling and alternatives
Two-zone grilling is the most reliable indirect-heat setup: coals or burners on one side and the food on the other. Close the lid to create a convection oven inside the grill.
On a gas grill, light only one zone. On charcoal, bank coals to one side. You can also reproduce indirect heat using an oven or a covered smoker for similar results.
Charcoal approach
Arrange lit coals to one area and leave the other side free for the food. Use a drip pan under the food to catch juices and reduce flare-ups.
Add wood chunks to the hot coals for controlled smoke. Monitor vents to stabilize temperature rather than chasing quick heat spikes.
Gas grill approach
Light a single burner or one side of the burners and cook on the unlit side. Use a drip pan to maintain humidity and prevent drips from causing flare-ups.
Keep a reliable grill thermometer visible. Small burner adjustments maintain a steady 225–275°F for most slow cooks.
Ingredients and staging for a pork shoulder cook
Below are the ingredients you can use for a classic indirect-heat pork shoulder. Quantities match a 4 lb bone-in shoulder that feeds 6–8 people.
- 4 lbs bone-in pork shoulder, trimmed
- 3 tbsp olive oil
- 2 tbsp smoked paprika
- 1 tbsp garlic powder
- 1 tbsp onion powder
- 2 tsp ground cumin
- 1 tbsp kosher salt
- 1 tsp freshly cracked black pepper
- 1 cup apple cider vinegar + 1 cup water for the drip pan
- 4 large carrots, halved lengthwise
- 3 medium zucchinis, cut thick
- Fresh rosemary sprigs for garnish
Step-by-step: Cook the pork shoulder with indirect heat
Prepare the rub by mixing paprika, garlic powder, onion powder, cumin, salt, and pepper. Rub the shoulder with oil, then coat thoroughly with the spice mix.
Set up the grill for indirect heat and place a drip pan under the indirect zone. Preheat to a steady 250°F (120°C) and position the meat away from direct flame.
Place the pork on the cool side and close the lid. Check the grill every 15–20 minutes, stabilize vents or burners, and add soaked wood chips every 45 minutes for smoke flavor.
After roughly 1.5 hours, arrange the prepared carrots and zucchinis around the meat on the indirect side so they roast slowly and absorb smoky notes.
When the shoulder reaches about 195°F (90°C) in the thickest part, it will be tender and pull-apart ready. Remove the meat and vegetables, tent with foil, and rest 20 minutes before slicing against the grain.
Tips for success
Temperature control wins more cooks than expensive gear. A stable grill temp prevents overcooking and reduces variability between cooks.
Keep a spray bottle with apple cider vinegar for occasional spritzing; it helps maintain surface moisture and adds a mild tang.
Expert Insight
Rotate the drip pan and add fresh water or vinegar mix as needed to keep humidity steady. For vegetable timing, place them later in the cook so they don’t become overly soft.
Pro-Caution
Serving suggestions and finishing
Slice the pork against the grain and plate with roasted carrots and zucchini. A bright herb sauce or tangy barbecue condiment balances the rich pork flavors.
Garnish with rosemary and a light sprinkle of coarse salt to enhance texture. Pair with grilled asparagus or a simple green salad for contrast.
Tools and buying guide
Prioritize a good grill thermometer and a probe with an alarm. These two items increase repeatability across cooks and different weather conditions.
For further practical techniques, visit our internal guides: Grilling Techniques for Beginners and Best Grill Thermometers to choose reliable tools and improve your outcomes.
Nutritional snapshot
This estimate covers pork shoulder and roasted vegetables per serving. Values vary by trimming and portion size.
| Nutritional Info (per serving) | Calories | Protein | Carbs | Fat |
|---|---|---|---|---|
| Pork Shoulder & Veggies | 480 kcal | 38 g | 12 g | 30 g |
Further reading and reference
To better understand smoking and slow-cook traditions, consult the culinary methods covered on Wikipedia. These pages explain the historical and technical context for indirect heat cooking.
Relevant reads: barbecue, smoking (cooking), and the general grilling overview. Those articles help connect technique to tradition and equipment choices.
FAQ
What is indirect heat?
Indirect heat cooks food adjacent to, rather than directly over, a flame or heat source. It relies on circulating warm air and radiation to finish the cook without burning the surface.
How do I set up a two-zone grill?
On charcoal, bank the coals to one side. On gas, light only half the burners. Place a drip pan under the indirect zone and keep the lid closed to trap heat.
What internal temperature should I aim for with pork shoulder?
Target roughly 195°F (90°C) for pull-apart tenderness. Use a probe thermometer to confirm the thickest point of the shoulder.
Can I start with direct heat for a sear?
Yes. Sear over direct heat for a crust, then move to the indirect zone to finish. This two-step approach combines flavor and control.
Which vegetables work best with indirect heat?
Denser vegetables—carrots, potatoes, squash, and thick zucchini—stand up well to slow roasting and develop deep sweet flavors without collapsing.
See also: Indirect Heat
]]>