- Controlled temperature and warm broth keep starch extraction steady for gloss and flow.
- Choose meaty mushrooms to add concentrated umami without watering down the pan.
- Use the right rice (short-grain varieties) and add broth in measured ladles for even absorption.
- Finish off heat with cold butter and Parmigiano-Reggiano for a true emulsion and sheen.
Mushroom Risotto: Selecting Ideal Mushrooms for Deep Flavor
Pick mushrooms that deliver concentrated flavor and low internal water. Cremini and shiitake provide meaty texture, while rehydrated dried porcini concentrate savory notes that persist after cooking.
Firm caps brown better than soft ones; browning builds Maillard flavor that complements the rice. For an overview of mushroom biology and culinary use, consult mushroom varieties and uses.
Which mushroom varieties to prefer
Cremini (baby bella) and shiitake add texture and savory depth without excess moisture. Dried porcini contribute an intense, almost smoky base when rehydrated and their soaking liquid is a concentrated stock booster.
Avoid very watery fungi such as enoki or young button mushrooms if your goal is concentrated mushroom flavor. Pat sautéed mushrooms dry before folding them into the rice to prevent dilution.
 Expert Insight
Mushroom Risotto: Achieving the Silky Creamy Texture
Creaminess in risotto comes from released rice starch rather than added cream. Toasting the rice briefly and then adding warm broth in controlled ladles encourages even starch release and a glossy finished sauce.
Finish off the heat with cold butter and finely grated Parmigiano-Reggiano to emulsify the pan juices and produce a silky mouthfeel. For background on the cheese, see Parmigiano-Reggiano production and profile.
Temperature and finishing techniques
Keep the broth at a steady gentle simmer so each ladle raises the pan temperature just enough to coax starch. Cold liquid and abrupt temperature drops interrupt starch extraction and yield uneven texture.
Remove the pan from the heat before adding cheese and the last knob of cold butter, then stir briskly off heat to form an emulsion. That motion and temperature balance give classic risotto its sheen and flow.
Expert Insight
Mushroom Risotto: Choosing the Right Rice and Broth for Absorption
Select rice bred for risotto. Arborio releases starch readily and creates cream, while Carnaroli retains shape under longer stirring, so chefs prefer it for more forgiving timing.
Use a mushroom-infused vegetable stock, or a clear homemade stock, to complement the sautéed mushrooms without masking them. Keep the stock warm so it does not chill the rice during additions. See details on rice varieties at Arborio rice and Carnaroli rice.
Broth choice and preparation
Make or choose a stock with restrained seasoning and a clear mushroom presence. Strongly flavored or overly salted broths will dominate the delicate balance between mushroom and cheese.
Keep the broth on a low flame and measure ladles so each addition absorbs before adding more. A steady rhythm produces a saucy, flowing mushroom risotto rather than a watery or gluey result.
Mushroom Risotto: Stirring Techniques and Timing for Perfect Consistency
Stirring moderates the release of starch and the development of a creamy sheath around each grain. Begin with energetic stirring to coat and toast the grains, then switch to regular, steady strokes as broth is added.
Add the next ladle when the rice nearly absorbs the previous portion. That cadence keeps moisture consistent and allows the grains to swell evenly into a balanced texture.
When to reduce stirring and why
As the rice reaches al dente, reduce stirring and finish off heat. Overworking the grains in the final minutes can shear starches and create a sticky, gluey mouthfeel rather than silk.
Trust the grain: aim for tender with a slight center bite. Resting the risotto off heat for two minutes lets the carryover heat equalize and the texture to settle into a cohesive sauce around the rice.
 Pro-Caution
Mushroom Risotto: Recipe and Practical Details
This recipe yields a restaurant-style mushroom risotto for four and balances timing with repetition to deliver consistent outcomes. Read the full method before you begin to synchronize mise en place and pan workflow.
All steps below follow tested professional technique. Adjust single components only after you master the base method and the timing that works with your stove and pan size.
Prep and Cook Time
- Preparation: 15 minutes
- Cooking: 35 minutes
- Total: 50 minutes
Yield and Difficulty
Yield: Serves 4 generously.
Difficulty: Medium — attention to timing and stirring required, but the steps are straightforward and repeatable.
Ingredients
- 1 ½ cups Arborio rice
- 4 cups warm mushroom or vegetable broth
- 1 cup mixed mushrooms (cremini, shiitake, dried porcini rehydrated), sliced
- 1 small onion, finely chopped
- 3 cloves garlic, minced
- 3 tablespoons unsalted butter
- 2 tablespoons olive oil
- ½ cup freshly grated Parmigiano-Reggiano
- Salt and freshly ground black pepper, to taste
- Fresh parsley, chopped, for garnish
Instructions
- Prepare broth and porcini: Warm the broth gently. Rehydrate dried porcini in a small portion of the warm broth for ten minutes, then reserve the strained soaking liquid to boost flavor.
- Sauté mushrooms: Heat 1 tablespoon olive oil and 1 tablespoon butter over medium. Add mushrooms with a pinch of salt and sauté until golden and the moisture evaporates, about six minutes. Set aside.
- Sauté aromatics: In a large pan, heat the remaining oil and butter. Cook the onion and garlic gently until translucent, about five minutes, being careful not to brown the garlic.
- Toast the rice: Add rice to the aromatics and stir for two minutes until the grain edges look translucent and the rice smells nutty.
- Add broth gradually: Add a ladle of warm broth and stir until nearly absorbed. Continue ladling broth one portion at a time while stirring frequently and maintaining a gentle simmer.
- Fold in mushrooms: When the rice is roughly halfway cooked, fold the sautéed mushrooms into the pan and continue adding broth until the rice is al dente and the sauce flows.
- Finish: Remove from heat. Stir in Parmigiano-Reggiano and adjust seasoning. Emulsify with a small knob of cold butter if you want extra silk and shine.
- Rest and serve: Rest two minutes, garnish with parsley, and serve immediately in warmed shallow bowls.
See a practical mushroom risotto recipe for a printable format and shopping checklist. For technique variations, consult our risotto stirring and timing guide.
Mushroom Risotto: Tips for Success
Use warm broth to maintain a steady pan temperature and to support continuous starch extraction. Monitor each ladle by texture rather than strict timing and adjust as the rice cooks.
For a dairy-free version, replace the butter with extra olive oil and use a fermented nutritional yeast or a plant-based cheese. Reheat leftovers gently with a splash of warm broth to revive creaminess.
Mushroom Risotto: Serving Suggestions
Serve risotto in warmed, shallow bowls so the sauce remains flowing and accessible. Bright garnishes such as chopped parsley or chives cut through the richness and provide contrast.
Finish with a few shavings of aged cheese or a light drizzle of high-quality olive oil for gloss. Pair with a crisp green salad or a simple roasted vegetable side to balance the plate.
Mushroom Risotto Nutrition per Serving
Per serving, this classic mushroom risotto provides a balanced carbohydrate base, a modest amount of protein, and fat from butter and cheese. The calories and macronutrient profile vary with ingredient swaps such as vegan butter replacements.
Estimated per serving values: ~370 kcal, 11 g protein, 55 g carbohydrates, and 9 g fat. Adjust portions to match dietary needs and use whole-grain rice alternatives cautiously as they change cooking time significantly.

For general technique background on risotto, see risotto fundamentals. For additional context on rice varieties and their properties, review Arborio rice. For mushroom categories and nutrition, consult mushroom nutrition.
FAQ: Mushroom Risotto Questions
What rice should I use for the creamiest result?
Use short-grain varieties crafted for risotto such as Arborio or Carnaroli. Arborio gives reliable cream while Carnaroli holds its shape better under longer stirring, which many cooks prefer.
Choose based on your tolerance for timing: Carnaroli tolerates extended stirring; Arborio reaches creaminess faster but can lose structure if overworked.
Do I need white wine in the recipe?
White wine adds acidity and aromatic lift, but it is not mandatory. You can substitute a splash of lemon juice or a little extra warm broth to keep non-alcohol versions balanced.
If using wine, add it after toasting the rice and let it reduce almost completely before the first ladle of broth so the alcohol cooks off and the flavor concentrates.
Can I make mushroom risotto vegan and still keep it creamy?
Yes. Replace butter with extra virgin olive oil and use nutritional yeast or a vegan parmesan alternative to mimic the savory, nutty finish. Robust mushroom selection and patient stirring still produce a creamy result.
Also finish off heat with a swirl of high-quality olive oil to add mouth-coating fat and sheen if you avoid dairy.
How do I fix risotto that is too thick or too loose?
If it is too thick, stir in warm broth a little at a time off heat until it flows. If it is too loose, simmer gently while stirring to reduce excess liquid until the grains concentrate and the sauce clings to the rice.
Adjust seasoning only after the texture is corrected, since salt levels concentrate as the sauce reduces.
Is it OK to prepare risotto ahead of time?
Risotto is best served fresh. You can undercook it slightly, chill, and reheat with warm broth; however, you will lose some of the immediate creaminess present in freshly finished risotto.
For make-ahead service, reheat gently with broth and finish off heat with butter and grated cheese to revive emulsion and shine.
Mastering mushroom risotto requires focused technique: the right rice, warm broth, steady stirring, and a careful finish. Follow these ten professional secrets and practice the rhythm; your mushroom risotto will gain consistent creaminess and depth.
See also: mushroom risotto
]]>Roasted Pasta starts with confident technique: high heat, even cuts, and precise seasoning. When vegetables roast correctly, they develop concentrated sweetness and savory browning that transform a simple pasta into a standout meal.
- Roast at high heat for caramelization without steaming.
- Choose sturdy vegetables that keep shape under dry heat.
- Toss with reserved pasta water to marry sauce and pasta.
This guide uses practical chef methods and tested timings to produce consistent results. I present clear steps, ingredient notes, and variations so you can recreate the dish reliably.
Unlocking the Essence of Roasted Vegetables for Pasta
Roasting concentrates sugars and creates Maillard browning that adds savory depth. Chefs use this dry-heat method to build layers of flavor before finishing a dish with bright acid and fresh herbs.
To understand why roasting works, consult the technique overview on roasting (cooking). It explains the science behind browning and moisture loss that deliver the texture and taste we seek.
Vegetable Selection and Texture
Choose vegetables that tolerate high oven temperatures and keep structure. Bell peppers, zucchini, carrots, eggplant, onions, and mushrooms perform well when cut to uniform sizes.
Root vegetables take slightly longer than tender summer squash; monitor and mix varieties accordingly. Uniform cuts ensure even caramelization and avoid undercooked pieces.
Fat, Salt, and Seasoning
Use a neutral or fruity extra-virgin olive oil to promote browning and carry herbs. Olive oil chemistry supports even heat transfer and flavor release; see olive oil for its culinary properties.
Season early but sparingly. Salt draws moisture and helps surface browning; herbs add aromatic layers. Reserve some finishing salt to adjust at the end.
Prep and Timing
Efficient mise en place makes the roasting and pasta steps flow. Prep all vegetables, measure oil and seasonings, and set a pot of water to boil before you open the oven.
Timing keeps components hot and vibrant. The oven and stove should work together so roasted vegetables finish just as pasta drains and you assemble the final toss.
Prep and Cook Time
Preparation: 15 minutes. Cut vegetables to similar sizes and mince garlic. This reduces variability in roasting time.
Roasting: 20–25 minutes at 425°F / 220°C. Stir once midway to expose edges to direct heat and ensure even browning.
Total Time and Yield
Pasta & assembly: 10 minutes. Reserve 1/2 cup pasta water to adjust sauce viscosity. Toss gently over low heat to marry flavors.
Total: ~50 minutes. Yield: serves 4 generous portions. Scale ingredients proportionally for more servings.
Ingredients
Below are tested ingredient amounts and recommended swaps. Use listed quantities for four servings and adjust salt or cheese to taste.
For a deep-dive on pasta varieties and shapes that pair best with chunky sauces, reference pasta.
- 2 cups cherry tomatoes, halved
- 1 medium red bell pepper, 1-inch pieces
- 1 medium zucchini, sliced
- 1 cup baby carrots, halved lengthwise
- 1 medium red onion, wedges
- 3 tbsp extra-virgin olive oil
- 1 tsp smoked paprika
- 1 tsp dried thyme (or fresh sprigs)
- Salt & black pepper, to taste
- 12 oz dried pasta (penne or fusilli recommended)
- 2 cloves garlic, minced
- 1/4 cup freshly grated Parmesan or Parmigiano-Reggiano (optional)
- Fresh basil, for garnish
Step-by-Step Instructions
Follow these steps to ensure the vegetables roast properly and the pasta finishes with a glossy, cohesive coating.
Work confidently and check textures rather than exact times; ovens vary. Below is a sequence that synchronizes oven and stove work.
Roasting the Vegetables
Preheat the oven to 425°F (220°C) and line a baking sheet with parchment. Toss cut vegetables with oil, smoked paprika, thyme, salt, and pepper.
Spread in a single layer with space between pieces. Roast 20–25 minutes, stirring once halfway, until edges brown and interiors are tender.
Cooking the Pasta
Bring a large pot of salted water to a rolling boil and cook pasta to al dente. Follow package timing as a baseline and taste for the desired bite.
Reserve 1/2 cup of pasta water before draining. This starchy liquid will help bind the vegetables and pasta into a cohesive sauce.
Finishing and Assembly
Return the drained pasta to the pot. Add minced garlic, roasted vegetables, and a splash of reserved pasta water. Toss gently over low heat until glossy and combined.
Adjust seasoning and stir in grated Parmesan if using. Serve immediately with basil and a light drizzle of olive oil for shine.
Pro-Caution
After the warning, take a moment to taste and season. Small adjustments of acid or salt at the end make a big difference.
Expert Insight
Tips for Success
Small technique choices determine the final plate quality. Use these targeted tips to refine texture and flavor.
They focus on roast control, herb timing, and smart use of starch for a balanced finish.
Even Roasting
Do not crowd the pan and cut to uniform sizes. This approach prevents steaming and promotes dry-heat browning on all surfaces.
Use a rimmed baking sheet and single layer; tilt the sheet to drain any pooled oil for crisper edges.
Herb and Acid Timing
Add hardy herbs like rosemary before roasting; finish with delicate herbs like basil after tossing. Bright acid—lemon juice or a small splash of balsamic—lifts the flavors just before serving.
Keep finishing acid minimal to avoid flattening roasted flavor. A teaspoon or two is often sufficient for four servings.
Serving, Variations, and Storage
Presentation and side choices affect perceived quality. Serve on shallow bowls so the vegetables sit atop the pasta and look vibrant.
Pair with a crisp green salad and toasted bread for texture contrast. Small additions such as toasted pine nuts add crunch and fat balance.
Protein and Diet Swaps
For added protein, fold in grilled chicken, beans, or crispy tofu. For vegan plates, omit cheese and add nutritional yeast or toasted nuts for umami and texture.
Adjust roasting times for dense vegetables like butternut squash by cutting smaller or starting them first on the sheet.
Storing Leftovers
Store in an airtight container in the refrigerator for up to 3 days. Reheat gently in a skillet with a splash of water or olive oil to revive texture.
Add fresh herbs or a squeeze of lemon after reheating to refresh the dish. Avoid prolonged reheating that breaks down roasted textures.
Nutrition Snapshot
The following values reflect a typical portion using the recipe quantities listed above. Values vary by ingredient brands and portion sizes.
This meal provides a balance of carbohydrates, moderate protein, and healthy fats from olive oil and optional cheese.
| Nutrient | Per Serving |
|---|---|
| Calories | 380 kcal |
| Protein | 12 g |
| Carbohydrates | 55 g |
| Fat | 10 g |
FAQ
What vegetables roast best for this pasta?
Choose vegetables that tolerate high heat and keep structure, such as bell peppers, zucchini, carrots, onions, and mushrooms. Cut to uniform sizes so they cook evenly.
How do I prevent soggy vegetables?
Use a hot oven (425°F/220°C), a single layer on a rimmed sheet, and do not overcrowd. High heat promotes evaporation and crisp edges rather than steaming.
Can I make this ahead for a dinner party?
Yes. Roast the vegetables up to 24 hours in advance and chill. Reheat gently and toss with freshly cooked pasta just before serving to preserve texture.
What pasta shape works best?
Chunky, short shapes like penne, rigatoni, or fusilli trap roasted pieces and sauce. Long strands like spaghetti also work if you prefer a lighter presentation.
How do I adapt this for dietary needs?
For vegan plates, omit cheese and add nutritional yeast or toasted nuts for umami. Use gluten-free pasta if required; cooking time will vary.
For more on vegetable nutrition and plant-based cooking principles, consult the general overview on vegetables. To explore classic cheese-making that informs Parmesan flavor, see Parmigiano-Reggiano.
See also: Roasted Pasta
]]>
- Brining drives salt and spice molecules into the meat for flavor and moisture retention.
- Collagen-to-gelatin conversion gives corned beef its silky mouthfeel when cooked low and slow.
- Maillard browning adds roasted, nutty notes when you finish with a sear or broil.
- Timing and resting preserve juices and improve sliceability.
What corned beef is and why curing matters
Corned beef is brisket cured in a salt-based brine with spices, then cooked to tenderness. The salt mixture denatures surface proteins and helps spices penetrate deeper for consistent flavor.
During curing, salt and nitrite chemistry alter muscle pigments and microbial risk, which stabilizes color and safety. For basic reference on brine chemistry see brine.
Brine composition: salt, sugar, and curing agents
Use a brine with balanced salt and sugar to control osmotic flow into the meat. Salt draws water and solutes into muscle cells via osmosis, while sugar moderates flavor and browning potential.
Nitrite or pink curing salt prevents growth of harmful bacteria and fixes the distinctive pink hue by reacting with myoglobin. For the pigment chemistry, consult myoglobin.
How protein and water interact during brining
Salt changes protein structure; it partially unfolds myosin and other proteins so they bind more water and retain it during cooking. This altered protein matrix produces a juicier texture compared with an untreated cut.
Turn the brisket periodically while brining to ensure even penetration. Also, soak briefly in fresh water after curing to correct excess salt levels before cooking.
Collagen, gelatin, and texture transformation
Brisket is rich in collagen that toughens raw meat but becomes gelatin when heated gently. Gelatin dissolves into the cooking liquid and coats the tongue, giving that characteristic silky mouthfeel.
Apply a low, steady heat for several hours to convert collagen into gelatin without overcooking muscle fibers. For a deeper explanation of structural proteins, review collagen.
Temperature windows for ideal conversion
Collagen breaks down effectively between about 70–90°C (160–195°F); maintain steady heat in that range to maximize tenderness. If temperature rises too quickly, fibers expel moisture and the texture can become dry or stringy.
Use a probe thermometer and gentle simmering or controlled pressure cooking to hold the meat within the target window. Consistent temperature yields reproducible results.
Maillard reaction: finishing for flavor depth
The Maillard reaction produces dozens of volatile compounds that create roasted, savory, and nutty flavors. This reaction occurs between amino acids and reducing sugars at higher temperatures and gives browned surfaces their complex aroma.
Although corned beef often cooks in moist heat, finish with a brief high-heat sear or under a broiler to activate Maillard chemistry on the surface. Read more about the reaction on the Maillard reaction page: Maillard reaction.
Practical cooking methods and timing
Choose the method that matches your schedule and texture goals. Slow simmering and pressure cooking both break down collagen, but they behave differently in timing and result.
Consult our cooking techniques guide for detailed methods that suit your equipment and time. Also see our recipes index at /recipes/corned-beef for tested timing charts and variations.
Slow simmer versus pressure cooking
Slow simmering at low heat allows gradual collagen dissolution and gentle spice infusion into the meat. This method rewards patience with even texture and controlled moisture retention.
Pressure cooking shortens the time needed for collagen conversion but raises the risk of over-softening if held too long. Use manufacturer timing recommendations and test doneness; err on the side of slightly underdone and allow carryover to finish during natural release.
Spices, aroma compounds, and their roles
Spices contribute volatile oils and small molecules that dissolve into the brine and migrate into the meat. Mustard seed, coriander, and peppercorns each add distinct volatile compounds that build a layered aromatic profile.
Because volatiles are temperature-sensitive, many of their oils release during long, gentle heating rather than a rapid boil. Toast whole spices briefly before adding to the brine to amplify their aromatic compounds.
Chef’s Notes: precise steps for repeatable results
Brine time: 5–7 days for a 4–6 lb brisket gives deep flavor without excessive salt. Turn the meat every 48 hours for uniform cure penetration.
Rinse and soak: After curing, rinse thoroughly and soak 1–2 hours in cold water to remove surface salt. This step prevents an overly salty final dish while preserving the brine’s benefits.
Expert Insight
After cooking, rest the corned beef 10–15 minutes before slicing against the grain to preserve juices and improve mouthfeel. Resting allows protein fibers to relax and redistributes gelatin within the cut.
Pro-Caution
Finish slices with a quick sear in a hot skillet or under a hot broiler for 2–4 minutes to add a caramelized surface. The contrast between tender interior and browned exterior increases perceived richness.
Serving suggestions and pairings
Serve corned beef with simple, bright sides that cut fat and highlight aroma: steamed cabbage, boiled potatoes, or a mustard-forward sauce work well. Acidic or spicy condiments lift the savory profile and add balance.
For visual appeal, slice uniformly and arrange on a warm board with herbs. Offer a small bowl of spiced mustard or horseradish on the side for guests to customize heat and tang.

Evidence-based troubleshooting
If your corned beef is dry, check the brine concentration and cooking temperature control. Overly high heat or insufficient brine time both reduce moisture retention.
If texture is gummy, you may have heated too quickly into a high-temperature zone where muscle fibers contract and squeeze out moisture. Slow down the heat ramp and use a thermometer for repeatability.
FAQ
What is the role of nitrite in corned beef?
Nitrite inhibits growth of Clostridium botulinum and stabilizes the pink color by reacting with myoglobin. Use only approved curing salts at label doses to gain safety benefits without exceeding safe intake limits.
How long should I brine a brisket for corned beef?
For a 4–6 lb brisket, 5–7 days achieves deep flavor infusion. Reduce time for smaller cuts and increase for large pieces; monitor salt uptake by sampling during the process.
Can I get Maillard flavor without dry-searing?
Yes. Use a hot oven broil or torch to brown the surface after moist cooking, or sear slices in a very hot pan for a short time. These approaches trigger Maillard reactions without drying the whole cut.
Why is resting the meat important?
Resting permits redistributed juices and allows internal temperature to equilibrate, which yields juicier slices and better texture. Slice after rest and always cut against the grain for tenderness.
Are there safety concerns with home curing?
Yes. Follow tested recipes for nitrite amounts, maintain refrigeration during curing, and discard brines after use. Proper sanitation and measured ingredients minimize risk.
For layered technique advice, see our internal guide to cooking techniques and the recipes index at /recipes/corned-beef. These pages provide timing charts and step-by-step photos to support reliable execution.
Understanding the simple chemistry behind corned beef — salt-driven curing, collagen conversion, and Maillard browning — makes the dish easier to master. Apply these science-backed steps to get tender, flavorful results consistently.
See also: Corned beef
]]>
- Slow, low heat promotes even starch gelatinization and prevents a gummy interior.
- Fat coats starch to create a velvety mouthfeel and inhibit toughness.
- Layering maximizes surface contact for uniform cooking and flavor infusion.
- Finishing heat creates Maillard browning for an aromatic crust.
Core Chemistry Overview
Potato structure and dairy interaction determine the final texture. The native granules inside potato cells absorb liquid and swell; controlled gelatinization gives the gratin its creamy body.
For background on the tuber, review the potato physiology and uses on Potato on Wikipedia. Those basics explain why variety choice matters.
Prep and Cook Time
- Preparation: 20 minutes
- Cooking: 90 minutes (slow bake for optimum texture)
- Total Time: 1 hour 50 minutes
Slow baking at 300°F (150°C) provides gentle, even heat and gives starch granules time to gelatinize without overcooking the exterior. That slow schedule also concentrates flavors while limiting moisture loss too quickly.
Allowing a final uncovered phase of higher surface heat encourages Maillard reactions. Read about the Maillard process at Maillard reaction on Wikipedia to understand crust development.
Yield
Serves 6 generously when paired with simple sides. The recipe scales linearly; increase liquid proportionally for larger dishes to maintain the same creamy set.
Resting time after baking is part of the yield strategy: it reduces runniness and improves sliceability, so each portion holds together for plating.
Difficulty Level
Medium — this recipe rewards careful attention to technique rather than advanced tools. Precise slicing, even layering, and controlled temperature are the key skills.
Use a mandoline or a sharp knife and steady hands to ensure uniform 1/8-inch slices. Consistent thickness yields consistent gelatinization and texture across the dish.
Ingredients
2 pounds Yukon Gold potatoes, peeled and sliced 1/8-inch thick
2 cups whole milk; 1 cup heavy cream; 2 cloves garlic, minced; 4 tbsp unsalted butter, melted; 1 ½ tsp kosher salt; ½ tsp black pepper; ¼ tsp nutmeg; 1 cup Gruyère, grated; 2 tbsp Parmesan, finely grated; thyme to finish.
Choose a medium-starch potato like Yukon Gold for balance between structure and creaminess. Higher-starch varieties thicken more, while waxy ones hold shape longer.
For dairy context, review cream properties at Cream (food) on Wikipedia. The fat fraction and protein behavior determine emulsification and mouthfeel.
Instructions
Custard Preparation
Preheat oven to 300°F (150°C). Butter a 9×13-inch baking dish thoroughly for even browning and to prevent sticking.
Combine whole milk, heavy cream, minced garlic, salt, pepper, and nutmeg in a mixing bowl. Whisk gently to homogenize the liquid without over-aerating; a calm custard reduces bubble formation during bake.
Layering and Baking
Arrange a single overlapping layer of potato slices across the dish to maximize surface contact and uniform heat transfer. Sprinkle a light layer of Gruyère and drizzle a tablespoon of melted butter to ensure even fat distribution.
Repeat layers until nearly full, reserving some cheese for the finish. Pour the custard over the potatoes so the liquid settles between slices and replace evaporating moisture during the slow bake.
Bake and Finish
Cover tightly with foil and bake 75 minutes to allow starch gelatinization and protein setting. The covered phase traps steam, which aids gentle heat penetration and uniform texture development.
Remove foil, top with Parmesan and remaining Gruyère, then bake uncovered 15 minutes to encourage Maillard browning. Rest 10 minutes before serving so the custard tightens for clean slices.
Resting and Serving
Resting lets residual heat finish the gel matrix without excess moisture. Serve warm so the fat remains soft but the slices hold shape.
For plating, garnish with thyme for aromatic lift and pair with crisp salads or roasted proteins to balance richness.
[having_space_to_isolate_tip_warning]
Expert Insight
After salting and drying, build your layers promptly to keep the slices from oxidizing. Oxidation affects color more than texture, so trim any discolored edges if needed.
Pro-Caution
Use the recommended slow-bake schedule. If you need a crisper top, only raise heat for the final uncovered phase for short bursts to control interior doneness.
Tips for Success
Slice uniformly: consistent thickness leads to consistent gelatinization. A mandoline yields the most repeatable slices for predictable results.
Balance fat and liquid: fat coats starch granules, producing silkiness, while liquid supports swelling. Small adjustments to cream and milk change firmness and richness.
Control evaporation: cover during most of the bake to retain moisture for starch swelling, then uncover to form a browned crust. The timing of this switch defines texture contrast.
Cheese choice matters: melting, flavorful cheeses with moderate fat complement texture without making the sauce greasy. Reserve some cheese for browning to layer flavors.
Serving Suggestions
Present the gratin as a centerpiece for seasonal dinners or as a side to roasted meats. Fresh herbs brighten the dish and cut the palate weight of dairy.
Pair with green salads, pickled vegetables, or lean proteins to offset richness. A small drizzle of browned butter on each portion adds aroma and a toasty finish.
| Nutrient | Per Serving |
|---|---|
| Calories | 360 |
| Protein | 12 g |
| Carbohydrates | 29 g |
| Fat | 22 g |

Science Details: Starch and Emulsions
Starch governs thickening and mouthfeel. As granules absorb water and heat, they swell and leach amylose, which increases viscosity and sets the custard structure.
Explore starch fundamentals at Starch on Wikipedia to understand how potato type changes behavior during baking.
Fat works as an emulsifier in combination with dairy proteins; it coats granules and smooths texture. Proteins denature with heat and help the mixture gel while preventing separation when proportioned correctly.
Temperature control matters: slow, steady heat optimizes gelatinization and minimizes syneresis (liquid weeping). Good technique ensures the fats and proteins create a cohesive, stable matrix around swollen starch.
Expand practical skills with related content in our site guides: Classic French Casseroles and Kitchen Technique Guides. These internal pages provide complementary recipes and method primers.
FAQ
How does slow baking improve gratin texture?
Slow baking lets heat penetrate gradually, allowing starch granules to swell uniformly. That slow process avoids overcooking the surface while the interior sets, producing a consistently creamy texture.
Which potato variety works best?
Choose medium-starch potatoes like Yukon Gold for a balance of creaminess and structural integrity. Higher-starch Russets will thicken more but can break down if sliced too thinly or cooked too long.
Can I reduce the fat without losing texture?
Yes. Substitute part of the cream with whole milk and slightly reduce butter, but expect a lighter mouthfeel. Maintain enough fat to coat starch granules so the custard remains smooth.
Why does my gratin become watery sometimes?
Watery gratins usually result from excess surface moisture or under-gelatinized starch. Lightly salting and resting potato slices, or patting them dry before layering, reduces surface water and prevents runniness.
How do I get a crisp, browned top without drying the interior?
Finish uncovered for 10–15 minutes at a slightly higher temperature to trigger Maillard reactions on the surface. This step creates a crust while the covered bake has already set the interior texture.
By understanding how starch, fat, and heat interact, you gain predictable control over the gratin outcome. Apply these chemical principles to adapt the dish, whether you seek extra creaminess, firmer slices, or a more pronounced crust. Practical technique plus informed ingredient choices yield repeatable, exceptional gratins every time.
See also: potato gratin
]]>
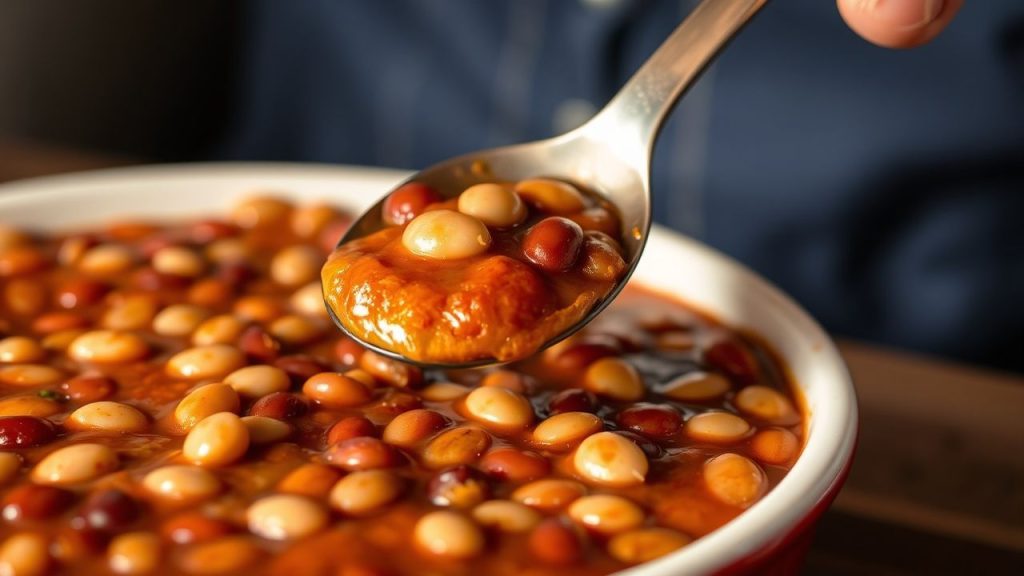
- Key takeaway: Slow, low heat yields creamy beans without collapsing skins.
- Key takeaway: Balancing sugar and acid controls caramelization and brightness.
- Key takeaway: Proper soaking and initial simmer shorten final cook time and equalize texture.
- Key takeaway: Maillard browning and tomato paste boost savory depth.
The scientific foundation
Beans are seeds from plants in the legume family, and their structure drives how they cook. The outer skin, cell walls, and internal starch matrix change at different temperatures and with moisture, so technique matters.
When you control temperature and time, you control hydration and starch gelatinization. These factors produce a bean that is tender yet intact and a sauce that clings without becoming gluey.
Ingredient overview
Choose beans and supporting ingredients that contribute texture and flavor in predictable ways. Beans with thin skins and moderate starch content, neutral oils, acids, and sugars build the classic baked-bean profile.
Below are the ingredients commonly used. Quantities and options follow the recipe style that emphasizes balance between sweetness, acid, fat, and umami.
- 2 cups dry navy beans, rinsed and soaked overnight
- 6 cups water, plus extra for soaking
- 4 slices thick-cut bacon, diced (optional)
- 1 large yellow onion, finely chopped
- 3 cloves garlic, minced
- 1/4 cup maple syrup
- 1/4 cup molasses
- 1/4 cup tomato paste
- 2 tablespoons Dijon mustard
- 1 tablespoon apple cider vinegar
- 1 teaspoon smoked paprika
- 1 teaspoon kosher salt
- 1/2 teaspoon freshly ground black pepper
- 1/4 teaspoon ground cayenne pepper (optional)
- 2 cups low-sodium chicken or vegetable broth
- 2 tablespoons olive oil
Prep and cook time
Preparation: 20 minutes. Soaking: 8 hours or overnight. Cold-water soak hydrates beans uniformly and reduces cooking time.
Cooking: 2 hours 30 minutes slow simmer. Total time: Approximately 11 hours including soaking. Plan a long, low simmer rather than a short, hot boil.
Instructions
1. Drain and rinse the soaked navy beans. Place them in a large pot, cover with fresh water, bring to a boil, then reduce to a gentle simmer and cook until just tender, about 45–60 minutes.
2. Build flavor by preheating a Dutch oven over medium heat, then sautéing diced bacon until crisp and removing it with a slotted spoon, leaving the rendered fat. Add olive oil if needed and cook the onions and garlic until golden, about 5 minutes, to create caramelized base notes.
3. Layer and simmer by stirring in tomato paste and cooking it briefly to deepen flavor through browning reactions. Add the sweeteners, mustard, vinegar, smoked paprika, salt, pepper, and broth; return the beans and bacon, reduce to low, and simmer partially covered for 1 hour, stirring gently every 15 minutes.
4. Adjust texture by monitoring sauce thickness and adding small splashes of broth when it becomes too thick. Taste near the end and brighten with a touch more vinegar or salt to balance sweetness and deepen overall flavor.
Pro-Caution
Science of texture and flavor
Starch gelatinization occurs as beans absorb water and heat, transforming rigid granules into a gel-like network that thickens sauce. The timing of gelatinization depends on bean variety, soaking time, and heat level.
Proteins in beans soften and free amino acids that participate in browning reactions with sugars. These reactions add savory, nutty notes that we attribute to depth and complexity.
Starch gelatinization and cell walls
Gelatinization begins when internal bean temperature rises, typically between 60–80°C, depending on starch composition. Controlled heating ensures starches swell enough to thicken the sauce without collapsing bean structure.
Cell wall strength and pectin content determine how well a bean holds together. Soaking and low, steady heat help the cell walls hydrate and yield a tender interior while keeping the outer skin intact.
Maillard reaction and caramelization
The Maillard reaction generates brown pigments and dozens of aroma compounds when amino acids meet reducing sugars under heat. Encourage these reactions on onion, bacon, and tomato paste to create savory backbone flavors.
Separately, sugar caramelization adds sweetness and toffee-like notes. Balance caramelization with acid—such as vinegar or mustard—to avoid cloying sweetness and to lift the final dish.
Read more about the Maillard process at Maillard reaction. For background on plant categories and seeds, see legume and the general bean entry. For starch science, consult starch.
Tips for success
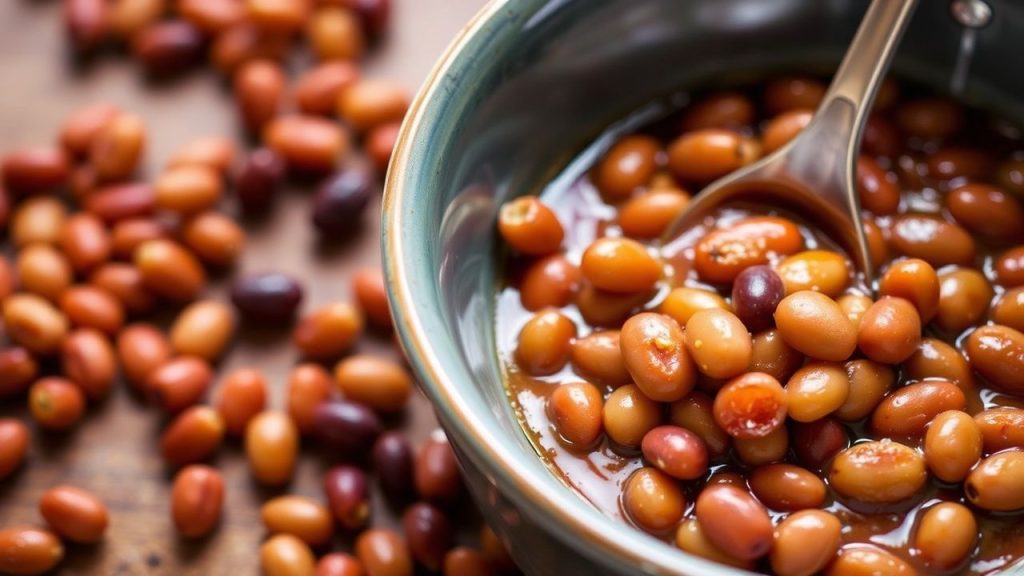
Bean selection matters. Navy and great northern beans typically produce a creamy interior and delicate skins that take sauce well. Use firmer varieties like pinto if you prefer more texture.
Soak overnight to rehydrate evenly and remove some oligosaccharides that contribute to digestive discomfort. Use the soaking water for compost rather than cooking to reduce flatulence compounds.
Expert Insight
Variations and substitutions
To make a vegetarian version, omit bacon and use mushroom or vegetable broth plus smoked paprika for smokiness. You can also swap maple syrup with brown sugar or honey while adjusting vinegar slightly to maintain balance.
If you need lower sodium, use low-sodium broth and add salt late in cooking to control final seasoning. For spicier beans, add chili powder or cayenne in measured increments and taste as flavors concentrate.
Serving suggestions
Baked beans pair well with cornbread, grilled sausages, or roasted pork shoulder, and they also function as a hearty topping for baked potatoes. Garnish with chopped parsley or scallions for freshness and color contrast.
A dollop of sour cream or a sprinkling of sharp cheddar can add a cooling contrast to the sauce’s richness. For a chilled salad application, let the beans cool and use a vinaigrette to brighten the mix.
Nutrition per serving
The recipe yields a balanced mix of protein and complex carbohydrates. A typical serving offers substantial fiber and plant protein, making baked beans a satisfying, energy-dense option.
| Nutrient | Per Serving |
|---|---|
| Calories | 280 kcal |
| Protein | 15 g |
| Carbohydrates | 40 g |
| Fat | 7 g |
Common pitfalls and remedies
Overcooking at high heat breaks skins and produces a paste-like texture. If you notice excessive breaking, reduce heat, add more liquid, and avoid vigorous stirring to let beans recover.
Undercooking leaves a chalky interior and thin sauce. If beans remain firm after the recommended time, continue simmering gently and test frequently to avoid overshooting the ideal texture.
Troubleshooting: Sauce too thin or thick
If the sauce is too thin, simmer uncovered to concentrate flavors and thicken naturally. If it becomes too thick, stir in small amounts of warm broth until it reaches the desired cling and shine.
Also, account for chilling: beans will thicken as they cool, so slightly loosen the sauce just before serving if you plan to reheat or chill leftovers.
Pro-Caution
FAQ
What makes baked beans so flavorful?
Slow heat lets sugars caramelize and amino acids react, creating complex savory and sweet notes. Layered ingredients like tomato paste, smoked paprika, and rendered fat provide concentrated flavor foundations.
Do I have to soak beans overnight?
Soaking improves even hydration and reduces cooking time, but you can use a quick soak method if needed. Quick soaking involves boiling beans briefly then letting them stand for an hour before draining and cooking.
How do I keep beans tender but intact?
Use a gentle simmer, soak beans first, and avoid vigorous stirring. Test a few beans periodically; stop the final cook when they are tender but still hold shape.
Can I use canned beans?
Yes. Canned beans offer convenience and reduce total cook time. Adjust liquids and simmer time to allow flavors to meld without overcooking the canned beans.
Why add acid like vinegar or mustard?
Acid brightens and balances sweetness, preventing the sauce from tasting flat or overly sweet. Add acid in small amounts near the end to preserve brightness and acidity perception.
For technical reading on seeds and crop categories, see legume. For starch mechanics, consult starch. For browning chemistry, visit Maillard reaction.
See also: Baked beans
]]>