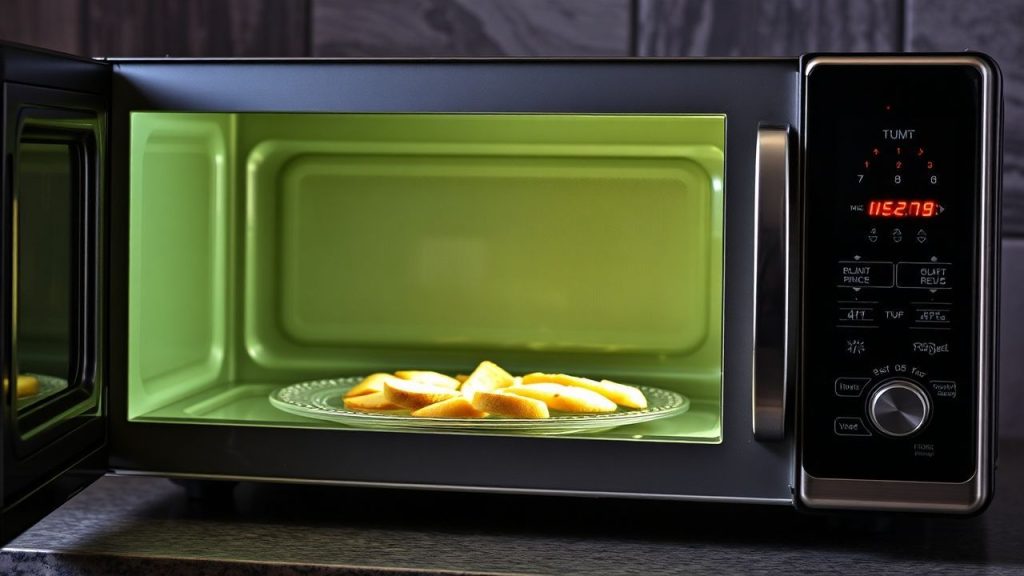
For decades the microwave oven has attracted myths. One persistent myth says microwaves cook food from the inside out.
That claim misunderstands how microwave energy interacts with food. This article explains the physics, practical implications, and how to get even results every time.
- Microwave energy heats surface layers first: penetration depth is limited.
- Conduction moves heat inward: the center warms by transfer, not direct wave heating.
- Stirring and standing time matter: they equalize temperature and reduce cold spots.
- Use correct containers and geometry: shape and material affect evenness.
Prep and Cook Time
Microwave cook times depend on food volume, density, and water content. Typical small vegetable or grain reheats take 3–8 minutes on high, while dense casseroles need longer at lower power.
Plan for short bursts and pauses. Use 30–60 second increments for large portions and allow standing time after heating so heat conducts inward evenly.
- Preparation: 5 minutes
- Cook Time: Typically 3-8 minutes, depending on food type
Yield
This guideline yields 2–4 servings, depending on portion size. Scale ingredients linearly and adjust microwave time accordingly.
When you double a recipe, double the standing and stirring intervals rather than relying on a linear time increase. That reduces cold centers and overcooked edges.
Difficulty Level
Microwave cooking ranges from easy to moderate. Basic reheating is simple; multi-ingredient dishes require attention to layering and stirring.
Practice yields predictable results. Use timers, internal thermometers, and simple technique adjustments to raise repeatability quickly.
Ingredients
These ingredients demonstrate typical microwave-friendly proportions for a quick meal. The list emphasizes moisture and even particle size for predictable heating.
When using leftovers, break up clumps and distribute protein and grains evenly to improve heat transfer during heating and standing time.
- 1 cup fresh vegetables, chopped (broccoli, carrots, bell peppers)
- 2 tablespoons olive oil or melted butter
- Salt and pepper to taste
- 1 teaspoon dried herbs (thyme, basil, or rosemary)
- 1/2 cup cooked protein (chicken, tofu, or beans)
- 1 cup cooked rice or quinoa
- 1/4 cup shredded cheese or nutritional yeast (optional)
- 1 tablespoon lemon juice or vinegar (for freshness)
Instructions
Follow a simple workflow: layer, cover, heat, stir, and allow standing time. These steps minimize hot spots and speed even heating.
Use a microwave-safe dish and break up large pieces before cooking. Rotate or stir midway to redistribute heat.
- Arrange chopped vegetables evenly in a microwave-safe dish. Drizzle with olive oil and season with salt, pepper, and herbs.
- Cover with a vented lid or microwave-safe wrap to trap steam while allowing moisture to escape and avoid sogginess.
- Microwave on high for 2–3 minutes. Pause halfway to stir gently; stirring breaks hot spots and distributes heat more uniformly.
- Add the cooked protein and grains. Stir to combine and promote even temperature throughout the dish.
- Cover and microwave for another 2–4 minutes depending on density. Use shorter bursts for denser mixes and test internal temperature.
- Check doneness with a fork or thermometer. If heat is uneven, stir and microwave in 30-second bursts until uniform.
- Finish with cheese or nutritional yeast and a splash of lemon. Let sit covered for 1 minute to allow heat equalization before serving.
Chef’s Notes: Tips for Success
Microwave penetration varies with water content and thickness. Thin or uniform layers heat faster and more evenly than thick blocks.
Stirring and repositioning reduce the common problem of overheated edges and cold centers. Use a turntable and pause to stir.
- Microwave penetration depth varies with food density and shape; slice large items into thin pieces for better results.
- Use microwave-safe containers with lids to harness steam and control moisture for tender results.
- Avoid metal in the microwave; use silicone or microwave-safe plastic tools for stirring.
- Embrace standing time: internal heat continues to spread after the magnetron stops, improving doneness.
- Reheating leftovers? spread food evenly in a shallow dish to achieve uniform heating without drying edges.
 Expert Insight
The Science Behind Microwave Penetration Depth and Common Misconceptions
Microwaves heat by agitating polar molecules, primarily water, through alternating electromagnetic fields. This process is technically called dielectric heating, and it concentrates energy in outer layers rather than at the core.
Microwave wavelength and material properties determine penetration depth. Typical domestic microwaves deliver energy that penetrates only a few centimeters, so the center warms mainly by thermal conduction.
For readers who want a technical reference, see the microwave oven article on design and operation. For the mechanism of energy absorption, consult dielectric heating.
Remember that the molecular target is water. High-water-content foods absorb energy efficiently, while low-moisture or highly dense foods heat unevenly. Heat then travels inward via thermal conduction, which is slower than direct microwave absorption.
If you want more practical safety recommendations, review our microwave safety guidelines for container selection and temperature targets. Those internal pages show tested approaches for safe reheating.
 Pro-Caution
Tips for Even Cooking and Avoiding Hot Spots
Turntables help rotate food through varying field intensities, reducing persistent hot or cold zones. If your microwave lacks rotation, manually turn the dish during pauses.
Corners and dense lumps concentrate or block microwaves. Use round dishes, and break food into uniform pieces to increase exposed surface area and equalize heating.
- Use a microwave turntable to rotate food consistently during cooking.
- Cut food into uniform pieces to help even energy absorption and conduction.
- Cover food to trap steam which assists internal heating and prevents drying.
- Pause and stir food midway to distribute heat and avoid undercooked sections.
Serving Suggestions
Serve microwave-cooked dishes directly from a warmed container for rustic presentation. Bright herbs and a small acid finish lift flavors that sometimes flatten during reheating.
A drizzle of olive oil or a spoon of yogurt adds mouthfeel. Balance warm microwaved components with a crisp salad or toasted bread for contrast.

FAQ
Below are focused answers to common reader questions. Each entry addresses a single concept and gives actionable advice.
Read the questions that match your use case, and follow the practical steps suggested to improve safety and evenness.
Q1: Do microwaves cook food from the inside out?
No. Microwaves primarily heat outer layers by exciting polar molecules. The center warms through conduction, so the process is outside-in rather than inside-out.
Q2: Why do some foods seem hotter inside after microwaving?
Apparent hot centers arise when microwaves penetrate slightly and deposit energy below a cooler surface, or when dense pockets heat unevenly. Stirring and standing time correct these disparities.
Q3: Can microwaves penetrate all foods evenly?
No. Water content, geometry, and density govern absorption. High-water foods heat more uniformly, while dry or layered dishes need technique adjustments.
Q4: How do I avoid cold spots and ensure food safety?
Stir thick mixtures, use lower power for longer intervals on dense items, and verify temperatures with a food thermometer. Covering and allowing standing time also helps heat spread.
Q5: Are microwaves safe to use for everyday cooking?
Yes. When used with microwave-safe containers and proper procedures, microwaves are a fast, energy-efficient, and safe cooking method. Follow manufacturer guidance and monitored temperatures for high-risk foods.
In Summary
Microwaves do not cook food from the inside out. They deposit energy within limited depths and rely on conduction to warm the center.
Apply simple techniques—cut uniform pieces, stir, use covers, and allow standing time—to get consistent, safe results. For more tips, visit our related internal guide on microwave cooking tips and the microwave safety guidelines page.
See also: Microwaves
]]>The microwave speeds reheats, but the container determines how fast and how evenly your food heats. Choose the right material and shape and you cut reheating time while keeping texture and safety intact.
- Glass often heats evenly and retains heat well.
- Plastic can heat quickly but risks uneven hot spots and leaching if not microwave-safe.
- Ceramic holds heat well but may take slightly longer to reach temperature.
- Container shape affects microwave exposure and final temperature distribution.
Prep and Cook Time
Preparation Time: 2 minutes. Prepare ingredients and choose an appropriate container before you start the microwave to avoid repeated heating cycles.
Cook (Microwave) Time: Typically 1-5 minutes depending on portion size, container material, and power setting. Start short and check to reduce overcooking and protect container integrity.
Yield
Serves 1-4 depending on portion size. Use shallower, wider dishes for even reheating when serving multiple portions.
Portion size scales linearly with heat time but not always with safety; larger portions may need lower power and longer time to avoid cold cores.
Difficulty Level
Easy — this workflow fits everyday reheating tasks. You do not need special skills, only the right container and basic timing.
Follow the instructions and safety tips to prevent damage to containers or uneven heating that risks food safety.
Ingredients
Keep ingredients simple for repeatable testing of containers. This article uses a basic mixed plate to compare warming speed and evenness.
- 1 cup cooked rice or pasta
- 1/2 cup cooked vegetables (broccoli, carrots)
- 1/4 cup protein (chicken, tofu, beans)
- 2 tablespoons olive oil or butter
- Salt and pepper to taste
- Optional: fresh herbs for garnish
The Science Behind Container Choice
Microwave ovens emit electromagnetic waves that primarily agitate water molecules inside food; containers with low moisture content usually remain cooler. See the physics of the device on Microwave oven for fundamentals.
Heat travels through food by conduction and convection after microwaves create internal heating. For deeper context, review Heat transfer principles used in kitchen science.
Material Properties and Heat Response
Glass and ceramic are poor absorbers of microwave energy; they heat mainly by contact with warm food and by conduction. Their thermal mass gives slow, steady heat release that reduces hot spots during standing time.
Plastics vary widely. Microwave-safe plastics resist melting and chemical migration, but many plastics absorb microwave energy unevenly and can form hot zones. For polymer basics see Plastic.
Instructions for Speedy Microwave Heating
Use standardized steps to compare container performance. Consistency in portion size, cover method, and power setting reveals real differences between materials.
Follow these steps to heat quickly while protecting food quality and container durability.
- Assemble food: Place rice or pasta, vegetables, and protein in your chosen container in an even layer.
- Add fat: A small amount of oil or butter preserves moisture and improves heat conduction.
- Season: Salt and pepper refresh flavor; add herbs after heating.
- Cover: Use a microwave-safe lid or vented film to trap steam and limit splashback.
- Power and time: Microwave on high for short bursts: 1-3 minutes total, checking halfway. For glass/ceramic start at 90-second interval; for microwave-safe plastic try 60-90 seconds then check.
- Stir midway: Mixing redistributes heat and prevents cold spots.
- Let stand: Allow 1-2 minutes for residual conduction to finish heating internal pockets.
- Verify temperature: Use a thermometer or check by stirring and testing center temperature before serving.
Safety and Practicality Tips
Only use containers labeled microwave-safe. If a container warps, cracks, or produces an unusual smell when heated, stop using it immediately and replace it.
Avoid metallic trims or painted decorations; metal can spark in a microwave and damage the oven or container. When in doubt, refer to our internal guide Microwave Safe Materials: Your Ultimate Guide for tested recommendations.
Fatty or oily foods reach higher temperatures and can exceed the tolerance of some plastics, causing deformation. Store such foods in glass or ceramic when reheating to avoid contact with plastics.
For information on safe storage and how reheating affects food safety, consult our Leftover Storage & Safety resource.
Expert InsightTest any new container with a cup of water for 60 seconds on high to check whether the container itself heats excessively. If the container becomes hot and the water stays cool, do not use it for reheating.
Pro-CautionTop Container Picks for Efficiency
Tempered glass containers combine durability and even heating. They tolerate thermal cycling and reduce the need for repeated reheating, which preserves moisture and nutrients.
Ceramic vessels with microwave-safe certification keep food warm longer after the cycle ends and excel with soups and stews due to their heat retention. Learn more about ceramic materials on Ceramic.
- Tempered glass (e.g., borosilicate or soda-lime glass): Durable, even heating, oven- and dishwasher-safe when rated.
- Ceramic bowls: Great heat retention; avoid glazed trims with metal pigments.
- BPA-free microwave-safe plastic: Lightweight and fast but monitor for warping and odor over time.
- Paper containers labeled microwave-safe: Use for short heating tasks, but expect lower heat retention.
Chef’s Notes: Tips for Success
Venting the cover reduces pressure and encourages even steam circulation; it also shortens active cook time since steam helps distribute heat. Slightly ajar lids work best for most mixed plates.
Arrange dense items at the perimeter and softer items toward the center when possible. This layout balances heating because microwaves interact with exposed surface area and produce variable local heating.
Serving Suggestions
Transfer food to a ceramic plate for presentation if you prefer higher heat retention at the table. Garnish with fresh herbs and a drizzle of olive oil to restore aroma and texture after reheating.
When serving, allow a brief rest to stabilize internal temperatures. This step both improves flavor and reduces the chance of burns from unexpected hot spots.
| Nutrient | Per Serving |
|---|---|
| Calories | 350 kcal |
| Protein | 18 g |
| Carbohydrates | 45 g |
| Fat | 10 g |
Internal Resource: For more on container safety and material selection, visit Microwave Safe Materials: Your Ultimate Guide. For storage and reheating timelines see Leftover Storage & Safety.

FAQ
Why does container material matter when microwaving?
Material affects how microwaves interact with the vessel and how heat transfers into food. Differences in absorption, thermal mass, and conductivity change heating speed and evenness.
Which container type heats fastest?
Glass often delivers the best balance of speed and evenness for most mixed foods. It rarely absorbs microwaves itself and transfers heat efficiently from food contact.
Are plastics safe for microwave use?
Only use plastics labeled microwave-safe. Over time, repeated exposure to heat can degrade some polymers, so rotate containers and replace any that discolor or warp.
Does container shape change heating time?
Yes. Shallow, wide containers expose more surface area to microwaves and promote even heating. Deep, narrow dishes create cold cores and require longer times.
How do I test a new container?
Place a cup of water and the empty container in the microwave for 60 seconds at high. If the container is cool and the water hot, the vessel is likely safe for reheating food.
In Retrospect
Selecting a container for microwave reheating is a small habit that yields consistent benefits: shorter active heating times, better texture, and fewer safety risks. Glass and ceramic usually win when you balance speed, safety, and food quality.
Next time you reheat, pick a container for the food type and portion. Test new vessels, vent covers, and always verify internal temperature before serving to ensure a fast, safe meal.
See also: Microwave containers
]]>
- Speed with control: set power and cycles, then stir to develop starch structure.
- Ingredient focus: use the right rice and warm stock to reduce overall cook time.
- Finish for texture: add sautéed mushrooms or a quick pan-sear to introduce color and contrast.
- Safety always: vent covers and careful handling prevent steam burns and preserve texture.
Why the microwave works for microwave risotto
The microwave heats by exciting water molecules, which creates rapid internal heating ideal for moist-heat techniques like steaming and poaching. That rapid, volumetric heat makes the appliance suited to grains and delicate proteins when you manage power and time.
Also, understanding how the appliance delivers energy—along with vessel shape and liquid volume—lets you predict hotspots and finish textures. For technical context, see the microwave oven entry for design and power considerations.
Prep and Cook Time for microwave risotto
Prep: 10 minutes. Precise mise en place saves cycles and reduces reheats. Measure stock, rinse rice, and chop aromatics before you start the microwave sequence.
Cook: about 12 minutes active microwaving across cycles, plus 2 minutes resting time. Resting lets starch hydrate fully and keeps the grain tender without overcooking.
Yield and scaling for microwave risotto
This method yields 4 servings. When you scale, adjust liquid proportionally and expect longer gentle cycles for larger volumes. A wider, shallower bowl shortens the required time per volume.
Keep a cook log for your oven: record power settings and effective cook times for each batch. Over time, that log becomes your calibration chart for consistent microwave risotto results.
Difficulty Level and skill focus
Rated Easy to Medium. The method relies on accurate timing, consistent stirring, and monitoring. Basic knife work and timing discipline are the main skills required.
Advanced cooks can introduce finishing steps such as a hot pan sear or broiler finish to add color and the Maillard note for deeper flavor. For the chemistry behind browning, see Maillard reaction.
Ingredients for microwave risotto
- 1 cup arborio rice, rinsed thoroughly
- 2 ½ cups vegetable broth, warm
- 1 tablespoon olive oil
- 1 small shallot, finely minced
- 1/2 cup white mushrooms, sliced thinly
- 1/4 cup freshly grated Parmesan
- 1 teaspoon garlic powder
- Salt and black pepper, to taste
- 1 tablespoon fresh parsley, for garnish
- 1 tablespoon chilled butter, diced
Choose short-grain rice for its high starch. For example, use arborio rice to get the starch necessary for a creamy microwave risotto. Use warm stock so the rice never cools mid-cycle.
Instructions: cook microwave risotto
1. Prepare the rice base: In a microwave-safe bowl combine rice, olive oil, minced shallot, and garlic powder. Microwave uncovered at full power for 1 minute, then stir to distribute heat evenly.
2. Add broth and cover: Pour warm vegetable broth over the rice so it is submerged. Cover loosely using a vented microwave-safe lid to let steam escape safely.
3. Cook on medium-high: Set power to 70% (medium-high) and microwave for 10 minutes total. At the 5-minute mark, pause and stir briskly to release starch and promote even cooking.
4. Sauté mushrooms: Place mushrooms in a separate microwave-safe dish, add 1 teaspoon olive oil, and microwave on high for 2 minutes, stirring once to encourage browning and reduce excess liquid.
5. Final assembly: Remove the cover carefully away from your face. Stir in the mushrooms, grated cheese, and butter cubes so they emulsify into the rice. Cover and let rest for 2 minutes.
6. Season and serve: Taste and adjust seasoning. Garnish with fresh parsley and serve immediately with a bright salad or crusty bread for balance.
Pro-Caution
Tips for microwave risotto: control and technique
Maintain the 70% power guideline. Higher power causes uneven evaporation and can leave the center undercooked while edges dry out. Medium-high power lets starches gelatinize more slowly and predictably.
Stirring midway is critical. It redistributes heat and suspends starch so the rice binds into a creamy matrix. Record timing for your microwave model to achieve consistent results.
Expert Insight
Serving suggestions for microwave risotto
This microwave risotto works as a vegetarian main or an elegant side. Pair it with quick pan-seared scallops or grilled lemon-herb chicken to balance richness with acidity.
For texture contrast, add toasted nuts or crispy shallots before serving. A light drizzle of finishing oil or a squeeze of lemon brightens the plate and gives a restaurant-style polish.
Nutritional Information
Values below are estimates per serving. Actual values vary by brand and portion size. This estimate assumes the recipe as written with vegetable broth and one tablespoon of butter per batch.
Per serving: about 320 kcal, 8 g protein, 50 g carbohydrates, 7 g fat. Adjust fat and cheese to change calorie and saturated fat totals.
Technique Notes and science for microwave risotto
Microwave heating emphasizes water-mediated energy transfer. That rapid internal heating suits moist methods but limits surface browning. To introduce crust or color, finish briefly under a broiler or in a hot skillet.
For an explanation of browning chemistry and why dry heat produces different flavor compounds, see the Maillard reaction. Use a short, hot finish to develop those browned flavors without overcooking the grain.
Practical adjustments and substitutions for microwave risotto
To make the dish vegan, swap butter for a neutral oil and replace Parmesan with nutritional yeast. Add a small splash of acid like lemon juice at the end to mimic the tang of aged cheese.
If you substitute rice types, expect texture changes. Long-grain rice remains more separate and will not yield classic risotto creaminess; experiment and record times if you adapt the method. For rice varietal context, see rice.
FAQ
Can I use regular long-grain rice instead of arborio for microwave risotto?
Short-grain arborio yields the starch needed for creaminess; long-grain stays separate and yields a pilaf-like texture. You can use long-grain but expect a different mouthfeel and reduce cook time accordingly.
How do I adjust times for a more powerful microwave?
Reduce high-power intervals by approximately 15–25% and keep the 70% guideline where possible. Test with a small batch and log the effective cook time for your unit.
Is it safe to cover with plastic wrap when making microwave risotto?
Use microwave-safe plastic wrap and vent it to avoid pressure build-up. A vented microwave lid is preferable. Remove covers away from your face to avoid steam burns.
How can I add proteins like chicken or fish to microwave risotto?
Thin fish fillets and diced chicken cook through in the same steam environment if you use medium power and monitor internal temperature. Place protein on top or in a separate dish; ensure proteins reach safe internal temperatures.
Where can I learn more about the rice varieties best for risotto?
Study short-grain varieties such as arborio and carnaroli to understand starch profiles and how they influence texture. Reliable reference material on rice varietals helps you select the right grain for microwave risotto.
Closing Notes
With measured liquid, controlled power, and brief stirring, the microwave becomes a dependable tool for a creamy risotto. Keep records of time and power to make repeatable microwave risotto batches.
Apply the same method to other grain-based dishes; this approach rewards technique and good ingredients, turning fast cooking into repeatable quality.
See also: internal resources on microwave technique and recipe collections.
See also: microwave risotto
]]>Microwave Explosion: Why Did My Food Suddenly Explode?
A routine reheating can turn dangerous when a microwave explosion throws hot food or liquid. Understanding why a microwave explosion happens helps you prevent burns and messy cleanups.
- Key cause: trapped steam and uneven heating often trigger a microwave explosion.
- Common offenders: sealed containers, whole eggs and dense foods are frequent causes.
- Simple fixes: venting, short bursts and stirring greatly reduce microwave explosion risk.
How Microwave Explosion Heating Actually Works
Microwave ovens heat food by exciting water and fat molecules, which produces heat internally. This rapid internal heating creates pressure and hot spots that can lead to a microwave explosion if steam cannot escape.
Microwave energy deposits inside foods rather than only at the surface. When liquid pockets superheat, they can vaporize suddenly and force a rapid volume change — the physical event behind many microwave explosions.
At the Source: Why Microwave Explosion Occurs
Most microwave explosions start with trapped steam. Moist or dense foods form internal vapor pockets beneath skins or lids; without a vent, pressure builds until something fails suddenly.
Think of a sealed jar or an intact egg as a small pressure vessel. When internal pressure exceeds the strength of the container or skin, it ruptures, producing the characteristic pop and spray of a microwave explosion.
Hotspots and Microwave Explosion Risk
Microwave fields produce uneven energy patterns. Certain shapes and compositions concentrate energy into localized hotspots that can superheat a small region.
Disturbing a superheated pocket — by stirring or cutting into it — can nucleate boiling or rapid vaporization. That sudden phase change creates the mechanical force seen in a microwave explosion.
Seven Common Culprits
1. Sealed Containers: Lids, plastic wrap or sealed bags trap steam and convert the vessel into a pressure chamber. The sudden release causes a microwave explosion.
2. Intact Eggs: Eggs in shells have no escape for expanding steam. They commonly rupture and create a dramatic microwave explosion.
3. Dense Foods: Whole potatoes, sausages and tomatoes build internal steam pockets unless pierced. These pockets can cause a microwave explosion on venting.
4. Thick Sauces: High-viscosity sauces trap steam and develop localized superheated zones, which can erupt when disturbed and trigger a microwave explosion.
5. Uneven Food Distribution: Crowded or irregularly shaped dishes create uneven heating and localized boiling that can lead to a microwave explosion.
6. Non-Microwave-Safe Plastics: Some plastics warp or obstruct vents as they deform, increasing internal pressure and the chance of a microwave explosion.
7. Residue and Splatter Spots: Food buildup on the cavity creates hotspots that raise local temperatures and can contribute to small eruptions or a microwave explosion.
Prep, Timing and Yield: Practical Guidelines to Prevent Microwave Explosion
Prep: Choose a vented, microwave-safe container, pierce skins of dense items and arrange food evenly. These steps reduce trapped steam and lower microwave explosion risk.
Timing: Heat in short intervals (20–45 seconds) and stir between bursts. Short cycles let you test temperature and avoid sudden vaporization that causes microwave explosion.
Yield: Use one batch per container and avoid overcrowding. Overfilling worsens uneven heating and increases the probability of a microwave explosion.
How to Choose Containers and Covers
Select glass or ceramic labeled microwave-safe to avoid warping and uneven heat transfer. Proper materials help vent steam predictably and reduce microwave explosion incidents.
Use vented lids or a loosely placed paper towel to trap splatter but allow steam to escape. Avoid tight seals and do not use metal objects that reflect energy and create arcing.
Container Choices and Heat Distribution
Shallow, wide vessels increase surface area and reduce depth; that lowers the chance of internal steam pockets that produce a microwave explosion. Stirring regularly evens temperature.
When reheating soups or gravies, transfer to a broad dish and heat at medium power. That reduces hotspot intensity and the abrupt vaporization that causes a microwave explosion.
Step-by-Step Instructions to Prevent Explosions
1. Pierce dense skins once or twice with a fork to provide steam vents. A small hole controls pressure and prevents a microwave explosion.
2. Cover with a vented lid or loose paper towel. This contains splatter while allowing gas flow; tight seals can provoke a microwave explosion.
3. Heat in short intervals and stir between cycles. Stirring redistributes heat and collapses steam pockets gradually, avoiding microwave explosion triggers.
4. Use medium power for dense items. Lower power produces gentler heating and reduces the formation of hotspots that can cause a microwave explosion.
Expert Insight
Cleaning and Maintenance to Reduce Risk
Keep the interior clean. Baked-on food creates thermal hotspots that raise local temperatures and increase the chance of ignition or a microwave explosion.
Run a short steam-clean cycle with water and lemon in a safe bowl to loosen residue, or wipe the cavity after use. Regular maintenance preserves predictable heat patterns and reduces microwave explosion occurrences.
Pro-Caution
Serving Suggestions and Safe Handling
Allow heated foods to rest for a minute before serving. Standing time equalizes temperature and lets residual steam dissipate, lowering the chance of a microwave explosion when opened.
Use oven mitts and tilt lids away from your face to vent escaping steam safely. Open lids slowly and stir carefully to release any remaining pockets gradually.
Common Myths Versus Facts
Myth: Microwaves explode food randomly. Fact: Explosions follow specific physical causes — trapped steam and hotspots — both of which you can control to prevent a microwave explosion.
Myth: Microwaving is inherently unsafe. Fact: With proper containers, power settings and technique, microwave cooking is efficient and safe and rarely leads to a microwave explosion.
Technical Note: Heat Transfer and Phase Change
Phase change from liquid to vapor absorbs and redistributes energy. When that change happens rapidly, it does mechanical work that can eject food and cause a microwave explosion.
Superheating can occur in smooth containers where bubbles do not form until disturbed. Sudden nucleation throws liquid out in a boil-over event similar to a microwave explosion.
For further technical background, see the appliance entry on microwave oven and the physics of steam. Also review pressure cooker dynamics and thermal conduction for related concepts.
Visuals, Nutrients and Practical Notes
Microwave heating preserves nutrients well because of reduced cook times. Short, even heating maintains texture and decreases the conditions that produce a microwave explosion.
When reheating soups or sauces, use a broader vessel and stir before serving. That yields consistent temperatures and avoids pockets that might erupt when pierced.
Prep Checklist Before You Hit Start
1. Choose a microwave-safe dish and a vented cover. 2. Pierce dense skins. 3. Arrange food evenly and avoid overfilling.
Follow this checklist to reduce trapped steam and improve results. Small prep work prevents large cleanups and minimizes the chance of a microwave explosion.
FAQ
Why does an egg explode in the microwave?
Eggs in shells lack vents for steam. Heating converts liquid interior to pressurized vapor and the unyielding shell ruptures, producing a messy microwave explosion.
Can plastic containers cause explosions?
Unsafe plastics can deform and obstruct vents. Use containers labeled microwave-safe to prevent warping that could trap steam and lead to a microwave explosion.
Are microwave explosions dangerous?
Explosions usually cause messy splatter and potential burns from hot liquid. They rarely damage the appliance, but scalding steam and fluids can injure you.
How do I safely open a hot container that was microwaved?
Wear heat protection, tilt the lid away from your face to vent steam, and allow a short standing time. Stir carefully to release any remaining pressurized pockets slowly and avoid a microwave explosion.
Where can I learn more about safe microwave operation?
Refer to your appliance manual for safety specs and to the Wikipedia entry on microwave oven for general principles. Manufacturer guides provide model-specific precautions to avoid a microwave explosion.
See also: Microwave Safety
Recommended Reading:
]]>
- Microwaves cook by exciting water molecules, not by making food radioactive.
- Quick cooking often preserves heat-sensitive vitamins better than boiling.
- Uneven heating is a common issue; stirring and standing time reduce it.
- Use only microwave-safe containers to avoid chemical leaching.
How Microwaves Work
Microwave ovens generate electromagnetic waves tuned to agitate polar molecules. These waves primarily target water and other polar components in food, producing heat internally.
The mechanism is well documented in technical literature and summaries on microwave ovens. Electromagnetic principles are the same as in other appliances that use non-ionizing radiation.
Mechanism at the molecular level
Microwave frequency causes dipolar molecules such as water to rotate rapidly. That rotation creates friction and thermal energy that raises the food temperature.
This is distinct from thermal conduction from an external hot surface. The effect is efficient when moisture is present and lower in very dry foods.
Heat Distribution and Common Issues
Microwave fields inside the cavity form standing wave patterns that lead to hot spots and cold spots. Those patterns explain why some bites are scalding while adjacent areas remain cool.
Rotation trays and stirring break up those patterns. Allowing a short standing time after cooking helps residual heat homogenize the meal for safer, tastier results.
Prep and Cook Time
Microwaves reduce hands-on time. Typical dishes go from prep to plate much faster than conventional ovens.
Adjust times to your oven’s wattage and the food’s mass. Test initial runs and add brief increments to avoid overcooking.
- Preparation: 5 minutes
- Cooking: 8-12 minutes, depending on dish and microwave wattage
- Total Time: 13-17 minutes
Yield & Difficulty
This recipe yields roughly four servings in standard portions. It makes a quick weeknight side or light main when paired with protein.
Difficulty is low. The method favors precise timing and brief stirring, not advanced culinary technique.
- Serves 4 comfortably
Ingredients
Use fresh or frozen vegetables for speed and consistent moisture. Frozen mixes often come pre-cut and save prep time.
Adjust grains to preference. Cooked quinoa or brown rice hold up well to gentle microwave reheating and mixing.
- 1 cup fresh or frozen mixed vegetables (carrots, peas, corn)
- 1/2 cup cooked quinoa or brown rice
- 1 tbsp olive oil
- 2 cloves garlic, minced
- 1 tsp dried Italian herbs
- Salt and freshly ground black pepper, to taste
- 1/4 cup shredded low-fat mozzarella or vegan cheese (optional)
Instructions
Use a microwave-safe dish and cover it loosely to trap steam. Steam speeds cooking and helps retain nutrients by reducing water loss.
Stirring once or twice improves uniformity. Allow standing time after cooking to let temperatures equalize throughout the dish.
- Prepare your microwave-safe dish: Lightly grease it with olive oil to prevent sticking and to help flavors coat the vegetables.
- Mix garlic and herbs: Combine minced garlic with dried Italian herbs and olive oil; brush this mixture evenly over the vegetables for aromatic infusion.
- Add the vegetables and grains: Layer fresh or frozen mixed vegetables and cooked quinoa or brown rice in the dish, seasoning with salt and pepper.
- Cover loosely: Use a microwave-safe lid or vented plastic wrap to allow steam to escape, preventing sogginess while ensuring thorough cooking.
- Cook on high power: Microwave for 6 minutes, then stir gently to distribute heat evenly, helping to cook all ingredients uniformly.
- Continue microwaving: Cook for another 4-6 minutes, depending on your microwave wattage and vegetable size, until vegetables are tender but vibrant.
- Add cheese and finish: Sprinkle shredded cheese on top and microwave for an additional 1 minute, creating a creamy, melted finish.
- Rest before serving: Let the dish sit covered for 2 minutes; residual heat enhances flavors while moisture distributes evenly.
Chef’s Notes and Tips for Success
Microwave wattage varies; common ranges are 600–1,200 W. Start with shorter times and increase by 30-second increments to avoid overcooking.
Microwaving uses minimal water and short exposure, which helps retain heat-sensitive vitamins. For more on nutrients, review summaries on nutrition science.
Expert Insight
Always cover food to retain moisture but leave vents. Trapping steam speeds cooking and reduces nutrient loss compared with boiling.
Pro-Caution
If reheating leftovers, add a tablespoon of water to the container for each cup of food. This small step restores moisture and prevents dryness.
Serving Suggestions
Garnish the finished dish with fresh herbs for aroma and visual contrast. A squeeze of citrus brightens flavors and adds vitamin C at the table.
Pair the vegetable and grain mix with grilled protein or a leafy salad. For texture contrast, serve with a crisp side or toasted seeds.
| Nutrient | Per Serving |
|---|---|
| Calories | 210 |
| Protein | 7g |
| Carbohydrates | 28g |
| Fat | 7g |
For safe handling and temperature targets, consult standard food safety summaries on food safety. Those pages outline safe reheating temperatures and bacterial risk factors.
For basic physics background about radiation types relevant to microwaves, review the primer on electromagnetic radiation. This clarifies why microwaves are non-ionizing and do not make food radioactive.
Q&A
Below are concise answers to common microwave concerns. These responses reflect consensus in food science and appliance safety.
They address safety, nutrients, containers, and reheating best practices based on documented mechanisms.
Q1: Are microwaves cooking food with radiation? Should I be worried?
Microwaves use non-ionizing electromagnetic waves. They heat by agitating polar molecules and do not induce radioactivity.
Q2: Does microwaving destroy nutrients in my food?
Rapid cooking with little water tends to preserve vitamins like vitamin C better than prolonged boiling. The overall nutrient loss depends on time, temperature, and water exposure.
Q3: Can microwaving create toxins?
Microwaving does not create unique toxins distinct from other cooking methods. Overheating or burning any food can produce undesirable compounds, regardless of the heat source.
Q4: Why does food sometimes heat unevenly?
Field distribution and food geometry cause uneven heating. Stirring, rotating, and standing time reduce temperature gradients for safer consumption.
Related Resources
Read our practical safety guide for device-specific tips: Microwave Safety Tips Every Cook Should Know. That page lists safe practices for container choice and reheating targets.
For appliance comparisons and buying guidance, see our overview: Kitchen Appliances Guide. It helps you select a suitable microwave by wattage and features.
FAQ
Is food cooked from the inside out in a microwave?
Microwave energy penetrates a few centimeters and heats water molecules directly. Dense or layered foods may heat from surfaces as conduction follows the initial microwave heating.
Can I sterilize jars or containers in a microwave?
Microwaving can sanitize moist containers but does not reliably sterilize them. Use proper sterilization methods for canning to ensure safety and longevity.
Are microwave-safe plastics truly safe?
Only use plastics labeled microwave-safe. Independent testing shows that approved materials remain stable under normal microwave conditions, while untested plastics can deform or leach.
Does microwaving kill bacteria?
Microwave heating can kill bacteria if the food reaches uniform, safe internal temperatures. Uneven heating may leave pockets at unsafe temperatures, so stir and check with a thermometer.
Will microwaving alter food flavor or texture?
Microwaving preserves moisture but does not produce browning reactions like the Maillard reaction. Textural changes occur; crunchy surfaces often become soft unless finished by other methods.
See also: microwave
]]>
- Trapped steam and pressure cause most sudden releases.
- Uneven heating creates hotspots that trigger bursts.
- Sealed skins and containers turn food into pressure vessels.
- Simple venting and short cycles prevent most incidents.
How a Microwave Heats Food
Microwave ovens transfer electromagnetic energy into polar molecules, mainly water, inside the food. That molecular excitation raises temperature rapidly and converts liquid water into steam.
This process depends on dielectric heating, which concentrates energy where moisture is present and where geometry concentrates fields. For technical context, see microwave oven.
Why Foods Explode
Most kitchen blasts labeled as microwave explosions come from pressure buildup inside an enclosed pocket. When trapped steam reaches a critical pressure, the weakest layer ruptures and ejects contents.
Pressure, material strength, and the rate of steam generation determine whether venting is gradual or explosive. For a primer on pressure dynamics, see pressure.
Steam and Rapid Phase Change
Rapid local boiling creates steam bubbles that expand faster than surrounding layers can relax. Superheated spots can form when liquid exceeds its boiling point under local conditions and then flashes to steam.
When that phase change occurs inside a sealed pocket, it drives the mechanical rupture you see in microwave explosions. For basic chemistry of water and phase change, consult water.
Hotspots, Structure, and Trapped Moisture
Food is heterogeneous: pockets of moisture, fat, or dense tissue heat unevenly and produce hotspots. Structural barriers like skins, membranes, or tightly sealed packaging act as lids that trap rising steam.
Those trapped pockets convert a benign heating cycle into a pressure vessel that can fail catastrophically under load. Identifying likely hotspot regions helps you target venting and stirring.
Common Culprits and Why They Fail
Whole eggs, sealed jars, dense tubers, and wrapped leftovers rank high for causing microwave explosions. Each item either traps steam or concentrates energy into a small volume that overheats.
Grapes and other small, high-moisture items can also behave unpredictably under microwaves and produce sparks or plasma in extreme cases. Avoid experimenting with items that reliably generate dangerous conditions.
Simple Mechanical Fixes: Venting and Piercing
Piercing a potato, loosening a lid, or cutting slits in plastic wrap converts a sealed volume into a controlled venting system. That small change allows steam to escape gradually and lowers peak pressure dramatically.
Use a fork or a sharp tool to create several vents in thick skins and leave lids slightly ajar on containers. If you want a dedicated how-to, consult the internal microwave safety guide for step-by-step checks before heating.
Expert Insight
When you vent intentionally, monitor the heating process in short bursts and use lower power settings. Those habits prevent steam from accumulating faster than it can escape.
Safety Techniques to Prevent Microwave Explosions
Control steam generation by using lower power levels and short intervals, then stir or rest between cycles. These steps equalize temperatures and release trapped steam slowly.
Choose microwave-safe containers with vents or leave a small opening. Avoid fully sealed jars or plastic wrap pressed tight; confirm containers are labeled microwave-safe and avoid metal.
Pro-Caution
If you smell burning or see smoke, stop the microwave immediately and unplug if safe. Allow pressurized containers to cool briefly before opening to reduce scald risk.
Microwaving a Potato: Quick, Safe Method
Potatoes often appear in reports of microwave explosions because their skin traps steam and they develop dense cores. Piercing the skin and using medium power prevents the common pressure failure mode.
Ingredients: 1 medium potato, cleaned and pierced several times; 1 tbsp olive oil; salt and optional toppings. Choose medium-sized tubers for uniform cooking and avoid very large ones that form dense cores. For botanical and storage context, see potato.
Instructions: Pierce thoroughly with a fork to create steam vents and rub with oil. Cook on high for 3 minutes, check firmness, then continue in 1-minute bursts until tender; rest 1–2 minutes before opening to let steam redistribute.
For more recipe adaptations and timing, see our internal microwave potato method and adjust power for your appliance wattage. Use a probe thermometer if you want precise doneness without overcooking.
Practical Tests and Troubleshooting
Run short test bursts when you face an unfamiliar item and monitor for swelling or steam vents. Use a thermometer or thermal probe where safe to detect hidden hotspots.
If a container balloons, stop heating and let it cool; then open away from your face while shielding with a towel. Regularly clean the microwave interior so residue cannot ignite and create a secondary hazard.
What to Do After an Explosion
Unplug the microwave and allow it to cool before cleaning. Remove large debris with a paper towel, then wash interior surfaces with warm, soapy water to remove grease and carbonized food.
Check seals and turntables for damage and test basic functions with water in a microwave-safe cup before reheating food. If you find cracks or persistent odors, have a qualified technician inspect the appliance.
FAQ
Why do potatoes sometimes explode in the microwave?
Potatoes have a dense core and intact skin that can trap steam during rapid heating. If you do not pierce the skin, internal steam pressure builds and then releases suddenly.
Piercing and resting allow steam to escape gradually, which prevents the burst. Use medium power and short bursts for large tubers.
Can I microwave an egg safely?
You can microwave beaten eggs or scrambled eggs in a vented container safely. Never microwave whole eggs in their shells because the shell traps steam and often bursts.
For whole eggs, crack them into a bowl and whisk, then heat in short intervals while stirring to avoid sudden pressure buildup. Use a microwave-safe vessel and cover with a vented lid.
Do certain containers increase explosion risk?
Airtight containers and tight plastic wrap trap steam and cause pressure spikes. Use vented lids or leave a small opening to allow steam to escape.
Also confirm containers are microwave-safe to avoid melting or chemical leaching during heating. Replace damaged containers and avoid makeshift lids that seal under heat.
What causes hotspots inside food?
Hotspots result from uneven moisture distribution and geometry that concentrates microwave energy in specific regions. Dense areas, fat pockets, or irregular shapes absorb energy differently and overheat compared to surrounding material.
Stirring between cycles and using lower power for longer intervals reduces hotspots and yields more even heating. Rotating plates or using a turntable also evens exposure.
How should I clean up after a microwave explosion?
Unplug the microwave and let it cool before opening doors. Remove loose debris with a paper towel and wash surfaces with warm soapy water to remove oil and burned particles.
Regular cleaning prevents odors and reduces the chance that spilled food will burn in later cycles. Inspect seals and vents after cleaning to ensure safe future operation.
Understanding the mechanics of steam, pressure, and food structure gives you actionable tools to prevent microwave explosions. Apply piercing, venting, stirring, and paced heating to turn a risky cycle into a predictable, safe one.
See also: microwave explosions
]]>
- Microwave boiling depends on molecular polarity, surface texture, and dissolved solids.
- Superheating and nucleation sites control eruption risk; container finish matters.
- Lower power, stirring, and brief cycles give predictable, even heat and reduce hazards.
How microwave boiling heats liquids
Microwaves in a kitchen oven create an electromagnetic field that excites polar molecules, notably water. The rapid rotation of dipoles converts electromagnetic energy to thermal motion and raises temperature quickly.
This selective coupling explains why microwave boiling affects watery liquids more than nonpolar oils and why power settings matter for control. For background on the appliance physics, see microwave oven.
Key physical factors that change microwave boiling behavior
Three core properties control microwave boiling: molecular polarity, viscosity, and solute content. Polar fluids heat efficiently; viscous or particulate-laden fluids trap steam and develop hot spots that affect bubble formation.
Surface tension, dissolved gases, and nucleation sites determine when bubbles form and escape. Consult the formal thermodynamic concepts behind phase change at boiling point.
Setting up a safe microwave boiling experiment
Choose identical microwave-safe glass or ceramic cups and label samples: distilled water, olive oil, whole milk, and saltwater. Keep variables limited so results reflect each liquid’s properties, not container or volume differences.
Use lower power and short cycles when you run tests. This approach reduces thermal gradients and allows you to spot small bubbles, surface skin, or sudden eruptions before they escalate.
Supplies and baseline parameters
Gather one cup per sample, a wooden stir stick, and oven mitts. Set the microwave to roughly 50–60% power and clear a workspace to handle hot cups safely.
Start with 60–90 second bursts for water or milk, then pause and observe. For oils, plan shorter checks after the first minute because they hide localized hotspots.
Step-by-step heating routine
Heat each sample for an initial interval and then pause to stir gently. Stirring breaks hot spots and introduces nucleation, lowering the chance of superheating and sudden eruptions.
Continue in 20–30 second increments, stirring between cycles until you see a consistent ring of small bubbles or a steady shimmer. Remove when the visual cue matches your target temperature range.
Expert Insight
Common behaviors in microwave boiling: What each liquid typically does
Distilled water: Heats rapidly and often becomes superheated because it lacks dissolved gases and particulates that promote bubble nucleation. When disturbed, superheated water can erupt violently and cause scalding.
When testing distilled samples, watch for a smooth, glassy surface that hides energy above the boiling point. See the controlled explanation of superheating at superheating (phenomenon).
Olive oil and fats: Heat slowly in a microwave; oils are less polar and convert less microwave energy into heat. They develop surface hotspots that can reach smoking or ignition temperatures without visible boiling behavior.
Because oils reach much higher temperatures before vaporizing, stop heating at the first sign of smoke and use stovetop methods for high-temperature cooking. Oils rarely form bubbles, so rely on shimmer and odor cues.
Whole milk: Contains proteins, fats, and sugars that change its heating profile and promote skin formation on the surface. The skin traps steam and can cause the liquid to froth or boil over suddenly.
Heat milk in short bursts and stir between intervals to collapse surface film and redistribute heat. For composition context, review milk (animal product).
Salted water: Dissolved salts raise the boiling point slightly and alter nucleation dynamics. Solutes delay bubble formation and can mask the approach to a boil, so handle with extra care.
Salt changes surface tension and the microscopic sites where bubbles form; therefore, salted samples often show delayed visible boiling compared with pure water.
Practical microwave boiling safety and timing
Plan for short, monitored heating windows: typical runs total 2–10 minutes split across short cycles depending on microwave wattage and the liquid. Use higher-sided containers to reduce boil-over risk and always handle with protective gear.
For a safe simmer-like result in water or milk, begin with a 1–2 minute interval at reduced power. If small bubbles rise steadily from the bottom, the sample has reached a stable simmer and you can stop heating.
Pro-Caution
Microwave boiling applications: When to use each heated liquid
Warm milk suits beverages like hot chocolate, lattes, and recipes that require controlled temperature rather than rapid boiling. Reheat gently to avoid skin and scalding and always stir before serving.
Briefly warmed olive oil unlocks aroma for dressings or infusions; heat at low power and for short bursts to extract herbal notes without damaging flavors or risking ignition. For culinary technique, test small volumes first.
Salted water is useful for blanching or dissolving seasonings, but its higher effective boiling point demands attention; delayed bubbling can hide rapid steam release. Use a thermometer or visual cues to judge readiness.
Understanding these differences improves food quality and reduces kitchen accidents. For context on water properties, consult water.
Microwave boiling troubleshooting and advanced tips
If you see uneven heating or cold spots, switch to lower power and add scheduled stirring breaks. Rotating the container by hand between cycles also helps distribute energy more uniformly in ovens without turntables.
Replace scratched or glossy-smooth containers when possible: highly smooth surfaces reduce nucleation and increase superheating risk. Minor surface roughness or a wooden stick provides safe nucleation points.
Advanced timing cues
Use infrared thermometers or probe thermometers for exact control when preparing sensitive recipes. Visual cues—small rising bubbles, consistent steam, and absence of sudden surface tension changes—help you stop at the correct temperature.
For oils and high-fat liquids, check every 30 seconds after the first minute and stop at the first hint of smoke. For volatile applications, prefer stovetop control where you can directly sense and disperse hotspots.
FAQ: microwave boiling questions
Why does my water sometimes erupt when I take it out of the microwave?
Water can become superheated when it lacks nucleation sites. When you disturb the cup, the trapped energy forms vapor bubbles suddenly and violently, causing eruptions. Prevent this by introducing a spoon or stirring between cycles.
Is milk safer to microwave than water?
Milk carries solids and fat that provide nucleation, so it tends to resist superheating compared with distilled water. However, milk forms surface skin and can boil over, so heat in short bursts and stir frequently to avoid spills and scorching.
Can I heat oil in the microwave for cooking?
You can gently warm oil to release aromas, but do not attempt to reach typical stovetop cooking temperatures in a microwave. Oils hide hotspots and can smoke or ignite; use a pan for high-heat cooking and short microwave checks for flavor extraction only.
Does container material change microwave boiling behavior?
Yes. Glass and ceramic differ from plastics in heat transfer and surface finish. Smooth, glossy surfaces reduce nucleation and increase superheating risk; scratched or textured surfaces promote bubble formation. Always use microwave-safe, undamaged vessels.
How do I avoid superheating in future microwave boiling attempts?
Use lower power settings, heat in short intervals, stir regularly, and add a wooden stir stick or a teaspoon to provide nucleation. Cover containers loosely to contain splashes while letting steam escape, and test unfamiliar combinations in small quantities first.
Related internal reading: explore practical tips and experiments on microwave boiling and detailed safety protocols at microwave heating safety for further guidance.
See also: microwave boiling
]]>