- Surface water delays Maillard reactions and crust formation.
- Dry surfaces sear faster, producing deeper flavor and firmer texture.
- Wet surfaces increase cook time and promote steaming rather than browning.
- Controlling moisture simplifies repeatable results for home searing.
Patting Meat: Overview
Patting meat is the simple act of removing surface water with towels before high-heat contact. The practice directly affects heat flow, evaporative cooling, and the Maillard reaction on the exterior.
When you skip patting meat, the surface spends energy evaporating water instead of reaching browning temperatures. That changes crust development and can produce a paler, softer exterior.
Prep and Cook Time for Patting Meat
Plan roughly 5–15 seconds per side to pat meat dry, depending on cut size and packaging moisture. For a 1-inch steak, include 10 minutes for patting, seasoning, and a brief rest at room temperature.
Cook time shifts when surface moisture remains. A dry steak sears within 3–4 minutes per side on a hot pan; a wet surface can add several minutes and reduce crust quality.
- Preparation Time: 10 minutes (including patting and seasoning)
- Cooking Time: 8–12 minutes for medium-rare on a 1-inch steak
Ingredients and Cut Selection (Patting Meat)
Choose cuts that tolerate high heat, such as boneless ribeye or sirloin at about 1-inch thickness. Thicker cuts benefit from both patting meat and short air-dry time in the fridge for extra surface drying.
Use neutral, high-smoke-point oil to transfer heat quickly and avoid pooling. Keep seasoning minimal and even so that the variable you test is surface moisture, not salt distribution.
- 1 lb boneless ribeye or sirloin, ~1-inch thick
- 1 tsp kosher salt; 1/2 tsp freshly ground black pepper
- 1 tbsp high-smoke-point oil (grapeseed or avocado)
Instructions: How to Pat Meat and Sear
Repeatable technique makes the experiment useful. Use identical pans, heat, and seasoning timing for both dry and wet samples, changing only surface moisture.
Document visual cues: pan shimmer, crust color, and internal temperature. A good instant-read thermometer verifies doneness while you evaluate crust and texture differences.
- Pat the meat dry thoroughly with clean paper towels until surface water stops beading. For consistent results, press evenly and rotate towels to fresh areas.
- Season both sides with kosher salt and freshly ground black pepper, applying salt 30–60 seconds before searing.
- Heat a heavy skillet or cast iron over high heat until it shimmers and holds heat under a drop of water.
- Add a small amount of high-smoke-point oil and coat the pan, then place the steak. Press gently to ensure full surface contact.
- Sear without moving for 3–4 minutes until a deep golden-brown crust forms, then flip and finish with butter and aromatics if desired.
- Rest the steak for 5 minutes on a cutting board before slicing against the grain to redistribute juices.
Chef’s Notes on Patting Meat
Preheat the pan and wait for a faint smoke point in the oil to overcome the latent heat of evaporation quickly. That minimizes the time the surface spends near 100 °C while water evaporates.
Use consistent towel pressure and a fresh towel per side to avoid reintroducing moisture. For larger programs, weigh steaks before and after patting to quantify surface-water removal.
Science of Browning
The Maillard reaction produces the complex flavors associated with seared meat. Browning occurs when amino acids and reducing sugars react at temperatures typically above 140 °C.
Surface water prevents reaching those temperatures until evaporation completes. For deeper reading on the chemistry, see the Maillard reaction overview.
Why Moisture Blocks Browning
Evaporation absorbs heat energy, keeping the meat surface close to the boiling point until water is gone. That thermal buffer prevents the chemical pathways needed for a brown crust.
Removing surface water reduces the evaporation phase and allows the metal surface to transfer heat directly into proteins, promoting rapid temperature rise and Maillard chemistry.
 Expert Insight
Troubleshooting Patting Meat: Common Problems
If your steak steams instead of browning, check surface moisture and pan temperature first. Even small droplets will force the pan to do work on evaporation rather than browning.
Avoid overcrowding the pan; spacing pieces allows consistent high-temperature contact. If the pan cools, remove one piece and complete the sear in batches to maintain heat.
 Pro-Caution
Serving Suggestions After Proper Patting
Slice rested steak thin against the grain to maximize tenderness and mouthfeel. A light sprinkle of flaky salt after resting highlights the seared crust without masking it.
Balance richness with a bright condiment or vegetable. Simple sides—roasted vegetables or a fresh herb sauce—accentuate the sear and keep the plate balanced.
Experiment Findings on Skipping Patting Meat
In repeat tests, the wet sample showed delayed color development and a paler, softer exterior consistent with steaming. Observers reported reduced roasted flavor intensity.
The dry sample developed a consistent, deep golden-brown crust, with more pronounced roasted notes and firmer exterior texture. Drying consistently reduced sear time and increased flavor complexity.
Key Takeaways on Patting Meat
Patting meat before searing is a small control with large effects. Removing surface water shifts energy from evaporation to surface heating and unfolding chemical reactions that create flavor.
To improve crust and reduce cook time, remove surface moisture, preheat the pan, and avoid overcrowding. These steps produce repeatable, professional-quality sears at home.
Related Topics and Further Reading
For context on cuts and handling, consult the general overview on steak. That page describes common cuts and how thickness influences cooking.
To understand how surface contact produces browning, review the searing entry. For meat science background, see the meat article.
For a practical internal reference, consult our internal guides on patting meat techniques and searing basics for step-by-step photos and troubleshooting checklists.
FAQ
Do I always need to pat meat dry?
No. For braises, stews, and wet-cooking methods, surface moisture assists liquid integration and is desirable. For high-heat searing, however, patting meat improves crust formation and flavor.
Use the technique appropriate to the cooking method: dry for searing, wet for long-braise or steaming preparations.
How long should I pat meat dry?
Spend 5–15 seconds per side with clean paper towels until water no longer beads. For thicker cuts, add an hour or more of uncovered refrigeration for additional surface drying if time permits.
Consistency matters: the same patting approach across samples yields clearer experimental outcomes and reproducible results.
Will patting dry change internal juiciness?
Patting meat removes only surface water, not the internal juices. A better sear can help preserve internal moisture by ensuring faster crust formation and more even heat penetration.
Overcooking, not patting, causes most dry interiors. Use a thermometer to avoid exceeding target temperatures.
Can I skip oil if my pan is nonstick?
Even with nonstick pans, add a small amount of high-smoke-point oil to promote even heat transfer and encourage a uniform crust. Excessive oil, however, pools and can cause splatter.
Choose oils like grapeseed or refined avocado for higher smoke tolerance and neutral flavor.
What if I have only thin cuts?
Thin cuts react faster to heat, so a dry surface becomes even more important. Thin pieces need immediate browning on contact; residual surface water will turn them into steamed, pale pieces quickly.
For thin cuts, pat meat vigorously and sear briefly at high heat to lock in flavor without overcooking the interior.
See also: patting meat
]]>This guide breaks the process into clear steps and actionable tips so you can replicate the result with consistent texture and flavor. Use the timings and techniques below to avoid watery layers and to get a golden, stable slice every time.
- Key result: Roasting vegetables reduces moisture and concentrates flavor.
- Cheese balance: A ricotta-based blend adds cream while aged cheese adds bite.
- Sauce strategy: Simmer low to deepen tomato richness without bitterness.
- Make-ahead: Assemble a day early for cleaner slices and stronger flavor.
Prep and Cook Time
Preparation: 30 minutes. Cooking: 45 minutes. These times assume standard oven performance and prepped vegetables.
Account for an additional 15 minutes of resting time after baking to let the layers set. Resting improves slice definition and serving presentation.
Yield and Difficulty
This recipe yields eight generous portions. It suits dinner parties, meal prep, and freezer-friendly planning.
Difficulty: Medium. The technical tasks involve consistent slicing, moisture control, and even layering. These are straightforward with the right sequence.
Ingredients
Gather organized, quality ingredients before you start. Good inputs—fresh vegetables, whole-milk ricotta, and ripe tomatoes—simplify technique and deliver predictable results.
Below are the core components and suggested quantities for a 9×13-inch pan. Adjust proportions while keeping the same layering logic to scale up or down.
- Lasagna noodles: 12 sheets (no-boil or pre-cooked)
- Vegetables: 1 medium zucchini (thinly sliced), 1 large eggplant (½-inch rounds), 2 cups fresh spinach, 1 red bell pepper (diced), 1 yellow onion (finely chopped), 3 cloves garlic (minced)
- Cheese blend: 1 cup whole-milk ricotta, 2 cups shredded mozzarella, ½ cup grated Parmesan, ½ cup crumbled feta
- Tomato sauce: 5 cups crushed tomatoes, 2 tbsp extra-virgin olive oil, 1 tsp dried oregano, 1 tsp dried basil, ½ tsp red pepper flakes, 1 small carrot (grated), 1 celery stalk (finely diced), salt and black pepper
- Olive oil: 2 tbsp for sautéing
- Fresh herbs: ¼ cup chopped basil, plus extra for garnish
- Salt and pepper: To taste
Cheese blend notes
Use whole-milk ricotta for a creamier mouthfeel and better structure when slicing. Combine it with a melting cheese like mozzarella and one aged cheese for savory depth.
If you prefer tang, replace feta with goat cheese or add a bit more Parmesan. These swaps change flavor but preserve the structural role of the blend.
Sauce components
Start with high-quality crushed tomatoes to build an unbroken flavor base. Adding grated carrot and diced celery mellows acidity and adds natural sweetness.
Simmer uncovered to concentrate flavor. Low, steady heat prevents acidity from turning bitter and creates a sauce with body rather than thin liquid.
Instructions
Follow the sequence: sauce, roast vegetables, wilt greens, mix cheeses, assemble, and bake. Keeping tasks parallel saves time and ensures components finish together.
Work with hot pans and oven-ready trays so you minimize waiting between steps. A clean mise en place prevents overcooking.
Prepare the tomato sauce
Heat 2 tbsp olive oil in a saucepan over medium heat. Add grated carrot, diced celery, and chopped onion; sauté until softened, about 6–8 minutes.
Add minced garlic for one minute, then stir in crushed tomatoes. Season with oregano, basil, red pepper flakes, salt, and pepper. Reduce to low and simmer uncovered for 30–40 minutes until thick.
Roast and prep the vegetables
Preheat the oven to 400°F (200°C). Lightly brush zucchini and eggplant slices with olive oil and roast for 12–15 minutes on a baking sheet until slightly caramelized. Flip once for even color.
Wilt spinach quickly in a hot skillet with a pinch of salt, then drain thoroughly in a sieve or kitchen towel. Roasted vegetables and drained greens prevent excess moisture in the final bake.
Optional: Reduce moisture further
After roasting, let eggplant and zucchini rest on paper towels to wick surface oil and water. This extra step yields cleaner layers and crisper edges when sliced.
Pressing roasted slices gently with a spatula removes pooled liquid. It costs little time and improves final presentation.
Mix the cheese and assemble
In a mixing bowl, combine ricotta, 1 cup mozzarella, Parmesan, feta, and 2 tbsp chopped basil. Season lightly with salt and black pepper; the cheese blend should taste balanced but not salty.
In a 9×13-inch baking dish, spread a thin coat of sauce on the base. Layer four noodles, one-third of the cheese blend, a layer of roasted vegetables, diced bell pepper, a handful of wilted spinach, and a spoonful of sauce. Repeat twice and finish with remaining noodles and sauce.
Bake and rest
Cover the dish tightly with aluminum foil and bake at 375°F (190°C) for 25 minutes. Remove foil and bake another 15–20 minutes until the edges bubble and the top browns slightly.
Allow the lasagna to rest at least 15 minutes before slicing. Resting firms the structure and produces clean, attractive portions.
Tips for Success
Consistency in slice thickness makes a big difference. Aim for uniform vegetable slices to ensure even roasting and layer texture.
Control moisture at three points: roast vegetables, drain greens, and simmer sauce until thick. That sequence prevents a runny bake.
- Uniform slicing: Use a mandoline for even rounds.
- Layer balance: Keep sauce thin on the base and generous between layers to avoid dryness.
- Cheese distribution: Mix cheeses well so every forkful gets cream and melt.
Expert Insight
Make-ahead assembly lets flavors meld and improves slice stability. Refrigerate overnight, then add 5–10 minutes to the covered baking time when cooking from chilled.
Serving Suggestions
Serve warm garnished with torn basil and a light drizzle of extra-virgin olive oil. A crisp green salad with a vinegar-based vinaigrette cuts richness and refreshes the palate.
Pair with light to medium-bodied wines or sparkling water with lemon to balance the dish. Offer crusty bread for those who want extra texture.
Pro-Caution
For vegetarian diners who follow gluten-free or vegan diets, consider gluten-free noodle sheets or thinly sliced vegetables as noodle substitutes. Use firm tofu ricotta or cashew cream to replace dairy without losing body.
Nutritional Information (per serving)
These estimates assume standard cheeses and no added meat. Values vary by brand and portion size. Use nutrition labels for precise tracking when needed.
Typical per-serving values: ~380 calories, 22 g protein, 32 g carbohydrates, 18 g fat. Adjust cheese and oil to alter fat and calorie totals.
| Calories | Protein | Carbs | Fat |
|---|---|---|---|
| 380 | 22g | 32g | 18g |
FAQ
This FAQ addresses common execution questions and substitutions. Read these answers before you begin to avoid common pitfalls.
Each response focuses on practical steps you can apply immediately at the stovetop or assembly table.
What makes a veggie lasagna “classic”?
A classic relies on balanced layers: pasta, a flavorful tomato base, a creamy cheese layer, and well-cooked vegetables. The aim is contrast between soft pasta and textured vegetables.
Traditional versions use ricotta and mozzarella; adding one aged cheese such as Parmesan gives savory lift and salt balance.
Which vegetables give the best texture and flavor?
Zucchini, eggplant, spinach, mushrooms, and bell peppers offer variety in bite and taste. Each adds a different texture, so combine firmer roasted vegetables with quick-wilted greens.
Roasting concentrates sugars and cuts water content; that step matters more than the specific vegetable chosen.
How do I avoid a watery lasagna?
Remove moisture at three control points: drain wilted greens, roast (don’t steam) vegetables, and simmer sauce until it reduces. Also use no-boil pasta only if it can absorb excess liquid.
Covering the lasagna while baking holds moisture, then removing the foil at the end encourages a golden top without drying the interior.
Can I make this ahead or freeze it?
Yes. Assemble the lasagna and refrigerate overnight for sharper slices and deeper flavor. Or freeze unbaked in an airtight pan for up to 3 months.
If baking from frozen, add 20–30 minutes to the covered baking time to ensure even heating through the center.
How can I adapt this for gluten-free or vegan diets?
Use certified gluten-free lasagna sheets or thinly sliced vegetables as noodle substitutes for a gluten-free version. For vegan, swap ricotta with tofu ricotta or cashew cream and use plant-based shredded cheese.
Maintain the same layering and moisture-control principles to preserve structure and flavor regardless of substitutions.
See also: veggie lasagna
]]>
- Control steam: Pierce or vent casings to prevent sudden bursts.
- Use medium power: Moderate energy yields even internal cooking.
- Finish hot: Brief searing mimics Maillard browning for aroma and texture.
How Microwaves Cook Sausage
Microwave ovens agitate water molecules inside food, producing internal heat rather than surface-only heating. This mechanism explains why microwaved items steam from within and why surfaces do not brown the way they do on a skillet.
Understanding that mechanism helps you manage moisture and avoid casing failure. For a technical reference on the appliance and its heating principle, see microwave oven.
Prep and Cook Time
Preparation Time: 5 minutes. Cook Time: 3–5 minutes depending on microwave wattage. Short bursts and checks prevent overcooking.
Total Time: 8–10 minutes. Timing varies with sausage diameter and starting temperature; colder sausages require slightly longer cook cycles.
Yield
Serves: 2–3 people with four average pork sausages. Adjust portion counts for appetite and side dishes.
Portion control helps you plan rest time and finishing sear to keep texture consistent across servings.
Difficulty Level
Skill: Easy. The microwave simplifies thermal control but requires brief technique tweaks for optimal texture.
Follow measured power settings, vent casings, and add an optional skillet finish to match pan-fried results.
Ingredients
Use quality sausages for best results; natural casings respond predictably to heat. Typical ingredients include:
- 4 pork sausages (natural casing preferred)
- 1 tbsp olive oil or melted butter
- 1 tbsp water to generate gentle steam
- 1 tsp smoked paprika (optional)
- Fresh cracked black pepper to taste
- Fresh herbs such as thyme or rosemary for garnish
For background on the food type and its composition, consult sausage on Wikipedia.
Instructions
1. Prepare the sausages: Lightly prick each sausage in several places with a fork to create steam escape paths. This step reduces pressure buildup and prevents sudden casing rupture.
2. Combine liquids: Place sausages in a microwave-safe dish with the oil and water; toss to coat. The water produces controlled steam while the oil supports surface sheen that helps mimic sizzle.
Power Settings and Timing
Set the microwave to medium-high (about 70–80% power) to allow energy to penetrate without blasting the outer layer. If the unit lacks percentage settings, use the medium setting and shorten intervals.
Cook for 2 minutes, turn sausages, then continue in 1-minute bursts until internal temperature reaches 160°F (71°C) for pork. Use a probe thermometer for accuracy.
Resting and Optional Finish
Let sausages rest for 1–2 minutes after microwaving; this redistributes juices and stabilizes internal temperature. Resting improves texture and reduces moisture loss when you finish with heat.
For authentic Maillard flavor and a glossy crust, sear sausages in a preheated skillet with a teaspoon of butter for 1–2 minutes per side. That brief surface contact creates real sizzle and aroma.
Science of Sizzle and Maillard
The familiar frying sizzle comes from hot fat evaporating and the Maillard reaction producing complex aroma compounds. Microwaves do not produce the same surface temperatures, so the sizzle sound differs.
To replicate browning, finish sausages on a hot surface. Read about the chemical reaction responsible for browning at Maillard reaction.
Heat Transfer Principles
Heat moves inside the sausage by conduction and convection of steam. The exterior warms progressively as internal water vapor migrates outward and escapes through vents.
Understanding basic heat transfer helps set realistic expectations for microwave cooking. For more on the physics, see heat transfer.
Tips for Success
Short cooking bursts with frequent turning reduce temperature gradients inside the sausage and prevent dry, rubbery texture. Use a thermometer rather than visual cues alone.
Moisture balance: A small amount of water in the dish creates steam that maintains juiciness; oil in the dish supports surface gloss and aids the sear if finishing in a pan.
Expert Insight
Rotate sausages mid-cycle and monitor internal temperature; overcooking causes protein tightening and moisture loss. If your microwave has an inverter or variable power mode, use it for gentler heating.
Pro-Caution
Serving Suggestions
Serve microwaved-and-finished sausages on toasted brioche buns with mustard and sautéed peppers for textural contrast. Fresh herbs add aromatic top notes that enhance perceived juiciness.
Pair the sausages with sides that offer acidity or brightness—acid cuts through fat and amplifies flavor. For more meal ideas, see our internal guides: Mastering Protein Cooking Techniques and Quick Breakfast Recipes.
Nutrition
| Nutrient | Amount (per sausage) |
|---|---|
| Calories | 220 kcal |
| Protein | 12 g |
| Carbohydrates | 2 g |
| Fat | 18 g |
Q&A
Clear, practical answers help you anticipate problems before they occur. Below are concise explanations to common microwave sausage questions.
Each response focuses on actionable steps and the science behind them so you can repeat success reliably.
Why does a sausage sometimes explode in the microwave?
Explosion happens when internal steam pressure exceeds the casing strength. Piercing the casing and using lower power prevents rapid steam buildup and reduces rupture risk.
How can I get that perfect sizzle without frying?
Controlled moisture and a finishing sear deliver the sensory cues of frying. Microwave to temperature, then sear briefly in a hot pan to trigger the Maillard reaction and produce audible sizzling.
What microwave power setting works best?
Medium-high (70–80%) usually provides the best balance. It allows heat to move inward without overcooking the surface, reducing splits and dryness.
Does sausage shape affect cooking?
Yes. Thinner, uniform sausages cook faster and more evenly. Irregular shapes trap steam and require longer, lower-power cycles to avoid uneven doneness.
Any safety tips for microwaving sausages?
Always check internal temperature (160°F / 71°C for pork). Avoid sealed containers and metal. For more appliance safety practices, consult our internal resource: Microwave Safety Tips.
The Way Forward
Applying controlled steam management, measured power, and a brief finishing sear yields a microwaved sausage that rivals pan-fried results for juiciness and aroma. Consistency depends on small procedural details more than gadgetry.
Use the steps here as a standard operating procedure: vent casings, cook at medium power, rest, and finish hot for a reliable sizzle. With practice, you will produce predictable, flavorful outcomes in minutes.
See also: microwave sausage
]]>
- Balance moisture to avoid sogginess and ensure a structured bite.
- Sear and caramelize key ingredients to layer umami and sweetness.
- Choose the right binder to control texture and sliceability.
- Match vessel and temperature for even cooking and ideal browning.
The Science of Heat, Moisture, and Texture
Heat governs the physical and chemical changes inside a casserole. Proteins set, starches gelatinize, and surface browning occurs when temperatures favor the Maillard reaction for savory complexity.
Moisture distribution matters as much as temperature. Too much liquid yields a stew-like result, while too little dries the filling; a measured béchamel or thick sauce controls water activity and mouthfeel.
Key Ingredients and Their Roles
Each ingredient serves a technical purpose beyond flavor. Proteins supply structure, starches swell to bind, fats carry aroma, and acids brighten the overall profile.
Understanding these roles helps you swap ingredients without guessing. For more background on the casserole concept, see casserole.
Proteins, Starches, and Binders
Proteins coagulate with heat and provide firmness; think shredded chicken, eggs, or cheese. Proteins also interact with starches to trap water and produce a cohesive sliceable texture.
Starches gelatinize when heated with liquid and set as they cool, giving body to the filling. Common binders include a roux-based sauce or a béchamel; both modulate viscosity and final mouthfeel.
Technique: Sautéing, Roux, and Sauce
Sautéing concentrates flavor by driving off surface moisture and initiating caramelization. This step unlocks sugars and concentrates savory compounds that enhance the dish when baked.
Building a proper roux and finishing with milk or stock yields a stable white sauce. Study the chemistry of a roux and béchamel for precise control: roux and béchamel sauce.
Practical Recipe: Chicken, Broccoli, and Cheddar Casserole
Below is a tested formula that applies the science above. Follow the timings and techniques for consistent texture and flavor.
Preparation is straightforward when you prepare ingredients to the same doneness and size; uniformity means even heat exposure and predictable results.
Prep and Cook Time
- Preparation: 25 minutes
- Cooking: 45 minutes
- Total Time: 1 hour 10 minutes
Yield & Difficulty
Serves 6 hearty portions with medium difficulty. The technique emphasizes timing and texture control rather than advanced skills.
Use a consistent cutting board and measuring spoons to keep ingredient ratios accurate and repeatable.
Ingredients
- 2 cups cooked shredded chicken (roasted for depth)
- 1 cup diced yellow onion, finely chopped
- 2 cloves garlic, minced
- 1 cup sliced mushrooms, cremini or white button
- 1 cup broccoli florets, blanched until just tender
- 1 cup shredded sharp cheddar cheese
- 1 cup whole milk
- 2 tablespoons unsalted butter
- 2 tablespoons all-purpose flour, sifted
- 1 teaspoon dried thyme
- Salt and freshly ground black pepper to taste
- 1 cup cooked pasta (rotini or penne)
- ½ cup panko breadcrumbs for topping
- 2 tablespoons olive oil for sautéing and drizzling
Instructions
Preheat the oven to 375°F (190°C) so the oven reaches steady heat before baking. A stable oven temperature ensures predictable browning and internal set.
- Sauté the aromatics: Melt butter with 1 tablespoon olive oil in a skillet. Cook onions until translucent, then add garlic for one minute.
- Add mushrooms and thyme: Sauté mushrooms until they brown and release juices. Browning increases savory complexity via Maillard chemistry.
- Make the roux and sauce: Sprinkle flour and stir to coat; cook for two minutes. Whisk in milk and simmer until thickened to a velvety sauce.
- Combine components: In a large bowl, fold shredded chicken, blanched broccoli, cooked pasta, and most of the cheese into the sauce. Stir gently to avoid breaking pasta.
- Transfer and top: Spoon into a greased 9×13-inch dish. Sprinkle breadcrumbs and remaining cheese on top, then drizzle with olive oil.
- Bake: Bake uncovered for 35–40 minutes until bubbling and golden. Rest five minutes before serving to allow cooling and moisture redistribution.
These steps emphasize heat control, moisture management, and texture contrast. Following them reduces common faults such as separation or sogginess.
Pro-Caution
Allow the casserole to rest; the cooling period helps starches set and proteins relax. Resting time improves sliceability and mouthfeel.
Expert Insight
Serving, Storage, and Reheating
Serve with a bright salad or acid-based condiment to cut richness and refresh the palate. Acid contrasts improve perceived flavor and lighten the meal.
Store leftovers covered in the refrigerator for up to three days. Reheat at low oven temperature covered to reintroduce steam and avoid drying the protein.
How Vessel and Temperature Alter Results
Metal pans heat faster and promote a crisp edge, while ceramic and glass retain heat longer and produce more uniform internal cooking. Choose based on desired crust and timing.
Bake at 375°F for balance between internal heating and surface browning. If you prefer slower moisture retention, reduce temperature slightly and extend bake time for tenderness.
Applied Flavor Chemistry and Browning
Browning reactions create savory and nutty notes that anchor the casserole’s flavor profile. Control surface dryness and salt to optimize these reactions without burning.
Layering flavor matters: sear early, season at key stages, and finish with fresh herbs to add volatile aromatics that baking alone cannot produce.
More Resources
For practical texture strategies, see our Ultimate Guide to Texture in Cooking. For basic heat and baking principles, consult Baking Basics.
For scientific context on browning and sauce foundations, review the Maillard reaction and roux concepts at these references: Maillard reaction and roux.
FAQ
What makes a casserole hold together when sliced?
Binders such as eggs, cheese, and starch-thickened sauces set during baking and cooling. These agents create a matrix that traps moisture and holds pieces in a cohesive slice.
How do I avoid a soggy bottom?
Blanch vegetables and drain thoroughly before assembly to remove excess water. Also, ensure your sauce is thick enough to coat ingredients without flooding them.
Can I freeze this casserole?
Yes. Cool completely, cover tightly, and freeze for up to three months. Thaw in the refrigerator overnight and bake covered until warmed through, then uncover to brown the top.
Is there a substitute for dairy in the sauce?
Use full-flavor plant milks and a starch slurry or nut-based cream to mimic viscosity. Adjust salt and acid to compensate for reduced dairy richness.
How can I increase protein without changing texture?
Add extra cooked, shredded lean meat or a small portion of high-protein cheese. Keep moisture balance by reducing liquid slightly when you add more solids.
See also: Casserole
]]>
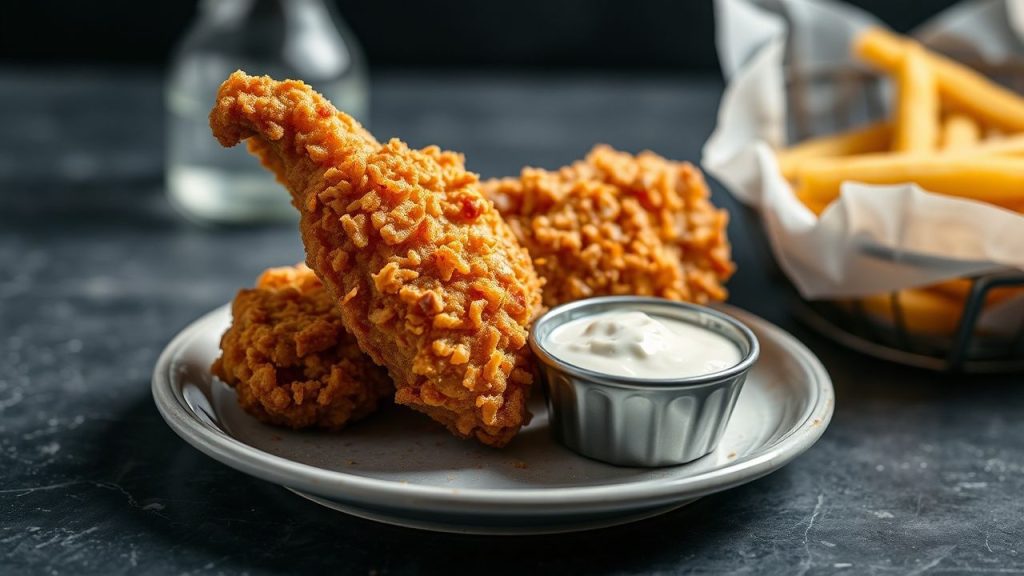
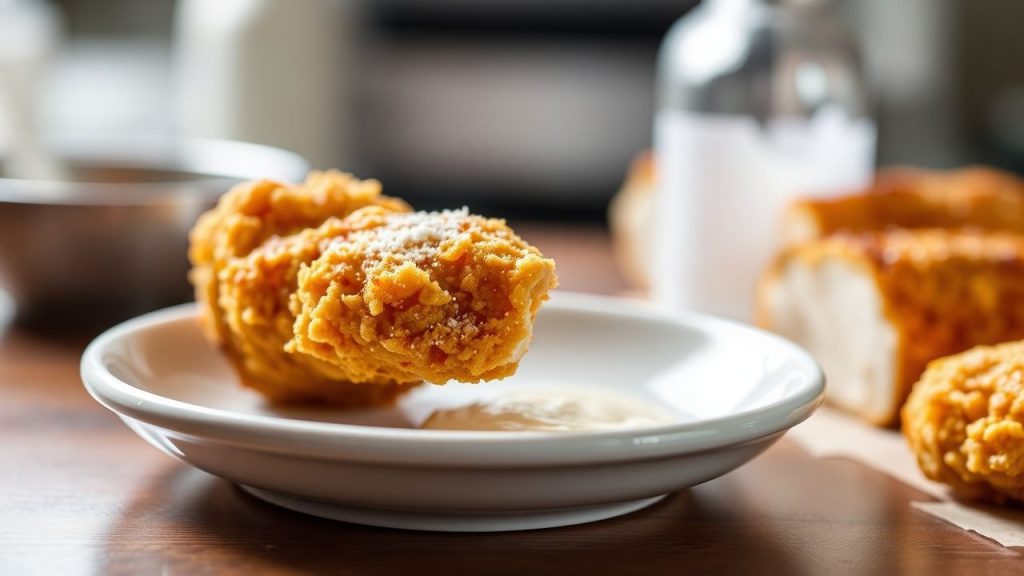
- Moisture control seals juiciness while enabling a dry, shattering crust.
- Flour + starch balance produces structure plus crispness without toughness.
- Oil temperature and batch size determine oil uptake and browning.
- Finishing steps (rest, oven blast) preserve and restore crunch.
The Role of Moisture Control in Achieving Ultimate Crunch
Moisture determines whether a crust crisps or goes limp. If the surface stays wet while frying, steam softens the crust and oil soaks in.
Manage moisture with an acid soak such as buttermilk to tenderize meat while controlling surface wetness before dredging. For background on the chemistry of tenderizing, see buttermilk.
Pat pieces so they retain enough film for adhesion but not pools of liquid. That thin film creates even contact for the flour-starch blend to cling and transform under heat.
Rest coated pieces briefly on a tray to set the crust before frying; this forms a tacky skin that fries into a stable, crisp shell.
Key Ingredients and Why They Work
All-purpose flour gives structure; starches such as cornstarch or potato starch add brittle, dry texture. Combining them limits gluten formation while promoting that desirable shatter.
Baking powder adds microscopic air pockets and raises pH slightly to speed browning and crisping. For a primer on related leavening chemistry, consult baking powder.
Salt and spices season while modifying surface behavior; salt draws minimal moisture to the surface but also seasons the crust. Tiny changes in formulation shift the final texture and color.
Rice flour or tapioca starch can replace some wheat flour to reduce chew and enhance flake. Starch behavior under heat relates to native polymer properties; see starch for technical context.
Prep, Timing, and Yield
Preparation: 25 minutes active time. Marinate 2–4 hours for best results. Cooking per batch runs about 15–18 minutes.
Yield: Serves 4 adults. Keep timings consistent so batches finish at similar doneness and all pieces share the same crisp profile.
Ingredients (Why each matters)
Use bone-in, skin-on pieces for moisture retention and flavor. Buttermilk tenderizes proteins and improves coating adhesion.
Combine 2 cups all-purpose flour, 1 cup cornstarch, 1 tablespoon baking powder, and seasonings. This mix balances structure, browning, and brittle texture.
Step-by-Step Frying Technique: Temperature and Oil Management
Heat oil to 350°F (175°C) and maintain between 350–375°F for ideal crust formation and safe internal cooking. Holding temperature prevents excessive oil uptake and uneven browning.
Fry in small batches to avoid sudden temperature drops. Use a reliable thermometer and adjust heat quickly to recover the set point.
When coating hits oil at target temperature, surface water vaporizes immediately, forming tiny bubbles and drying the crust. That rapid surface change creates a barrier that keeps oil out.
Deep frying parameters tie directly to the physics of heat transfer. For a focused technical overview, review deep frying.
Coating Methods and Layering
Single dredge gives a thin crust; double-dredge builds layers that fry into a thicker, more textured shell. Press the dry mix gently so it adheres without compacting.
Use a wet-dry-wet-dry sequence when you want maximum crunch: wet dip, dry coat, brief return to wet, then finish in dry mix. Layering traps steam inside and produces flakes on the exterior.
For lighter crunch, incorporate rice flour or thinly sift cornstarch into the final dusting. For heavier, craggy crusts, coarser flour and a looser batter increase surface ruggedness.
After frying, drain on a wire rack to let oil drip and air circulate. Avoid stacking pieces or using paper towels that trap steam and soften the crust.
[h2]Tips for Success[/h2]
Maintain oil temperature precisely; a 25–40°F drop will change moisture dynamics and increase oil uptake. Adjust stove settings between batches to recover quickly.
Control batch size. Overcrowding reduces oil temperature and produces greasy, limp crusts. Fry in consistent groups so each piece gets the same thermal exposure.
Expert Insight
Finish with a light seasoning right after frying to let salt cling to hot oil and intensify flavor. A brief 3–5 minute oven blast at 400°F can revive crispness for resting or late service.
Pro-Caution
Instructions
1. Soak chicken in buttermilk for 2–4 hours to tenderize and help coating adhesion. Drain and let pieces rest until tacky, not dripping.
2. Mix flour, cornstarch, baking powder, and spices in a bowl. For extra crisp, double-dredge by dipping back into buttermilk and re-coating.
3. Heat oil to 350°F (175°C); fry in small batches until golden and internal temperature reaches safe levels. Turn pieces for even browning.
4. Drain on a wire rack and rest for several minutes before serving to lock the crust. Optionally, give leftovers a short oven refresh to restore snap.
Serving Suggestions
Serve hot with contrasting textures: creamy mashed potatoes or a tart, crunchy slaw balances richness. Herbs add a fresh note that lifts the overall bite.
Offer dipping sauces at room temperature; extreme cold can reduce perceived crispness and overwhelm the palate.
Common Science Questions Answered
Why does the crust shatter? Rapid evaporation of surface moisture forms pockets and dries the coating, while starches and proteins set into a brittle matrix.
How do starches behave? Under high heat, starches undergo physical changes that reduce elasticity and increase brittleness, delivering higher snap.
Internal Resources
For technique refinement, check our recipe guide: Perfect Fried Chicken Techniques. It covers knife work, brining, and pacing for batch frying.
Explore a focused guide on oil recovery and fryer management at Frying Temperature & Oil Care for long-term consistency and cost control.
| Nutrient | Per Serving (1 piece) |
|---|---|
| Calories | 420 |
| Protein | 35g |
| Carbohydrates | 18g |
| Fat | 23g |
FAQ
How does buttermilk improve crispiness?
Buttermilk tenderizes proteins and leaves a thin, acidic film that promotes coating adhesion. The film helps the coating set quickly when it hits hot oil, contributing to a lighter crust.
What temperature is best for frying to get the crispiest crust?
Maintain oil between 350°F and 375°F (175–190°C). That range crisps the exterior while allowing the interior to reach safe temperatures before the crust over-browns.
Does double-dredging always mean better texture?
Double-dredging increases crust thickness and texture but can trap more moisture if overdone. Use it when you want a hearty, craggy crust; skip it for a thin, delicate snap.
Can I make this gluten-free without losing crunch?
Yes. Replace all-purpose flour with a gluten-free blend and favor potato or rice starch for crunch. Adjust seasoning since blends vary in salt and binders.
How do I restore crispness in leftovers?
Use a hot oven or air fryer for 3–6 minutes to drive off surface moisture and recrisp the coating. Avoid microwaves, which steam the crust and make it soggy.
Understanding the interactions of moisture, starch, and heat will let you control every element of the final crust. Use the internal technique pages above to refine timing and scale for service.
See also: fried chicken
]]>
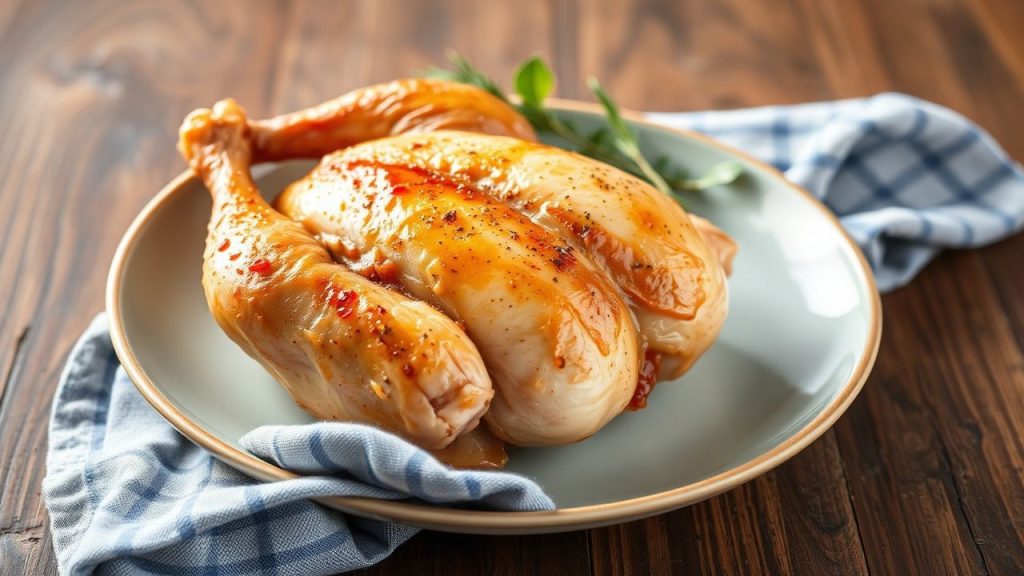
- Drying first lets heat brown skin instead of steaming it.
- Salt and air-dry speed moisture removal and improve texture.
- Use high dry heat to render fat and trigger browning reactions.
- Thermometer-led cooking guarantees safe, juicy meat without overcooking.
Understanding the Science Behind Wet Chicken Skin and Cooking Outcomes
Wet skin forces the surface to spend time evaporating water before it can reach the temperatures needed for browning. During that phase, steam forms and softens the skin, which produces a limp texture rather than a crisp one.
Fat under the skin must render and reach 300–320°F localized surface temps to crisp properly, but water must leave first. The Maillard reaction is the key chemistry that creates brown color and savory flavor; it requires a dry, hot surface to activate reliably. See Maillard reaction for the background on browning.
The Impact of Moisture on Crispiness and Texture
When surface moisture is present, the cooking mode shifts from dry-heat browning to wet steaming. Steam keeps the skin temperature near 212°F until most water evaporates, which delays fat rendering and Maillard browning.
Excess moisture also traps heat under skin folds and between pieces. That increases overall cooking time and can lead to uneven doneness if you push heat to compensate. For controlled drying, chilling on a rack in the refrigerator works well; learn more about refrigeration basics at Refrigerator.
Techniques to Achieve Perfectly Crispy Skin When Starting with Wet Chicken
Start by removing surface water. Pat each piece with absorbent paper, then allow air-drying on a wire rack when time permits. Drying reduces the steaming window and gets skin ready to render fat.
Use salt strategically: a short dry brine pulls moisture from the outer layer and seasons the skin. For details on the method, review the general concept at Brining. When you’re short on time, patting and a quick rest in the fridge still helps.
Expert Insight
Best cooking methods
Choose dry-heat techniques like high-heat roasting, pan-searing, or grilling to maximize crisping. These methods expose skin to direct heat that both renders fat and triggers Maillard browning.
When searing, maintain medium-high heat so the skin releases from the pan once browned. Overcrowding causes steam to collect between pieces, so give each piece breathing room for air circulation. For an overview of roasting techniques, see Roasting (cooking).
Practical Tips to Avoid Common Pitfalls and Enhance Flavor
Start with room-temperature chicken when possible. Cold meat increases the time the skin spends exposed to heat before the interior reaches safe temperature, which can make achieving a crisp exterior harder.
Brush skin lightly with oil or melted fat to promote even browning. Infuse that fat with garlic or herbs for extra aroma without adding surface moisture.
Salt timing and marinating
Dry brining (salt and rest uncovered) enhances both texture and flavor by extracting and reabsorbing juices while drying the surface. Wet marinades add moisture, so always pat skin dry after marinating to restore crisp potential.
If you brine overnight, place the chicken uncovered on a rack in the fridge for several hours to let the skin dry. That step significantly improves final texture.
Recipe: Crispy Skin Chicken Thighs (from Wet Start)
Yield: Serves 4. This recipe steps through turning damp skin into a crisp finish using common kitchen techniques.
Difficulty: Medium. You need basic but precise timing and a thermometer to finish correctly.
Ingredients
4 bone-in, skin-on chicken thighs; 1 tsp fine sea salt; 1/2 tsp black pepper; 2 tbsp olive oil or rendered chicken fat; 2 cloves garlic, minced; 1 tsp chopped rosemary; optional lemon zest.
Keep ingredients at hand and preheat the oven to ensure the pan is hot when you begin searing.
Instructions
Pat the thighs thoroughly dry with paper towels. For improved results, place them on a wire rack uncovered in the refrigerator for 2 hours or overnight to evaporate surface moisture.
- Preheat oven to 425°F (220°C).
- Mix oil, garlic, and rosemary; brush over the skin. Season with salt and pepper.
- Heat an oven-safe skillet over medium-high heat until shimmering. Add 1 tbsp oil or fat.
- Place thighs skin-side down, spaced apart. Sear without moving until golden and crisp, about 6–8 minutes.
- Flip thighs and transfer skillet to the oven. Roast uncovered 20–25 minutes until internal temp reads 165°F (74°C).
- Optional: Broil 1–2 minutes to finish crisping, watching closely to prevent burning.
- Rest on a wire rack for 5 minutes before serving; finish with lemon zest.
Use a probe thermometer for accuracy and avoid overcooking. For an expanded method, visit our Perfect Roast Chicken guide for related techniques and variations.
Chef’s Notes and Variations
For extra crunch, finish on a hot grill for 2–3 minutes over indirect heat. Swap rosemary for thyme or smoked paprika to alter the aroma profile.
If time is limited, thorough patting and immediate searing still produce strong results. Leftovers work well cold or reheated gently to preserve skin texture.
Pro-Caution
After resting, serve the thighs on a warm platter with roasted vegetables or a crisp green salad. Garnish with fresh herbs and lemon wedges for brightness.
Nutritional Snapshot
Per serving approximate values: 370 kcal, 30 g protein, 0 g carbs, 27 g fat. Values vary with skin and fat retained.
Keeping the skin on increases fat and calories but preserves moisture and flavor. Use portion control and pair with vegetables for balance.
FAQ
Why does wet skin prevent crisping?
Wet skin creates a steam layer that holds the surface temperature near the boiling point of water. That steam delays fat rendering and stops the Maillard reaction until the moisture evaporates.
Drying the surface first removes the steam and lets direct heat brown the proteins and sugars on the skin.
Can I still get crisp skin if I marinated the chicken?
Yes. Pat the skin dry thoroughly after marinating, then air-dry on a rack if time allows. A brief dry-brine with salt after marinating also helps remove extra surface moisture.
Remember that heavy wet marinades add liquid back to the skin, so plan a drying step before cooking.
How long should I air-dry chicken in the fridge?
Two hours is a practical minimum for noticeable improvement. Overnight drying produces better results when you have the time.
Place the chicken on a wire rack set over a tray to collect drips. For background on refrigeration and food handling, see Food safety.
Does wet skin affect food safety?
Surface moisture itself does not make the chicken unsafe. The risk appears when uneven cooking due to longer cooking times leaves parts below safe temperature. Use a meat thermometer to confirm 165°F (74°C).
Follow standard hygiene and storage practices. For more on safe handling, consult our internal chicken safety resource.
Are there quick hacks if I’m short on time?
Pat dry vigorously and rest uncovered in the fridge for 20–30 minutes if possible. Otherwise, sear on high heat and finish in a hot oven, but monitor closely to prevent burning.
A final one- to two-minute broil can crisp stubborn spots, but keep the bird a safe distance from the element to avoid flare-ups.
Closing Notes
Moisture on chicken skin dictates whether heat browns or steams the surface. Control that moisture with drying, salt, and dry-heat cooking to get predictable, crispy results.
Practice the small steps—patting, resting, and using a thermometer—and you will reliably transform wet-start chicken into a crisp, flavorful dish.
See also: chicken skin
]]>
- Key takeaway: Humidity, carrier choice, and temperature drive clumps.
- Fixes: Drying, sieving, and anti-caking agents restore flow.
- Storage: Airtight, cool, opaque containers extend shelf life.
- Make-or-buy: Encapsulation quality dictates stability.
Why Is My Olive Oil Powder Clumpy and Oily?
Olive oil powder is a powdered form of oil created by binding oil to a carrier. When the encapsulation or storage fails, the oil migrates to the surface and particles stick together.
Two mechanics explain the problem: moisture makes particles tacky, and weak encapsulation releases oil. Understanding both helps you choose the right fixes and storage steps.
Prep and Cook Time
Preparation: 10 minutes. This covers mixing oil with carrier and initial checks for texture. Keep tools dry to limit humidity pickup.
Cook / Dry time: None for most commercial powders. For homemade batches, a low-temperature drying cycle of about 15–20 minutes reduces surface moisture without degrading flavor.
Yield and Difficulty Level
Yield: About 2/3 cup (approx. 80 g) of finished powder from 1 cup oil and 1 cup carrier. Yield varies with carrier absorption rate and mixing efficiency.
Difficulty: Medium. The process requires attention to carrier selection, mixing technique, and moisture control to avoid oily clumps.
Ingredients
Core components: High-quality extra virgin olive oil and an appropriate carrier, most commonly maltodextrin. Carrier choice determines absorption and shelf stability.
Optional: A pinch of sea salt or dried herbs for infusion is common. For alternate texture, try tapioca or potato starch as the carrier in small trials first.
Instructions
Bring oil and carrier together slowly to ensure uniform encapsulation. Pour oil gradually into the carrier while stirring to create a sand-like crumb, indicating adequate absorption.
Dry the mix on a shallow tray at low temperature if homemade, then sieve to break lumps and store immediately in airtight packaging. Quick handling reduces exposure to ambient humidity.
- Combine: Add oil slowly to maltodextrin while mixing.
- Texture: Aim for crumbly, sand-like mix; that shows good oil uptake.
- Dry: Spread thinly; dry at ~50°C (120°F) for 15–20 minutes if needed.
- Sift: Break clumps with a fine sieve or fork once cool.
- Store: Seal in airtight container away from heat and light.
Understanding Common Causes of Clumping and Oiliness
Moisture absorption is the most frequent culprit. When ambient humidity contacts powder, surface tension increases and particles adhere, creating clumps.
The carrier matters too. Maltodextrin with the wrong DE value can behave gummy rather than dry. Low-DE maltodextrin usually stabilizes oil better than high-DE variants.
How Storage Conditions Affect Olive Oil Powder Quality
Temperature swings force oil migration. Heat softens the encapsulate and allows oil to weep out; cooling then leaves small oily clusters behind. Keep powder below 21°C (70°F) when possible.
Humidity is equally damaging. Use moisture-barrier packaging and consider a desiccant packet in the container. For more on storing delicate powders, see our internal guide at Keeping Herbs and Powders Fresh and the basics at Powder Storage Basics.
Practical Tips to Keep Your Olive Oil Powder Smooth and Free-Flowing
Choose packaging that resists water vapor: vacuum-sealed pouches, glass jars with tight seals, or metal tins with liners. Opaque containers also protect the oil from light-driven oxidation.
When using the powder, avoid steam and wet hands. Small habits—using a dry spoon and scooping over a dry surface—prevent immediate re-clumping.
- Include a food-grade desiccant to control moisture.
- Add a small pinch of anti-caking agent like rice flour or food-grade silica if long storage causes clumping.
- Break clumps with a fork, sift, or briefly warm in a dry pan to redistribute oil.
- Make smaller batches when humidity is high.
Expert Insight
Spray-dried powders generally exhibit fewer oily clumps than hand-mixed home batches because the process creates a consistent wall around oil droplets. If you experiment at home, test small batches and record carrier ratios for reproducible results.
Chef’s Notes
Infuse oil with herbs or garlic before powdering to boost aroma, but strain solids thoroughly to prevent moisture pockets. Infused oil can add moisture if not well filtered.
Substitute carriers to test mouthfeel changes. Tapioca and potato starches yield different textures; record sensory notes and shelf stability data for each variation.
Pro-Caution
If oil separates and clumps recur after fixes, it usually signals poor encapsulation or oxidized oil. Replace the batch if sensory tests fail.
Serving Suggestions
Olive oil powder works as a finishing seasoning on vegetables, breads, and salads. Use light, even sprinkles to avoid concentrated oily pockets on the food surface.
Combine the powder with dried herbs or citrus zest for a seasoning blend. The powder adds olive flavor without the wet mouthfeel of liquid oil, useful on crisp snacks and fried garnishes.
Nutritional Information
Olive oil powder retains much of the fat profile of olive oil, depending on carrier ratio. A typical sample per 10 g often shows calories driven mainly by fat.
Use the powder as a flavor tool rather than a primary fat source when precise nutrition is critical, since carrier percent dilutes fat content compared with pure oil.
| Nutrient | Amount per 10g |
|---|---|
| Calories | 90 kcal |
| Protein | 0 g |
| Carbohydrates | 3 g |
| Fat | 10 g |
FAQ
What exactly is olive oil powder?
Olive oil powder is liquid olive oil encapsulated within an edible carrier to form a dry, free-flowing powder. Encapsulation traps oil droplets and allows the powder to be sprinkled or blended into dry mixes.
Why does my powder become clumpy and oily?
Clumping arises from moisture uptake and oil migration. High humidity, poor encapsulation, and temperature swings all promote sticking and surface oiling.
Can I fix oily olive oil powder?
Yes. Sift to remove clumps, dry briefly at low heat to drive off surface moisture, or add a small amount of food-grade anti-caking agent. Severe oil separation usually requires replacement.
How should I store olive oil powder long-term?
Store in airtight, opaque containers with a desiccant at cool, stable temperatures. Limit opening frequency and keep away from heat sources and direct light to reduce oxidation and moisture ingress.
Is clumpy powder unsafe to eat?
Clumps are usually a quality issue rather than a safety hazard. However, if the powder smells rancid, discard it to avoid off-flavors and possible degraded compounds.
The Conclusion
Clumping and oiliness reflect physical and chemical behavior: moisture, carrier performance, and temperature. Addressing each factor—encapsulation, drying, and storage—returns the powder to a usable state or warns you to replace it.
Follow dry handling practices, test carriers when experimenting, and store powders with barriers to moisture. These steps reduce oily clumps and keep your olive oil powder functional and flavorful.
Further reading on related topics: olive oil, maltodextrin, and humidity.
See also: olive oil
]]>
- At a glance: Keep cold below 40°F and hot above 140°F to avoid bacterial growth.
- Containers matter: Airtight, sturdy carriers and proper seals reduce leaks and oxygen exposure.
- Packing order: Separate wet components and use insulated carriers with frozen gel packs.
- Simple checks: Verify seals and use a food thermometer before serving.
Why temperature control matters in food transport
Temperature drives safety during food transport. Food that sits between 40°F and 140°F enters the bacterial growth range, so maintaining safe temperatures is non-negotiable for preventing foodborne illness.
Follow established food safety guidance and cold-chain principles for reliable results. For background on temperature-related risks, see food safety and foodborne illness references.
Choose the right containers for food transport
Select container materials and designs based on the dish and the transport duration. Use rigid, airtight boxes for stacked items and leak-proof jars for liquids to prevent cross-contamination and preserve texture.
Consider thermal properties: glass holds heat and flavor while some polymers reduce weight. For high-thermal shock tolerance, review material notes like borosilicate glass. Discard cracked lids or warped seals that compromise the airtight barrier.
Packing and layering techniques for food transport
Packing order determines final condition. Place the coldest items closest to cooling sources and position heavy items at the bottom to prevent crushing fragile elements.
Use moisture barriers and small sauce cups to keep dressings separate. This prevents salad wilt and sogginess in sandwiches while keeping textures intact on delivery.
Moisture control and separation
Isolate wet components in leak-proof bags or sealed containers. Wrap juicy items in parchment or use silicone pouches to prevent condensation from migrating into crisp layers.
For baked goods, add a thin absorbent layer between tiers to keep crusts dry and crumb structure stable. Small details like these raise perceived quality at service time.
Expert Insight
Insulated bags and cooling accessories for food transport
Insulated carriers form the primary defense against ambient temperature changes. Choose bags with thick foam insulation, tight closures, and internal dividers to reduce thermal bleed and movement.
Supplement insulation with reusable gel packs or frozen bottles. For longer runs, plan passive cooling strategies and stacked packing patterns that maintain cold zones for hours.
Transport handling and practical routines for food transport
Good handling reduces temperature excursions and mechanical damage. Keep carriers upright, secure them flat in the vehicle, and shield them from direct sunlight and cabin heat sources.
Load with service order in mind so the items served first were placed last in the carrier. That practice minimizes the time perishable items sit open after arrival.
Pro-Caution
Safety checks and sanitation for food transport
Perform a quick pre-departure checklist: confirm seals, test gel pack firmness, and verify hot container temps with a probe thermometer. These checks prevent surprises on arrival.
Sanitize reusable containers and seals routinely. Keep raw ingredients physically separate from ready-to-eat items to avoid cross-contact and maintain food preservation standards; review food preservation concepts for practical techniques.
Chef’s notes and advanced tactics for food transport
Staging is a professional tactic: assemble components but combine them at the point of service. This preserves crisp textures and peak flavor by minimizing exposure to steam and moisture.
Use thermal zoning in your carriers to isolate hot and cold dishes. Pack hot items in dedicated thermal boxes and cold items in insulated coolers to avoid thermal bleed and protect intended mouthfeel.
- Glass vs. plastic: glass retains flavor and heat; high-grade plastic reduces weight and breakage risk.
- Freeze components: pre-freeze sauces to double as ice packs during transport.
- Portion for speed: small portions cool and reheat faster and more evenly when needed.
- Label times: mark pack time to track safe-hold windows easily on delivery.
Serving suggestions for food transport
Assemble garnishes and delicate components only at the destination. Keep herbs, crispy toppings, and emulsions separate until plating to preserve aroma and texture.
Use modular trays or lightweight crates for presentation to reduce handling. Minimize touches between carrier and table to reduce contamination risk and keep plating intact on arrival.
FAQ
How long can I safely transport cold food?
Cold food should remain below 40°F. With proper insulation and frozen gel packs, most cold meals stay safe for roughly 4 to 6 hours during routine food transport.
For longer runs, implement active cooling or refrigerated vehicles and monitor temps at intervals with a data logger or probe thermometer.
Can I transport hot food without reheating on arrival?
Yes, if you use preheated thermal containers and minimize lid openings. Hot food should stay above 140°F to remain in a safe zone during food transport.
If temperatures dip, reheat promptly to the recommended internal temperature before serving to ensure safety and quality.
Are reusable containers safe for frequent use?
Yes, when you use food-grade materials and inspect them regularly. Replace items with cracks or persistent stains and sanitize lids and seals to prevent bacterial buildup.
Maintain a rotation for high-use items and track their service life to avoid compromised seals that jeopardize food transport safety.
What are quick fixes for a leaky container at pickup?
Contain the leak with a secondary sealed vessel or place the leaking item upright in a plastic-lined compartment. Transfer contents to a backup airtight container when practical.
Keep absorbent material beneath the item to limit spread. If cross-contamination occurs, discard exposed ready-to-eat items per safety policy.
How do I keep salads crisp during food transport?
Keep dressings separate and place ice packs beneath the salad compartment. Use breathable barriers and add a dry layer between greens and cold packs to prevent direct condensation contact.
Assemble dressings at service time and add fragile garnishes last. These steps preserve texture and appearance on delivery.
Applying these food transport practices makes deliveries predictable and repeatable. Follow temperature rules, choose containers with the right thermal behavior, and adopt simple packing routines to keep food fresh and safe on every trip.
See also: cold chain
See also: food transport
]]>