- Key takeaway: Temperature and stabilizer selection determine foam stability.
- Key takeaway: Nitrous oxide in a siphon gives the creamiest, most consistent espuma.
- Key takeaway: Small adjustments to liquid ratios fix common problems quickly.
Why Espuma Works
Espuma converts a flavorful liquid into a structured foam by trapping gas in a stabilized network. The stabilizer turns transient bubbles into a lasting matrix that holds texture and flavor on the plate.
The technique sits inside the practice of molecular gastronomy, where chefs use modern tools and food science to control texture and aroma. Understanding that science sharpens your results.
Prep and Cook Time
Preparation: 10 minutes active work. Keep steps tight to avoid warming ingredients. Cold starting prevents collapse.
Cook Time: 5 minutes if you need to infuse or heat a base. For many vegetable or fruit bases, brief heating extracts flavor and helps dissolve stabilizers evenly.
Yield and Difficulty
Yield varies with siphon size; the basic recipe below yields about 4 servings. Measure volumes to match your equipment so you avoid overfilling a cream whipper.
Difficulty: Medium. You need basic tools and attention to detail. The learning curve is short if you follow precise temperatures and dosing.
Ingredients
Here is a reliable base for a classic, creamy espuma. Change the stock or puree for sweet or savory variations while keeping proportions steady.
- 1 cup (240 ml) heavy cream, chilled (cream)
- 1/2 cup (120 ml) vegetable or chicken stock or fruit puree for sweet foams
- 2 teaspoons lecithin powder — a surface-active stabilizer (lecithin)
- Pinch of salt for savory or 1 tablespoon sugar for sweet
- Optional: fresh herbs, citrus zest, vanilla, or concentrated flavor reductions
Keep ingredients cold and concentrated. If a base tastes weak before foaming, it will taste weaker after aeration; adjust seasoning before charging.
Equipment Essentials
The right toolset reduces guesswork. A commercial cream whipper (iSi-style) charged with nitrous oxide yields the creamiest textures for dairy and emulsified bases.
For gas and safety background, consult the nitrous oxide entry: nitrous oxide. Use fresh cartridges and follow manufacturer instructions for your siphon model.
Instructions
Follow these steps precisely for consistent espuma. The process divides into mixing, stabilizing, charging, and resting.
Mixing and Stabilizing
1. Combine cold liquids. In a chilled bowl, whisk heavy cream and stock or puree until even. Keep the bowl in a fridge or on ice to maintain low temperature.
2. Add lecithin. Sprinkle lecithin over the surface and blend with an immersion blender. Start slowly to incorporate the powder, then increase speed for a uniform suspension. The lecithin acts as an emulsifier and stabilizer.
Whipping, Charging, and Resting
3. Whip lightly. Blend until the mixture gains slight viscosity but stays pourable. Over-whipping can produce a stiff, meringue-like texture that defeats the silkiness you want.
4. Season and fill the siphon. Adjust salt or sugar to taste, then transfer the base into the clean, chilled siphon. Do not exceed the fill line on your device.
5. Charge with N2O. Attach a nitrous oxide cartridge and charge per device instructions. Shake the siphon vigorously 10–20 times depending on volume; this evenly distributes gas and prevents channeling.
6. Rest in the fridge. Refrigerate the charged siphon at least 1–2 hours. Cold stabilizes the foam and allows microbubbles to equalize, producing a silkier mouthfeel.
Dispensing
Hold the siphon upside-down and dispense gently. A steady, controlled release forms a smooth, cohesive foam that sits on food without breaking.
If you need to retexture the espuma later, invert the siphon, vent any gas slowly, and re-charge following safety guidelines.
 Expert Insight
Allow at least one hour between charging and service when you want a slightly denser foam for plating. This rest time helps microbubbles stabilize and prevents immediate collapse on warm dishes.
 Pro-Caution
If you plan to prepare multiple flavors, clean the siphon thoroughly between batches. Residual sugars or oils will alter emulsification and affect the next foam’s stability.
Tips for Success
Temperature control: Cold ingredients and chilled equipment preserve bubble structure. Warm mixtures break down quickly once aerated.
Stabilizer choice: Use lecithin for delicate foams that disperse quickly; gelatin or agar gives firmer gels. Match the stabilizer to the desired texture.
Gas and handling: Fresh N2O cartridges supply consistent pressure. Shake after charging and keep the siphon cold until plating.
Troubleshooting: If the foam is watery, increase lecithin by 0.5 teaspoon or reduce liquid by 5–10 percent. If the foam is too stiff, add a splash of cream or stock and re-blend gently.
Serving Suggestions
Espuma complements strong, simple bases. Try a bright tomato-basil espuma over grilled crostini or a lemon-herb espuma atop scallops for contrast and lift.
For desserts, pair mango or citrus espuma with crunchy textures such as crisp tuile or toasted coconut for contrast. Use micro herbs, edible flowers, or a finishing oil sparingly to preserve the foam’s profile.
For more ideas and complementary sauces, see our internal reference: Comprehensive Guide to Foam-Based Sauces. Also browse practical equipment recommendations at Kitchen Tools and Siphons.
Nutrition
Per serving (classic cream base): roughly 120 calories, 1 g protein, 2 g carbs, 12 g fat. Values change with stock, puree, and added sugar.
Reduce calories by substituting some cream with concentrated vegetable reductions or lower-fat emulsified bases, and retest stabilizer levels for texture retention.
| Nutrition per Serving | Calories | Protein | Carbs | Fat |
|---|---|---|---|---|
| Espuma (classic cream base) | 120 | 1g | 2g | 12g |
Advanced Variations
Use high-concentration flavor reductions for intense, low-volume foams. Reductions allow bold flavor without diluting stabilizer function.
Vegetable and fruit bases often need pectin or a combined stabilizer approach. Combine small amounts of agar or xanthan with lecithin to tune firmness versus dispersal.
FAQ
What exactly is espuma?
Espuma is a culinary foam made by incorporating gas into a flavored liquid and stabilizing the bubbles so the foam holds shape. Chefs use it to add airy texture and concentrated flavor to dishes.
Can I make espuma without a siphon?
Yes. An immersion blender can create a usable espuma for immediate service. Expect a slightly coarser texture and a shorter hold time compared with siphon-made foams.
Which stabilizer should I use?
Choose lecithin for light, quick-dissipating foams. Use gelatin for rich, stable textures that tolerate heat, and agar or xanthan for vegan options. Match the stabilizer to the dish and service timeframe.
Why did my espuma collapse quickly?
Common causes include warm base temperature, insufficient stabilizer, or undercharging the siphon. Cool the mixture, increase stabilizer slightly, and ensure proper N2O use.
Is nitrous oxide safe for culinary use?
When you use food-grade nitrous oxide cartridges designed for cream whippers and follow manufacturer safety instructions, it is the standard gas for culinary foams. Never reuse spent cartridges or substitute unknown gases.
Summary: Mastering espuma requires precise ratios, cold handling, and correct stabilizer choice. Practice small batches, adjust seasoning before charging, and rest charged siphons cold for the best texture. With these controls you can deliver consistent, restaurant-quality foams that enhance both flavor and presentation.
Further reading on food emulsifiers and technique is available through authoritative sources such as emulsifier and the cream overview when you want to refine your approach.
See also: Espuma
]]>
- Key takeaways: precise alginate and calcium balance yields clean membranes.
- Fresh tomato juice and layered seasoning preserve signature savory notes.
- Rinse and refrigerate spheres briefly; consume within 24 hours for best texture.
Prep and Cook Time
Preparation: 25 minutes. Chilling and setting: 1 hour. These windows include blending, degassing, and a short resting period for the alginate to hydrate.
Plan active time for precise drops into the calcium bath and a 2–3 minute setting per sphere. Staying organized improves yield and reduces wasted base liquid.
Yield
This recipe yields six Bloody Mary spheres, which will typically serve three cocktails if you use two spheres per serving. Adjust quantities linearly if you need more spheres for a party.
Small-batch scaling preserves control of alginate concentration. For larger batches, mix the alginate in separate vessels and combine slowly to avoid over-thickening.
Difficulty Level
Difficulty: Medium. Spherification requires accurate weighing and gentle handling rather than advanced culinary skill. A digital scale and syringe or calibrated spoon improve consistency.
Expect a learning curve around drop size and setting time; practice with plain tomato juice first. Many professionals treat initial trials as calibration runs before serving to guests.
Ingredients
Core ingredients deliver the classic Bloody Mary profile while the functional ingredients enable spherification. Use fresh tomato juice, horseradish, lemon, Worcestershire, and hot sauce for the base.
Functionals include sodium alginate and calcium chloride; measure alginate to within 0.1 g and dissolve calcium chloride in cold water for the bath. Read more about sodium alginate and its role in gelling.
- 2 cups freshly squeezed tomato juice
- 1 tbsp freshly grated horseradish
- 1 tsp smoked paprika
- 1 tsp celery salt
- 1/2 tsp ground black pepper
- 2 tbsp freshly squeezed lemon juice
- 1 tbsp Worcestershire sauce
- 1 tsp hot sauce, or to taste
- 1/2 tsp smoked sea salt (optional)
- 1 tbsp vodka (optional)
- 1.5 tsp sodium alginate
- 5 cups cold water (for bath)
- 5 g calcium chloride
Instructions
Start by building a smooth Bloody Mary base. Blend tomato juice with seasonings, lemon, horseradish, Worcestershire, hot sauce, vodka if using, and strain to remove pulp for a clean membrane.
Slowly incorporate sodium alginate while blending at low speed to avoid clumping. Allow the mixture to rest 15 minutes so trapped air escapes and the alginate hydrates; this improves sphere clarity.
- Prepare the base: Blend ingredients until fully integrated and smooth.
- Add alginate: Sprinkle alginate slowly while blending; blend 2 minutes then rest 15 minutes.
- Mix calcium bath: Dissolve calcium chloride in cold water and stir thoroughly until clear.
- Form spheres: Use a syringe or special spoon to drop measured droplets into the calcium bath; let set 2–3 minutes.
- Rinse: Remove spheres with a slotted spoon and rinse gently in cold water to remove residual calcium.
- Store: Refrigerate spheres submerged in fresh tomato juice and use within 24 hours for optimal texture.
Control drop size and timing; small changes change membrane thickness. Practice on one set of droplets to dial in ideal setting time before making the full batch.
Safety and Handling
Calcium chloride is a food-safe salt but tastes bitter if not rinsed off the spheres. Always rinse spheres in clean, cold water after removal from the bath to neutralize surface residue.
Use food-grade sodium alginate and calcium chloride only; avoid household chemicals. For a primer on the culinary technique, consult the entry on spherification and related methods in molecular gastronomy.
Pro-Caution
Tips for Success
Fresh ingredients drive flavor. Use high-quality tomato juice and freshly ground spices; this reduces the need for heavy seasoning and preserves the subtlety of the sphere’s center.
Maintain chilled solutions to slow reactions and improve control. Keep both the base and the calcium bath refrigerated until you are ready to form spheres to prevent premature gelling.
Expert Insight
Serving Suggestions and Storage Tips for Maximum Freshness
Serve spheres chilled on a small spoon, in a shot glass, or drop them into a sparkling wine for a savory fizz. Garnish simply: celery, olive, or microherbs provide visual balance without overwhelming the sphere.
Store spheres submerged in fresh tomato juice in an airtight container at refrigerator temperature. Avoid freezing because ice crystals will rupture the gel membrane and ruin texture.
Explore variations using infused vodkas or smoked salts while preserving alginate ratios. For foundational spherification practice and recipes, check our internal guide at ‘/recipes/spherification-basics’ and browse classic variations at ‘/recipes/bloody-mary-classics’.
Nutrition Info per Sphere
The following is an estimate per sphere. Nutrition depends on tomato juice brand and any added vodka or thickening agents.
Use nutrition data as a guideline for menu labeling and portion control. Adjust if you increase size or add rich garnishes.
| Calories | Protein | Carbs | Fat |
|---|---|---|---|
| 35 kcal | 1 g | 5 g | 0.1 g |
FAQ
What is a Bloody Mary sphere?
A Bloody Mary sphere is a small gel membrane encapsulating the classic cocktail flavors. The membrane forms by exposing a sodium alginate solution to calcium ions, which cross-link to create a thin, edible skin.
Why spherify a Bloody Mary instead of serving it in a glass?
Spherification concentrates flavor and turns drinking into a tactile experience. Guests get an immediate flavor burst when the membrane breaks, and the presentation elevates typical brunch service.
How do I avoid bitter taste from calcium chloride?
Rinse spheres in cold water immediately after removing them from the calcium bath. Brief, gentle rinses remove residual calcium and prevent off-flavors that mask the cocktail profile.
Can I make the spheres non-alcoholic?
Yes. Simply omit vodka and consider adding a small amount of pickle brine or olive brine for savory complexity. Non-alcoholic bases often require the same alginate ratio for texture control.
How long can I store the spheres?
Store refrigerated and submerged in fresh tomato juice; consume within 24 hours for best texture. Extended storage softens the membrane and dilutes the concentrated flavor.
See also: Bloody Mary
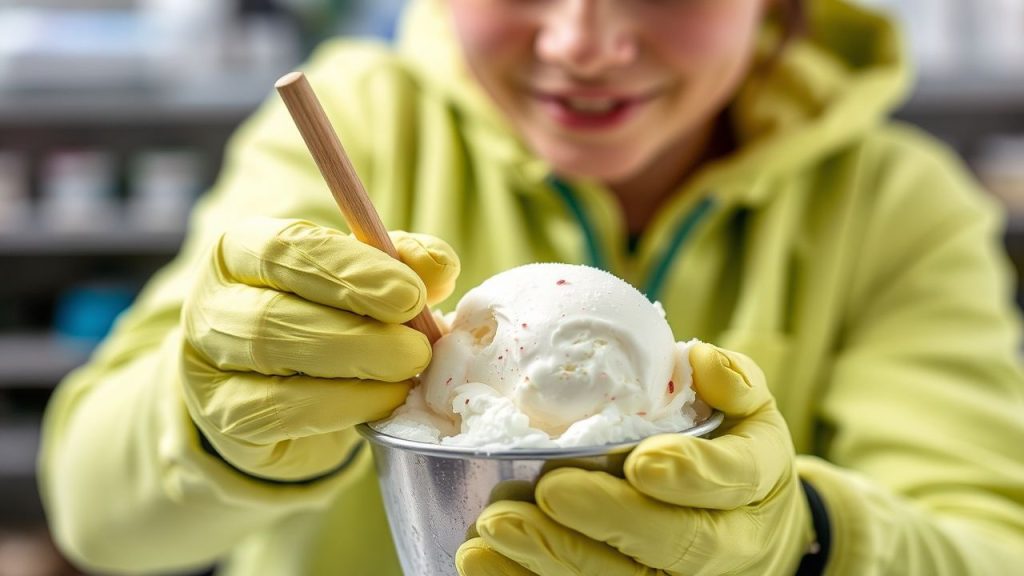
]]>Liquid nitrogen ice cream blends fast freezing physics with culinary technique to yield ultra-smooth texture and theatrical presentation. A practical approach and clear safety rules let you make this dessert at home while minimizing risk.
- Instant freezing produces finer ice crystals for silkier ice cream.
- Safety gear and ventilation are non-negotiable when handling cryogenic liquids.
- Stirring technique controls texture—constant motion is essential.
- Serve fresh for the best mouthfeel and visual impact.
Prep and Cook Time
Preparation: 10 minutes. Freezing Time: 3–5 minutes. Total Time: 15 minutes.
These times assume you work with chilled base ingredients and have liquid nitrogen ready in a proper dewar. Allow extra time for safety checks and equipment setup; rushing increases risk and harms texture.
Yield
This recipe makes about four generous servings from the listed quantities. Adjust proportions linearly: double the base to double the yield, but scale liquid nitrogen slowly to maintain texture.
For larger batches, freeze in portions rather than pouring all at once to keep the stirring effective. Staggered freezing preserves the smooth, small-crystal structure that defines liquid nitrogen ice cream.
Difficulty Level
Medium. You need steady hands, proper safety gear, and a clear workspace to use liquid nitrogen safely. Familiarity with basic kitchen technique and a calm, focused approach will get excellent results.
If you are new to cryogenic liquids, practice the stirring rhythm with a small amount of cold water (not liquid nitrogen) to build coordination. Then progress to small test batches before scaling up.
Ingredients
Use chilled dairy and cold utensils to speed freezing and reduce required nitrogen. Below is a classic base; customize flavors after the freeze for best results.
- 2 cups heavy cream, chilled
- 1 cup whole milk, chilled
- 3/4 cup granulated sugar
- 1 tablespoon pure vanilla extract
- Pinch of salt
- Liquid nitrogen, approximately 3–4 cups (handled carefully)
Substitute up to 25% of the cream with mascarpone or cream cheese for a richer mouthfeel. When using fruit purées, reduce added liquid to avoid excessive hardness after freezing.
Instructions
Start with a well-mixed, chilled base to minimize nitrogen use and speed freeze time. A stainless steel bowl helps conduct cold into the mix evenly.
Follow these steps carefully and keep movement controlled to produce a uniform texture and avoid splatter.
- Mix the base: Combine heavy cream, milk, sugar, vanilla, and salt in a large, chilled stainless steel or heatproof glass bowl. Whisk until the sugar dissolves and the mix looks smooth.
- Prepare workspace & safety: Work in a well-ventilated area. Wear insulated gloves and safety goggles. Place the dewar on a stable surface away from traffic and flammables.
- Add liquid nitrogen gradually: Pour small amounts of liquid nitrogen while stirring continuously with a sturdy wooden or silicone spatula. The mixture will freeze quickly; add nitrogen in measured increments to avoid over-freezing.
- Stir continuously: Maintain steady, circular stirring to break up forming crystals and keep the texture smooth. Continue until the mixture reaches scoopable consistency, typically 3–5 minutes.
- Finish and serve: Stop adding nitrogen once the desired texture appears. Transfer to bowls or a chilled container and serve promptly for best texture.
Stirring technique
Use a consistent, even motion that moves across the bowl to mix the cold front into the warmer center. Avoid aggressive churning; that can trap pockets of unmixed liquid nitrogen and create safety hazards.
Practice on small volumes to develop a feel for the point when the mix turns from slushy to scoopable. Visual cues and a slight resistance on the spatula indicate readiness.
Liquid nitrogen dosing
Add nitrogen slowly and in short bursts, especially during the first minute of freezing. Each dose should lower temperature without forming hard lumps.
Measure by sight and feel: if the mixture stiffens too quickly, pause stirring to allow even cooling. Err on the side of caution—you can always add more nitrogen, but you cannot remove excess.
Safety
Liquid nitrogen boils at −196 °C and expands rapidly as gas; treat it with respect and follow strict safety practices. Use only food-grade nitrogen from reputable suppliers and store it in a proper dewar.
Never pour liquid nitrogen into a sealed container, never ingest liquid nitrogen, and keep people and pets at a safe distance during the freeze. Ventilation prevents oxygen displacement in enclosed spaces.
Protective gear
Wear cryogenic or insulated gloves, splash-resistant goggles, and long sleeves when working with liquid nitrogen. Foot protection is important to prevent burns from spills on the floor.
Keep a spill kit and first-aid supplies handy. If skin contact occurs, cool the affected area with lukewarm water and seek medical attention for severe frostbite; do not rub the skin.
Handling and disposal
Let leftover liquid nitrogen evaporate outdoors in a ventilated area away from people and structural openings. Do not pour it down drains or into sinks where oxygen displacement can occur.
Transport dewars upright and secured. Follow supplier instructions for refill and return of cylinders, and store empty containers properly to avoid pressure hazards.
Expert Insight
The best textures come from a balance of chilled ingredients, steady stirring, and cautious nitrogen dosing. Make small test batches when trying new add-ins.
Pro-Caution
Tips for Success
Work methodically: set out tools, PPE, and serving bowls before you open the dewar. Preparation reduces mistakes during the rapid freeze process.
Fold delicate mix-ins like fresh fruit or cookie pieces in after the base reaches a semi-firm state to preserve their structure and flavor. Over-mixing can crush delicate textures.
Serving Suggestions
Serve the ice cream in chilled metal or glass bowls to slow warming and maintain texture longer. Garnish with fresh berries, toasted nuts, or freeze-dried fruit powder for contrast.
For theatrical presentations, combine your serving with a dry-ice fog tray operated at a safe distance; never mix dry ice and liquid nitrogen directly with the food. Keep children at a safe viewing distance during the preparation.
Nutrition
Per serving nutrition depends on ingredient choices; a standard recipe typically contains 300–350 kcal per portion. Fat and sugar content vary with cream percentage and added sweeteners.
To reduce calories, substitute part of the cream with full-fat Greek yogurt or use a sugar alternative with similar freezing properties. Keep in mind that changes alter texture and freezing behavior.
| Nutrient | Amount per Serving |
|---|---|
| Calories | 320 kcal |
| Protein | 4 g |
| Carbohydrates | 28 g |
| Fat | 22 g |
For more creative recipes, visit our Innovative Ice Cream Recipes collection. For safety protocols and supplier guidance, see our liquid nitrogen safety guide.
Liquid nitrogen transforms texture because it freezes the mixture so quickly that ice crystals remain very small. For the science behind the cooling and phase change, review liquid nitrogen and general cryogenics principles.
FAQ
Is liquid nitrogen safe for home use?
Yes, when you follow established safety procedures and use proper equipment. Wear protective gear, ensure adequate ventilation, and handle nitrogen only in dewars designed for cryogenic liquids.
If you lack proper PPE or a calm, controlled workspace, arrange a supervised demonstration with a trained provider instead of attempting it solo.
How does liquid nitrogen improve ice cream texture?
Liquid nitrogen freezes the mix in seconds, creating very small ice crystals that yield a smooth mouthfeel. That physics is what separates instant-freeze methods from conventional freezers.
For a primer on the culinary side, consult the ice cream article on texture and structure.
Where can I source food-grade liquid nitrogen?
Purchase from specialty gas suppliers or scientific suppliers that label their product for food use. Always request documentation and storage instructions from the supplier.
Keep cylinders upright during transport and follow local regulations for handling hazardous materials. If unsure, ask the supplier for a safety data sheet (SDS).
Can I prepare this with children nearby?
Children may watch from a safe distance and enjoy the finished product, but only trained adults should handle liquid nitrogen. Assign one adult to manage the dewar and one to manage the cooking area.
Designate a clear safety perimeter and explain the hazards in simple terms before starting to keep curious hands away from danger.
How do I dispose of leftover liquid nitrogen?
Allow it to evaporate outdoors in a ventilated, unoccupied area away from openings into buildings. Never pour it into plumbing or confined spaces where oxygen displacement can create asphyxiation risk.
Follow supplier guidance for larger volumes; small residual amounts will vaporize safely if left to warm in the open air.
Concluding Remarks
Liquid nitrogen ice cream rewards careful technique with exceptional texture and memorable presentation. Plan, prepare, and protect: those three steps cover most risks and yield consistent results.
Respect the properties of cryogenic liquids, practice on small batches, and build confidence before hosting. When done right, the combination of sound technique and safety produces a spectacular dessert.
For general food-handling standards that apply when preparing ice cream and frozen desserts, consult food safety resources. Proper hygiene, temperature control, and storage preserve both flavor and safety.
See also: Liquid nitrogen
]]>
- Key takeaway: Stable foams need proper emulsifiers, temperature control, and gentle aeration.
- Tool focus: An immersion blender or siphon yields repeatable results when used correctly.
- Troubleshooting: Adjust emulsifier levels and aeration speed rather than adding more air.
- Versatility: Use foams for soups, desserts, and cocktails to add texture and aroma.
Foam Mastery: Understanding the Science Behind Stable Foams
Foam forms when gas becomes trapped inside a liquid film and those films resist rupture. Two physical properties dominate: surface tension and the strength of the film formed by proteins or surfactants.
Proteins and emulsifiers create networks that slow bubble coalescence and drainage. For a tactical overview of the culinary approach that uses these principles, consult molecular gastronomy, which frames practical lab techniques for the kitchen.
Prep and Cook Time
Plan a short hands-on window for foaming; most methods concentrate work into a few focused minutes. Preparing cold equipment and pre-measured ingredients shortens active time and improves consistency.
Follow predictable timing to manage expectations: cooling, hydration of stabilizers, and active aeration each take fixed intervals that you can train to repeat reliably.
- Preparation: 10 minutes
- Foaming process: 5–7 minutes
- Total time: 15–20 minutes (including chill time)
Yield and Difficulty
A single batch using the proportions below produces about 1 cup of foam, enough to top four servings. Scale up cautiously; larger volumes often demand incremental adjustments to aeration technique and stabilizer percentage.
Skill level: intermediate. You need awareness of texture, timing, and temperature to achieve repeatable results. Practice refines the eye for bubble size and gloss.
- Makes approximately 1 cup of stable foam (1/4 cup per serving)
- Difficulty: Intermediate — experience helps but the method is accessible
Ingredients
Select components with structure in mind: proteins and emulsifiers provide film strength, fats adjust mouthfeel, and acidity affects stability. Keep ingredients cold when possible to slow bubble drainage.
Below are practical choices and why they matter in the foam matrix. Use high-quality, fresh liquids and measure emulsifiers accurately for consistent results.
Emulsifiers and Stabilizers
Soy lecithin and gelatin function differently: lecithin lowers surface tension and stabilizes thin films, while gelatin forms a gel network that traps air for longer hold. See lecithin for technical details.
Egg white and aquafaba (chickpea liquid) provide protein networks but need immediate use; their stability decreases with time and temperature changes. Adjust technique rather than overloading with additives.
Liquids, Fats, and Flavor
Milk, broths, fruit purées, and coffee all foam differently because of their protein, sugar, and fat content. Higher protein content usually yields firmer foam; fats can make films more flexible but may weaken them if excessive.
Use neutral oils sparingly to modify mouthfeel. Balance seasoning after foaming when possible so salts and acids don’t prematurely break films.
Step-by-Step Instructions
Follow a disciplined sequence: chill tools, hydrate stabilizers, combine liquids, then aerate at the surface. That order preserves film integrity while building fine bubbles.
Work deliberately and observe change. Visual cues—sheen, bubble size, and body—tell you when to stop aeration and transfer the foam to service vessels.
- Chill bowl and whisk or immersion blender head. Cold contact surfaces reduce bubble collapse during formation.
- Pour the liquid into a wide, shallow container. Wider surface area encourages consistent surface aeration.
- Sprinkle the lecithin across the surface and let it hydrate for 1–2 minutes. Hydration disperses the emulsifier and strengthens the surface film.
- Add a small amount of neutral-flavored oil and a pinch of salt, and stir gently to avoid breaking the developed surface film.
- Position the immersion blender or whisk just below the surface and begin aeration slowly. Increase speed as stable microbubbles appear, then stop once a glossy, cloud-like foam forms.
- Skim the foam gently with a slotted spoon and transfer to the plate or glass immediately. Prompt transfer keeps the foam intact and attractive.
Chef’s Notes: Tips for Success
Small adjustments create big improvements: reduce aeration speed if bubbles become coarse, or increase emulsifier by small increments when foams weaken. Keep logs of each batch for repeatability.
Temperature control is non-negotiable. Cold ingredients slow drainage and extend hold time; warm liquids accelerate coalescence and collapse.
- Ingredient choice: Favor higher-protein milks or broths for structure.
- Lecithin timing: Hydrate before aeration; avoid adding it to steaming liquids.
- Substitutions: Use aquafaba or egg whites when lecithin is not available, but serve quickly.
Expert Insight
A Deeper Dive: Techniques and Tools for Effortless Foam Perfection
An immersion blender with a narrow, high-speed head gives control for most home and professional kitchens. For ultra-fine bubbles, whipped siphons deliver superior texture but require practice and precise recipes.
Use a shallow vessel to maximize the gas-liquid interface and favor surface aeration over deep mixing. For tool selection guidance, consult our kitchen tools guide to match gear to volume and desired bubble size.
Consider the science behind tools: mechanical shear affects bubble size distribution, while pressure-based methods change nucleation and bubble formation. Cross-reference technique choices with ingredient profiles for the best outcomes.
Troubleshooting Common Challenges in Foam Creation
Diagnose problems by observing bubble size, sheen, and drainage. Those cues map directly to root causes—emulsifier level, aeration method, or temperature.
Apply small corrections and test again; avoid large one-off changes that obscure which variable fixed the issue. Keep notes to speed learning.
- Foam collapses too quickly: Check temperature and hydration of stabilizers; using slightly more lecithin often helps.
- Large, unstable bubbles: Slow down aeration and reduce oil percentage; large bubbles reveal weak films.
- Foam sinks immediately: Verify emulsifier dispersion and avoid deep mixing that breaks the surface network.
- Muted flavor: Adjust seasoning after foaming or use more concentrated base liquids.
If a siphon or charger is involved, verify seals and charge technique. Equipment failure can mimic formula problems, so confirm hardware is working before changing recipes.
Pro-Caution
Nutrition Snapshot
Foams add negligible calories per serving when used sparingly, but ingredient choices alter macros. For example, increased oil raises fat and energy density significantly.
Use the nutritional frame to decide foam portions in plated dishes or cocktails, and adjust base liquids for dietary requirements.
| Nutrient | Per serving (1/4 cup) |
|---|---|
| Calories | ~35 kcal |
| Protein | ~1.2 g |
| Carbohydrates | ~2.8 g |
| Fat | ~2.0 g |
Further Reading and References
For deeper technical context on foams and surfactants, see foundational references on emulsifiers and foam physics. Those entries summarize the core phenomena that govern culinary foams.
Explore related recipes and technique pages, including our molecular gastronomy techniques hub for applied examples and tested formulas.
FAQ
The following short answers address common operational questions and offer quick fixes. Each response focuses on a single actionable step to help you progress fast.
What is culinary foam and why use it?
Culinary foam traps gas in thin liquid films to add texture and aroma without heavy calories. Chefs use foam to enhance mouthfeel, concentrate flavor delivery, and create visual contrast.
How do I make foam last longer?
Use effective stabilizers like lecithin or gelatin, keep ingredients chilled, and aerate gently at the surface. Small increases in stabilizer concentration usually extend hold time more reliably than added air.
Which liquids produce the best foams?
Proteins-rich liquids such as milk, broths, and certain fruit purées foam well. Liquids high in oil or sugar need formulation tweaks, like added emulsifier or reduced fat, to behave predictably.
Can I flavor and color foams safely?
Yes; infuse herbs, spices, or concentrated juices, but add potent oils or pigments sparingly because they can disrupt film strength. Always test the stability after any flavor addition.
What tools should a beginner buy first?
Start with a quality immersion blender and a set of chilled bowls. Move to a siphon once you understand formulation and can reproduce textures consistently with basic tools.
Mastering foam technique rewards precision and repetition. Use the troubleshooting cues and tool guidance above to refine your approach, and consult linked references for scientific context. Practice with consistent measurements and you will obtain reliable, elegant foams every service.
See also: culinary foam
]]>
- Key idea: shared flavor compounds often signal good matches.
- Practical: simple rules help you test combinations fast.
- Starter recipe: strawberry and manchego shows sweet–savory balance.
- Science: tools like gas chromatography reveal aroma molecules.
Understanding Flavor Profiles to Create Perfect Pairings
Food pairing relies on measurable chemistry and human perception. Researchers compare volatile compounds in foods to identify overlaps that often translate to pleasant matches.
For example, chefs use knowledge from Food pairing and flavor science to design dishes that feel coherent. These links help explain why strawberry and basil work, or why chocolate and coffee pair well.
Historically, teams applied analytical chemistry to gastronomy. They used methods like gas chromatography–mass spectrometry to map aroma compounds and build pairing databases.
That research fed into culinary practice and into related disciplines such as molecular gastronomy. Chefs now combine intuition with data to propose surprising, yet grounded, combinations.
How the Theory Works — Practical Concepts
The core principle is straightforward: when two items share key volatile compounds, they often taste compatible. You can test this by comparing ingredient aroma profiles or using curated pairing lists.
Additionally, contrast plays a role. Balanced acids, fats, sugars, and textures can create a pleasing interplay even when molecules differ. Thus pairing uses both similarity and contrast to achieve balance.
Start with small experiments. Match one dominant note and one supporting note. Then adjust seasoning, temperature, and texture to refine the match.
For a structured approach, consult internal guides like ingredients and flavor matching and detailed technique pages such as food-pairing basics. These resources help you apply the theory in real kitchens.
Recipe: Strawberry and Manchego Bites
This simple plate demonstrates sweet–savory contrast and shared ester notes between fruit and herb. It requires minimal technique and shows how a molecular idea becomes a practical bite.
Serve it as an appetizer or tasting-course interlude. The recipe below highlights pairing mechanics and provides a quick test you can repeat with other cheeses or fruits.
Prep and Cook Time
- Prep Time: 15 minutes
- Cook Time: 10 minutes
Yield
Serves 4 adventurous palates.
Difficulty Level
Medium — ideal for home cooks who like to experiment with flavor.
Ingredients
- 200g fresh strawberries, hulled and halved
- 50g aged manchego cheese, thinly sliced
- 1 tsp black peppercorns, cracked
- 2 tbsp balsamic reduction
- Fresh basil leaves, for garnish
Instructions
- Prepare the strawberries: Rinse under cold water and pat dry. Halve each berry to expose its interior aroma and juice.
- Slice the manchego: Thin slices let the cheese release its nutty notes without overpowering the fruit. Arrange alternately on a plate for visual balance.
- Season and finish: Sprinkle cracked black pepper and drizzle the balsamic reduction. Garnish with basil leaves for freshness.
- Serve: Present on a wooden board or small plates. Pair with a crisp white wine if desired.
Tips for Success
Substitutions: If manchego is unavailable, try pecorino or a mild goat cheese to keep the creamy texture. Texture matters as much as aroma.
Seasoning edge: Add pepper or a touch of salt to amplify sweetness and reveal hidden aromatics. Small changes can shift a pairing from good to exceptional.
Expert Insight
Balsamic reduction shortcut: Simmer balsamic vinegar until thick and syrupy. Store refrigerated for up to two weeks to save prep time for later service.
Experiment: Try a drizzle of quality olive oil or a sprinkle of toasted almonds for crunch. Each addition should support either sweetness, fat, or acidity.
Pro-Caution
Serving Suggestions and Pairing Logic
This dish works as an appetizer or a palate cleanser between courses. The sweet fruit and salty, nutty cheese provide both contrast and shared aromatic notes.
For beverage pairings, choose acidic or floral wines to lift the fruit. Alternatively, use a light sparkling wine to cleanse the palate and reset the senses between bites.
When plating, think about temperature and texture. Serve slightly chilled for freshness, not ice-cold, to keep aromatics active. Add a crunchy element to contrast creaminess.
Use the same logic for other matches: identify dominant notes, choose a complementary contrasting element, then test. The method scales from simple plates to composed entrees.
Practical Steps to Build Your Own Pairings
Collect simple data: note dominant aromas, main taste (sweet, salty, bitter, sour, umami), and texture. Then search for ingredients with overlapping descriptors.
Use controlled taste tests. Try one variable at a time, such as swapping one cheese or herb. Record outcomes and refine your instincts into reliable rules.
Maintain a small pairing log. Over time, you build a personal database that reflects local ingredients and your diners’ preferences. This practice turns theoretical knowledge into usable skill.
Also, revisit classic pairings to understand why they work. Dissecting a reliable dish teaches principles you can reuse in creative ways.
FAQ
What exactly is Food Pairing Theory?
Food Pairing Theory analyzes shared volatile compounds and sensory interactions to predict compatible ingredient matches. It combines analytical data with sensory testing to identify likely harmonies.
How can I apply the theory at home?
Start small with two-ingredient tests. Smell, then taste, and adjust texture or seasoning. Use internal guides like ingredients and flavor matching for structured experiments.
Does similarity always mean a good match?
No. Similarity often yields harmony, but contrast can produce balance. Use both strategies: match key aroma notes or pair contrasting textures and tastes for interest.
What tools do professionals use?
Chefs and researchers use analytical tools such as GC–MS to identify volatile compounds. In kitchens, they rely on tasting, iteration, and culinary technique.
Where can I learn more?
Study resources on Food pairing and molecular gastronomy. Practice with simple recipes and keep a pairing journal to develop reliable instincts.
Applying food pairing theory sharpens both creative and technical skills. Use measured tests, keep notes, and let sensory evidence guide your experiments.
See also: Food Pairing
]]>Culinary espumas are light, flavor-intense foams created by stabilizing a liquid matrix and entrapping air. Chefs control acidity, viscosity and stabilizers to make foams that hold form and deliver concentrated taste.
- Quick takeaway: stable espumas rely on the right stabilizer and correct siphon technique.
- Balance: acidity, salt and fat determine perceived flavor in an espuma.
- Tools matter: a chilled siphon and correct cartridge use create fine bubbles and consistent texture.
- Practice: start with small batches and adjust gelatin or cream ratios for density.
Mastering Flavor Balancing Techniques for Memorable Espumas
Flavor balance in an espuma differs from sauces because the foam amplifies volatile aromatics while muting some textures. Therefore, taste the base hot and cold; acidity and salt behave differently as temperature and aeration change.
Use small adjustments: add acid or soy in drops, and re-test after chilling. Also, pair an espuma with contrasting textures to highlight its ephemeral character.
Prep, Yield, Difficulty & Ingredients
Time and skill: Prep takes about 15 minutes; chilling and setting add roughly 1 hour. The recipe yields around four servings and rates medium difficulty because it requires precise balance and a siphon.
Ingredients (core):
- 1 cup heavy cream (cold)
- 1/2 cup stock (vegetable or chicken, strained)
- 2 tbsp lemon juice (fresh)
- 1 tsp soy sauce (adjust for umami)
- 1 tbsp sugar (or adjust to taste)
- 1/2 tsp salt
- 1 tbsp gelatin sheets or 1 tsp powdered gelatin
- Optional: herbs or spices (fresh thyme, black pepper)
Instructions
Follow a methodical workflow: bloom stabilizer, combine flavour base, cool, then incorporate cream and siphon. Keep temperatures controlled and strain for a satin texture.
- Bloom gelatin: Soak sheets in cold water for 5 minutes or sprinkle powdered gelatin over 2 tbsp cold water. Squeeze and set aside.
- Prepare the base: Warm stock, lemon, soy, sugar and salt gently until dissolved. Do not boil; just warm enough to dissolve solids.
- Add gelatin: Remove from heat, stir in bloomed gelatin until fully dissolved and smooth.
- Cool: Allow the base to drop to room temperature before adding cream to avoid breakdown of emulsion.
- Fold in cream: Slowly incorporate cold heavy cream to retain body and prevent over-dilution of fat.
- Strain: Pass the mixture through a fine mesh sieve into a cold siphon to remove solids or coagulated bits.
- Charge: Insert one N2O cartridge, shake 10-15 times; test texture and add a second cartridge only if necessary for density.
- Chill and set: Refrigerate the charged siphon at least 1 hour. Gelatin will stabilize the foam and extend holding time.
- Dispense: Hold the siphon upside down and release in controlled bursts to place the espuma cleanly on the dish.
After dispensing, observe the bubble size and mouthfeel. If bubbles are coarse, reduce over-agitation or lower the gas charge next time.
Chef’s Notes: Tips for Success
Start light: under-season and under-acid initially; you can always adjust but cannot remove excess once set. This approach preserves the delicate aroma profile that espuma emphasises.
Expert Insight
Work in small batches and keep records: note gelatin weight, cream percentage and cartridge count. This log speeds repeatability in a professional or home kitchen.
- Gelatin vs agar: gelatin creates a creamier mouthfeel; agar works for vegetarian options but produces a different bite.
- Texture fixes: if too dense, slightly reduce gelatin. If it collapses, increase stabilizer or lower liquid ratio.
- Aeration control: shake moderately. Over-shaking makes large bubbles and a coarse texture.
Science Behind Foams and Stability
Small bubbles create a silkier espuma because a higher surface-area-to-volume ratio stabilises aroma release and mouthfeel. Surface properties, proteins and hydrocolloids form films around bubbles that prevent rapid coalescence.
For deeper reading on the physics, see surface tension and for molecular context consult molecular gastronomy. Both explain why temperature and pH affect foam life.
Equipment, Safety and Storage
Use a quality siphon and check seals before charging. Understand the role of nitrous oxide for foaming; it dissolves in fat and releases as tiny bubbles when dispensed.
Store charged espumas in the refrigerator and use within 4 hours for peak texture. If stored longer, recheck pressure and recharge carefully to avoid over-pressurization.
Pro-Caution
When handling stabilizers, note gelatin properties on the ingredient card and consult the gelatin page for bloom strength guidelines. For cartridge chemistry, review nitrous oxide basics.
Serving Suggestions
Serve espumas over purees, fish, salads, or desserts where a light foam can lift flavors without adding weight. Contrast with a crunchy element—like toasted seeds or brioche crumbs—for textural interplay.
For pairing ideas and the science of mouthfeel, see our internal resource on texture and flavor science. For step-by-step siphon handling, reference siphon usage guide.
FAQ
What exactly is an espuma?
An espuma is an aerated foam made from a flavored liquid that is stabilized to hold air. It concentrates aroma and lightens mouthfeel, acting both as garnish and flavour vehicle.
Can I make espumas without a siphon?
You can create foams with immersion blenders or whipped cream machines, but a siphon yields the most consistent micro-bubble structure and control. For fine, restaurant-quality texture, the siphon is the recommended tool.
Which stabilizers work best?
Gelatin and lecithin are common; gelatin provides creamy stability while hydrocolloids like xanthan or agar serve vegetarian needs. Choose based on desired mouthfeel and serving temperature.
How long do espumas hold their shape?
Holding time depends on stabilizer and temperature. Gelatin-stabilized espumas often hold for several hours when chilled; lighter, cream-only foams collapse faster.
Are espumas suitable for sweet and savory dishes?
Yes. The technique adapts to both profiles—savory umami foams and sweet fruit foams both use the same technical principles with tailored flavor bases and stabilizers.
The Conclusion
Espumas pair culinary intuition with precise technique to create memorable, airy additions. Control of stabilizers, temperature and gas yields repeatable results that elevate both flavor and presentation.
Practice the recipe, keep a preparation log, and adjust gelatin and cream ratios to match your ingredient list. With focused repetition, you will consistently produce refined espumas that enhance dishes.
See also: culinary espumas
]]>