- Use even-thickness chicken for uniform cooking and consistent juiciness.
- Sauté garlic briefly to unlock sweetness without bitterness.
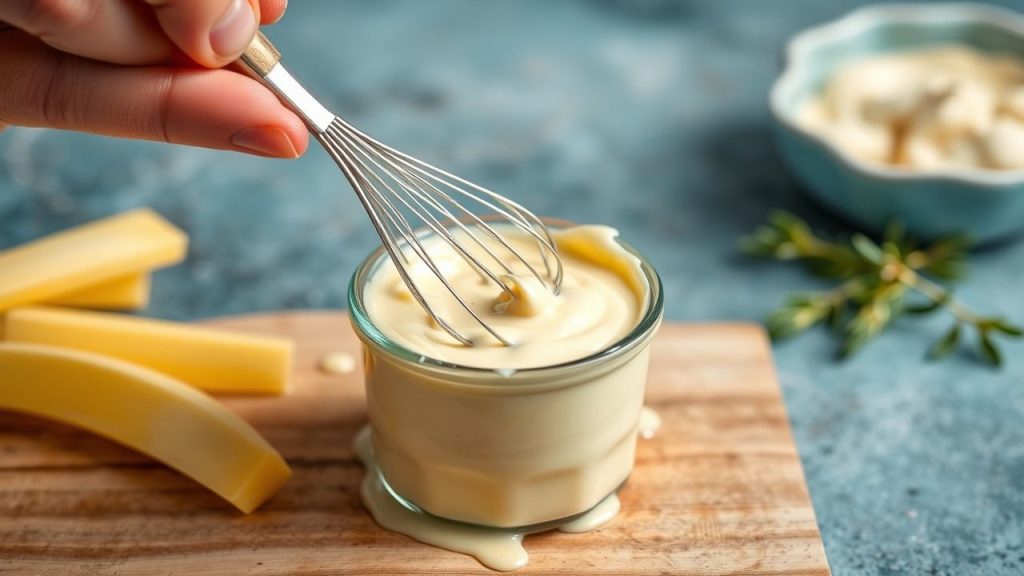
- Slowly combine cream and broth to prevent separation and encourage a glossy finish.
- Rest cooked chicken so juices re-distribute before plating.
Overview
This recipe balances rich dairy with savory aromatics to produce a restaurant-style sauce at home. It favors technique: searing, deglazing, and gentle simmering to stabilize emulsion and flavor.
I frame the method for home cooks who want repeatable results, and I reference culinary science where it clarifies decisions. For example, fat content in cream affects sauce stability and mouthfeel.
Prep and Cook Time
Preparation: 15 minutes. Keep mise en place: mince garlic, measure cream and broth, and pat chicken dry to promote a good sear.
Cooking: 30 minutes. Work on medium heat: sear, deglaze, and then simmer gently to thicken without curdling.
- Total: 45 minutes
Yield and Difficulty
Serves 4 generous portions. The method works for both boneless breasts and thighs with minor timing tweaks.
Difficulty: Medium. The techniques are straightforward but require attention to heat control and timing to prevent overcooking and sauce separation.
Ingredients
Use fresh, high-quality items for best results. Fresh garlic and a high-fat cream deliver the signature flavor and texture.
- 4 boneless, skinless chicken breasts, trimmed and pounded to even thickness
- 6 cloves garlic, finely minced
- 1 ½ cups heavy cream (or half-and-half for lighter creaminess)
- 2 tablespoons unsalted butter
- 2 tablespoons olive oil
- 1 teaspoon smoked paprika
- 1 tablespoon fresh thyme leaves, roughly chopped
- 1 tablespoon fresh parsley, finely chopped, for garnish
- Salt and freshly ground black pepper, to taste
- ½ cup low-sodium chicken broth
- 1 teaspoon Dijon mustard
If you substitute, maintain balance: lower-fat dairy reduces richness, while coconut cream changes aromatics and sweetness. For herb context, see thyme.
Instructions
Follow order of operations: season, sear, remove, deglaze, add dairy, and finish. That sequence preserves fond, which drives deep savory notes in the sauce.
- Prepare the chicken: Season the breasts with salt, pepper, and smoked paprika. Let them rest 10 minutes at room temperature for even seasoning absorption.
- Infuse the garlic: Heat olive oil over medium. Add minced garlic and sauté 1–2 minutes until fragrant; avoid browning to prevent bitterness.
- Cook the chicken: Add butter, then sear chicken 5–6 minutes per side until golden and cooked through. Remove and tent with foil to hold juices.
- Create the cream base: Lower heat. Pour in chicken broth and scrape the pan to release browned bits. Whisk in heavy cream and Dijon mustard until smooth.
- Simmer to perfection: Add thyme and season. Simmer gently 4–6 minutes until sauce thickens slightly; stir to keep texture uniform.
- Reunite chicken and sauce: Return chicken to skillet, spoon sauce over pieces, and let warm 3–4 minutes to marry flavors.
- Finish and garnish: Remove from heat and sprinkle parsley just before serving for a fresh lift.
Use a thermometer: 160–165°F (71–74°C) internal for breasts ensures doneness without dryness. Let the chicken rest for a few minutes off heat to allow carryover cooking and juice redistribution.
Tips for Success
Pound chicken to uniform thickness to reduce overcooked edges and undercooked centers. Consistent thickness shortens timing guesswork.
Control garlic heat: add it early to flavor the oil, but remove from direct high heat to avoid bitter notes. Gentle color yields sweet, aromatic garlic.
- Even thickness: Aim for about ¾-inch for consistent searing.
- Cream options: Heavy cream gives the most stable emulsion; half-and-half or cashew cream are alternatives.
- Herb balance: Fresh thyme is classic; try rosemary sparingly to avoid overpowering garlic.
- Thickening tip: If needed, a small cornstarch slurry stabilizes a sauce without adding flouriness.
 Expert Insight
Make-ahead strategies work: prepare sauce up to the simmer stage, cool quickly, and reheat gently with chicken. Reheat on low to maintain emulsion and texture.
 Pro-Caution
Serving Suggestions
Serve the chicken over fluffy mashed potatoes or creamy polenta to catch every spoonful of sauce. Both starches enhance the mouthfeel and balance richness.
Offer roasted asparagus or sautéed green beans for crunch and brightness. A squeeze of lemon or grated Parmesan adds contrast and lifts the savory profile.
Pair with complementary sides from the same kitchen flow. Try the recipe linked in the site collection for a complementary rice or risotto: classic creamy risotto. For make-ahead sauce techniques see make-ahead sauces.
Nutrition and Portioning
Calculated per serving, this dish focuses on protein and fat with minimal carbohydrates. Use low-sodium broth and adjust butter to control total sodium and fat content.
| Nutrition | Per Serving |
|---|---|
| Calories | 450 kcal |
| Protein | 42 g |
| Carbohydrates | 4 g |
| Fat | 28 g |
Adjust portions and sides for dietary needs: swap mashed potatoes for cauliflower mash for a low-carb plate. For dairy-free, replace cream with full-fat coconut cream while understanding it alters flavor.
Recipe Variations
Thighs handle higher heat and longer sear times, and they yield richer mouthfeel due to intramuscular fat. Breasts remain lean and pair well with quick pan sauces.
Additions like a splash of white wine during deglazing or a pinch of smoked paprika deepen savory complexity. Use acidic finishes, such as lemon, sparingly to brighten the sauce.
For a Parmesan layer, sprinkle finely grated cheese into the sauce at the end and whisk briefly to melt. This adds umami and slightly thickens the sauce without cornstarch.

FAQ
What makes garlic chicken so creamy and flavorful?
Proper cream selection and controlled simmering create a stable emulsion that coats the chicken. Searing the chicken first builds fond; deglazing captures that flavor and disperses it into the sauce for depth.
Can I use garlic powder instead of fresh garlic?
Fresh garlic gives volatile aromatics and a sweeter cooked flavor that garlic powder cannot replicate. Use garlic powder only as a convenience option; reduce quantity and add it earlier in the process.
How do I prevent the sauce from separating?
Keep the heat moderate and whisk gradually when combining cream with pan liquids. If you must thicken, use a small cornstarch slurry off-heat and finish with gentle warming to maintain texture.
Which chicken cut is best for this recipe?
Boneless, skinless thighs remain juicier and tolerate longer cooking; breasts deliver lean tenderness when pounded to uniform thickness. Choose based on desired texture and adjust times accordingly.
How do I adapt this for dietary restrictions?
For low-carb plates, serve with steamed vegetables or cauliflower mash. For dairy-free, use coconut or cashew cream and expect a shift in aroma and sweetness; balance with lemon or mustard to compensate.
Final Notes
Execute this method consistently: sear for flavor, deglaze for depth, and simmer gently for sauce stability. The result rewards attention to heat and sequence with a reliably creamy, savory dish.
Practice these small steps and you will routinely deliver restaurant-caliber creamy garlic chicken at home. Trust technique over improvisation when you want predictable, elevated results.
See also: Garlic Chicken
]]>
- Golden, flaky results come from dry fillets, the right oven temperature, and a crisp topping.
- Quick prep and short bake times keep the fish moist while encouraging a light crust.
- Simple tweaks — lemon, herbs, or panko — transform texture and flavor.
Prep and Cook Time
Preparation: 15 minutes. Marinating (optional): 20 minutes. These short steps build flavor without breaking the cod’s delicate structure.
Cooking: 18–22 minutes at 400°F (200°C) for a breadcrumb-topped fillet. Watch the fish closely; the flake test tells you doneness faster than the clock.
Yield and Difficulty
This recipe yields serves 4 from four six-ounce fillets. It suits cooks who want a reliable, high-impact seafood dish with low effort.
Difficulty equals Easy to Medium. The technique focuses on temperature control and topping adhesion rather than advanced skills. Even novices can reach consistent results with these steps.
Ingredients
Use fresh, thick fillets for even cooking. Aim for firm flesh that springs back slightly when pressed and shows a natural sheen.
Core ingredients: 4 cod fillets (6 oz each), 2 tbsp extra virgin olive oil, 1 lemon (zest and juice), 2 garlic cloves (minced), 1 tsp smoked paprika, 1/2 tsp sea salt, 1/4 tsp black pepper, 1 tbsp chopped dill, 1 tbsp chopped parsley, 1/4 cup panko breadcrumbs, and butter or ghee for basting if desired.
Instructions
1. Dry and season: Pat each fillet dry with paper towels to remove surface moisture. Drying is essential; moisture prevents a crisp crust and lengthens oven time.
2. Make the marinade: Whisk olive oil, lemon zest, lemon juice, minced garlic, smoked paprika, salt, and pepper. Coat fillets and let them rest for 20 minutes at room temperature to allow flavors to penetrate without “cooking” the fish.
3. Prepare crumb topping: Combine panko breadcrumbs with chopped dill and parsley; add a tablespoon of melted butter when you want extra color and adhesion. For context on the crumb type, see panko breadcrumbs for why they stay crispier than regular crumbs.
4. Bake and finish: Preheat the oven to 400°F (200°C) and place a rack in the middle. Transfer fillets to a greased tray, press the breadcrumb mixture onto each portion, and bake 18–22 minutes. If a deeper crust appeals, broil 1–2 minutes while watching closely to prevent burning.
Tips for Success
Select even-thickness fillets for uniform heat penetration. If fillets vary, fold thin tips under or trim to consistent thickness.
Time the marinade: Keep marinating under 30 minutes for citric mixes. Acid breaks down proteins; too long will make the texture mealy rather than tender.
Expert Insight
Add herbs near the end of prep for brighter color. Fresh parsley and dill deliver aroma without turning brown after prolonged exposure to heat.
Use a shallow layer of melted butter in the breadcrumb mix to improve browning. For a leaner crust, swap to high-heat olive oil sparingly.
Pro Cautions
Watch oven hot spots: Temperatures fluctuate between ovens. Use an oven thermometer and rotate the tray halfway through the bake for even color and doneness.
Pro-Caution
When broiling to deepen color, stand nearby. Broiling acts fast and can turn a golden top into burnt crumbs in seconds.
For allergy safety, note that some crumb mixes include nuts or dairy. Label any shared dishes accordingly and provide nut-free alternatives if needed.
Serving Suggestions to Elevate Your Cod Experience
Serve baked cod on a bed of lemon risotto or alongside garlic mashed potatoes for a balanced plate. A squeeze of fresh lemon brightens the fish and cuts richness.
Complement the texture with roasted baby asparagus or sautéed green beans topped with toasted almonds. For oil-related technique notes, refer to olive oil guidance on smoke points and flavor profiles.
Nutrition and Practical Notes
Cod delivers high-quality lean protein with modest calories. Typical values per serving: about 280 kcal, 38 g protein, 6 g carbohydrates, and 8 g fat; these numbers vary with added butter or oil.
Cod represents an important fisheries stock; for sustainable sourcing and species info, review the Atlantic cod profile: Atlantic cod. Choose certified sources when possible to support healthy stocks.
| Nutrient | Per Serving |
|---|---|
| Calories | 280 kcal |
| Protein | 38 g |
| Carbohydrates | 6 g |
| Fat | 8 g |
For technique context on dry-heat methods and timing, read the general baking overview at baking. Understanding conduction and convection helps you place racks and set temperatures properly.
Store cooked cod refrigerated within two hours in an airtight container and consume within 48 hours for best quality. Reheat gently to avoid drying the protein.
FAQ
This FAQ answers common practical questions with concise, actionable steps. Each answer focuses on timing, texture, and flavor control so you repeat success reliably.
Read each response for quick fixes and pro-level explanations that save time in the kitchen.
What oven temperature yields the best texture?
Bake at 400°F (200°C) for a balanced cook: it crisps the topping while cooking the center to an opaque, flaky finish. Lower temps extend time and increase the risk of a soggy crust.
How do I test for doneness without overcooking?
Use the flake test: insert a fork at the thickest point and twist gently. If the flesh separates into moist flakes and looks opaque, it is done. Pull the fish at that point and allow a short rest; residual heat completes the cook.
Can I use frozen cod for this recipe?
Yes, but fully thaw and pat dry before seasoning to avoid excess moisture. Thaw slowly in the refrigerator for 12–24 hours and press away water to enable crust formation.
What are good topping variations?
Mix panko with parmesan for a savory crust, or swap in finely chopped nuts like almonds for crunch. Lemon zest and a dash of smoked paprika lift flavor without masking the fish.
How can I make the dish more family-friendly?
Keep seasonings mild and present lemon wedges on the side. Offer a simple breadcrumb without strong cheeses and pair the cod with neutral sides like mashed potatoes or steamed rice.
In Retrospect
Mastering golden baked cod relies on predictable steps: dry the fillet, balance acid and fat in the marinade, and control oven heat. These principles yield consistent, restaurant-quality results at home.
With practice, you will recognize doneness by sight and feel. Each successful bake reinforces timing and seasoning instincts so you can adapt the recipe to your pantry and preferences.

See also: Baked Cod
]]>
- Weigh not guess: aim for 1.5–3% salt by weight of prepared vegetables.
- Use additive-free salt: coarse sea salt or kosher salt avoids off-flavors and cloudiness.
- Submerge fully: keep veg under brine to prevent aerobic spoilage organisms.
- Adjust by veg: leafy greens need less salt than dense roots for optimal crunch.
Unlocking the Science Behind Salt Fermentation
Salt fermentation works by selecting for salt-tolerant lactic acid bacteria that produce acid and preserve food. This selective ecology reduces spoilage organisms and yields stable, tangy ferments.
Osmosis and salt-driven water movement concentrate sugars and cells inside plant tissues and help form brine quickly. For core science, see fermentation and osmosis for concise background.
Choosing the Right Salt for Salt Fermentation
Pick plain, additive-free salts for reliable salt fermentation. Coarse sea salt and kosher salt provide consistent crystal size and dissolve predictably into brine.
A salt’s mineral profile gives subtle taste and mouthfeel differences, but anti-caking agents and iodine can cause cloudiness or off-odors. For reference on the compound itself, review salt.
Mastering Salt Ratios for Different Vegetables and Salt Fermentation Timing
Use a scale for reproducible salt fermentation: 1.5% to 3% salt by weight of prepared vegetables is a practical range. For most cabbage ferments, 2% is reliable; raise toward 2.5–3% for roots to slow fermentation and keep crunch.
Calculate by weight: 1,000 g vegetables = 20 g salt for 2%. Adjust within the 1.5–3% window based on texture goals and temperature. Track temperature because salt and heat combine to set fermentation speed.
Troubleshooting Common Salt-Related Issues in Salt Fermentation
Mushy texture, off-odors, or pale brine commonly trace back to incorrect salt percentage or poor submersion. Low salt lets spoilage organisms grow; excessive salt stalls acid producers and delays souring.
When fermentation stalls, verify the salt percentage and storage temperature first. Check for aerobic exposure and make small corrections—adjust salt on new additions or repack under fresh brine if needed.
Identifying Too-Little Salt
Low-salt ferments can produce strong, putrid odors and rapid softening of vegetables. If you detect rotten smells or widespread surface mold, discard the batch safely and review measurements.
Use a calibrated kitchen scale to avoid guesswork. Rework procedures and sanitation to prevent repeat failures and maintain predictable salt fermentation outcomes.
Dealing with Over-Salty Jars
Excess salt slows microbial activity and yields a bland, under-soured product. Rescue strategies include diluting with unsalted vegetables or rinsing and repacking at a lower percent, then ensuring full submersion under brine.
Adjust timing and temperature on subsequent batches to prevent repeats. Record exact weights and environmental conditions to build consistent behavior from jar to jar.
Pro-Caution
Clean, but avoid harsh sterilization that strips native microbes from vegetables. The right balance relies on measurement and technique rather than sterile conditions.
Recipe Framework and Practical Steps for Reliable Salt Fermentation
This framework yields about 1 quart and scales linearly by weight. The method emphasizes measurement: weigh, salt, pack, and fully submerge to control the microbial environment.
Tools matter. Use a digital kitchen scale and a fermentation weight or suitable substitute to maintain consistent submersion. For a primer on lactic acid organisms active in this process, consult lactic acid bacteria.
Prep and Timings
Preparation typically takes about 20 minutes; fermentation ranges from 5 to 14 days at 65–72°F (18–22°C) depending on desired acidity. Cooler temps slow activity and preserve crunch.
Check jars every 2–3 days and move to refrigeration once you reach the target flavor and texture. Cold storage slows bacterial action and extends shelf life.
Ingredients and Ratios
Example for 1 lb (approx 450 g) trimmed vegetables: use 2% salt by weight (about 9 g salt for 450 g veg). Scale up or down with the same percentage rule.
Typical ingredients: fresh vegetables, 1.5–3% non-iodized coarse salt by weight, filtered water if needed, and optional aromatics like garlic or caraway. Measure salt precisely to maintain consistent salt fermentation results.
Expert Insight
Packing, Submersion, and Fermentation Management
Pack vegetables evenly and press to remove air pockets so brine covers the produce by at least 1 inch. Consistent pressure and a good weight reduce aerobic pockets and limit spoilage.
Use a lid that allows CO2 escape or an airlock. Record the date, salt percentage, and ambient temperature on each jar to learn what works for your space.
Temperature Control
Temperature governs speed: higher heat accelerates acid production but can soften texture. Aim for 65–72°F for balanced progress; move jars to the fridge once the desired acidity forms.
Log observations. Small adjustments in salt percentage and temperature produce predictable changes in timing and texture over successive batches.
Serving, Storage, and Shelf Life for Salt Fermentation
Serve ferments as a crisp condiment or ingredient. A small spoonful brightens rich dishes and adds savory complexity to salads and bowls.
After reaching your target profile, refrigerate to slow fermentation and preserve texture. Properly salted ferments stored cold can remain quality for months with periodic visual and smell checks.
| Nutrient | Per Serving (1/2 cup) |
|---|---|
| Calories | 35 |
| Protein | 1g |
| Carbohydrates | 7g |
| Fat | 0g |
| Salt (Sodium) | 400mg |
FAQ
Why is salt important in salt fermentation?
Salt restricts non-desirable microbes and selects for lactic acid bacteria that produce acid and preserve the food. Proper salinity yields stable ferment, improved texture, and predictable flavor.
How much salt should I use for reliable results?
Common guidance is 2% salt by weight of prepared vegetables. Adjust within a 1.5–3% range based on vegetable density and the desired fermentation speed and texture.
Can I use any salt for salt fermentation?
Use plain, additive-free salt. Iodized and anti-caking salts may cloud brine or alter fermentation behavior. Coarse sea salt and kosher salt are dependable choices.
My ferment smells off. What now?
Pungent rotten or putrid odors or pervasive mold indicate spoilage. Discard unsafe batches and review salt percentage, submersion, and sanitation before retrying.
How long should I ferment before refrigerating?
Taste every 2–3 days. Most jars reach a pleasant balance between 5 and 14 days at 65–72°F. Refrigerate once you like the acidity and texture to slow further change.
Mastering salt fermentation depends on consistent measurement, the right salt, and controlled temperatures. Use the percentage rules above, keep records, and refine technique to suit your vegetables and personal taste.
See also: salt fermentation
]]>
- Quick wins: dry the fish, oil lightly, and watch the clock.
- Timing matters: most 6 oz fillets finish in 12–18 minutes at 400°F.
- Flavor balance: lemon, smoke, and fresh herbs heighten cod without masking it.
- Nutritional bonus: cod is lean, protein-rich, and supplies micronutrients like vitamin B12.
Choosing Fresh Cod
Select firm, translucent fillets that smell clean and mild. When in doubt, ask your fishmonger about the catch date and handling; freshness governs texture and safety.
Atlantic cod remains a common commercial option; learn more on Atlantic cod to understand species and sourcing. Proper storage on ice and rapid cooling keep the flesh firm and prevent degradation.
Prep and Cook Time
Preparation: 15 minutes. Cooking: 12–20 minutes depending on thickness. These ranges account for carryover heat and standard oven variability.
Total Time: 30–40 minutes including brief resting. Resting for 1–2 minutes locks juices and eases handling before plating.
Yield and Difficulty
Yield: Serves 4 when using four 6 oz fillets. Portion sizes scale linearly with fillet count and side choices.
Difficulty: Easy. The technique relies on temperature control and minimal handling rather than complex skills.
Ingredients
Use quality, simple ingredients to reinforce cod’s mild profile. Below is a practical ingredient list for four servings.
- 4 cod fillets (6 oz each), skin removed if preferred
- 2 tbsp extra virgin olive oil
- 1 tsp smoked paprika
- 1 tsp garlic powder
- 1/2 tsp sea salt, or to taste
- Freshly ground black pepper, to taste
- 1 tbsp fresh lemon juice
- 1 tsp dried thyme or 1 tbsp fresh thyme leaves
- 2 tbsp chopped fresh parsley, for garnish
- 1 lemon, thinly sliced, for baking and garnish
- 2 tbsp Greek yogurt or dairy-free alternative (optional, for serving)
Instructions
Preheat the oven to 400°F (200°C). Line a baking sheet with parchment or use a lightly oiled shallow dish to prevent sticking and encourage even browning.
Pat fillets dry with paper towels to remove surface moisture; this step is critical for creating a pleasant exterior without overcooking the interior.
- Mix the marinade: whisk olive oil, smoked paprika, garlic powder, salt, pepper, thyme, and lemon juice in a small bowl to form a light dressing.
- Season fillets: brush the mixture over fillets on both sides. Allow 10 minutes at room temperature for the flavors to settle; refrigerate up to 30 minutes if prepping early.
- Arrange on the sheet: space fillets evenly and nestle lemon slices around them so the citrus steams and imparts aroma during baking.
- Bake: place in the center of the oven for 12–18 minutes, depending on thickness. Check at 12 minutes for 1-inch fillets; fish is done when opaque and flakes with light pressure from a fork.
- Optional finish: broil 1–2 minutes for a slight crust—watch closely to avoid charring.
- Rest and serve: remove from oven, rest 1–2 minutes, then garnish with parsley and a squeeze of fresh lemon.
Pro-Caution
Allow at least one full paragraph between warning and the next block to comply with content layout rules.
Tips for Success
Dryness control: removing surface moisture gives a better sear and prevents steam from overcooking delicate flesh. This small step yields noticeably cleaner texture.
Marinade timing: a short room-temperature rest of 10–30 minutes integrates flavors without denaturing proteins. Overlong acidic marinades can toughen fillets.
Expert Insight
For herb variations, swap thyme for dill or tarragon to complement fish oils and bright citrus notes. Small changes in herb choice shift the dish profile while preserving the cod’s mild base.
Serving Suggestions
Baked cod pairs well with light, textured sides that add fiber and color. Consider roasted Mediterranean vegetables or a peppery arugula salad dressed with a lemon vinaigrette to echo the fish’s citrus accents.
Grain-based sides like quinoa or wild rice offer additional texture and make the plate more filling while keeping the meal nutrient-forward. Link to related recipes in your site for cross-navigation: Healthy Seafood Dishes Collection and Seafood Nutrition Guide.
Nutritional Benefits
Cod delivers lean protein with modest calories, providing essential amino acids while remaining low in saturated fat. It supplies micronutrients such as vitamin B12 and selenium that support metabolic and immune functions.
Cod also contains omega-3 fatty acids, which contribute to cardiovascular and cognitive support; see more on omega-3 fatty acids. Combine cod with fiber-rich sides for a balanced plate that promotes satiety and nutrient density.
For a deeper look at vitamin content, consult expert references like vitamin B12. Pairing techniques such as adding citrus or herbs do not significantly change the core nutrient profile but enhance palatability and adherence to healthy eating plans.
Food Safety and Baking Science
Baking preserves moisture better than high-heat pan-frying when executed with correct temperature and time. The gentle, even heat of the oven reduces localized overcooking and helps maintain an appealing mouthfeel.
Learn about the thermal basics of dry-heat cooking and how it affects protein structure via general resources on baking. Temperature control and short cook times prevent protein collapse and maintain flake separation.
| Nutrient | Per Serving |
|---|---|
| Calories | 180 kcal |
| Protein | 35 g |
| Carbohydrates | 1.5 g |
| Fat | 3.5 g |

Practical Variations
Turn baked cod into tacos, salads, or sandwiches by flaking the cooked fillets and combining with fresh, crunchy elements. This repurposing stretches ingredients and increases meal variety across the week.
For a one-pan approach, arrange sliced vegetables to roast alongside the fillets. Vegetables will cook in the fish juices, creating a cohesive flavor profile and simplifying cleanup.
FAQ
How do I know when the cod is cooked through?
Check for opacity and flake separation: the flesh should be uniformly opaque and flake with gentle pressure from a fork. For precision, a thermometer showing around 135°F will indicate a tender, slightly moist finish depending on preference.
Can I substitute other white fish for cod?
Yes. Halibut, haddock, or pollock work well with similar timing adjustments based on thickness. Each fish has a slightly different texture; adjust cook times and seasoning intensity accordingly.
Is it safe to marinate cod in lemon juice?
Short acid marination (10–30 minutes) brightens flavor without breaking down proteins excessively. Extended acidic exposure can firm the flesh, so avoid long citrus-only marinades for delicate fillets.
What sides best complement baked cod?
Light, textural sides such as roasted vegetables, quinoa, or a citrus-dressed salad pair best. These sides balance the lean protein and add fiber and color to the plate.
Can I prepare this dish ahead of time?
Yes. Marinate briefly and refrigerate for up to a few hours, then bake when ready. Cooked cod stores in the fridge for 2–3 days; reheat gently to preserve texture.
For further reading on seafood handling and nutrition, refer to authoritative resources and extend internal navigation using the site’s recipe and nutrition pages to keep readers engaged and increase dwell time.
See also: Baked Cod
]]>
- Short cook time: Most fillets finish in 10–15 minutes at 400°F (200°C).
- Light marinade: Acid, oil and herbs boost flavor without masking the fish.
- Prevent dryness: Steam briefly under foil, then finish uncovered for color.
- Pairing: Whole grains or roasted vegetables create a balanced plate.
Choosing the Freshest Fish for Optimal Flavor and Nutrition
Start with firm, translucent fillets that smell like the sea, not fishy. Look for even color and tight flesh; avoid fillets with discolored edges or a soft, mushy texture.
For baking, mild white fish such as cod, haddock or tilapia work well, while salmon and trout add richness and omega-3s. When possible, buy from a reputable supplier and choose sustainably sourced options; this supports long-term supply and consistent quality.
Reference: learn more about common species and seafood handling on Fish resources and general seafood topics on Seafood.
Essential Seasonings and Marinades to Elevate Your Fillets
Keep the seasoning simple to let the fish shine. A basic marinade combines a citrus acid, high-quality olive oil, minced garlic and fresh herbs like parsley or dill for bright, layered flavor.
For a subtle smoky note, add smoked paprika or a small pinch of crushed red pepper. Marinades should be brief for lean fillets—10–20 minutes is enough to impart flavor without denaturing proteins.
Study marinades and how they interact with proteins on the Marinade page for technique context and safety guidance.
Mastering Temperature and Timing for Tender, Flaky Perfection
Set the oven to 400°F (200°C) to surround fillets with consistent dry heat. This temperature seals the exterior quickly while keeping interiors moist when you monitor time closely.
Bake on a parchment-lined sheet or in a shallow baking dish. Cover loosely with foil for the first half of the cook to trap steam, then remove the foil to allow gentle browning and concentrated aroma development.
Expert Insight
Thickness determines time: plan about 10 minutes per inch of thickness. Test with a fork—done fillets flake easily and look uniformly opaque. Avoid the common error of leaving fish in the oven “just a bit longer”; small time additions dramatically change texture.
Serving Suggestions and Healthy Sides to Complement Your Baked Fish
Balance textures and nutrients with a simple quinoa salad, roasted seasonal vegetables or a crisp green salad. Acidic components like lemon zest or a light vinaigrette brighten every bite and cut through fish richness.
For creamy contrast, serve sliced avocado, a spoon of tzatziki or a light tahini drizzle. Whole grains such as brown rice or couscous add fiber and make the meal more filling without heavy calories.
When plating, add fresh herb sprigs and lemon slices. These small details boost aroma and perceived freshness, which improves diner satisfaction and dwell time on recipe pages.
Recipe Details
Prep: 15 minutes | Cook: 15 minutes | Total: 30 minutes. This timeline assumes average fillet thickness (about 1-inch); adjust for thicker or thinner cuts.
Yield: Serves 4. Choose fillets of similar thickness to ensure uniform cooking and predictable timing in a single batch.
Ingredients
Use fresh, high-quality ingredients to keep flavors clean and healthful. Organic or cold-pressed olive oil will carry herb aromas and extract fat-soluble flavors efficiently.
- 4 fish fillets (about 6 oz each), skin removed
- 2 tbsp extra virgin olive oil
- 2 tbsp fresh lemon juice
- 3 garlic cloves, minced
- 1 tsp sea salt
- ½ tsp freshly ground black pepper
- 1 tsp smoked paprika (optional)
- 2 tbsp fresh parsley, finely chopped
- 1 tbsp fresh dill, finely chopped
- Lemon slices, for garnish
Instructions
Preheat the oven to 400°F (200°C). Line a baking sheet with parchment and set a shallow dish for the marinade close to your workstation for efficient workflow.
- Prepare the marinade: Combine olive oil, lemon juice, garlic, salt, pepper, smoked paprika (if using), parsley and dill. Whisk until emulsified.
- Marinate: Place fillets in a shallow dish and spoon the marinade over them. Turn to coat evenly. Marinate 10–15 minutes at room temperature or up to 2 hours refrigerated if needed.
- Arrange and cover: Place fillets on the prepared sheet spaced apart. Cover loosely with aluminum foil to trap steam for the first stage.
- Bake: Bake covered for 8 minutes, then remove foil and bake another 5–7 minutes, or until the fillets are opaque and flake easily with a fork. Use an instant-read thermometer if available.
- Finish: Transfer to plates, garnish with lemon slices and a sprinkle of fresh herbs. Serve immediately for best texture.
Chef’s Notes
Use similar-thickness fillets so one pan cooks evenly. If fillets vary, start the thicker pieces first or separate into pans by thickness to prevent overcooking thinner pieces.
When brushing fillets during baking, discard any marinade that contacted raw fish. This maintains food safety while adding moisture mid-cook when using reserved, uncontaminated glaze.
Pro-Caution
Swap citrus types—lime or orange—for a subtle flavor shift. Use dried herbs cautiously; they concentrate quickly, so reduce quantity by roughly one-third compared with fresh herbs.
Nutritional Information (per serving)
This recipe provides lean protein and heart-healthy fats, especially when you choose oily fish. Baking, rather than frying, preserves the nutrient profile and limits added calories.
| Calories | Protein (g) | Carbs (g) | Fat (g) |
|---|---|---|---|
| 220 | 28 | 1 | 10 |
For details on the health benefits of fish oils and omega-3 fatty acids, consult the Omega‑3 fatty acid resource.
Q&A
Q1: What makes baking healthier than frying?
A1: Baking requires minimal added fat and preserves the fish’s natural oils and nutrients. The result is a leaner dish with controlled calories and retained protein quality.
Q2: How do I prevent dryness?
A2: Monitor time closely, use foil during initial baking to trap steam, and remove it to finish. Also, brief marination and correct oven temperature lock moisture in the flesh.
Q3: Can I use different fish?
A3: Yes. Mild white fish are versatile; fattier fish add richness and more omega-3s. Choose fillets of similar thickness for even cooking.
Q4: Any quick seasoning ideas?
A4: Lemon, garlic, olive oil, fresh herbs and a pinch of smoked paprika form a reliable base. Keep seasoning light so the fish remains the focal point.
FAQ
How long should I marinate fish before baking?
Marinate lean fillets for 10–20 minutes to add flavor without breaking down proteins. For fattier fillets like salmon, you can extend to 30–45 minutes depending on the marinade strength.
What oven temperature gives the best results?
400°F (200°C) produces consistent results for most fillets. This temperature balances exterior sealing and internal moisture retention when paired with correct timing.
Can I bake fish from frozen?
Yes, but allow extra time and expect slightly different texture. Ideally thaw fillets under refrigeration to maintain even cooking and reduce surface moisture that can dilute seasoning.
How do I reheat baked fish without drying it out?
Reheat gently in a low oven (about 275–300°F / 135–150°C) covered with foil for 10–12 minutes, or until just warmed through. Alternatively, add chilled fillets to salads for a safe, enjoyable cold serving.
Where can I learn more about baking techniques?
Consult general baking principles on the Baking page for heat transfer fundamentals and how temperature and time interact with proteins.
Embrace these straightforward methods and precise checks to serve reliably moist, flaky baked fish fillets. The approach rewards attention to temperature, timing and ingredient quality—simple factors that deliver professional results at home.
See also: baked fish
]]>
- Key action: use room-temperature, grease-free equipment for maximum volume.
- Stability hack: add acid (cream of tartar) and add sugar slowly to lock structure.
- Finish: dry low for crisp shells or quick bake for pie toppings.
Mastering meringue stability requires understanding how egg proteins, sugar, and air interact. With clear technique and a few controlled variables you can create glossy peaks that hold through transport and serving.
Prep and Cook Time
Preparation: 15 minutes. Plan equipment setup and ingredient measured so you do not waste whipping time.
Cooking (Baking/Drying): 1 to 1.5 hours for stand-alone meringues at 110°C (225°F). For pie toppings, a short 8–10 minute blast at 175°C (350°F) gives a golden crust while keeping interior soft.
Yield and Difficulty
This recipe yields about 12 medium meringues or enough to top a 9-inch pie. Adjust piping size to increase or decrease yield without changing the fundamental chemistry.
Difficulty: medium. This technique demands attention to detail, but it rewards consistency once you follow the core rules for protein stabilization and sugar dissolution.
Ingredients
4 large egg whites, at room temperature. Egg white protein structure is the backbone of foam; learn the basics at egg white.
1 cup granulated sugar (superfine/caster preferred). Sugar dissolves into the foam and strengthens it; read more on the role of sugar in confections.
- 1/4 tsp cream of tartar (or 1 tsp white vinegar) to stabilize. See the chemistry of cream of tartar.
- 1/2 tsp pure vanilla extract (optional).
- Pinch of salt.
Instructions
Start by ensuring bowls, beaters, and spatulas are perfectly clean and free from grease. Any fat presence interferes with foam formation and reduces final volume.
Separate the egg whites carefully, keeping yolk traces away. Use room-temperature whites to whip more quickly and reach full volume.
- Begin whipping: Start on medium speed until the mixture goes frothy. Add cream of tartar and salt once bubbles appear; the acid strengthens protein bonds.
- Add sugar slowly: When soft peaks form, add sugar one tablespoon at a time. Slow addition prevents grit and encourages the sugar to dissolve fully.
- Whip to glossy peaks: Raise speed to high and whip to stiff, glossy peaks. Test by rubbing a small amount between your fingers—it should feel smooth.
- Fold flavors: Gently fold in vanilla or extracts with a spatula to preserve the foam structure.
- Shape and bake: Pipe or spoon onto parchment. Dry at low heat (110°C / 225°F) for 1–1.5 hours for crisp shells. For pie toppings, quick-bake at 175°C / 350°F for 8–10 minutes to color the peaks.
For troubleshooting techniques and higher-level variations, consult our advanced meringue techniques guide. Also explore recipe variations at meringue recipes for practical examples.
Pro-Caution
Tips for Success
Use fresh or slightly aged eggs depending on your goal. Very fresh eggs give stronger whites, while eggs a few days old can yield larger volume due to lower viscosity.
Control humidity and temperature. High humidity slows drying and can cause weeping; bake meringues on dry low-heat days for best results.
Expert Insight
Whisk choice matters. Use a balloon whisk or the whisk attachment on a stand mixer for the most air incorporation. Manual whisks give you control but require stamina.
A gentle but firm folding technique preserves trapped air while distributing flavor evenly. Fold with a spatula, cutting through the center and lifting the mixture until homogeneous.
Serving Suggestions
Top a vibrant lemon tart or build a layered pavlova with whipped cream and fresh berries for an impressive dessert. The contrast between crispy shell and soft interior offers superior mouthfeel.
Garnish thoughtfully: toasted nuts, a light dusting of powdered sugar, or a restrained drizzle of dark chocolate add texture and balance. For plated desserts, pipe small quenelles to control portion and presentation.
Nutrition
Per serving (1 medium meringue) the calories come mainly from sugar. A typical serving contains minimal fat and modest protein from egg whites.
Use the nutrition facts to plan portion sizes; meringue’s light texture can mask high sugar content, so serve mindfully when catering to calorie-conscious diners.
| Nutrient | Per Serving (1 medium meringue) |
|---|---|
| Calories | 70 kcal |
| Protein | 2 g |
| Carbohydrates | 16 g |
| Fat | 0 g |
Advanced Techniques and Variations
Explore French, Swiss, and Italian meringue styles to match application and stability needs. Each technique alters when and how sugar and heat enter the system, changing stability and texture.
Swiss and Italian methods use cooked sugar syrup to create a stiffer, more stable foam ideal for buttercreams and piping. For decorative work, these methods give a longer working window and greater weather resistance.
For a deeper procedural breakdown, see our internal resource on advanced meringue techniques. For recipe ideas tailored to each method, consult meringue recipes that scale capacity and timing precisely for pro kitchens.
Context and Science
Meringue formation rests on protein denaturation and reassembly around air bubbles. Heating and acid influence these networks, which is why adding an acid like cream of tartar improves elasticity and sheen.
Read a general overview of the dessert and its history at meringue. For plated presentations and national variations, the pavlova entry offers useful perspective at pavlova (dessert).
FAQ
What makes meringue fail to whip properly?
Failure usually comes from fat contamination, cold egg whites, or dirty equipment. Ensure bowls and beaters are grease-free and use room-temperature whites to trap air efficiently.
How long should I whip the egg whites?
Whip until you reach stiff, glossy peaks that hold shape without collapsing. Stop promptly once you reach this stage to avoid overbeating and graininess.
Why add cream of tartar or vinegar?
Acids stabilize the protein network and improve elasticity. A small amount prevents foam collapse and enhances sheen, which helps peaks hold during baking and transport.
Can I make meringues on humid days?
High humidity slows drying and can cause weeping. If you must bake on a humid day, extend drying time and store cooled meringues in an airtight container with desiccant packets.
How do I fix grainy or weepy meringue?
Graininess often signals overbeating; stop and gently fold in a tiny additional amount of sugar if needed. Weeping results from undissolved sugar or trapped moisture—for baked styles, dry longer at low temperature to eliminate syrup pockets.

As you practice these steps, refine small details: bowl material, sugar granulation, and whisk timing. Controlled repetition builds consistent results and makes professional-level meringue reliably repeatable.
See also: Meringue
]]>
- Quick cook: Ready in about 25 minutes from start to finish.
- Versatile batter: Easily adapt for gluten-free or dairy swaps.
- Pro frying tips: Maintain oil temperature and fry in small batches.
- Serve hot: Crisp texture fades as they cool, so serve right away.
Overview and Origins
Hush puppies are small fried cornmeal balls rooted in Southern U.S. foodways. For historical context, see the hushpuppy (food) entry for regional background and variants.
They rely on simple chemistry: cornmeal, a leavening agent, and hot oil produce a crisp exterior and light interior. For ingredient specifics, the role of cornmeal is central to texture and flavor.
Prep and Cook Time
Preparation: 15 minutes. Cooking: 10 minutes. Total: 25 minutes.
Timing assumes active prep and frying in batches to protect oil temperature. If you make a larger batch, plan extra time to keep portions warm and crisp.
Yield
Yield is about 24 hush puppies, which serves four to six people as a side. Adjust portion sizes by scaling the batter in 50% increments for larger groups.
Keep in mind that frying multiple batches can slightly change yield due to oil absorption. Use a kitchen scale for high accuracy when planning servings.
Difficulty Level
Easy. The technique focuses on temperature control rather than advanced skills. Even beginners can achieve reliable results with a thermometer and a steady stove flame.
Experienced cooks will find room for refinement: batter chill, mix-ins, and oil type all influence the final crunch and crumb. Small changes yield measurable improvements.
Ingredients
Below is a tested ingredient list that produces consistent texture and flavor. All items are common pantry staples unless noted otherwise.
- 1 cup yellow cornmeal, stone-ground preferred
- 1 cup all-purpose flour, sifted
- 1 tablespoon baking powder
- 1 teaspoon granulated sugar
- 1 teaspoon salt
- 1/2 teaspoon black pepper, freshly ground
- 1/2 teaspoon smoked paprika (optional)
- 1/2 cup finely chopped onion (white or yellow)
- 1 cup buttermilk, at room temperature
- 2 large eggs, lightly beaten
- Vegetable or peanut oil, for frying
For dairy context, consult the buttermilk note: its acidity tenderizes the crumb and reacts with baking powder. Substitute with milk + acid if needed.
For gluten-free versions, swap a tested blend or rice flour and expect a slightly different mouthfeel. Always test a single hush puppy when changing flours.
Instructions
Follow these steps for consistent batter and controlled frying. Measure carefully and keep the batter slightly thick so spooned portions hold shape in hot oil.
Use a deep, heavy pot and a reliable thermometer to maintain 350°F (175°C). Consistent oil temperature is the single biggest factor for uniform color and non-greasy texture.
Step-by-step
Combine the dry ingredients—cornmeal, flour, baking powder, sugar, salt, pepper, and smoked paprika—in a large bowl. Whisk them until evenly distributed to avoid lumps and ensure uniform rise.
Mix the wet ingredients—buttermilk and beaten eggs—in a separate bowl. Whisk gently to combine and bring the liquids to room temperature for predictable batter behavior.
- Fold in the onion: Stir the chopped onion into the dry mix so it disperses evenly. This prevents pockets of moisture that can alter frying behavior.
- Combine wet and dry: Pour the buttermilk-egg mixture into the dry ingredients. Stir gently until just combined; a few small lumps are fine and keep the crumb tender.
- Heat the oil: Fill a Dutch oven or deep pan with 2–3 inches of oil and heat to 350°F (175°C). Use a thermometer and adjust heat to maintain temperature during frying.
- Scoop and fry: Use a small cookie scoop or tablespoon to drop rounded batter into oil. Fry in small batches to avoid temperature loss and sticking.
- Cook to color: Fry for about 3–4 minutes, turning occasionally, until evenly golden brown. Transfer to paper towels to drain and rest briefly.
- Serve immediately: Best eaten hot for maximum crispness. Keep cooked hush puppies warm on a baking sheet in a 200°F oven if you need to fry remaining batter.
Tips and Tricks for Frying Like a Pro at Home
Always check oil temperature with a probe thermometer; visual cues alone can mislead. A steady 350°F yields crisp shells and a moist interior.
Test-fry one hush puppy before completing the batch. This gives insight on texture and color and allows quick salt or temperature adjustments.
[NOTE]
Expert Insight
To vary flavor, fold in minced jalapeño, sweet corn kernels, grated cheddar, or herbs. Small additions change moisture and frying time, so adjust accordingly.
Chef’s Notes and Substitutions
Buttermilk adds acidity and flavor, but you can substitute whole milk plus 1 tsp vinegar per cup in a pinch. For vegan options, use plant-based milk and an egg replacer; texture will change.
For gluten-free batter, use a blend with rice flour and a binder like xanthan gum for structure. Dry-to-wet ratios may need slight adjustments when switching flours.
Pro-Caution
Pro-Caution: Never leave hot oil unattended. Use a heavy pot, monitor temperature, and keep a lid nearby to smother flames in case of a fire. Hot oil causes serious burns.
Serving Suggestions
Serve hush puppies alongside barbecue, fried fish, or a fresh slaw for balanced textures and flavors. They also pair well with bright sauces to cut richness.
For curated pairings, see our Southern Classics Collection and a dedicated hush puppies recipe page for menu ideas. These internal pages provide complementary recipes and side dishes.
Garnish with chopped chives or parsley and offer dips like remoulade, spicy aioli, or honey butter. Small touches lift presentation and encourage guests to sample multiple flavors.
Nutritional Snapshot
The table below shows approximate nutrients per serving (4 hush puppies). Values vary with oil type and portion size.
| Nutrient | Per Serving (4 hush puppies) |
|---|---|
| Calories | 220 |
| Protein | 5g |
| Carbohydrates | 28g |
| Fat | 9g |
Frying Safety and Technique
Deep frying relies on heat transfer; consult the deep frying page for technical fundamentals. Temperature, oil type, and pan geometry matter.
Use a heavy-bottomed pot to reduce hot spots. Maintain a steady medium-high flame and avoid overcrowding to preserve oil temperature and prevent soggy results.
FAQ
What are hush puppies and why are they called that?
Hush puppies are fried cornmeal dumplings central to Southern cuisine. Tradition says they were tossed to dogs to quiet them, which likely inspired the name.
How do I get a crisp exterior and tender interior?
Maintain 350°F oil and fry in small batches. Proper hydration of the batter and a small amount of baking powder deliver the ideal interior.
Can I make hush puppies ahead of time?
Prepare the batter up to four hours in advance and refrigerate, covered. Fry just before serving for best texture and heat.
Are there healthier cooking alternatives?
You can bake hush puppies at 400°F for about 18–22 minutes, brushed lightly with oil. They won’t match deep-fried crispness but remain tasty and lighter.
What mix-ins work well in the batter?
Chopped onions, corn kernels, jalapeños, and shredded cheese all work. Adjust moisture and salt when adding wet or salty components to the batter.
Wrapping Up
Mastering hush puppies hinges on controlling oil temperature and maintaining a balanced batter. Small adjustments and a careful test fry set you up for consistent success.
These golden bites reward experimentation and pair beautifully with many Southern main dishes. Keep notes on mix-ins and timing so you can reproduce your best batch every time.
See also: hush puppies
]]>
- Balance matters: oil, emulsifiers, and acid must integrate slowly and evenly.
- Temperature control: room-temperature ingredients reduce the risk of breaking.
- Tools count: an immersion blender or whisk plus patience yields reliable results.
- Rescue strategies: you can often repair a broken emulsion with a fresh yolk or warm water.
Understanding the Science Behind Emulsification in Mayonnaise
Mayonnaise is a classic oil-in-water emulsion where tiny oil droplets suspend inside a water phase. Lecithin and other phospholipids in egg yolks act as surface-active agents that stabilize those droplets.
For a technical primer, see the chemistry on emulsion and the role of lecithin. These pages explain droplet dynamics and how emulsifiers lower interfacial tension.
Choosing the Ideal Ingredients for Creamy and Stable Results
Start with fresh, high-quality egg yolks. The yolk provides natural emulsifiers and proteins that bind oil and vinegar into a cohesive texture; read more about the yolk structure at egg yolk.
Use a neutral vegetable oil or a light olive oil for flavor balance. Add acid—white wine vinegar or lemon juice—in measured amounts. Also, include a small amount of Dijon mustard to strengthen initial emulsification.
Ingredient checklist
2 large egg yolks, room temperature.
1 cup neutral oil (grapeseed or light olive oil preferred). Add a tablespoon of acid and a teaspoon of mustard for stability.
Techniques and Tools to Achieve Flawless Mayonnaise Every Time
Technique dictates success. Begin by whisking yolks, mustard, and acid until smooth. Then add oil extremely slowly at first to build a stable matrix.
An immersion blender in a tall jar speeds the process and reduces arm strain. Alternatively, a steady hand with a balloon whisk works well; focus on small, consistent additions of oil and even motion.
Hand method vs. blender
When whisking by hand, adopt a wide, steady stroke and keep the bowl tilted slightly toward you. That creates consistent shear and helps form uniform oil droplets.
With an immersion blender, pulse briefly and lift as the emulsion thickens to incorporate more air and prevent overprocessing. Both methods require patience.
Expert Insight
Between the hand and blender methods, choose the one that matches your comfort level. Both deliver professional-quality mayo when you respect speed and temperature variables.
Troubleshooting Common Emulsion Failures and How to Fix Them
A broken emulsion means the oil droplets aggregated and the continuous phase no longer binds them. Most failures result from adding oil too fast or from temperature mismatch.
To rescue a split mayo, place a fresh yolk in a clean bowl and add the broken mayo dropwise while whisking. Alternatively, whisk in a teaspoon of warm water to loosen texture and re-integrate phases.
Common problems and quick fixes
- Broken: Start a new yolk and slowly whisk in the broken mix.
- Too thin: Add oil dropwise while whisking until it thickens.
- Too thick: Whisk in warm water by the teaspoon to reach desired consistency.
Also, remember that acid level affects stability and taste. If separation recurs, check your acid proportion and room-temperature status of ingredients.
Pro-Caution
If a rescue fails, start over with a new yolk and gradually reincorporate the failed batch. This method restores emulsifying capacity reliably.
Chef’s Notes and Tips for Success
Consistency beats improvisation. Keep your motions steady and your pour controlled. Smaller initial oil additions create the emulsion scaffold you need to add larger volumes later.
Experiment with flavored oils or infused vinegars after you form the base. Add chopped herbs, roasted garlic, or lemon zest at the end so that these ingredients don’t interfere with emulsification during the build stage.
Vegan alternatives
Use aquafaba—the cooking liquid from chickpeas—as an egg-free emulsifier. Apply the same slow-oil addition and steady whisking principles to achieve a similar texture.
Note that plant-based mayo may differ slightly in mouthfeel but still performs well in dressings and dips when stabilized properly.
Serving Suggestions and Storage
Homemade mayo enhances sandwiches, salads, and sauces. Use it as a base for aioli, tartar sauce, or creamy dressings that benefit from its fresh flavor and texture.
Store mayonnaise in a clean jar and keep refrigerated. Use within one week for best safety and flavor. Bring to room temperature briefly before serving to recover silkiness if chilled too long.
For more technique notes and related recipes, see our internal guide on Culinary Emulsions: Techniques and Tips and explore variations at Mayonnaise Variations and Flavor Ideas.
At-Home Equipment and Safety
Use a tall jar with an immersion blender or a deep bowl with a whisk. Avoid reactive metal bowls when using acid; choose glass, ceramic, or food-safe plastic instead.
Handle raw eggs with standard food-safety precautions. While many cooks use raw yolks safely, consider pasteurized eggs if you serve vulnerable populations.
FAQ
The following questions address common points that home cooks ask when making mayonnaise. Each answer focuses on practical, tested steps.
Read these carefully and keep the rescue techniques in mind when experimenting.
What causes mayonnaise to break?
Mayonnaise breaks when oil droplets coalesce and the continuous phase fails to hold them apart. Rapid oil addition and cold ingredients are common causes. Slow addition and room temperature balance reduce this risk.
How do I repair a broken emulsion?
Start a fresh yolk in a clean bowl and whisk the broken mixture in slowly, drop by drop. Alternatively, whisk in a teaspoon of warm water to loosen and rebind phases. Both methods restore emulsifier function.
Can I use different oils?
Yes. Neutral oils like grapeseed deliver a clean flavor. Light olive oil works if you prefer some olive character. Avoid strong-flavored oils until after the emulsion forms.
Are there vegan options that match the texture?
Aquafaba mimics egg yolk’s emulsifying properties well. Use the same slow-oil addition and whisking technique. Textural differences are minor when you follow standard emulsification steps.
How long does homemade mayonnaise keep?
Refrigerated in a sealed jar, homemade mayonnaise lasts up to one week. For safety, use pasteurized eggs if serving elderly, pregnant, or immunocompromised guests.
Mastering mayonnaise transforms a simple condiment into a flexible tool in your kitchen. With controlled technique, informed ingredient choices, and rescue methods on hand, you can produce stable, silky mayo repeatedly.
| Nutrient | Per 1 Tbsp |
|---|---|
| Calories | 94 |
| Protein | 0.1 g |
| Carbohydrates | 0.2 g |
| Fat | 10 g |
See also: Mayonnaise
]]>Steaming veggies locks in bright color and a crisp-tender texture when you control cut size, timing, and finish. Use consistent pieces, preheated steam, and quick finishing techniques to avoid limp or soggy results.
- Short steam times preserve color and nutrients.
- Uniform cuts ensure even cooking and predictable doneness.
- Finish hot with fat and acid for glossy flavor and balance.
Why Steam? Science and Benefits of Steaming Veggies
Steaming heats vegetables with moist, rising vapor so they cook without direct water immersion. This reduces nutrient leaching and preserves water-soluble vitamins while keeping texture intact.
Steam transfers heat gently and evenly, which helps maintain cell structure and color. For technical context, see steaming (cooking) and how it differs from boiling and roasting.
Ingredients and Yield
This mix highlights common choices that reach crisp-tender at about the same rate when cut properly. Use broccoli, baby carrots, sugar snap peas, and zucchini to practice timing and sequence.
- 1 cup broccoli florets, cut uniform
- 1 cup baby carrots, peeled
- 1 cup sugar snap peas, trimmed
- 1 medium zucchini, sliced 1/2-inch rounds
- 1 tsp sea salt, 2 tbsp cold unsalted butter, 1 tbsp lemon juice
- 1 tbsp fresh parsley, optional pepper
Yield: Serves 4 as a side. Prep: 10 minutes. Cook: 8–12 minutes depending on density.
Prep & Timing: Cut, Group, and Schedule for Steaming Veggies
Cut vegetables to uniform size so heat penetrates evenly during steaming. Group pieces by density: roots and dense stems first, then florets, and finally tender leaves or shoots.
Use this general timing as a baseline: roots (10–12 minutes), florets (6–8 minutes), and tender greens (2–4 minutes). Adjust by a minute or two based on equipment and personal preference.
Choosing Vegetables
Pick fresh, firm produce for predictable results; avoid limp or bruised pieces that steam unevenly. Dense vegetables like carrots and large florets need longer to reach center temperature than thin slices.
For reference on common produce categories, consult the encyclopedia entry for vegetable. Root crops such as carrot respond differently to steam than airy florets like broccoli.
Step-by-Step Instructions for Steaming Veggies
Use a steamer basket, bamboo steamer, or metal insert above 1–2 inches of boiling water. Bring the water to a steady simmer before adding vegetables so steam is vigorous on contact.
Layer dense items first and add quick-cook pieces later so everything finishes at the same moment. Work quickly when you remove the lid to avoid carryover overcooking.
- Prep veg: Rinse and cut uniform pieces to promote even cooking.
- Boil water: Add 1–2 inches to the pot and heat until simmering, not rolling.
- First batch: Add dense items like carrots and large broccoli florets and steam 4–5 minutes first.
- Add quick-cook veg: Layer in zucchini and snap peas; continue steaming 3–5 minutes until crisp-tender.
- Check doneness: A fork should meet slight resistance; avoid soft, collapsing texture.
- Finish: Immediately transfer to a warm bowl, toss with cold butter and lemon to melt the fat and lock flavor.
Chef’s Notes: Practical Tips for Consistency with Steaming Veggies
Uniform cuts equal uniform cook time, so spend an extra two minutes sizing pieces. Use a kitchen timer and test with a fork rather than relying solely on clock time.
Layer denser vegetables first and add quick-cook items partway through the session. This saves energy and preserves the snap of delicate pieces.
For rapid cooling when preparing salads, plunge steamed items into an ice bath for 30–60 seconds. Shocking stops carryover cooking and preserves bright pigments.
Expert Insight
When you need an aromatic lift, add a lemon slice or herb sprigs to the water beneath the basket. Aromatics perfume the steam without wetting the vegetable surface.
Pro-Caution
Flavor Finishes and Serving Steaming Veggies
Finish steamed vegetables with a small knob of cold butter and a splash of acid such as lemon juice or vinegar. The cold fat melts and creates a glossy coating that carries flavor.
Garnish with toasted seeds, chopped nuts, or fresh herbs for texture and visual contrast. Add flaky salt just before serving to preserve surface crunch.
Advanced Techniques and Alternatives
Combine steaming with blanching to lock color for salads: steam briefly, then shock in ice water. This two-step process helps produce stable, vibrant greens for cold dishes; see blanching (cooking) for background on the method.
Bamboo steamers stack for multi-layer cooking, which suits batch work. Metal baskets fit inside pots and heat quickly; electric steamers give set-and-forget control for busy kitchens.
Tool notes
Choose equipment based on batch size and storage. If you steam often, an electric steamer improves consistency and frees up the stove for other tasks.
Bamboo steamers impart a mild aroma and are ideal for quick-sided dishes, while metal inserts heat fast and are durable for high-use environments. Match the tool to your workflow and cleaning preferences.
Nutrition Snapshot for Steaming Veggies
Steaming minimizes nutrient loss compared with boiling because vegetables avoid direct water contact. Short cook times preserve water-soluble vitamins like vitamin C and protect fiber structure.
A typical side of mixed steamed vegetables is low in calories but provides micronutrients and fiber. For context on vegetable categories and nutrition, reference the vegetable overview.
| Nutrient | Per Serving |
|---|---|
| Calories | 85 kcal |
| Protein | 3 g |
| Carbohydrates | 15 g |
| Fat | 3 g |
FAQ
Q: Why choose steaming veggies over boiling or roasting?
Steaming cooks with moist heat and limits nutrient leaching into water, so vitamin retention is higher. It also keeps vegetables tender without creating a crust or dehydrating surfaces.
For delicate greens and quick-cook items, steaming is gentler and often faster than roasting. The result is a fresher flavor and preserved texture.
Q: How do I prevent soggy vegetables when steaming veggies?
Preheat the steamer water so steam begins immediately upon adding vegetables. Avoid packing pieces tightly and remove vegetables the moment they reach desired firmness.
Drain pooled water and serve immediately, or shock in ice water for salads to stop residual steam from softening surfaces.
Q: Can I steam ahead for meal prep?
Yes. Steam until just under done, shock in ice water, and refrigerate in airtight containers. Reheat briefly by steaming or sautéing to refresh texture.
Label containers and use within 3–4 days to maintain quality and food safety. Proper cooling and storage slow bacterial growth and preserve texture.
Q: Which vegetables should I steam separately?
Group by density: dense roots and large florets benefit from separate steaming or staggered starts to avoid overcooking softer pieces. Tender greens and thin stalks should be added last or steamed separately for a few minutes.
Separating improves precision and prevents softer items from collapsing while denser pieces finish.
Q: What small tweaks make the biggest flavor difference when steaming veggies?
Finish with an acid and a small amount of fat: lemon juice plus butter or olive oil brightens flavor and improves mouthfeel. Add flaky salt just before serving to preserve crunch.
Also try toasting seeds or nuts and sprinkling them on top for texture contrast and deeper flavor. Simple toppings can transform steamed vegetables into a standout side.
Final Notes on Steaming Veggies
Consistent crisp-tender results come from uniform cuts, accurate timing, and immediate finishing. Practice with small batches to dial in your preferred point between raw snap and softness.
For further reading on steam technique and vegetable handling, consult technical references on steaming (cooking) and on individual produce pages such as broccoli and carrot. Happy steaming and enjoy the texture and flavor that precise method brings to your plate.
See also: steaming veggies
]]>
- Balance is additive: combine small amounts of sweet, acid, fat, and salt to tame bitterness.
- Texture matters: contrast soft bitter leaves with crunchy elements for greater appeal.
- Cook intentionally: heat and caramelization change bitter compounds into pleasant notes.
- Test and adjust: taste often and change one variable at a time.
Prep and Cook Time
Time management affects bitterness. Quick, high-heat techniques preserve bright bitterness; gentle, longer cooking softens it into depth. Choose your timing to match the role bitterness will play in the plate.
Prep: 20 minutes | Cook: 35 minutes | Total: 55 minutes
Yield
This recipe is written to serve four people as a side dish. The volume suits family meals and provides leftovers that actually improve with resting.
If scaling up, adjust the acid and sweeteners in small increments; they scale non-linearly compared to bulk ingredients.
Difficulty Level
Medium. The techniques are straightforward, but the judgment calls on seasoning require tasting and small adjustments. This is a great recipe to practice sensory calibration.
With basic knife skills and timing control, cooks of intermediate ability will reproduce consistent results. I recommend one trial before serving to guests.
Ingredients
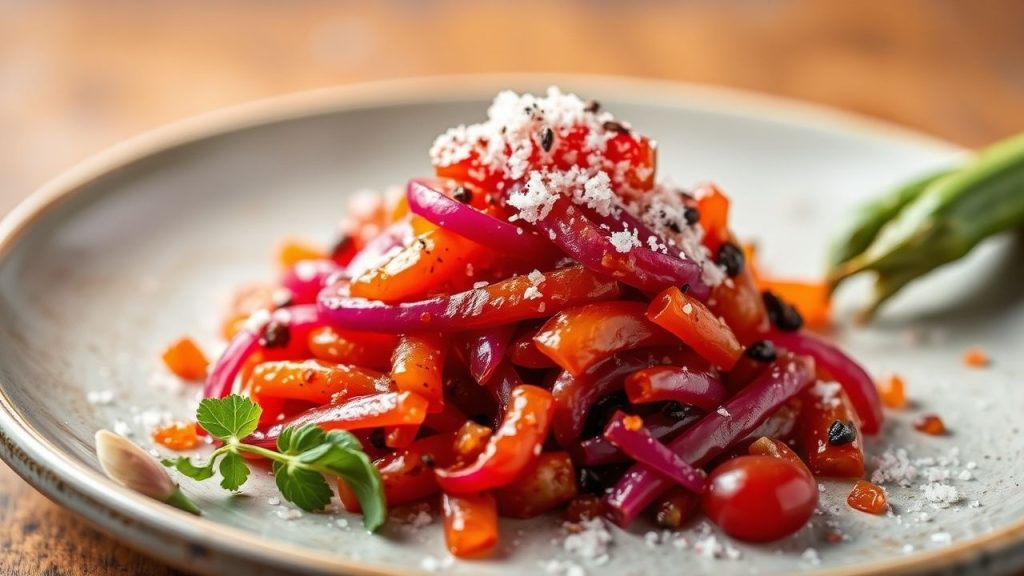
Choose fresh, firm leaves and ripe fruit. For example, radicchio delivers tight, bitter flavors when raw and becomes complex when cooked.
Quality matters: use a good olive oil and a balanced vinegar for predictable acidity. For background on bitter taste and perception, see bitterness and taste (sensation).
- 1 medium radicchio, chopped (bitterness base)
- 2 tablespoons olive oil
- 1 small red onion, thinly sliced
- 2 cloves garlic, minced
- 1 large apple, peeled and diced (sweetness enhancer)
- 1 tablespoon balsamic vinegar (acidity booster)
- 1 teaspoon honey
- 1/2 teaspoon fresh thyme leaves (herb complement)
- 1/4 teaspoon ground cumin (spice complement)
- Salt and freshly ground black pepper, to taste
- 2 tablespoons toasted walnuts, chopped (textural contrast)
- Fresh parsley for garnish
Instructions
Follow the sequence closely: extract sweetness, layer bitterness, then finish with acid and fat. Small timing changes alter the outcome significantly, so keep techniques consistent.
Taste between steps and adjust. Use the listed order to coax the best interplay between sugar, acid, and tannin-driven bitterness.
- Heat olive oil in a large skillet over medium heat. Add the red onion and sauté until soft and translucent, about 5 minutes. This draws out sugars that will counterpoint the radicchio.
- Add garlic and sauté for 30 seconds until fragrant, being careful not to burn it. Burnt garlic introduces acrid notes that clash with delicate bitter flavors.
- Stir in the radicchio and toss to coat with oil, onion, and garlic. Cook until just wilted but still vibrant, about 4 minutes. Keep stirring intermittently to ensure even heat and prevent charring.
- Add diced apple, balsamic vinegar, honey, thyme, and cumin. The apple’s sugars and honey moderate bitterness while vinegar adds brightness. For more on vinegar types, consider how aged varieties affect sweetness and acidity.
- Simmer the mixture on low for 10-12 minutes, allowing flavors to meld and bitterness to soften into a layered profile. Low heat promotes gentle breakdown of bitter compounds without losing texture.
- Season with salt and black pepper. Salt enhances perceived sweetness and reduces the sharpness of bitter compounds. Adjust gradually and taste after each addition.
- Remove from heat and transfer to a serving dish. Sprinkle toasted walnuts for crunch and fresh parsley for a clean herb counterpoint. Nuts provide a welcome textural contrast to tender greens.
- Serve warm or at room temperature, letting the nuanced bitterness reveal itself gradually across bites. Leftovers may develop more cohesion as acids integrate with sugars.
Chef’s Notes: Tips for Success
Patience matters: cook radicchio until tender but not limp to keep bitterness poised rather than aggressive. Overcooking destroys desirable texture and can flatten the flavor profile.
Swaps work well: honey can be replaced by maple syrup, and a splash of aged balsamic will read sweeter than a quick vinegar. Be deliberate with substitutes and taste as you go.
Substitutions & Flavor Layering
When substituting, match the functional role: if replacing acid, maintain similar pH and aromatic profile; if replacing sweet, match viscosity and caramel notes. This preserves the balance between elements.
Layer herbs and spices selectively. A small pinch of smoked paprika or toasted coriander can add complexity without obscuring bitterness. Use spices sparingly to avoid masking primary flavors.
Expert Insight
Serving Suggestions
Pair the dish with proteins that supply fat and umami to complement bitterness. It works well alongside roasted chicken or grilled fish where the savory elements counterbalance the greens.
Serve as a topping for toasted sourdough or alongside grains for a composed plate. For additional serving ideas and technique notes, see our internal guide at how to balance flavors in cooking and try a composed plate recipe at radicchio salad variations.
For color and contrast, add thin ribbons of carrot or scatter toasted seeds. Visual contrast encourages tasting and helps diners accept more assertive flavors.
Pro-Caution
Nutrition
Radicchio and apple provide fiber and micronutrients while the oil and walnuts supply healthy fats. This side is moderate in calories and delivers a balanced nutritional profile for a vegetable accompaniment.
Adjust portion size and added sweeteners to meet dietary needs. For example, swap honey for a lower-glycemic sweetener if required.
| Nutrition | Per Serving |
|---|---|
| Calories | 150 kcal |
| Protein | 3 g |
| Carbohydrates | 18 g |
| Fat | 8 g |
Practical Applications
Use these techniques across bitter ingredients: leafy greens, coffee-forward sauces, bitter herbs, and certain roots. The same balancing framework—sweet, acid, fat, salt—applies consistently.
Experiment with one variable at a time. For instance, add acid in 1/4-teaspoon increments while tasting to avoid overshooting the brightening effect.
FAQ
Why do some dishes taste bitter, and is bitterness always a flaw?
Bitterness comes from compounds such as flavonoids and tannins found in many plants. It is not inherently a flaw; used judiciously, it adds contrast and sophistication to dishes.
Proper balance ensures bitterness complements other tastes rather than dominating them. When managed, bitterness enhances memorability and structure.
What is the first step to mastering bitterness in cooking?
Understand the ingredient’s raw and cooked profiles by tasting at each stage. That direct sensory feedback guides how much sweetener, acid, or fat you need to add.
Create a small test batch when trying new bitter components; this reduces waste and speeds learning.
How can sweetness help tame bitterness?
Sweetness counteracts perceived bitterness by altering taste receptor balance and providing contrast. Natural sugars from fruit, honey, or caramelization work well.
Add sweet elements incrementally and prefer complex sweeteners that also carry flavor, such as maple syrup or aged balsamic.
Are acids effective in balancing bitterness?
Yes. Acid brightens and lifts bitter flavors, renewing the palate between bites. Lemon, vinegar, or tart fruit are effective options.
Apply acids at the end of cooking when possible so their volatile aromatics remain vibrant and assertive.
Can bitterness be used as a central theme in dishes?
Certain recipes celebrate bitterness as a leading note—classic examples include bitter aperitifs and regional vegetable preparations. When bitterness is the theme, build supporting elements to showcase it.
Balance becomes about accompaniment rather than suppression: pair bitter mains with bright, fatty, and textural contrasts to keep the plate engaging.
For more technical context on vinegars and aging, consult balsamic vinegar and for natural sweeteners refer to honey. These resources help you choose components that behave predictably under heat.
See also: bitterness
]]>