- Even doneness edge-to-edge: gentle heat prevents a thick gray band around the steak.
- Better crust with less moisture loss: sear after reaching target temperature to lock juices in place.
- Tools matter: probe thermometers and heavy pans improve repeatability.
At a Glance: Key Takeaways
Reverse searing uses a low-temperature oven or indirect grill to bring steaks to near-final temperature, followed by a short, hot sear. The technique emphasizes control and timing to produce consistent results.
Use a probe thermometer, choose thick cuts, and let steaks rest after searing. Mastering these elements yields a reliable medium-rare every time.
Prep and Cook Time
Preparation: 15 minutes of active prep plus 30 minutes to bring meat closer to room temperature. This step shortens the slow-cook time and promotes even heat transfer.
Cooking: 30–45 minutes low-and-slow plus 3–4 minutes of high-heat searing and 10 minutes resting. Total time normally ranges from 1 hour to 1 hour 15 minutes depending on thickness and oven efficiency.
Yield
This recipe yields 2 generous portions or 3 modest servings, depending on appetite and side dishes. Thick steaks slice into satisfying portions that hold heat well during plating.
Serving size will vary with cut and trimming; factor bone-in cuts as heavier per portion when planning quantities.
Difficulty Level
Medium: technique requires temperature control but follows repeatable rules that scale from home kitchens to professional settings. Experience improves timing but novice cooks can achieve reliable results with a thermometer.
Precision tools reduce guesswork. A digital probe or instant-read thermometer and a heavy searing pan make the difference between inconsistent and repeatable outcomes.
Ingredients
2 beef ribeye steaks, 1.5 to 2 inches thick, trimmed but with fat cap intact. Thick cuts retain moisture and develop a better crust than thin steaks.
Seasoning & finishing: kosher salt, freshly ground black pepper, garlic powder, neutral high smoke point oil, unsalted butter, fresh thyme, and smashed garlic. Keep seasoning simple to let the beef flavor shine.
Essential Tools and Reference Links
Use a reliable probe or instant-read thermometer for internal temperature feedback. A heavy cast-iron pan or other thick-bottomed skillet provides steady surface heat required for a fast Maillard reaction.
Further reading on the underlying science is useful: the Maillard reaction explains crust chemistry, and sous-vide is the precision cousin of reverse searing. See Maillard reaction, Steak, and Sous-vide for background.
Instructions
The workflow splits into two clear phases: a controlled low-temperature phase and a brief, intense sear. Consistency comes from repeating the same temperatures and timings until they suit your equipment and cut.
Follow the numbered steps below to reproduce reliable results every time. Keep sentences short and monitor temperature rather than time exclusively.
Low-and-Slow Phase (Oven or Indirect Heat)
Remove steaks from the refrigerator 30 minutes before cooking to reduce thermal shock and to let the center climb toward room temperature. Pat dry and season evenly with salt, pepper, and garlic powder to promote surface drying and even browning during the sear.
Preheat the oven to 225°F (107°C). Place steaks on a wire rack set over a baking sheet to allow air circulation. Insert a probe into the thickest part and roast until internal temperature reaches about 110–115°F for medium-rare carryover.
High-Heat Sear
Preheat a heavy skillet over high heat for several minutes until it is evenly smoking hot. Add a splash of high-smoke-point oil to coat the surface; this reduces sticking and supports fast crust formation.
Sear steaks for 1.5–2 minutes per side without moving them to develop an even, deeply browned crust. Add butter, thyme, and garlic in the last 30–60 seconds and baste continuously to finish flavor and surface sheen.
Step-by-Step Checklist
1) Room temp steak, dry surface, generous salt. 2) Slow roast to target minus 10–15°F. 3) Hot pan sear, butter baste, rest 10 minutes. These checkpoints minimize error.
Keep a log of times and temperatures for your oven and skillet; small variations change the final cook by minutes. Repeatable technique produces predictable results.
[having a separated practical tips block below]
 Expert Insight
Many cooks forget that temperature rise during resting is normal; plan removal accordingly. Use warm plates and avoid over-tenting, which can trap steam and soften the crust.
Tips for Success
Use a digital probe thermometer and track internal temperature rather than rely solely on time. Oven and pan performance vary, so temperature is the universal measure of doneness.
Choose thick steaks—ribeye, strip, or filet—from trusted suppliers. If you dry-age at home or buy dry-aged cuts, the flavor intensifies, and surface moisture reduces, improving searing performance. See our guide on dry-aging techniques for more on aging.
Trim fat wisely: a modest fat cap improves flavor and mouthfeel, but excessive hard fat can flare when searing. Render fat slowly by searing the edge against the pan for 20–30 seconds before searing faces.
Maintain a clean, very hot pan and minimal movement during the sear. A thin crust develops fastest when the meat is left undisturbed long enough for the Maillard reaction to progress.
 Pro-Caution
When finishing with butter and aromatics, remove pan from direct heat briefly if butter smokes excessively; burnt butter will impart bitter notes. Time the butter baste to the last 60 seconds of searing.
Serving Suggestions
Straight from the cutting board, slice against the grain and serve while warm. Simple accompaniments—roasted garlic mashed potatoes, sautéed broccolini, or a red wine jus—pair well without masking beef flavor.
Finish with a sprinkle of flaky salt and a small pat of compound butter if desired. Keep sides warm so the steak remains the focal point of the plate.
Nutrition
Estimated nutrition for a typical ribeye reverse-seared portion: approx. 650 kcal, 55 g protein, 48 g fat, and minimal carbohydrates. Values vary by cut, trimming, and portion size.
For menu planning, calculate per-serving values with your exact steak weight and any finishing sauces or butters added at service time.
Related Reading
Deepen technique with targeted gear articles and method guides on our site. See our resources on choosing the right thermometer and sharpening searing technique for home cooks.
Quick references: Best steak thermometers and Choosing and seasoning cast-iron pans help you pick tools that raise consistency and results.
FAQ
What is reverse searing and how does it differ from traditional methods?
Reverse searing starts with slow, gentle cooking to raise internal temperature evenly, then applies a brief, intense sear to create the crust. Traditional sear-first methods can produce a larger gradient of doneness from edge to center.
The two-phase approach of reverse searing reduces the risk of overcooking the exterior while you wait for the center to reach the proper temperature.
Which internal temperatures should I target for different doneness levels?
Aim for probe temperatures slightly below your final target because steaks rise during rest. Typical finish targets: 120–125°F rare, 130–135°F medium-rare, 140–145°F medium, 150–155°F medium-well.
Remove steaks 5–10°F below these final numbers and rest 8–10 minutes to allow carryover cooking to complete the process.
Can I use sous-vide or smokers in a reverse sear workflow?
Yes. Sous-vide is effectively a precision low-and-slow that produces exact internal doneness before a quick sear. Smokers add a flavor layer during the slow phase and still require a hot sear to form a proper crust.
For technique comparisons, review the sous-vide overview and consider smoke intensity relative to the final crust you want.
Why does the Maillard reaction matter for reverse searing?
The Maillard reaction creates the complex flavor and brown crust that define a great sear. High surface temperature for a short time encourages that chemistry without dragging moisture from the interior.
Learn more about the reaction and its role in flavor formation at the Maillard reaction page.
What tools improve consistency for reverse searing?
Reliable equipment includes a digital probe thermometer, a heavy cast-iron or thick-bottomed skillet, and an oven or grill with predictable low-temperature performance. Heavy pans maintain heat during the sear, enabling fast crust development.
See background on cookware materials such as cast iron for heat retention properties: Cast iron.
For a practical pairing guide and aging tips, read our in-depth post on Dry Aging Steak for Maximum Flavor.

Insights and Conclusions
Mastery of reverse searing comes from disciplined temperature control and consistent technique. The method reduces guesswork and yields repeatable, restaurant-quality results.
Practice with the same cuts and tools until you understand how your oven and pan behave. When you control heat precisely, the science behind the cook converts into better flavor and texture every service.
See also: Reverse sear
]]>
- At a glance: Choose direct heat for quick sears and indirect heat for gentle, even cooking.
- Use a calibrated probe thermometer to reach 165°F / 74°C without overcooking.
- Rest cooked chicken to let juices redistribute for better texture.
- Combine zones: sear on direct heat, finish on indirect for best results.
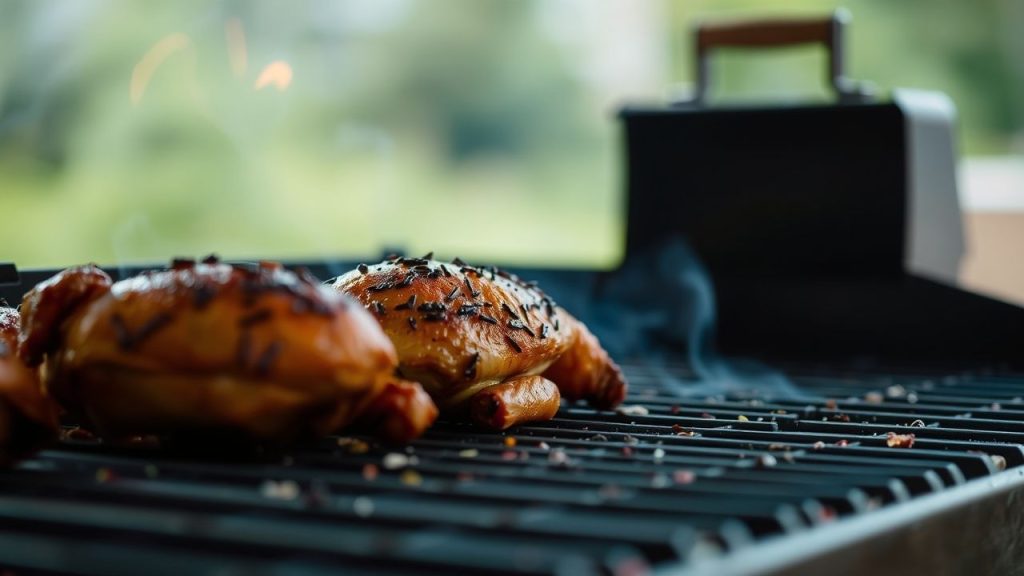
Overview and Practical Uses of Direct Heat and Indirect Heat
Direct heat delivers high, focused energy to the chicken surface and produces crisp skin and char. This approach suits wings, thighs, and small cuts that benefit from intense surface browning.
Indirect heat cooks by surrounding the chicken with warm air or radiant heat and prevents the exterior from burning while the interior comes up in temperature. Use it for whole birds, bone-in breasts, and large pieces that need time to reach a safe internal temperature.
Grilling and roasting share technical fundamentals but differ in airflow, fuel, and scale. Refer to authoritative context on grilling and roasting for technique differences and equipment choices.
Prep and Cook Time for Direct Heat and Indirect Heat
Preparation: 15 minutes is typical when you include patting dry and seasoning. Properly dried skin with a light oil coat allows direct heat to crisp quickly and predictably.
Cooking: Total cook time varies by cut and method. Direct sear times per side are short; indirect finishes take 20–40 minutes depending on size and whether you use a two-zone grill or an oven.
- Preparation: 15 minutes
- Cooking: 30-45 minutes (varies by heat method and cut)
- Total Time: 45-60 minutes
Yield
This guidance serves about four people when using four bone-in thighs or a similar weight of boneless cuts. Adjust quantities if you scale to larger gatherings or smaller appetites.
Yield depends on side dishes and portion sizes. Apply the same timing principles when cooking multiple racks on a grill or in batches in the oven.
- Serves 4 generously
Difficulty Level
Difficulty rates as medium because you must manage heat zones and use a thermometer to confirm doneness. Learning to control direct heat and indirect zones rewards careful attention more than advanced chef skills.
Home cooks can learn two-zone grilling and oven finishing quickly. Practice sequencing sear and finish stages and you will improve consistency across all poultry cuts.
Ingredients
Use four bone-in, skin-on thighs or four breasts depending on texture preference. Season simply with oil, smoked paprika, garlic powder, onion powder, dried thyme, salt, and black pepper.
Fresh herbs and lemon added after resting brighten the dish and enhance perceived juiciness. Keep seasonings balanced so the heat method expresses the chicken’s natural flavor.
- 4 bone-in, skin-on chicken thighs (or 4 chicken breasts)
- 2 tbsp olive oil
- 1 tbsp smoked paprika
- 1 tsp garlic powder
- 1 tsp onion powder
- 1 tsp dried thyme
- Salt and freshly ground black pepper, to taste
- Fresh herbs and 1 lemon for garnish and finishing
Instructions
Start by preheating and create clear hot and cool zones: for direct heat use high heat (~450°F / 230°C); for indirect heat leave one side cooler or use a 375°F (190°C) oven. Building zones gives you control over sear and finish stages.
Pat chicken dry, rub with oil, and season evenly. Let the rub adhere briefly but avoid brining or over-salting without testing first on a small piece.
Direct Heat Grilling
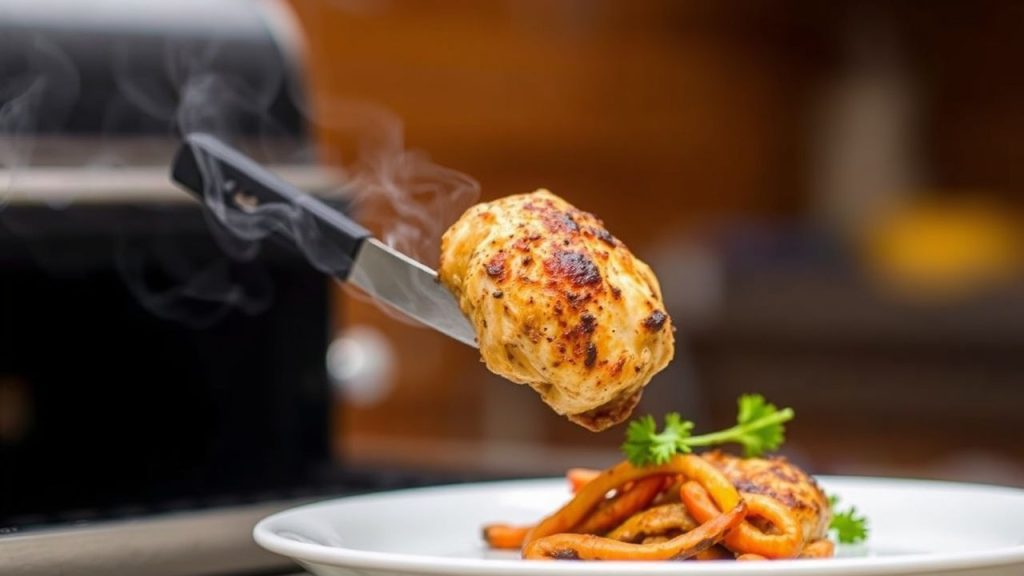
Place pieces skin side down over high heat and sear until the skin crisps and char marks form, about 5–7 minutes. Flip once and finish for another 4–6 minutes while watching for flare-ups from dripping fat.
Use tongs and move pieces off the hottest area if flames spike. A quick sear on direct heat locks surface flavor while you reserve interior cooking for the finish stage.
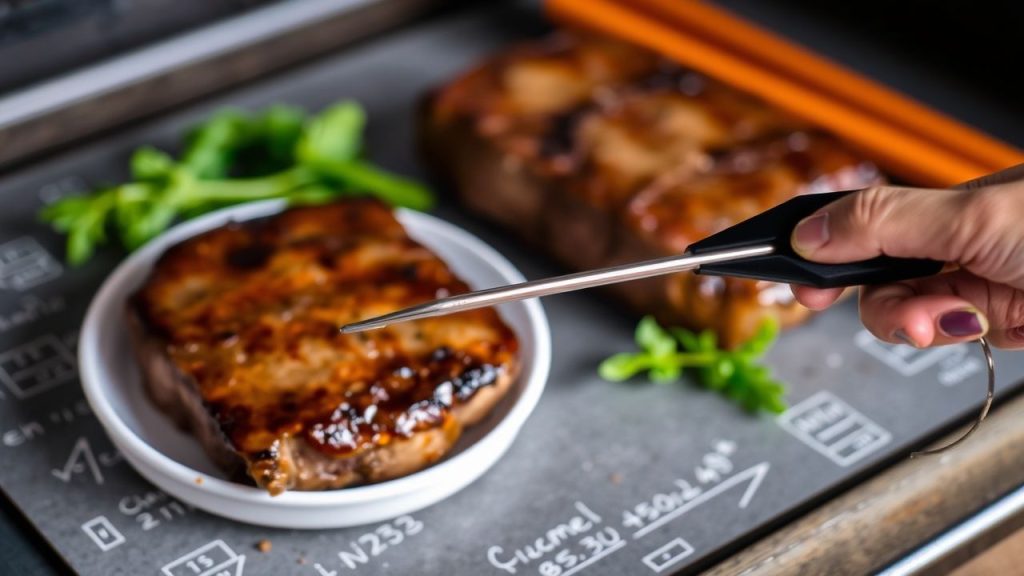
Indirect Heat Grilling or Oven Finish
Move seared pieces to the cooler zone or close the oven to let them cook gently for 25–35 minutes. Insert a probe thermometer into the thickest part to confirm 165°F (74°C) for safety.
Maintain a covered environment to encourage even heat circulation and consistent carryover cooking. Let carryover raise the final temperature slightly while resting under tented foil.
Pro-Caution
After removing from heat, tent the chicken loosely and rest for 5–10 minutes to allow juices to redistribute. Cutting immediately forces juices out and dries the meat.
Finish with lemon and herbs for brightness. Serving at the right temperature and texture improves perceived flavor without adding extra fat.
Tips for Success with Direct Heat and Indirect Heat
Choose heat by cut: Use direct heat for thin or skin-on cuts and indirect for thick or whole birds. This approach balances exterior texture and interior moisture.
Manage flare-ups by trimming excess fat and keeping a spray bottle of water or a cooler zone to move pieces into when flames spike. Predictable heat reduces burnt spots and bitterness.
- Direct heat: Quick sear, crisp skin, best for thighs and wings.
- Indirect heat: Slow cook, even internal temp, best for whole birds and large breasts.
- Hybrid method: Sear on direct heat then finish indirectly for the best balance of texture and juiciness.
Experiment with wood chips during indirect grilling to introduce mild smoke without burning the skin. Keep spice blends simple so the method remains the primary flavor driver.
Expert Insight
Serving Suggestions
Pair grilled chicken with seasonal vegetables that can share the grill or be roasted at similar temperatures. Vegetables like asparagus and bell peppers complement smoky, direct heat flavors and add textural contrast.
Light sauces such as garlic aioli or chimichurri brighten both direct and indirect preparations without overwhelming the meat. A lemon wedge and fresh parsley add a final acidic lift to the plate.
For authoritative guidance on handling and temperatures, consult food-safety references such as food safety. Follow recommended temperatures and hygiene for best results.
Nutritional Information (per serving)
| Nutritional Information (per serving) | Calories | Protein | Carbs | Fat |
|---|---|---|---|---|
| Bone-in, skin-on thigh (150g) | 280 | 26g | 0g | 18g |
| Olive Oil (1/2 tbsp) | 60 | 0g | 0g | 7g |
| Spices & herbs | 5 | 0g | 1g | 0g |
Technical Notes and Equipment
A reliable instant-read or probe thermometer is essential for precision; it removes the guesswork from timing. For details on thermometer types and calibration, review the thermometer overview.
Set up a two-zone grill when using charcoal or gas to create a hot sear zone and a cooler finish zone. This setup mimics an oven’s ambient heat while preserving the option to sear on direct heat.
Use heavy pans or a cast-iron skillet when finishing in the oven to preserve heat and encourage even cooking. Consistent contact and radiant heat reduce hot spots and speed finishing without drying the meat.
Final Notes
Mastering direct heat and indirect heat is a practical skill set that improves reliability and flavor for all poultry cooks. Consistent use of temperature checks, resting, and appropriate heat selection elevates everyday chicken to restaurant-quality results.
Adopt the routines described here and practice across cuts until the timing and behavior of your equipment feel intuitive. With repeated application you will deliver juicy, safe, and well-textured chicken every time.
See also: chicken heat | grill basics
FAQ
What is the core difference between direct and indirect heat?
Direct heat places the chicken directly above the heat source for immediate browning and crisping. Indirect heat surrounds the chicken with warm air and radiates heat gently to avoid burning the exterior.
When should I use direct heat over indirect?
Use direct heat for small, skin-on, or thin cuts that need quick browning and a crispy crust. Switch to indirect when pieces are thick, bone-in, or require time to reach safe internal temperatures without charring.
Can I combine both methods in one cook?
Yes. A common method is to sear over direct heat, then move the chicken to indirect heat to finish cooking. That combination produces both crisp skin and a moist interior.
How do I prevent flare-ups on the grill?
Trim excessive fat, keep a cooler zone to move pieces into, and use tongs to reposition items during flare-ups. A short spray from a water bottle helps control flames without dousing coals.
What internal temperature is safe for chicken?
The safe internal temperature target for chicken is 165°F (74°C) measured at the thickest point. Use a calibrated probe to confirm, then allow brief resting time for carryover stabilization.
Recommended Reading:
]]>
- Check accuracy regularly with ice and boiling tests.
- Keep ±1°F accuracy as a practical target for food safety and quality.
- Calibrate, replace batteries, and inspect probes to avoid skewed readings.
- Store and clean properly to extend service life and performance.
Choosing the Right Meat Thermometer for Reliable Readings
Selecting the correct thermometer sets the baseline for accurate cooking. Choose a device that matches the cooking technique you use most often: instant-read for quick checks, probe-style for unattended roasts, or oven probes for long cooks.
Look for a stated accuracy of ±1°F when possible and prefer probes made from food-grade stainless steel. Also consider response time, waterproof rating, and whether the unit supports field recalibration.
Types and features that matter
Instant-read digital thermometers give fast readings and are ideal for finishing steaks and chops. Probe thermometers with wired or wireless transmitters monitor internal temps during long roasts and smoking sessions.
Analog dial thermometers work, but they generally lack the precision and quick response of quality digital probes. For most cooks, a calibrated digital probe with a stainless-steel shaft provides the best balance of speed and durability.
Step-by-Step Methods to Calibrate Your Meat Thermometer at Home
Two simple lab-style checks give you verifiable reference points: an ice-water bath for the freezing point and a pot of boiling water for the boil point. Both are quick, repeatable, and require only common kitchen items.
Perform these checks on a stable surface and avoid contact with metal sides or pot bottoms. Record readings and use your device’s calibration option or note the offset if recalibration is not available.
Ice bath method (freezing point)
Fill a tall glass with crushed ice, add cold water, and stir to create an ice-water slurry. Insert the probe so it sits fully in the chilled water but does not touch the glass walls or bottom.
The accurate reference is the freezing point of water, 32°F (0°C). A properly calibrated probe should read within about ±1°F of that mark after 30 seconds.
Boiling water method (boil point)
Bring a pot of fresh water to a rolling boil and suspend the probe in the steam above the bubbles, avoiding contact with the pot sides or bottom. Wait for the reading to stabilize.
At sea level, the reference is the boiling point of water, 212°F (100°C). Adjust expectations if you cook at altitude; higher elevation lowers the boiling temperature.
Common Accuracy Issues and How to Troubleshoot Them
Temperature errors usually come from a few repeatable causes: dirty or bent probes, low batteries, or calibration drift. Diagnose quickly by running the ice and boiling tests and noting consistent offsets.
If readings shift between tests, replace batteries first, then inspect the probe for physical damage or debris. Clean the shaft with warm, soapy water and a soft cloth before retesting.
Pro-Caution
Digital units may offer a user-accessible calibration screw or menu reset. For units without calibration, track the offset and mentally correct readings, or replace the unit if the error exceeds about 2°F.
Slow response and inconsistent values
Slow response often comes from residue coating the probe. Even a thin grease film insulates the sensor and delays equilibrium. Clean and dry the probe thoroughly and repeat the check.
If results still vary, swap in fresh batteries, or try the thermometer in several different cups of ice water to confirm whether the issue is repeatable. Intermittent faults usually mean internal electronics are degrading.
Pro Tips for Maintaining and Storing Your Meat Thermometer for Longevity
Routine care keeps readings reliable. Clean the probe after every use, store the unit in its protective case, and remove batteries during long-term storage to avoid leakage and corrosion.
Handle probes gently; do not bend the shaft or drop the unit on hard surfaces. Even a small kink in a probe can change how the sensor reads temperatures.
Expert Insight
For cooks who travel or smoke outdoors, choose IP-rated or explicitly waterproof models. High humidity and temperature swings accelerate wear in non-sealed units.
Practical Uses: When Accuracy Matters Most
Poultry, large roasts, and ground meats demand precise internal temperatures to ensure safety. Conservative targets and trusted readings prevent undercooking without sacrificing juiciness.
For sous-vide and candy work, probe accuracy and calibration are essential because small temperature differences produce big changes in texture. Verify instruments before critical cooks.
For reference on safe final internal temperatures and food handling, consult reputable public guidance such as the food safety resources maintained by public health authorities.
At-Home Test Plan: A Quick Checklist
Run this checklist before any important cook: check batteries, clean probe, ice-test, boil-test, and note any consistent offsets. If offsets exceed about 2°F, recalibrate or replace.
Keep a small notebook or digital note with recorded offsets for each thermometer you own. That habit saves time and prevents guesswork during service.
For step-by-step usage of instant-read devices, see our internal guides: how to use an instant-read meat thermometer and best meat thermometers for purchasing advice.
FAQ
How often should I check my meat thermometer?
Test before any major cook and at least monthly with regular use. Physical shocks, heat exposure, and battery changes can shift accuracy, so quick checks are inexpensive insurance.
Can I trust a cheap thermometer if it passes the ice and boil tests?
Yes, a basic unit that reads accurately at both reference points can be trusted for many cooks. However, cheaper units may drift sooner and often lack rugged construction for heavy use.
Does altitude affect thermometer tests?
Yes. The boiling point of water drops as elevation increases. See the altitude relationship and adjust expectations when using the boiling test at higher elevations.
What accuracy tolerance should I accept?
A practical target is ±1°F for most cooking purposes. When safety margins are tight, such as poultry or cured meats, keep devices within that tolerance or replace them when they exceed it.
Can I use the same tests on smoker and oven probe thermometers?
Yes. The ice and boiling checks apply to oven probes, smoker controllers, and candy thermometers within their intended ranges. Confirm that the probe’s rated range includes your test points first.
Final Thoughts
Testing a meat thermometer is a low-effort, high-impact habit. Accurate readings protect health and improve flavor by preventing over- or undercooking.
Use the simple ice and boil checks regularly, maintain the probe and battery compartment, and replace compromised units. Small steps produce consistent, professional-level results in any kitchen.
See also: meat thermometer
]]>Roasting a thick cut well requires controlled heat, timing, and simple technique. When you handle each step deliberately, the result becomes a reliably tender, evenly cooked roast that impresses guests.
- Slow, steady heat yields uniform doneness through the center.
- Thermometer use removes guesswork and prevents overcooking.
- Resting locks juices and improves sliceability.
Why thickness changes everything
Thick cuts behave differently from thin steaks because heat must travel farther to reach the center. That creates a risk of a well-browned exterior with an undercooked core unless you manage temperature and time carefully.
Understanding heat transfer in meat helps you plan the roast. The surface browns via the Maillard reaction, while internal temperature rises by conduction; balance both for best results.
At the range: Prep and cook time
Allow at least one hour for the meat to come to near-room temperature; this reduces the gap between exterior and core temperatures. For many 2–4 inch roasts, plan a long, low roast of 1.5 to 3 hours followed by a short rest and a finish sear if desired.
Temperature targets matter. Pull roasts several degrees below your final target to allow for carryover heat during resting and to hit the desired doneness precisely.
Ingredients and equipment checklist
Gather a reliable probe thermometer, a sturdy roasting rack, a rimmed pan, and a heavy skillet for searing. Use coarse kosher salt, freshly cracked black pepper, whole garlic, and fresh herbs for classic flavor.
Choose marbled cuts such as ribeye or sirloin for natural basting from fat. If you prefer pork or lamb, apply the same principles: steady low heat, accurate temperature checks, and adequate resting time.
Step-by-step instructions
1. Bring to temperature: Remove meat from refrigeration at least 45–60 minutes before cooking. This reduces shock from cold and promotes even heat penetration.
2. Score and season: Pat dry, then score the fat cap lightly. Season generously with salt and pepper; for deeper seasoning, salt the roast several hours ahead and refrigerate uncovered to dry the surface for a crisper crust.
Oven method
Preheat the oven to a low setting (around 275°F / 135°C) for gradual cooking. Insert a probe thermometer into the thickest section and place the roast on a rack to allow air circulation underneath.
Roast slowly until the internal temperature reaches 5–10°F below your final target. For medium-rare, remove at about 125°F (52°C) and finish with a brief high-heat sear if you want a deeper crust.
Sear-first (reverse sear vs. traditional sear)
For maximum crust control, use the reverse-sear: roast low, then sear hot at the end. This method produces a consistent edge-to-edge color and precise doneness with a caramelized exterior.
Alternatively, sear first in a hot skillet, then finish at low oven temperature. Both methods work; choose based on available time and the crust intensity you prefer.
Basting, aromatics, and moisture control
Basting every 20–30 minutes keeps the surface moist and adds flavor, but avoid overbasting and cooling the roast with cold liquids. Use warm stock or pan juices when basting to maintain oven temperature.
Tuck sprigs of thyme and rosemary alongside the roast rather than directly under the meat to infuse aroma without burning. For added moisture retention, consider a light brine for pork or a dry-brine for beef; both techniques adjust protein structure to hold more juices.
Learn more about brining techniques from a concise reference on brining.
Resting and carving: finish like a pro
Resting is non-negotiable. Tent the roast loosely with foil and rest 15–25 minutes depending on size; this lets juices redistribute and allows carryover temperature to settle.
Slice against the grain in even 1/4-inch to 1/2-inch cuts to maximize tenderness. Use a long, sharp slicing knife or a carving knife and a steady sawing motion for clean edges.
Expert Insight
After resting, serve immediately to preserve the ideal texture. If you must hold slices, place them loosely in a shallow pan and cover; reheat gently at low oven heat to avoid further cooking.
Pro-Caution
Flavor variations and rubs
Create a rub with smoked paprika, garlic powder, and mustard powder for a savory crust. For herbed profiles, press chopped rosemary and thyme into the fat after scoring for direct infusion.
When using acidic marinades, limit contact time for tougher cuts to prevent breakdown of surface proteins that can lead to a mushy exterior. Salt-based dry rubs remain safest for long roasts.
Serving suggestions and pairings
Serve the roast with creamy mashed potatoes, roasted root vegetables, and a glossy pan jus for classic balance. Bright garnishes such as chimichurri or a lemon-herb vinaigrette cut through richness and refresh the palate.
For wine, select full-bodied reds like Cabernet Sauvignon or Malbec to match the roast’s intensity. Also consider bold beers or fortified wines for contrast.
Explore practical roasting variations in our internal guides: perfect beef roast guide and roasting techniques for step-by-step photos and timing charts.
Nutrition snapshot
Approximate nutrition per serving varies by cut and trimming level. A 4 oz serving of a trimmed ribeye roast typically contains significant protein and fat; balance portions with vegetables for a complete plate.
Use nutrition calculators or product labels for precise dietary planning, and adjust serving sizes to meet caloric goals for your meal.
| Nutrient | Per Serving (approx.) |
|---|---|
| Calories | 520 kcal |
| Protein | 45 g |
| Carbohydrates | 2 g |
| Fat | 38 g |
Final notes on mastering thick cuts
Focus on temperature control, a reliable thermometer, and patient timing to tame thick cuts. When you combine those elements, you create repeatable results and a roast that cuts clean and tastes consistent.
Study the science behind browning and moisture management, then practice on different muscles to learn how each cut responds. For more reading on cooking techniques, review the general overview of roasting.
FAQ
How long should I roast a 4 lb ribeye for medium-rare?
Roast at 275°F (135°C) and remove at about 125°F (52°C) internal temperature. Expect roughly 1.5–2.5 hours depending on oven stability and roast shape, then rest 15–20 minutes.
Do I need to sear before roasting?
Searing is optional but recommended for deeper crust and flavor via the Maillard reaction. You can sear first or use a reverse-sear after a low roast to achieve similar results with more precise internal doneness.
Can I brine a beef roast?
Dry-brining with salt works well for beef; it enhances flavor and surface dryness for better crust. Wet brining suits leaner proteins like pork; adjust times to avoid over-salting.
What temperature is safe for consuming beef?
Food safety guidelines note that ground beef requires higher internal temperatures than whole-muscle cuts. For whole cuts, target temperatures for doneness (rare to well-done) align with preferred texture and safety; use a thermometer to verify the internal temperature before resting.
How do I keep the roast moist if I need to reheat it?
Reheat gently in a covered dish at low oven heat (about 250°F / 120°C) with a splash of stock to recreate moisture. Avoid microwave reheating for large slices, as it drives out juices and creates uneven texture.
Consistent practice and careful use of tools reward you with predictable, tender results. Master these steps, and thick meat will become your most reliable centerpiece.
See also: Thick meat
]]>
- Predictable results: Control of hydration and fat gives repeatable texture and flavor.
- Simple tools: A scale and probe thermometer remove guesswork.
- Short workflow: Hydrate crumbs, mix gently, shape uniformly, and bake on a hot sheet.
- Food safety: Monitor internal temperature rather than relying on color alone.
The science of texture and moisture
Understanding why baked meatballs turn out juicy or dry starts with protein and water behavior. Heat causes protein denaturation, which firms the matrix and traps juices when done properly.
Fat renders during cooking to lubricate the interior while hydrated binders hold liquid in the center. These physical changes determine chew, collapse resistance, and slice integrity.
Ingredients for baked meatballs
Choosing the right meat blend gives the baseline for texture. Aim for an 80/20 lean-to-fat proportion in beef paired with a fattier pork to balance structure and juiciness.
Binders like eggs and hydrated breadcrumbs control moisture migration and prevent a dry crumb. Cheese, salt, and aromatics adjust flavor and influence surface browning.
Ingredient list
Assemble measured components to avoid improvisation at the mixing stage. Exact quantities promote uniform results across batches.
- 1 lb ground beef (80% lean)
- 0.5 lb ground pork
- 1/2 cup fresh breadcrumbs
- 1/3 cup whole milk
- 1 large egg, lightly beaten
- 1/4 cup grated Parmigiano-Reggiano
- 2 cloves garlic, finely minced
- 2 tbsp chopped parsley
- 1 tsp kosher salt
- 1/2 tsp freshly cracked black pepper
- 1/2 tsp smoked paprika (optional)
- Olive oil for drizzling
Prep and cook time for baked meatballs
Plan active and passive moments: hydration, shaping, and baking. Efficient sequencing cuts handling time and improves uniformity.
Preparation: 20 minutes. Baking: 20–25 minutes. Total: About 45 minutes for 1.5-inch meatballs at recommended temperature.
Yield and difficulty
This method yields roughly 24 uniform baked meatballs and serves six to eight people depending on portions. The technique rates as intermediate because of ratio attention and thermometer use.
Uniform shaping and measured times beat culinary improvisation. A scale and probe thermometer convert intuition into reproducible results.
Step-by-step baking method for baked meatballs
Follow a sequence that preserves tenderness and encourages even browning. The workflow below limits protein over-development and maximizes internal moisture retention.
Each step contains an action and a short rationale so you can adjust variables according to size and oven behavior.
- Hydrate breadcrumbs: Combine breadcrumbs and milk; let sit 5 minutes. Hydrated crumbs act as internal reservoirs and reduce dryness.
- Combine meats: Place beef and pork in a bowl and fold gently until just combined. Low-energy mixing minimizes protein tightening and chewiness.
- Add binders and seasonings: Fold in the hydrated crumbs, egg, cheese, garlic, parsley, salt, pepper, and smoked paprika until evenly distributed.
- Form balls: Weigh or size into uniform 1.5-inch spheres to ensure predictable heat penetration. Uniformity shortens checking time and improves batch consistency.
- Preheat oven: Heat to 400°F (200°C) so the exterior browns while the interior cooks through. Controlled heat promotes the Maillard reaction and flavor development.
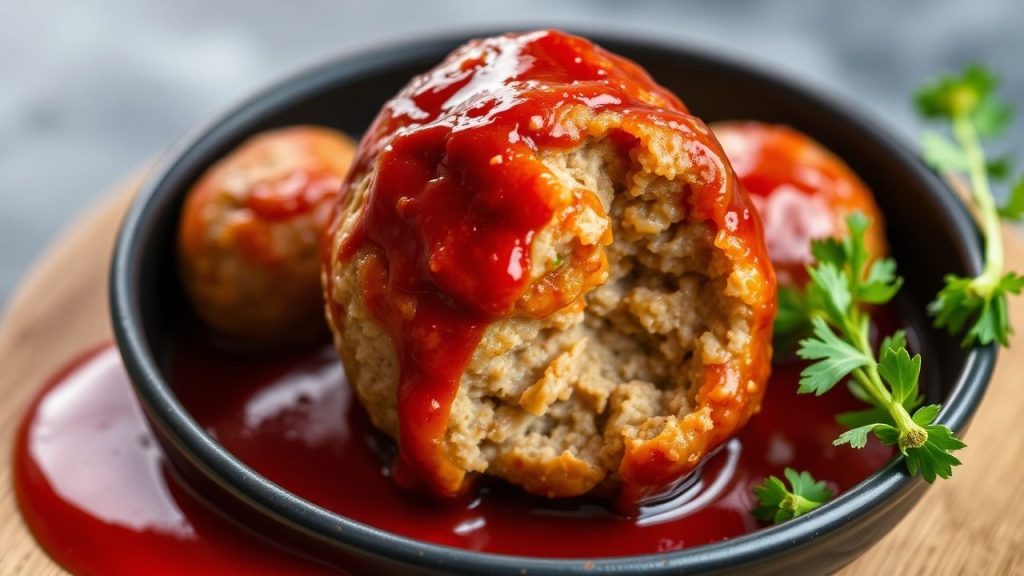
- Bake: Arrange on a parchment-lined sheet, drizzle lightly with oil, and bake 20–25 minutes. Use a probe thermometer and remove meatballs at 160°F (71°C) for safe, juicy results.
- Rest: Let meatballs rest 4–6 minutes to redistribute juices and stabilize texture. Resting reduces immediate moisture loss when cut.
Expert InsightAfter shaping, you can chill meatballs briefly or freeze them on a tray for storage. Bake from frozen but add 5–7 minutes to the time and verify temperature in several pieces.
Tips for success with baked meatballs
Small technique adjustments produce large improvements in final texture and flavor. Focus on binder hydration, gentle mixing, and accurate temperature control.
Avoid overcrowding the tray so convection and browning remain even. Rotate the sheet halfway through the bake to equalize color and heat exposure.
Pro-CautionCommon adjustments and troubleshooting
If meatballs feel dense, you likely overworked the mix. Stop mixing as soon as ingredients appear uniform to retain tenderness.
If the crust overbrowns before the center reaches temperature, lower the oven 25°F and extend time, or start on a hotter sheet then finish on a cooler rack.
Serving suggestions for baked meatballs
Serve these baked meatballs over al dente pasta, creamy polenta, or in toasted buns for sliders. Fresh herbs and a finishing cheese brighten aroma and presentation.
For restaurant-style finish, briefly broil to tighten the crust or glaze lightly with sauce and return to the oven to concentrate flavors. Finish time depends on size and oven intensity.
Nutritional snapshot
A typical serving of three medium baked meatballs contains approximately 320 kcal with a protein-heavy profile and moderate fat. Exact values depend on the meat blend and added toppings.
Use a nutrition calculator when altering meat ratios; leaner mixes lower calories but change mouthfeel and juiciness.
| Nutrient | Per Serving (3 meatballs) |
|---|---|
| Calories | 320 kcal |
| Protein | 22 g |
| Carbohydrates | 7 g |
| Fat | 22 g |
Final notes on reliability and flavor of baked meatballs
A methodical approach removes guesswork and produces repeatable results. Precise hydration, measured ratios, and thermometer use turn a home recipe into a consistent staple.
Respect ingredient function and thermal mechanics and the oven will deliver juicy interiors and caramelized exteriors. Adjust time by size and rely on temperature rather than guesswork.
FAQ
Below are focused answers to common questions about baked meatballs to help troubleshoot and refine your technique quickly.
Each answer gives practical steps and the underlying reason so you can apply the fix immediately.
What oven temperature yields the best browning without drying?
Set the oven to 400°F (200°C) for a balanced result where the exterior browns via the Maillard reaction while the interior cooks through. This temperature promotes efficient browning without excessive time in the oven.
If you see overbrowning before the center reaches 160°F (71°C), reduce oven temperature by 25°F and extend time, or move the tray lower in the oven to slow surface coloring.
How do I prevent meatballs from becoming dense?
Mix ingredients only until evenly distributed and avoid vigorous handling. Hydrating breadcrumbs and using a mix of beef and pork limit shrinkage and compressive toughness during cooking.
Chilling briefly before baking firms shape but avoid extended resting at refrigerator temperature as very cold meat can tighten and reduce tenderness.
Are baked meatballs safer than fried?
Baking reduces added surface oil and allows excess fat to render away from the meatballs on the sheet. For reliable safety, monitor internal temperature rather than cooking method alone.
Target 160°F (71°C) for ground beef and pork blends for safe consumption. Use a probe thermometer to verify temperature in several pieces to avoid undercooked pockets.
Can I scale this recipe for larger meatballs?
Yes. Increase bake time for larger diameters and rely on a probe thermometer to reach the target 160°F (71°C). Larger pieces require slower heat penetration, so monitor temperature rather than time alone.
For very large meatballs, consider lowering oven temperature by 25–50°F and extending bake time, which allows the center to reach temperature without the surface overbrowning.
What role does resting play after baking?
Resting lets juices redistribute and internal temperature stabilize, reducing moisture loss when cut. A brief 4–6 minute rest materially improves perceived juiciness and texture.
Serve immediately after resting for the best balance of warm interior and intact structure. Long resting times will cool the center and slightly firm the texture.
For related technical concepts see meat composition and general food safety guidance to align ratios and temperatures with established standards.
See also: meatball baking techniques and ratio tuning for larger batches.
See also: baked meatballs
]]>
- Accurate doneness: Remove guesswork for consistent results.
- Food safety: Reach temperatures that kill harmful bacteria.
- Texture control: Prevent dry meat and undercooked centers.
- Versatility: Use on grilling, roasting, baking, and candy work.
What a food thermometer is and how it works
A food thermometer is an instrument that measures the internal temperature of food. Most modern devices use a metal probe with a sensor that converts heat to an electrical signal and displays a temperature value.
Thermometers calibrated for cooking read quickly and give a reliable value within a few seconds for instant-read types, or monitor continuously for probe-style units. Learn more about the underlying device technology on thermometer.
Why you should use one every time
Using a thermometer removes guesswork and reduces waste. You stop overcooking proteins and preserve juiciness by targeting precise internal temperatures for each food type.
Food safety improves because you can confirm lethal temperatures for pathogens rather than relying on color or time alone. For background on illness prevention and temperature control, see food safety.
Key temperature targets to memorize
Memorize a short list of internal temperatures to speed decisions in the kitchen. Common safe targets include: poultry 165°F (74°C), pork 145°F (63°C), fish 140°F (60°C), and beef ranges where medium-rare is 130–135°F (54–57°C).
Rest time matters: carryover cooking raises internal temperature after removal. For large roasts allow 10–20 minutes rest depending on size; smaller cuts need less time. That final rise yields juicier results and predictable doneness.
Types of food thermometers
Thermometers fall into clinical groups by use case: instant-read, leave-in probe, and smart wireless devices. Choose based on cooking method, response time, and whether you need continuous monitoring.
Each type has trade-offs: instant-read gives speed, probe units give long-term monitoring, and wireless options free you to multitask while the probe watches the roast.
Instant-read thermometers
Instant-read models deliver temperatures in seconds and suit quick checks while searing or finishing a steak. Use them for thin cuts and when you need fast, actionable feedback.
They are not designed to stay in the oven for long. For slow roasts or smoking, pair instant-read checks with a leave-in probe to monitor progress between checks.
Probe and leave-in thermometers
Probe thermometers are ideal for roasts, whole birds, and smokers where continuous monitoring matters. Insert the probe into the thickest part and route the cable through the oven door or use a wireless base for remote reads.
These units help you track temperature curves and predict when to remove food and begin resting. They improve precision for large cuts and low-and-slow techniques.
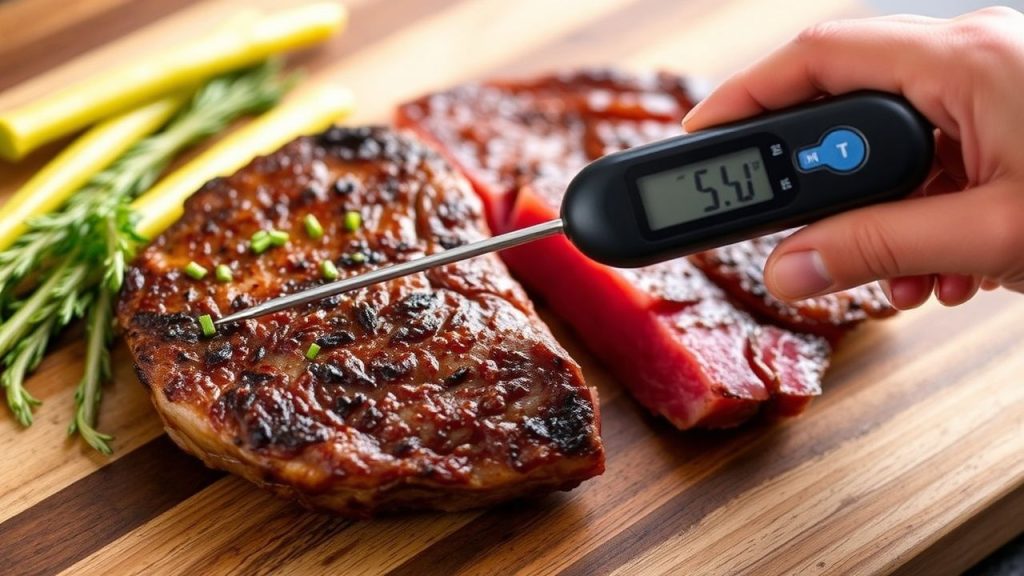
How to use a food thermometer correctly
Always insert the probe into the thickest part of the food, avoiding bone, gristle, or excess fat. For steaks and fillets insert sideways to reach the center; for whole poultry target the breast and thigh junction.
Allow the display to stabilize before recording the reading. For instant reads wait the manufacturer-specified time, usually 2–10 seconds. For leave-in probes confirm the steady reading over several minutes to detect temperature stalls.
Follow recommended targets for each protein and consider carryover rise when timing removal from heat. Use a consistent probe insertion point for repeated checks so your notes remain comparable.
Pro-Caution
Calibration, maintenance, and best practice
Calibrate thermometers periodically. The ice-point method (probe in crushed ice water at 32°F/0°C) and the boiling-point method (probe in rolling water, adjusted for altitude) require simple checks to ensure accuracy.
Clean and sanitize the probe between uses with hot, soapy water or alcohol wipes. Store in a protective sheath to avoid bending or damaging the sensor, which spoils accuracy.
Chef’s notes and practical tips
Choose the right tool for the task: a fast-response instant-read for thin cuts and a wired probe for roasts. Battery life, response speed, and probe length matter in daily use.
Keep a small kitchen log. Note temperatures, oven setup, and resting time for recurring recipes so you replicate success and learn from variation. Cross-referencing results shortens the learning curve.
Expert Insight
Serving suggestions and finishing touches
Rested proteins yield juicier slices and better mouthfeel. Slice against the grain for tender cuts and present on warmed plates so food keeps heat at the table.
Use finishing elements—compound butter, pan jus, or a light sauce—to add gloss and depth. These touches highlight the precise doneness your thermometer helped secure.
| Nutrient | Per Serving (Avg.) |
|---|---|
| Calories | 250 kcal |
| Protein | 28 g |
| Carbohydrates | 5 g |
| Fat | 12 g |
For trusted safety guidance and temperature charts consult authoritative resources. Pair your reading practice with technique guides to build confidence and reduce waste.
Explore related content like Mastering Grilling Temperatures and Kitchen Tools Guide for deeper practical steps and product recommendations.
FAQ
What is the best temperature for chicken?
Cook chicken to an internal temperature of 165°F (74°C) in the thickest part. This target ensures harmful bacteria are reduced to safe levels while keeping meat moist when combined with proper resting time.
Can I leave a thermometer in the oven?
Only use leave-in thermometers designed for continuous high-heat exposure. Instant-read devices usually cannot withstand long oven exposure. Check the manufacturer’s specifications before leaving any probe inside.
How often should I calibrate my thermometer?
Check accuracy every few months or after a drop. Use the ice-point or boiling-point methods to confirm. Frequent professional use or rough handling calls for more frequent checks.
Do thermometers work for baking and candy?
Yes. Use probe thermometers for bread and custards to verify doneness and candy thermometers for sugar stages where precise temperature defines texture. Each task requires the correct thermometer type.
Where can I learn more about cooking science?
Read focused references on technique and science. The cooking and meat pages explain fundamentals that link temperature to texture. Combine that knowledge with hands-on practice and a log of results.
Final thoughts
A food thermometer is a compact investment that upgrades results across grilling, roasting, and baking. It saves time, reduces waste, and protects health by giving you concrete temperature data instead of guesswork.
Adopt consistent probe technique, maintain your device, and keep a short set of target temperatures by memory. Your food will reward that small habit with better texture, flavor, and reliability every time.
See also: food thermometer
]]>
- Map heat visually before cooking to avoid scorch points.
- Use thermometry at multiple points for repeatable results.
- Adjust the heat source and repeat tests until readings stabilize.
Prep and Cook Time
Preparation: 10 minutes. Gather tools and pick the heat source you normally use to get realistic data.
Testing and Monitoring: 20 minutes. Run multiple short tests and record readings to spot patterns instead of single anomalies.
Yield and Difficulty
This procedure suits a single fondue pot and supports 4–6 servings when used as part of normal meal prep. Testing does not change your recipe; it only ensures even heating during service.
Difficulty is medium because accurate mapping needs patience and consistent measurement. Anyone comfortable with a probe thermometer and basic kitchen safety can perform these checks.
Ingredients and Tools
Use common items: a digital probe thermometer, small drops of vegetable oil, aluminum foil strips, and optionally thermochromic paint or liquid for visual mapping. These let you observe surface behavior and measure temperature gradients.
Choose a test medium such as 2 cups of water to simulate fondue fluid without wasting ingredients. Water prevents immediate burning and transmits heat in the same way cheese or chocolate does, giving useful comparative results.
Instructions
Run the sequence slowly and repeat each subtest once or twice to confirm findings. Keep notes and label any consistent hot zones on the pot rim or base.
Work with the same heat source settings you will use for service to ensure test results translate to real cooking conditions. Small changes in flame or electric setting create large differences in hotspot behavior.
Set up and baseline
Place the cleaned fondue pot on your usual heat source and add 2 cups of room-temperature water to cover the bottom. Insert a digital probe in the center and wait for the readout to reach a steady baseline for five minutes.
Record the center temperature and then place the probe 1–2 cm from the side to capture an edge reading. Repeat at opposite edges to build a simple thermal map of the pot interior.
Visual mapping methods
Scatter a few small drops of vegetable oil across the water surface and watch where the oil drifts; oil moves toward warmer areas and reveals circulation patterns. Oil tests are nondestructive and fast, useful for spotting lateral heat flow toward a hotspot.
For clearer visual cues, lay small strips of aluminum foil flat on the cooled interior before reheating; brighter discoloration or faster darkening indicates hotter zones. This method produces durable marks you can reference in future sessions.
Thermometric mapping
Probe temperatures at the center, mid-radius, and edge every five minutes during a controlled heat cycle. Log the data and look for consistent deltas greater than 5–8 °C, which usually indicate meaningful hotspots that affect melting.
If you use thermochromic paint or liquid for a heat map, apply it in thin sections and watch for color shifts during heating. Thermochromism gives immediate, high-resolution feedback on temperature differences across the interior surface; refer to the chemistry at thermochromism for how color change correlates to temperature.
Recording and adjustment
Log times, set points, and locations in a simple table so you can repeat tests and compare results. Consistent documentation turns one-off checks into a maintenance plan you can follow before each service.
When hotspots appear, try a diffuser plate, lower the heat setting, or shift the pot slightly on the burner and retest. For electric bases, change power settings incrementally and rerun mapping until readings converge within an acceptable band.
Tips for Success
Test in short intervals and avoid long continuous runs during the diagnostic phase to prevent accidental scorching. Short cycles expose transient hotspots and let you adjust faster without wasting ingredients.
Keep a small notebook for repeated checks and add dates so you can track changes after seasoning or maintenance work. Repeated tests after cleaning or seasoning confirm whether adjustments had the intended effect.
Expert Insight
Maintenance and Safety
Maintain pot surfaces through proper cleaning and recommended seasoning routines to avoid residue that alters heat transfer. Residue and build-up act as insulators and can produce false hotspot patterns over time.
Use a silicone mat under fuel burners and stabilize the pot on the heat source to prevent tipping and uneven contact. Stable, repeatable positioning reduces the chance of localized overheating caused by gaps or angular contact.
Pro-Caution
Serving Suggestions
Once you achieve even heating, use that stability to focus on texture control and timing during service. Consistent thermal behavior lets you keep cheese or chocolate at ideal viscosity without frequent stirring.
Pair your fondue with a curated set of dippers so guests can enjoy variety without crowding the pot. Overloading the pot can change thermal balance quickly, so serve in batches if you expect heavy traffic.
Pot Types and Heat Behavior
Different materials heat and hold temperature in distinct ways; consult material properties when choosing mitigation strategies. For an overview of the dish and its history, see fondue.
Cast iron retains and spreads heat more evenly once hot, while thin-wall stainless steel can develop hotspots faster due to lower thermal mass. For more on cast-iron behavior, read cast-iron insights and consider a heavier base to smooth peaks.
Thermal conduction and convection within the pot drive hotspot patterns; understanding basic heat transfer helps you select tests and interpret results. See heat transfer for the governing principles that predict how energy moves through fluids and solids.
Internal Resources
For related upkeep steps, consult our internal guide on kitchen tool care. That page outlines cleaning, seasoning, and storage practices that influence heating behavior.
To align testing with everyday cooking, review our basic fondue techniques before guests arrive so you test under real service conditions. Internal consistency between tests and service yields reliable results.
FAQ
What are hot spots and how do they form?
Hot spots are localized areas of higher temperature inside the pot where energy concentrates. They form from uneven contact with the heat source, variable wall thickness, or insulating build-up on the interior surface.
Which quick test is most reliable without special tools?
The oil drift test plus a shallow water boil gives fast, nondestructive feedback and highlights circulation and point heating. Combine that with foil strips to create a durable visual record.
Can seasoning or cleaning change hotspot patterns?
Yes, surface condition affects heat transfer significantly. Proper cleaning and seasoning remove insulating residue and improve thermal contact, often reducing apparent hotspots.
When should I use a diffuser plate?
Use a diffuser plate when persistent hotspots appear along one side or when using thin-walled pots on high-intensity burners. A diffuser spreads flame or element heat more evenly across the pot base.
How often should I retest my pot?
Run a quick check after any major cleaning, after long storage, or before important service events. Regular spot-checks keep your heat profile predictable and prevent surprises during service.
Applying these methods turns hotspot detection from guesswork into a routine check that fits into normal prep. Use measured tests, document results, and adjust heat sources until thermal readings match the ideal profile for smooth, consistent fondue.
See also: fondue pot
]]>