This roasted veggie quinoa salad combines nutty quinoa with caramelized vegetables for a balanced, satisfying bowl. It highlights texture contrast and bright dressing to deliver layered flavor in every bite.
- High-protein, plant-forward meal that stores well for meal prep.
- Roasting unlocks sweetness and builds savory depth without added salt.
- Easy swaps let you adapt the salad to seasonal produce or dietary needs.
This recipe uses straightforward techniques that yield consistent results even for cooks new to grains and roasting. Read on for precise timings, expert tips, and serving ideas to maximize flavor and texture.
Ingredients That Elevate the Salad
Use quality staples: well-rinsed quinoa and ripe, firm vegetables for best texture. Proper seasoning and a simple tahini-lemon dressing boost mouthfeel and balance the roasted notes.
Key ingredients: organic quinoa, bell pepper, zucchini, yellow squash, red onion, cherry tomatoes, Brussels sprouts, extra-virgin olive oil, smoked paprika, ground cumin, salt, pepper, fresh parsley, toasted pumpkin seeds, tahini, lemon, and a touch of honey or maple syrup.
For background on quinoa’s nutritional profile and cultivation, see quinoa. To understand the science behind browning and flavor development, refer to Maillard reaction.
Prep, Cook Time, and Yield
Preparation: 15 minutes. Roasting: 20–25 minutes. Quinoa cooking: 15 minutes. Total active time is under an hour when tasks run concurrently.
Yield: Serves 4–6 as a main or 6–8 as a side. Scale quinoa and vegetables proportionally for larger batches and store components separately for best texture retention.
Equipment and pantry notes
Use a medium saucepan with a tight-fitting lid for quinoa and a rimmed baking sheet for roasting. Parchment or a light film of oil prevents sticking and promotes even browning.
Keep toasted seeds and herbs separate until serving to preserve crunch and color. A microplane grater speeds dressing emulsification and releases more aromatic garlic flavor.
Step-by-Step Instructions
Follow the sequence below for reliable results: cook the quinoa first, then roast vegetables while the grain rests. Combining warm roasted veg with just-fluffed quinoa helps integrate flavors.
Work in batches if your sheet pan is small; overcrowding causes steaming rather than roasting. Remember to flip vegetables halfway for even caramelization.
1. Cook the quinoa
Rinse 1 cup quinoa thoroughly under cold water to remove saponins, which can taste bitter. Simmer in 2 cups vegetable broth or salted water for about 15 minutes, then let rest covered for 5 minutes before fluffing.
Fluff with a fork to separate the grains and retain a light, airy texture that will absorb dressing without turning mushy. For background on proper rinsing and processing, see quinoa.
2. Roast the vegetables
Preheat oven to 425°F (220°C). Toss bell pepper, yellow squash, zucchini, red onion, cherry tomatoes, and halved Brussels sprouts with 2 tablespoons olive oil, smoked paprika, cumin, salt, and pepper. Spread in a single layer on a baking sheet.
Roast 20–25 minutes, turning once, until edges brown and veggies yield to a fork. High heat encourages caramelization and concentrates natural sugars without added sweeteners.
3. Make the dressing
Whisk 3 tablespoons lemon juice with 2 tablespoons tahini, 1 tablespoon honey or maple syrup, and a minced garlic clove. Thin gradually with 1–2 tablespoons water until the dressing reaches a silky, pourable consistency.
Tahini brings creaminess and a toasted sesame note that complements roasted vegetables. For context on tahini and its culinary uses, consult tahini.
4. Combine and finish
Fold warm roasted vegetables gently into the fluffed quinoa. Pour the dressing in stages and toss lightly to ensure an even coat without breaking the vegetables.
Finish with chopped parsley and toasted pumpkin seeds for brightness and crunch. Adjust seasoning with salt and freshly ground pepper to taste.
Tips for Success
Temperature control: Use a hot oven for roasting; this maximizes browning and flavor concentration. Keep the quinoa covered during resting to ensure full hydration of the grains.
Texture management: Store dressing separately if you plan to refrigerate the salad to prevent sogginess. Add seeds and fresh herbs just before serving for peak texture and aroma.
 Expert Insight
Swap-ins are simple: roasted sweet potato, eggplant, or broccoli all work well. Match roasting times by size and density to ensure even doneness across the tray.
Pro-Cautions for Food Safety and Texture
Handle cooked quinoa and roasted vegetables promptly. Cool leftovers quickly and refrigerate within two hours to stay within safe food-handling windows.
 Pro-Caution
Serving Suggestions
Serve warm as a main or chilled as a side. Pair with warm flatbread, hummus, or a protein of choice for a complete plate. Add a lemon wedge at the table for extra brightness.
Garnish options include crumbled cheese for non-vegan diners, fresh herbs like parsley, cilantro, or basil, and a final drizzle of high-quality olive oil. For recipe ideas that complement this salad, explore our internal guides Hearty Grain Salad Ideas and Quinoa Salad Variations.
Nutritional Information (Per Serving)
This salad provides a balance of complex carbohydrates, plant protein, fiber, and healthy fats. Estimated nutrition per serving: ~320 kcal, 9 g protein, 45 g carbs, 10 g fat.
Quinoa supplies all nine essential amino acids in modest amounts, while vegetables contribute vitamins, minerals, and phytonutrients. For a high-level overview of roasting as a culinary method, see roasting.
Common Variations and Add-Ins
Add toasted nuts like almonds or walnuts for extra crunch and omega-3s. Swap tahini for plain yogurt in the dressing if you prefer a tangier, dairy-based option.
Introduce roasted chickpeas or grilled halloumi for added protein and textural interest. Seasonal herbs will change the flavor profile; basil elevates summer versions, while parsley and mint suit spring or fall preparations.
FAQ
Can I make this salad ahead of time?
Yes. Roast the vegetables and cook the quinoa up to 48 hours in advance and store each in airtight containers. Combine with dressing shortly before serving to preserve texture.
How do I keep quinoa fluffy and separate?
Rinse quinoa well, use a 2:1 liquid-to-quinoa ratio, bring to a simmer, then reduce heat and cover. After cooking, rest covered for 5 minutes and fluff with a fork to separate grains.
Which vegetables roast best for this recipe?
Firm, low-moisture vegetables like bell peppers, zucchini, squash, red onion, and Brussels sprouts roast evenly. Denser vegetables like sweet potato need slightly longer and may require larger pieces to match cook times.
Is this salad suitable for special diets?
Yes. The base recipe is naturally gluten-free and vegan when you choose maple syrup over honey. Adjust toppings like cheese or yogurt if you need a dairy-free or vegan version.
How should I store leftovers and how long do they keep?
Store salad components separately in airtight containers. Roasted vegetables and quinoa last 3–4 days refrigerated. Add fresh herbs and seeds just before serving to restore brightness and crunch.
For further reading on ingredient origins and nutritional context, consult the Wikipedia pages on bell pepper and tahini. These resources provide reliable background on key components used in this recipe.
Final Notes
This roasted veggie quinoa salad prioritizes technique: proper rinsing, high-heat roasting, and a balanced dressing deliver consistent, flavorful results. Use the recipe as a template for seasonal adaptations and flavor experiments.
Save variations and notes after your first batch to refine roasting times and dressing ratios based on your oven and produce. The method scales well and rewards simple adjustments with big flavor returns.
See also: quinoa salad
]]>
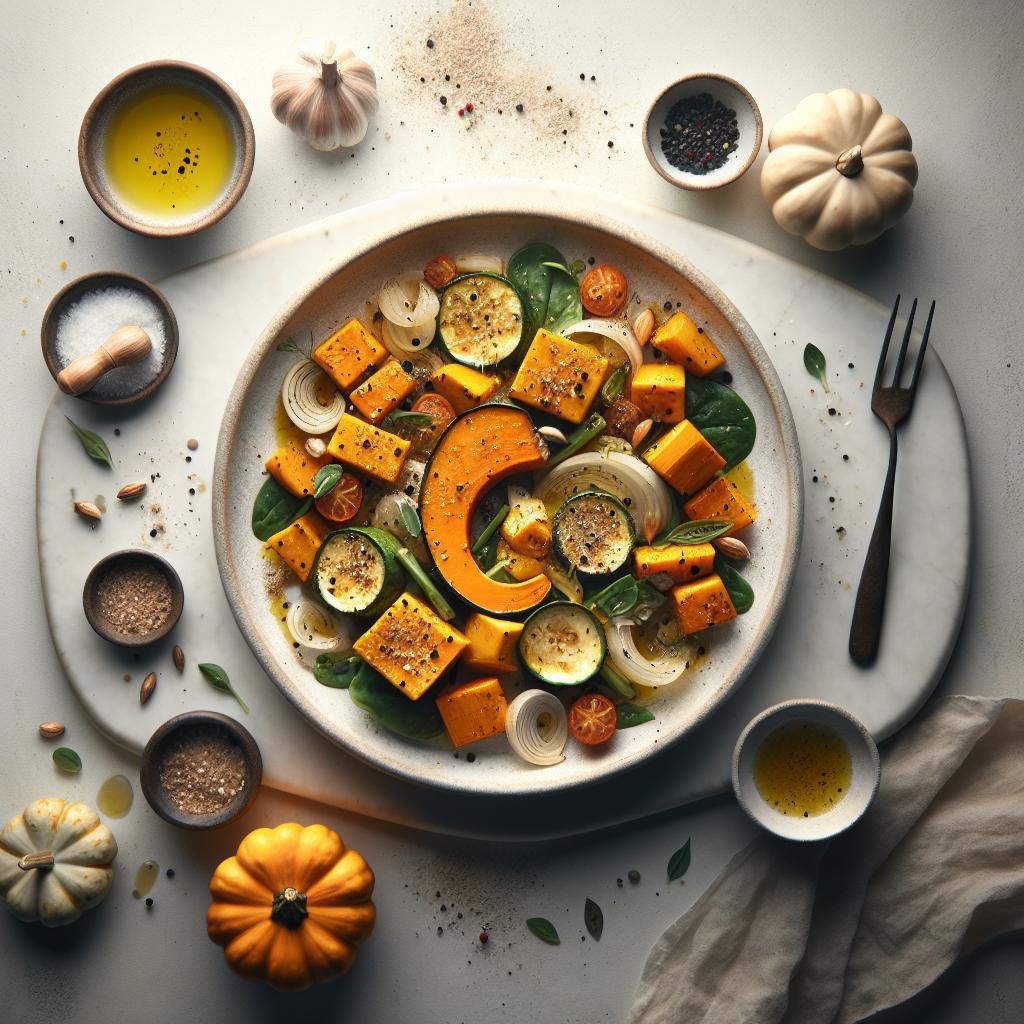
- Roast for depth: Proper high-heat roasting creates caramelized edges and deeper flavor.
- Texture balance: Combine warm squash with cool greens and crisp seeds for contrast.
- Make-ahead smart: Roast in advance but assemble just before serving to keep greens alive.
- Versatile protein: Add legumes or grains to turn this into a main course.
Prep and Cook Time
Preparation: 20 minutes. I recommend cutting squash into uniform pieces for even roasting and faster cook time.
Cooking: 35–40 minutes at high heat. That range delivers caramelization without collapsing the pieces.
Yield
This recipe serves 4 as a hearty salad. It scales well: double the squash and seeds while keeping greens light to preserve texture.
Portioning matters. Serve immediately for best contrast between warm squash and cool greens, or refrigerate for a chilled plate later.
Difficulty Level
Easy to medium. The technique focuses on simple roasting and basic knife skills, approachable for home cooks with minimal equipment.
To reduce difficulty, choose delicata or pre-cut squash. Both minimize prep and accelerate the process while preserving flavor.
Recipe
This section groups the ingredients and the method for clarity. Follow the sequence: prep, roast, toast seeds, assemble, dress, and finish.
I use a single baking sheet and one skillet for pepitas to keep clean-up minimal and workflow efficient.
Ingredients
- 2 cups butternut squash, peeled and cubed (about 1-inch pieces)
- 1 cup acorn squash, cubed
- 1 cup delicata squash, sliced into ½-inch half-moons
- 1 cup kabocha squash, cubed
- 3 tablespoons olive oil, divided
- 1 teaspoon sea salt
- ½ teaspoon freshly ground black pepper
- 1 teaspoon ground cinnamon
- 2 tablespoons pure maple syrup (optional for extra caramelization)
- 1 cup cooked quinoa (room temperature)
- ½ cup toasted pepitas (pumpkin seeds)
- ¼ cup crumbled feta cheese (optional for tanginess)
- 2 cups arugula or mixed baby greens
- 1 small red onion, thinly sliced
- Juice of 1 lemon
- 2 tablespoons fresh parsley, chopped
When I list multiple squash varieties I reference the plant genus and regional varieties for texture and sweetness. Learn more about the botanical group Cucurbita to understand how varieties differ.
Instructions
- Preheat your oven to 425°F (220°C). Line a large baking sheet with parchment paper for even roasting and easy cleanup.
- Prepare the squash mixture: In a large bowl, toss butternut, acorn, delicata, and kabocha pieces with 2 tablespoons olive oil, salt, pepper, and cinnamon. Drizzle maple syrup if you want more caramelization.
- Spread the squash evenly on the baking sheet in a single layer. Crowding causes steaming; separation yields crisp, browned edges.
- Roast for 35–40 minutes, tossing once at the 20-minute mark. Look for golden-brown edges and tender centers.
- Toast the pepitas: Heat a small skillet over medium heat and toast seeds until they pop and turn golden, about 3–4 minutes. Watch carefully to prevent burning.
- Assemble the base: In a large serving bowl, combine arugula, cooked quinoa, and thinly sliced red onion. Toss briefly so the onion distributes evenly.
- Fold in squash: Let roasted squash cool slightly, then gently fold it into the salad to keep greens from wilting too quickly.
- Dress the salad: Drizzle remaining 1 tablespoon olive oil and fresh lemon juice. Toss lightly to combine flavors without crushing the squash.
- Finish and serve: Top with toasted pepitas, crumbled feta, and fresh parsley. Serve immediately or chill briefly if preferred cold.
For a concise guide to roasting science and Maillard browning, consult practical technique notes. You can review more on the method at roasting (cooking).
Tips for Success
Choosing squash: Pick firm, heavy specimens with intact skin and no soft spots. Butternut and kabocha deliver sweetness while delicata’s thin skin can stay on for speed and nutrition.
Uniform cuts: Cut to consistent size to ensure even cooking and predictable texture. Smaller pieces brown faster; larger pieces hold structure for a salad.
Expert Insight
Layer textures thoughtfully: warm squash, cool peppery greens, chewy quinoa, and crisp seeds. That contrast makes each bite interesting and satisfying.
Vegan swap: Omit feta and use toasted walnuts or extra pepitas for richness and crunch. Legumes like roasted chickpeas add protein and texture.
Pro-Caution
If you plan to prep ahead, roast squash a day early and store airtight. Assemble just before serving to keep greens crisp and seeds crunchy.
Serving Suggestions for Seasonal Appeal
Serve this salad on a shallow platter to showcase its color and layers. Garnish with microgreens or edible flowers for a refined look at gatherings.
Pair with crusty bread or a bowl of lentil soup to round the meal. Add sliced crisp apple or pomegranate arils for acidity and jewel-like color.
For gluten-free grains, quinoa works well. Read more about the grain and its culinary use at quinoa.
Swap pepitas for toasted pumpkin seeds or chopped toasted pecans to vary flavor and crunch. For background on pepitas see pumpkin seeds.
Nutritional Information
The salad delivers a balanced macronutrient profile: complex carbs, moderate protein, and healthy fats. Squash contributes fiber and carotenoids, while seeds add plant-based fat and minerals.
Adjust portions to fit dietary needs. Remove cheese to lower saturated fat or add legumes to increase protein density for a main-course salad.
| Nutrient | Per Serving |
|---|---|
| Calories | 320 kcal |
| Protein | 8 g |
| Carbohydrates | 45 g |
| Fat | 11 g |
For additional seasonal roasted vegetable ideas, explore recipes in your collection and swap squash for roasted root vegetables when desired.
Q&A
This quick Q&A covers common technique and pairing questions. Use it as a reference while cooking or planning menus.
The answers focus on practical application and substitution options for home cooks of varying skill levels.
Q1: What makes roasted squash the star ingredient in this salad?
Roasted squash concentrates natural sugars and develops caramelized browning, contributing rich, sweet notes. That sweetness balances bitter greens and acidic dressings.
Q2: Which squash types roast best for texture and flavor?
Butternut and delicata are reliable: they roast evenly and maintain a pleasant texture. Kabocha adds a dense, nutty quality while acorn provides a subtle earthiness.
Q3: How do I prevent squash from becoming mushy?
Cut uniform pieces, avoid overcrowding the pan, and roast at high heat. Turning once mid-roast encourages even browning without overcooking interiors.
In Retrospect
Roasting transforms winter squash into a component that can anchor a composed salad or support other dishes. The method emphasizes caramelization and texture contrast.
By balancing warm squash with fresh greens, grains, seeds, and acid, you create a seasonal dish that reads as both rustic and refined.
FAQ
How far ahead can I roast the squash?
Roast up to 24 hours ahead and store in an airtight container. Reheat briefly or use at room temperature; assemble the salad just before serving to protect greens.
Can I omit quinoa?
Yes. Omit grains for a lighter side salad or substitute cooked farro, bulgur, or couscous if not gluten-sensitive. Adjust seasoning to taste after adding a different grain.
What dressing pairs best with roasted squash?
A simple lemon-olive oil dressing highlights squash sweetness. For richness, blend olive oil with a touch of Dijon mustard and honey or maple syrup for balance.
How do I store leftovers?
Keep components separate when possible. Store roasted squash and greens in separate containers for up to 3 days. Combine just before serving for best texture.
Can I roast everything on one tray?
Yes, provided pieces are uniform and you avoid overcrowding. For mixed vegetables with different cook times, stagger their addition so nothing overcooks.
See also: Roasted Squash
]]>
- Roast at high heat to maximize caramelization and crisp edges.
- Balance textures with crunchy nuts and tender greens.
- Use acid in the dressing to cut through natural sweetness.
Selecting the Perfect Sweet Potatoes for Maximum Flavor
Choose tubers with firm, smooth skin and no soft spots. Firmness indicates dense, moist flesh that will caramelize rather than dry out.
Medium-sized sweet potatoes roast most evenly; avoid oversized roots that can overcook on the exterior. Learn more about the crop and common varieties on Sweet potato.
Prep, Cook Time, Yield, and Difficulty
Preparation takes about 15 minutes; roast at 425°F (220°C) for 30–35 minutes. Plan 50 minutes total from start to finish, including brief cooling time.
This recipe yields 4–6 servings as a side or light main and rates easy for most home cooks. The method requires only basic equipment: a rimmed baking sheet, a bowl for tossing, and a whisk for the dressing.
Ingredients and Sourcing Notes
Use fresh, high-quality staples for the best result. Quality oil, fresh citrus, and well-toasted nuts matter as much as the sweet potatoes themselves.
Optional grains such as quinoa add structure and protein if you want a heartier main dish. Below are the core ingredients used in this guide.
- 4 medium sweet potatoes (about 2 pounds), peeled and cut into 1-inch cubes
- 3 tablespoons extra-virgin olive oil
- 1 teaspoon smoked paprika
- 1 teaspoon sea salt
- ½ teaspoon freshly ground black pepper
- 1 cup cooked quinoa (optional)
- ½ cup toasted pecans
- 1 small red onion, thinly sliced
- ½ cup dried cranberries
- 2 cups baby arugula
Instructions: Mastering Roasting for a Caramelized Crust
Start by preheating the oven to 425°F (220°C). High, dry heat encourages surface sugars to brown without steaming the cubes.
Toss the sweet potato cubes with oil, smoked paprika, salt, and pepper until each piece shines. Spread in a single layer on a rimmed baking sheet to allow hot air circulation and even browning.
Roasting Steps
Place potatoes on a parchment-lined or silicone-lined sheet to prevent sticking. Roast 30–35 minutes, flipping once halfway through, until pieces show deep golden edges and tender centers.
Let the potatoes cool slightly before adding to the salad so they retain crisp edges and absorb dressing without becoming soggy. Avoid overcrowding the pan; if needed, roast in two batches for the best caramelization.
Pro-Caution
Assembly: Combining Textures and Temperatures
Combine cooked quinoa, toasted pecans, red onion, dried cranberries, and arugula in a large serving bowl. Reserve the arugula until the end if you prefer its leaves very crisp.
Add the roasted sweet potatoes last, folding gently to preserve their crisp edges. Serve immediately or let warm potatoes rest a few minutes so flavors meld without wilting greens.
Creative Ingredient Pairings to Elevate Your Salad
Sweet potatoes pair well with sharp cheeses, bright fruit, and toasted seeds for contrast. Use tart elements like cranberries or pomegranate seeds to create tension against the tuber’s sweetness.
To change texture and flavor, swap pecans for walnuts or pumpkin seeds. For more on the nut commonly used here, see Pecan.
Dressing Decisions That Balance Sweetness and Tang
A citrus-forward vinaigrette brings clarity to the dish by cutting through richness. Combine acid, oil, and a touch of sweetener to complement roasted sugars without overpowering them.
Whisk the vinaigrette just before tossing so it stays emulsified and coats ingredients evenly. The dressing below hits a dependable sweet-tang balance for this salad.
- 3 tablespoons extra-virgin olive oil
- 1 ½ tablespoons fresh lemon juice
- 1 teaspoon honey (or maple syrup for vegan)
- 1 teaspoon Dijon mustard
- Salt and pepper, to taste
Chef’s Notes and Practical Tips
Choose Garnet or Jewel varieties for a deep orange hue and high sugar content; these roast to a tender, creamy interior. Smaller, uniformly sized pieces brown more consistently.
Toast nuts in a dry skillet for 3–5 minutes, watching closely; toasted nuts add crunch and a toasty aroma that lifts the salad. Store leftover roasted cubes refrigerated for up to 48 hours and re-crisp briefly in a hot oven.
Expert Insight
Serving Suggestions and Presentation
Serve the salad warm or at room temperature. Arrange it on a shallow platter so the roasted cubes and mix-ins display clearly for guests.
Garnish with chopped fresh parsley or cilantro for color contrast, and offer warm, crusty bread or grilled seasonal vegetables alongside. Presentation enhances appetite and dwell time for readers and diners alike.

Nutrition and Practical Notes
This salad provides a balanced mix of carbohydrates, healthy fats, and plant protein when quinoa is included. Serving size and add-ins will change total calories and macros.
Below is a representative nutrient snapshot per serving based on the core recipe without optional grains.
| Nutrient | Per Serving |
|---|---|
| Calories | 310 |
| Protein | 6g |
| Carbohydrates | 45g |
| Fat | 12g |
Further Reading and References
For background on leafy greens used in salads, consult the plant profile for arugula at Eruca sativa. That page explains flavor compounds and culinary uses.
To compare whole-grain additions such as quinoa, see the Quinoa entry for cultivation and nutrition context. These references support ingredient choices and dietary swaps.
FAQ
What makes roasted sweet potatoes ideal for salads?
Roasting concentrates natural sugars and creates a textured exterior that contrasts with greens. The resulting sweet-savory profile pairs well with bright dressings and crunchy elements.
Which sweet potato varieties should I choose?
Garnet and Jewel varieties deliver rich color and high natural sugar, making them ideal for caramelization. Smaller, evenly sized tubers cook more uniformly than very large roots.
Can I make the salad ahead of time?
Yes. Roast and cool potatoes a day ahead, store airtight, and reheat briefly to re-crisp. Assemble just before serving to preserve greens’ texture.
Is the salad suitable for special diets?
It naturally suits gluten-free diets and becomes vegan when you replace honey with maple syrup and omit dairy. Adding quinoa increases plant-based protein for more balanced meals.
How do I prevent soggy sweet potatoes?
Avoid overcrowding the baking sheet and roast at high temperature. Pat cubes dry after cutting and use adequate oil to promote a crisp, caramelized surface.
Final Notes
Roasted sweet potato salad rewards technique and thoughtful pairings. Focus on heat, texture, and a bright dressing to achieve balance.
Apply these methods and variations to fit your menu and season. A well-roasted cube and a balanced vinaigrette make a memorable dish that highlights harvest flavors.
See also: Sweet potato
]]>
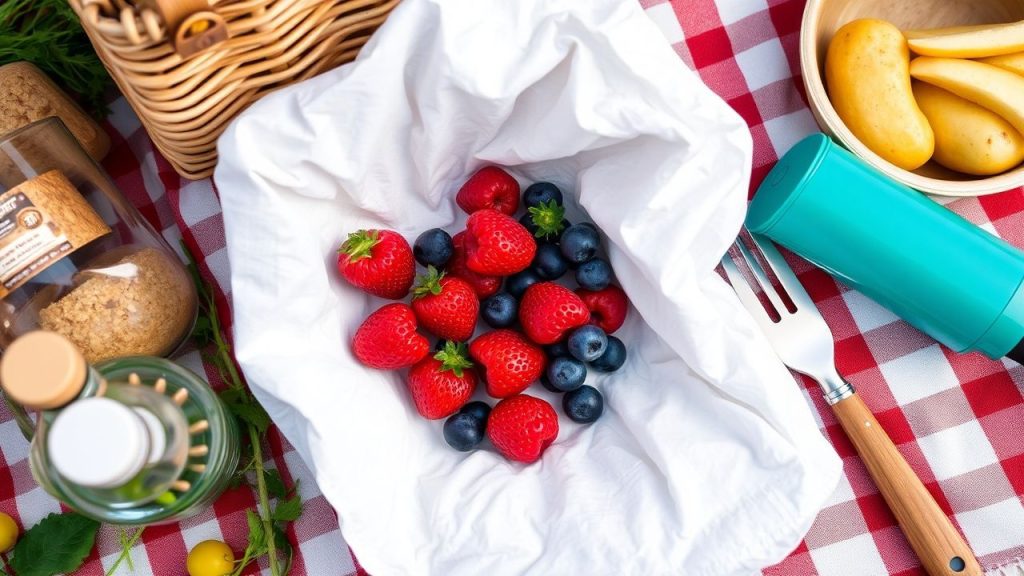
- Control pH and temperature to slow spoilage and enzymatic browning.
- Use natural antioxidants like citrus and herbs to extend color and flavor.
- Pack smart with insulated coolers and airtight containers for safe transport.
Understanding Food Preservation Chemistry for Picnic Freshness
Preservation relies on predictable chemical levers: acidity, water activity, and antioxidant presence. Controlling these variables slows microbial growth and enzymatic reactions that cause spoilage.
For example, citric acid lowers surface pH to reduce enzymatic browning in fruits. For deeper context, consult food preservation principles that underpin many traditional and modern methods.
Expert Insight
Prep and Cook Time
- Preparation: 20 minutes
- Cooking: 15 minutes
- Total: 35 minutes
Yield
- Servings: 4 picnic portions
Difficulty Level
- Easy to Medium – Practical for home cooks seeking reliable results
Ingredients
- 1 cup cooked quinoa, cooled to room temperature
- 1/2 cup cherry tomatoes, halved
- 1/4 cup fresh basil, finely chopped
- 1/4 cup diced cucumber, drained
- 1/4 cup crumbled feta cheese
- 2 tablespoons extra virgin olive oil
- 1 tablespoon fresh lemon juice
- 1 teaspoon honey
- Salt and freshly ground black pepper, to taste
- 1 teaspoon fresh rosemary, minced
- 1/2 teaspoon ground turmeric (antioxidant benefits)
Instructions
- Combine the base: Gently fluff cooked quinoa with a fork to prevent clumping.
- Add vibrant veggies: Stir in cherry tomatoes, diced cucumber, and fresh basil so ingredients distribute evenly.
- Infuse flavor and preservation: Whisk olive oil, lemon juice, honey, minced rosemary, turmeric, salt, and pepper until emulsified.
- Marinate the salad: Pour the dressing over the quinoa and toss to coat all pieces thoroughly.
- Incorporate feta: Fold in crumbled feta gently to avoid breaking the curds.
- Chill for freshness: Cover and refrigerate at least 30 minutes. The acidity and antioxidants will meld flavors and slow spoilage.
- Pack strategically: Store the salad in an airtight container and keep it cold until serving.
Packing, Temperature Control and Safety
Temperature controls drive microbial kinetics. Keep perishable items at or below 4°C (40°F) to slow bacterial growth and enzymatic reactions.
Practical tools include insulated coolers, reusable ice packs, and partitioned containers to prevent cross-contamination. For engineering context, review the physics of refrigeration which explains how heat transfer keeps food cold.
Pro-Caution
Flavor Chemistry and Culinary Techniques
Heat-driven reactions, like the Maillard reaction, create the complex aromas and brown crusts we associate with grilled foods. Controlling time and temperature optimizes flavor without overcooking.
Learn more about the underlying reaction at the Maillard reaction. Meanwhile, emulsification stabilizes dressings; an emulsion forms when you bind oil and water with a surface-active agent.
For stable picnic dressings, use mustard or egg yolk as emulsifiers. These molecules present both hydrophilic and hydrophobic ends, so they bridge oil and aqueous phases and prevent separation. A concise primer is available at the emulsion entry.
Tips for Success
- Use cooled grains: Warm quinoa raises container humidity and encourages spoilage.
- Adjust acidity: Add lemon juice when packing in heat to improve shelf life.
- Herbal antioxidants: Rosemary, thyme, and turmeric provide phenolic compounds that slow oxidation.
- Make ahead: Prepare up to 12 hours in advance for flavor melding, but keep chilled.
- Keep cold: Use insulated coolers and maintain core temperatures under 4°C (40°F).
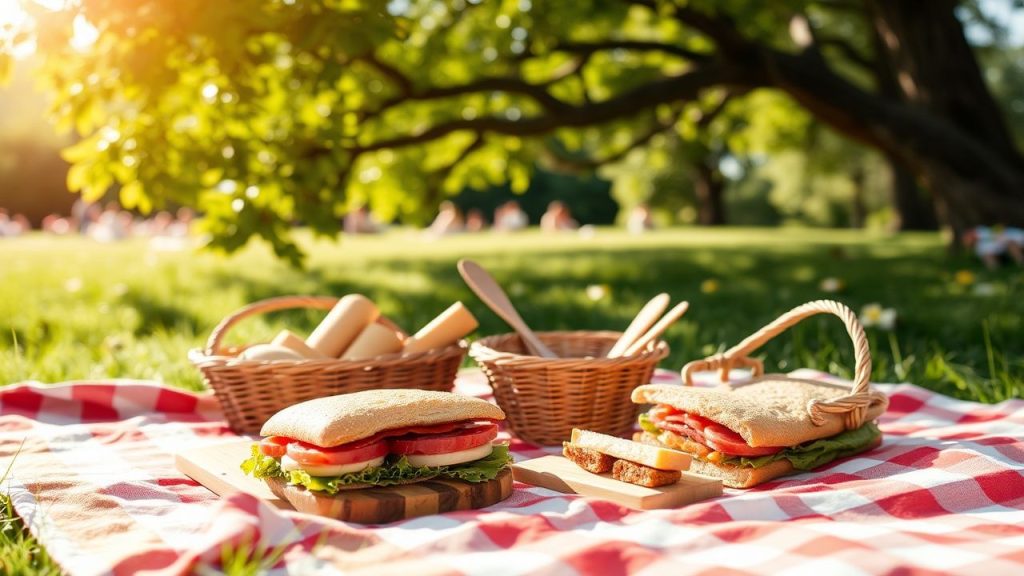
Serving Suggestions
Present the quinoa salad in clear bowls to highlight color contrast and garnish with basil leaves for aroma and visual appeal. Pair with crusty bread or grilled proteins to complete the meal.
For portion control and reduced waste, pack single-serve airtight containers. This minimizes repeated opening and limits oxygen exposure, which slows oxidative spoilage.
| Nutrient | Per Serving |
|---|---|
| Calories | 210 |
| Protein | 6g |
| Carbohydrates | 22g |
| Fat | 11g |
For readers wanting advanced packaging and temperature control techniques, focus on materials that reduce heat transfer and oxygen ingress. Practical changes extend shelf life without complex equipment.
Q&A
This Q&A addresses common chemistry questions that influence picnic safety and flavor. Each answer cites core chemical mechanisms and practical steps you can apply immediately.
Read these concise explanations to translate science into packing and recipe choices that preserve both taste and safety.
Q1: What role does chemistry play in creating delicious picnic foods?
A1: Chemistry governs texture, aroma, and color. Reactions such as the Maillard reaction generate flavor compounds during cooking, while acids and salts modulate protein denaturation and seasoning balance.
Q2: How does chemistry help keep picnic food safe?
A2: Chemistry explains how pH, water activity, and temperature promote or inhibit microbial growth. Adjusting acidity and lowering storage temperature slows microbial metabolism and enzymatic spoilage.
Q3: Why is refrigeration important, and how does it work chemically?
A3: Refrigeration reduces molecular motion and slows enzymatic and microbial reactions. Cooler temperatures thus delay spoilage reactions and extend the safe window for perishable items.
Q4: What chemistry tips help keep fruits and veggies fresh during a picnic?
A4: Prevent oxidation by reducing oxygen exposure and applying acids like lemon juice. These steps slow polyphenol oxidase activity and preserve color and texture.
Q5: Are there natural preservatives chemistry can explain?
A5: Yes. Salt and sugar lower water activity via osmosis, inhibiting microbes, while acids lower pH to discourage bacterial growth. Spices and herbs add antimicrobial phenolics that further slow spoilage.
Closing Remarks
Understanding the chemical controls behind acidity, oxidation, and temperature arms you with repeatable techniques to keep picnic foods safe and appetizing. Apply targeted adjustments and you will see measurable improvements in stability and flavor.
Next time you pack a basket, remember that deliberate choices about pH, cooling, and packaging translate directly into fewer leftovers, fewer food-safety risks, and more enjoyable meals outdoors.
FAQ
This FAQ provides quick, practical answers to the most common picnic chemistry questions. Use it as a checklist before you pack.
Each entry gives an actionable step you can implement in under five minutes.
How long can I safely keep a quinoa salad without refrigeration?
Keep the salad chilled and consume within two hours at room temperature. In hot conditions above 32°C (90°F), reduce that window to one hour to limit bacterial growth.
Does lemon juice really prevent browning?
Yes. Lemon juice supplies citric acid that lowers surface pH and inhibits the enzyme polyphenol oxidase. Apply within minutes of cutting for best results.
Can herbs and spices extend shelf life?
Herbs like rosemary and spices like turmeric contain antioxidant phenolics and volatile compounds that slow oxidation and offer mild antimicrobial effects when used in recipes.
How should I pack beverages with food?
Keep drinks in a separate cooler compartment or upright in a packed cooler to avoid spills. Maintain low temperatures to protect both beverages and perishable foods from warming.
What packaging minimizes spoilage?
Airtight containers and vacuum-sealed packs reduce oxygen exposure. Combine these with insulation and frozen gel packs to lower temperature and slow oxidative and microbial reactions.
For further reading on osmosis and moisture control mechanisms relevant to food preservation, see osmosis for a technical overview.
See also: food chemistry
]]>