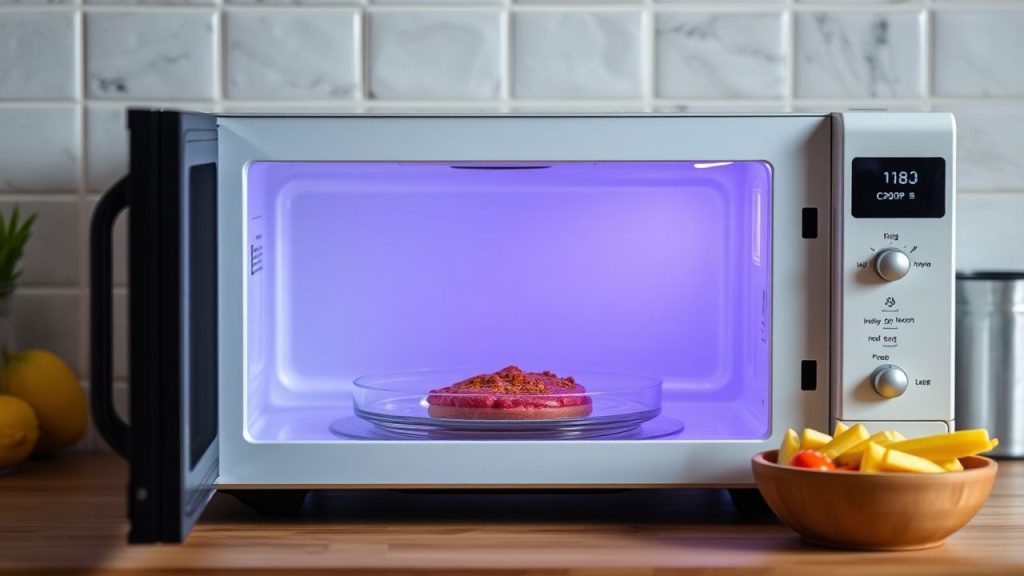
- Choose a container that matches food moisture and portion size for fastest, safest reheating.
- Tempered glass and certain ceramics balance speed and evenness for mixed plates.
- Always test a new container with a cup of water before routine use.
Prep and Cook Time for Microwave Containers
Plan reheating time around portion size and the material of your microwave containers to reduce repeated cycles. Short, repeatable bursts on high plus a brief standing time give the best results.
Typical microwave sessions for single portions run 1–3 minutes depending on power and container choice. Use lower power for dense or layered dishes to avoid cold cores.
Yield for Microwave Containers
Yield scales with container volume and shape; shallower, wider microwave containers heat more uniformly for multiple servings. A larger shallow dish reduces hotspots and shortens total run time compared with deep vessels.
When reheating for several people, split portions between identical microwave containers for even results. This tactic reduces overall time and improves food safety by eliminating cold centers.
Difficulty Level
Using microwave containers correctly is easy and repeatable with basic technique and timing. No specialist equipment is required beyond a reliable microwave-safe thermometer and proper lids.
Mastering container selection takes a few tests and simple rules of thumb that improve results immediately. Follow a consistent method to limit food degradation and protect reheating safety.
Ingredients
This practical comparison uses a representative mixed plate to test container performance under real-world conditions. Use consistent ingredients and portioning so container effects dominate the outcome.
Sample test plate: 1 cup cooked rice or pasta, 1/2 cup mixed vegetables, 1/4 cup protein, 2 tbsp oil or butter, and salt. The fat and water content in this plate reveal differences in conduction and microwave coupling between containers.
The Science Behind Container Choice
Microwave ovens project electromagnetic waves that excite water molecules inside food; containers with low moisture content typically remain cooler. For device fundamentals see microwave oven.
After electromagnetic absorption, heat moves inside food through conduction and convection driven by internal temperature gradients. For a technical primer on these mechanisms see heat transfer.
Material Properties and Heat Response
Glass and many ceramics are largely transparent to microwaves and warm mainly through contact with hot food and conduction. For background on glass as a material see glass.
Plastics vary widely in microwave behavior; some polymers absorb energy and can form hot spots or degrade over time. For polymer basics see plastic.
Instructions for Speedy Microwave Heating with Containers
Standardize portion, cover method, and power setting when comparing microwave containers to get reproducible results. Consistency reveals true material performance rather than operator variance.
Steps: assemble food in an even layer, add a little fat for moisture, cover with a vented lid, heat in short bursts, stir, and rest for 1–2 minutes. This workflow minimizes active microwave time and lowers the chance of cold cores.
Practical Testing Protocol
Test a new container by placing it next to a cup of water and running the microwave for 60 seconds on high. If the container becomes hot while the water remains cool, the vessel is absorbing energy and should not be used for direct reheating.
Document time, power, and temperature profiles for each container to build a quick reference that matches your microwave’s power output. Record the time to reach a safe internal temperature for the center of typical portions.
[having a small spacer paragraph to separate callouts so they are not adjacent]
Use a thermometer that measures center temperature to validate your routine; visual checks can miss cold spots. Accurate measurement prevents underheating and reduces food-safety risk.
[NOTE: The line above is an editorial spacer to separate callouts and ensure proper placement.]
[TESTER BREAK]
 Expert Insight
Place the tip into practice by starting with 60–90 second intervals for glass containers, depending on portion size. Then stir and measure; most mixed plates reach serving temperature with fewer cycles in glass than in some plastics.
Safety and Practicality Tips for Microwave Containers
Only use containers labeled microwave-safe and inspect them for warping, cracks, or unusual odors after heating. Replace any container that degrades; degraded polymers can leach chemicals and compromise food safety.
Avoid metallic trims or painted decorations as these elements can arc and damage the oven. For repeated use with fatty or oily foods, prefer glass or certified ceramic to protect plastic longevity and food quality.
Test cookware sensitivity by heating a water cup with the container for 60 seconds; this routine reduces surprises in daily reheating tasks. Implementing a quick test keeps the reheating workflow efficient and safe.
 Pro-Caution
When reheating dense, layered dishes in any container, program in intermediate stirring steps to prevent cold cores. Proper stirring and standing time finish heat transfer and improve evenness.
Top Container Picks for Efficiency
Tempered glass containers offer a reliable balance of heat transfer from food contact and resistance to thermal shock. Their predictable behavior often reduces total microwave time compared with some light plastics.
Ceramic vessels with microwave-safe certification retain heat after the cycle ends and excel for soups and stews. For more on ceramic properties see ceramic.
- Tempered glass: durable, even heating, and often oven-safe when rated.
- Ceramic bowls: strong heat retention; watch for metallic glazes.
- BPA-free microwave-safe plastic: lightweight and often fast, but monitor for warping and odors.
- Paper containers labeled microwave-safe: use for brief reheating tasks; expect lower retention.
Chef’s Notes: Tips for Success with Microwave Containers
Vent covers slightly to allow steam escape and encourage even steam circulation inside the container. Steam helps redistribute heat and typically shortens active microwave time.
Arrange dense items at the perimeter and softer items toward the center when possible to balance heating. This layout uses container surface area effectively and reduces reheating cycles.
Serving Suggestions
Transfer reheated food to a ceramic plate for presentation if you prefer higher table retention; the container choice for reheating and the serving plate can be different. A brief rest before serving stabilizes internal temperatures and reduces hot-spot risk.
Garnish with fresh herbs and a small drizzle of olive oil to restore aroma and mouthfeel lost during reheating. Presentation hacks improve perceived freshness and increase satisfaction without extra microwave time.
Data and Practical Metrics
Measure the center temperature and surface temperature to evaluate container performance objectively. Track average time-to-safe-temperature and required stirring steps to build a simple efficiency index for your most-used microwave containers.
Create a quick reference card listing container type, typical time per portion, and recommended power setting. Over time this card reduces trial cycles and extends container life.
FAQ
Why does container material matter when microwaving?
Material controls how a vessel absorbs or transmits microwave energy and how it conducts heat into food. That behavior changes heating speed, evenness, and the number of stirring cycles required.
Which container type heats fastest?
For mixed, moisture-rich plates, tempered glass often gives the best balance of speed and evenness because it does not absorb microwaves and heats primarily via contact. Glass typically reduces the need for repeated short cycles.
Are plastics safe for microwave use?
Use only plastics labeled microwave-safe and monitor them for signs of degradation. Replace plastics that discolor, warp, or emit odors to avoid long-term contamination and structural failure.
Does container shape change heating time?
Yes. Shallow, wide microwave containers expose more surface area and promote even heating, while deep, narrow dishes can create cold cores and require longer times. Choose shape deliberately to match dish geometry and portion size.
How do I test a new container?
Place a cup of water and the empty container in the microwave for 60 seconds on high. If the container becomes hot while the water stays cool, do not use it for reheating; the vessel is likely absorbing microwave energy.
In Retrospect
Selecting the right microwave containers is an efficient habit that cuts active reheating time and improves final texture. Prioritize certified microwave-safe glass or ceramic for mixed plates and reserve plastics for short, low-fat reheats.
Document your microwave’s behavior with each container type and use a simple checklist: test new vessels, vent covers slightly, stir midway, and verify center temperature before serving. Those steps yield safer, faster, and more consistent reheating results.
| Nutrient | Per Serving |
|---|---|
| Calories | 350 kcal |
| Protein | 18 g |
| Carbohydrates | 45 g |
| Fat | 10 g |
Internal Resource: For more on container safety and selection, consult your site’s microwave-safe materials guide and leftover storage recommendations for reheating timelines.

See also: microwave containers
]]>Turkey stew gives steady, satisfying results when you want a one-pot meal that reheats well and keeps texture. This version prioritizes juicy turkey, clearly separated rice, and a savory broth that holds up to batch cooking.
Use deliberate browning, controlled simmering, and a short rice finish to create bowls that stay appealing after refrigeration or freezing. Below you will find clear steps, practical tips, and a few advanced moves to elevate the pot.
- Key takeaway: Brown turkey and lightly toast spices to build deep savory notes before simmering.
- Key takeaway: Rinse rice and maintain a low simmer to keep grains separate and creamy.
- Key takeaway: Prefer dark meat for resilience; undercook rice slightly when planning to freeze.
- Key takeaway: Cool quickly, label portions, and reheat with a splash of warm stock to restore texture.
Understanding Texture: Why Balance Matters
A winning turkey stew balances three elements: liquid, protein, and starch. If any one element dominates, the bowl becomes soggy, mealy, or watery.
First, brown the meat to develop flavor via the Maillard reaction. Then simmer gently so the turkey becomes tender without breaking down the rice later.
Recipe Overview
This recipe yields about six servings and scales well for batch cooking. Expect about 15 minutes prep and roughly 45 minutes active cooking, depending on your equipment.
The method splits into three stages: sear for flavor, low simmer to tenderize, and a final short cook to finish rice. Monitor simmer intensity instead of watching the clock; cookware varies.
Ingredients
Choose fresh, high-quality ingredients for the best result. Use low-sodium stock to control seasoning and boneless turkey thighs for moisture retention.
Adjust spicing and rice type to match your pantry. If you substitute brown rice, increase liquid and time accordingly.
- 1 lb boneless, skinless turkey thighs, cut into 1″ pieces
- 1 cup long-grain white rice, rinsed and drained
- 1 large yellow onion, finely diced
- 3 cloves garlic, minced
- 2 medium carrots, thinly sliced
- 2 stalks celery, sliced
- 1 can (14.5 oz) diced tomatoes, drained
- 4 cups low-sodium chicken stock
- 2 tbsp olive oil
- 1 tsp smoked paprika
- 1 tsp dried thyme
- ½ tsp ground cumin
- 1 bay leaf
- Salt and freshly ground black pepper, to taste
- Fresh parsley, chopped for garnish
Step-by-Step Instructions
Read all steps before you begin. A quick mise en place prevents last-minute scrambling and keeps rice from overcooking.
Use a heavy-bottomed pot for even heat and to capture the fond—the browned bits that concentrate flavor when deglazed.
- Heat oil over medium in a large heavy pot. Add turkey in a single layer and sear until golden on each side, about 6–7 minutes total; work in batches if needed to avoid steaming.
- Set seared turkey aside. Add onion, carrots, and celery to the same pot. Sauté until softened, about 4–5 minutes, scraping browned bits between turns.
- Toast spices. Stir in garlic, smoked paprika, thyme, cumin, and bay leaf. Cook for 30–60 seconds to bloom the spices and release their aroma.
- Deglaze and simmer. Return the turkey, add drained tomatoes and 4 cups of stock, and bring to a gentle boil while scraping up fond. Then lower heat to a steady, low simmer.
- Tenderize. Cover and simmer for 25 minutes to make the turkey fork-tender and marry flavors. Avoid a vigorous boil to protect texture.
- Add the rice. Stir in rinsed rice, distribute it evenly, then cover and cook 18–20 minutes until rice is tender but not mushy. Keep heat low and resist frequent stirring.
- Finish and season. Remove the bay leaf, taste, and adjust salt and pepper. If the stew sits too thick, stir in a splash of warm stock to loosen the consistency.
- Garnish and rest. Let the pot rest off heat for a few minutes, then top with chopped parsley before serving.
Techniques That Make the Difference
Small technique choices create big improvements. For instance, rinsing rice removes surface starch so grains cook more independently and the broth holds a pleasant body.
Also, sear meat in batches. Overcrowding forces steam and prevents proper browning. After searing, deglaze to reclaim the fond and fold that concentrated flavor back into the stew.
Expert Insight
When you add rice, maintain a low, steady simmer. Rapid boiling disrupts starch granules and turns grains sticky. Lift the lid only to check doneness near the end.
Pro-Caution
Serving, Cooling, and Storage
Serve turkey stew with crusty bread, a bright salad, or roasted vegetables for a balanced plate. Fresh herbs and a squeeze of lemon brighten heavy flavors.
Cool leftovers quickly and store in airtight containers. Refrigerate up to 3 days or freeze up to 3 months. If freezing, undercook rice by 1–2 minutes so reheating finishes the grain without turning it mushy.
Variations and Advanced Moves
To deepen umami, add sautéed mushrooms or finish with a splash of dry white wine during deglazing. Both moves layer complexity without masking the turkey.
For whole-grain rice, increase the stock by 1/2 cup and simmer 10–15 minutes longer. Monitor texture closely because brown rice absorbs liquid more slowly and changes the stew’s viscosity.
Nutrition and Ingredient Notes
Turkey is a lean protein choice from the broader poultry family. Using thighs balances moisture and flavor while keeping saturated fat low compared with many red meats.
Rice supplies carbohydrates and structure. For technical context on rice varieties and behavior during cooking, consult the rice overview.
Your broth affects both taste and mouthfeel. Start with low-sodium stock and finish seasoning at the end. See the stock (food) entry for how different stocks influence a stew.
Kitchen Equipment and Heat Control
A heavy-bottomed pot distributes heat evenly and helps you sustain a gentle simmer. Thin pans encourage hot spots and uneven cooking.
Keep heat moderate for browning and drop to low for the simmer. You can briefly increase heat to bring the pot to a boil, but maintain a steady low simmer for the majority of the cook.
FAQ
What rice cooks best in turkey stew?
Long-grain white rice yields separate, fluffy grains when rinsed and simmered gently. Short-grain varieties will produce a creamier, stickier body. Choose based on the texture you want.
Can I use turkey breast instead of thighs?
Yes, but breast meat cooks faster and dries more easily. If you use breast, reduce the initial simmer and add the meat later to preserve juiciness.
How do I reheat frozen portions without losing texture?
Thaw overnight in the fridge when possible. Reheat gently on the stove with a splash of warm stock, stirring minimally to avoid breaking the rice grains.
Is this recipe gluten-free?
Yes, if you use certified gluten-free stock and verify your spice blends. The core ingredients—turkey, rice, vegetables, and stock—are naturally gluten-free.
How can I boost savory depth without adding salt?
Add umami-rich ingredients like sautéed mushrooms, a splash of soy sauce (or tamari for gluten-free), or a small amount of anchovy paste. Deglazing the pot well also concentrates flavor without more sodium.
See also: Turkey Stew
]]>The microwave is the fastest tool in a kitchen, but speed alone does not guarantee good texture or safe results. Mastering microwave power lets you control heat delivery and avoid common problems like dry proteins or cold centers.
- Use the right power for the job: lower power heats evenly, high power heats fast.
- Stir and rest: mid-cycle stirring and short rests reduce hot spots.
- Adjust for wattage: match times to your microwave’s watt rating.
Why Power Levels Matter
Power settings change how the microwave cycles energy, not the frequency of the waves. That difference affects heat distribution inside food and determines texture outcomes.
Understanding this principle reduces overcooking and improves safety. For technical context, read the microwave oven entry for fundamentals on how these appliances emit energy.
Prep and Cook Time
Preparation: 5 minutes for setup and safety checks. Keep tools and thermometer ready.
Cooking: Times vary by recipe and wattage, typically 1 to 10 minutes. Use incremental timing and checks to avoid overcooking.
Yield and Difficulty
Yield is recipe-dependent; most example dishes serve 2–4. Adjust ingredients and times proportionally for larger portions.
Difficulty: Easy to medium. Achieving reliable results requires practice and observing how your microwave responds.
Ingredients and Tools
Use microwave-safe containers, a cover or vented lid, and a thermometer for precise results. Include water or broth for steaming vegetables or maintaining moisture.
Keep paper towels and short-handled utensils on hand to stir or check food. If you want technical reading, consult heat transfer resources for how heat moves through food.
Instructions
Step 1 — Identify your microwave’s wattage and settings. Check the sticker inside the cavity or the manual. Match the appliance wattage to timing charts for accuracy.
Most controls use percentages that represent duty cycle. For example, 50% often means the magnetron runs half the time and rests half the time.
Matching Power Levels to Food Types
Full power (90–100%): Use for boiling water and quick-cook items like thin soups or reheating beverages. High power produces rapid heating that suits low-mass liquids.
Medium (50–70%): Best for casseroles, dense vegetables, and most proteins. Medium power lets heat penetrate without overcooking the exterior.
Low (10–30%): Ideal for defrosting, softening butter, or melting chocolate. Low power prevents partial cooking while thawing or gently warming delicate components.
Practical note: If you drop from 100% to 50%, expect roughly double the time to reach the same internal temperature, but results are gentler and more uniform.
Mid-Cook Habits for Even Results
Pause mid-cycle to stir or rotate food when possible. This habit reduces cold spots and balances moisture distribution across the dish.
Allow a 1–2 minute rest after cooking so residual heat equalizes. The internal temperature will continue to rise slightly during that time.
Chef’s Notes: Practical Techniques
Avoid dense layering of food in a single dish; spread items in a shallow, even layer for uniform exposure to microwave energy. Thicker sections need longer times at lower power.
Place denser items toward the outside of the dish if you want them hotter; center pieces receive less direct energy. Adjust placement and timing based on testing.
Expert Insight
Microwave cookware matters. Glass, ceramic, and labeled microwave-safe plastics perform differently. Avoid metal and untested containers to prevent sparks and uneven heating.
Pro-Caution
Serving Suggestions
Finish microwaved vegetables with a splash of acid or a drizzle of oil to restore brightness and mouthfeel. Small touches improve perceived quality without extra cook time.
For reheated meals, add fresh garnishes such as herbs or grated cheese to refresh aroma and texture. These finishing steps enhance presentation and flavor immediately.
Time and Power Quick Reference
Use the following as a starting point; always test and adjust to your microwave’s wattage. These ranges assume a 1,000 W baseline and standard portion sizes.
Examples: Defrost chicken (30% power, 6–10 minutes per pound, rotate), Reheat rice (70% power, 60–90 seconds), Steam vegetables (70% power, 2–4 minutes with 1 tbsp water).
Common Problems and Fixes
Rubbery eggs often result from high power applied too long; reduce to medium-low power and extend time slightly. Stir eggs mid-cook for even texture.
Cold centers in dense casseroles mean power was too high. Cut cooking into shorter intervals at medium power and stir or rearrange contents between intervals.
Safety and Food Handling
Follow safe handling steps to avoid cross-contamination and undercooking. For meat and poultry, verify internal temperature reaches safe levels before serving.
Refer to authoritative food safety guidance for temperature targets and recommendations; see the food safety overview for general principles and links to standards.
Tools and Accuracy
A digital instant-read thermometer increases reliability when testing meats and casseroles. Thermometers remove guesswork and reduce food waste due to overcooking.
If you want to compare power numerically, check the appliance’s watt sticker and consult the watt unit description for understanding how output relates to time.
Serving Sizes and Nutrition
Nutrition varies widely by recipe; consider portion control and ingredient choices when planning meals. Microwave cooking does not significantly change macronutrient profiles compared to other methods.
Use balanced plates with vegetables, lean protein, and whole grains to ensure a nutritious meal. Microwaving can make quick, healthy meals more accessible with minimal oil.
| Nutrient | Per Serving | Notes |
|---|---|---|
| Calories | Varies | Adjust portion size for control |
| Protein | 10–30 g | Higher for meats, moderate for vegetables |
| Carbohydrates | 15–40 g | Depends on dish type |
| Fat | 5–15 g | Use healthy oils for enhancements |

To build reliable routines, keep a short log of settings and times for favorite dishes. Note container type and portion size so you can replicate results repeatedly.
Visit our internal guides for practical examples and timing charts: microwave meal prepping and microwave wattage and power guide for step-by-step tables you can use with your model.
FAQ
How do I know my microwave’s wattage?
Check the label inside the door or the back of the unit; manufacturers usually list watts there. If no label exists, consult the user manual or model lookup online.
Knowing wattage helps convert published times to your machine. Many timing charts assume 800–1000 W as a baseline.
Can I defrost meat safely in the microwave?
Yes, if you use low power and rotate frequently to prevent partial cooking. Aim for incremental thawing and cook immediately after defrosting.
Always check that meat reaches safe internal temperatures during the subsequent cook step to ensure food safety.
Why does food sometimes heat unevenly?
Uneven heating comes from density differences and microwave standing wave patterns. Stirring and resting help even out temperatures.
Using a turntable and arranging food in a shallow, even layer reduces hot and cold spots significantly.
What containers are safest for microwaving?
Use glass, ceramic labeled microwave-safe, and approved plastics. Avoid metal and containers with metallic trim to prevent arcing.
If unsure, test a container with a short run of 10–15 seconds with a cup of water; if the container stays cool and the water warms, the container is usually safe.
How can I make reheated food taste fresher?
Add moisture before reheating and finish with fresh herbs or acid after heating. Small ingredients like a pat of butter or a squeeze of lemon uplift texture and flavor.
Reheating at 70% power often preserves texture and reduces hot spots, especially for proteins and starchy sides.
Wrapping Up
Power levels give you control. They let you match energy delivery to the food’s needs so texture and safety improve together.
Practice with simple recipes, keep notes, and use a thermometer for critical dishes. Over time, you will consistently achieve better, faster results.
See also: microwave power
]]>
- Microwaves cook by exciting water molecules, not by making food radioactive.
- Quick cooking often preserves heat-sensitive vitamins better than boiling.
- Uneven heating is a common issue; stirring and standing time reduce it.
- Use only microwave-safe containers to avoid chemical leaching.
How Microwaves Work
Microwave ovens generate electromagnetic waves tuned to agitate polar molecules. These waves primarily target water and other polar components in food, producing heat internally.
The mechanism is well documented in technical literature and summaries on microwave ovens. Electromagnetic principles are the same as in other appliances that use non-ionizing radiation.
Mechanism at the molecular level
Microwave frequency causes dipolar molecules such as water to rotate rapidly. That rotation creates friction and thermal energy that raises the food temperature.
This is distinct from thermal conduction from an external hot surface. The effect is efficient when moisture is present and lower in very dry foods.
Heat Distribution and Common Issues
Microwave fields inside the cavity form standing wave patterns that lead to hot spots and cold spots. Those patterns explain why some bites are scalding while adjacent areas remain cool.
Rotation trays and stirring break up those patterns. Allowing a short standing time after cooking helps residual heat homogenize the meal for safer, tastier results.
Prep and Cook Time
Microwaves reduce hands-on time. Typical dishes go from prep to plate much faster than conventional ovens.
Adjust times to your oven’s wattage and the food’s mass. Test initial runs and add brief increments to avoid overcooking.
- Preparation: 5 minutes
- Cooking: 8-12 minutes, depending on dish and microwave wattage
- Total Time: 13-17 minutes
Yield & Difficulty
This recipe yields roughly four servings in standard portions. It makes a quick weeknight side or light main when paired with protein.
Difficulty is low. The method favors precise timing and brief stirring, not advanced culinary technique.
- Serves 4 comfortably
Ingredients
Use fresh or frozen vegetables for speed and consistent moisture. Frozen mixes often come pre-cut and save prep time.
Adjust grains to preference. Cooked quinoa or brown rice hold up well to gentle microwave reheating and mixing.
- 1 cup fresh or frozen mixed vegetables (carrots, peas, corn)
- 1/2 cup cooked quinoa or brown rice
- 1 tbsp olive oil
- 2 cloves garlic, minced
- 1 tsp dried Italian herbs
- Salt and freshly ground black pepper, to taste
- 1/4 cup shredded low-fat mozzarella or vegan cheese (optional)
Instructions
Use a microwave-safe dish and cover it loosely to trap steam. Steam speeds cooking and helps retain nutrients by reducing water loss.
Stirring once or twice improves uniformity. Allow standing time after cooking to let temperatures equalize throughout the dish.
- Prepare your microwave-safe dish: Lightly grease it with olive oil to prevent sticking and to help flavors coat the vegetables.
- Mix garlic and herbs: Combine minced garlic with dried Italian herbs and olive oil; brush this mixture evenly over the vegetables for aromatic infusion.
- Add the vegetables and grains: Layer fresh or frozen mixed vegetables and cooked quinoa or brown rice in the dish, seasoning with salt and pepper.
- Cover loosely: Use a microwave-safe lid or vented plastic wrap to allow steam to escape, preventing sogginess while ensuring thorough cooking.
- Cook on high power: Microwave for 6 minutes, then stir gently to distribute heat evenly, helping to cook all ingredients uniformly.
- Continue microwaving: Cook for another 4-6 minutes, depending on your microwave wattage and vegetable size, until vegetables are tender but vibrant.
- Add cheese and finish: Sprinkle shredded cheese on top and microwave for an additional 1 minute, creating a creamy, melted finish.
- Rest before serving: Let the dish sit covered for 2 minutes; residual heat enhances flavors while moisture distributes evenly.
Chef’s Notes and Tips for Success
Microwave wattage varies; common ranges are 600–1,200 W. Start with shorter times and increase by 30-second increments to avoid overcooking.
Microwaving uses minimal water and short exposure, which helps retain heat-sensitive vitamins. For more on nutrients, review summaries on nutrition science.
Expert Insight
Always cover food to retain moisture but leave vents. Trapping steam speeds cooking and reduces nutrient loss compared with boiling.
Pro-Caution
If reheating leftovers, add a tablespoon of water to the container for each cup of food. This small step restores moisture and prevents dryness.
Serving Suggestions
Garnish the finished dish with fresh herbs for aroma and visual contrast. A squeeze of citrus brightens flavors and adds vitamin C at the table.
Pair the vegetable and grain mix with grilled protein or a leafy salad. For texture contrast, serve with a crisp side or toasted seeds.
| Nutrient | Per Serving |
|---|---|
| Calories | 210 |
| Protein | 7g |
| Carbohydrates | 28g |
| Fat | 7g |
For safe handling and temperature targets, consult standard food safety summaries on food safety. Those pages outline safe reheating temperatures and bacterial risk factors.
For basic physics background about radiation types relevant to microwaves, review the primer on electromagnetic radiation. This clarifies why microwaves are non-ionizing and do not make food radioactive.
Q&A
Below are concise answers to common microwave concerns. These responses reflect consensus in food science and appliance safety.
They address safety, nutrients, containers, and reheating best practices based on documented mechanisms.
Q1: Are microwaves cooking food with radiation? Should I be worried?
Microwaves use non-ionizing electromagnetic waves. They heat by agitating polar molecules and do not induce radioactivity.
Q2: Does microwaving destroy nutrients in my food?
Rapid cooking with little water tends to preserve vitamins like vitamin C better than prolonged boiling. The overall nutrient loss depends on time, temperature, and water exposure.
Q3: Can microwaving create toxins?
Microwaving does not create unique toxins distinct from other cooking methods. Overheating or burning any food can produce undesirable compounds, regardless of the heat source.
Q4: Why does food sometimes heat unevenly?
Field distribution and food geometry cause uneven heating. Stirring, rotating, and standing time reduce temperature gradients for safer consumption.
Related Resources
Read our practical safety guide for device-specific tips: Microwave Safety Tips Every Cook Should Know. That page lists safe practices for container choice and reheating targets.
For appliance comparisons and buying guidance, see our overview: Kitchen Appliances Guide. It helps you select a suitable microwave by wattage and features.
FAQ
Is food cooked from the inside out in a microwave?
Microwave energy penetrates a few centimeters and heats water molecules directly. Dense or layered foods may heat from surfaces as conduction follows the initial microwave heating.
Can I sterilize jars or containers in a microwave?
Microwaving can sanitize moist containers but does not reliably sterilize them. Use proper sterilization methods for canning to ensure safety and longevity.
Are microwave-safe plastics truly safe?
Only use plastics labeled microwave-safe. Independent testing shows that approved materials remain stable under normal microwave conditions, while untested plastics can deform or leach.
Does microwaving kill bacteria?
Microwave heating can kill bacteria if the food reaches uniform, safe internal temperatures. Uneven heating may leave pockets at unsafe temperatures, so stir and check with a thermometer.
Will microwaving alter food flavor or texture?
Microwaving preserves moisture but does not produce browning reactions like the Maillard reaction. Textural changes occur; crunchy surfaces often become soft unless finished by other methods.
See also: microwave
]]>
- Buy based on protein and sodium balance: choose meals with higher protein and moderate sodium for better satiety.
- Upgrade smartly: a few fresh ingredients can elevate most frozen entrees quickly.
- Cooking method matters: oven-crisping or stovetop finishing improves texture more than relying on the microwave alone.
- Price doesn’t guarantee taste: some low-cost meals outperform pricier brands on key sensory metrics.
Prep and Cook Time
Total time: Most frozen dinners finish in 10–25 minutes depending on method and meal size. Microwaves save time but ovens deliver better texture on many dishes.
For precise heating, follow package directions and then use sensory checks: look for even steam and test temperature in the center. If you want a technical reference on the appliance, see the microwave oven article for core principles.
Yield
Standard frozen entrees typically serve one adult, with portion sizes designed for convenience and calorie control. Check the packaging for grams and calories to align with hunger and activity levels.
If you need more volume, pair an entree with inexpensive sides like legumes or a green salad to increase fiber and protein without boosting cost dramatically. This tactic often improves satiety and nutritional value.
Difficulty Level
Reheating and plating frozen dinners requires minimal skill: timing, heat control, and a few finishing touches make the difference. Home cooks can reliably upgrade texture with a quick sear or oven crisping.
Operators who want consistency should time each method and note preferred tweaks for each brand. Keep a simple log of cooking times and adjustments to reproduce the best result every time.
Ingredients
Ingredients lists vary widely; premium meals often contain higher-quality proteins, vegetables, and fewer fillers. Cheap options may rely on starches or additives to stretch portion size.
Scan labels for whole-food ingredients, actual meat cuts, and recognizable seasonings. When protein or sodium metrics matter, refer to nutrient columns below for a focused comparison.
- 1 frozen dinner entrée (select budget or premium based on price and label)
- 1 tablespoon olive oil (optional for richness after heating)
- 1 teaspoon fresh herbs (parsley, chives, or basil)
- Fresh vegetables or salad greens (for serving)
- Salt and pepper to taste if needed
Instructions
Preparation
Remove all non-microwave-safe packaging and read the label to match your appliance. Keep a clean plate and any garnishes ready before heating so the meal goes from heat to plate quickly.
For frozen entrees with separate sauce packets, heat as instructed and add sauce after reheating to protect texture. This step prevents sauces from overcooking and losing emulsification.
Heating
Use the microwave for speed, but consider the oven for entrees that benefit from browning or crisp edges. Preheat the oven to the recommended temperature and place the meal on a baking dish for even heat distribution.
When microwaving, rotate the dish and rest the food for one to two minutes to allow carryover cooking. If the meal seems soggy after microwave heating, finish briefly under the broiler or in a hot skillet for 1–2 minutes.
Enhancement
Finish with a drizzle of olive oil or a squeeze of citrus to add freshness and lift flavor. A light herb sprinkle increases perceived complexity and balances richness in heavier sauces.
For protein-based dishes, a quick pan-sear after microwave heating restores surface texture and improves mouthfeel. Keep a non-stick skillet on hand to make this a simple habit.
Adjust seasoning
Taste before you salt: many lower-cost meals skew under-seasoned or overly salty depending on the brand. Make small seasoning adjustments incrementally to avoid overpowering the dish.
Use acid (lemon or vinegar) to brighten dull flavors rather than adding more salt. Acid often provides a stronger flavor lift with less impact on sodium intake.
Presentation
Transfer the entree to a warm plate and add contrasting colors from vegetables or herbs. Good presentation improves perceived value and increases eating satisfaction.
Use simple garnishes like chopped parsley or lemon wedges to signal freshness. These cues change how you perceive texture and flavor without adding much time or expense.
Pro-Caution
Chef’s Notes and Tips for Success
Small interventions yield big improvements: sautéed mushrooms, roasted peppers, or grated cheese transform many frozen entrees into fuller meals. Texture management matters; blot excess liquid for firmer bites.
Packaging affects steam retention and crisping; remove overwraps when needed and finish in the oven for crunch. For a deeper look at how frozen food is processed and preserved, see the frozen food entry.
- Upgrade with fresh ingredients: add sautéed vegetables or fresh herbs to enrich flavor.
- Mind moisture: blot excess liquid before plating to preserve texture.
- Nutrition swaps: add legumes, nuts, or an egg to boost protein inexpensively.
- Label extras: freeze leftovers with date and contents for easy meal planning.
Expert Insight
Document your favorite tweaks for each brand so you achieve consistent results. A simple cooking note taped to a shelf saves time and reduces waste.
Serving Suggestions
Plate the entree centrally and add colorful sides like steamed broccoli or a mixed green salad to boost fiber and micronutrients. Contrast in texture—crisp, creamy, and tender—improves the overall meal experience.
For comfort dishes, include warm crusty bread or a small roasted root vegetable medley. These additions round out the meal and increase satisfaction per dollar spent.
Nutritional Comparison
Price correlates imperfectly with nutrition: premium frozen meals often contain more protein and whole ingredients, while cheaper options may have lower protein and higher sodium. Review nutrient panels to identify the best value for calories and macronutrients.
Protein supports fullness and muscle maintenance; learn more about the nutrient at the protein (nutrient) page. Sodium influences taste and preservation—see the sodium article for context on daily limits and health effects.
| Nutrient | Cheap Frozen Dinner | Expensive Frozen Dinner |
|---|---|---|
| Calories | 350 | 420 |
| Protein | 12g | 28g |
| Carbohydrates | 40g | 38g |
| Fat | 10g | 15g |
Use the table to match meals to daily goals: lower-calorie entrées suit calorie-controlled plans, while higher-protein options support strength training and recovery. Consider cost per gram of protein when evaluating value.
Pro-Caution
FAQ
How do I choose between a cheap and an expensive frozen dinner?
Focus on ingredient quality, protein content, and sodium. Choose the meal that best fits your nutrition targets and reheating capabilities.
Also consider the intended use: a quick lunch may prioritize speed, while a quick-finished oven meal can lean toward a premium entree for dinner.
Can I make a cheap frozen dinner taste like a premium one?
Yes. Finish with fresh herbs, olive oil, or a quick pan-sear to improve texture and aroma. Small steps often yield the largest perceived upgrades.
Add protein-rich or fiber-rich sides to balance macronutrients and increase satisfaction without adding much cost.
Are premium frozen meals healthier than budget ones?
Not always. Premium meals often use better ingredients and deliver more protein, but you must read labels to verify. Calories, fat, and sodium can still vary widely between brands.
Use nutrition facts to compare portion size and nutrient density rather than relying on price alone when making health-focused choices.
What reheating method preserves the best texture?
Oven finishing or a quick pan-sear preserves crispness better than the microwave alone. Microwaving followed by a short broil or sear recreates texture efficiently.
For best results, remove plastic film when recommended and transfer to an oven-safe dish for even browning and moisture control.
How should I store leftover frozen dinners once opened?
Refrigerate leftovers within two hours of cooking in an airtight container and consume them within 3–4 days. Label with the date to avoid confusion.
For long-term storage, freeze properly in airtight containers and follow safe thawing methods to maintain quality and safety.
Wrapping Up
Both budget and premium frozen dinners have roles in a practical eating strategy. Use labels to select meals that align with your protein targets and sodium tolerance, then apply small finishing steps to lift quality.
Track the brands and techniques that work best for you to maximize convenience and enjoyment. With a few expert tweaks, frozen dinners can deliver reliable, satisfying meals without unnecessary waste or expense.
See also: Frozen dinners
]]>