The method focuses on fundamental technique: high-heat browning, controlled sauce development, and finishing steps that preserve texture and flavor. Follow each stage deliberately for consistent, restaurant-quality results.
- Key takeaway: Browning builds flavor; don’t crowd the pan.
- Key takeaway: A light roux plus controlled simmer gives a stable, velvety sauce.
- Key takeaway: Choose marbled cuts for tenderness and mouthfeel.
- Key takeaway: Rest meat briefly to preserve juiciness.
Crafting the Perfect Creamy Garlic Sauce to Elevate Your Beef
The sauce relies on three pillars: concentrated garlic, an emulsified dairy phase, and a proper thickening agent. Use fresh garlic for volatile aromatics and quick flavor release; minced or crushed garlic softens quickly when sautéed briefly in butter or oil.
For body and stability, combine cold heavy cream with a cooked flour base or reduction. Cold cream incorporates smoothly and resists splitting when added gradually to a warm, stabilized liquid. See the cream entry for basic composition and how fat percentage affects sauce behavior.
Core Sauce Techniques
Start by sweating garlic briefly to develop sweetness without browning. Then create a light roux to bind fat and liquid, which yields a satin mouthfeel and prevents separation.
Use the roux method or a beurre manié for finishing; both stabilize and thicken while preserving gloss. Whisk constantly when introducing liquid to avoid lumps.
Prep and Cook Time
Plan for about 20 minutes of active prepping and 30 minutes of cooking. Active timing varies with cut thickness and pan size, but these benchmarks fit most home kitchens.
Allow extra time for resting the meat and finishing the sauce. Resting for 5–10 minutes improves texture and redistributes juices.
- Preparation: 20 minutes
- Cooking: 30 minutes
- Total Time: 50 minutes
Ingredients: Select for Flavor and Texture
Ingredient choice determines the final profile. Use marbled cuts—top sirloin, ribeye, or tenderloin—for consistent tenderness and flavor. For background on beef composition, consult the beef reference.
Keep ingredients simple and high quality: fresh garlic, unsalted butter, a neutral oil, heavy cream, and a low-sodium beef stock help you control seasoning precisely.
- Beef: 1.5 lbs top sirloin or ribeye, trimmed and cut into 1-inch strips
- Garlic: 6 cloves, finely minced
- Butter: 3 tbsp unsalted
- Olive oil: 2 tbsp extra-virgin
- All-purpose flour: 2 tbsp, sifted
- Heavy cream: 1 1/2 cups, cold
- Beef broth: 1 cup, low-sodium
- Dijon mustard: 1 tsp for acidity and balance
- Fresh thyme: 1 tsp, finely chopped
- Fresh parsley: 2 tbsp, finely chopped, for garnish
- Salt & pepper: to taste
- Optional: pinch of smoked paprika
Step-by-Step Instructions
Technique beats speed. Work in controlled stages: sear, remove, build sauce, then finish by returning beef to the pan. Each stage requires brief attention for consistent results.
Use a heavy skillet or a stainless steel pan for predictable browning and easy deglazing. Reserve pan juices to enrich the sauce.
- Prepare the beef: Pat meat dry with paper towels. Season generously with salt and freshly cracked black pepper to season to the core.
- Brown in batches: Heat oil over medium-high heat. Add strips without overcrowding. Sear 3–4 minutes per side until deeply caramelized, then transfer to a warm plate.
- Sauté garlic: Reduce heat to medium, melt butter, and add minced garlic. Sauté 1–2 minutes until fragrant, stirring constantly to prevent bitter charring.
- Create the roux: Sprinkle flour into the butter-garlic mixture and whisk for about 2 minutes to cook raw flour taste away while keeping the roux pale.
- Deglaze and build: Gradually whisk in beef broth to lift fond, then add cold heavy cream in a slow stream while whisking to form an emulsion. Stir in Dijon and thyme.
- Simmer and adjust: Simmer gently until sauce thickens to coat the back of a spoon, roughly 5–7 minutes. Taste and adjust salt and pepper.
- Return beef: Add beef with accumulated juices back to the skillet. Warm through for 3–5 minutes to meld flavors without overcooking.
- Finish and serve: Off heat, stir in chopped parsley. Rest briefly, then plate over mashed potatoes, noodles, or rice to capture every drop of sauce.
Tips for Success from a Culinary Professional
Temperature control matters most. High initial heat forms a flavorful crust; lower temperatures during finishing preserve tenderness and prevent curdling of dairy.
Use small batches when searing and keep a warm oven (120°C / 250°F) to hold finished meat if you must. This prevents carryover cooking from drying the protein.
 Expert Insight
Herbs and acid balance the richness. A teaspoon of Dijon or a small splash of white wine reduces perceived fattiness and sharpens flavors without dominating the profile.
 Pro-Caution
For dairy-free adaptations, substitute coconut cream and a neutral oil, but taste carefully: coconut carries its own aroma that changes the final profile. Adjust herbs and acid to compensate.
Serving Suggestions and Pairing Ideas for an Unforgettable Meal
Serve this beef over creamy mashed potatoes or buttered egg noodles to highlight the sauce. The starch acts as a carrier for the silky cream and captures the pan juices.
Round the plate with lemon-tossed asparagus or roasted Brussels sprouts to introduce a bright counterpoint. Crusty bread also performs well for mopping the pan.
For wine, choose a medium-bodied red that offers moderate tannin and ripe fruit notes to match the sauce’s weight. For non-alcoholic options, a citrus-infused sparkling beverage cuts richness and refreshes the palate.
Explore related resources on our site for advanced techniques, such as luxury beef dinners and a guide to selecting beef cuts to refine your approach to texture and doneness.
| Nutrient | Per Serving |
|---|---|
| Calories | 480 kcal |
| Protein | 38 g |
| Carbohydrates | 8 g |
| Fat | 32 g |

FAQ
Which beef cuts work best for this dish?
Choose marbled cuts such as ribeye or top sirloin for juiciness and flavor. These cuts sear well and stay tender during the brief simmer in sauce.
Can I make the sauce ahead of time?
Yes. Prepare the sauce up to 48 hours in advance and cool rapidly. Reheat gently over low heat, then add freshly cooked beef to preserve texture and temperature control.
How do I prevent the cream from splitting?
Add cold cream slowly while whisking and keep the sauce below a rapid boil. Maintain a gentle simmer to stabilize the emulsion and avoid high heat that causes separation.
What are good side pairings?
Buttery mashed potatoes, garlic-infused noodles, and roasted seasonal vegetables complement the sauce. Acidic or bright sides help balance fat and refresh the palate.
Is there a vegetarian alternative that keeps the same profile?
Replace beef with seared king oyster mushrooms or firm tofu and use vegetable stock in the sauce. Finish with the same technique to achieve a similar savory, creamy texture.
See also: Garlic beef
]]>
- Two-zone cooking for fast crust and gentle finish to protect internal juices.
- Marinades and resting help fibers retain and redistribute moisture.
- Choose the right cut—marbling and fat prevent the perception of dryness.
- Use thermometers to stop cooking before excessive moisture loss.
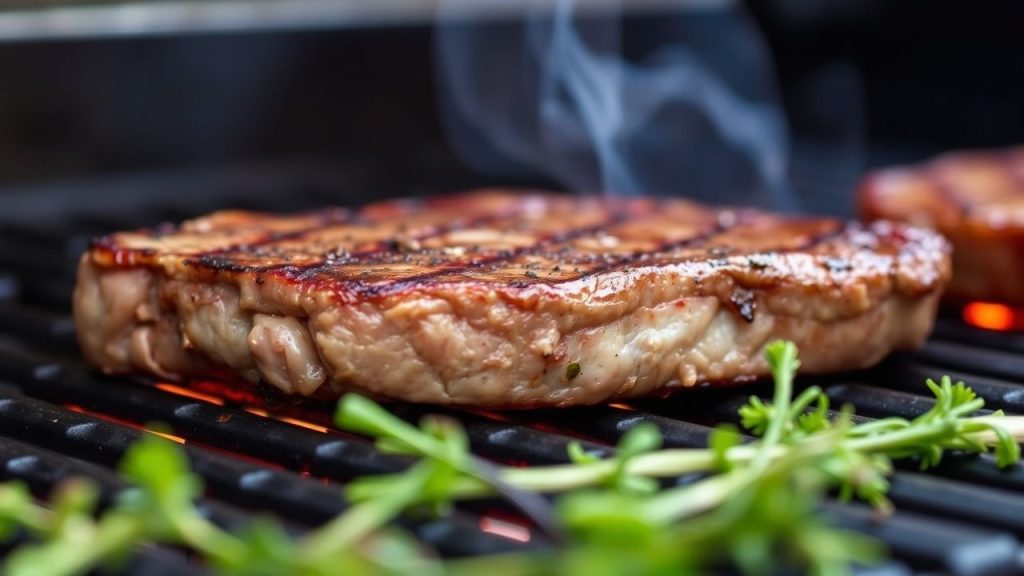
Mastering Temperature Control to Preserve Grilling Moisture
Heat management determines how rapidly proteins denature and expel liquid. When you plan for searing and finishing zones, you control where moisture moves and how much evaporates from the surface.
Set up at least two zones on the grill: a hot, direct side for crust formation and a cooler, indirect side for finishing. This two-zone approach reduces total time at extreme temperatures and protects grilling moisture in thicker cuts.
Why Heat Forces Moisture Out
Muscle tissue stores water inside cells and between protein strands; as temperature rises, the protein matrix contracts and squeezes liquid outward. That mechanical change explains why rapid, prolonged exposure to high heat increases drip loss and surface evaporation.
Thermal denaturation changes protein shape and binding capacity, which frees water previously held in the matrix. For the underlying biochemistry consult protein denaturation, which clarifies how heat releases bound water.
Heat, Evaporation, and Drippings
Evaporation accelerates with hotter air and longer exposure, so a hot sear can force moisture toward the exterior and increase drip loss. That steam and liquid loss is a physical process you must manage when you concentrate heat at the surface.
Conversely, slower cooking at moderate temperatures gives proteins time to set more gently and reduces aggressive expulsion of water. For basic physics about phase change and heat transfer, see evaporation.
Practical Grilling Workflow
Organize your workflow before you light the grill to reduce time on extreme heat and lower overall moisture loss. Sequence matters: prep, sear, finish indirectly, then rest—the order protects grilling moisture at each stage.
Prepare tools and staging: a calibrated instant-read thermometer, clean tongs, and a two-zone setup reduce guesswork and prevent accidental overexposure to direct flame. Consistent technique produces repeatable, juicy results.
Prep and Cook Time
Allow time for active prep and any marinade so the surface chemistry supports browning without excessive steaming. Typical windows are 15 minutes active prep and 2–4 hours of marinade when applicable to tenderize and add protective oil.
Cooking time varies by thickness and cut; a 1–2 inch steak often needs 20–30 minutes total with sear plus indirect finish, while larger roasts require longer indirect cooking but at lower temperatures to preserve grilling moisture.
Yield and Difficulty
Yield depends on portion size and cut. A 2 lb portion generally serves four; adjust target internal temperatures rather than strict times to preserve juiciness across different weights and shapes.
Difficulty is medium: you need a two-zone setup and an accurate thermometer. Focused attention and a consistent workflow yield better results than complicated spice blends or extended marinades.
Ingredients & Prep
A well-marbled ribeye or chuck roast holds and conveys moisture better during cooking because rendered intramuscular fat improves mouthfeel. For reference on muscle and fat composition consult meat composition.
Marinades that combine oil and modest acid—such as buttermilk or lemon—tenderize connective tissue and create a thin lipid barrier that limits surface evaporation. Pat the surface dry before searing to encourage rapid crust formation without steaming.
Step-by-Step Instructions
- Marinate: Combine buttermilk, lemon juice, minced garlic, rosemary and a pinch of salt. Submerge for 2–4 hours so the acid loosens connective tissue while dairy buffers surface proteins.
- Preheat grill: Create two heat zones: one side hot (450–500°F) for searing, the other medium-low (300–350°F) for finishing. This limits the time meat spends at moisture-extracting temperatures.
- Pat dry: Remove from marinade and blot the surface. A dry surface browns quickly and avoids steam that can pull water toward the exterior and increase drip loss.
- Sear: Sear 2–3 minutes per side over direct heat until a deep crust forms. Flip once to promote even browning and reduce total surface exposure to flames.
- Finish indirectly: Move to the cooler zone, close the lid, and monitor internal temperature with an instant-read thermometer. Pull at 5°F below target to account for carryover and protect final grilling moisture.
- Rest: Tent loosely with foil for 10 minutes so juices redistribute. Cutting too soon forces fluid out and reduces perceived juiciness.
Pro-Caution
Measure temperature rather than guessing by touch. Calibration and correct probe placement reduce variance between cooks and avoid wasted product.
Tips for Success
Choose cuts with balanced marbling because intramuscular fat melts and lubricates the mouthfeel, which improves perceived juiciness even if some water is lost. Lean cuts require gentler heat and faster cooking to maintain moisture.
Manage flare-ups by moving meat to indirect heat when fat ignites; open flames char the surface quickly and can drive moisture from deeper tissues. Control fat rendering with moderate searing and timely movement to the cool zone.
[TI P]Expert Insight: Rest your meat under a loose foil tent for at least half the thickness time. This short cooldown re-equilibrates internal juices and often improves perceived juiciness more than adding more fat or extra marinade.[/TIP]
Use a thermometer that reads quickly and accurately to reduce time with the lid open and the grill cool zone compromised. Accuracy improves repeatability and reduces moisture loss from overshooting target temperatures.
Serving Suggestions
Slice across the grain to shorten muscle fibers and make each bite feel more tender; cutting technique directly affects perceived moisture and chew. Serve slices alongside quick-grilled vegetables for contrast in texture and temperature.
Finish with a light drizzle of herb oil or a small pat of compound butter to add surface fat and enhance mouthfeel without changing internal moisture. These surface additions mask small losses in internal water and improve palatability.
Nutritional Snapshot
This section provides a practical estimate for standard servings and highlights the role of fat in perceived juiciness. The numbers vary by cut, trimming, and cooking losses, so treat values as guides rather than absolutes.
For a typical 2 lb portion divided into four servings you can expect roughly the following macronutrient profile; adjust for leaner cuts or added butter.
| Nutrient | Amount per Serving |
|---|---|
| Calories | 380 kcal |
| Protein | 45 g |
| Carbohydrates | 3 g |
| Fat | 22 g |
FAQ
The FAQ answers focus on why meat loses water on the grill and how to protect what matters. These concise answers give direct, evidence-based steps to reduce grilling moisture loss and improve outcomes.
Below are the most common questions home cooks ask, with clear, actionable answers you can apply on the next cook.
Why does meat lose moisture when grilled?
Heat causes muscle proteins to contract, which squeezes water out of cells and between fibers. Simultaneously, surface evaporation removes water, so both internal pressure and air exposure determine total moisture loss.
Is all moisture lost during grilling?
No. Some water remains bound within tissue, especially in well-marbled cuts where rendered fat improves juiciness perception. Nevertheless, higher temperatures and longer times generally increase both evaporation and drip loss.
Can marinating reduce moisture loss?
Yes. Oil in marinades provides a partial barrier to evaporation, while acids and enzymes help break down connective tissue and improve water-holding capacity. Proper marinade timing yields tender, moister results.
What role does resting play?
Resting lets contracted proteins relax and allows juices to redistribute internally, so less fluid escapes when you slice. A proper rest improves the final plate’s juiciness more reliably than extra fat or extended searing.
Which cuts retain moisture best?
Fattier cuts such as ribeye and short rib retain more perceived moisture because melting intramuscular fat enhances mouthfeel. For lean cuts, shorten cook times and pull at lower target temperatures to preserve grilling moisture.
Final Thoughts
Heat is a tool; use it deliberately to coax flavor without surrendering moisture. Two-zone cooking, controlled searing, correct marinades, and accurate thermometry keep grilling moisture within the muscle for consistently juicy results.
Practice the workflow, check internal temperatures, and make small adjustments to timing and heat for each cut. With attention to these principles you will routinely produce steaks and roasts that balance a flavorful crust with a tender interior.
See also: grilling techniques and grilled steak guide
See also: grilling moisture
]]>
- Control heat: steady temperature preserves interior meat moisture and prevents runaway evaporation.
- Sear smart: a dry surface forms a crust quickly while limiting deep interior moisture loss.
- Rest meat: hold before slicing so meat moisture redistributes and stays in the muscle.
- Pick marbling: intramuscular fat slows moisture loss and boosts perceived juiciness.
Mastering Temperature Control to Preserve Meat Moisture
Temperature is the single most effective tool for managing meat moisture during grilling. Proteins denature and fibers contract as internal temperature rises, and controlling that rise reduces how much water the muscle expels.
Use a quality thermometer and zone heat to manage the ramp. Establish a hot sear zone and a moderate indirect zone so you can sear then finish without blasting the interior; this two-zone method limits evaporation and protects meat moisture.
The Science: How Heat Forces Meat Moisture Out of Muscle
At a molecular level, heat changes protein structure and forces meat moisture outward. Protein networks shrink as they denature, squeezing intracellular water toward the surface where it either pools or evaporates.
Simultaneously, internal water becomes vapor as temperature climbs and creates pressure gradients. Those gradients push meat moisture outward until equilibrium or evaporation at the surface reduces the vapor pressure.
Maillard Reaction and Meat Moisture Management
The Maillard reaction produces the brown, savory crust we prize, but it needs a relatively dry surface to proceed. Surface moisture must evaporate before browning, so a short, dry sear intentionally trades surface water for flavor without sacrificing interior meat moisture when timed correctly.
Patting the surface dry and avoiding crowding lets moisture evaporate quickly during the sear window. That fast surface drying helps form a crust faster and reduces the length of time the interior experiences elevated steam pressure that drives meat moisture loss.
Why a Dry Surface Matters
Surface water creates steam that blocks browning and prolongs high internal temperatures. By contrast, a dry surface supports rapid Maillard reactions that lock in texture and minimize prolonged internal vapor pressure.
Work in short, controlled sear intervals. This preserves more meat moisture while still delivering the flavorful crust diners expect.
Practical Prep, Timing and Ingredients to Protect Meat Moisture
Good results begin before the meat hits the grates. Bring steaks to near room temperature and pat them dry to remove surface water that would otherwise steam away during searing.
Salt draws moisture briefly to the surface, but when you time it correctly salt helps proteins hold water and improves flavor without increasing final moisture loss. Use coarse kosher salt at least 30 minutes prior or just before cooking, based on cut thickness.
Prep and Cook Time Guidelines
Preparation Time: 15 minutes. Bring meat close to ambient and dry the surface thoroughly to reduce initial steam.
Marinating Time: Optional, 1–4 hours. Balanced marinades with oil and mild acid can aid tenderness without causing excessive moisture migration in thin cuts.
Equipment and Thermometry
A reliable instant-read thermometer removes guesswork and helps maintain meat moisture. Aim for internal targets rather than fixed cook times: 130–135°F for medium-rare suits most steaks.
Keep the sear surface around 450°F for rapid crusting, then move to indirect heat to finish. That prevents the interior from climbing too fast and expelling excessive meat moisture.
Ingredients, Yield and Cut Selection for Juiciness
Yield: Serves 4. Choose steaks about 1-inch thick for predictable cook times and consistent meat moisture retention.
Recommended cuts: Ribeye, striploin, and tenderloin use marbling to slow moisture loss and increase perceived juiciness.
Shopping List
- 4 beef ribeye steaks (1-inch thick, well-marbled)
- 2 tbsp olive oil
- 1 tbsp kosher salt
- 1 tsp black pepper
- 2 cloves garlic, minced
- Fresh rosemary
- Optional: 1 tbsp butter for finishing
Step-by-Step Instructions to Minimize Meat Moisture Loss
Follow consistent steps to control moisture migration and maximize flavor. Each action either shortens unnecessary evaporation or enhances final texture.
Use a two-zone approach: sear over high heat, then move to indirect heat to reach the target internal temperature without overshooting and forcing meat moisture out.
- Bring steaks to room temperature. Pat dry to remove surface moisture; a dry exterior sears faster and reduces steam formation.
- Rub olive oil evenly. Season with kosher salt and black pepper to taste.
- Preheat the grill to medium-high (≈450°F/230°C). Verify with a surface thermometer and set an indirect zone.
- Sear for 3–4 minutes per side without moving to develop a caramelized crust quickly.
- Finish over indirect heat until internal temperature reaches your desired doneness.
- Optional basting: In the final minute, baste with butter, garlic, and rosemary for aroma and added surface fat that slows moisture escape.
- Rest 5–7 minutes. Let juices redistribute; slicing too soon causes immediate drip loss and reduces retained meat moisture.
Expert Insight
Record sear duration, surface temp, and carryover rise each cook. This practice reduces variability and protects meat moisture batch to batch.
Pro-Caution
Thin cuts require a different approach: short sear and immediate rest, or a lower surface temperature to avoid explosive moisture migration.
Chef’s Notes: Techniques that Preserve Meat Moisture
Choose marbled cuts. Intramuscular fat both adds flavor and reduces rapid heat penetration, which helps the interior retain meat moisture longer during cooking.
Avoid piercing the meat. Use tongs to flip and a probe thermometer to check temperature. Each puncture creates a direct path for meat moisture to escape.
Marinades and Salt Use
Balanced marinades with oil create a thin surface barrier while salt helps proteins bind water when timed properly. Use oil-based or balanced blends rather than aggressive acidic baths on thin cuts.
Sous-vide pre-cook followed by a quick sear can yield predictable internal doneness and conserve meat moisture through gentle temperature control.
Serving, Pairings and Presentation to Highlight Juiciness
Slice against the grain to shorten muscle fibers and make each bite seem juicier. Garnish with flaky sea salt and herbs to accentuate perceived moisture and flavor.
Pair with bright chimichurri or charred vegetables to cut fat and highlight texture contrasts. A robust red wine or acid-forward sauce balances richness and emphasizes retained meat moisture.
Advanced Concepts: Pressure, Steam and Fiber Mechanics
As internal water vaporizes, pressure gradients form between the interior and surface. Those gradients drive meat moisture outward until the surface allows evaporation into the air.
You can limit this migration by slowing the interior temperature rise. Low-and-slow finishes or precise thermal baths reduce internal steam pressure and preserve more liquid in the muscle matrix.
Thermal Properties and Heat Capacity
Water has a high heat capacity and a large latent heat of vaporization. Once internal water turns to vapor, it removes significant heat and accelerates drying unless the temperature ramp is controlled.
Understanding these thermal properties helps you design cook curves that retain meat moisture while achieving safe, flavorful doneness.
Internal Resources and Further Reading
Want to refine your heat mapping? See our internal guide for zone charts and target temps for common cuts. Track both surface and internal readings to protect meat moisture across different grills.
For detailed guidance on resting and carryover cooking, consult our resting guide with carryover temperature tables and timing rules that help preserve meat moisture in larger roasts and steaks.
FAQ
Why does grilled meat sometimes come out dry?
High heat and long cook times push more internal water out of muscle fibers. If internal temperature rises too fast, proteins contract excessively and expel juices that then evaporate, reducing meat moisture.
Control the temperature ramp, use a two-zone grill, and monitor internal temps to limit aggressive evaporation and keep meat moisture where it belongs.
What happens to moisture inside meat during grilling?
Heat denatures proteins and creates vapor pressure inside cells. That pressure pushes water outward where it either collects on the surface or evaporates into the air, decreasing retained meat moisture.
Maintaining a moderate interior rise lowers vapor pressure and helps retain more meat moisture in the muscle matrix.
How does the Maillard reaction affect moisture loss?
The Maillard reaction requires a hot, relatively dry surface to produce flavor. Surface moisture must evaporate before browning begins, so the intended short sear window sacrifices a little surface water to gain crust while protecting interior meat moisture.
Time the sear for fast, hot contact on a dry surface to minimize interior moisture loss and maximize crust formation.
Can marinating help retain meat moisture?
Balanced marinades with oil, salt, and mild acid can slow moisture loss and improve tenderness. Oil creates a small protective barrier while salt helps proteins bind water when used correctly.
Avoid over-marinating thin cuts in acidic solutions longer than four hours; excessive breakdown can make texture mushy and alter moisture behavior.
Which grilling techniques best preserve juiciness?
Use a sear-then-finish method: sear quickly over high heat, then move to indirect heat to reach target internal temperature slowly. Rest the meat before slicing to allow juices to redistribute and maintain meat moisture.
Combine thermometry with zone cooking and choose cuts with good marbling for consistent, juicy results.
See also: protein denaturation, Maillard reaction, water, sous-vide, meat
See also: meat moisture
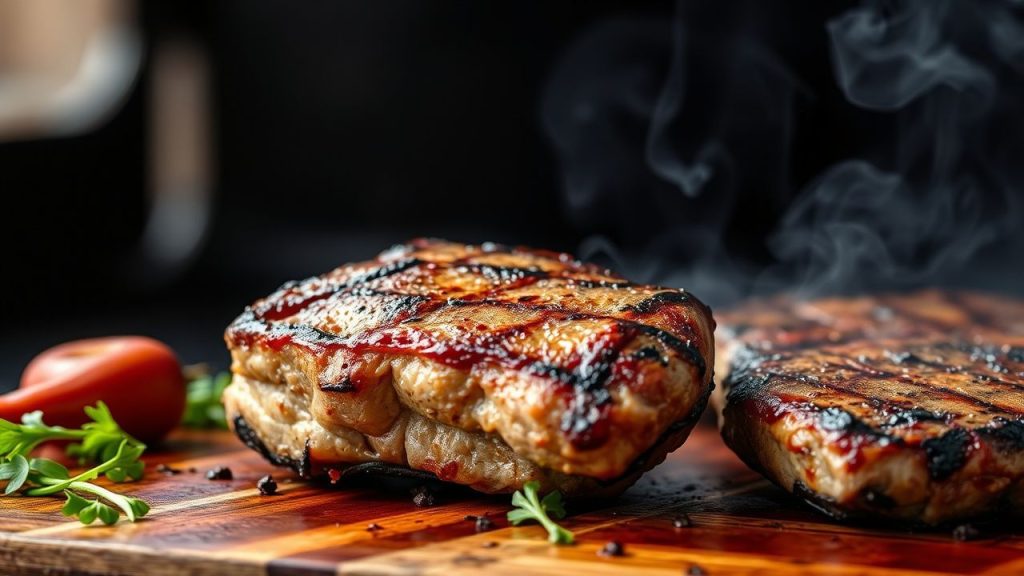
]]>Roasting a thick cut well requires controlled heat, timing, and simple technique. When you handle each step deliberately, the result becomes a reliably tender, evenly cooked roast that impresses guests.
- Slow, steady heat yields uniform doneness through the center.
- Thermometer use removes guesswork and prevents overcooking.
- Resting locks juices and improves sliceability.
Why thickness changes everything
Thick cuts behave differently from thin steaks because heat must travel farther to reach the center. That creates a risk of a well-browned exterior with an undercooked core unless you manage temperature and time carefully.
Understanding heat transfer in meat helps you plan the roast. The surface browns via the Maillard reaction, while internal temperature rises by conduction; balance both for best results.
At the range: Prep and cook time
Allow at least one hour for the meat to come to near-room temperature; this reduces the gap between exterior and core temperatures. For many 2–4 inch roasts, plan a long, low roast of 1.5 to 3 hours followed by a short rest and a finish sear if desired.
Temperature targets matter. Pull roasts several degrees below your final target to allow for carryover heat during resting and to hit the desired doneness precisely.
Ingredients and equipment checklist
Gather a reliable probe thermometer, a sturdy roasting rack, a rimmed pan, and a heavy skillet for searing. Use coarse kosher salt, freshly cracked black pepper, whole garlic, and fresh herbs for classic flavor.
Choose marbled cuts such as ribeye or sirloin for natural basting from fat. If you prefer pork or lamb, apply the same principles: steady low heat, accurate temperature checks, and adequate resting time.
Step-by-step instructions
1. Bring to temperature: Remove meat from refrigeration at least 45–60 minutes before cooking. This reduces shock from cold and promotes even heat penetration.
2. Score and season: Pat dry, then score the fat cap lightly. Season generously with salt and pepper; for deeper seasoning, salt the roast several hours ahead and refrigerate uncovered to dry the surface for a crisper crust.
Oven method
Preheat the oven to a low setting (around 275°F / 135°C) for gradual cooking. Insert a probe thermometer into the thickest section and place the roast on a rack to allow air circulation underneath.
Roast slowly until the internal temperature reaches 5–10°F below your final target. For medium-rare, remove at about 125°F (52°C) and finish with a brief high-heat sear if you want a deeper crust.
Sear-first (reverse sear vs. traditional sear)
For maximum crust control, use the reverse-sear: roast low, then sear hot at the end. This method produces a consistent edge-to-edge color and precise doneness with a caramelized exterior.
Alternatively, sear first in a hot skillet, then finish at low oven temperature. Both methods work; choose based on available time and the crust intensity you prefer.
Basting, aromatics, and moisture control
Basting every 20–30 minutes keeps the surface moist and adds flavor, but avoid overbasting and cooling the roast with cold liquids. Use warm stock or pan juices when basting to maintain oven temperature.
Tuck sprigs of thyme and rosemary alongside the roast rather than directly under the meat to infuse aroma without burning. For added moisture retention, consider a light brine for pork or a dry-brine for beef; both techniques adjust protein structure to hold more juices.
Learn more about brining techniques from a concise reference on brining.
Resting and carving: finish like a pro
Resting is non-negotiable. Tent the roast loosely with foil and rest 15–25 minutes depending on size; this lets juices redistribute and allows carryover temperature to settle.
Slice against the grain in even 1/4-inch to 1/2-inch cuts to maximize tenderness. Use a long, sharp slicing knife or a carving knife and a steady sawing motion for clean edges.
Expert Insight
After resting, serve immediately to preserve the ideal texture. If you must hold slices, place them loosely in a shallow pan and cover; reheat gently at low oven heat to avoid further cooking.
Pro-Caution
Flavor variations and rubs
Create a rub with smoked paprika, garlic powder, and mustard powder for a savory crust. For herbed profiles, press chopped rosemary and thyme into the fat after scoring for direct infusion.
When using acidic marinades, limit contact time for tougher cuts to prevent breakdown of surface proteins that can lead to a mushy exterior. Salt-based dry rubs remain safest for long roasts.
Serving suggestions and pairings
Serve the roast with creamy mashed potatoes, roasted root vegetables, and a glossy pan jus for classic balance. Bright garnishes such as chimichurri or a lemon-herb vinaigrette cut through richness and refresh the palate.
For wine, select full-bodied reds like Cabernet Sauvignon or Malbec to match the roast’s intensity. Also consider bold beers or fortified wines for contrast.
Explore practical roasting variations in our internal guides: perfect beef roast guide and roasting techniques for step-by-step photos and timing charts.
Nutrition snapshot
Approximate nutrition per serving varies by cut and trimming level. A 4 oz serving of a trimmed ribeye roast typically contains significant protein and fat; balance portions with vegetables for a complete plate.
Use nutrition calculators or product labels for precise dietary planning, and adjust serving sizes to meet caloric goals for your meal.
| Nutrient | Per Serving (approx.) |
|---|---|
| Calories | 520 kcal |
| Protein | 45 g |
| Carbohydrates | 2 g |
| Fat | 38 g |
Final notes on mastering thick cuts
Focus on temperature control, a reliable thermometer, and patient timing to tame thick cuts. When you combine those elements, you create repeatable results and a roast that cuts clean and tastes consistent.
Study the science behind browning and moisture management, then practice on different muscles to learn how each cut responds. For more reading on cooking techniques, review the general overview of roasting.
FAQ
How long should I roast a 4 lb ribeye for medium-rare?
Roast at 275°F (135°C) and remove at about 125°F (52°C) internal temperature. Expect roughly 1.5–2.5 hours depending on oven stability and roast shape, then rest 15–20 minutes.
Do I need to sear before roasting?
Searing is optional but recommended for deeper crust and flavor via the Maillard reaction. You can sear first or use a reverse-sear after a low roast to achieve similar results with more precise internal doneness.
Can I brine a beef roast?
Dry-brining with salt works well for beef; it enhances flavor and surface dryness for better crust. Wet brining suits leaner proteins like pork; adjust times to avoid over-salting.
What temperature is safe for consuming beef?
Food safety guidelines note that ground beef requires higher internal temperatures than whole-muscle cuts. For whole cuts, target temperatures for doneness (rare to well-done) align with preferred texture and safety; use a thermometer to verify the internal temperature before resting.
How do I keep the roast moist if I need to reheat it?
Reheat gently in a covered dish at low oven heat (about 250°F / 120°C) with a splash of stock to recreate moisture. Avoid microwave reheating for large slices, as it drives out juices and creates uneven texture.
Consistent practice and careful use of tools reward you with predictable, tender results. Master these steps, and thick meat will become your most reliable centerpiece.
See also: Thick meat
]]>
- Key takeaways:
- High, stable surface heat creates the Maillard crust that builds flavor.
- Dry surface, correct oil, and minimal flipping deliver even browning.
- Resting and temperature control preserve juiciness and texture.
Prep and Cook Time
Preparation: 10 minutes. Bring cuts to room temperature, pat dry, and pre-measure aromatics for efficient basting. A short prep prevents surprise moisture that ruins the crust.
Cooking: 15 minutes. A properly preheated pan shortens sear time and improves crust development. The actual sear window is brief; plan your timing and tools before you heat the skillet.
Yield
Serves 4 when using roughly 2 lbs of ribeye or equivalent protein. Portion sizes and thickness change cook times, so adjust the resting guidance accordingly.
Scale ingredients and sear times for smaller pieces or multiple batches. Searing in controlled batches keeps pan temperature consistent and ensures an even crust on each piece.
Difficulty Level
Medium. Searing requires attention to heat and timing, but it relies on repeatable technique rather than advanced culinary maneuvers. Anyone who follows the sequence and monitors temperature will succeed.
Key skills include seasoning, surface-drying, managing pan heat, and using an instant-read thermometer. These tasks are straightforward and teachable for regular home cooks.
Ingredients
Use clean, focused ingredients to let the sear shine. For a classic seared steak, use a 1-inch ribeye or similar steak brought to room temperature and fully patted dry.
Essential items: a high-smoke-point oil, coarse salt, fresh cracked black pepper, butter, and aromatics for basting. Adjust herbs and aromatics to match the protein.
- 2 lbs beef ribeye steak, about 1-inch thick, room temperature
- 2 tbsp high smoke point oil (refined avocado oil or refined grapeseed oil)
- 1 tsp kosher salt
- 1/2 tsp freshly ground black pepper
- 2 tbsp unsalted butter
- 3 cloves garlic, crushed
- 2 sprigs fresh thyme
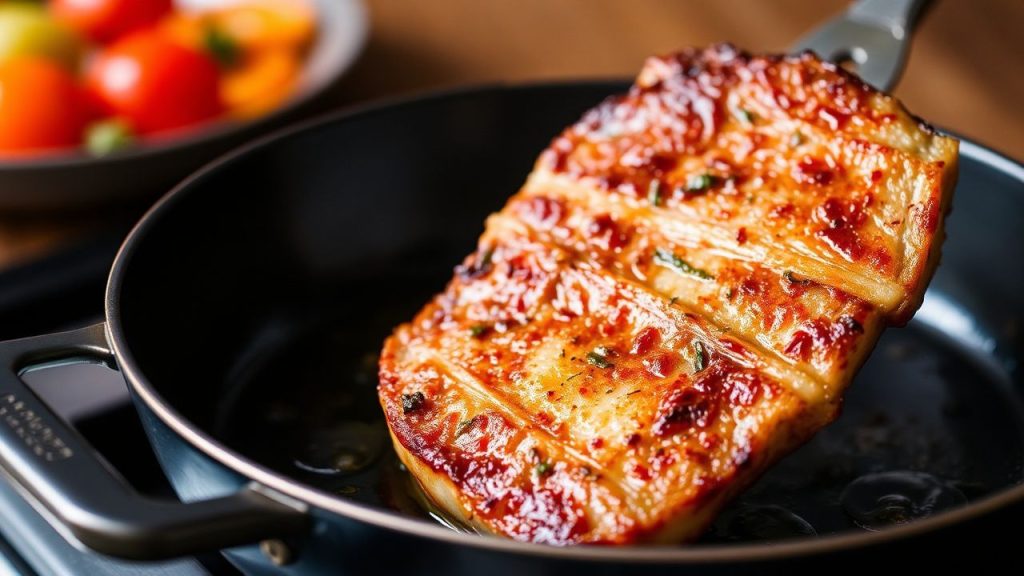
Instructions
Select a heavy-bottomed stainless steel or cast iron skillet for the best heat retention and even browning. Cast-iron provides the sustained hot surface that helps form a consistent crust; consult an internal guide for pan care and seasoning if needed: Pan Selection Guide.
Follow these steps in order to sear with control and repeatability. Keep tools — tongs, spoon for basting, and an instant-read thermometer — within reach before you heat the pan.
- Preheat the pan: Place the skillet over medium-high heat for 4–6 minutes until it is visibly smoking at the edge. A hot, dry surface is non-negotiable for a good sear.
- Pat the steak dry: Press a few paper towels across the surface to remove moisture. A dry surface contacts the pan directly and browns efficiently.
- Season: Generously season both sides with kosher salt and cracked black pepper. Press the seasoning lightly so it adheres without drawing moisture.
- Add oil: Add 2 tablespoons of your high-smoke-point oil and swirl to coat the bottom of the pan. The oil should shimmer, not smoke aggressively.
- Sear without disturbance: Place the steak in the pan and leave it undisturbed for 3–4 minutes, or until a dark golden-brown crust forms. Flip once using tongs to preserve the crust.
- Baste with butter and aromatics: Add butter, garlic, and thyme immediately after flipping. Tilt the pan and spoon the melted butter over the top for 2–3 minutes to finish, aiming for 125–130°F for medium-rare final temp after resting.
- Rest: Remove the steak to a warm plate, tent loosely with foil, and rest 5–10 minutes. Resting allows internal temperature to equalize and juices to redistribute.
Tips to Sear It Right: Mastering Temperature Control
Surface temperature governs the Maillard reaction — the chemical browning that produces complex savory flavors. A steady surface temp between roughly 400°F and 450°F promotes ideal crust formation without burning the fat.
Use an infrared or contact thermometer to gauge pan temperature. If the pan temperature dips after adding protein, pause between batches so the surface regains heat to avoid steaming instead of searing.
For background on the chemical process that creates browned flavor, read more about the Maillard reaction: Maillard reaction. Understanding the reaction helps you time the sear for maximum flavor.
Choosing the Right Pan and Oil for Maximum Flavor
Cast iron and heavy stainless steel excel because they hold heat when food hits the surface. A pan that cools significantly on contact will steam the food and prevent proper browning.
For technical reading on pan types and material properties, consult the cast iron reference: Cast-iron skillet. Good pan selection reduces hot spots and improves control.
Select oils with smoke points above 450°F for high-heat searing. These oils allow sustained surface temperatures without producing off flavors from burnt oil.
Chef’s Notes – Tips for Success
Patience matters: Resist constant flipping. Allow the crust to develop undisturbed for a clean sear. Frequent movement breaks the surface contact needed for the Maillard reaction.
Avoid overcrowding: Sear in batches to keep surface temperature stable. Crowding traps steam and yields pale, uneven browning.
- Swap herbs: Replace thyme with rosemary if you prefer a piney aroma during basting.
- Internal temp guide: Aim for 125–130°F for medium-rare after resting; adjust to taste.
Expert Insight
Do not skip the resting step; it is short but critical for texture. Cutting too soon lets flavorful juices run out and diminishes the eating experience.
Pro-Caution
Serving Suggestions
Slice the steak against the grain for tender bites and plate over creamy mashed potatoes or grilled seasonal vegetables. Simple sides let the seared flavors remain the focal point.
Finish with a sprinkle of flaky sea salt and a spoonful of pan jus or herb butter to add shine and immediate flavor contrast. For related preparation techniques, see our internal Ultimate Guide to Cooking Steaks.
| Nutrient | Per Serving |
|---|---|
| Calories | 580 kcal |
| Protein | 54 g |
| Carbohydrates | 1 g |
| Fat | 42 g |
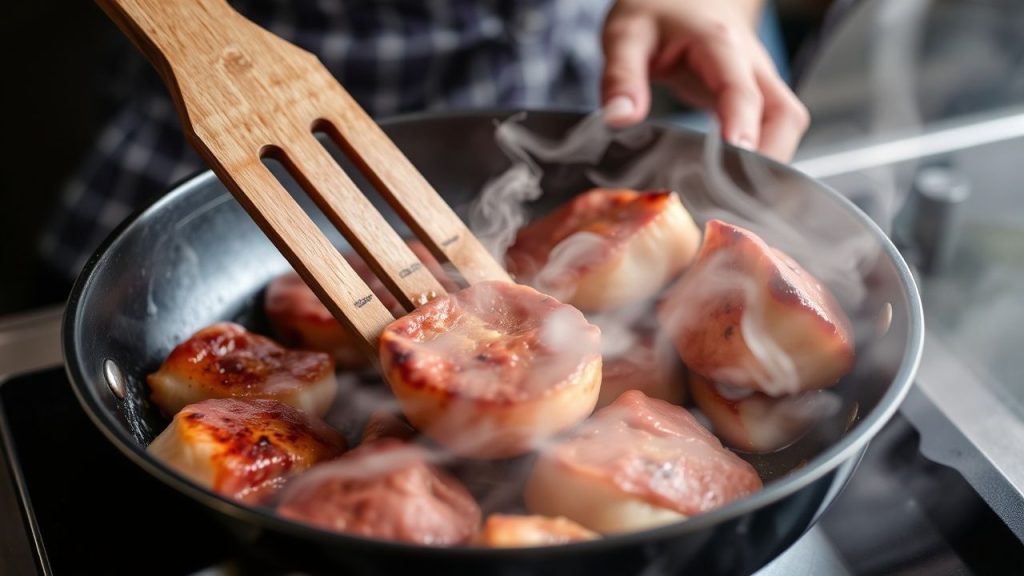
Practical Notes and Techniques
Vegetables sear differently than meats; they release water and often require a hotter pan and drier surface. Give vegetables space and use direct contact to concentrate sugars into caramelization.
When using grill grates, you still rely on the same principles: high, direct heat and dry contact. For a primer on outdoor searing techniques, see the grilling resource: Grilling.
FAQ
What does it mean to sear food, and why is it important?
Searing applies high, dry heat to a food surface to create a brown, flavorful crust. This browning occurs via the Maillard reaction and amplifies savory flavors while adding texture contrast to the dish.
Does searing seal in juices?
Searing does not physically ‘seal’ juices, but a good crust slows moisture loss during further cooking. The crust improves perceived juiciness by preserving interior moisture and adding concentrated surface flavor.
Can I sear vegetables the same way as steak?
Yes—apply the same principles: dry surface, very hot pan, and minimal overcrowding. Vegetables benefit from high heat to caramelize sugars, producing complex, sweet-savory notes.
Is cast iron better than stainless steel for searing?
Both work well. Cast iron holds heat longer and provides steady contact; heavy stainless heats faster and offers fine control. Choose the pan that matches your workflow and heat source.
How do I know when to flip?
Flip when the protein releases easily and shows a deep golden-brown crust. If it resists, give it more time; forcing a flip too early will tear the developing crust.
For a basic overview of cooking science and techniques that inform searing decisions, consult this foundational resource: Cooking. Understanding the why helps you apply the how consistently.
Embrace the heat, control the contact, and let a reliable sequence of temperature, timing, and rest produce repeatable results. Searing rewards precision and a small set of reliable habits.
See also: Searing
]]>
- Pull slightly low: aim 5–10°F (3–5°C) below final target for most cuts.
- Rest smart: allow 10–30 minutes depending on size to let juices redistribute.
- Probe placement matters: center thickest section without touching bone or fat.
- Use the right tool: instant-read for checks, leave-in probes for continuous monitoring.
What is carryover cooking?
Carryover cooking occurs when internal temperature rises after removal from a heat source. Residual heat stored in outer layers migrates inward and raises the center temperature by several degrees.
This concept applies across roast, steak, poultry, and even thick fish. Understanding carryover links directly to how heat transfers through muscle and fat, so knowing the physics helps you time the pull point precisely. For background on how heat affects food structure, consult this meat overview.
Why a thermometer matters
A thermometer removes guesswork. Visual cues like color or juices lie; temperature gives objective data so you can pull meat at the exact moment to account for carryover.
Temperature control improves juiciness, texture, and food safety. For core safety thresholds—especially for poultry—use validated temperature targets when planning your pull temperature; see food safety guidance.
Thermometer types and when to use them
Pick a thermometer that fits the task. Two common categories dominate pro and home kitchens: instant-read units and leave-in probe thermometers.
Instant-read thermometers
Instant-read devices give a quick temperature snapshot. Use them to check the thickest part of a cut right before you expect to pull; they are fast and less invasive.
Instant reads are ideal for steaks and thin roasts where you need frequent checks. However, avoid leaving them in during rest or oven cook time; they are for spot checks only. For basic technical context, read about the standard thermometer principles.
Leave-in probe thermometers
Leave-in probes monitor temperature continuously and record trends during the last phase of cooking. They allow you to pull based on the rising curve rather than a single reading.
Probes shine with large roasts and whole birds where carryover will be significant. Choose a probe with a thin stem and an accurate display; wireless probes add convenience when resting on the counter.
Practical pull temperatures and resting guidelines
Plan your pull point by subtracting the expected carryover amount from your target final temperature. Typical rise ranges from 5°F to 15°F (3–8°C) depending on mass, initial temperature, and cooking method.
Below is a quick reference table with common target final temperatures and recommended pull points plus resting times. Use these as starting points and refine by experience.
| Protein | Final Temp (F) | Pull Temp (F) | Rest Time |
|---|---|---|---|
| Beef steak (medium-rare) | 130–135°F | 125–130°F | 5–10 min |
| Beef roast | 135–145°F | 125–140°F | 10–30 min (size-dependent) |
| Pork (safe and juicy) | 145°F | 135–140°F | 10–20 min |
| Poultry (safe) | 165°F | 155–160°F | 10–20 min |
| Thick fish / salmon | 120–130°F | 115–125°F | 5–10 min |
Adjust the pull temperature if the piece has high thermal mass (dense bone, large diameter) or if you prefer carryover to finish the cooking. Always allow for a safety margin on poultry and ground meats per food-safety standards.
Expert Insight
After a few tests you will learn how many degrees your typical roast climbs while resting. Keep a simple log of weight, oven temp, pull temp, and final result to speed mastery.
Probe placement and technique
Insert the probe into the thickest part of the cut, perpendicular to the muscle fibers. For bone-in pieces, avoid touching bone because bone reads hotter and will give a false high result.
Place probes so the tip sits at the geometric center of the thickest section. For long roasts, target the broadest cross-section rather than the narrow end.
Thickness, thermal mass, and crust management
Thick pieces store more residual heat and therefore have greater carryover. Thin fillets often show negligible rise; treat them as near-instant items.
Crisp crusts can soften during resting if wrapped tightly. Tent with foil loosely to retain heat while allowing steam to escape and preserve textural contrast.
Pro-Caution
After resting, slice against the grain for even texture and to display the correct doneness. Slicing too soon releases juices; wait until the internal pressure relaxes after rest.
Troubleshooting common issues
If a roast finishes too dry, identify whether the oven temperature was too high, the probe was misplaced, or the pull point was set too high. Record the failure mode and change only one variable at a time.
If the exterior lacks color, you probably pulled too early or the Maillard reaction did not develop. Higher initial sear heat or longer exposure at medium-high heat helps; learn more about browning chemistry at Maillard reaction.
FAQ
How many degrees does carryover cooking usually add?
Expect about 5–15°F (3–8°C). Small steaks will be at the low end; large roasts will be at the high end. Use the probe trend to refine this estimate for your specific roasts.
Should I tent with foil or leave uncovered when resting?
Tent loosely to hold heat without trapping steam if you want to preserve crust crispness. Tight wrapping creates condensation and softens crusts.
Can carryover cooking make undercooked meat safe?
Carryover adds limited heat and cannot reliably replace reaching safe internal temperatures while cooking. Always aim for the correct minimum safe temperature during the cook, especially for poultry and ground products.
What probe accuracy should I expect?
Aim for a probe accuracy of ±1–2°F. Calibrate periodically by testing in an ice water slurry (should read ~32°F/0°C) and near-boiling water, adjusted for altitude.
Does resting time differ for bone-in versus boneless cuts?
Yes. Bone-in cuts usually need longer rest because bone affects heat distribution and thermal mass. Increase rest time for large bone-in roasts by 5–10 minutes compared to a similar-sized boneless cut.
Mastery of carryover cooking comes from combining methodical temperature control with consistent technique. Use the guidance above, keep notes, and tune pull points to your kitchen and equipment. Over time, the thermometer will become your most reliable tool for consistent, juicy results.
See also: carryover cooking
]]>