- Temperatures matter: target ranges control protein denaturation and collagen melting.
- Marbling feeds flavor: intramuscular fat melts and bastes the meat internally.
- Sear plus rest: a rapid crust and a proper rest preserve juices and texture.
Prep and Cook Time for a Juicy Steak
Preparation time: 15 minutes. Give the steak time to approach room temperature for even cooking and predictable internal rise.
Cooking time: 10–15 minutes, depending on thickness and doneness target. Use a thermometer rather than the clock to aim for a consistent, juicy steak every time.
- Preparation time: 15 minutes
- Cooking time: 10–15 minutes (depending on desired doneness)
- Resting time: 10 minutes
Fat content and cut thickness influence the exact cook time. Track internal temperature to avoid overcooking and to preserve the best juicy steak texture.
Yield and Portions for a Juicy Steak
Serves: 2 hearty portions. Two 1½-inch ribeye steaks or an equivalent cut will feed two adults with generous portions.
Scale ingredients without changing the technique. The method works for single steaks or a batch; thickness and carryover heat remain the critical variables for a juicy steak outcome.
Skill Level for a Juicy Steak
Skill: Medium. The method focuses on temperature control and timing rather than exotic steps, so consistent results come from repetition and good tools.
With an instant-read thermometer and a heavy skillet, most home cooks can achieve a repeatable juicy steak by following the steps and verifying temperature rather than relying on feel alone.
Ingredients for a Juicy Steak
Keep ingredients simple to highlight meat quality. Use coarse salt, freshly ground pepper, a high-smoke-point oil, butter, and aromatics to support the natural flavor.
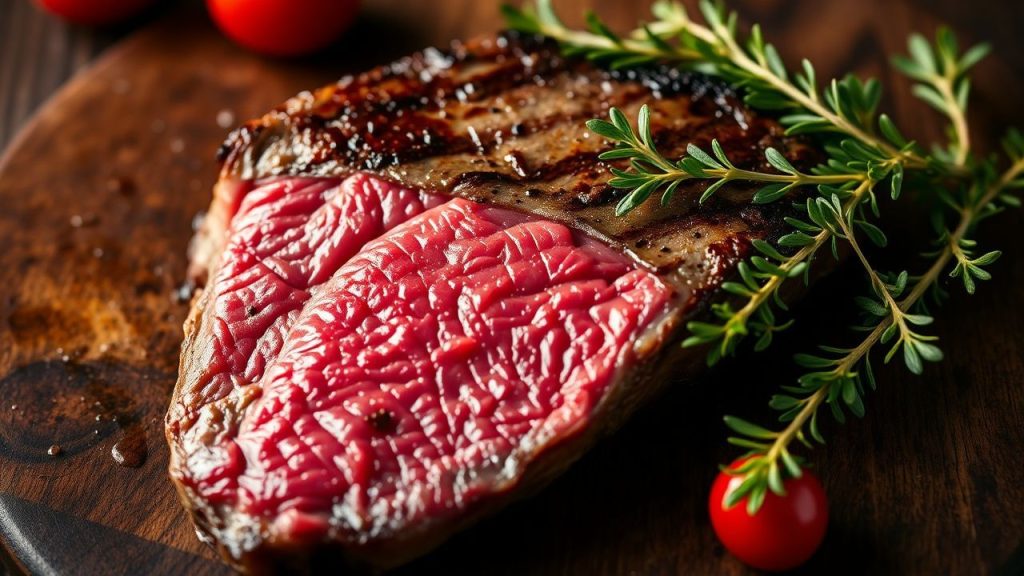
Choose steaks about 1½ inches thick for best sear-to-center balance. Pat dry before seasoning to encourage a strong crust and a reliably juicy steak interior.
- 2 ribeye steaks, about 1½ inches thick, room temperature
- 1 tablespoon kosher salt
- 1 teaspoon freshly ground black pepper
- 1 tablespoon high-smoke-point oil (avocado or grapeseed)
- 2 tablespoons unsalted butter
- 3 garlic cloves, lightly crushed
- 2 sprigs fresh rosemary
- Optional: finishing sea salt for serving
Instructions for a Juicy Steak
Follow a clear workflow: season, sear, baste, monitor temperature, then rest. Each step influences internal texture and the overall juiciness of the steak.
Work with a heavy skillet on high heat to develop the crust quickly, then lower heat for basting and finish. Use a calibrated instant-read thermometer for precision and consistent results.
- Prep the steaks: Pat the steaks dry with paper towels. Season both sides generously with kosher salt and black pepper to penetrate and flavor the meat.
- Preheat the pan: Heat a heavy cast-iron skillet over high heat until very hot. A properly hot pan creates the Maillard crust that locks flavor without overcooking the center.
- Sear the steaks: Add the oil and sear without moving for about 3–4 minutes per side to form a deep brown crust. Flip once for an even sear and avoid repeated turning.
- Add aromatics and butter: Reduce heat to medium-low. Add butter, garlic, and rosemary, then tilt the pan and spoon melted butter over the steaks to baste and finish the exterior.
- Monitor internal temperature: Use a thermometer to check doneness: 125°F for rare, 135°F for medium-rare, 145°F for medium. Rely on temperature rather than time alone to protect the juicy steak interior.
- Rest the steaks: Transfer to a warm plate and tent loosely with foil. Rest for 8–12 minutes to allow juices to redistribute via carryover heat.
- Slice and serve: Slice against the grain just before serving to preserve tenderness and reveal the juicy interior.
Keep the pan hot enough to sear but not so hot that butter smokes or burns. Adjust the heat while basting to maintain a controlled finish and a consistent juicy steak center.
 Pro-Caution
Science of Juiciness
This section links culinary practice to muscle biology and heat-driven changes that determine a juicy steak. The explanations use industry terminology and measurable thresholds.
Understanding those mechanisms helps you choose temperature targets and timing to protect moisture and tenderness. The science explains why the method works.
Maillard Reaction and Crust Formation
The brown crust forms through the Maillard reaction, a set of chemical reactions between amino acids and reducing sugars. These reactions produce browned color and complex flavor compounds quickly at high heat.
A strong sear improves flavor and texture without requiring prolonged high internal temperatures. Searing creates surface flavor while the interior stays at the target doneness for a juicy steak.
Connective Tissue, Collagen, and Gelatin
Collagen toughens raw muscle but softens to gelatin with heat and time. The conversion follows predictable thermal thresholds, so moderate heat plus brief resting preserves tenderness and moisture.
For quick-cook cuts like ribeye, you rely on partial collagen softening plus fat to deliver tenderness. For tougher cuts, longer low-temperature cooking converts more collagen to gelatin for a different kind of juicy steak experience. See collagen for structural detail.
Muscle Fibers and Temperature Control
Skeletal muscle structure determines how proteins denature as temperature climbs. The arrangement and type of fibers set how the steak reacts to heat and how much moisture it releases.
Controlling internal temperature prevents excessive contraction of proteins and limits moisture loss. For background on muscle anatomy consult skeletal muscle.
Marbling and Melted Fat
Intramuscular fat melts during cooking and redistributes flavor and lubrication inside the meat. That internal basting is central to what consumers perceive as a rich, juicy steak.
Fat chemistry influences mouthfeel and perceived tenderness. For a technical overview of lipids in food see fat. Properly rendered fat helps protect the juicy steak interior while adding flavor.
Tips for Success with a Juicy Steak
Choose marbled cuts: Ribeye and strip deliver predictable juiciness due to intramuscular fat. Tenderloin remains tender but contains less fat and will taste leaner.
Use precise tools: A calibrated instant-read thermometer and a heavy skillet reduce variability and build repeatable habits that produce a consistently juicy steak.
- Consistent thickness: Trim or butterfly irregular steaks to get even cooking and an even juicy interior.
- Dry surface: Pat steaks dry to promote better crust formation and faster searing.
- Reverse sear option: For very even doneness, cook low then finish with a hot sear to protect the center while building a deep crust.
Practice the technique with the same cut and thickness to refine timing for your equipment. Track internal temperatures and record results to build a repeatable track record for a juicy steak.
 Expert Insight
For more practical guides on searing and finishing, see the hands-on how-to on our site about searing techniques. Use the reverse sear guide to compare outcomes and choose your personal preference for a juicy steak finish.
Related internal resources: Steak science and a practical how-to sear steak guide provide recipe variations and troubleshooting tips tailored to home kitchens.
Serving Suggestions
Serve steaks on a warm plate and finish with a sprinkle of finishing salt to highlight texture. Allow slices to rest slightly before arranging on the plate so the juices settle evenly.
Classic sides include garlic mashed potatoes, grilled vegetables, or a bright salad to cut richness. Pair with a robust red wine or a dark ale if desired to match the meat’s intensity and support the juicy steak flavor.
| Nutrient | Per Serving |
|---|---|
| Calories | 620 kcal |
| Protein | 58 g |
| Carbohydrates | 1 g |
| Fat | 45 g |
For a technical reference on meat structure and cooking techniques consult trusted culinary science texts and professional resources. Use measured temperature targets and verified methods to reproduce a reliably juicy steak.
FAQ
What happens inside a steak as it cooks to make it tender and juicy?
Heat denatures muscle proteins and changes texture while collagen softens toward gelatin and intramuscular fat melts. Those concurrent processes add moisture and tenderness.
Controlling the rates and endpoints of those processes yields a tender, juicy steak interior rather than a dry, overcooked center.
How does temperature affect steak tenderness?
Temperature determines protein contraction and collagen transformation. Lower internal targets reduce moisture loss and preserve the soft texture associated with a juicy steak.
Use thermometer readings—125°F rare, 135°F medium-rare, 145°F medium—and allow for a few degrees of carryover during resting for accurate results.
Why is resting essential after cooking?
Resting lets internal temperature equalize and juices redistribute. If you cut too early, juices run onto the plate instead of staying in the meat.
A rest of 8–12 minutes on a warm plate is typically sufficient for common steak sizes and preserves both moisture and texture for a juicy steak serving.
Does marbling change the cooking method?
Marbled cuts need the same fundamental methods but offer more margin for error. Rendered intramuscular fat bastes the meat internally and protects against dryness.
Lean cuts require closer temperature control and sometimes a finishing compound butter or sauce to enhance perceived juiciness.
Which tools and techniques give the most reliable results?
A heavy skillet, an instant-read thermometer, and a timer deliver the best consistency. Aim to sear quickly and finish at a controlled lower heat when needed.
Practice with the same cut and thickness to refine your timing and develop a repeatable approach for a reliably juicy steak outcome.
See also: Steak science
Recommended Reading:
]]>
- Resting steak keeps juices in the meat, not on your cutting board.
- Carryover cooking finishes doneness while protecting the crust.
- Tent loosely to preserve crust and retain warmth without steaming.
- Match rest time to thickness — thicker cuts need longer rests.
Why Resting Steak Matters: The Science in Plain Terms
When a steak meets high heat, muscle fibers contract and push moisture toward the center. Resting steak lets those fibers relax and reabsorb some of the expelled juices, preserving tenderness.
Thermal movement then evens internal temperature as heat migrates inward. This carryover effect raises internal temperature a few degrees and stops overcooking the crust while the interior finishes. For context on heat transfer in cooking, see cooking.
What Happens When You Cut a Steak Too Soon
Cut too early and juices run out, leaving a wet plate and a drier interior. Those visible juices contain flavor compounds and dissolved proteins; losing them reduces taste and mouthfeel.
Cutting prematurely also flattens the contrast between the browned crust and the interior. The desirable crust forms through the Maillard reaction. If you slice too soon or wrap tightly, that crust cools and softens, diminishing texture.
How Long to Rest Steak: Timing Rules That Work
Use a simple rule: rest for roughly half the active cooking time for most steaks. If you seared a steak for 8–10 minutes total, plan 4–5 minutes of rest to balance juice redistribution with temperature retention.
For precision, rely on internal temperatures and carryover expectations. Most steaks rise 3–8°F (1.5–4°C) off the heat. Pull steaks a few degrees below your target doneness and let resting steak finish the job.
Resting Times by Cut and Thickness
For a 1-inch steak, allow about 4–6 minutes. For 1.5–2 inch cuts, allow 8–12 minutes. Larger roasts require 15–30 minutes depending on mass.
Thin steaks (under ¾ inch) cool quickly and benefit from a short pause of 2–3 minutes. Reserve longer rests for steaks where carryover meaningfully affects final temperature.
Step-by-Step: Cook, Resting Steak, Finish — A Practical Workflow
Follow a clear sequence for consistent results: season, sear, rest, slice. This order protects juices and showcases your crust. Each step supports the next, so do not skip the pause.
Bring the steak to near room temperature for 20–30 minutes and salt just before cooking. Sear on high heat in a heavy skillet or cast-iron. For searing technique, see our internal guide on how to sear steak.
Detailed Instructions
1. Pat the steak dry and season both sides with coarse salt and cracked pepper. A dry surface produces a better sear. 2. Heat the pan until it just smokes; add a high-smoke-point oil and sear undisturbed to form a crust.
3. Flip once to cook the second side and add aromatics like garlic, thyme, and butter to baste for flavor. 4. Transfer to a warm plate and tent loosely with foil; rest for the recommended time before slicing against the grain.
Slicing and Serving
Always slice against the grain to shorten muscle fibers and improve tenderness. Cut uniform slices to preserve temperature and mouthfeel when served.
Pair steak with contrasting textures and acidic elements — crisp vegetables or a bright vinaigrette balance the richness. For doneness targets and temperature charts, consult our steak doneness guide.
Expert Insight
If you tent after searing, keep the foil loose to avoid trapping steam. A loose tent holds warmth while allowing airflow that protects the crust.
Pro-Caution
Sous-vide cooks need a shorter rest since the piece sits at a uniform temperature. Still, a quick sear followed by a brief rest improves texture and appearance by setting a crust without forcing juices out.
Practical Alternatives When You’re Short on Time
If time is tight, use strategies that mimic resting steak benefits without a long pause. A low oven at about 140°F (60°C) preserves heat while allowing redistribution for 3–5 minutes.
Another tactic is to remove the steak just shy of final temperature. Because of carryover cooking, residual heat finishes the doneness while a short rest prevents juice loss. Larger slices at service also help maintain internal moisture on the plate.
Common Mistakes and How to Avoid Them
Wrapping steaks tightly in foil to preserve heat is a common mistake. That traps steam and softens your sear; avoid it. Use a loose tent or rest on a warm plate instead.
Over-resting thin cuts is another error: extended waits cool them down and require reheating, which risks overcooking. Match rest length to cut size and thickness to keep temperature and texture optimal.
Chef Notes: Small Techniques, Big Differences
Finish steaks with a small pat of compound butter in the final seconds before slicing to add gloss and a flavor boost. The butter melts into the surface without driving juices out.
Use coarse or kosher salt for even seasoning and apply early for thicker cuts. Consider resting on a warm plate rather than a chilled surface; contact with cold plates can draw heat out prematurely.
Relevant Reading
For background on muscle structure and meat science, consult Meat. To understand browning chemistry, read about the Maillard reaction. For specifics on different cuts, review the Steak page.
FAQ
How long should I rest a 1-inch steak?
Rest a 1-inch steak about 4–6 minutes. This lets juices redistribute while keeping the steak warm and close to your target doneness.
Does the steak keep cooking while resting?
Yes. Residual heat causes carryover cooking and typically raises internal temperature 3–8°F. Pull steaks a few degrees below your target to account for that finish.
Can resting ruin the sear?
Only if you rest incorrectly. Tight foil will steam the crust and make it limp. A loose tent preserves the sear while the interior relaxes.
Is resting necessary for all meats?
Most large cuts benefit from resting, including pork, lamb, and poultry. Thin cuts and fast-cooked items may need little or no rest, but a brief pause often improves texture and juiciness.
What tool gives the best consistency?
An instant-read thermometer provides the most consistent results. Combine it with proper timing for predictable doneness and optimal juices.
See also: resting steak
See also: resting steak
]]>Steak flipping is a deliberate technique that controls crust development, heat transfer, and final juiciness. Use measured turns to shape the Maillard crust while moving the internal temperature toward your target doneness.
- Controlled flips promote even cooking and reduce carryover surprises.
- Initial sear secures the Maillard layer; subsequent flips build thin crusts.
- Tools and timing determine how many flips a steak tolerates without losing moisture.
- Resting finalizes texture and redistributes juices for clean slices.
Why steak flipping frequency matters
Flip frequency changes how heat moves through the meat and how the surface browns. Each flip equalizes surface temperature and limits prolonged exposure on one side.
When you plan flips, you influence the Maillard reaction and the temperature gradient from crust to center. For further reading on browning chemistry, see Maillard reaction.
Prep and cook time for steak flipping
Bring steaks to room temperature and pat dry; that reduces thermal lag and yields more predictable carry to doneness. A 30-minute rest on the counter works for most cuts up to 2 inches thick.
Typical pan times vary by thickness and heat. For a 1½-inch ribeye expect 8–12 minutes total on the stove, plus a 5-minute rest to hit medium-rare reliably.
Yield, difficulty, and expected results with steak flipping
This method yields two hearty portions from two 1½-inch steaks and suits cooks who want repeatable results. It requires attention and a thermometer rather than specialized gear.
Difficulty sits at intermediate: you must read sear color and monitor internal temp. Aim for about 125–128°F before resting to carry to 130°F for medium-rare.
Ingredients and equipment for effective steak flipping
Use quality cuts and minimal seasoning: salt, black pepper, high-smoke oil, and finishing butter with aromatics work best. Fat content affects tolerance for frequent turns.
Choose a heavy skillet or a hot grill for rapid crust formation. For guidance on cookware choices, reference cast-iron skillets and how they retain heat.
Instructions: Practical steak flipping patterns
Start with a high-heat sear to establish an initial crust, then switch to brief, timed flips to even out cooking. Sear for 90–120 seconds without disturbance, then begin controlled turns.
After the final turn, remove the steak, tent it loosely with foil, and rest five minutes. Resting lets internal juices redistribute and stabilizes the final temperature.
- Bring steaks to room temperature for 30 minutes; pat dry and season immediately before cooking.
- Heat pan or grill to medium-high until shimmering; add oil to coat the surface and prevent sticking.
- Sear first side undisturbed for 90–120 seconds to lock a Maillard crust in place.
- Begin controlled flips every 20–45 seconds after the initial sear to equalize surface temperature and speed up interior cooking. Use tongs; avoid piercing the meat.
- Add butter and aromatics after the second side sears; baste while flipping to layer flavor without overcooking.
- Target internal temp: remove at 125–128°F if you want medium-rare after resting. Use a calibrated thermometer for accuracy; read more about food thermometers at food thermometers.
Chef’s notes: technique details for steak flipping
Flip with intent: lift, rotate, and set. Avoid frantic agitation that cools the surface and prolongs cook time.
Adjust frequency by thickness and heat. Thicker cuts benefit from more frequent turns to avoid overcooked edges and underdone centers.
Choosing the right cut for steak flipping
Marbled cuts such as ribeye and strip tolerate repeated turns because intramuscular fat keeps the meat moist. The fat also supports crust development under frequent flips.
Lean, thin cuts cook quickly and usually require fewer flips. Match your flip pattern to the cut for the best texture and doneness.
Mastering temperature control when steak flipping
Keep heat steady. Too hot and butter will brown too fast; too cool and you won’t build a reliable crust. Medium-high often balances searing with internal warming.
Consider finishing in a moderate oven if the crust forms faster than the interior cooks. The oven changes how flips affect final doneness.
Tools and technique for clean steak flipping
Use sturdy tongs and a thin spatula to flip without piercing. A fork will drain juices and reduce final succulence.
Read edge color and bead juices as cues. When the edge shows consistent golden color, flip confidently for the next interval.
Expert Insight
Practice builds visual and tactile memory. Use a thermometer alongside sight and touch until timing becomes reliable.
Pro-Caution
Serving suggestions after steak flipping
Rested steaks slice cleanly and present glossy, not wet. Finish with flaky sea salt and a turn of cracked pepper for texture and lift.
Pair with roasted vegetables, mashed potatoes, or a bright chimichurri. For classic service, use warm plates to keep temperature stable while plating.
Practical context: grill vs. pan vs. oven for steak flipping
Different environments change flip strategy. Open-flame grilling often needs fewer turns because of radiant heat, while pan-searing allows finer control and more frequent flipping.
For more on outdoor methods, consult material about grilling and how it alters surface and interior heat transfer.
Further reading and reference links
For authoritative background on steak as a culinary item, see the general entry on steak. These resources clarify terms and underpin technique choices.
Use these references to deepen your technical approach and adapt flips by cut, thickness, and heat source. The linked pages explain the science and cookware considerations that inform best practices.
FAQ
How many times should I flip a steak for best results?
There is no fixed number; count flips by window rather than a set total. After a solid initial sear, flip every 20–60 seconds depending on thickness and heat until you reach your target internal temperature.
Does flipping more often make the steak juicier?
Moderate frequent flipping helps even heat penetration and can reduce overcooked edges by avoiding long exposure on a single surface. Excessive flips cool the pan and can extend cook time, so balance frequency with pan temperature.
Will flipping stop the Maillard crust from forming?
No, provided you allow an initial uninterrupted sear. The first 90–120 seconds create a Maillard layer; controlled subsequent flips build additional thin crust layers rather than removing them.
What internal temperature should I aim for?
Pull steaks around 125–128°F if you want medium-rare after resting; they will rise to about 130°F during carryover. Always use an instant-read or probe thermometer for repeatable results.
Can I use this flip method on a grill?
Yes. High-heat grills often require fewer flips, but the same principles apply: an initial sear followed by controlled turns based on color and temperature. Adapt the interval to grill intensity and flare-up behavior.
Final takeaway
Steak flipping is a practical technique that balances crust formation with interior evenness. Use a clear sear, timed flips, and a thermometer to get consistent, restaurant-quality results.
Practice with different cuts and heat sources, apply expert flip windows, and you will improve consistency, texture, and juiciness every time.
See also: steak flipping
]]>