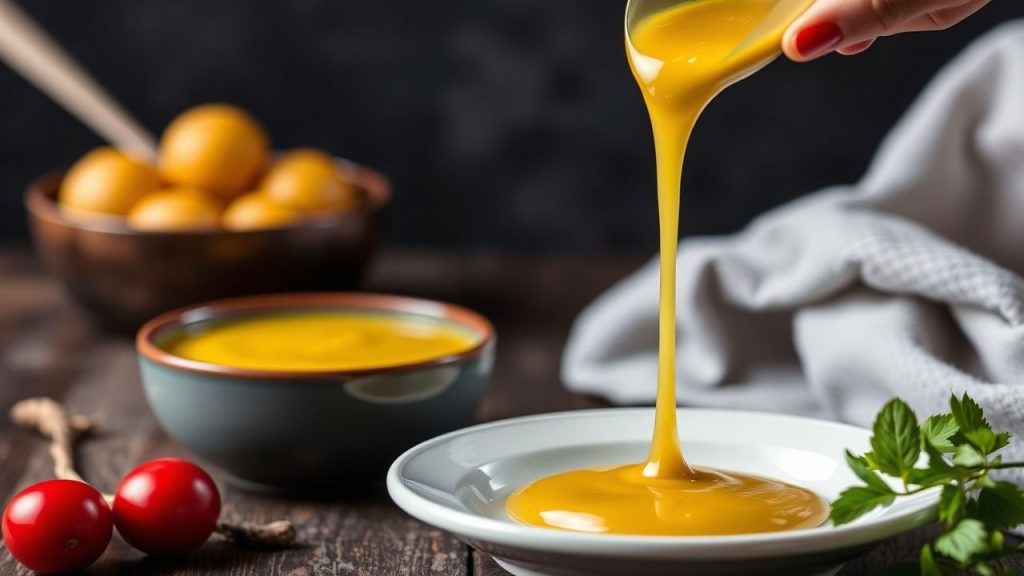
Roux is the classic cooked blend of fat and flour that forms the backbone of many sauces, gravies, and stews. When you stop cooking a roux too soon, it can leave a dish tasting powdery, thin, or uneven in texture.
- Short roux often tastes raw and fails to thicken properly.
- Color and aroma signal readiness more reliably than time alone.
- Recovery methods exist: gentle heat, patience, and proper technique restore many faults.
Understanding the Roux Basics
A roux is simply fat combined with flour and cooked to remove the raw starch flavor while creating a stable thickener. You can read the basic definition on Roux (Wikipedia) for a concise overview.
Beyond definition, two functional changes occur during cooking: starch granules swell and gelatinize, and Maillard-type browning develops flavor. For context, see Maillard reaction (Wikipedia), which explains how heat transforms aromas and color.
Timing, Color, and Texture: What to Watch
Cook time affects three linked attributes: color, aroma, and thickening power. A pale, or white, roux cooks just until the raw flour smell dulls; a blonde roux develops some tan color; a brown roux takes longer and yields deeper flavor.
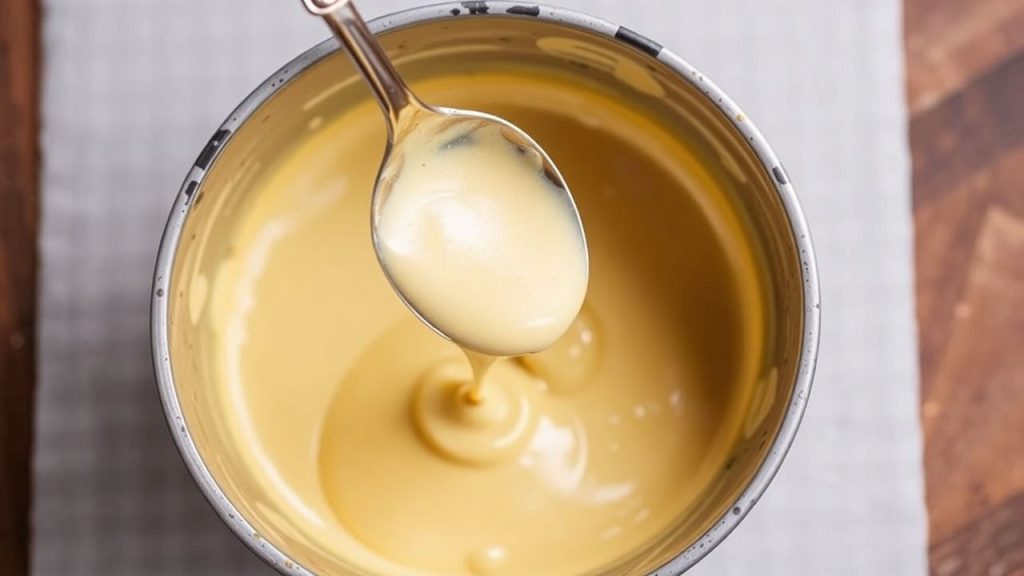
Use visual and tactile cues rather than a stopwatch alone. The roux should feel smooth and paste-like, and the aroma should shift from raw flour to toasted and slightly nutty.
What Goes Wrong When the Roux Runs Short
When cooking time falls short, the most immediate issue is a lingering raw-flour taste. That powdery note masks other flavors and reduces appetite appeal.
Second, undercooked roux may not thicken reliably. The starches need heat and time to become effective thickeners; otherwise you get a thin or unstable sauce. Also, uneven cooking causes lumps and a gritty mouthfeel.
How to Diagnose an Undercooked Roux
First, smell the roux. If it still smells like paste or raw dough, then it needs more time. Aroma changes are a fast, reliable test during stovetop cooking.
Second, test texture. Cool a small amount and rub it between your fingers; it should be smooth without a gritty, floury feel. Finally, check the color: if it’s too pale for the intended dish, extend cooking time and stir constantly.
Practical Fixes: Rescue Steps for a Roux Run Short
If you catch the issue before you add liquid, the best fix is simple: return the pan to gentle heat and stir. Low, steady heat brings the flour through the needed transformations without burning the fat.
If you already added liquid and the dish tastes raw, avoid high heat. First, remove excess liquid if possible or strain and set it aside. Then, finish the roux in a separate pan and reintroduce it slowly to the dish to rebuild consistency and flavor.
Step-by-step recovery:
- Remove pot from heat and let the mixture cool slightly to prevent splatter.
- In a separate saucepan, melt a small amount of fat and add fresh flour to make a small corrective roux. Cook it properly until it reaches the right color and aroma.
- Temper this cooked roux with a measured amount of warm liquid, whisking until smooth.
- Slowly add the tempered roux back to the main pot while stirring; heat gently until the sauce regains thickness.
These steps maintain control and prevent locking in raw starch flavors. They also let you match color and taste without risking lumps.
 Pro-Caution
When Shortcuts Help—and When They Hurt
Thickeners like cornstarch or arrowroot can rescue texture quickly, but they will not recreate the nutty depth of a properly cooked roux. Use them only when texture matters more than traditional flavor.
Also, pre-made premixes offer convenience, but quality varies. For traditional dishes where roux contributes flavor—such as gumbo or béchamel—taking the time to cook the roux yields superior results. See background on the sauce base at Béchamel sauce (Wikipedia).
Chef’s Notes: Technique & Substitutions
Use a heavy-bottomed pan to spread heat evenly and reduce local hotspots that burn the roux. Stirring constantly with a wooden spoon or heatproof spatula prevents sticking and promotes uniform color development.
For flavor variations, choose the cooking fat carefully. Butter gives richness, while neutral oils tolerate higher heat without burning. Clarified butter extends the usable temperature range while preserving buttery flavor.
 Expert Insight
Storage, Make-Ahead, and Reheating
Roux stores well. Cool it, transfer to airtight containers, and refrigerate for up to a week. Freeze portions for longer storage to have ready-made base for quick sauces.
Reheat gently over low heat while whisking. Add a splash of warm liquid to loosen the roux if it thickened in the fridge. Avoid high heat; fast reheating can scorch the flour and ruin flavor.
Serving Suggestions and Pairings
A properly cooked roux adds depth to béchamel, gravies, and regional classics like gumbo. Use lighter roux for creamy sauces and longer-cooked roux for dishes that benefit from a toasty note.
Garnish finished sauces with fresh herbs or a squeeze of acid to lift the flavor. Acid and herbs balance the toasted richness and make the sauce taste brighter on the palate.
For additional technique on building sauces from this base, consult our internal guide on mastering béchamel and the primer on alternative thickeners at how to thicken sauces.
Common Faults and Quick Corrections
Grainy texture usually signals uneven cooking or inclusion of cold liquid. If graininess appears, strain the sauce and return it to gentle heat with a small corrective roux.
Flat or dull flavor often requires more browning. If safe for the dish, finish the sauce with a short cook and a little acid—vinegar or lemon juice can brighten flavors without increasing fat.
FAQ
What exactly is a roux and how does it work?
A roux is a cooked mixture of fat and flour used to thicken liquids. Heat gelatinizes starches and browns proteins, which increases both thickening strength and flavor.
How do I know when my roux is done?
Look for a smooth paste, a shift in aroma from raw to toasty, and the target color for your recipe. These cues tell you when starches have cooked enough to avoid a raw taste and provide reliable thickening.
Can I fix a roux after I add liquid?
Yes. Remove excess liquid if practical, make a corrective roux in a separate pan, temper it with warm liquid, and whisk it back in slowly. This restores texture and reduces raw notes.
Are shortcuts like cornstarch acceptable?
Cornstarch or arrowroot can correct texture quickly, but they don’t replace the toasted flavors a cooked roux provides. Use them for speed, but expect a different flavor profile.
How should I store leftover roux?
Cool and refrigerate in airtight containers for up to a week, or freeze in small portions. Reheat slowly and whisk to restore smoothness before adding to dishes.
For more on ingredient chemistry, you can read about all-purpose flour (Wikipedia) process and properties. Also review Maillard reaction (Wikipedia) to understand how heat builds flavor.
By watching aroma, color, and texture, you will catch a short-cooked roux early and apply one of the recovery techniques above. With practice, timing becomes a reliable skill that protects both texture and flavor in your sauces.
See also: roux
]]>
- Key takeaway: Lumps result from starch granules swelling unevenly.
- Key takeaway: Temperature control and gradual liquid addition prevent most clumps.
- Key takeaway: Simple rescues — strain, blend, or whisk — restore silkiness quickly.
- Key takeaway: Use technique over shortcuts for superior flavor and texture.
Understanding why gravy becomes lumpy
Gravy thickens because starch granules absorb liquid and swell, forming a network that traps water. When those granules meet heat and moisture unevenly, they clump instead of dispersing, producing lumps.
Two technical points explain most failures: insufficient mechanical dispersion and thermal shock. Mechanical dispersion means whisking the starch into fat or liquid so granules separate; thermal shock happens when very cold liquid hits hot roux and causes sudden clumping.
For the science behind thickening agents, see starch structure and gelatinization. For classic technique background, consult the culinary concept of a roux.
Common culprits that turn your gravy grainy
One frequent error is adding dry flour directly to hot fat without proper whisking; dry pockets caramelize or remain raw, then clump when liquid arrives. Another is pouring cold stock too quickly, which shocks the starch and yields gluey clumps instead of a smooth dispersion.
High heat also ruins texture. A violent boil can break starch granules and force water from the network, leaving a separated, grainy sauce. Use a gentle simmer to let the starch hydrate and align into a cohesive matrix.
When choosing thickeners, note that cornstarch behaves differently from wheat flour. For details about corn-based thickeners, review cornstarch. If you want technique drills, review our internal guide on perfect gravy techniques for step-by-step practice drills.
Mastering stir and heat control
Start by cooking the fat-and-flour mixture (the roux) on medium heat and stir constantly until it smells nutty and looks pale gold. That color signals that the starch has lost its raw edge and will thicken evenly without tasting floury.
Next, bring your stock up to warm, not cold. Add it in a steady stream while whisking vigorously. This mechanical action prevents pockets of concentrated starch from forming, and the warmed liquid reduces thermal shock to the roux.
Think of the whisk as an alignment tool: it breaks clusters, introduces consistent motion, and helps distribute heat. For practical technique cues and pan selection, see our internal note on roux basics and pan choice.
Rescue tactics: how to fix lumpy gravy fast
If lumps appear, don’t panic. Remove the pan from direct heat and whisk over low flame; often the reduced temperature lets trapped granules rehydrate and loosen. For concentrated clumps, push gravy through a fine-mesh sieve while pressing with the back of a spoon.
When you need a rapid fix before serving, an immersion blender will emulsify and smooth the sauce in seconds. Alternatively, whisk a small amount of cold liquid into a measured scoop of gravy to form a temporary slurry, then reincorporate slowly to break stubborn clumps.
Expert Insight
Straining and blending change texture slightly but restore a pleasing mouthfeel faster than starting over. For a long-term fix, reheating gently with whisking, then finishing with a knob of butter, will rebuild sheen and body.
Prevention checklist: practical steps to avoid lumps
Use a measured roux: equal parts fat and flour by weight produces predictable thickening. Sift flour before adding to fat and whisk immediately to create a uniform paste. This prevents dry islands that later become lumps.
Temper liquids: warm stock slightly and add in a slow, continuous stream while whisking. Keep heat at a bare simmer so gelatinization proceeds gradually and evenly. Additionally, consider a slurry for cornstarch—mix cornstarch with cold water first, then whisk into hot liquid to avoid clumping.
Recipe: Basic smooth gravy (4 servings)
This recipe emphasizes method over magic. Follow the sequence exactly for a reliable, lump-free result every time.
Prep and cook times remain short: five minutes prep and about 15 minutes cook time. Yield is approximately four servings and difficulty is moderate due to technique demands.
Ingredients
3 tbsp unsalted butter
3 tbsp all-purpose flour, sifted
2 cups warm chicken or beef stock
½ tsp salt, ¼ tsp black pepper, 1 tsp Worcestershire (optional)
1 tsp fresh thyme (optional)
Instructions
1. Melt the butter in a medium saucepan over medium heat until it foams but does not brown. Immediately whisk in the sifted flour to form a smooth paste.
2. Cook, stirring constantly, 3–5 minutes until the roux turns light golden. This removes any raw flour flavor and stabilizes thickening performance.
3. Warm your stock separately. Add it slowly in a thin stream while whisking vigorously to integrate the liquid and eliminate pockets of dry flour.
4. Simmer gently while whisking until the gravy thickens, about 5–7 minutes. Adjust seasoning and thin with warm stock if necessary.
5. Finish off heat and stir in a small knob of butter for gloss. Serve immediately and keep leftovers loosely covered in the refrigerator.
Chef’s notes and substitutions
For a gluten-free option, replace flour with cornstarch but prepare it as a slurry mixed into cold liquid first. Cornstarch thickens more quickly and yields a glossier finish than wheat flour.
To rescue overly thick gravy, whisk in warm stock incrementally until you reach the desired consistency. Avoid water if possible; stock adds flavor and keeps texture cohesive.
Pro-Caution
Make-ahead tip: prepare the roux up to a day in advance and refrigerate. Warm gently before finishing with hot stock to avoid introducing cold liquid into the hot fat.
Common mistakes and how to correct them
Skipping constant stirring and using high heat are the two most consistent errors I see in kitchens. Both produce hot spots and uneven gelatinization that create lumps and grainy textures.
Another misstep is mismeasuring. Fat and starch ratios determine thickening power, so measure by volume or weight for predictable outcomes. If you need a thinner result, add warm stock slowly and test texture incrementally.
FAQ
Why does my gravy clump when I add cold stock?
Cold stock cools the roux locally and causes starch granules to constrict and clump. Always warm stale or refrigerated stock before adding to a hot roux and add it gradually while whisking.
Can I fix gravy that already has lumps?
Yes. Remove the pan from high heat and whisk over low. Strain through a fine sieve for larger clumps or use an immersion blender for rapid smoothing. Re-season after adjusting consistency.
Is cornstarch better than flour for gravy?
Cornstarch gives a clearer, glossier finish and thickens at a lower temperature. However, it requires a cold-water slurry before adding to hot liquid. Flour roux provides more flavor and a classic mouthfeel.
Will overheating a gravy break it?
Excessive boiling can break down the starch network and cause separation or a grainy texture. Maintain a gentle simmer and remove from direct heat once the desired thickness appears.
What tools prevent lumps most effectively?
A balloon whisk provides the best mechanical action for dispersion. For final texture control, an immersion blender or fine-mesh sieve will rescue any remaining imperfections quickly.
For technique reinforcement, review our step-by-step pages on perfect gravy techniques and roux basics. For authoritative background on sauces, consult classic sauce theory.
See also: Gravy lumps
]]>
- Roux controls texture: color determines flavor and thickening strength.
- Fat choice matters: butter yields creaminess; neutral oil yields darker, cleaner flavors.
- Cook time trades thickness for depth: darker roux thickens less but tastes nuttier.
- Make ahead: cooled roux stores well for fast sauce-making.
Understanding Roux: The Foundation of Flavor and Texture
A roux forms when flour coats fat and cooks enough for starch granules to hydrate and swell once liquid is added. This interaction produces a gelatinous network that thickens sauces while creating a smooth mouthfeel.
Different colors of roux—white, blonde, brown—signal how long the mixture cooked and how much thickening power remains. For technical detail on roux and its role in cooking, refer to the roux (cooking) entry.
Basic Ingredients and Ratios
Classic proportions start at equal parts fat to flour by weight; a common home ratio is 1:1 by volume for simplicity. Use a digital scale when precision matters; weight-based ratios deliver repeatable results.
Fat choice influences flavor and smoke point. Use unsalted butter for béchamel and higher smoke-point fats like vegetable oil for darker, longer-cooked roux.
Choosing Fat
Butter provides a rich, dairy-forward note ideal for white and blonde roux used in milk-based sauces. It also browns faster, so monitor heat closely when aiming for deeper color.
Rendered animal fats or neutral oils tolerate higher heat and support darker browning required for dishes such as gumbo. For more on sauces and their classifications, see béchamel and velouté.
Choosing Flour
All-purpose wheat flour gives predictable thickening and flavor. Sift flour to remove lumps and to encourage even coating of fat for a smooth finish.
Alternative starches such as rice or chickpea flour can work for gluten-free needs, but they change viscosity and flavor. Test small batches to adjust cook time and liquid ratios.
Technique: Step-by-Step Roux Cooking
Heat control and constant stirring deliver an even color and prevent scorching. Use a heavy-bottomed pan to distribute heat and avoid hot spots that char flour particles.
Start by melting fat until it liquefies but does not brown. Add flour gradually and stir immediately to fully coat particles. Maintain medium heat and stir with a wooden spoon or silicone spatula.
Blonde to Brown: Timing and Cues
A white roux sees minimal cook time and tastes mild—ideal for milk-based sauces. A blonde roux cooks a few minutes longer until a pale golden color develops and a subtle nutty aroma appears.
A brown roux takes 10–20 minutes at moderate heat and must be stirred constantly. Expect less thickening but a deeper, toasted flavor suited to dark gravies and Creole sauces such as gumbo. For cultural context on gumbo, consult gumbo.
Practical Uses and Creative Applications
Roux anchors classic sauces like béchamel, velouté, and espagnole, but chefs repurpose it across preparations to add silkiness or body. Use roux to stabilize cheese sauces, thicken stews, or enrich mashed potatoes.
Beyond traditional applications, a dark, cooled roux can be crumbled for a crunchy garnish, while a pale roux blends into batters to improve texture. Roux also extends to pastry kitchens where it contributes to structured fillings when precise thickening matters.
Scaling, Storage, and Make-Ahead Strategy
Prepare roux in larger quantities and cool it quickly for later use; it stores refrigerated for up to a week and freezes well in portioned blocks. Label containers with date and fat type to track quality and flavor expectations.
When reheating, warm slowly and whisk in hot liquid to reincorporate. Cold roux can clump if added without gentle heat, so temper it by adding a little warm stock first to loosen the mixture.
Troubleshooting Common Roux Problems
Burnt or bitter roux results from too-high heat or poor agitation. If scorching occurs, discard and start over—burnt flour gives persistent off-flavors that linger in sauces.
If your sauce becomes grainy or thin, reassess your roux color and the liquid temperature during incorporation. A darker roux often requires more roux volume or slower reduction to achieve the same final viscosity.
Expert Insight
Separate from the previous tip: when using butter, clarify it first to raise the smoke point and reduce the risk of burning at the stages where you want more color. Clarified butter gives a cleaner toasted note with less risk.
Pro-Caution
Chef’s Tips for Consistent Results
Use a wide pan to increase surface area and speed moisture evaporation for faster color development when making darker roux. Also, scrape the bottom and sides frequently; trapped flour fragments will char if left alone.
Sift flour and measure ingredients by weight. Small adjustments in ratio change thickening strength. For instance, a slightly higher flour-to-fat ratio increases body but can make the sauce feel pasty if overdone.
Serving Suggestions and Pairings
Match roux color to the dish: white or blonde roux suits delicate poultry and vegetable sauces, while brown roux pairs with roasted meats and richly spiced stews. Use fresh herbs or acid to brighten the final sauce.
Garnish with aromatic butter or a dash of citrus to cut richness when serving heavy roux-based sauces. A light sprinkle of toasted nuts can add pleasing texture where appropriate.
FAQ
What is the best fat for a beginner making roux?
For beginners, use unsalted butter because it melts and blends predictably and it introduces a familiar, pleasant flavor. Butter helps you sense when the mixture starts to brown due to its aroma and color changes, which makes timing easier.
How do I adjust a recipe that calls for roux when I need gluten-free?
Substitute rice or chickpea flour and test small batches first. These flours thicken differently and can introduce a distinct flavor, so reduce or increase quantity to match desired viscosity and taste.
Can I use roux in cold sauces or dressings?
Roux typically thickens hot liquids; use it to create warm emulsions or sauces that will cool. For cold dressings, consider starches like arrowroot or cornstarch dissolved and heated separately, then chilled, as roux-derived textures can tighten on cooling.
How long does roux need to cook to lose its raw flour taste?
A brief cook of 2–3 minutes removes raw flour taste for a white or blonde roux. Longer cooking deepens flavor but reduces thickening power, so balance color with the viscosity your recipe needs.
Is roux necessary for every sauce that needs thickening?
No. Roux is one effective thickener among many, including reduction, cornstarch slurry, egg liaison, and beurre manié. Choose roux when you want a stable, velvety texture and an integrated flavor base.
Understanding and practicing roux transforms sauce-making from guesswork into repeatable technique. Use the cues described here—color, aroma, and consistency—to control outcomes and expand your repertoire across classic French and regional cuisines.
See also: roux
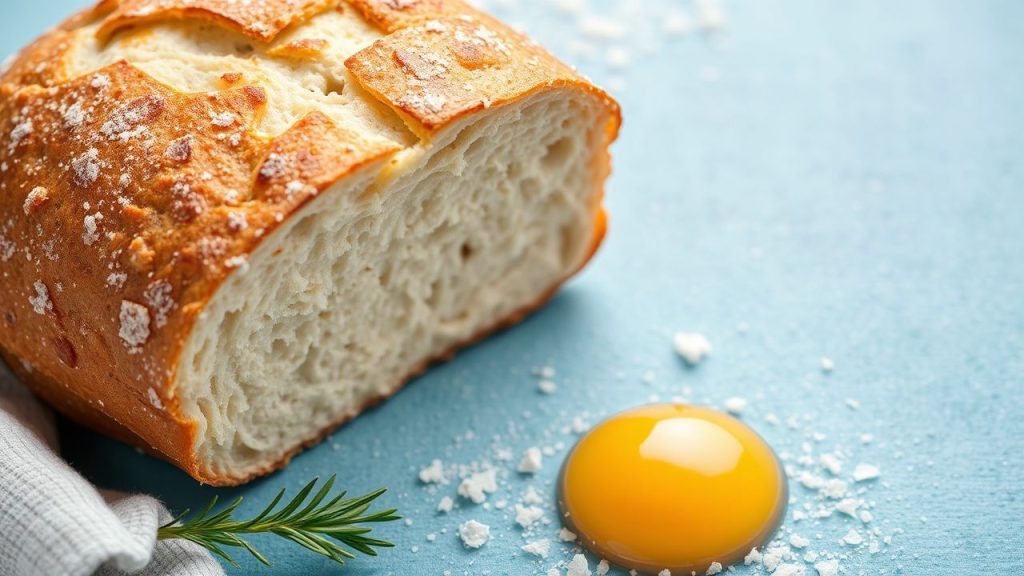
]]>Starch drives texture in bread, rice, potatoes, and many sauces. Understanding how starch hydrates and gels gives you predictable outcomes in the kitchen.
- Gelatinization: Heat plus water makes starch thicken.
- Resting: Hydration before cooking improves texture.
- Heat control: Balance browning and full gelatinization.
What is starch and where it lives
Starch is a plant polysaccharide used by plants to store energy. You encounter it daily in potatoes, rice, wheat, and corn.
For a technical overview, see starch on Wikipedia. That page details structure, sources, and industrial uses.
Prep and Cook Time
These timings are typical for the batter-based recipe below: Prep: 15 minutes; Cook: 30 minutes; Total: 45 minutes.
Timing matters because starch gelatinization occurs over a temperature and time window. Short rests and correct heat keep crumb tender and sauces stable.
Yield
This recipe yields servings for four as a satisfying side or breakfast plate. Use it to practice starch control in a small batch.
Scale ingredients proportionally. When you change batch size, keep liquid-to-starch ratios consistent to preserve texture.
Difficulty Level
Medium. The techniques require attention to hydration and temperature but reward you with repeatable results.
Focus on two skills: measuring liquids accurately and managing pan temperature. Those habits influence gelatinization and browning most.
Ingredients
Ingredients include common pantry starches and liquids. Each item plays a specific role in structure, moisture, or browning.
Below is the ingredient list for the example batter. Use a kitchen scale for best consistency.
- 1 cup all-purpose flour, sifted
- 2 tablespoons cornstarch (for starch gelation clarity)
- 1/2 teaspoon baking soda
- 1 teaspoon fine sea salt
- 1 cup whole milk, warmed
- 2 large eggs, at room temperature
- 3 tablespoons unsalted butter, melted
- 1 tablespoon brown sugar (enhances Maillard browning)
- 1 teaspoon vanilla extract
Instructions
Follow these steps in order. Each step protects starch structure to deliver a tender crumb and reliable browning.
Measure and mix with intent. Overworking or rushing heat changes starch behavior and the final texture.
- Combine dry ingredients: In a large bowl, whisk flour, cornstarch, baking soda, and salt until even. Uniform dry mix prevents local overdosing of starch.
- Mix wet ingredients: Beat eggs, then whisk in warm milk, melted butter, brown sugar, and vanilla. Warm milk helps starch granules hydrate more uniformly.
- Combine gently: Fold wet into dry just until moistened. Overmixing strengthens gluten and can make the crumb tough.
- Rest the batter: Let batter sit for 10 minutes at room temperature. This short rest lets starch granules fully absorb water before heat.
- Preheat and grease the pan: Warm a non-stick skillet over medium heat and grease lightly. Proper pan temperature supports even Maillard browning without burning.
- Cook carefully: Pour 1/4 cup of batter per pancake. Cook until bubbles form and edges set, about 2–3 minutes; flip and cook another 2 minutes until golden.
- Repeat and serve: Continue cooking and keep finished pieces on a rack to preserve texture. Stacking traps steam and softens crusts.
Resting and hydration details
Resting hydrates starch granules so they swell evenly when heated. That swelling creates a stable gel instead of isolated gummy patches.
When you hydrate starch in cold or warm liquid, the kinetics differ. For reference on the physical process, consult gelatinization on Wikipedia.
Tips for Success: Mastering Gelatinization and Flavor
Know which starch you use. Cornstarch and potato starch behave differently from wheat flour because of amylose/amylopectin ratios.
Control temperature. Medium heat balances caramelization and full starch gelatinization without burning sugars.
- Know your starches: Cornstarch gelatinizes at a lower temperature than all-purpose flour, giving a smoother finish.
- Temperature matters: Too-hot cooking can brown sugars before starch fully gels, leading to a drier interior.
- Resting is key: Rest batters or doughs to hydrate granules and reduce toughness.
- Use acids sparingly: High acidity can weaken starch gels; add acidic components after thickening when possible.
Expert Insight
If sauces turn gummy, reduce cooking time or use a lower-gelatinization starch. For grainy textures, ensure thorough pre-hydration and even mixing.
Pro-Caution
Serving Suggestions: Elevate the Experience
Plate pancakes freshly cooked to preserve crust contrast. A simple syrup or fruit keeps textures complementary rather than competing.
For savory applications, use a starch-manipulated base such as crispy shredded potatoes for a contrasting crunch. Consider texture contrasts with soft proteins and acidic condiments.
Nutritional Breakdown
The values below are estimates per serving for the example recipe. Adjust values when you scale the recipe or substitute ingredients.
| Nutrient | Per Serving |
|---|---|
| Calories | 210 kcal |
| Protein | 6 g |
| Carbohydrates | 30 g |
| Fat | 7 g |
Practical Troubleshooting
If your batter is gummy, first check hydration. Excess liquid or too-long cooking often causes a pasty result.
If items brown too fast and remain raw inside, lower your heat and allow more time for starch gelatinization. Adjust pan temperature and try again.
Further Reading and Science Links
To explore browning chemistry, see the Maillard reaction entry for mechanisms and flavor outcomes: Maillard reaction on Wikipedia.
For specifics on a common thickener used in these recipes, see the cornstarch article: cornstarch on Wikipedia. These resources provide concise, sourced technical details.
FAQ
What is the best starch for thickening sauces?
Cornstarch gives a clear, glossy result and sets quickly. Use half as much cornstarch by volume compared with flour for the same thickening power.
For high-acid sauces or long-simmered dishes, use stable starches or add them late in the process to preserve gel strength.
Can I substitute potato starch for cornstarch?
Yes. Potato starch often thickens at slightly lower temperatures and yields a silkier mouthfeel. Adjust quantity by feel and desired finish.
Be aware that potato starch can break down under prolonged, vigorous boiling, so add it near the end of cooking when possible.
Why did my sauce separate after cooling?
Separation usually means the gel network weakened. Excess acid, overcooking, or mechanical shear can break the gel and release water.
To rescue a separated sauce, reheat gently and whisk in a small slurry of starch off heat, then warm slowly to re-establish a network.
How does resting affect baked goods?
Resting lets starch absorb moisture uniformly and relaxes gluten slightly. This yields a more tender crumb and consistent structure after baking.
Short rests (10–30 minutes) work well for batter-based items. Longer autolyse periods help yeast breads develop flavor and hydration.
Where can I read more technical background on starch structure?
Consult authoritative references such as the general starch article and the gelatinization entry for polymer behavior under heat: starch on Wikipedia and gelatinization on Wikipedia.
These pages summarize the molecular basis that explains practical kitchen outcomes and point to academic sources for deeper study.
Key Takeaways
Controlling starch hydration, heat, and resting yields predictable textures from sauces to breads. Small technique changes produce large sensory differences.
Practice with simple recipes, measure carefully, and note how starch type and temperature shift outcomes. That disciplined approach gives repeatable, high-quality results.
See also: starch
]]>