- Slow heat plus time converts collagen to gelatin for juicy strands.
- Maillard browning creates complex savory and roasted notes on exposed surfaces.
- Fat balance and finishing heat determine crispness without drying the meat.
- Acid and salt tune texture and flavor penetration during marinating.
These fundamentals guide ingredient choice, cut selection, and the finish technique. Apply them deliberately to replicate professional results in a home kitchen.
The chemistry of carnitas
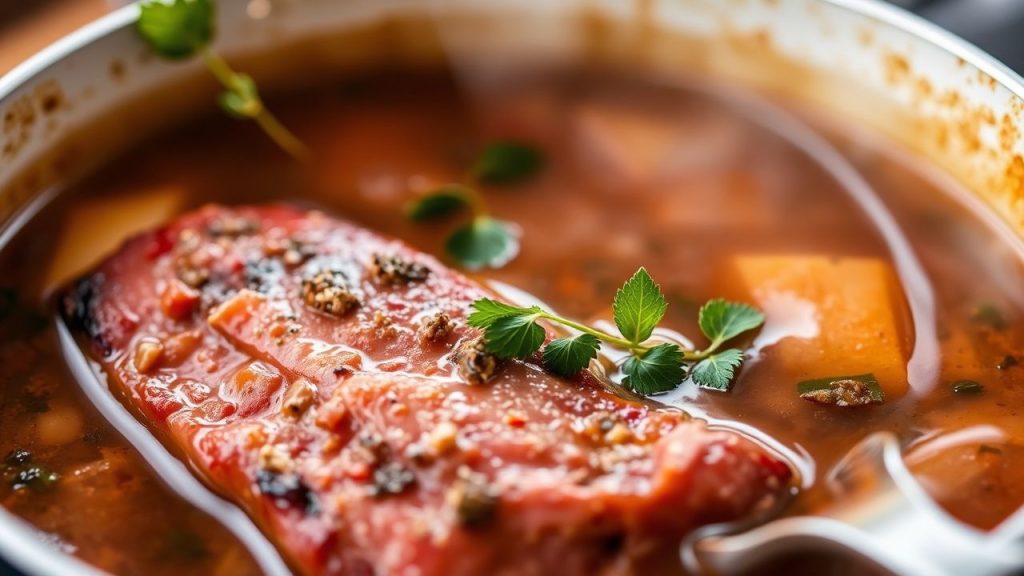
Carnitas rely on two core chemical processes: the breakdown of structural proteins and surface browning. First, connective tissue converts to gelatin during prolonged moist heat, which creates the luscious mouthfeel that defines good carnitas.
Second, surface browning via the Maillard reaction yields aromatic compounds that register as roasted, nutty, and savory. Control of temperature and moisture shifts the balance between these two processes.
Maillard reaction and flavor formation
The Maillard reaction occurs when amino acids and reducing sugars react under elevated heat to form hundreds of flavor molecules. These compounds add depth and the visual cue of golden-brown edges that people expect from carnitas.
To maximize Maillard products without overcooking, concentrate browning at the finish: dry surfaces and apply direct, high heat briefly. This preserves the gelatin-rich interior while producing crisp, flavorful crusts.
Collagen to gelatin: texture explained
Collagen, the connective protein in shoulder cuts, denatures and hydrolyzes to gelatin under moist heat and moderate temperature. This process requires time: the collagen solubilizes slowly between roughly 160–185°F (71–85°C).
As collagen converts, the meat becomes unctuous rather than stringy. For more technical context see collagen and how it behaves under heat.
Ingredients and why they matter
Every ingredient plays a chemical or physical role. Salt seasons and alters water retention; citrus provides mild acid to loosen muscle fibers; spices contribute aroma compounds that complement Maillard-derived flavors.
Use the following ingredient list to reproduce consistent results. Adjust quantities for taste and weight, but retain the functional roles of acid, fat, salt, and aromatics.
- 3 lbs pork shoulder, trimmed and cut into large chunks
- 2 tbsp lard or neutral oil
- 1 orange, juiced (reserve the spent halves)
- 4 garlic cloves, minced
- 1 tbsp ground cumin
- 1 tbsp dried oregano
- 1 tsp smoked paprika
- 1 tsp ground black pepper
- 1 tbsp kosher salt
- 1/2 tsp cayenne pepper (adjust to taste)
- 1 onion, quartered
- 2 bay leaves
- 1 cup chicken broth
- 1/4 cup orange juice (additional for marinade)
Use coarse salt for predictable extraction and seasoning. Orange juice adds acidity and sugar, which aid both tenderization and Maillard browning when concentrated at the finish.
Choosing cut and fat
Choose a pork shoulder (also called Boston butt) for its marbling and connective tissue. The intermuscular fat renders slowly and bastes the meat internally during braising.
For background on pork anatomy and culinary uses, consult the general pork overview. Fat contributes flavor and mouthfeel, and a small amount of lard helps with authentic crisping.
Equipment and vessel impact
Use a heavy-bottomed Dutch oven or a covered braising pan to stabilize temperature and reduce hot spots. Even heat distribution prevents early surface drying and uneven collagen conversion.
For the braising technique fundamentals see braising. A tight lid traps steam and creates the moist environment that converts collagen without forcing a boil.
Step-by-step technique
Follow a clear sequence: season, sear if desired, braise low and slow, shred, then finish with high heat. Each stage targets a different chemical transformation, so respect timing and temperature.
Below is a practical method that balances tenderness and crispness. Short notes explain why each step matters so you can adapt without losing control.
- Marinate: Combine garlic, cumin, oregano, paprika, pepper, cayenne, salt, orange juice, and zest. Massage into pork, refrigerate 4 hours or overnight to allow salt and acid to penetrate.
- Sear (optional): Brown meat in batches over medium-high heat to jump-start Maillard reactions and add initial flavor depth. Searing is optional if you prefer a cleaner braise, but it accelerates flavor development.
- Braise: Place pork, onion, bay leaves, orange halves, and broth in a heavy pot. Cover and cook at low heat or 275°F (135°C) oven for 3–4 hours until fork-tender and collagen has melted into gelatin.
- Shred: Remove pork and shred with forks. Reserve some cooking liquid to adjust moisture without making the meat soggy; the gelatin-rich liquid improves mouthfeel.
- Finish: Crisp shredded pork in a hot skillet with lard or oil in batches. Allow edges to brown without stirring to produce crispy, caramelized surfaces.
Control moisture when finishing: too wet and the meat steams; too dry and it becomes tough. Work in small batches and press shredded clumps gently to maximize contact with the hot pan.
Finishing for crisp edges
The crisp exterior is a concentrated Maillard outcome that requires dry, high heat. Use a preheated skillet and a thin layer of fat to generate strong surface temperatures quickly.
Alternatively, spread shredded pork on a sheet tray and briefly broil to create even browning. Either method isolates browning from the moist braise and preserves gelatin in the interior.
 Expert Insight
After you implement the tip above, rest the meat briefly so juices redistribute. Resting reduces loss of moisture during the final sear and gives more consistent texture.
 Pro-Caution
If smoke point is a concern, use lard or a high-smoke-point oil and regulate heat. Adjust ventilation and watch fat carefully to avoid burning aromatic compounds that can taste bitter.
Seasoning strategy
Salt early to improve moisture retention and flavor penetration. Acidic components like orange juice can tenderize superficially and add bright counternotes to the rich pork.
Layer aromatic spices at three points: in the marinade, during braising, and a final seasoning after crisping. This preserves volatile aromatics and maintains sensory contrast between interior and exterior.
Serving and storage
Serve carnitas hot with warm tortillas, fresh cilantro, diced onion, and lime. The acidity and freshness cut through richness and balance the palate.
Store cooled carnitas in an airtight container in the refrigerator for up to 3 days, or freeze for longer keeping. Re-crisp refrigerated or thawed carnitas briefly in a hot skillet before serving to restore texture.
Nutritional information
Portion size and fat content determine calories and macronutrients. A typical serving from a shoulder cut contains substantial protein and fat due to marbling and rendered fat retained in the dish.
Approximate per-serving values for a 1/6 portion: 420 kcal, 35 g protein, 3 g carbs, 27 g fat. Adjust these numbers by trimming fat or draining rendered oil before finishing.
FAQ
How long should I braise pork shoulder for ideal tenderness?
Braise until the pork pulls apart easily with a fork, typically 3–4 hours at 275°F (135°C) or until internal temperature reaches the gelatinization window. Time varies by piece size and oven consistency.
Can I skip the finish step and still have good carnitas?
Yes, the braise produces tender, flavorful pork, but you lose the characteristic crispy edges without a high-heat finish. For the best contrast, crisp briefly before serving.
Why use lard for crisping?
Lard adds authentic pork flavor and tolerates high heat while encouraging even browning. Use a neutral oil if lard is unavailable, but adjust heat to avoid burning.
Does marinating with citrus make the pork mushy?
Short marination (a few hours or overnight) with citrus brightens flavor and aids slight tenderization without producing a mushy texture. Strong acids for long periods can over-tenderize, so follow recommended times.
What vessel gives the most consistent results?
A heavy, tight-lidded Dutch oven gives predictable heat and moisture control, making it the preferred choice for consistent braises. It stabilizes temperature and reduces the risk of localized overcooking.
Apply these chemical principles and practical steps to make repeatable, restaurant-quality carnitas at home. With deliberate control of time, temperature, and finishing, you will consistently achieve that sought-after balance of tender interior and crispy, flavorful edges.
See also: carnitas
]]>
- Fat shields food: it limits air exposure and slows spoilage.
- Fat softens proteins: it infiltrates fibers and helps break down collagen.
- Fat amplifies flavor: it stores and releases aroma compounds efficiently.
- Use technique: rendering, basting, and emulsifying maximize fat’s benefits.
How fat preserves food
Fat creates a physical barrier that reduces exposure to oxygen and microbes. When you coat or confit food in fat, you slow oxidation and dehydration and extend shelf life.
Animal fats and vegetable oils differ in stability and flavor. For context on animal-derived fats, see animal fat and refer to rendering techniques in our rendering fat guide.
How fat tenderizes meat
Fat penetrates muscle and connective tissue during slow cooking. It lubricates fibers and helps heat break down collagen into gelatin, which yields a tender bite and a richer mouthfeel.
Heat and time govern this process: low-and-slow methods let fat migrate and collagen dissolve without toughening proteins. For theory on fats and cell structure, see lipid basics.
Practical recipe and timing
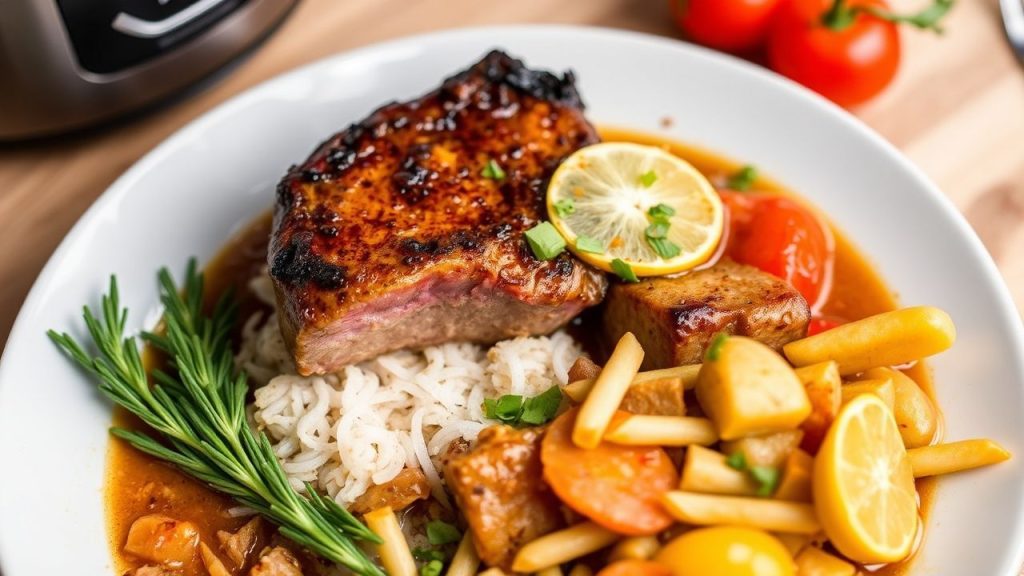
This section pairs the science with a tested roast recipe that demonstrates preservation and tenderizing in practice. Follow technique closely: sear, slow-cook, and finish with a fat-based sauce.
Prep and cook times suit a medium-complexity home project. The method stresses fat management—render, retain, and integrate fats to gain both shelf stability and texture.
Prep and Cook Time
Prep Time: 20 minutes. Cook Time: 40 minutes. Use active heat control during searing to avoid burning the fat.
Total Time: 1 hour. Resting time counts toward final tenderness; do not skip rest.
Yield
Serves 4 generously. Portioning influences reheating and preserving outcomes; slice and store with a thin fat layer to extend freshness.
Leftovers keep better when covered with sauce or fat and chilled promptly.
Difficulty Level
Medium. This recipe requires basic searing and an understanding of low-heat braising. Maintain steady, low oven or stovetop temperature to let fat do its work.
Recommended for cooks ready to refine technique. See our companion notes on choosing fats in best fats for cooking.
Ingredients
Use well-marbled cuts and quality fats to maximize preservation and tenderness. Quality of fat affects flavor, melting behavior, and stability during cooking.
- 1.5 lbs (680 g) beef chuck roast, well-marbled
- 2 tbsp unsalted butter, softened
- 2 tbsp olive oil
- 3 garlic cloves, minced
- 1 tbsp fresh rosemary, chopped
- 1 tsp smoked paprika
- Salt and freshly ground black pepper, to taste
- 1 cup beef broth, low sodium
- 2 medium onions, sliced thin
- 1/2 cup heavy cream
Note: if you avoid dairy, substitute suitable plant fats with stable behavior under heat. See the notes below for alternatives.
Instructions
Sequence matters. Dry the meat, season it, sear to develop crust, then slow-cook with retained fat to allow penetration and collagen breakdown.
Finish by enriching pan juices with cream or additional butter for mouthfeel. Strain and cool properly if you plan to store the dish under a protective fat layer.
- Prepare the beef: Pat the roast dry and season with salt, pepper, smoked paprika, and half the rosemary to ensure even seasoning.
- Heat the fat base: Warm olive oil and 1 tbsp butter in a heavy skillet until shimmering. A fat blend helps flavor and browning performance.
- Sear the beef: Sear on all sides until a deep golden-brown crust forms, about 3–4 minutes per side. Browning concentrates flavor via the Maillard reaction.
- Sauté aromatics: Reduce heat to medium and cook garlic and onions until soft and caramelized, about 6–8 minutes. The fat carries aromatic compounds into the sauce.
- Deglaze with broth: Add beef broth to lift fond and dissolve concentrated flavors. Stir and scrape the pan bottom to incorporate browned particles.
- Slow cook and infuse: Return beef with rendered fat. Cover and simmer gently or use a 300°F (150°C) oven for 30–40 minutes until fork-tender. Slow heat allows fat to penetrate fibers and collagen to convert to gelatin.
- Finish the sauce: Remove the beef to rest. Stir cream and remaining butter into pan juices and reduce until slightly thickened for a silky finish.
- Serve: Slice against the grain and spoon sauce over the meat. Garnish with the remaining rosemary for a fresh contrast.
Chef’s Notes
Choose fats based on desired flavor and melting point. Butter adds sweetness and gloss; olive oil contributes a fruity note and stability.
Animal fats like lard and tallow perform well for sealing and preservation. For more on emulsions and fat behavior, consult the emulsifier reference.
- For dairy-free cooking, use coconut milk and refined coconut oil for richness and mouthfeel.
- Always rest meat after cooking to let juices and fat redistribute; this step increases tenderness and juiciness.
- Use well-marbled cuts for maximum natural fat; for lean cuts, consider adding rendered pork fat or frequent basting.
Expert Insight
When storing, cool food quickly and keep below 5°C to limit bacterial growth. Fat reduces oxidation but does not replace proper refrigeration.
Pro-Caution
Serving suggestions
Serve slices over buttered mashed potatoes or roasted roots to complement richness. Fresh herbs or a dressed bitter green cuts through fat and refreshes the palate.
Light vinaigrettes, pickled vegetables, or acid-based condiments balance the dish and reduce the perception of heaviness while highlighting tender texture.
Nutritional snapshot
This recipe yields a high-protein, moderate-carbohydrate plate with substantial fat content. Tailor portions and fat choices to fit dietary goals.
| Nutrient | Amount per Serving |
|---|---|
| Calories | 530 kcal |
| Protein | 45 g |
| Carbohydrates | 8 g |
| Fat | 35 g |
Explore related technique articles such as our rendering fat guide and a primer on choosing cooking fats for further skill-building.
FAQ
Why does fat improve flavor?
Fat dissolves and carries flavor compounds, releasing them as you eat. This transport of volatile aromas makes herbs, spices, and browned surfaces more intense.
Fats also coat the tongue, prolonging flavor release and enhancing perceived richness.
How does fat slow spoilage?
When food is submerged in or coated with fat, the surface sees less oxygen and moisture loss. This reduces oxidative rancidity and surface dehydration.
Combine fat coverage with refrigeration for safe, extended storage; fat alone is not a sterilization method.
Which fats are best for slow cooking?
Choose fats with stable melting behavior and a flavor that complements the dish. Tallow, lard, butter, and medium-stability vegetable oils all work, depending on taste goals.
For neutral preservation use rendered animal fats; for aromatic results, select olive oil or butter according to the recipe.
Can I get tenderness without high fat content?
Yes. Acids, enzymes, mechanical tenderizing, and proper low-and-slow heat also break down connective tissue. Fat accelerates lubrication and mouthfeel but is not the sole route to tenderness.
Combine modest fat with acids or slow braise to turn lean cuts into tender dishes.
Where can I learn more about fat chemistry?
Authoritative resources include texts on lipid chemistry and culinary science. For quick reference on rendering methods and emulsification, see the linked Wikipedia pages for rendering and emulsification.
Apply tested technique frequently to refine your sense of fat behavior across recipes.
Fat remains a tool. Use it with intention: select the right type, control temperature, and apply storage best practices to preserve and tenderize reliably.
See also: Fat
]]>
- Soak for even hydration: Proper soaking yields uniform cooking and reduces digestive sugars.
- Control low heat: Gentle simmering preserves shape while releasing starches for creaminess.
- Layer aromatics: Timing aromatics and acid protects texture and builds depth.
- Use the right vessel: Even heat distribution matters—choose heavy-bottom cookware or a low slow-cooker setting.
The Science Behind Bean Selection and Soaking Techniques
Choose firm, mature beans such as cannellini or great northern. These varieties contain the starch and cell-wall structure that yield a creamy interior while holding shape during long, moist cooking.
Soak beans in cold water for 8–12 hours to hydrate cells evenly. Cold overnight soaking reduces premature skin splitting and helps leach oligosaccharides that can cause digestive discomfort. For quick preparation, a one-hour hot soak works, but expect a slight loss of texture finesse.
Discard soaking water and rinse thoroughly before cooking. That step removes soluble compounds and reduces foam, improving clarity and flavor of the broth.
For background on bean biology, consult the common bean entry for cultivar and composition details.
Unlocking the Maillard Reaction Through Controlled Simmering
Sautéing onions, celery, and garlic at moderate heat encourages Maillard-like browning of aromatics and builds savory compounds that deepen soup flavor. Use medium heat and watch for gentle color change without burning.
During long simmering, slow chemical changes between amino acids and sugars form complex umami notes. This process differs from high-heat searing but still relies on controlled temperatures to avoid bitterness.
Learn more about the underlying browning chemistry at the Maillard reaction article.
Balancing Aromatics and Broth Composition for Depth and Complexity
Begin with sautéed aromatics to release essential oils. Add herbs and spices at calculated times to keep bright notes where desired and mellow them when needed.
Use a rich stock to contribute collagen-derived mouthfeel and minerals that round out flavor. For vegetable-based depth, concentrated mushroom stock or a reduced vegetable stock supplies umami without meat.
For more on stock building, visit the internal resource Ultimate Homemade Broth Guide to refine your base.
Optimizing Cooking Time and Temperature for Creamy Consistency
Maintain a gentle simmer near 85°C (185°F). That temperature range lets starch granules swell and release slowly, thickening the broth without collapsing bean skins into a puree.
Stir occasionally and monitor the pot base to prevent localized scorching. If using a slow cooker, select the low setting and extend time rather than increasing heat for a shorter interval.
Read about starch behavior and gelatinization at the starch page for technical context on how starches thicken liquids.
Prep and Cook Time
- Prep Time: 20 minutes (plus 8–12 hours soaking)
- Cook Time: 1.5 to 2 hours simmering (or low slow-cooker overnight)
Yield
Approximately 6 servings.
Difficulty Level
Medium — requires temperature attention and timing for best texture.
Ingredients
- 1½ cups dried white beans (cannellini or great northern), soaked and rinsed
- 6 cups high-quality chicken or vegetable broth
- 1 medium yellow onion, finely chopped
- 2 stalks celery, diced
- 3 cloves garlic, minced
- 2 tbsp olive oil
- 1 tsp dried thyme or 2 tsp fresh thyme
- 1 bay leaf
- Salt and freshly ground black pepper to taste
- 1 tbsp freshly squeezed lemon juice (optional, for finishing)
- Chopped fresh parsley for garnish
Instructions
- Drain and rinse the soaked white beans and set aside.
- Heat olive oil in a heavy-bottomed pot over medium heat. Sauté onion and celery until translucent and lightly golden, about 6–8 minutes.
- Add garlic and thyme, stirring for 30–60 seconds until aromatic. Avoid browning the garlic aggressively.
- Pour in stock, add bay leaf and beans, and bring to a gentle simmer over medium-low heat.
- Maintain a low simmer (small, steady bubbles) and cook uncovered for 1.5–2 hours, stirring occasionally to prevent sticking.
- Taste halfway and add salt gradually. Early heavy salting can tighten bean skins; season toward the end for accurate salt balance.
- When beans are tender and the broth has thickened, remove from heat and discard the bay leaf.
- Stir in lemon juice to brighten flavors and finish with fresh parsley.
- Ladle into bowls and serve with crusty bread and a drizzle of extra-virgin olive oil if desired.
Chef’s Notes and Tips for Success
For a silkier mouthfeel, blend one-third of the soup and return it to the pot. This technique thickens without adding extra fat.
Use a Dutch oven or heavy-bottom pot to distribute heat evenly. If using a slow cooker, choose low for longer times to achieve the same texture.
Substitute smoked paprika or a small diced ham hock for smoky depth, or keep it vegetarian with concentrated mushroom stock and a dash of soy sauce for umami.
Make-ahead advantage: flavors meld and improve after resting overnight; reheat gently on low.
Pro-Caution
When you adjust seasoning at the end, rely on small increments. Over-salting is harder to correct than under-seasoning.
Expert Insight
Serving Suggestions and Pairings
Serve piping hot with rustic bread for soaking. A dollop of crème fraîche or a drizzle of extra-virgin olive oil adds a finish layer of richness.
Pair the soup with a bright green salad dressed in lemon vinaigrette or oven-roasted root vegetables for a balanced meal. Offer grated hard cheese at the table for extra umami.
For method variations and appliance tips, see the internal guide on slow cooker techniques to adapt times and temperatures.
Nutritional Snapshot
Per serving estimates: ~320 kcal, 18 g protein, 45 g carbohydrates, 6 g fat. Beans deliver fiber, plant protein, and micronutrients such as iron and folate.
Slow cooking preserves most nutrients. Drinking the broth captures water-soluble vitamins that leach from ingredients during simmering.
Use drained, canned beans to cut time, but note the texture and sodium profile will differ from properly soaked dried beans.
FAQ
Why are white beans ideal for slow cooking?
White beans have a dense starch matrix with a sturdy skin that withstands long, moist heat. Their internal structure softens into a creamy texture while skins often remain intact, producing a pleasing contrast.
The process depends on gradual cell-wall breakdown and starch gelatinization, which slow cooking promotes more predictably than high-heat methods.
Does soaking always reduce cooking time?
Yes. Soaking hydrates cells and starts limited enzymatic activity, which shortens active cook time and improves uniformity. Cold overnight soaks deliver the best textural control.
Quick hot soaks speed the process but can slightly compromise final bite. Rinse soaked beans to remove soluble oligosaccharides and reduce foaming.
When should I add salt and acid?
Season lightly early, then finish seasoning toward the end of cooking. Heavy salting early can toughen bean skins by affecting protein cross-linking.
Add acid such as lemon juice or vinegar only after beans are tender. Acid strengthens pectin in cell walls and can stall softening if added too soon.
Can I use a slow cooker for this recipe?
Yes. Use the low setting and extend time rather than increasing heat. Slow cookers promote even, moist heat and excellent starch release for creamy broth.
Use a heavy-bottomed pot on the stovetop for greater control, especially if you need to adjust heat rapidly or finish by reducing the broth.
How do I fix a soup that’s too thin or too thick?
If too thin, simmer uncovered to reduce liquid or blend a portion of the soup to thicken naturally. If too thick, add warm stock or water and adjust seasoning.
Maintain gentle heat during adjustments to preserve bean integrity and avoid rapid breakdown of texture.
Further reading on cookware properties is available at the Dutch oven page and appliance behavior at the slow cooker page.
See also: white beans
]]>
- Slow cooking converts collagen into gelatin, creating moist, silky meat.
- Control of temperature and time matters more than exact seasonings.
- Sear first to build flavor, then finish low and slow for tenderness.
- Rest and slice against the grain for the best mouthfeel.
Understanding Connective Tissue and Its Transformation
Tough cuts are tough because they contain dense connective tissue and more collagen. These proteins give muscles structure for movement, which is why shoulder, shank and brisket are economical but firm.
When you apply steady, low heat, collagen denatures and becomes gelatin. That gelatin dissolves into the cooking liquid, improving mouthfeel and moisture retention.
The Role of Collagen Breakdown in Tenderizing Tough Cuts
Collagen is the structural protein that keeps fibers bound. Over hours at low temperatures, collagen hydrolyzes into gelatin, which feels silky and coats meat fibers.
As gelatin forms, it also thickens the braising liquid and traps juices close to the meat. That dual effect both tenderizes and boosts savory depth.
Optimal Temperature and Timing for Maximum Flavor Extraction
Temperature control is decisive. Aim for steady heat that allows collagen to dissolve without drying muscle fibers; typically that means oven or slow-cooker ranges where liquid simmers gently.
For many large cuts, plan on 6–12 hours depending on size and connective tissue. Use an instant-read thermometer and focus on feel: when the meat yields easily to a fork, collagen has softened sufficiently.
Choosing the Right Cuts and Enhancing Flavor
Select cuts with visible connective tissue and a tone of marbling: beef brisket, chuck roast, pork shoulder, lamb shanks and oxtail perform predictably. Those cuts respond to low heat and long time because they have the collagen to convert.
Marinades with moderate acid—vinegar or citrus—help tenderize the surface before cooking. Also, apply a dry rub and sear to develop the Maillard reaction for deeper flavor; learn more about the Maillard reaction to use heat to your advantage.
Practical Recipe & Timing Details
This section converts the science above into a practical plan for a classic slow-cooked brisket. Follow the sequence: season, sear, braise slowly, rest, then slice against the grain.
For more technique notes, visit our internal guide on slow-cooking basics and check a related brisket build at brisket recipes. These pages expand on tools and vessel choice.
Prep and Cook Time
Preparation: 20 minutes for trimming and assembling a rub. Reserve time if you plan to marinate overnight.
Marinating (optional): 4–12 hours. Cooking: 6–8 hours on low heat; larger pieces need up to 12 hours.
Yield & Difficulty
Serves 6–8 depending on side dishes. Expect some shrinkage during cooking as moisture concentrates.
Difficulty: Medium. The work is front-loaded. After searing and setup, most of the time is hands-off.
Ingredients
The ingredient list below supports a classic savory brisket. Quantities are scalable.
- 3 lb beef brisket, trimmed
- 1 cup beef broth
- 1/2 cup apple cider vinegar
- 2 tbsp olive oil
- 1 tbsp smoked paprika
- 2 tsp garlic powder
- 1 tsp ground cumin
- 1 tsp black pepper
- 1 tsp kosher salt
- 1 large onion, sliced
- 4 cloves garlic, smashed
- 2 bay leaves
Instructions
Follow a three-stage sequence: build flavor, denature collagen, and finish to serve. Each step affects final texture and sauce quality.
- Mix the rub: Combine vinegar, olive oil, smoked paprika, garlic powder, cumin, pepper, and salt. The rub both seasons and primes the surface for searing.
- Apply and rest: Rub the brisket thoroughly. For deeper penetration, refrigerate 4–12 hours. Bring meat to near room temperature before searing.
- Sear: Brown brisket on all sides in a hot skillet until a rich crust forms. This step creates flavor compounds that enrich the braise.
- Set up to braise: Place sliced onion and smashed garlic in the bottom of a Dutch oven or slow cooker. Nestle the seared brisket on top, add bay leaves, and pour beef broth around—not over—the meat to preserve the crust.
- Slow cook: Maintain a gentle simmer or use the low setting on a slow cooker. Cook 6–8 hours, or until the meat pulls apart with minimal resistance.
- Rest and slice: Rest 10–20 minutes before slicing against the grain. Resting redistributes juices and improves texture.

Expert Insight
Finishing touches matter. A light sprinkle of fresh herbs or a squeeze of acid at service can brighten the rich sauce and cut perceived fattiness.
Pro-Caution
Storage is straightforward: refrigerate leftovers in an airtight container up to 3 days or freeze portions for longer storage. Reheat gently to preserve texture.
Chef’s Notes & Troubleshooting
If meat remains firm after the recommended time, extend the cook rather than increase the heat. Low, additional hours allow collagen to finish breaking down.
Use a fork to test for correct pull: when the fork slides in with little resistance and the meat flakes loosely, it is ready. Overcooking can make thin portions stringy, so consider slicing larger pieces thicker for service.
Variations
Swap proteins to change flavor: pork shoulder and lamb shank behave similarly due to collagen content. Adjust cook time to account for bone-in pieces and shape.
Try adding aromatic vegetables, mushrooms, or a splash of fortified wine to the braising liquid for flavor variation while maintaining the same low-and-slow approach.
Serving Suggestions
Pair slow-cooked brisket with creamy mashed potatoes, polenta, or buttered noodles to match the sauce’s richness. Add a crisp vegetable or a bright slaw for contrast.
Garnish with parsley and a light dusting of smoked paprika to make plates pop visually and to add a final aromatic lift.
| Nutrient | Amount (per serving) |
|---|---|
| Calories | 410 kcal |
| Protein | 38 g |
| Carbohydrates | 6 g |
| Fat | 24 g |
FAQ
Why does slow cooking transform tough cuts into tender meat?
Slow cooking exposes collagen to steady, moderate heat so it can hydrolyze into gelatin. That gelatin lubricates and softens fibers, producing a tender mouthfeel and richer sauce.
What temperatures and internal doneness should I aim for?
Maintain a gentle simmer or use a slow-cooker low setting. Rather than a single internal temperature, judge doneness by tenderness: when a fork meets little resistance and meat pulls apart, it is done.
Are there cuts that should not be slow-cooked?
Lean, tender cuts such as tenderloin or sirloin lack connective tissue and can dry out with prolonged cooking. Reserve slow methods for collagen-rich cuts and use quick, high-heat techniques for lean steaks.
Does searing matter if I plan to cook the meat for many hours?
Yes. Searing builds flavor via surface browning and creates compounds that enrich the braising liquid. The extra 5–10 minutes of searing translates to a deeper finished flavor.
How should I store and reheat leftovers to retain texture?
Cool brisket quickly, then refrigerate in an airtight container up to 3 days. Reheat gently in a low oven with a splash of braising liquid or in a covered skillet to avoid drying the meat.
Embrace the process: time and controlled heat will transform inexpensive cuts into meals with complex aroma and luxurious texture. Use technique, test by feel, and trust patient cooking.
See also: Slow cooking
]]>
- Key takeaway: Cassoulet relies on patient cooking and careful layering of flavors.
- Bean tip: Use Tarbais or another creamy white bean for the best texture.
- Make ahead: Cassoulet improves after resting; reheat slowly to preserve texture.
Origins and Regional Variations
The dish traces to the south of France, centered in towns such as Castelnaudary and Toulouse. These towns each claim a regional method and ingredient emphasis.
Scholars and food historians link cassoulet to rural peasant kitchens of the Languedoc region, where casseroles cooked slowly to stretch ingredients. For context on the region, see Languedoc.
Castelnaudary, Toulouse, Carcassonne
Castelnaudary often focuses on white beans and pork; Toulouse includes sausages; Carcassonne sometimes adds mutton or lamb. Each variation emphasizes a specific balance of meat and bean.
Understanding local priorities clarifies why authentic techniques vary. For a broader cultural reference, consult the general article on cassoulet.
Ingredients and Technique
Good ingredients deliver clear returns: quality beans, properly cured meats, and rendered duck fat or pork fat. Choose ingredients that deliver both umami and texture contrast.
Technique matters as much as components. Browning, slow simmering, and the crust ritual combine to build the layered profile cassoulet demands.
Beans and Meats
Tarbais beans are the traditional choice for their thin skins and creamy interior. If unavailable, use Great Northern or Cannellini beans made from Phaseolus vulgaris varieties.
Common meat choices include salted pork shoulder, garlic sausage (Toulouse-style), and duck confit. Each provides fat and collagen that the beans absorb during long cooking.
Layering, Browning, and Crust
Layer beans and meats deliberately: half the beans first, then meats, then the remainder of beans. This order helps the starchy beans absorb rendered juices.
Browning meat provides Maillard complexity, while the baked crust concentrates flavor and supplies a contrasting texture. The crust ritual—breaking and reincorporating the top—keeps the dish moist and integrated.
Step-by-Step Method
Start by soaking beans overnight, then par-cook them with a bouquet garni until just tender. Par-cooking prevents the beans from disintegrating during the long final bake.
Brown the pork pieces and sausage in rendered fat, then quickly sauté aromatics until soft. Assemble in a heavy casserole: beans, meats, vegetables, and stock.
Slow Simmering and Baking
Simmer gently for several hours. Maintain low, consistent heat so collagen breaks down into gelatin without aggressive agitation that can mash the beans.
Finish uncovered in a moderate oven to form a crust. After 20-30 minutes, break the crust and press it back into the casserole; repeat this ritual during the last hour to meld flavors.
Timing and Temperature
Expect active preparation and total cook time of 4 to 6 hours, including gentle oven time. Use an oven thermometer and a low simmer on the stovetop to hold steady heat.
If the casserole dries excessively, add small amounts of hot stock. The goal is a glossy, slightly saucy finish rather than a dry mass.
Chef’s Notes for Consistent Results
Bean handling: Do not overcook during the initial simmer. Slight firmness prevents collapse during the final bake.
Meat choices: Use a mix of fatty and lean cuts. Duck confit adds richness; pork shoulder gives structure and collagen.
Expert Insight
Rest the finished cassoulet for 10–20 minutes. Resting lets gelatin settle and flavors integrate, giving cleaner portioning and a better mouthfeel.
Pro-Caution
Serving and Pairings
Serve cassoulet in shallow, warm bowls to showcase both the beans and the crispy top. Garnish sparingly with chopped parsley and a thyme sprig.
For wine, select medium- to full-bodied reds from southwest France; their acidity and tannin cut through richness. Regional pairings such as Cahors or Madiran suit the dish’s rustic profile.
Sides and Presentation
A crisp green salad with a mustard vinaigrette balances the dish’s fat. Provide crusty bread to soak up juices and to offer textural contrast.
Plate portions modestly. Cassoulet is dense; smaller servings allow diners to enjoy the dish as part of a multi-course meal.
Nutritional Snapshot
Cassoulet is calorie-dense and high in protein and fat, thanks to meats and confit. Beans provide fiber and complex carbohydrates, while meats contribute iron and collagen.
Adjust portion sizes and side choices to match dietary goals. Substitute leaner meats or reduce confit portions for lower overall fat when needed.
Practical Sourcing and Substitutions
Seek out local butchers for cured pork shoulder and high-quality sausages. For duck confit, buy from a reputable source or confit your own to control salt and fat levels.
If Tarbais beans are unavailable, choose beans labeled for casseroles or stews. Texture matters more than origin; aim for beans that hold shape after long cooking.
For additional recipes and regional techniques, visit our French Country Cooking hub or explore related dishes on our cassoulet recipes page.
FAQ
What is traditional cassoulet?
Traditional cassoulet is a slow-baked casserole of white beans, pork, and preserved meats such as duck confit. It originated in southern France and emphasizes long, gentle cooking.
Which beans work best?
Use Tarbais beans when possible for a silky interior and thin skin. Good substitutes include Great Northern and Cannellini beans, both members of the common bean family.
Can I make cassoulet without meat?
Yes. Create a vegetarian version using smoked mushrooms, roasted root vegetables, and umami-rich ingredients such as miso or smoked paprika to replace the depth usually provided by meat.
How far ahead can I make it?
Make cassoulet a day ahead; flavors deepen overnight. Reheat gently in a low oven and refresh the crust ritual before serving for best texture.
Where can I taste an authentic cassoulet?
Visit towns in southern France known for the dish. Historic centers like Toulouse and Castelnaudary preserve regional methods and host restaurants that serve traditional versions. For historical background on the towns, see Toulouse and related regional notes on cassoulet.
See also: Cassoulet
]]>
- Builds flavor: Browning creates compounds that enrich the broth.
- Improves texture: A seared crust adds contrast to tender meat.
- Maximizes fond: Deglazing lifts concentrated flavors into the sauce.
- Works for most proteins: Beef, lamb, pork, and heartier poultry benefit most.
Unlock Bold Flavors: Mastering Searing for Delectable Stews
Searing is a targeted, high-heat step designed to develop a flavorful crust and concentrated savory notes. Performed correctly, it creates aromatic compounds that later dissolve into the stew liquid.
Moreover, searing gives you control. You concentrate flavor at the start, then coax tenderness through long, low heat during braising or stewing. That combination yields a dish with both richness and succulence.
Why Searing Works (Science and Sensory)
At high temperatures, amino acids and reducing sugars react to form browned, flavorful compounds known as the Maillard reaction. This chemistry produces dozens of volatile molecules that our senses register as roasted, nutty, and savory.
Additionally, the browned surface produces fond: concentrated caramelized bits that, when deglazed, become the backbone of an enriched stew. Together, these effects increase perceived umami and overall mouthfeel.
Expert Insight: Texture and Collagen
Long, slow cooking breaks down collagen into gelatin, yielding a silky mouthfeel. However, searing ensures the exterior remains flavorful and adds slight chew for contrast.
Therefore, both processes—searing and slow cooking—work in concert: one builds surface flavor, the other transforms tough connective tissue into tenderness.
Expert Insight
Technique: Step-by-Step Searing and Stewing
Follow a clear sequence to get predictable results. First, prep and dry the meat; second, brown in high heat without overcrowding; third, deglaze and simmer gently until tender.
Use a heavy-bottomed skillet or Dutch oven so heat distributes evenly. This minimizes hot spots and ensures consistent browning across pieces.
Prep and Cook Time
Preparation: ~20 minutes. Trim, cube, and pat dry the meat to remove surface moisture that inhibits browning.
Cooking: 2–2.5 hours total, including searing and stewing. Timing varies by cut and pot temperature.
Yield
Serves 6 hearty portions when using the standard quantities below.
Adjust portioning as needed for family size or meal planning.
Difficulty Level
Medium. The method requires attention during searing but relies on low-maintenance simmering afterward.
With practice, searing becomes a fast, reliable technique that yields professional-level flavor.
Ingredients
- 2 lbs beef chuck, cut into 1.5-inch cubes
- 2 tbsp vegetable oil (or another high smoke-point oil)
- 1 large onion, finely chopped
- 3 cloves garlic, minced
- 2 carrots, sliced diagonally
- 2 celery stalks, chopped
- 1 cup dry red wine (optional; useful for deglazing)
- 4 cups beef broth
- 2 bay leaves
- 1 tsp dried thyme
- Salt and freshly ground black pepper, to taste
Note: For dietary adjustments, replace oil with a light spray and use lower-sodium broth.
Instructions
1. Dry and season: Pat the beef dry with paper towels. Season generously with salt and pepper to promote surface browning.
2. Heat the pot: Warm a heavy pot over medium-high heat until shimmering. Add oil and let it heat until it slightly ripples across the surface.
3. Sear in batches: Place beef cubes in a single layer and do not overcrowd. Allow each side to develop a deep brown crust, about 3–4 minutes per side.
Avoid moving pieces prematurely. When the crust releases easily, it’s ready to turn; rushing produces steam instead of a crust.
4. Set meat aside: Transfer seared pieces to a resting plate. Reduce heat to medium for the aromatics.
5. Sauté aromatics: In the same pot, add onion, garlic, carrots, and celery. Cook until softened, about 4–6 minutes, scraping fond from the bottom.
6. Deglaze: Pour in wine or a splash of broth and scrape the pan to lift browned bits. Let the liquid reduce for 2–4 minutes to concentrate flavor.
7. Simmer: Add beef broth, bay leaves, thyme, and return seared meat to the pot. Bring to a gentle simmer, then cover and stew on low for 2–2.5 hours.
8. Finish and season: Taste and adjust salt and pepper. Remove bay leaves before serving to avoid sharp, bitter notes.
Finally, skim excess fat if desired and rest the stew for 10 minutes to let flavors integrate further.
Chef’s Notes: Tips for Success
Choosing the right cut matters: choose beef chuck, brisket, or other cuts with connective tissue. These cuts soften and become unctuous after long cooking.
Drying your meat ensures a proper crust. Even slight surface moisture will steam and prevent ideal browning.
- Don’t overcrowd: Overcrowding drops pan temperature and produces steam, not a crust.
- Moderate oil: Use just enough oil to coat the pan; excess oil inhibits crust formation.
- High smoke point oils: Prefer vegetable, canola, or refined avocado oil for stable heat.
Deglazing is non-negotiable. The liquid lifts the fond into solution and creates a deeper, more integrated sauce. Use wine, stock, or even a splash of vinegar for brightness.
Pro-Caution
If you wish to reduce oil, sear with less fat and finish in the oven at high heat briefly, or use a heavy non-stick pan to limit fat absorption.
Serving Suggestions
Serve the stew in a wide bowl, garnished with fresh parsley or thyme sprigs for color and aromatics. The herb garnish brightens the deep, savory profile.
Pair with creamy mashed potatoes, buttered egg noodles, or crusty bread to soak up the sauce. A simple green vegetable balances richness and adds texture contrast.
| Nutrient | Per Serving |
|---|---|
| Calories | 420 kcal |
| Protein | 35 g |
| Carbohydrates | 12 g |
| Fat | 22 g |
Discover more techniques on slow cooking meat and how time deepens flavor. Additionally, see best cuts for stew to match cooking method with the right protein.

Q&A
Q&A: Unlock Bold Flavors – Why Searing Meat Before Stewing Matters
What is searing meat, and how does it differ from simply cooking it?
Searing is the rapid browning of a meat’s surface at high heat to develop a caramelized crust. In contrast, simple cooking at lower temperatures does not create the same Maillard-driven flavor compounds.
Therefore, searing adds a concentrated layer of taste that complements the long, slow cooking that follows.
Why is searing important before stewing?
Searing generates flavor through the Maillard reaction and creates fond on the pan surface. Deglazing then captures those compounds and folds them into the stew liquid.
Consequently, a seared-and-deglazed base produces a richer, more complex broth than unseared meat alone.
Does searing lock in juices as many believe?
The old notion that searing “seals in” juices is misleading. Searing primarily develops flavor rather than preventing moisture loss.
However, when combined with proper low-temperature simmering, searing contributes to a final dish that tastes juicier and more savory.
Can I skip searing for a quicker or leaner stew?
You can skip searing to save time or limit oil, but expect a noticeable difference in flavor depth. If short on time, sear at least a portion of the meat or use a quick pan-roast to capture some browning.
Alternatively, use a hot oven roast or torch for spot browning, but these techniques still aim to produce Maillard compounds rather than preserve juices.
Does searing benefit all stewed meats?
Most hearty proteins—beef, lamb, pork, and robust poultry—gain from searing. Delicate fish and very lean cuts may not respond well and can dry out under high heat.
Match the method to the protein. When in doubt, use smaller test batches to evaluate texture and flavor before committing to the full cook.
In Summary
Searing meat before stewing is a proven technique to concentrate flavor, create textural contrast, and produce a richer sauce. Practically, it requires little extra time but returns substantial sensory benefits.
For consistent results, dry your meat, use high heat, avoid overcrowding, and always deglaze the pan. These steps convert surface caramelization into lasting, integrated flavor in the finished stew.
FAQ
How long should I sear each piece?
Sear pieces about 3–4 minutes per side on medium-high heat until a deep brown crust forms. Timing varies with pan temperature and piece size.
Remember: the crust should release easily when it is properly seared—forced movement often tears the surface.
Can I brown meat in the oven instead?
Yes. High-heat roasting on a preheated sheet can brown large quantities at once. Finish liquid steps on the stovetop to deglaze and build the stew base.
However, stovetop searing gives more direct control and faster fond formation for deglazing.
What if I have leftover stew—does flavor improve?
Flavors often deepen after resting overnight in the refrigerator because aromatics and fat integrate more fully. Reheat gently to avoid overcooking the meat.
Also, chilled stew can be defatted easily by skimming solidified surface fat before reheating.
Which herbs and aromatics pair best with seared stews?
Classic pairings include bay leaves, thyme, rosemary, and whole peppercorns. Use fresh parsley at the end for brightness and contrast to the rich base.
Finally, acids like a splash of vinegar or lemon can brighten the final bowl without overpowering the Maillard-derived richness.
Where can I read more about the chemistry behind browning?
For a reliable overview, consult the Maillard reaction entry and the browning (cooking) article on Wikipedia for accessible, referenced explanations.
These sources clarify why searing produces flavor compounds and how they influence the final dish.
See also: Searing meat
]]>
- Slow heat builds texture: collagen converts to gelatin, enriching mouthfeel.
- Layering matters: beans absorb fat and aromatics when assembled thoughtfully.
- Maillard crust: a brief high-heat finish adds aroma and crunch.
- Resting: lets juices redistribute for balanced bites.
What is cassoulet?
Cassoulet is a traditional French bean casserole from Languedoc built on long, low cooking and rich, cured meats. It combines tender legumes with duck, pork, and sausage to deliver concentrated savory flavor.
The dish links culinary technique with simple chemistry: slow heat breaks down collagen and starch, while controlled browning produces aroma compounds. For background on the regional tradition, see cassoulet on Wikipedia.
Prep and Cook Time
Plan time deliberately: cassoulet benefits from hours, not minutes. Soak beans overnight and allow slow simmering to build depth.
Account for active work and passive cooking. The schedule below reflects common practice for a classic home oven or stovetop approach.
- Preparation: 40 minutes active
- Cooking: 3 to 4 hours low heat (plus bean soaking)
- Total: roughly 5 hours from start to finish
Yield
This recipe yields about six generous portions, enough for a family meal or a dinner party. Portions will vary with serving size and side dishes.
Make-ahead works well: flavors meld overnight, improving on day two. Reheat gently with a splash of stock to restore moisture.
Difficulty Level
Expect an advanced-level project for cooks new to long braises or confit handling. Precision in timing and seasoning matters more than fancy technique.
However, each step is repeatable and forgiving when you monitor liquid levels, skimming excess fat, and resting the casserole properly before serving.
Ingredients
Use quality staples: dried white beans, pork shoulder and belly, duck legs, and a flavorful stock. Each ingredient plays a structural or flavor role in the final casserole.
Substitutions are possible, but focus on fattier cuts and long-cooking components so the dish achieves classic mouthfeel and depth.
- 500g dried Tarbais or cannellini beans, soaked overnight and drained
- 2 duck legs, confit or fresh
- 300g pork shoulder, 1-inch cubes
- 200g pork belly, rind removed and cubed
- 150g Toulouse-style or similar sausage, thick rounds
- 1 large onion, finely chopped
- 3 garlic cloves, minced
- 2 carrots, diced
- 2 sprigs fresh thyme
- 2 bay leaves
- 1 small bouquet garni tied with parsley and thyme
- 1 L chicken or poultry stock, low sodium preferred
- 100g fresh breadcrumbs for the gratin topping
- 2 tbsp duck fat or olive oil
- Salt and freshly ground black pepper, to taste
Instructions
Follow a clear sequence: hydrate beans, brown meats, assemble, then slow-cook. Each phase concentrates flavor in different ways.
Pay attention to texture targets: beans should be tender but intact; meats should yield easily and remain moist after reheating.
- Prepare the beans: After soaking, rinse the beans. Place in a pot with fresh water, bring to a gentle boil, then simmer about 1 hour until just tender. Drain and set aside. For information on bean categories and behavior, see beans on Wikipedia.
- Sear the meats: Heat duck fat in a heavy casserole over medium heat. Brown pork shoulder and pork belly cubes until golden, about 6–8 minutes. Remove and reserve. Browning develops Maillard compounds that add savory depth.
- Sauté aromatics: Add onion, carrots, and garlic to the pot. Cook gently until translucent and fragrant, about 4–5 minutes. Deglaze with a splash of stock, scraping browned bits from the base.
- Combine ingredients: Return pork to the pot, add sausage slices and duck legs, and nestle beans among the meats. Tuck in the bouquet garni, thyme, and bay leaves.
- Infuse flavors: Pour in stock to just cover the beans and meats. Season lightly because confit and sausages can be salty. Bring to a gentle simmer, then lower the heat.
- Slow cook: Partially cover and simmer on low for 3–4 hours. Stir occasionally and skim foam or excess fat. Collagen conversion produces gelatin, which enriches the cooking liquid and mouthfeel.
- Create the crust: In the last 45 minutes, set oven to 180°C (350°F). Sprinkle breadcrumbs across the surface to form a crunchy top. Bake uncovered until the crust browns. The rapid surface heat produces Maillard browning; for context see Maillard reaction.
- Rest and serve: Let rest 10–15 minutes before spooning. Resting lets juices redistribute so each serving retains moisture and balance.
Tips for Success
Small adjustments change outcomes significantly: bean type, render of fat, and final gratin technique alter texture and aroma. Aim for consistency in each step.
Beans: Tarbais beans hold shape and become creamy internally. When unavailable, use cannellini but reduce simmer time slightly to avoid collapse.
- Meat selection: Favor fatty cuts; they release umami and lubricate the beans during long cooking.
- Skimming: Remove excess fat selectively to keep broth clear while retaining enough for mouthfeel.
- Make-ahead: Cassoulet often improves after a day in the fridge. Reheat gently with a splash of stock to refresh texture.
Pro-Caution
When you brown meats, use moderate heat. Excessive heat can char rather than develop savory browning, leading to bitter notes.
Expert Insight
Serving Suggestions
Serve cassoulet in shallow, rustic dishes to display the browned crust. Offer a simple green salad to cut richness and refresh the palate.
Pair with structured reds such as Cahors or Malbec, or moderate-bodied wines that balance fat and acidity. Garnish lightly with chopped parsley or thyme for brightness.
Nutrition and Portioning
Estimate nutritional values per serving for menu planning. Ingredients and portion size will change exact numbers, but the table below reflects a common composition.
| Nutrient | Per Serving |
|---|---|
| Calories | 680 kcal |
| Protein | 42g |
| Carbohydrates | 45g |
| Fat | 32g |
Further Reading and Reference
Explore historical context and technique to refine practice. Classic sources and culinary science explain why slow, low heat produces superior gelatin and texture.
Read about related techniques like confit and traditional braising to understand how preserved meats and long cooking interact in cassoulet.
For additional recipes that thrive under prolonged cooking, browse our internal collections: slow-cooker recipes and a focused duck confit guide to master preservation and flavor.
Q&A
What is cassoulet, and where did it originate?
Cassoulet originates from the Languedoc region of France and combines beans with pork and preserved duck or goose components. It developed as a rural, resourceful dish that concentrates flavor through long cooking.
Regional variations exist, but the core principle remains the same: slow heat plus fatty proteins creates intense savory depth.
How does slow cooking change meats and beans?
Slow cooking breaks down connective tissue into gelatin, which thickens and enriches the braising liquid. Beans absorb fat and aromatic compounds, gaining flavor from surrounding ingredients.
Maintaining a gentle simmer prevents beans from disintegrating and keeps meats tender and moist.
Why is the crust important?
The crust delivers contrasting texture and aroma by concentrating Maillard reaction products on the surface. It adds to perceived complexity in each bite.
Brief exposure to higher heat or oven finishing crisps the top while preserving the soft interior beneath.
Do I have to soak beans?
Soaking hydrates beans and reduces cooking time. It also helps with even texture and reduces some oligosaccharides that can cause digestive discomfort.
If short on time, use a quick-soak method: boil 2 minutes, remove from heat, and soak one hour before draining and proceeding.
Can I adapt cassoulet for a slow cooker?
Yes. Use low setting and monitor liquid; slow cookers trap steam so you may need less stock. Finish under the broiler or in a hot oven to form the crust.
For more slow-cook adaptations, see our slow-cooker recipes collection for technique adjustments and timing guides.
In Retrospect
Cassoulet rewards careful attention: technique over haste, and quality ingredients over shortcuts. Understand each step to control texture and flavor.
Practice the sequence—bean prep, controlled browning, slow simmering, and a warm gratin finish—and you will produce reliable, deeply flavored results every time.
See also: Cassoulet
]]>