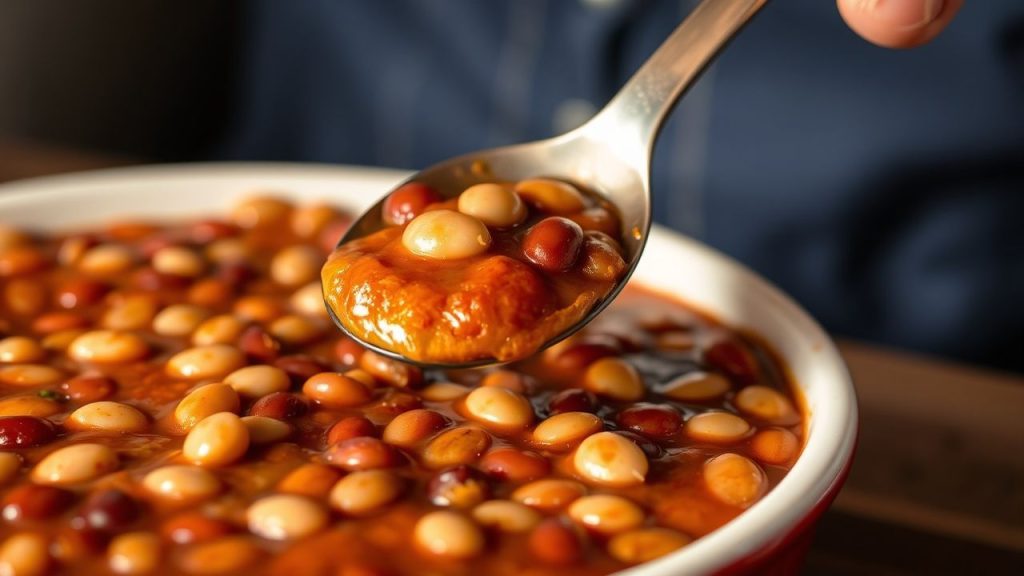
- Protein-forward: Lean turkey provides high-quality protein for satiety.
- Fiber-rich: White beans add texture and steady energy.
- Make-ahead friendly: Flavors deepen after refrigeration; it freezes well for batch cooking.
Quick Facts for Turkey Soup
Prep and cook timings help you plan efficient batch-cooking and reheating. They guide when to soak beans and when to begin the long simmer to develop depth.
Follow the timeline below for predictable results; adjust simmer times if you swap bean varieties or choose dark turkey meat that requires longer cooking.
Prep and Cook Time
Preparation: 20 minutes | Cooking: 1 hour 15 minutes | Total: 1 hour 35 minutes. These estimates assume pre-soaked dried beans.
If you use canned beans, reduce active simmer time and add them late to avoid excessive softening.
Yield
Serves 6 generous bowls, making turkey soup ideal for family meals or meal prep. Scale ingredients linearly for larger batches or halve for 2–3 servings.
This recipe balances portion size with nutrition, delivering lean protein and complex carbohydrates in each serving.
Difficulty Level
Easy to Medium — suitable for cooks who want layered flavor without advanced technique. Techniques used include soaking, sweating aromatics, searing, and gentle simmering.
A heavy-bottomed pot or Dutch oven promotes even heat and prevents scorching during the simmer that builds a clear, rich broth.
Ingredients for Turkey Soup
Use fresh, high-quality ingredients to maximize flavor with minimal effort. Choose low-sodium broth when possible to control final seasoning.
Olive oil or another neutral oil will give the fat needed to carry aromatics and to brown turkey properly; consider the oil’s smoke point for searing.
- 1½ pounds turkey breast, skinless and boneless, cut into 1-inch cubes
- 1 cup dried white beans (cannellini, navy, or Great Northern), rinsed and soaked overnight
- 1 large yellow onion, finely chopped
- 3 cloves garlic, minced
- 2 medium carrots, peeled and diced
- 2 stalks celery, diced
- 6 cups low-sodium chicken broth
- 2 tablespoons olive oil (or neutral oil)
- 1 teaspoon smoked paprika
- 1 teaspoon dried thyme
- 1 bay leaf
- Salt and freshly ground black pepper, to taste
- ½ cup fresh parsley, chopped
- Juice of ½ lemon (optional, for brightness)
For background on legumes and their nutritional role, consult reliable references such as the legume overview on legume. For notes on turkey as a poultry choice, see the encyclopedia entry for turkey.
Instructions for Turkey Soup
Execute the recipe in stages to control texture and to build a clear, layered broth. Take care during each phase—beans, aromatics, turkey, and simmer—to maintain structure and flavor.
Use a heavy pot for even heat distribution and to protect the stock from scorching during the long simmer that extracts flavor without clouding the liquid.
1. Prepare the beans
After soaking the beans overnight, drain and rinse them thoroughly. Place the beans in a pot, cover with fresh water, and bring to a gentle boil; then reduce heat and simmer until tender, about 45–60 minutes.
Drain cooked beans and set aside. If you use canned no-salt-added beans, rinse well and add them during the final simmer to prevent mushiness.
2. Sauté the aromatics
Heat the oil over medium heat in your heavy pot. Add onion, carrots, and celery; sauté until softened, about 6–8 minutes, stirring to avoid excessive browning.
Add minced garlic and cook 30–60 seconds more until fragrant. Properly softened aromatics form the flavor base that carries through the entire turkey soup.
3. Add and brown the turkey
Toss turkey cubes into the pot and season with salt, pepper, smoked paprika, and dried thyme. Sear gently until the pieces show light browning, about 4–6 minutes.
Avoid overcooking at this stage; you want surface color for flavor while keeping the interior tender for the final simmer.
4. Build and simmer the broth
Pour in the low-sodium broth and add the bay leaf. Bring to a slow boil, then reduce to a gentle simmer and cover; simmer 20–25 minutes to marry flavors without breaking down bean structure.
Skim any surface foam for clarity and maintain a low simmer to avoid over-reducing the liquid or shredding the turkey.
5. Combine beans and finish
Add the cooked beans to the pot and simmer uncovered for an additional 10–15 minutes. Taste and adjust seasoning with salt, pepper, and lemon if desired.
Remove the bay leaf before serving. Stir in chopped parsley just before plating to preserve its color and bright, herbal lift in the turkey soup.
Tips & Variations for Turkey Soup
Small adjustments change texture and flavor without complicating the process. Consider alternative proteins, bean types, or spice accents to tailor the soup to your palate.
For a heartier bowl, add chopped greens like kale or Swiss chard in the last 8–10 minutes of simmering. For a smoother mouthfeel, blend a portion of the soup and stir it back in for body.
 Expert Insight
Separate from the tip above, consider swapping turkey breast for dark meat if you want more gelatin and richness; increase simmer time slightly to render connective tissue.
Use canned beans to save time but add them late to prevent excessive softening. If you need a gluten-free option, verify that your broth and seasonings contain no hidden gluten.
 Pro-Caution
Serving & Nutrition for Turkey Soup
Serve the turkey soup hot, garnished with parsley and an optional drizzle of extra-virgin olive oil or a small spoon of plain yogurt for creaminess. Fresh lemon wedges allow diners to adjust brightness at the table.
The recipe balances macronutrients: lean protein from turkey, complex carbohydrates and fiber from beans, and minimal fat when you use limited oil and low-sodium broth.
Store leftovers in airtight containers. Refrigerate up to 4 days; freeze up to 3 months for best quality. Reheat gently over low heat to avoid breaking down bean texture and to keep turkey tender.
For clear stock-making and clarification principles, refer to the culinary overview on culinary stock. For olive oil selection and its culinary properties, review the entry on olive oil.
| Nutrient | Per Serving |
|---|---|
| Calories | 320 kcal |
| Protein | 38 g |
| Carbohydrates | 28 g |
| Fat | 6 g |
FAQ
What makes turkey soup a classic comfort food?
Turkey soup offers warmth, texture, and satiety in a single bowl. The combination of rich broth, tender meat, and creamy beans creates a restorative meal that many cultures value.
Its simplicity and scalability also make turkey soup a practical choice for feeding families and for seasonal menus when you want nourishing food with minimal fuss.
Why choose turkey over other meats for this soup?
Turkey supplies lean, complete protein with a subtle flavor that allows herbs and aromatics to shine. It keeps the soup lighter in fat while still delivering satisfying mouthfeel after proper browning and simmering.
Using turkey breast shortens overall fat content; switching to dark meat increases richness and benefits from slightly longer cooking to tenderize connective tissue.
Which beans work best in turkey soup?
Cannellini, navy, or Great Northern beans perform reliably due to their creamy interiors and firm skins after cooking. They absorb broth and retain shape when simmered gently.
If you prefer a firmer bite, soak beans until just plump and test during simmering; harvest variations affect cooking time and water absorption.
Can I prepare turkey soup in advance?
Yes. This turkey soup improves after resting because flavors meld and deepen. Refrigerate for up to 4 days, and reheat on low to preserve texture.
For long-term storage, freeze portions in airtight containers for up to 3 months. Thaw in the refrigerator overnight before reheating slowly on the stovetop.
Is this soup suitable for a balanced diet?
Yes. It provides lean protein, complex carbohydrates, and fiber, and keeps added fat low if you use minimal oil and low-sodium broth. Portion control and side choices determine its place in meal planning.
Adjust salt and finish with lemon to control sodium while maintaining perceived flavor. For tailored guidance on nutrition, consult a registered dietitian.
Final Thoughts on Turkey Soup
Hearty turkey soup rewards simple, careful technique with satisfying comfort and nutrition. A modest set of ingredients transforms into a bowl that supports practical meal prep and steady satiety.
Use quality ingredients, follow the steps above, and adjust seasoning to taste. This classic turkey soup remains a dependable recipe for warming kitchens and feeding families efficiently.
See also: Turkey soup recipes | Bean soup recipes

See also: turkey soup
]]>
- Key takeaway: Slow, low heat yields creamy beans without collapsing skins.
- Key takeaway: Balancing sugar and acid controls caramelization and brightness.
- Key takeaway: Proper soaking and initial simmer shorten final cook time and equalize texture.
- Key takeaway: Maillard browning and tomato paste boost savory depth.
The scientific foundation
Beans are seeds from plants in the legume family, and their structure drives how they cook. The outer skin, cell walls, and internal starch matrix change at different temperatures and with moisture, so technique matters.
When you control temperature and time, you control hydration and starch gelatinization. These factors produce a bean that is tender yet intact and a sauce that clings without becoming gluey.
Ingredient overview
Choose beans and supporting ingredients that contribute texture and flavor in predictable ways. Beans with thin skins and moderate starch content, neutral oils, acids, and sugars build the classic baked-bean profile.
Below are the ingredients commonly used. Quantities and options follow the recipe style that emphasizes balance between sweetness, acid, fat, and umami.
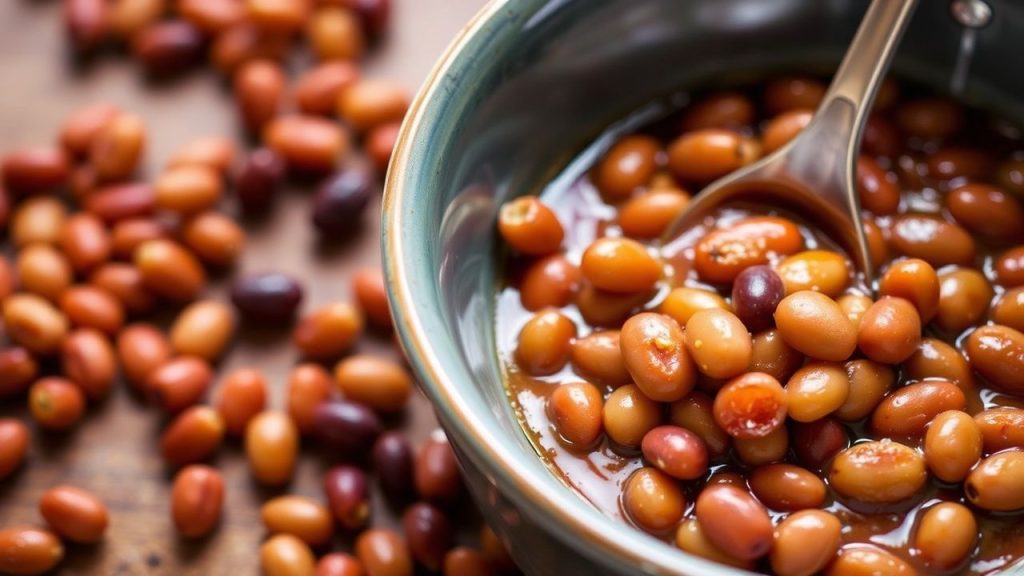
- 2 cups dry navy beans, rinsed and soaked overnight
- 6 cups water, plus extra for soaking
- 4 slices thick-cut bacon, diced (optional)
- 1 large yellow onion, finely chopped
- 3 cloves garlic, minced
- 1/4 cup maple syrup
- 1/4 cup molasses
- 1/4 cup tomato paste
- 2 tablespoons Dijon mustard
- 1 tablespoon apple cider vinegar
- 1 teaspoon smoked paprika
- 1 teaspoon kosher salt
- 1/2 teaspoon freshly ground black pepper
- 1/4 teaspoon ground cayenne pepper (optional)
- 2 cups low-sodium chicken or vegetable broth
- 2 tablespoons olive oil
Prep and cook time
Preparation: 20 minutes. Soaking: 8 hours or overnight. Cold-water soak hydrates beans uniformly and reduces cooking time.
Cooking: 2 hours 30 minutes slow simmer. Total time: Approximately 11 hours including soaking. Plan a long, low simmer rather than a short, hot boil.
Instructions
1. Drain and rinse the soaked navy beans. Place them in a large pot, cover with fresh water, bring to a boil, then reduce to a gentle simmer and cook until just tender, about 45–60 minutes.
2. Build flavor by preheating a Dutch oven over medium heat, then sautéing diced bacon until crisp and removing it with a slotted spoon, leaving the rendered fat. Add olive oil if needed and cook the onions and garlic until golden, about 5 minutes, to create caramelized base notes.
3. Layer and simmer by stirring in tomato paste and cooking it briefly to deepen flavor through browning reactions. Add the sweeteners, mustard, vinegar, smoked paprika, salt, pepper, and broth; return the beans and bacon, reduce to low, and simmer partially covered for 1 hour, stirring gently every 15 minutes.
4. Adjust texture by monitoring sauce thickness and adding small splashes of broth when it becomes too thick. Taste near the end and brighten with a touch more vinegar or salt to balance sweetness and deepen overall flavor.
Pro-Caution
Science of texture and flavor
Starch gelatinization occurs as beans absorb water and heat, transforming rigid granules into a gel-like network that thickens sauce. The timing of gelatinization depends on bean variety, soaking time, and heat level.
Proteins in beans soften and free amino acids that participate in browning reactions with sugars. These reactions add savory, nutty notes that we attribute to depth and complexity.
Starch gelatinization and cell walls
Gelatinization begins when internal bean temperature rises, typically between 60–80°C, depending on starch composition. Controlled heating ensures starches swell enough to thicken the sauce without collapsing bean structure.
Cell wall strength and pectin content determine how well a bean holds together. Soaking and low, steady heat help the cell walls hydrate and yield a tender interior while keeping the outer skin intact.
Maillard reaction and caramelization
The Maillard reaction generates brown pigments and dozens of aroma compounds when amino acids meet reducing sugars under heat. Encourage these reactions on onion, bacon, and tomato paste to create savory backbone flavors.
Separately, sugar caramelization adds sweetness and toffee-like notes. Balance caramelization with acid—such as vinegar or mustard—to avoid cloying sweetness and to lift the final dish.
Read more about the Maillard process at Maillard reaction. For background on plant categories and seeds, see legume and the general bean entry. For starch science, consult starch.
Tips for success
Bean selection matters. Navy and great northern beans typically produce a creamy interior and delicate skins that take sauce well. Use firmer varieties like pinto if you prefer more texture.
Soak overnight to rehydrate evenly and remove some oligosaccharides that contribute to digestive discomfort. Use the soaking water for compost rather than cooking to reduce flatulence compounds.
Expert Insight
Variations and substitutions
To make a vegetarian version, omit bacon and use mushroom or vegetable broth plus smoked paprika for smokiness. You can also swap maple syrup with brown sugar or honey while adjusting vinegar slightly to maintain balance.
If you need lower sodium, use low-sodium broth and add salt late in cooking to control final seasoning. For spicier beans, add chili powder or cayenne in measured increments and taste as flavors concentrate.
Serving suggestions
Baked beans pair well with cornbread, grilled sausages, or roasted pork shoulder, and they also function as a hearty topping for baked potatoes. Garnish with chopped parsley or scallions for freshness and color contrast.
A dollop of sour cream or a sprinkling of sharp cheddar can add a cooling contrast to the sauce’s richness. For a chilled salad application, let the beans cool and use a vinaigrette to brighten the mix.
Nutrition per serving
The recipe yields a balanced mix of protein and complex carbohydrates. A typical serving offers substantial fiber and plant protein, making baked beans a satisfying, energy-dense option.
| Nutrient | Per Serving |
|---|---|
| Calories | 280 kcal |
| Protein | 15 g |
| Carbohydrates | 40 g |
| Fat | 7 g |
Common pitfalls and remedies
Overcooking at high heat breaks skins and produces a paste-like texture. If you notice excessive breaking, reduce heat, add more liquid, and avoid vigorous stirring to let beans recover.
Undercooking leaves a chalky interior and thin sauce. If beans remain firm after the recommended time, continue simmering gently and test frequently to avoid overshooting the ideal texture.
Troubleshooting: Sauce too thin or thick
If the sauce is too thin, simmer uncovered to concentrate flavors and thicken naturally. If it becomes too thick, stir in small amounts of warm broth until it reaches the desired cling and shine.
Also, account for chilling: beans will thicken as they cool, so slightly loosen the sauce just before serving if you plan to reheat or chill leftovers.
Pro-Caution
FAQ
What makes baked beans so flavorful?
Slow heat lets sugars caramelize and amino acids react, creating complex savory and sweet notes. Layered ingredients like tomato paste, smoked paprika, and rendered fat provide concentrated flavor foundations.
Do I have to soak beans overnight?
Soaking improves even hydration and reduces cooking time, but you can use a quick soak method if needed. Quick soaking involves boiling beans briefly then letting them stand for an hour before draining and cooking.
How do I keep beans tender but intact?
Use a gentle simmer, soak beans first, and avoid vigorous stirring. Test a few beans periodically; stop the final cook when they are tender but still hold shape.
Can I use canned beans?
Yes. Canned beans offer convenience and reduce total cook time. Adjust liquids and simmer time to allow flavors to meld without overcooking the canned beans.
Why add acid like vinegar or mustard?
Acid brightens and balances sweetness, preventing the sauce from tasting flat or overly sweet. Add acid in small amounts near the end to preserve brightness and acidity perception.
For technical reading on seeds and crop categories, see legume. For starch mechanics, consult starch. For browning chemistry, visit Maillard reaction.
See also: Baked beans
]]>
- Check bean age — fresher dried beans hydrate faster.
- Control water chemistry — switch to filtered water if your tap is mineral-rich.
- Soak and heat correctly — proper soaking and steady simmering prevent split skins and uneven texture.
- Use rescue methods — tiny baking soda doses or pressure cooking can finish stubborn batches.
Why beans stay hard and how to get soft beans
Beans are seeds with protective coats and dense cell walls that require water and heat to break down. The interaction of pectin, hemicellulose, and minerals determines how quickly you get soft beans.
Age, water minerals, and early acid additions commonly slow softening. Understanding those factors helps you choose the right fix and avoids wasting time and fuel.
Bean variety and age
Different legumes soften at different rates; small beans like navy or black beans typically cook faster than chickpeas and kidney beans. Choose the correct technique for the variety to reach reliably soft beans without overcooking.
Storage matters. Beans stored dry for more than a year often lose internal moisture and resist hydration. Buy from sellers who rotate stock and store beans in airtight containers away from heat and light to preserve cooking performance.
Water chemistry and its effect on soft beans
Hard water contains calcium and magnesium ions that bind to pectin in cell walls and slow softening. If your tap water tastes mineral-rich, use filtered water or bottled sources to improve outcomes for soft beans.
When adjusting pH, sodium bicarbonate speeds softening by raising alkalinity, but it alters flavor and texture when overused. Apply it sparingly and test frequently. For background on hard water and sodium bicarbonate consult these references: hard water and sodium bicarbonate.
Prepping beans: sorting, rinsing, and soaking for soft beans
Begin with a visual sort to remove stones and damaged beans, then rinse under cold water to clear dust. Clean beans hydrate more evenly and give consistent soft beans across the pot.
Soaking ahead reduces cook time and promotes even hydration. Use either an overnight soak or a quick-soak when you are short on time to improve the odds of achieving soft beans.
Soaking techniques
Traditional soak: cover beans with at least 2 inches of water and soak 8–12 hours. This method gives predictable results and lowers the energy required to reach soft beans on the stovetop.
Quick soak: bring beans to a boil for two minutes, remove from heat, cover, and let rest one hour. Drain, rinse, and cook in fresh water. Quick soaking performs well when you forget an overnight soak and still want soft beans.
Drain and rinse
Always discard the soak water and rinse before cooking. Soak water contains soluble oligosaccharides that can create excessive foam and affect final texture and flavor if carried into the cooking liquid.
Use fresh water for cooking so you can control salt, acidity, and seasoning. Using fresh water also avoids concentrating any minerals from a prolonged soak, which helps produce soft beans consistently.
Expert InsightCooking methods that produce tender soft beans
Choose a cooking method that suits the bean type and your timing. Stovetop simmering gives fine texture control, while pressure cooking yields predictable soft beans quickly.
Manage heat, salt timing, and acids to avoid a gummy exterior with an undercooked center. Follow a routine and tweak only one variable at a time to isolate causes when beans stay hard.
Stovetop simmering
Bring beans to a brief boil, then reduce to a low, steady simmer with the pot partially uncovered. High rolling boils will rupture skins and produce uneven texture instead of uniformly soft beans.
Start testing for tenderness after 45 minutes for small beans and after about an hour for larger types. Test by gently pressing a bean between thumb and forefinger rather than cutting, which can mislead you about interior doneness.
Pressure cooking and its advantages for soft beans
Pressure cookers and multi-cookers speed cooking and force water into bean structure more effectively, producing soft beans with less attention. Use manufacturer times and a standard pressure setting for safety and reliable texture.
Allow pressure release per device instructions and avoid long natural releases that can lead to overcooked, splitting skins. For technical background, see pressure cooking.
For many cooks, a pressure cooker reduces failure rates and delivers soft beans across a range of bean ages and sizes. However, stovetop simmering remains superior when you want very specific mouthfeel or intact skins.
Troubleshooting: rescue methods for stubborn beans
If beans remain firm after the expected cook time, proceed methodically: extend simmering time, then consider a tiny baking soda addition, and if needed, finish in a pressure cooker. These steps escalate from least to most intervention.
Keep heat low during extended simmering and check every 10–15 minutes to avoid splitting. Often extra time solves the problem, especially for larger beans or older stock.
When extending simmering fails
When two hours of simmering produces no change, the beans are likely too old or damaged. Replace the batch when repeated long simmers fail to yield soft beans; continued cooking wastes fuel and time.
Test a few beans frequently near the end of a long simmer. If one or two beans soften but the rest do not, the batch is inconsistent and swapping in fresher beans will give reliable results.
Using baking soda correctly
Sodium bicarbonate raises pH and breaks down hemicellulose and pectin faster, which speeds softening. Dissolve a very small pinch in a little warm water before stirring into the pot, then simmer and test often.
Use caution: excess baking soda will make beans mushy and can impart a soapy or metallic taste. Measure carefully—about 1/16 teaspoon per liter of cooking liquid is typically adequate for a small rescue dose. See more on sodium bicarbonate.
After a baking soda rescue, rinse or dilute the cooking liquid if you detect off-flavors, then season again at the end of cooking to restore balance.
Pro-CautionServing, flavoring, and practical tips to keep soft beans reliable
Finish tender beans with salt, acid, and fat to balance flavor. Add salt late if you suspect mineral issues; otherwise, moderate early salting can season effectively without preventing softening for most modern beans.
A splash of vinegar or lemon brightens beans at the end, and a drizzle of olive oil adds silkiness. Reserve acidic ingredients until beans reach near-tender to avoid tightening pectic substances and re-hardening the interior.
Use soft beans as a base for salads, soups, stews, or purees. Plan texture: mash a portion for creaminess while leaving other beans whole for bite and contrast.
At a Glance
- Age matters: fresher dried beans give faster, more consistent soft beans.
- Water matters: hard water can slow or prevent softening; filter when in doubt.
- Technique matters: soak, control heat, and rescue carefully to avoid flavor or texture problems.
FAQ
Why are my beans still hard after an hour?
Hard beans after an hour typically mean incomplete hydration from age, insufficient soak, or mineral-rich water. Switch to filtered water, extend simmering, or use a pressure cooker to force tenderness.
Does soaking always make beans soft?
Soaking shortens cook time and evens hydration, but it cannot fully reverse problems from very old beans. If you skip soaking, use a pressure cooker and expect longer stovetop times to reach soft beans.
Can I fix hard beans with baking soda?
Yes. A tiny amount of sodium bicarbonate can speed softening by raising pH. Dissolve a pinch in water before adding, then simmer and test. Use caution to avoid off-flavors or mushy texture.
Will adding salt early keep beans hard?
Modern tests show moderate early salting rarely prevents softening and often enhances flavor. However, when troubleshooting hardness, delay salt until beans approach tenderness to isolate variables.
Which method gives the most consistent soft beans?
Pressure cooking delivers the most repeatable results across bean types and ages because it improves water penetration and reduces cook time. Stovetop simmering offers finer texture control but needs more attention.
For botanical context on legumes and bean types, consult these references: legume and bean.
See also: soft beans
]]>