- Two-zone cooking for fast crust and gentle finish to protect internal juices.
- Marinades and resting help fibers retain and redistribute moisture.
- Choose the right cut—marbling and fat prevent the perception of dryness.
- Use thermometers to stop cooking before excessive moisture loss.
Mastering Temperature Control to Preserve Grilling Moisture
Heat management determines how rapidly proteins denature and expel liquid. When you plan for searing and finishing zones, you control where moisture moves and how much evaporates from the surface.
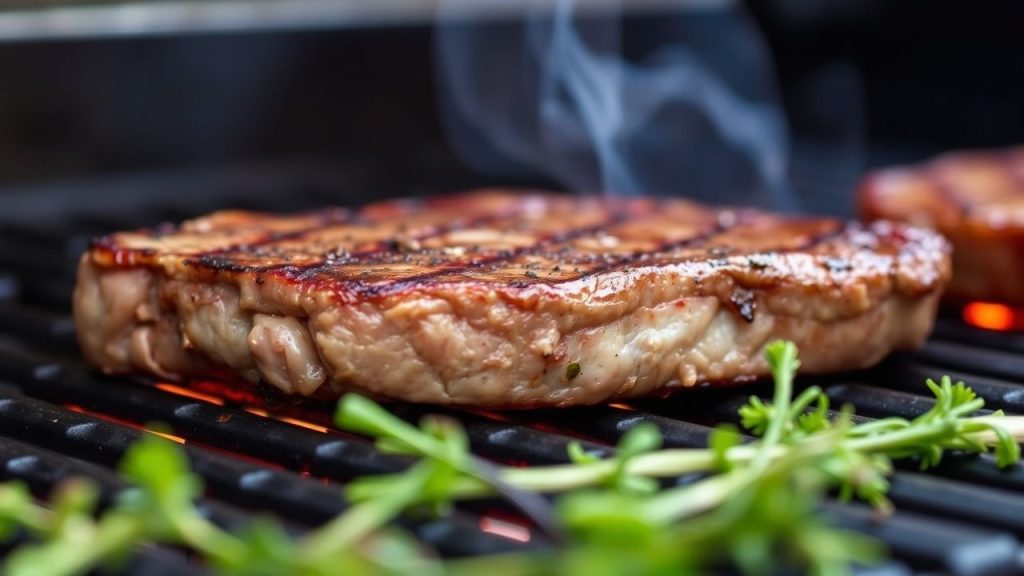
Set up at least two zones on the grill: a hot, direct side for crust formation and a cooler, indirect side for finishing. This two-zone approach reduces total time at extreme temperatures and protects grilling moisture in thicker cuts.
Why Heat Forces Moisture Out
Muscle tissue stores water inside cells and between protein strands; as temperature rises, the protein matrix contracts and squeezes liquid outward. That mechanical change explains why rapid, prolonged exposure to high heat increases drip loss and surface evaporation.
Thermal denaturation changes protein shape and binding capacity, which frees water previously held in the matrix. For the underlying biochemistry consult protein denaturation, which clarifies how heat releases bound water.
Heat, Evaporation, and Drippings
Evaporation accelerates with hotter air and longer exposure, so a hot sear can force moisture toward the exterior and increase drip loss. That steam and liquid loss is a physical process you must manage when you concentrate heat at the surface.
Conversely, slower cooking at moderate temperatures gives proteins time to set more gently and reduces aggressive expulsion of water. For basic physics about phase change and heat transfer, see evaporation.
Practical Grilling Workflow
Organize your workflow before you light the grill to reduce time on extreme heat and lower overall moisture loss. Sequence matters: prep, sear, finish indirectly, then rest—the order protects grilling moisture at each stage.
Prepare tools and staging: a calibrated instant-read thermometer, clean tongs, and a two-zone setup reduce guesswork and prevent accidental overexposure to direct flame. Consistent technique produces repeatable, juicy results.
Prep and Cook Time
Allow time for active prep and any marinade so the surface chemistry supports browning without excessive steaming. Typical windows are 15 minutes active prep and 2–4 hours of marinade when applicable to tenderize and add protective oil.
Cooking time varies by thickness and cut; a 1–2 inch steak often needs 20–30 minutes total with sear plus indirect finish, while larger roasts require longer indirect cooking but at lower temperatures to preserve grilling moisture.
Yield and Difficulty
Yield depends on portion size and cut. A 2 lb portion generally serves four; adjust target internal temperatures rather than strict times to preserve juiciness across different weights and shapes.
Difficulty is medium: you need a two-zone setup and an accurate thermometer. Focused attention and a consistent workflow yield better results than complicated spice blends or extended marinades.
Ingredients & Prep
A well-marbled ribeye or chuck roast holds and conveys moisture better during cooking because rendered intramuscular fat improves mouthfeel. For reference on muscle and fat composition consult meat composition.
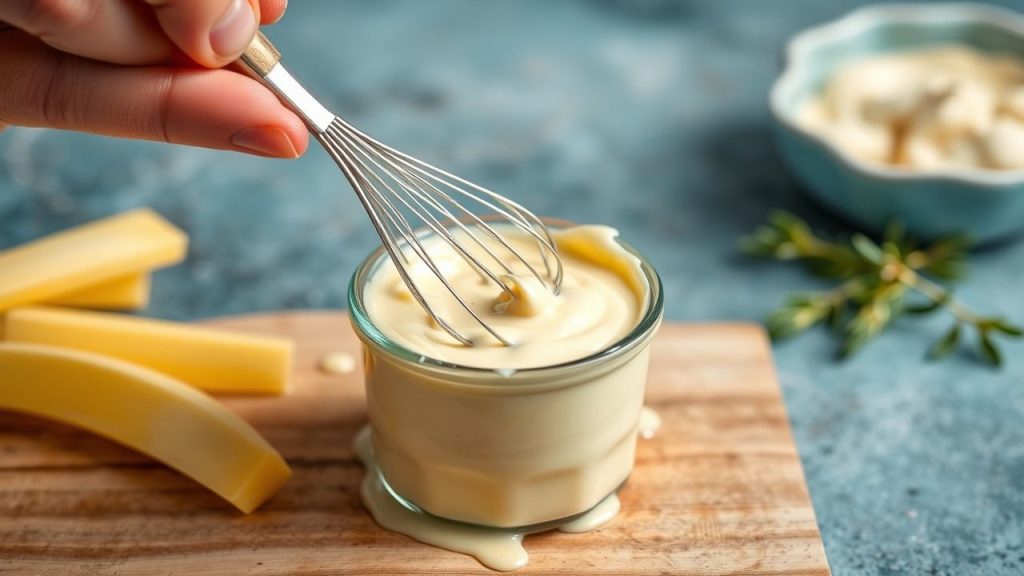
Marinades that combine oil and modest acid—such as buttermilk or lemon—tenderize connective tissue and create a thin lipid barrier that limits surface evaporation. Pat the surface dry before searing to encourage rapid crust formation without steaming.
Step-by-Step Instructions
- Marinate: Combine buttermilk, lemon juice, minced garlic, rosemary and a pinch of salt. Submerge for 2–4 hours so the acid loosens connective tissue while dairy buffers surface proteins.
- Preheat grill: Create two heat zones: one side hot (450–500°F) for searing, the other medium-low (300–350°F) for finishing. This limits the time meat spends at moisture-extracting temperatures.
- Pat dry: Remove from marinade and blot the surface. A dry surface browns quickly and avoids steam that can pull water toward the exterior and increase drip loss.
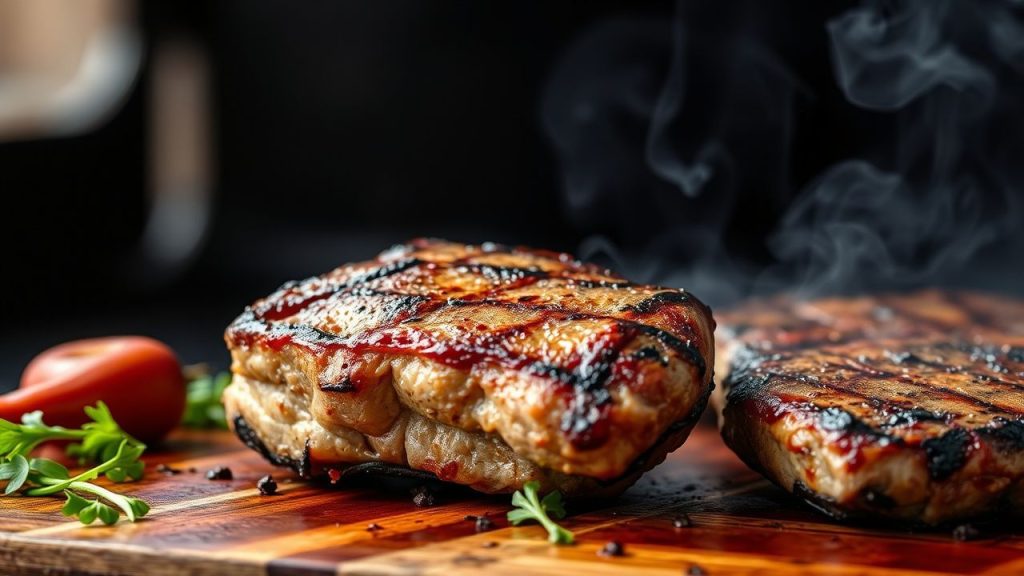
- Sear: Sear 2–3 minutes per side over direct heat until a deep crust forms. Flip once to promote even browning and reduce total surface exposure to flames.
- Finish indirectly: Move to the cooler zone, close the lid, and monitor internal temperature with an instant-read thermometer. Pull at 5°F below target to account for carryover and protect final grilling moisture.
- Rest: Tent loosely with foil for 10 minutes so juices redistribute. Cutting too soon forces fluid out and reduces perceived juiciness.
 Pro-Caution
Measure temperature rather than guessing by touch. Calibration and correct probe placement reduce variance between cooks and avoid wasted product.
Tips for Success
Choose cuts with balanced marbling because intramuscular fat melts and lubricates the mouthfeel, which improves perceived juiciness even if some water is lost. Lean cuts require gentler heat and faster cooking to maintain moisture.
Manage flare-ups by moving meat to indirect heat when fat ignites; open flames char the surface quickly and can drive moisture from deeper tissues. Control fat rendering with moderate searing and timely movement to the cool zone.
[TI P]Expert Insight: Rest your meat under a loose foil tent for at least half the thickness time. This short cooldown re-equilibrates internal juices and often improves perceived juiciness more than adding more fat or extra marinade.[/TIP]
Use a thermometer that reads quickly and accurately to reduce time with the lid open and the grill cool zone compromised. Accuracy improves repeatability and reduces moisture loss from overshooting target temperatures.
Serving Suggestions
Slice across the grain to shorten muscle fibers and make each bite feel more tender; cutting technique directly affects perceived moisture and chew. Serve slices alongside quick-grilled vegetables for contrast in texture and temperature.
Finish with a light drizzle of herb oil or a small pat of compound butter to add surface fat and enhance mouthfeel without changing internal moisture. These surface additions mask small losses in internal water and improve palatability.
Nutritional Snapshot
This section provides a practical estimate for standard servings and highlights the role of fat in perceived juiciness. The numbers vary by cut, trimming, and cooking losses, so treat values as guides rather than absolutes.
For a typical 2 lb portion divided into four servings you can expect roughly the following macronutrient profile; adjust for leaner cuts or added butter.
| Nutrient | Amount per Serving |
|---|---|
| Calories | 380 kcal |
| Protein | 45 g |
| Carbohydrates | 3 g |
| Fat | 22 g |
FAQ
The FAQ answers focus on why meat loses water on the grill and how to protect what matters. These concise answers give direct, evidence-based steps to reduce grilling moisture loss and improve outcomes.
Below are the most common questions home cooks ask, with clear, actionable answers you can apply on the next cook.
Why does meat lose moisture when grilled?
Heat causes muscle proteins to contract, which squeezes water out of cells and between fibers. Simultaneously, surface evaporation removes water, so both internal pressure and air exposure determine total moisture loss.
Is all moisture lost during grilling?
No. Some water remains bound within tissue, especially in well-marbled cuts where rendered fat improves juiciness perception. Nevertheless, higher temperatures and longer times generally increase both evaporation and drip loss.
Can marinating reduce moisture loss?
Yes. Oil in marinades provides a partial barrier to evaporation, while acids and enzymes help break down connective tissue and improve water-holding capacity. Proper marinade timing yields tender, moister results.
What role does resting play?
Resting lets contracted proteins relax and allows juices to redistribute internally, so less fluid escapes when you slice. A proper rest improves the final plate’s juiciness more reliably than extra fat or extended searing.
Which cuts retain moisture best?
Fattier cuts such as ribeye and short rib retain more perceived moisture because melting intramuscular fat enhances mouthfeel. For lean cuts, shorten cook times and pull at lower target temperatures to preserve grilling moisture.
Final Thoughts
Heat is a tool; use it deliberately to coax flavor without surrendering moisture. Two-zone cooking, controlled searing, correct marinades, and accurate thermometry keep grilling moisture within the muscle for consistently juicy results.
Practice the workflow, check internal temperatures, and make small adjustments to timing and heat for each cut. With attention to these principles you will routinely produce steaks and roasts that balance a flavorful crust with a tender interior.
See also: grilling techniques and grilled steak guide
See also: grilling moisture
]]>
- Focus on one variable: change temperature, not temperature and time together.
- Measure precisely: use a thermometer and digital scale for repeatable results.
- Document outcomes: keep a short log to track meaningful pattern changes.
Optimizing Temperature and Timing for Consistent Culinary Results
Heat and time dictate texture and flavor. Proper searing, controlled simmering, and timed rests transform proteins and vegetables into predictable outcomes.
When searing meat, target the correct surface temperature to trigger browning without overcooking. The Maillard reaction is the chemical process that creates the browned flavor and aroma; learn its basics on Maillard reaction.
Surface Heat vs. Internal Temperature
Surface temperature controls browning; internal temperature controls doneness. Use a probe or instant-read thermometer to monitor internal values during and after cooking.
A calibrated thermometer reduces guesswork. For instrument basics, see the entry for thermometer and choose one rated for culinary use.
Practical Recipe: Controlled Chicken Skillet
This recipe demonstrates how small variable changes yield consistent results across cooks. Follow the sequence and measure key points.
Keep one variable steady per test: heat level, pan type, or batch size. Record the results and adjust in future runs.
Recipe Snapshot
Prep Time: 20 minutes. Cook Time: 30 minutes. The timing here reflects a single-skillet workflow that scales if you keep pan crowding in check.
Yield: Serves 4. Difficulty: Medium. If you change protein size or pan type, expect at least a 10% time variance.
Ingredients
- 2 tbsp olive oil, extra virgin
- 1 medium onion, finely diced
- 3 garlic cloves, minced
- 1 lb chicken breasts, cut into 1-inch cubes
- 1 tsp smoked paprika
- ½ tsp sea salt
- ¼ tsp freshly ground black pepper
- 1 cup cherry tomatoes, halved
- ½ cup chicken broth, low sodium
- 1 tbsp fresh thyme, chopped
- 1 tbsp lemon juice, freshly squeezed
Instructions
- Heat the oil in a heavy skillet over medium heat until it shimmers. Add diced onion and sauté until translucent, about 4 minutes.
- Add garlic and cook 30 seconds until aromatic; avoid browning so flavor remains bright.
- Raise heat to medium-high and add seasoned chicken. Sear until golden and cooked through, roughly 8 minutes, turning pieces for even color.
- Cook tomatoes until they soften, about 3 minutes, releasing juices that form the pan sauce base.
- Deglaze with chicken broth and simmer uncovered for 5 minutes to concentrate flavor and thicken the sauce slightly.
- Finish off heat with thyme and lemon juice to balance richness with acidity.
Tips for Success
Control one variable at a time to build reliable technique. Small, repeatable changes teach you how each factor affects the final plate.
Use tools that quantify variables: a probe thermometer, a digital scale, and timers. For a technical view of ingredient interactions, review food chemistry.
- Temperature control: Aim for pan surface ranges that support browning without burning.
- Timing: Avoid crowding the pan; work in batches for stable sear and consistent internal temps.
- Measuring: Use scales for spices and weight-sensitive elements to cut variance.
- Cookware: Match pan size to volume; large surface area increases evaporation and browning speed.
 Expert Insight
Adjust recipes for equipment differences. Induction heats faster; gas gives quick response. Adapt heat down 1–2 notches on fast-reacting surfaces.
Serving and Storage
Serve this chicken over neutral grains like couscous or mashed potatoes to showcase texture and sauce. Garnish with fresh thyme and a light oil drizzle to boost aroma.
Cool leftovers quickly and store in airtight containers in the refrigerator. Reheat gently over low heat to preserve moisture and avoid protein tightening.
Pro-Caution
Nutrition and Further Reading
Per serving estimates: approximately 320 kcal, 35 g protein, 6 g carbohydrates, and 15 g fat. Use these as planning targets if you adjust portion sizes or ingredients.
For broader technique references, consult the general topic of cooking and the discipline of culinary arts to place method decisions in context.
| Nutrient | Amount per Serving |
|---|---|
| Calories | 320 kcal |
| Protein | 35 g |
| Carbohydrates | 6 g |
| Fat | 15 g |
Want more precision techniques? Visit our internal resources for step-by-step calibration and advanced control strategies: Precision in Kitchen Techniques and Temperature and Timing Guide. These guides offer checklists you can print and use during tests.
Q&A
Q1: What are “variables” in the kitchen?
A: Variables are measurable factors that change a dish’s outcome: temperature, time, ingredient mass, equipment, and moisture. Treat them as parameters to control, test, and log.
Q2: Which variable gives the biggest payoff for home cooks?
A: Temperature control gives the most immediate improvement. Learning to manage surface heat and internal probe readings reduces many common errors.
Q3: Can tools remove all variability?
A: Tools reduce guesswork but cannot eliminate ingredient variance. Freshness, seasonality, and produce size still affect outcome; calibrate for those differences rather than chasing perfection.
Q4: How should a beginner start experimenting?
A: Change one variable per attempt and keep a two-line log: what you changed and the result. After a few repeats, patterns emerge and you gain predictable control.
Final Thoughts
Variables are the operational knobs of cooking. Learn to adjust heat, time, and quantities deliberately, and you convert recipes into reproducible results.
Approach the kitchen as a small lab: measure, test, record, and iterate. That approach yields consistent meals and builds real culinary skill.
FAQ
How do I calibrate my pan and stove?
Heat an empty pan for defined intervals and time how long water droplets sizzle. Use those observations to map stove settings to pan surface behavior under load.
Document the pan material and thickness. A thin pan heats faster and requires lower settings than a heavy, thick-bottomed skillet.
What probe temperature should I use for chicken breasts?
Target 160–165°F (71–74°C) for fully cooked, juicy chicken breast. Pull meat slightly under final target and rest; residual heat raises internal temperature a few degrees.
Always measure in the thickest part for a reliable reading.
How do I scale a skillet recipe without losing browning?
Scale by batch, not by pan size beyond its effective surface area. Cook in multiple batches to maintain high surface temperatures and consistent browning.
If you must increase volume, use a larger, heavier pan and increase heat in measured increments while monitoring with a thermometer.
How important is ingredient weight versus volume?
Weight gives repeatability. Spices and chopped produce vary by packing and size. Use a digital scale for repeatable seasoning and portion control.
For liquids, measuring cups suffice, but for dry ingredients, prefer grams for consistency.
Where can I learn more about the science behind these techniques?
Start with the food chemistry overview and practical technique guides in culinary curricula. Practice with short experiments and keep results brief and focused.
Visit our internal pages for printable checklists and experiment logs: Precision in Kitchen Techniques.
See also: Kitchen Control
]]>
- At a glance: wild yeasts produce carbon dioxide; lactic acid bacteria produce acids that shape flavor.
- Feeding matters: a consistent 1:1:1 weight feed stabilizes activity and predictability.
- Temperature tunes taste: warm speeds fermentation; cool improves acidity balance and complexity.
- Maintenance tip: refrigeration slows growth and reduces feed frequency without killing microbes.
What a sourdough starter is
A sourdough starter is a living culture of wild yeasts and lactic acid bacteria kept in flour and water. Bakers maintain it with regular feedings to keep microbial populations active and predictable.
The starter serves two roles: it leavens dough by producing gas and it shapes flavor through acid production and enzymatic activity. For background on the broad concept, see sourdough.
The chemistry of fermentation
Fermentation in a starter is a set of metabolic reactions. Yeasts and bacteria metabolize flour-derived carbohydrates into gases, acids and minor alcohols.
These products interact with dough proteins and starches to change texture and taste. For an overview of microbial metabolism in food, consult fermentation (food).
Yeast metabolism and gas production
Wild yeasts convert sugars to carbon dioxide and ethanol through glycolysis and alcoholic fermentation. The carbon dioxide inflates the gluten network, which gives bread its rise.
Different yeast strains vary in speed and gas yield, which affects proof timing and crumb structure. Read about the organism class at yeast.
Lactic acid bacteria: acids and enzyme action
Lactic acid bacteria ferment sugars into lactic and acetic acids and produce enzymes that break down complex molecules. These acids lower pH, preserve the dough briefly, and deliver the characteristic tang.
Acid production also alters gluten and starch behavior, improving shelf life and changing mouthfeel. For taxonomic and metabolic details see lactic acid bacteria.
Expert Insight
When you change flour type, hydration or temperature, you change the starter’s chemical environment. Small changes can shift the dominant microbes and therefore the acid profile and rise behavior.
Building and maintaining a starter
Start with equal parts flour and water by weight to create a predictable environment. Use filtered water and unbleached flour to avoid chemicals that suppress microbes.
Keep a jar in a warm, draft-free spot for active starters. If you need a step-by-step practical guide, refer to our internal resource: Comprehensive Guide to Perfecting Your Sourdough Starter.
Prep and timing
Preparation: 10 minutes initial mixing; expect 5–7 days to reach reliable maturity. Track bubble formation and doubling time to judge readiness.
Feeds: Start twice daily feedings with a 1:1:1 weight ratio (starter:flour:water) and shift to daily or refrigeration once mature. Refrigerate to reduce feeding frequency to weekly without killing the culture.
Ingredients and why they matter
Flour: Whole-grain flours supply more nutrients and diverse microbes, which accelerates establishment. White all-purpose flour yields a milder, slower-developing culture.
Water: Chlorinated water can suppress activity; use filtered or rested water. Small additions of rye or whole wheat can stimulate lactic acid bacteria if the starter lags.
Detailed feed schedule (concise)
Day 1: Mix 50 g flour with 50 g water in a clean jar and cover. Wait 24 hours.
Days 2–4: Discard half, then feed 50 g flour and 50 g water twice daily if warm. Expect bubbles and a mild sour aroma by day 3.
Days 5–7: Increase feed size to 100 g flour and 100 g water once activity becomes regular. A mature starter doubles reliably within 6–8 hours after feeding.
Baking with your starter and troubleshooting
When your starter doubles predictably and smells pleasantly acidic, you can use it in recipes. For most loaves, use about 120 g (½ cup) active starter per standard recipe batch.
Measure activity with a float test or by tracking rise after feeding. That helps you time mix and final proof for consistent crumb and crust.
Troubleshooting: A gray, pink or orange tint indicates contamination; discard and restart. A clear brownish liquid (hooch) means the starter is hungry; pour off or stir back and feed promptly.
Pro-Caution
Adjust temperature to tune flavor: cool retards activity and favors acetic acid, giving a tangier loaf. Warm accelerates fermentation and can reduce perceived sourness while increasing speed.
Remember that hydration changes dough handling and acid diffusion; higher hydration often boosts enzymatic activity and open crumb. Practice with small loaves to dial in preferred profiles.
Tips for consistent results
Hydration consistency: Use a scale for accuracy. A stable hydration supports predictable microbial rates and dough handling.
Utensils: Use glass or food-grade plastic. Avoid reactive metals with acidic starters to prevent metallic off-notes and corrosion.
Reviving sluggish starters: Feed more often and add a spoonful of whole rye or whole wheat for extra nutrients. Frequent feeds shift the community toward active fermenters.
Useful internal links: Explore recipes and maintenance tips in our Sourdough Recipes section and the detailed starter maintenance guide above.
Nutritional snapshot
Sourdough starter is mostly flour and water; it provides tiny amounts of calories and protein in active culture portions. The fermentation does reduce phytic acid, which improves mineral bioavailability.
The following table reflects a general estimate per 100 g of starter; values vary by flour type and hydration.
| Nutrient | Per 100 g starter |
|---|---|
| Calories | ≈80 kcal |
| Protein | ≈3 g |
| Carbohydrates | ≈16 g |
| Fat | ≈0.2 g |
For mineral and digestive benefits, the enzymatic activity and acid production in sourdough can reduce antinutrients such as phytic acid. This biochemical change improves absorption of iron and zinc.

FAQ
What exactly is a sourdough starter?
A sourdough starter is a stable culture of wild yeasts and lactic acid bacteria maintained in flour and water. It acts as both leavening agent and flavor developer.
How do I know when my starter is mature?
It reliably doubles in size within a consistent window after feeding and smells mildly acidic but not unpleasant. Use the doubling time and bubble structure to confirm readiness.
Can I use tap water to feed my starter?
Chlorine can slow microbial activity, so filtered or dechlorinated water is best. If only tap water is available, let it sit open for an hour or boil and cool to remove chlorine.
How does temperature affect flavor?
Warmer temperatures speed fermentation and often produce a milder acid profile. Cooler temperatures slow activity and tend to favor acetic acid, increasing perceived tang.
Why does using whole-grain flour change my starter?
Whole-grain flours supply more nutrients and native microbes, which can speed fermentation and alter the bacterial balance. Expect faster activity and a more complex acid profile.
Understanding the chemical interplay inside a sourdough starter helps you control texture, flavor and reliability. With consistent feeds, sensible temperature control and basic sanitation, you make reproducible, delicious loaves every time.
See also: sourdough starter
]]>
- Model practice: The Food Code serves as a non-binding model adopted and adapted by states and local agencies.
- Temperature control: It defines cold holding, hot holding, and time-temperature controls to limit pathogen growth.
- Prevention-focused: Personal hygiene, cross-contamination barriers, and sanitation procedures form the core controls.
- Implementation: Businesses need training, monitoring tools, and record-keeping to convert rules into daily habits.
Decoding Key Provisions of the FDA Food Code
The Food Code lays out operational requirements that affect every food-contact step. It emphasizes temperature control, employee hygiene, cross-contamination prevention, and sanitation protocols as primary defenses.
Temperature rules include cold holding below 41°F (5°C) and hot holding above 135°F (57°C), plus defined cook and cooling regimes. These limits reduce bacterial replication and are core to safe daily operations.
Temperature Control and Time-Temperature Management
Operators must use calibrated thermometers at critical control points: cooking, cooling, reheating, and holding. Accurate, logged readings support corrective actions and demonstrate compliance during inspections.
Handle time as a control where temperature alone cannot. Time-based limits for ambient cooling or display reduce risk when cold-holding is not possible. Digital sensors and automated logs help enforce these limits consistently.
Personal Hygiene and Employee Practices
The Food Code requires handwashing at key moments and mandates policies for illness exclusion and glove use. Effective programs spell out when to change gloves, wash hands, and report symptoms to supervisors.
Staff training and visible signage reinforce hygiene habits. Supervisors should verify that procedures are active and document corrective actions when breaches occur.
Prep and Implementation: Turning Rules into Routine
Adopting the Food Code starts with a gap assessment and a targeted implementation plan. Identify weak points—temperature logs, storage layout, or training—and sequence fixes by risk and feasibility.
Use simple monitoring tools: calibrated thermometers, checklists, and daily logs. Assign clear responsibilities so staff know who records temperatures, who signs off on cleaning, and who acts on deviations.
Storage Zoning and Cross-Contamination Controls
Design storage to separate raw from ready-to-eat foods using designated shelving, color-coded containers, or labeled zones. Clear physical barriers stop droplet and drip transfer between items.
Sanitation of shared equipment and dedicated utensils for allergen or raw-protein work reduces risk. Implement procedures for cleaning, sanitizing, and verifying surface safety before reuse.
Sanitation Protocols and Chemical Use
Sanitizer concentration, contact time, and approved chemicals are part of the Food Code’s sanitation framework. Follow manufacturer directions and verify concentrations with test strips or meters.
Document cleaning schedules and verification checks. Records that show routine cleaning and corrective actions strengthen inspection outcomes and reduce microbial buildup over time.
[h3>Training, Documentation, and Continuous Review
Effective training blends classroom instruction, visual job aids, and hands-on practice. Create short modules for handwashing, temperature checks, and cleaning to match shift schedules and turnover rates.
Maintain training logs, corrective action records, and maintenance histories. Well-kept documentation speeds inspections and demonstrates a culture focused on safety rather than minimal compliance.
Expert Insight
Digital tools can automate alerts and archive logs, but staff must still understand the why behind each control. Combine technology with regular competency checks and spot audits to keep skills current.
Pro-Caution
After a corrective action, verify the outcome and record the resolution. Repeat failures point to system gaps—training, equipment, or layout—rather than individual negligence.
Chef’s Notes: Practical Tips for Kitchen Leaders
Cross-reference the Food Code with your state or local health department rules to align policies and avoid conflicts. Local adoptions can vary; treat the Food Code as the model and local law as the operative rule where you work.
Use visual cues: posters for handwashing, charts for temperature zones, and color-coded utensils for allergen control. Visual systems reduce reliance on memory and make expectations explicit for new hires.
Run internal mock inspections quarterly to stress-test systems. Focus these drills on record completeness, time-temperature tracking, and staff adherence to hygiene steps.
Invest in bite-sized multimedia training that staff can replay between shifts. Short, focused modules improve recall and limit service disruption compared with long classroom sessions.
Serving Suggestions: Culture, Recognition, and Technology
Frame the Food Code as a daily practice, not a one-time checklist. Celebrate staff who maintain logs and exhibit consistent safe behavior to reinforce a safety-first culture.
Leverage technology where it reduces human error: wireless probes, automated alarms, and electronic logs with audit trails. These tools save time and provide reliable evidence for inspectors.
Pair operational controls with customer-facing transparency. Basic signage about temperature practices or allergy policies reassures patrons and demonstrates accountability.
For practical routines, review related internal guides such as Kitchen Safety Best Practices and staff development pages like Food Safety Training. These internal resources help translate code language into daily tasks.

| Key Provision | Importance | Impact on Safety |
|---|---|---|
| Temperature Control | Prevent pathogen growth | Minimizes foodborne illness risk |
| Personal Hygiene | Blocks contamination sources | Maintains food integrity |
| Cross-Contamination Prevention | Separates raw and ready-to-eat foods | Ensures safe handling |
| Sanitation Procedures | Keeps surfaces and tools clean | Prevents microbial buildup |
| Employee Training | Builds food safety culture | Promotes consistent compliance |
For the authoritative federal perspective on the Food Code’s development and publications, consult the U.S. Food and Drug Administration: United States Food and Drug Administration. The FDA authors the model code and posts current editions and annex materials.
To understand risk pathways and the public health impact, see the overview on Foodborne illness. That page summarizes common pathogens and trends that drive Food Code revisions.
For core prevention principles that underpin the Food Code, review topics on Food safety. This background clarifies why controls like time-temperature and hygiene hold high priority.
Hazard analysis and critical control concepts align with Food Code intent; see the primer on HACCP for systematic hazard identification and control strategies used in many food sectors.
Q&A — Unlocking Safety: What Is the FDA Food Code?
Q1: What is the FDA Food Code, and why should I care?
A: The Food Code is a science-based model that outlines safe food handling in retail and food service. Businesses rely on it to minimize bacterial growth, control cross-contamination, and meet inspection expectations.
Q2: Who develops the Food Code, and how often is it updated?
A: The U.S. Food and Drug Administration prepares the Food Code and typically revises it on a multi-year cycle to incorporate recent science and practical experience. States and local agencies then adopt or adapt the model.
Q3: Is the Food Code law?
A: The Food Code itself is a model, not a federal law. Jurisdictions adopt it into local regulations, so compliance requirements can vary by state or municipality. Always follow local health department rules where you operate.
Q4: How does the Food Code protect consumers?
A: It sets actionable requirements for temperature control, hygiene, sanitation, and monitoring. These steps interrupt contamination routes and reduce the incidence of foodborne illness.
Q5: Who uses the Food Code?
A: Health inspectors, restaurant managers, caterers, food safety trainers, and policy makers use it as a technical reference to set and evaluate safe practices.
Wrapping Up
The FDA Food Code offers a practical, evidence-based approach for reducing food safety risk in food service and retail environments. Systems that combine clear procedures, regular training, and reliable monitoring deliver the best protection.
Operators who align daily practice with Food Code principles reduce contamination incidents and improve inspection performance. Use the Food Code as a blueprint, adapt it to local law, and document your actions to show consistent, science-based control.
FAQ
How do I know which version of the Food Code applies to my facility?
Check with your state or local health department to learn which edition they have adopted. Local agencies post their adopted code version and any amendments on official websites and guidance documents.
What basic tools should every kitchen have to meet Food Code checks?
At minimum: calibrated thermometers, sanitizer test strips, temperature logs, cleaning checklists, and documented training records. These items verify performance and speed corrective response.
How often should thermometers and sensors be calibrated?
Calibrate probes daily when in heavy use and at least monthly for routine equipment. Follow manufacturer instructions and record each calibration event for audit trails.
What is the fastest way to reduce cross-contamination risk?
Implement physical separation: dedicated prep tables and color-coded tools for raw protein and ready-to-eat items. Combine that with strict handwashing policies and frequent surface sanitation.
Where can I find official training resources tied to the Food Code?
Local health departments and accredited food safety training providers offer modules aligned with the Food Code. Use these programs along with site-specific SOPs to ensure staff competence.
See also: Food Code
]]>
- Balance matters: salt, sugar, and fat shape flavor and texture.
- Temperature control: slow heating and measured cooling reduce ice crystals.
- Emulsion and churn: create small ice crystals and dense mouthfeel.
- Caramel chemistry: precise caramelization builds depth without bitterness.
Why Salted Caramel Gelato Works
Gelato relies on a dense matrix of milk solids, fat, and dissolved sugars to form a smooth texture. Unlike many frozen desserts, this density stems from lower overrun and a focus on milk rather than heavy cream; see the entry on gelato for context.
Salted caramel introduces Maillard and caramelization products that deepen flavor and increase perceived viscosity. Understanding caramelization helps you control color and bitterness while boosting mouthfeel.
Prep and Cook Time
Timing impacts both texture and flavor. Precise timing during caramelization and custard thickening prevents grainy sugar or scrambled egg, so plan each stage to avoid rushing.
Typical time windows work well for home cooks. Build a schedule and allow refrigeration time to let flavor integrate and the base to stabilize.
- Preparation: 20 minutes
- Cooking (caramel & custard): 25 minutes
- Chill & churn: 8 hours (overnight chilling preferred)
Yield and Difficulty
This recipe yields roughly 1 quart, suitable for four generous servings. It balances moderate technique with reliable results when you follow temperature cues.
Difficulty rates as medium because the process demands close attention during caramel and custard stages. Equip yourself with a candy or instant-read thermometer to keep the work predictable.
Ingredients
Use clean, high-quality ingredients to let science do the heavy lifting. Fresh dairy and correct sugar types influence freezing point and texture more than exotic add-ins.
Measure precisely. Small differences in sugar or salt change freezing behavior and flavor balance, which alters mouthfeel and perceived creaminess.
- 1 cup granulated sugar
- 6 tbsp unsalted butter, cubed and chilled
- 2 tsp flaky sea salt (adjust to taste)
- 2 cups whole milk
- 1 cup heavy cream
- 5 large egg yolks
- ½ cup light brown sugar, packed
- 1 tsp pure vanilla extract
Step-by-Step Instructions
Follow the sequence: make caramel first, then prepare the custard, temper the eggs, and combine. Each step modifies the base’s chemistry and sets the stage for a smooth churn.
Rinse and prep mise en place before heat hits the pan. That reduces interruptions and prevents overcooking at sensitive moments.
- Make the salted caramel: In a heavy-bottomed saucepan over medium heat, melt 1 cup granulated sugar in an even layer. Swirl gently until the sugar reaches a deep amber color, about 8–10 minutes.
- Add butter carefully: Remove from heat and whisk in the chilled 6 tbsp unsalted butter. Expect vigorous bubbling; keep hands and face clear.
- Stir in salt: Mix 2 tsp flaky sea salt into the caramel and set aside to cool slightly so it won’t curdle the custard when added.
- Warm milk and cream: Heat 2 cups whole milk and 1 cup heavy cream to just below a simmer, then remove from heat.
- Whisk yolks and sugar: Whisk 5 egg yolks with ½ cup light brown sugar until pale and slightly thickened to incorporate air and dissolve sugar.
- Temper the yolks: Slowly add warm milk to the yolks while whisking constantly to prevent scrambling.
- Cook the custard: Return the mixture to low heat, stirring until it coats the back of a spoon and reaches about 170°F (77°C). Do not boil.
- Combine with caramel: Off the heat, whisk the slightly cooled salted caramel and 1 tsp vanilla into the custard until uniform.
- Chill thoroughly: Cool to room temperature, then refrigerate for at least 4 hours or overnight to let sugars hydrate and flavors meld.
- Churn: Freeze in a gelato machine per manufacturer guidelines, typically 20–30 minutes for a dense, creamy texture.
- Set: Transfer to an airtight container and firm in the freezer for 2–4 hours before serving.
Caramel and Custard Details
Caramelization forms compounds that add aromatic complexity and increase viscosity. Control heat to avoid bitter notes that occur when sugars burn.
Custard viscosity depends on egg yolk proteins coagulating at controlled temperatures. Use a thermometer and low heat to reach the targeted gel without stranding proteins.
Tips for Success: Unlocking the Salted Caramel Gelato Magic
Precision and patience deliver the smoothest texture. Keep the custard below boiling and chill completely before churning to minimize ice crystal growth.
Adjust salt cautiously. Flaky sea salt adds bursts of flavor without raising the base’s ionic strength too far, which would lower freezing point excessively.
Expert Insight
Use European-style butter for a richer, silkier caramel due to its higher fat and lower moisture. Let the caramel cool slightly before adding to the hot custard to protect egg proteins.
Pro-Caution
Serving Suggestions
Serve gelato slightly warmer than ice cream (about 10–15°F warmer) to let aromatic compounds bloom on the palate. This temperature highlights salt and caramel nuance.
Garnish with a light drizzle of reserved salted caramel and a few toasted nuts for texture contrast. Pair with dark chocolate or a short espresso for complementary bitterness.
Nutrition and Storage
Expect about 380 kcal per serving, depending on portion size and ingredient brands. The chart below offers a practical per-serving snapshot for home cooks tracking macros.
| Nutrient | Per Serving (1/4 qt) |
|---|---|
| Calories | 380 kcal |
| Protein | 6 g |
| Carbohydrates | 38 g |
| Fat | 23 g |
Store gelato in an airtight container with a sheet of plastic pressed to the surface to limit ice crystal formation. Consume within two weeks for best texture and flavor.
Scientific Notes and Further Reading
For a molecular view of freezing point depression and sugar behavior, consult reliable references. The physics of ice crystal growth and sugar solubility explain why chilling and ingredient ratios matter.
Explore related concepts at these references: the chemistry of caramel, the role of salt in flavor perception, and how custard structure forms the base for rich frozen desserts. These pages connect practice to principle and help you troubleshoot technique.
FAQ
What makes salted caramel gelato creamier than ice cream?
Gelato uses less overrun and usually a lower fat ratio, resulting in denser texture. Smaller air cells and more dissolved sugars produce a smoother mouthfeel and a stronger perception of creaminess.
How much salt should I add to the gelato base?
Start with 2 teaspoons of flaky sea salt in the caramel, then taste the cooled base and adjust by small increments. Flaky salt adds bursts of flavor without dramatically changing freezing point.
Can I make this without eggs?
You can produce an egg-free gelato using milk solids, stabilizers like a small percentage of invert sugar, or a reduced cream ratio to mimic texture. Eggs add natural emulsification and body, so expect a slightly different mouthfeel without them.
Why did my gelato turn out grainy?
Graininess usually signals sugar recrystallization or icy crystals from inadequate chilling. Ensure the caramel fully dissolves into the custard, chill the base overnight, and churn at the correct speed to form small ice crystals.
How should I serve and store leftovers?
Scoop when slightly softened to release aromas and flavor. Store in an airtight container, press plastic film to the surface, and keep at a stable freezer temperature. Consume within two weeks for peak quality.
See also: Salted Caramel
]]>
- Precision cooling loosens the adductor muscle without damaging meat.
- Controlled timing preserves texture while limiting bacterial growth.
- Specialized tools and PPE reduce injury risk and maintain quality.
- Practical limits mean commercial setups are safest for cryogenic methods.
The Science of Cryo-Shucking: Temperature, Tissue, and Taste
Cryo-shucking relies on targeted cooling to alter the oyster’s adductor muscle and its attachment to the shell. When cooled rapidly to near-freezing, water within muscle cells forms small ice crystals that change fiber tension and loosen the grip on the shell.
This method contrasts with conventional freezing that forms large ice crystals and disrupts cellular structure. By controlling both temperature and exposure time, chefs can reduce mechanical force while keeping the flesh plump and briny.
Muscle Physiology and Ice Crystal Management
The adductor muscle that holds an oyster closed responds to thermal changes predictably. Rapid chilling increases intracellular ice nucleation points, which relax contractile fibers and decrease adhesion.
Therefore, the goal is to induce minor crystalline formation only in the muscle junction, not throughout the whole tissue. Carefully monitored temperatures (around 0 to 2°C) minimize structural damage and preserve mouthfeel.
Relevant Science and Context
For background on the animal and anatomy involved, consult the oyster overview. For the physics of low-temperature effects on materials and tissues, refer to cryogenics.
Also, practical tool considerations are covered on the oyster knife reference page. These sources clarify why controlled chilling works and where risks arise.
Equipment, Setup, and Safety Protocols
Use the right equipment: temperature-controlled refrigeration or blast chiller will deliver consistent results. In commercial applications, liquid nitrogen appears in demonstrations, but it demands trained handlers and strict controls.
Always combine tool choice with safety protocols. A thick glove or towel, a stable non-slip surface, and a proper oyster knife reduce injury. Ventilation is essential if any cryogenic liquids are present.
Expert Insight
Wear cut-resistant gloves rated for kitchen use during all shucking operations. Additionally, protect hands from extreme cold when handling cryogenic containers and avoid direct skin contact with liquid nitrogen or dry ice.
Regulatory and Food Safety Notes
Food safety practices determine whether cryo-shucking makes sense for routine service. Cooling slows microbial growth, but it does not sterilize. Follow accepted handling windows and discard any oysters held beyond recommended times.
For general guidance on safe handling and storage, consult reputable food-safety compilations such as the food safety literature. Proper hygiene and cold-chain control remain mandatory.
Practical Step-by-Step Guide
First, prepare a clean, dedicated workstation. Assemble an oyster knife, a heavy towel or cut-resistant glove, a thermometer, and a chilled tray for finished oysters.
Next, place oysters on crushed ice or in a temperature-controlled unit set to just above freezing. Aim for 0–2°C and a chilling window that typically runs 20–30 minutes depending on oyster size and thickness.
Then, stabilize each oyster on a folded towel. Hold it so the hinge faces your dominant hand; insert the tip of the oyster knife at the hinge and apply a short twist rather than steady force. When the hinge gives, slide the blade along the top shell to cut the adductor and open the oyster.
Finally, drain minimally to preserve liquor and serve immediately on crushed ice. If you will serve later, keep the shucked oysters covered on refrigerated ice and use within two hours for best texture and safety.
Step Notes and Timing
Short chilling windows prevent deep freezing and large ice-crystal formation. Overchilling causes toughening, so prefer incremental checks over fixed timers for variable batch sizes.
Always verify internal shell temperature with an accurate probe thermometer. Small adjustments to time or ice density significantly affect result consistency.
Chef’s Notes: Texture, Flavor, and Presentation
Controlled chilling preserves the oyster’s natural brininess and plump mouthfeel when done correctly. The technique enhances yield by reducing meat loss during opening.
For presentation, nest shucked oysters on crushed ice and garnish with lemon, simple mignonette, or clean condiments that highlight natural flavors. Avoid heavy sauces that mask texture nuances.
- Temperature is critical: Maintain 0–2°C during the chill step.
- Timing matters: Typical exposure: 20–30 minutes, adjust for oyster size.
- Limit storage: Shucked oysters best enjoyed immediately; refrigerate only briefly.
Pro-Caution
After the warning block, add a short operational reminder: if you lack training or appropriate PPE, use the chilled-ice approach instead of cryogens. This reduces hazard while retaining many benefits.
Operational Considerations for Restaurants and Producers
For chefs and oyster purveyors, invest in validated procedures and staff training. Validate chill times and temperatures for each oyster species you handle, as shell thickness and adductor size vary by species and origin.
Document washing, chilling, and holding times in your HACCP plan. Verify that your suppliers follow sustainable harvest and handling practices so quality enters your kitchen intact.
Link operational resources to your menu and service workflow. For a complementary recipe, see our Classic Mignonette Sauce Recipe. For guidance on selecting raw oysters, read How to Select Fresh Oysters.
FAQ
What is cryo-shucking and how is it different from normal chilling?
Cryo-shucking uses rapid, controlled cooling to relax the adductor muscle so the shell opens with less force. Normal chilling simply slows spoilage; cryo-shucking times and temperatures aim to alter tissue tension without freezing the entire animal.
Will cryo-shucking damage oyster flavor?
When executed with tight temperature and time control, cryo-shucking preserves the oyster’s briny flavor. Overchilling or deep freezing will create textural damage and dull taste, so monitoring is essential.
Can I safely cryo-shuck oysters at home?
Home cooks can use the chilled-ice method safely, but they should avoid liquid nitrogen or dry ice without training. Use a thermometer and short chilling windows, and always use protective gloves while shucking.
How long can cryo-shucked oysters be stored?
Shucked oysters remain best for immediate service. Hold them on ice in refrigeration for up to two hours with minimal quality loss. Extended holding reduces texture and increases microbial risk.
Does cryo-shucking apply to other shellfish?
Principles apply to clams, mussels, and scallops where controlled cooling can ease muscle attachment. However, validate procedures per species and follow food-safety controls for each shellfish type.
The documented method offers chefs and producers precise control over oyster presentation and safety. By applying measured cooling, trained teams can reduce shucking effort, increase yield, and protect quality while maintaining compliance with safety standards.

See also: cryo-shucking
]]>
- Convection grilling improves evenness: Moving air reduces hot spots so pieces finish uniformly.
- Control airflow: Vents and spacing shape the convection loop and final texture.
- Faster, cleaner cooks: Convection grilling often shortens time and cuts the need for extra fat.
- Repeatable results: Measure chamber temps and map zones to reproduce outcomes.
What is convection in convection grilling?
Convection grilling uses air motion to transfer heat across the cooking chamber. That moving air sweeps heat over the food surface and into the interior, producing steadier temperatures than radiation alone.
The physics behind that motion mirrors basic heat transfer principles. For a concise technical reference, see the Wikipedia entry on convection.
How convection grilling works on different grill types
Grill designs create distinct convection patterns. Pellet and many gas grills use fans or engineered venting; charcoal grills rely on vent placement, convective paths, and thermal mass to move air.
Each system changes airflow speed, temperature consistency, and the balance between direct radiative heat and moving air. Compare the broader cooking modes using the Wikipedia page on grilling for context.
Prep and Cook Time for convection grilling
Preparation: 15 minutes. Cook Time: 25–40 minutes depending on thickness and protein mass. Those ranges assume a convection-capable grill set near 375°F (190°C).
Convection grilling often lets you set slightly lower chamber temps because moving air accelerates heat transfer. Use a probe thermometer to hit the internal target without overbrowning the exterior.
Yield for convection grilling
Serves 4 generous portions with standard boneless chicken breasts or comparable cuts. Convection grilling favors uniform portion control because pieces finish at nearly the same rate.
If you alter protein size or density, adjust time rather than temperature to preserve texture. Small mass shifts can change cook time by 5–10 minutes under active convection conditions.
Difficulty Level for convection grilling
Medium. Convection grilling rewards attention to airflow and temperature but uses basic grill management tools most cooks already own. The main learning curve lies in configuring vents and zones properly.
Once you establish stable zones, the system maintains steady temperatures and promotes even browning. That reliability makes convection grilling a repeatable technique for busy cooks.
Ingredients
4 boneless chicken breasts, trimmed and patted dry. 2 tablespoons olive oil. 1 tablespoon smoked paprika. 1 teaspoon garlic powder. Salt and black pepper to taste.
Also have fresh rosemary sprigs for garnish and the juice of 1 lemon. Optional: 1 teaspoon cayenne for heat. These ingredients respond well to convection grilling because steady heat locks moisture and concentrates surface flavors.
Instructions
These steps assume an indirect heat setup or a convection mode that circulates air at roughly 375°F (190°C). Keep paragraphs short and monitor with a thermometer for precise results.
- Preheat: Set the grill to indirect/convection mode at 375°F (190°C). Close the lid and let the chamber stabilize for 5–10 minutes.
- Make the marinade: Whisk olive oil, smoked paprika, garlic powder, salt, pepper, and lemon juice until combined.
- Coat the chicken: Rub the mixture over each breast and let rest 10 minutes at room temperature to improve flavor penetration.
- Position the meat: Place breasts over the indirect zone or where the airflow sweeps best, often centered above vents. Close the lid immediately.
- Cook: Grill 20–30 minutes, flipping once halfway. Look for a golden crust while avoiding heavy charring.
- Check: Use an instant-read probe; pull at 165°F (74°C) internal for safety. Remove a few degrees early if you prefer carryover to finish the cook.
- Rest: Rest 5 minutes to redistribute juices before serving. Slice against the grain for optimal tenderness.
Convection grilling shortens the margin for error: rely on temperature rather than time alone. Small adjustments to airflow or spacing create predictable shifts in finish and texture.
Tips for convection grilling Success
Control airflow and spacing to create a stable convection loop. Overcrowding interrupts circulation and leads to uneven cooking.
Use a water pan under the grate for longer cooks to stabilize chamber temps and add humidity. That simple step prevents surface dryness while convection transfers heat efficiently.
Airflow management
Adjust vents gradually to shape the circulation path. Opening vents too wide increases oxygen and can promote direct flames; too-closed vents stifle convection and slow cooking.
Map your grill by testing with an infrared thermometer or by placing slices of bread to see where browning occurs fastest. This inexpensive test reveals your convection pattern without guesswork.
Expert Insight
Temperature and zone control
Create a hot side for searing and a cooler side for finishing to maximize convection grilling benefits. Direct heat gives quick color; indirect convection finishes interior doneness without burning the outside.
Place a grill thermometer near the food to track the actual cooking environment, not only the controller readout. Thermometer placement affects how you interpret and correct temperature drift.
Keep a short checklist: preheat, stabilize vents, space items, then load the grill. Repeating the routine produces consistent results and reduces fuel use.
Pro-Caution
Serving Suggestions for convection grilling
Serve convection-grilled chicken with oven-finished or grilled vegetables to match moisture and texture. Crisp-browned vegetables pair well because they respond to the same circulating heat patterns.
A bright quinoa salad or mashed potatoes complements the savory, slightly smoky profile. Finish plates with lemon zest and a sprig of rosemary for aroma that ties to the grilled flavors.
Nutritional Information
The table below approximates nutrition per serving for the specified ingredients and standard preparation. Use it as a reference for portion planning and dietary adjustments.
| Nutrient | Amount per Serving |
|---|---|
| Calories | 320 kcal |
| Protein | 45 g |
| Carbohydrates | 2 g |
| Fat | 12 g |
Convection grilling typically reduces the need for added fats because heat penetration occurs faster and more evenly. Adjust oil quantities if you prefer lower-fat cooking while maintaining surface browning.
Further reading and background on convection grilling
For practical comparison of heat modes, consult the Wikipedia article on heat transfer. It clarifies the roles of conduction, convection, and radiation in cooking.
For engineering-oriented readers, the Wikipedia page on thermodynamics connects energy conservation and heat transfer to practical kitchen outcomes. Apply those principles to predict how changes will affect your cook.
For community-tested recipes and grill technique posts, explore internal resources like convection-grilling tag and a technique hub at Grill Techniques. Those internal guides complement the technical references above.
FAQ
What is the main advantage of convection on a grill?
Convection grilling supplies uniform heat to the surface and interior, reducing hot and cold spots. That consistency yields even doneness across larger or denser cuts without excessive exterior burn.
Will convection make everything cook faster?
Generally yes. Circulating air transfers heat more efficiently than still air alone, often shortening cook times or permitting lower target temperatures. Thickness and water content remain primary determinants of speed.
Can I get convection benefits on a charcoal grill?
Yes. Arrange coals to one side, use a lid, and tune vents to guide airflow through the chamber. Proper venting shapes circulation and lets you approximate forced convection behavior.
How do I avoid drying out lean cuts?
Use slightly lower temperatures and reduce overall time; rely on internal temperature rather than time. Adding a water pan or basting periodically helps maintain surface moisture during longer convection cooks.
Do I need special equipment to measure convection effectiveness?
Basic tools suffice: an accurate probe thermometer and an infrared gun or multiple thermometers help map the grill. These instruments validate airflow settings and confirm stable cooking conditions.
Mastering convection grilling turns a home grill into a precision tool. Control airflow, measure temperatures, and adjust zones to achieve repeatable, flavorful results.
See also: Convection grilling
Recommended Reading:
]]>
- Balance matters: oil, emulsifiers, and acid must integrate slowly and evenly.
- Temperature control: room-temperature ingredients reduce the risk of breaking.
- Tools count: an immersion blender or whisk plus patience yields reliable results.
- Rescue strategies: you can often repair a broken emulsion with a fresh yolk or warm water.
Understanding the Science Behind Emulsification in Mayonnaise
Mayonnaise is a classic oil-in-water emulsion where tiny oil droplets suspend inside a water phase. Lecithin and other phospholipids in egg yolks act as surface-active agents that stabilize those droplets.
For a technical primer, see the chemistry on emulsion and the role of lecithin. These pages explain droplet dynamics and how emulsifiers lower interfacial tension.
Choosing the Ideal Ingredients for Creamy and Stable Results
Start with fresh, high-quality egg yolks. The yolk provides natural emulsifiers and proteins that bind oil and vinegar into a cohesive texture; read more about the yolk structure at egg yolk.
Use a neutral vegetable oil or a light olive oil for flavor balance. Add acid—white wine vinegar or lemon juice—in measured amounts. Also, include a small amount of Dijon mustard to strengthen initial emulsification.
Ingredient checklist
2 large egg yolks, room temperature.
1 cup neutral oil (grapeseed or light olive oil preferred). Add a tablespoon of acid and a teaspoon of mustard for stability.
Techniques and Tools to Achieve Flawless Mayonnaise Every Time
Technique dictates success. Begin by whisking yolks, mustard, and acid until smooth. Then add oil extremely slowly at first to build a stable matrix.
An immersion blender in a tall jar speeds the process and reduces arm strain. Alternatively, a steady hand with a balloon whisk works well; focus on small, consistent additions of oil and even motion.
Hand method vs. blender
When whisking by hand, adopt a wide, steady stroke and keep the bowl tilted slightly toward you. That creates consistent shear and helps form uniform oil droplets.
With an immersion blender, pulse briefly and lift as the emulsion thickens to incorporate more air and prevent overprocessing. Both methods require patience.
Expert Insight
Between the hand and blender methods, choose the one that matches your comfort level. Both deliver professional-quality mayo when you respect speed and temperature variables.
Troubleshooting Common Emulsion Failures and How to Fix Them
A broken emulsion means the oil droplets aggregated and the continuous phase no longer binds them. Most failures result from adding oil too fast or from temperature mismatch.
To rescue a split mayo, place a fresh yolk in a clean bowl and add the broken mayo dropwise while whisking. Alternatively, whisk in a teaspoon of warm water to loosen texture and re-integrate phases.
Common problems and quick fixes
- Broken: Start a new yolk and slowly whisk in the broken mix.
- Too thin: Add oil dropwise while whisking until it thickens.
- Too thick: Whisk in warm water by the teaspoon to reach desired consistency.
Also, remember that acid level affects stability and taste. If separation recurs, check your acid proportion and room-temperature status of ingredients.
Pro-Caution
If a rescue fails, start over with a new yolk and gradually reincorporate the failed batch. This method restores emulsifying capacity reliably.
Chef’s Notes and Tips for Success
Consistency beats improvisation. Keep your motions steady and your pour controlled. Smaller initial oil additions create the emulsion scaffold you need to add larger volumes later.
Experiment with flavored oils or infused vinegars after you form the base. Add chopped herbs, roasted garlic, or lemon zest at the end so that these ingredients don’t interfere with emulsification during the build stage.
Vegan alternatives
Use aquafaba—the cooking liquid from chickpeas—as an egg-free emulsifier. Apply the same slow-oil addition and steady whisking principles to achieve a similar texture.
Note that plant-based mayo may differ slightly in mouthfeel but still performs well in dressings and dips when stabilized properly.
Serving Suggestions and Storage
Homemade mayo enhances sandwiches, salads, and sauces. Use it as a base for aioli, tartar sauce, or creamy dressings that benefit from its fresh flavor and texture.
Store mayonnaise in a clean jar and keep refrigerated. Use within one week for best safety and flavor. Bring to room temperature briefly before serving to recover silkiness if chilled too long.
For more technique notes and related recipes, see our internal guide on Culinary Emulsions: Techniques and Tips and explore variations at Mayonnaise Variations and Flavor Ideas.
At-Home Equipment and Safety
Use a tall jar with an immersion blender or a deep bowl with a whisk. Avoid reactive metal bowls when using acid; choose glass, ceramic, or food-safe plastic instead.
Handle raw eggs with standard food-safety precautions. While many cooks use raw yolks safely, consider pasteurized eggs if you serve vulnerable populations.
FAQ
The following questions address common points that home cooks ask when making mayonnaise. Each answer focuses on practical, tested steps.
Read these carefully and keep the rescue techniques in mind when experimenting.
What causes mayonnaise to break?
Mayonnaise breaks when oil droplets coalesce and the continuous phase fails to hold them apart. Rapid oil addition and cold ingredients are common causes. Slow addition and room temperature balance reduce this risk.
How do I repair a broken emulsion?
Start a fresh yolk in a clean bowl and whisk the broken mixture in slowly, drop by drop. Alternatively, whisk in a teaspoon of warm water to loosen and rebind phases. Both methods restore emulsifier function.
Can I use different oils?
Yes. Neutral oils like grapeseed deliver a clean flavor. Light olive oil works if you prefer some olive character. Avoid strong-flavored oils until after the emulsion forms.
Are there vegan options that match the texture?
Aquafaba mimics egg yolk’s emulsifying properties well. Use the same slow-oil addition and whisking technique. Textural differences are minor when you follow standard emulsification steps.
How long does homemade mayonnaise keep?
Refrigerated in a sealed jar, homemade mayonnaise lasts up to one week. For safety, use pasteurized eggs if serving elderly, pregnant, or immunocompromised guests.
Mastering mayonnaise transforms a simple condiment into a flexible tool in your kitchen. With controlled technique, informed ingredient choices, and rescue methods on hand, you can produce stable, silky mayo repeatedly.
| Nutrient | Per 1 Tbsp |
|---|---|
| Calories | 94 |
| Protein | 0.1 g |
| Carbohydrates | 0.2 g |
| Fat | 10 g |
See also: Mayonnaise
]]>
- Control heat: steady temperature preserves interior meat moisture and prevents runaway evaporation.
- Sear smart: a dry surface forms a crust quickly while limiting deep interior moisture loss.
- Rest meat: hold before slicing so meat moisture redistributes and stays in the muscle.
- Pick marbling: intramuscular fat slows moisture loss and boosts perceived juiciness.
Mastering Temperature Control to Preserve Meat Moisture
Temperature is the single most effective tool for managing meat moisture during grilling. Proteins denature and fibers contract as internal temperature rises, and controlling that rise reduces how much water the muscle expels.
Use a quality thermometer and zone heat to manage the ramp. Establish a hot sear zone and a moderate indirect zone so you can sear then finish without blasting the interior; this two-zone method limits evaporation and protects meat moisture.
The Science: How Heat Forces Meat Moisture Out of Muscle
At a molecular level, heat changes protein structure and forces meat moisture outward. Protein networks shrink as they denature, squeezing intracellular water toward the surface where it either pools or evaporates.
Simultaneously, internal water becomes vapor as temperature climbs and creates pressure gradients. Those gradients push meat moisture outward until equilibrium or evaporation at the surface reduces the vapor pressure.
Maillard Reaction and Meat Moisture Management
The Maillard reaction produces the brown, savory crust we prize, but it needs a relatively dry surface to proceed. Surface moisture must evaporate before browning, so a short, dry sear intentionally trades surface water for flavor without sacrificing interior meat moisture when timed correctly.
Patting the surface dry and avoiding crowding lets moisture evaporate quickly during the sear window. That fast surface drying helps form a crust faster and reduces the length of time the interior experiences elevated steam pressure that drives meat moisture loss.
Why a Dry Surface Matters
Surface water creates steam that blocks browning and prolongs high internal temperatures. By contrast, a dry surface supports rapid Maillard reactions that lock in texture and minimize prolonged internal vapor pressure.
Work in short, controlled sear intervals. This preserves more meat moisture while still delivering the flavorful crust diners expect.
Practical Prep, Timing and Ingredients to Protect Meat Moisture
Good results begin before the meat hits the grates. Bring steaks to near room temperature and pat them dry to remove surface water that would otherwise steam away during searing.
Salt draws moisture briefly to the surface, but when you time it correctly salt helps proteins hold water and improves flavor without increasing final moisture loss. Use coarse kosher salt at least 30 minutes prior or just before cooking, based on cut thickness.
Prep and Cook Time Guidelines
Preparation Time: 15 minutes. Bring meat close to ambient and dry the surface thoroughly to reduce initial steam.
Marinating Time: Optional, 1–4 hours. Balanced marinades with oil and mild acid can aid tenderness without causing excessive moisture migration in thin cuts.
Equipment and Thermometry
A reliable instant-read thermometer removes guesswork and helps maintain meat moisture. Aim for internal targets rather than fixed cook times: 130–135°F for medium-rare suits most steaks.
Keep the sear surface around 450°F for rapid crusting, then move to indirect heat to finish. That prevents the interior from climbing too fast and expelling excessive meat moisture.
Ingredients, Yield and Cut Selection for Juiciness
Yield: Serves 4. Choose steaks about 1-inch thick for predictable cook times and consistent meat moisture retention.
Recommended cuts: Ribeye, striploin, and tenderloin use marbling to slow moisture loss and increase perceived juiciness.
Shopping List
- 4 beef ribeye steaks (1-inch thick, well-marbled)
- 2 tbsp olive oil
- 1 tbsp kosher salt
- 1 tsp black pepper
- 2 cloves garlic, minced
- Fresh rosemary
- Optional: 1 tbsp butter for finishing
Step-by-Step Instructions to Minimize Meat Moisture Loss
Follow consistent steps to control moisture migration and maximize flavor. Each action either shortens unnecessary evaporation or enhances final texture.
Use a two-zone approach: sear over high heat, then move to indirect heat to reach the target internal temperature without overshooting and forcing meat moisture out.
- Bring steaks to room temperature. Pat dry to remove surface moisture; a dry exterior sears faster and reduces steam formation.
- Rub olive oil evenly. Season with kosher salt and black pepper to taste.
- Preheat the grill to medium-high (≈450°F/230°C). Verify with a surface thermometer and set an indirect zone.
- Sear for 3–4 minutes per side without moving to develop a caramelized crust quickly.
- Finish over indirect heat until internal temperature reaches your desired doneness.
- Optional basting: In the final minute, baste with butter, garlic, and rosemary for aroma and added surface fat that slows moisture escape.
- Rest 5–7 minutes. Let juices redistribute; slicing too soon causes immediate drip loss and reduces retained meat moisture.
Expert Insight
Record sear duration, surface temp, and carryover rise each cook. This practice reduces variability and protects meat moisture batch to batch.
Pro-Caution
Thin cuts require a different approach: short sear and immediate rest, or a lower surface temperature to avoid explosive moisture migration.
Chef’s Notes: Techniques that Preserve Meat Moisture
Choose marbled cuts. Intramuscular fat both adds flavor and reduces rapid heat penetration, which helps the interior retain meat moisture longer during cooking.
Avoid piercing the meat. Use tongs to flip and a probe thermometer to check temperature. Each puncture creates a direct path for meat moisture to escape.
Marinades and Salt Use
Balanced marinades with oil create a thin surface barrier while salt helps proteins bind water when timed properly. Use oil-based or balanced blends rather than aggressive acidic baths on thin cuts.
Sous-vide pre-cook followed by a quick sear can yield predictable internal doneness and conserve meat moisture through gentle temperature control.
Serving, Pairings and Presentation to Highlight Juiciness
Slice against the grain to shorten muscle fibers and make each bite seem juicier. Garnish with flaky sea salt and herbs to accentuate perceived moisture and flavor.
Pair with bright chimichurri or charred vegetables to cut fat and highlight texture contrasts. A robust red wine or acid-forward sauce balances richness and emphasizes retained meat moisture.
Advanced Concepts: Pressure, Steam and Fiber Mechanics
As internal water vaporizes, pressure gradients form between the interior and surface. Those gradients drive meat moisture outward until the surface allows evaporation into the air.
You can limit this migration by slowing the interior temperature rise. Low-and-slow finishes or precise thermal baths reduce internal steam pressure and preserve more liquid in the muscle matrix.
Thermal Properties and Heat Capacity
Water has a high heat capacity and a large latent heat of vaporization. Once internal water turns to vapor, it removes significant heat and accelerates drying unless the temperature ramp is controlled.
Understanding these thermal properties helps you design cook curves that retain meat moisture while achieving safe, flavorful doneness.
Internal Resources and Further Reading
Want to refine your heat mapping? See our internal guide for zone charts and target temps for common cuts. Track both surface and internal readings to protect meat moisture across different grills.
For detailed guidance on resting and carryover cooking, consult our resting guide with carryover temperature tables and timing rules that help preserve meat moisture in larger roasts and steaks.
FAQ
Why does grilled meat sometimes come out dry?
High heat and long cook times push more internal water out of muscle fibers. If internal temperature rises too fast, proteins contract excessively and expel juices that then evaporate, reducing meat moisture.
Control the temperature ramp, use a two-zone grill, and monitor internal temps to limit aggressive evaporation and keep meat moisture where it belongs.
What happens to moisture inside meat during grilling?
Heat denatures proteins and creates vapor pressure inside cells. That pressure pushes water outward where it either collects on the surface or evaporates into the air, decreasing retained meat moisture.
Maintaining a moderate interior rise lowers vapor pressure and helps retain more meat moisture in the muscle matrix.
How does the Maillard reaction affect moisture loss?
The Maillard reaction requires a hot, relatively dry surface to produce flavor. Surface moisture must evaporate before browning begins, so the intended short sear window sacrifices a little surface water to gain crust while protecting interior meat moisture.
Time the sear for fast, hot contact on a dry surface to minimize interior moisture loss and maximize crust formation.
Can marinating help retain meat moisture?
Balanced marinades with oil, salt, and mild acid can slow moisture loss and improve tenderness. Oil creates a small protective barrier while salt helps proteins bind water when used correctly.
Avoid over-marinating thin cuts in acidic solutions longer than four hours; excessive breakdown can make texture mushy and alter moisture behavior.
Which grilling techniques best preserve juiciness?
Use a sear-then-finish method: sear quickly over high heat, then move to indirect heat to reach target internal temperature slowly. Rest the meat before slicing to allow juices to redistribute and maintain meat moisture.
Combine thermometry with zone cooking and choose cuts with good marbling for consistent, juicy results.
See also: protein denaturation, Maillard reaction, water, sous-vide, meat
See also: meat moisture
]]>
- Steam is the mechanical leavening: trapped moisture expands and separates dough layers.
- Cold, solid fat preserves layers: it must remain distinct through shaping and baking.
- Folding creates structure: lamination multiplies thin fat and dough sheets.
- Temperature control wins: chill between folds and bake hot for puff.
What steaming fat means in practical baking
Steaming fat refers to the way small, discrete pieces of fat melt and release water vapor during baking. That vapor inflates and separates adjacent dough sheets, yielding the classic flaky texture.
Professional bakers treat the technique as a controlled physical reaction. They use fats with predictable melting behavior to time the expansion and final structure.
Why steam separates layers and how to exploit it
When fat pieces remain solid until the oven’s heat, their internal water turns to steam and forces a split between dough layers. That split creates crisp outer sheets and tender inner laminations.
Manipulate three variables to maximize the effect: fat distribution, dough hydration, and oven temperature. Change any one and the final lift changes in predictable ways.
Science of steam, fat and gluten
Gluten forms a flexible matrix that can stretch as steam expands. If gluten is too tight, it resists separation and yields dense layers. If too weak, the dough breaks and collapses.
Balancing gluten strength means controlling mixing and adding acids like vinegar or lemon juice in small amounts to relax gluten release while keeping dough strong enough to trap steam.
Ingredients and equipment that matter
Choose a fat with the right melting profile. Unsalted butter gives superior flavor and a predictable water content. Lard and solid vegetable shortening melt at different temperatures and alter texture accordingly.
Use a bench scraper, rolling pin, and a chilled work surface. Maintain cold utensils and a refrigerator nearby to keep fat from softening while you fold and roll.
Expert Insight
Step-by-step technique for reliable layering
Start by mixing flour and salt, then cutting cold fat into pea-sized pieces. Those discrete particles are the loci of steam and the building blocks of layers.
Bring the dough together with ice-cold water just until it holds. Overworking will develop gluten and reduce flakiness.
Incorporating the fat
Use a pastry cutter or grater to create even pieces of butter. The goal is controlled distribution rather than fully emulsifying fat into the flour.
Work quickly and return the bowl to the fridge if the butter warms. Small, colder pieces produce more distinct steam pockets when baked.
Lamination: folding to multiply sheets
Roll into a rectangle, fold into thirds, rotate, and repeat. Each fold multiplies layers: three folds give dozens of alternating fat-and-dough planes.
Rest the dough 10–20 minutes between folds in the fridge. This keeps butter firm and prevents tearing while you roll.
Baking: convert moisture into puff
Preheat the oven to a high temperature—typically 400–425°F (200–220°C) for many pastries. The initial blast of heat converts water in the fat and dough into steam rapidly.
Place pastries on a preheated tray or baking stone to ensure an immediate transfer of heat and consistent rise from the bottom as well as the top.
Troubleshooting common faults
If pastries bake flat, the usual causes are warm fat, insufficient folds, or a slack gluten structure. Double-check chilling intervals and the size of your fat pieces.
If layers bake dense or gummy, you likely overhydrated or overworked the dough. Reduce mixing and increase rest times to let gluten relax.
Pro-Caution
Serving, storage, and make-ahead options
Serve pastries warm to highlight crisp layers and buttery aroma. A brief 3–5 minute reheat in a hot oven will refresh stored goods without sogginess.
Wrap dough tightly and freeze for up to two weeks. Thaw slowly in the refrigerator before final shaping; this preserves fat distribution and maintains layering performance.
| Nutrient | Per Serving |
|---|---|
| Calories | 220 kcal |
| Protein | 3 g |
| Carbohydrates | 15 g |
| Fat | 16 g |
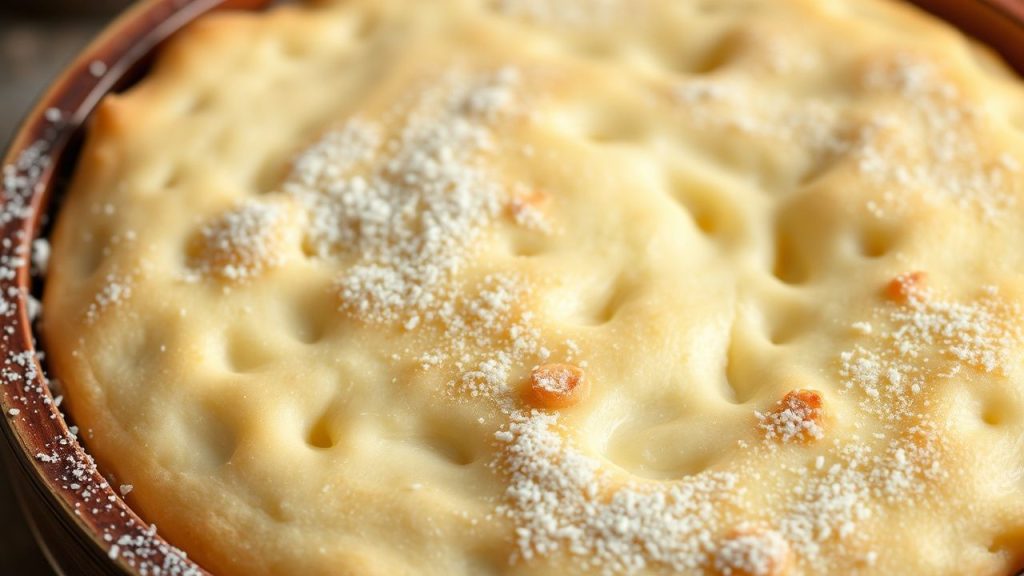
Relevant references and further reading
Compare techniques across pastry styles. For classic laminated pastry background, consult resources on puff pastry and how repeated folds produce lift.
Review the composition and culinary use of common fats via the butter and shortening pages. For technique specifics, study laminated yeast doughs such as the croissant.
Want recipes and related technique articles? See our detailed guide on artisan pastry techniques and a focused primer at pie crust basics for single-crust building blocks.
FAQ
What is the ideal fat for maximum steam lift?
Unsalted butter offers the best balance of flavor and water content for steam. It performs consistently in laminated doughs and browns attractively during baking.
Lard and solid shortening also perform well for flaky texture but change flavor and mouthfeel. Test small batches when switching fats.
How cold should the fat and dough remain?
Keep fat just firm, not rock-hard. Fat too cold can fracture; too warm will smear into the flour. Aim for refrigerated temperature, around 35–45°F (2–7°C).
Chill tools and rest dough between folds. Quick work with frequent chilling yields the most reliable layers.
Can steaming fat be used in all pastries?
The principle applies broadly: any pastry that benefits from separate sheets can use the technique. Applications vary from puff pastry to biscuits and croissants.
Adjust the number of folds, fat type, and hydration to suit the target texture—more folds for dramatic lift, fewer for rustic flake.
Why do some pastries brown before they fully puff?
Fast surface browning indicates high sugar or butter on the exterior or an oven hotspot. Reduce top heat slightly or shield tops with foil after initial rise to allow internal puff to complete.
Use an oven thermometer and rotate trays to reduce uneven color and to encourage uniform steam expansion throughout the bake.
How do I store laminated dough and finished pastries?
Unbaked laminated dough freezes well for up to two weeks. Thaw in the refrigerator overnight to preserve layer integrity before rolling and baking.
Store baked pastries at room temperature in a loose tent to avoid trapping steam; crispness returns with a brief oven reheat the next day.
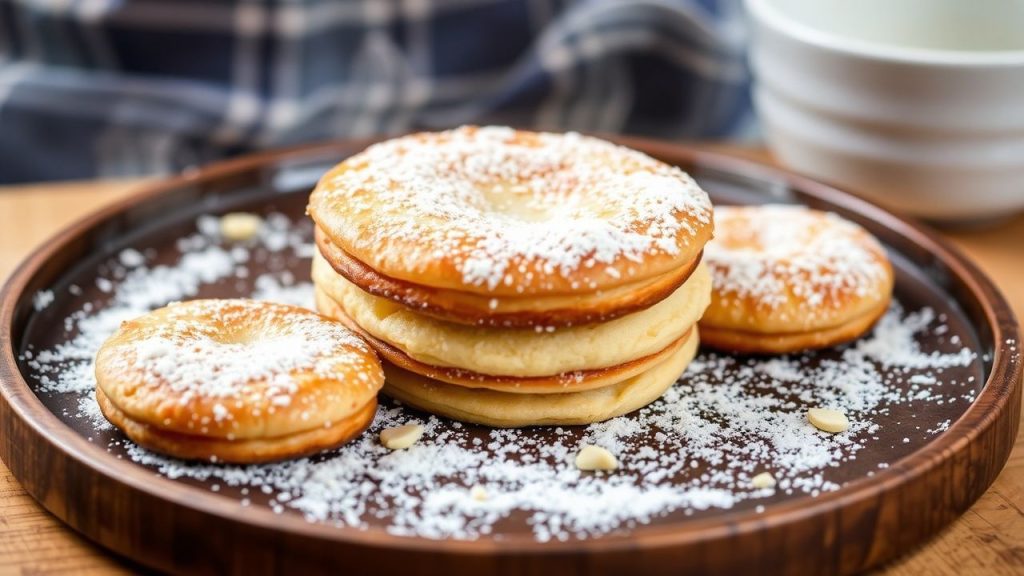
Mastering steaming fat refines your control over texture and taste. Keep experimenting with fat type, fold count, and oven heat to build repeatable, flaky results.
See also: Steaming fat
]]>