Flavor science explains how chemistry and precise technique produce aroma, taste, and texture. When you apply flavor science to heat, time, and ingredient choices, you move from guesswork to predictable, repeatable results.
- Control browning to increase savory aroma and depth.
- Balance acid and fat for perceived brightness and richness.
- Respect time: resting and slow extraction change texture and release tastants.
- Test methodically and record outcomes to improve consistency.
Why Flavor Science matters
Applying flavor science turns culinary practice into a set of controlled experiments. You focus on variables—temperature, surface dryness, acidity—that consistently change outcomes.
That repeatability reduces waste, improves yield, and raises the quality of dishes in both home and professional kitchens. Use simple measurements and sensory checks to track improvements.
Foundational Flavor Science: key reactions and concepts
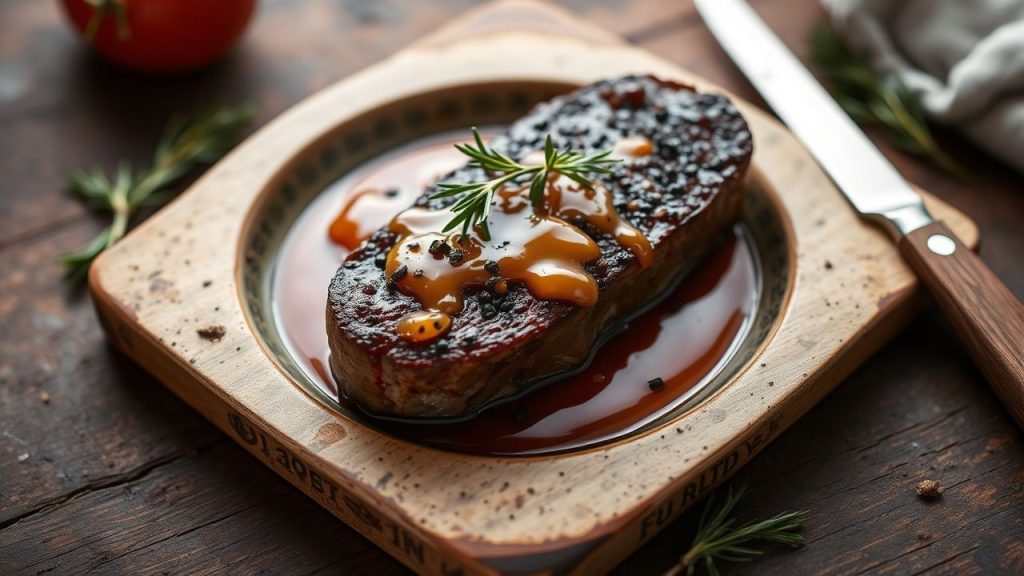
The Maillard reaction and caramelization create many volatile and nonvolatile compounds that we recognize as roasted, toasty, and sweet-browned notes. Control surface temperature and dryness to maximize positive compounds without burning.
Umami compounds concentrate through gelatin extraction and aging. Read about Umami to understand how glutamates and nucleotides layer into savory depth. Combine these concepts to design flavors rather than merely chase them.
Prep and Cook Time driven by Flavor Science
Preparation: 15 minutes | Cooking: 45 minutes | Total Time: 1 hour. These targets balance surface flavor development with internal doneness for bone-in chicken thighs.
Plan a short rest after cooking so juices redistribute and flavors equilibrate. Resting is a low-effort step with a high return in texture and perceived juiciness.
Yield and scaling with Flavor Science
Serves 4 as a main course. When scaling, maintain searing surface area and liquid ratios to preserve concentration of extracted compounds.
Measure critical ingredients by weight where precision matters. Weight-based measurement reduces variance that undermines reproducible flavor outcomes.
Difficulty Level: practical flavor science application
Medium — this recipe prioritizes heat control, browning management, and timed simmering. It rewards technique rather than specialized equipment.
Home cooks will succeed by following temperature cues and observing visual indicators such as a deep golden crust and reduced pan sauce viscosity.
Ingredients
These components combine protein, aromatics, and acid to build layered flavor. Choose bone-in cuts for gelatin, aromatics for volatile lift, and acid for brightness.
- 2 lbs bone-in chicken thighs, skin on
- 1 tbsp olive oil
- 1 tsp kosher salt
- ½ tsp freshly ground black pepper
- 1 medium yellow onion, finely chopped
- 3 cloves garlic, minced
- 1 tsp smoked paprika
- ½ tsp ground cumin
- 1 cup low-sodium chicken broth
- 1 tbsp tomato paste
- 1 tsp lemon zest
- 2 tbsp fresh parsley, chopped (for garnish)
- Juice of 1 lemon
Use fresh ingredients and measure by weight when practical. Precision supports consistent results when you apply flavor science principles.
Instructions — sequence guided by Flavor Science
Follow the sequence to maximize surface browning, bloom spices, and extract gelatin and collagen from bones and pan fond. Each step targets a defined chemical or physical change.
Work efficiently: prep mise en place, set heat levels before adding ingredients, and use visual cues like color, aroma, and pan fond to judge progress.
Searing and developing aroma
1. Prep the chicken: Pat thighs dry to remove surface moisture. Season both sides evenly with salt and pepper so the skin can reach the dryness needed for crust formation.
2. Sear: Heat oil in a heavy skillet until shimmering. Place chicken skin-side down and press to maintain contact. Sear until deep golden brown, about 6–8 minutes, then flip and sear 2–3 minutes more.
Sautéing aromatics and blooming spices
Remove chicken and set aside. Reduce heat, add onions, and cook until translucent and fragrant, about 4–6 minutes. Then stir in garlic, paprika, and cumin and cook 30–60 seconds to bloom spices and release their volatile oils.
Short, controlled cooking prevents bitter burnt notes while unlocking aroma. Blooming spices at moderate heat increases their solubility into the sauce.
Building and finishing the sauce
Stir in tomato paste and cook 1–2 minutes to deepen flavor. Add broth and scrape the pan fond; those browned bits concentrate Maillard compounds that enrich the sauce.
Return chicken skin-side up, add lemon zest, cover, and simmer gently for 30 minutes. Finish with lemon juice and a brief reduction to balance richness and concentrate savory notes.
Chef’s Notes: applied Flavor Science
Dry the skin: Surface moisture prevents reliable browning. Blot thoroughly before seasoning and searing to maximize Maillard-driven aroma.
Control heat: High heat builds aroma compounds quickly but can scorch spices. Lower heat after searing while you sauté aromatics to maintain clean flavors.
 Expert Insight
Use bones for depth: Bone-in cuts release gelatin and mineral cues under heat, which boost mouthfeel and perceived umami. That concentrated mouthfeel often reads to diners as deeper flavor.
Make ahead: This dish often improves after a few hours or overnight as flavors equilibrate. Reheat gently to preserve texture and avoid drying the meat.
Serving Suggestions guided by Flavor Science
Pair with basmati rice or creamy polenta to absorb sauce and balance textures. Both starches act as neutral carriers that highlight the chicken’s savory profile.
A crisp green salad with a citrus vinaigrette adds acidity and freshness to cut richness. Finish with chopped parsley and a lemon wedge for visual contrast and immediate brightness.
 Pro-Caution
Nutrition per serving
Approximate nutrition helps plan portions and dietary balance. Values assume typical ingredients and standard serving sizes.
Per serving: ~370 kcal, 32 g protein, 6 g carbohydrates, 24 g fat. Adjust ingredients to fit specific dietary needs.
Science links and resources for Flavor Science study
To extend technique into reliable practice, consult accessible scientific summaries. These sources provide frameworks for hypothesis-driven recipe tests and systematic adjustments.
Start with summaries in food chemistry and the mechanisms of taste perception. Use these concepts to design controlled tests at the stove.
FAQ
What is flavor science?
Flavor science studies how molecules, heat, and time interact to produce aroma, taste, and mouthfeel. It translates chemical reactions into culinary technique.
Practically, it means selecting methods that reliably produce the compounds you want—like Maillard-derived aroma—rather than hoping for them by chance.
How does the Maillard reaction improve flavor?
The Maillard reaction forms hundreds of compounds when amino acids react with reducing sugars under heat. These compounds produce roasted, savory, and toasty notes we associate with well-browned foods.
Control surface temperature and dryness to favor desirable Maillard products while avoiding bitter burnt byproducts. Visual and olfactory cues guide timing in real kitchens.
Can I use sous-vide techniques with this recipe?
Yes. Sous-vide gives precise temperature control to reach uniform doneness. Finish by searing to develop surface aroma through Maillard chemistry.
Dry the skin thoroughly before finishing with high heat to recreate the crust and volatile aroma compounds typical of pan-seared poultry.
What simple habits deliver the biggest flavor gains?
Start with three habits: salt ahead of time, control searing heat, and finish with acid. Those steps respectively improve seasoning penetration, build aroma, and balance richness.
Run small, controlled tests—change one variable at a time—and record sensory outcomes to identify the highest-impact adjustments.
How does texture influence perceived flavor?
Texture controls how flavors release and how saliva carries soluble tastants to receptors. Gelatin-rich sauces coat the palate and prolong taste, while crisp textures create contrast and perceived brightness.
Design textures deliberately by understanding starch gelatinization and protein coagulation to amplify the overall eating experience.
Key Takeaways
Flavor science gives you a toolbox: control browning, manage acidity, and respect time. These interventions target known chemical pathways that determine aroma, taste, and texture.
Apply small, testable changes and log results. This iterative, measurable approach delivers consistent, repeatable flavor improvements across recipes.

For hands-on practice, run a simple experiment: cook two thighs with different salting times or sear temperatures and note aroma, crust, and juiciness. Systematic comparison trains your senses to detect technique-driven differences quickly.
See also: Flavor Science and CookOrbit home
Recommended Reading:
]]>
- Key takeaway: Controlled fermentation and salt ratios govern safety and taste.
- Flavor driver: Free amino acids, especially glutamate, deliver the umami punch.
- Time matters: Extended aging smooths harsh notes and increases complexity.
- Practical tip: Clean technique and temperature control prevent off-flavors.
Chemical Foundations of Fish Sauce
Fish sauce is a concentrated solution of amino acids, organic acids, and small nitrogenous compounds produced when salted fish break down over time. The principal transformation occurs through natural fermentation, where endogenous enzymes and tolerant microbes act on proteins and lipids.
The salt concentration selects which microbes survive and which reactions dominate. High salt suppresses spoilage organisms while enabling proteolysis, the enzymatic cleavage of proteins into free amino acids and peptides that define taste and mouthfeel.
Amino Acids, Peptides and Umami
Free amino acids, notably glutamate, drive umami sensation in fish sauce. Analytical work on fermented seafood links rising levels of free amino acids to perceived savoriness, confirming the central role of glutamic acid in flavor intensity.
Peptides contribute body and slow-release flavor, while small organic acids add brightness and balance. Together, these molecules create the layered profile chefs rely on to round savory dishes.
Ingredients and Ratios: The Science of Balance
Ingredient choice shapes chemical outcomes. Small oily fish such as anchovies supply a consistent protein matrix and fat profile that ferment into flavorful compounds; traditional producers often use local anchovies for their predictable results.
Salt ratio matters more than exotic spices. A common working standard is ~30% salt by weight of fish to slow unwanted microbes while preserving enzymatic activity. Deviating from that range accelerates spoilage or stalls proteolysis.
Step-by-Step Fermentation Process
Start with fresh fish that are cold and firm to avoid early breakdown by spoilage bacteria. Rinse lightly, remove large impurities, but retain bones and skin—these tissues hold proteases that catalyze protein breakdown during aging.
Layer fish and salt in a clean, inert container, crush slightly to release fluids, and weigh contents so they remain submerged. Anaerobic microenvironments and continuous immersion reduce oxidation and favor desirable yeast and halotolerant bacterial activity.
- Layer fish and salt; include optional small amounts of sugar to modulate flavor.
- Cover with filtered water if necessary to ensure submersion and apply a weight.
- Store at controlled temperature and allow months of maturation; check monthly.
- When the liquid tastes harmonized, strain and bottle; age further if desired.
Time and Temperature Control
Temperature governs reaction rates: warmer conditions speed enzymatic cleavage but risk off-flavor formation if too hot. Keep fermentation in a stable range approximately 20–25 °C for consistent development.
Time converts simple savory notes into complex aroma. Short fermentations yield raw saltiness and sharpness; extended fermentation (six months to a year) increases soluble amino acids and mellows harsh volatile compounds.
Practical Recipe and Scheduling
For a reliable home batch: use 1 kg fresh small fish, 300 g sea salt (≈30%), and an optional tablespoon of palm or brown sugar. Adjust water only to cover; excessive dilution reduces enzymatic concentration and slows maturation.
Ferment in a food-grade container with occasional degassing and visual checks. Taste samples after 6 months; if flavor remains aggressive, continue aging. Strain through fine cloth and decant into sterilized bottles.
Safety, Microbial Control and Quality Checks
Salt provides the first line of microbial control but does not sterilize. Monitor visual signs: clear liquid with settled solids and no surface pellicle indicates a controlled fermentation. Off odors such as putrid, rotten-sulfur notes indicate contamination; discard any suspect batch.
Use good hygiene: sterilize jars, work with cold fish, and avoid introducing non-salted ingredients early in fermentation. If you detect unusual gas, foaming, or colored films, separate the liquid and assess; when in doubt, do not consume.
Pro-Caution
After bottling, keep fish sauce refrigerated once opened to preserve freshness and slow any late-stage chemical changes. Properly salted and aged fish sauce is shelf-stable unopened for long periods, but labeling date and batch notes help trace quality.
Tips to Maximize Flavor and Consistency
Control variables: use the same fish source, maintain consistent salt percentage, and keep a stable temperature to reproduce successful batches. Minor changes shift the chemical trajectory of flavor development.
When using fish sauce in cooking, taste early and adjust. Because it concentrates umami, use sparingly and layer with acid and sweet elements to unlock complexity without overpowering dishes.
Expert Insight
Experimentation is useful, but controlled trials work best: change one variable per batch to understand its effect. For example, test two salt ratios side-by-side to see how proteolysis and flavor diverge over six months.
Serving, Storage and Nutritional Notes
Fish sauce functions as a concentrated seasoning—use it to finish soups, vinaigrettes, marinades, and dipping sauces. Pair it with citrus, sugar, and aromatics to create balanced condiments that stretch a little goes a long way.
Packaged fish sauce is high in sodium; small amounts deliver a large flavor payoff. People with sodium-restricted diets should treat it as a potent seasoning and adjust other salt sources accordingly.
| Nutrient (per 1 tbsp / 15 ml) | Amount |
|---|---|
| Calories | ≈10 |
| Protein (soluble) | ≈1.4 g |
| Carbohydrate | ≈0.2 g |
| Fat | 0 g |
| Sodium | ~900 mg |
FAQ
How does fermentation create umami in fish sauce?
Endogenous enzymes break fish proteins into free amino acids and small peptides. These molecules, especially glutamate, stimulate umami receptors and intensify perceived savory taste.
What salt ratio ensures safe and effective fermentation?
About 25–35% salt by weight of fish is a reliable window for home practice. This range suppresses many spoilage organisms while allowing halotolerant enzymes and microbes to generate desirable flavor compounds.
How long should I age fish sauce for the best flavor?
Maturation for at least six months yields baseline umami development. Extending to 9–12 months typically produces smoother aromas and deeper complexity, depending on temperature and fish type.
Can I speed up fermentation without harming flavor?
Raising temperature accelerates reactions but increases the risk of off-flavors. It is better to allow time at a steady, moderate temperature than to force rapid fermentation.
Which fish produce the most consistent results?
Small, oily, protein-dense species like anchovies give predictable, concentrated results because their tissue and oil content ferment into classic savory compounds. Regional variations will still influence nuance.
For deeper reading on the scientific terms used here, review authoritative references on fermentation, umami, and enzymes to strengthen practical practice with theory.

See also: fish sauce
]]>
- Free glutamate activates taste receptors immediately for instant umami.
- Bound glutamate requires enzymatic or thermal cleavage to become taste-active.
- Choose technique—slow simmering, fermentation, roasting—to control timing of glutamate release.
- Small substitutions and pairing deliver large umami gains with less added salt.
Exploring the Chemical Nature of Free and Bound Glutamate in Foods
At the molecular level, glutamate exists as the amino acid glutamic acid and appears in two main forms: free (dissolved or unbound) and bound (linked inside proteins). The free pool drives immediate taste perception, while the bound pool acts as stored potential.
Free glutamate binds to taste receptors on the tongue and produces a clear umami signal. Bound glutamate requires proteolysis or hydrolysis to release the active amino acid back into the food matrix.
Free glutamate: immediate umami signal
Free glutamate is present in fermented condiments, ripe tomatoes, dried mushrooms, and aged items where proteases or microbes have already cleaved proteins. That pool interacts directly with T1R1/T1R3 and metabotropic receptors to give an immediate savory note.
Because it is already dissolved or accessible, free glutamate enhances perceived saltiness and fullness in a single bite. Use it when you want fast, reliable umami without long cooking.
Bound glutamate: latent and cumulative
Bound glutamate sits inside peptide chains and protein structures until enzymes or heat break those bonds. Slow cooking, fermentation, and aging gradually increase free glutamate as the matrix breaks down.
This latent pool gives depth over time: stocks taste better after resting, and aged proteins develop richer flavor as proteolysis proceeds. Plan technique and time when you want background umami that unfolds.
Practical Prep and Cook Time
Technique dictates how much bound glutamate converts to free form. Quick sears highlight existing free glutamate; long, gentle simmers and fermentations extract bound pools progressively.
Typical practical timing: short preparations (under 30 minutes) rely on free glutamate sources. Reserve long extractions—hours for stocks or days to months for fermentation—when you want slow-developing savoriness.
Yield
This recipe framework yields about four portions as a starter or light main. The goal is a balanced umami profile so other ingredients remain distinct.
Scale by increasing broth volume or adding proteins like tofu or shredded chicken. Keep proportions of concentrated umami ingredients steady to maintain flavor balance.
Difficulty Level
Skill level: medium. The techniques require controlled heat, timing, and awareness of fermentation or aging principles rather than advanced knife work.
Even cooks with basic skills can get consistent results by following order and temperature instructions. Attention and patience reward with measurable gains in depth.
Ingredients
Choose a mix of immediate and slow-release glutamate sources. Dried mushrooms and kombu supply free and slowly extractable compounds; fermented elements like miso and soy sauce contribute ready-made free glutamate.
- 1 cup dried shiitake mushrooms, soaked until tender
- 2 tablespoons naturally fermented soy sauce
- 1 cup chicken or vegetable broth (homemade preferred)
- 1 teaspoon dried seaweed flakes (kombu or wakame)
- 2 cloves garlic, minced
- 1 small onion, finely chopped
- 1 tablespoon neutral oil
- 1 teaspoon miso paste
- Salt and black pepper, to taste
- Fresh chives or scallions for garnish
Note the emphasis on dried mushrooms and fermented elements; both deliver different glutamate pools that combine synergistically. Use concentrated stocks when you want more bound-glutamate extraction.
Instructions
Order and temperature matter. Start by capturing dissolved free compounds, then use gentle heat to liberate bound glutamate without creating bitterness or reducing volatile savory molecules.
- Rehydrate mushrooms: Soak dried shiitake in warm water for 20 minutes. Reserve the soaking liquid; it contains dissolved free glutamate and soluble umami molecules.
- Sauté aromatics: Heat oil over medium and cook garlic and onion until translucent, about four minutes, to build Maillard-derived savory precursors.
- Infuse umami: Add mushrooms with reserved liquid, kombu, soy sauce, and broth. Simmer gently for 15–30 minutes to allow bound glutamate to release gradually.
- Finish with miso: Remove from heat and whisk in miso off the heat to preserve its free amino acids. Adjust salt and pepper after tasting.
- Serve: Ladle hot and garnish with chives or scallions to add aroma and a fresh contrast to the savory base.
Maintain low simmering temperatures to avoid breaking fats and amino acids into bitter degradation products. Gentle extraction yields a clean and layered umami profile.
Chef’s Notes: Tips for Success
Concentrated dried shiitake supply both free and bound glutamate and also contribute a stable, long-lasting savoriness. Preserve every flavorful liquid during prep; that liquid is often richest in free compounds.
Expert Insight
When adding miso, dissolve it off heat to protect its free amino acids. High heat can denature those compounds and blunt the final umami lift.
Serving Suggestions
Serve this broth with steamed rice, hand-pulled noodles, or a soft protein to create textural contrast. A few drops of toasted sesame oil and a sprinkle of seeds add aromatic lift without masking glutamate-driven savoriness.
For a heartier bowl, add silken tofu or shredded chicken; warming those proteins in the hot broth releases additional bound glutamate and deepens flavor over time.
Pro-Caution
If you follow a low-sodium diet, taste iteratively when using fermented condiments. Miso and soy sauce increase sodium even as they amplify perceived saltiness, so start low and adjust.
Pro-Caution
Nutrition
Per-serving nutrition depends on ingredient choices and portion size. A vegetable-based version will be lower in calories and saturated fat than a bone-based stock.
Typical per-serving estimate: ~120 kcal, ~8 g protein, ~10 g carbohydrates, and ~5 g fat. Use homemade broths and controlled salt to manage mineral and sodium levels.
| Nutrient | Per Serving |
|---|---|
| Calories | 120 kcal |
| Protein | 8 g |
| Carbohydrates | 10 g |
| Fat | 5 g |
Slow-cooked broths concentrate minerals and amino acids, so adjust portions and seasoning to match dietary needs and taste goals.
FAQ
What exactly is glutamate?
Glutamate is an amino acid that triggers the savory taste known as umami. For molecular context, see glutamic acid.
How do free and bound glutamate differ in taste impact?
Free glutamate produces an immediate umami perception when it contacts taste receptors. Bound glutamate becomes active only after enzymes or heat release it from proteins.
Where can I find free glutamate in common foods?
Free glutamate appears in fermented or aged products, ripe tomatoes, mushrooms, and long-aged cheeses. Fermentation and proteolysis increase the free pool; see umami for sensory context.
Can I add free glutamate to dishes safely?
Monosodium glutamate (MSG) supplies free glutamate and is recognized as safe by major food authorities when used in normal culinary amounts. For background, consult monosodium glutamate.
How does fermentation change glutamate availability?
Fermentation uses microbes and enzymes to cleave proteins and increase free glutamate levels. Fermentation also produces peptides and organic acids that interact with umami perception; see fermentation for processes and examples.
To Wrap It Up
Free and bound glutamate work together: free glutamate gives instant umami while bound glutamate supplies slow-building depth. Control technique and timing to shape when those pools activate in a dish.
Use the right combination—dried mushrooms, kombu, fermented condiments, and gentle extraction—to get richer flavor with less added salt. For related recipes and tags, see glutamate and try this approach in our umami broth recipe.

See also: glutamate
]]>
- Fat dissolves fat-soluble aroma compounds. These molecules do not travel well in water but move readily when bound to lipids.
- Different fats add distinct notes. Butter, ghee, olive oil, and animal fats each change a dish’s profile under heat.
- Finishing fats amplify mouthfeel and extend the time flavor lingers after swallowing.
Prep and Cook Time
Prep Time: 10 minutes | Cook Time: 20 minutes | Total Time: 30 minutes.
These estimates assume basic mise en place and a properly heated skillet. Adjust time upward for dense mushrooms or slow rendering at low temperature.
Yield
Serves 4 generous portions as a side or 2–3 as a main component. The recipe concentrates flavor, so smaller portions deliver strong impact.
Scale linearly by weight for larger batches, and maintain pan space to avoid steaming the mushrooms and losing Maillard-derived compounds.
Difficulty Level
Medium. The techniques require attention to heat management and timing rather than advanced knife skills.
Practice browning on moderate heat and finishing at low heat separately before combining them to build confidence.
Ingredients
These ingredients show how blending neutral and flavored fats yields depth and clarity. Use quality stock and fresh mushrooms for best results.
- 3 tbsp unsalted butter, softened
- 2 tbsp extra virgin olive oil
- 1 small onion, finely diced
- 2 garlic cloves, minced
- 1 cup sliced wild mushrooms (shiitake, cremini, or porcini)
- 2 tsp soy sauce (for umami boost)
- 1/2 cup chicken or vegetable stock
- Salt and freshly ground black pepper, to taste
- Fresh thyme leaves, for garnish
Instructions
Work in controlled temperature stages: sweat aromatics, brown solids, reduce liquids, then finish with a flavorful fat. Each stage extracts or concentrates distinct classes of compounds.
Use a hot skillet, a wooden spoon to avoid scraping, and taste as you go to adjust seasoning and richness.
Sauté and Brown: Building Base Flavor
Heat 1 tablespoon olive oil in a skillet over medium heat. Add diced onion and sauté until translucent and fragrant, about 3–4 minutes.
Add the minced garlic and cook 30–60 seconds, stirring constantly so the garlic releases aroma without burning. Increase heat slightly and add sliced mushrooms with a pinch of salt to promote water release and browning.
Reduce and Finish: Concentration and Fat Integration
Sauté mushrooms until they release moisture and begin to caramelize, about 7–8 minutes. Drizzle soy sauce, stir, and pour in stock; simmer until reduced by roughly half to concentrate flavor.
In a separate small pan, melt butter with the remaining tablespoon of olive oil over low heat until it becomes nutty and fragrant. Combine browned butter with the mushroom mixture and season to taste. Serve immediately to preserve the glossy finish.
Why Fat Flavor Works (Science Explained)
Many aroma molecules are lipophilic; they dissolve more readily into fat than into water. When fat melts or emulsifies, it carries these molecules into the oral and nasal cavities where perception occurs.
The molecular concept is standard in lipid chemistry. See lipid for the basic classes and solubility behavior of these compounds.
Mechanisms: Solvent, Carrier, Modifier
Fat acts first as a solvent: non-polar aroma compounds partition into the lipid phase. That partitioning increases their volatility at mouth temperature and concentrates scent at the retronasal pathway.
At the same time, fat coats the oral mucosa and slows release, lengthening the time the brain registers flavors. These effects together define practical fat flavor technique.
Browning, Maillard, and Umami Synergy
Browning generates new savory molecules via amino-sugar chemistry. Those Maillard reaction products pair exceptionally well with fat because both increase perceptible intensity.
For technical background on the Maillard reaction, consult Maillard reaction. For how fat amplifies savory notes, see the concept of umami.
Practical Tips to Maximize Fat Flavor
Control pan temperature. Too low and ingredients steam; too high and fats smoke and create bitter off-notes. Adjust heat in stages for browning without burning.
Balance neutral and flavored fats. A neutral oil tolerates higher heat; butter or ghee adds aroma. Use a blend to get high-heat browning with a rich finishing note.
Expert Insight
Bloom spices briefly in fat to extract essential oils; that step unlocks perfume and intensifies impact when combined with other savory components. Fat dissolves many of the same volatile compounds that water cannot.
Pro-Caution
Choose fats with appropriate stability. Clarified butter and high-oleic oils resist breakdown better at higher heat while unrefined oils best serve as finishes.
Serving Suggestions
Pair umami-rich mushrooms with creamy polenta, toasted country bread, or roasted vegetable medley. Finish with a soft fried egg for added richness and silky mouthfeel.
A final drizzle of a flavored oil or a pat of butter immediately before serving increases the perceived intensity and gives a satin sheen.
Nutrition and Portion Notes
Fats supply most of the calories but also provide fat-soluble vitamins and satiety. Moderate portions deliver more flavor per calorie because fat amplifies perception.
Per serving (approximate): 230 kcal, 20 g fat. Reduce butter and oil to lower calories while retaining finishing technique for mouthfeel by using emulsions.
| Nutrient | Per Serving |
|---|---|
| Calories | 230 kcal |
| Protein | 5 g |
| Carbohydrates | 7 g |
| Fat | 20 g |
Visuals
High-resolution photos should show browning levels and the finished shine from finishing fats. Use them to judge color targets and avoid blackening.
Properly integrated fat produces a satin sheen and visible pooling without greasiness. Aim for deep golden-brown color and avoid char.
Mechanistic Notes and Practical Applications
Fat-soluble aroma release explains why finishing a dish with a flavored oil or butter can dramatically change perception. Fat coats the oral cavity and slows release, lengthening flavor duration.
For deeper reference on fatty structures and how chain length affects aroma, consult fatty acid chemistry.
At a Glance
- Fat flavor depends on partitioning of lipophilic aromas into a lipid phase.
- Blend neutral and flavored fats for heat tolerance and finishing aroma.
- Finish with a small amount of high-impact fat to extend flavor linger.
FAQ
Q: Why is fat so effective at carrying flavor?
Fat dissolves lipophilic aroma molecules that water cannot carry. When fat integrates into a sauce or coats ingredients, those dissolved compounds become volatile and perceptible as aroma.
This solubility difference explains why oil-based dressings smell and taste different than water-based broths using the same herbs.
Q: Can I get the same flavor without animal fats?
Yes. Plant fats like olive oil and coconut oil carry aroma and provide mouthfeel. Each fat still introduces its own profile, so choose one that complements the dish.
Use emulsions or nut-based finishes if you need texture without animal-derived components.
Q: How should I choose a fat for high-heat cooking?
Pick fats with higher smoke points for direct high-heat work and reserve butter or ghee for finishing. Blend a neutral high-smoke oil with a small amount of butter to combine heat tolerance and aroma.
Properly rendered animal fat also performs well for searing and sautéing because of lower moisture and improved heat stability.
Q: Will reducing fat ruin a recipe’s taste?
Reducing fat can make a dish taste flatter because you remove the carrier for many aroma compounds. Compensate by concentrating stock, using umami-rich ingredients, or finishing with a small amount of high-impact fat.
Emulsions spread small droplets across the palate and can maintain perceived richness with less total fat.
Q: Are some fats unhealthy to use for flavor?
Use fats judiciously. Avoid repeatedly overheating oils with low smoke points and prefer minimally processed oils when possible. Balance saturated and unsaturated fats within overall diet context.
For culinary choices, prioritize flavor and proper technique rather than avoiding fat entirely; small amounts of the right fat improve satisfaction and reduce overeating tendencies.
Closing Remarks
Fat acts as a chemical solvent, a texture modifier, and a delivery system for aroma and flavor. When used deliberately, it converts ordinary ingredients into more complex, satisfying dishes.
Apply the techniques above—control heat, choose appropriate fats, bloom spices in fat, and finish with a flavorful drizzle—and you will notice immediate improvements in intensity and mouthfeel.
See also: lipid, Maillard reaction, umami
See also: fat flavor
]]>
- Key insight: Free glutamate and nucleotides produce the core umami sensation.
- Processing matters: Heat and drying trigger Maillard chemistry that adds nutty notes.
- Use it smart: Combine with fats, acid, or heat to amplify cheesiness.
- Store properly: Cool, dry, airtight storage preserves flavor and vitamins.
The Molecular Magic Behind Nutritional Yeast’s Savory Appeal
Nutritional yeast is a deactivated form of yeast commonly used for its savory, cheese-like flavor and dense nutrient profile. Many producers use strains of Saccharomyces cerevisiae, grown to yield protein and B vitamins and then heat-inactivated and dried.
The key flavor drivers are free amino acids and flavor-enhancing nucleotides. Together, these molecules stimulate umami receptors and create the perception of a tangy, nutty, and savory note that we often label as “cheesy.”
Glutamic Acid and Umami Synergy
Glutamic acid, present as free glutamate in processed yeast, directly activates umami taste receptors. This mirrors the same receptor activation that gives aged cheeses and broths their savory depth.
What intensifies the effect is synergy with nucleotides such as inosinate and guanylate. These compounds amplify the perceived intensity of glutamate, so smaller amounts of yeast can deliver a pronounced savory hit.
Nucleotides: Inosinate and Guanylate
Nucleotides like inosinate naturally form during yeast cell breakdown and drying. They do not taste intensely savory on their own, but they boost glutamate’s potency through a well-described biochemical synergy.
For readers who want the biochemical context, see the nucleotide overview at inosinate. That page explains how these molecules contribute to savory taste when paired with glutamate.
Maillard Reaction and Volatile Notes
Drying and mild heating during processing trigger Maillard reactions between amino acids and sugars. This set of reactions produces pyrazines and other volatiles that add roasted, nutty, and slightly sweet aroma notes.
These Maillard products round out the flavor, giving nutritional yeast that roasted, Parmesan-adjacent character without dairy. For more on the chemistry, refer to Maillard reaction.
Practical Recipe: Umami Lentil Mix (Uses Nutritional Yeast)
This simple lentil mix demonstrates how to coax the cheese-like quality from nutritional yeast using heat, acid, and fat. Follow the cooking steps to maximize flavor development while keeping the preparation approachable.
Prep time and yield suit weeknight cooking and meal prep. The recipe scales easily for bowls, toasts, or as a protein-rich side.
Prep and Cook Time
- Prep time: 5 minutes
- Cook time: 10 minutes
- Total time: 15 minutes
Yield and Difficulty
Serves: 4
Difficulty: Easy
Ingredients
- 1/4 cup nutritional yeast flakes
- 2 tbsp olive oil
- 1 medium shallot, minced
- 2 cloves garlic, minced
- 1 cup cooked lentils (green or brown)
- 1 tsp smoked paprika
- 1/2 tsp sea salt
- Freshly ground black pepper, to taste
- 1 tbsp fresh lemon juice
- 2 tbsp chopped fresh parsley
Instructions
- Heat the oil in a skillet over medium heat. Add minced shallot and sauté until translucent, about 2 minutes.
- Add garlic and cook 30 seconds, stirring to prevent browning.
- Toss in lentils and smoked paprika. Warm through for 3–4 minutes, stirring to meld flavors.
- Sprinkle nutritional yeast evenly and stir to coat. Cook 1–2 minutes to release savory compounds.
- Finish with salt, pepper, and lemon juice. Remove from heat and fold in parsley.
- Serve over toasted bread, steamed greens, or grain bowls.
Chef’s Notes and Serving Suggestions
Small changes affect perceived cheesiness. Adding a splash of plant milk or a teaspoon of miso increases creaminess and umami without masking the yeast’s character.
Try serving ideas such as toasted seeds for crunch or a balsamic drizzle for acidity. These contrasts highlight the nutty, tangy elements of the yeast.
- Substitute smoked paprika with a pinch of cayenne for heat.
- If fresh garlic is unavailable, use 1/2 tsp garlic powder to avoid bitterness.
- Make-ahead: store in an airtight container for up to 3 days.
Expert Insight
For additional uses and pairing options, consult our internal guides. Explore the guide to natural umami ingredients and the lentil and nutritional yeast recipe for variations and side ideas.
Pro-Caution
Storage, Processing, and Shelf Life
Proper storage preserves both flavor and nutrient content. Keep flakes in a cool, dry, airtight container away from heat and light to limit oxidative loss of volatile compounds.
Processing choices alter flavor. Longer drying times and higher temperatures can increase Maillard products but may reduce heat-sensitive B vitamins. Brands vary, so sample products to match your flavor preference.
FAQ
What exactly is nutritional yeast?
Nutritional yeast is a deactivated yeast commonly sold as yellow flakes or powder. Producers typically grow it for nutrient yield and then heat-inactivate and dry it to create a stable, savory ingredient.
Why does it taste “cheesy” if there is no dairy?
The cheesy impression comes from a mix of free glutamate, nucleotides, and Maillard-derived aromatics. These molecules mimic the savory and nutty notes associated with aged cheeses.
How can I make its flavor stronger in recipes?
Use gentle heat, a little fat, and a splash of acid. Heat releases volatile aromatics, fat carries them on the palate, and acid brightens the overall profile to emphasize the cheesy notes.
Are there nutritional benefits beyond flavor?
Yes. Nutritional yeast offers protein, fiber, and B-complex vitamins in many formulations. Fortified varieties provide vitamin B12, which is valuable for those on plant-based diets.
How should I choose a product?
Compare flavor intensity, fortification, and processing notes on packaging. If you prefer a roasted character, look for descriptions that mention toasty or nutty notes; for a milder, creamier profile, choose finer flakes.
For readers seeking the biochemical backdrop of taste receptors, the concept of umami is well covered at umami. For amino acid context, see glutamic acid.
Harnessing nutritional yeast effectively requires simple technique and awareness of chemistry. Use heat, fat, and acid strategically, and store flakes correctly to keep that cheesy, savory note bright and consistent.
See also: nutritional yeast
]]>Two common seasonings—monosodium glutamate (MSG) and table salt—deliver sodium and shape flavor in different ways. Chefs and dietitians choose one or both to control taste and total sodium load without losing depth. This piece compares their chemistry, culinary use, and practical tips for lowering sodium while keeping food satisfying.
- MSG supplies umami while adding less sodium per gram than salt.
- Table salt (sodium chloride) provides direct saltiness and preserves texture.
- Combining modest MSG with reduced salt can lower total sodium and improve flavor.
- Use measured techniques to keep dishes balanced and health-aware.
Quick Recipe Snapshot
Prep: 10 minutes | Cook: 25 minutes | Total: 35 minutes. This practical stir-fry demonstrates how small MSG amounts boost depth so you can reduce table salt.
Yield: 4 servings. Difficulty: Easy to Medium. The method fits home cooks who want clear steps and modest ingredient control.
Chemical profiles and what they mean
Table salt is primarily sodium chloride, an ionic compound that provides straightforward saltiness and affects water activity in food. It dissolves quickly, seasons uniformly, and contributes to texture in bread and cured foods.
MSG is sodium bound to the amino acid glutamate, most commonly produced by fermentation. See the reference entry on monosodium glutamate for production and history. Glutamate activates the umami taste receptors and amplifies savory perception without only increasing salty notes.
Sodium content and health context
By weight, typical table salt contains about 39% sodium, while MSG contains roughly 12% sodium. That means you can often reach the same perceived savory intensity with less sodium when you use MSG strategically alongside reduced salt.
Sodium itself is an essential electrolyte; read the basic biochemistry at the sodium entry. For patients with hypertension or heart failure, clinicians recommend lowering total sodium intake. Substituting part of the salt with MSG is one evidence-aligned strategy to reduce sodium while preserving palatability. Always coordinate dietary changes with a healthcare provider for clinical conditions.
Culinary roles: what each seasoning does
Salt brightens overall flavor, reduces bitterness, and promotes the typical ‘salty’ sensation. It affects mouthfeel and can bring forward aromatics in a dish. It also acts as a preservative and texture modifier in many recipes.
MSG enhances umami, a distinct taste often described as savory or brothy. The umami concept is documented on its overview page at Umami. Use MSG to deepen meatiness, add roundness to broths, and make vegetables taste fuller without adding fat or excessive salt.
Ingredients for the example stir-fry
Below is the ingredient list used in the example. The quantities balance protein, aromatics, and seasonings to show how small MSG additions work in practice.
Keep an internal reference to our practical resources for further umami tips: Guide to umami flavors and for sodium control strategies see Sodium reduction guide.
- 1 lb boneless chicken thighs, cut into bite-size pieces
- 1 tbsp vegetable oil
- 1 medium onion, finely chopped
- 3 cloves garlic, minced
- 1 tsp grated ginger
- 1 cup diced bell peppers
- 1 tbsp low-sodium soy sauce
- ½ tsp table salt (adjust)
- ¼ tsp MSG (optional, umami boost)
- ½ tsp freshly ground black pepper
- 2 tbsp chicken broth or water
- 2 green onions, sliced; 1 tsp toasted sesame seeds (optional)
Instructions
These steps reinforce technique: use heat control, avoid overcrowding, and add seasonings in stages so you can taste and adjust. Small changes in timing and order affect final flavor sharply.
Follow the numbered process below and taste as you go. The goal is to show a practical workflow for reducing salt and incorporating a modest MSG dose when desired.
- Heat oil in a large skillet over medium-high. Add onions and sauté until translucent, about 3 minutes.
- Stir in garlic and ginger; cook 1 minute to release aroma but avoid browning them to the point of bitterness.
- Add chicken pieces in a single layer; brown on all sides about 6–8 minutes. Avoid crowding; work in batches if needed.
- Toss in diced bell peppers and sauté 2–3 minutes for color and slight crunch.
- Pour soy sauce and broth; bring to a simmer and scrape browned bits from the pan for flavor.
- Season with the listed table salt and a small pinch of MSG if using. Stir and simmer 4–5 minutes for flavors to meld.
- Finish with black pepper, garnish with green onions and sesame seeds, and serve over rice or grain of choice.
Chef’s notes and practical adjustments
Use MSG as a targeted enhancer, not a blanket replacement. Reduce table salt incrementally—start by cutting 25% and add ¼ tsp MSG to compensate, then taste and refine. This approach helps maintain familiarity while lowering sodium.
For vegetarian swaps, replace chicken with firm tofu and use vegetable broth. For smoky or spicy profiles, add a dash of smoked paprika or chili flakes, but keep the seasoning additions measured to control total sodium.
Expert Insight
When you adjust salt levels, give the dish a short rest off heat; flavors continue to meld and you can reassess saltiness before serving. This resting period reduces the risk of oversalting.
Pro-Caution
Nutritional notes and serving suggestions
This recipe example aims for balanced macros and controlled sodium. Portion control, low-sodium broth, and reduced salt usage all contribute to a lower per-serving sodium load.
Serving suggestions include jasmine rice, quinoa, or steamed greens. Fresh herbs added at the end lift the dish without adding sodium.
| Nutrient | Per Serving |
|---|---|
| Calories | 280 kcal |
| Protein | 32 g |
| Carbohydrates | 8 g |
| Fat | 12 g |
FAQ
What is the core difference between MSG and table salt?
Table salt is primarily sodium chloride and gives direct saltiness. MSG supplies glutamate, which triggers umami receptors and enhances savory notes. They act differently on taste receptors, so chefs use them for distinct effects.
Does MSG reduce total sodium in a dish?
Because MSG contains less sodium by weight, substituting some salt with MSG can lower overall sodium while maintaining perceived flavor. Practical reductions require tasting and incremental adjustments to find the balance.
Is MSG safe for most people?
Regulatory bodies and decades of research consider MSG safe for the general population when used in typical culinary amounts. Individual sensitivities are rare; consult a healthcare professional if you suspect an adverse reaction.
Can I use MSG in baking or desserts?
MSG is primarily useful in savory applications to boost umami. It has limited use in sweet baking unless you deliberately pair it with salty or savory elements to create contrast.
How should I store MSG and salt for best quality?
Store both in cool, dry containers to prevent clumping and moisture uptake. Keep them away from heat and strong odors so they retain their free‑flowing character and flavor integrity.
For deeper technical reading on the chemistry of sodium and glutamate, consult the cited Wikipedia entries and follow internal practical guides linked above for recipe variations and sodium-control strategies.
See also: MSG
]]>
- Concentrated umami: Katsuobushi builds flavor quickly without fat.
- Versatile: Use as dashi base, garnish, or seasoning in fusion recipes.
- Storage tip: Keep flakes airtight and cool to preserve aroma.
- Technique: Steep briefly for clean dashi, add late for texture.
What Bonito Flakes Are and Why They Matter
Bonito flakes come from fillets of skipjack tuna that skilled producers smoke, ferment, and dry until firm and intensely flavored. Because of this process, katsuobushi concentrates amino acids such as glutamate that create the sensation called umami.
Chefs rely on katsuobushi for layered savory notes that amplify other ingredients rather than mask them. For background on the stock most commonly made with these flakes, see dashi.
Prep and Cook Time
Preparation: 10 minutes. Cooking: 15 minutes. These times assume you assemble a basic dashi using kombu and bonito flakes.
Allow 30 minutes for kombu to hydrate if you plan a cold soak, which yields a cleaner mineral backbone. For a fast finish, steep bonito flakes briefly and strain immediately to avoid bitterness.
Yield
This recipe yields about 4 cups of dashi, which serves 4 as a broth or more when used as a flavoring agent. You can scale the ratio of flakes to water for a lighter or stronger stock.
Freeze unused portions in ice cube trays for single-use flavor boosts. Cubed dashi defrosts quickly and ensures consistent seasoning across dishes.
Difficulty Level
Easy. The technique focuses on gentle heat control and timing rather than complex skills. Even beginners can achieve professional results with attention to steeping times and storage.
Experienced cooks will appreciate how small adjustments—timing, kombu quality, or type of bonito—shift aroma and umami balance. Test small batches to refine the profile you prefer.
Ingredients
1 cup bonito flakes (katsuobushi); 4 cups water; 1 piece kombu (about 4-inch square); optionally 2 tbsp soy sauce and 1 tsp mirin.
Use filtered water for clarity and mild mineral balance, and choose authentic kombu for oceanic depth. For further reading on kombu varieties, consult the kelp resource on Kombu.
Instructions
1. Wipe kombu with a damp cloth to remove surface salt. Soak kombu in cold water for 30 minutes to extract umami slowly.
2. Heat gently to just below boiling; remove kombu at first bubble to prevent bitterness. Immediately add bonito flakes, turn off heat, and steep for five minutes.
3. Strain through a fine sieve or cheesecloth, pressing gently to collect flavor without clouding the broth. Season with soy sauce and mirin to taste, if desired.
4. Use dashi immediately for soups, sauces, or simmered dishes. Cool and refrigerate for up to 48 hours or freeze for longer storage and convenience.
Chef’s Notes & Tips for Success
Choose quality flakes: Seek light-colored, thin shavings with a clean smoky aroma; they yield brighter dashi. Thicker, darker flakes may indicate heavier smoking and a different flavor profile.
Timing is critical: Oversteeping produces bitter notes. For balanced umami, steep bonito flakes just long enough to turn the water clear amber, then strain.
Expert Insight
For make-ahead strategies, portion dashi into 1/2-cup increments and freeze. This method gives precise control when you need a burst of umami without defrosting a full batch.
Pro-Caution
Try powdered bonito sparingly as a seasoning; use flakes for garnish to preserve texture and aroma. Also, link internal resources for technique and context: see our how to make dashi guide and the Japanese Ingredients Guide for paired components.
Serving Suggestions
Use dashi as the base for miso soup with tofu and wakame, or as a delicate poaching liquid for seasonal fish. Bonito flakes also finish okonomiyaki, takoyaki, or simply steamed rice for an immediate umami lift.
For nontraditional uses, sprinkle flakes on roasted vegetables, popcorn, or creamy mashed potatoes to add smoky depth. They play well with butter, citrus, and acid-driven condiments.
Nutritional Information per Serving
Per serving: approximately 15 kcal, 3 g protein, negligible fat and carbohydrates. Katsuobushi contributes concentrated flavor with minimal calories, useful for low-fat seasoning strategies.
Because bonito flakes add flavor without bulk, they help reduce reliance on salt and heavy fats. Adjust soy sauce to control sodium while retaining umami complexity.
Practical Uses: Seven Proven Applications
1. Traditional dashi base for soups and stews, where flakes supply the core savory foundation. Use as you would stock, but with lighter body and sharper aroma.
2. Garnish that moves: add flakes to hot dishes where they will visibly ripple, enhancing aroma and presentation. Their motion signals freshness and heat to diners.
3. Seasoning powder: pulse small amounts in a spice grinder to dust roasted vegetables or popcorn. This yields a dry umami boost that integrates without altering texture.
4. Infused oils and sauces: steep flakes briefly in warm oil or mix into vinaigrettes for a savory backbone. Strain to keep oils clear and aromatic.
5. Fusion finishing: fold into butter, mayonnaise, or compound spreads to elevate sandwiches, grilled fish, or roasted meats. A little goes a long way.
6. Fermentation partner: incorporate into pickling brines or fermented condiments to introduce savory complexity and support microbial flavors. Use cautiously to avoid overpowering delicate ferments.
7. Umami pairing for vegetables and grains: mix a pinch into mashed root vegetables or grain salads to bridge flavors and reduce need for added salt.
FAQ
What is the difference between katsuobushi and typical bonito flakes?
Katsuobushi refers to traditionally fermented and cured bonito, which develops deeper umami via microbial action. Commercial flakes may be smoked and dried without fermentation, resulting in milder, smokier notes.
How should I store bonito flakes to maintain peak flavor?
Store in an airtight container in the refrigerator away from light and moisture. For long-term storage, vacuum-seal and freeze; thaw briefly at room temperature before use to avoid condensation.
Can bonito flakes be used in non-Japanese cuisine?
Yes. Bonito flakes serve as a universal umami enhancer in pastas, sauces, roasted vegetables, and snacks. Their smoky, savory profile complements fatty and acidic elements across cuisines.
Are there vegetarian alternatives to katsuobushi for umami?
Yes. Kombu and dried shiitake mushrooms provide glutamate-rich umami without animal ingredients. Use a kombu-shiitake dashi to replicate depth while remaining vegetarian.
How do I make dashi stronger or lighter?
Adjust the ratio of bonito flakes to water and vary steep time. For lighter dashi, reduce flakes and steep briefly. For stronger stock, increase flakes slightly and monitor to avoid bitterness.
For additional techniques and recipes that incorporate katsuobushi, consult internal resources such as the Japanese Ingredients Guide and our step-by-step how to make dashi page.
See also: bonito flakes
]]>
- Salt controls microbial succession and crunch.
- Temperature determines fermentation speed and acidity.
- Spice and umami tune perceived depth and balance.
Fermentation chemistry: how microbes shape flavor
Lactic acid bacteria convert sugars to organic acids and other compounds that define kimchi’s tang and aroma. The initial community includes hetero- and homo-fermenters; their balance affects carbon dioxide, acidity, and ester formation. See fermentation science for the underlying pathways.
Primary genera include species of Lactobacillus and Leuconostoc, which dominate at different stages and temperatures. These bacteria lower pH and produce small peptides and aromatic compounds that increase umami perception. For a concise taxonomic reference, consult Lactobacillus.
Ingredient roles: salt, spice, and umami
Salt does three jobs: it draws water, creates a selective brine, and slows unwanted microbes. Typical salting targets are between 2% and 3% of vegetable mass by weight for Napa cabbage. Adjusting that range alters texture and fermentation rate.
Spice and umami both mask and reveal fermentation notes. Gochugaru provides capsaicin and pigments while fermented fish or soy-based umami sources increase savory depth. For a primer on the sensory concept behind savory taste, review umami.
Timing and temperature: controlling the process
Temperature controls microbial kinetics and therefore the timeline for desired acidity. At roughly 24°C (75°F), lactic fermentation develops rapidly in 3–7 days. Lower temperatures extend the window, producing slower acidification and more complex flavor compounds.
Monitor daily and taste for ideal tang rather than relying only on a fixed day count. For more foundational methods on brining and temperature control, see our Complete Fermentation Guide, which outlines safe salting and jar handling procedures.
Practical recipe and steps for consistent results
This practical method reduces variability and emphasizes reproducible outcomes. Use firm, fresh Napa cabbage and measure salt by weight to keep brine concentration consistent between batches.
Key timings: 2 hours for salting, 20 minutes draining, 5–7 days at 24°C for initial fermentation. Slower, cooler fermentation will need longer but often yields deeper complexity.
Ingredients (scaled for 1 quart)
- 1 medium Napa cabbage (~2 lb)
- 1/4 cup coarse sea salt
- 4 cups water
- 1 cup Korean radish, julienned
- 4 scallions, cut into 1-inch pieces
- 1/4 cup gochugaru (adjust to taste)
- 5 cloves garlic, minced; 1 tbsp fresh ginger, grated
- 2 tbsp fish sauce or soy sauce for vegetarian option
- 1 tsp sugar or grated pear to feed microbes
Step-by-step
- Salt the cabbage: Dissolve the salt in water and submerge the cabbage. Flip every 30 minutes for even brining; total time ~2 hours.
- Rinse and drain: Rinse thoroughly and drain for 15–20 minutes to remove excess salt and avoid softening during fermentation.
- Make spice paste: Mix gochugaru, garlic, ginger, fish sauce, and sugar into a smooth paste; incorporate radish and scallions.
- Coat leaves: Wearing gloves, coat each leaf with paste. Pack tightly in a clean, airtight jar to minimize trapped oxygen.
- Ferment: Leave at room temperature (~24°C) and taste daily after day 3. Refrigerate when flavor hits your preferred balance.
Tips for success
Ingredient quality matters: Use fresh, crisp produce and measure salt by weight for consistency. Fresh garlic and ginger produce brighter aroma and more predictable fermentation results.
Keep jars clean and avoid introducing utensils that have contacted other ferments. A clean environment reduces the chance of contaminants that slow or spoil fermentation.
Expert Insight
Balance is iterative. Small incremental changes to spice or salt yield predictable shifts in final flavor. Record each batch details—temperature, salt percent, and days fermented—to develop a repeatable formula.
Pro-Caution
Serving suggestions and storage
Freshly fermented kimchi pairs with grilled meats, rice bowls, and soups. Use it as a condiment or fold into stir-fries and fried rice for acidity and heat that brighten dishes.
Refrigerate once desired tartness appears. Cold storage slows microbes and preserves texture; properly stored kimchi can keep for months while continuing to darken in flavor. For ideas on integrating matured kimchi, visit our kimchi recipes page.
Nutritional snapshot
| Nutrient | Per Serving |
|---|---|
| Calories | 35 kcal |
| Protein | 1.5 g |
| Carbohydrates | 6 g |
| Fat | 0.5 g |
Key Takeaways
Crafting consistent kimchi depends on controlling salt, temperature, and ingredient balance. Precision in those variables produces predictable texture and flavor without guesswork.
Record batch parameters and taste often. Small, deliberate adjustments let you create a signature kimchi that highlights the fermented profile you prefer.
FAQ
How long should I ferment kimchi at room temperature?
Ferment at about 24°C for 3–7 days, tasting after day 3. If your room is cooler, extend the time to allow lactic bacteria to build acidity without producing off-flavors.
Can I make kimchi without fish sauce?
Yes. Replace fish sauce with soy sauce or a miso blend to supply amino acids and umami. Salt and controlled fermentation still drive the core tang and texture.
What is the ideal salt percentage?
Shoot for 2–3% salt by weight relative to the vegetables. That range favors lactic fermentation and preserves crunch while limiting unwanted microbes.
Why does kimchi sometimes get mushy?
Mushiness typically comes from over-salting, over-fermenting at warm temperatures, or under-draining after salting. Use measured salt, shorter warm-room fermentation, and thorough draining to preserve texture.
Are the probiotics in kimchi stable after refrigeration?
Refrigeration slows microbial activity but preserves many live cultures. While population dynamics shift over time, refrigerated kimchi continues to deliver probiotic and metabolic byproducts that contribute to its flavor and health benefits.
For technical references on microbial succession and fermentation mechanisms, consult authoritative resources such as kimchi, fermentation, and Lactobacillus. These articles summarize peer-reviewed findings and standard taxonomy used by food scientists.
See also: kimchi flavors
]]>
- Key takeaway: glutamic acid underpins umami taste and the neurotransmitter glutamate.
- Food fact: mushrooms, aged cheeses, and fermented sauces supply abundant natural glutamates.
- Brain fact: glutamate supports fast excitatory transmission critical for learning and memory.
- Practical: a mushroom risotto leverages natural glutamates for both flavor and nutrition.
Glutamic Acid: chemistry and biological identity
Glutamic acid is an amino acid with an acidic side chain that contributes to protein structure and metabolic reactions. It exists as L-glutamate in physiology and plays both structural and signaling roles.
As an amino acid, it fits into the broader class of proteinogenic building blocks and participates in nitrogen metabolism. For technical context see glutamic acid and amino acid resources.
Glutamate in the brain: neurotransmission and function
When the body converts glutamic acid to glutamate, neurons use it as the primary fast excitatory neurotransmitter. This molecule drives synaptic transmission across many brain regions that underlie attention and memory.
Neurons regulate extracellular glutamate tightly to avoid overexcitation and excitotoxic risk. Read the neuroscience background on neurotransmitter control and synaptic signaling for mechanisms and safety factors.
Glutamic acid in cooking: umami, sources, and flavor engineering
Culinary umami arises when glutamates interact with dedicated taste receptors on the tongue. Chefs and food scientists use glutamate-rich ingredients to deepen savory notes without adding sugar or fat.
Common culinary sources include mushrooms, aged cheese, fermented sauces, tomatoes, and seaweed. For a concise overview of the sensory concept consult umami and the industrial history around monosodium glutamate.
Savory Umami Mushroom Risotto (Recipe)
This risotto demonstrates how ingredient selection amplifies glutamate-driven umami while delivering balanced macronutrients. It combines mushrooms and aged cheese to produce layered savory flavor with a creamy mouthfeel.
The recipe suits cooks who time risotto carefully and monitor texture. Below you will find precise prep times, ingredients, and stepwise technique to reproduce consistent results.
Prep and Cook Time
Preparation: 15 minutes. Cooking: 35 minutes. Total about 50 minutes. These timings assume a medium heat and a steady stirring rhythm.
Plan reheating if serving later; add a splash of warm broth to restore creaminess. Mise en place speeds the process and reduces the risk of overcooking the rice.
Yield, Difficulty & Ingredients
Yield: Serves 4 hearty portions. Difficulty: Medium—requires attention to timing and patience when stirring. The technique rewards careful cooks with a restaurant-quality texture.
- 1 ½ cups Arborio rice, rinsed and drained
- 4 cups low-sodium vegetable broth, kept warm
- 1 cup shiitake mushrooms, sliced
- 1 cup cremini mushrooms, sliced
- ½ cup finely chopped onions
- 3 cloves garlic, minced
- 3 tbsp extra virgin olive oil
- ½ cup dry white wine (optional)
- ¼ cup grated Parmesan cheese
- 2 tbsp unsalted butter
- 1 tbsp soy sauce (adds natural glutamates)
- Salt and freshly ground black pepper, to taste
- 2 tsp fresh thyme, finely chopped
- Fresh parsley, chopped for garnish
Instructions
Heat olive oil in a large sauté pan over medium heat. Add onions and garlic and cook until fragrant and translucent, about 3 minutes, stirring frequently to prevent browning.
Add shiitake and cremini mushrooms and sauté until golden and tender, roughly 7 minutes. Stir often so mushrooms release their natural glutamate-rich juices and concentrate umami.
- Stir in Arborio rice and toast for 2 minutes to coat each grain and begin starch release.
- Pour in white wine and stir until mostly evaporated to build depth of flavor.
- Add warm vegetable broth one ladle at a time, stirring so the rice absorbs liquid gradually. Continue about 20–25 minutes until rice is al dente.
- When rice reaches texture, fold in soy sauce, butter, Parmesan, and thyme. Taste and adjust salt and pepper.
- Remove from heat and rest covered for 2 minutes before serving. Garnish with parsley and extra Parmesan if desired.
Tips for success
Use warm broth to keep the pot temperature steady and to coax consistent starch release for a creamy texture. Stir gently but often to avoid crushing grains.
Choose high-umami mushrooms like shiitake or rehydrate dried porcini for an intensified savory profile. Add soy sauce late to preserve its aromatic complexity without over-salting.
Expert Insight
For a plant-based plate, replace butter and Parmesan with nutritional yeast and a neutral oil to echo the umami and richness. Reheat leftovers slowly with broth to preserve the risotto’s integrity.
Pro-Caution
Serving suggestions
Serve the risotto in shallow bowls to show its creamy structure and to allow steam to lift aroma toward the diner. A light green salad with lemon vinaigrette balances the dish’s richness.
Pair with a dry white such as Pinot Grigio or a crisp Vermentino to clean the palate between bites. Explore similar profiles at umami-rich recipes and try variations on mushrooms at mushroom recipes.
Nutrition & practical notes
This risotto provides a balanced meal with complex carbohydrates and moderate protein. A typical serving yields about 370 kcal with 11 g protein and 9 g fat, making it suitable as a main for four.
Adjust portion size and add a side of lean protein if desired for higher protein targets. Fermented or aged ingredients supply concentrated glutamates; use them judiciously for flavor impact without excess sodium.
| Nutrient | Amount Per Serving |
|---|---|
| Calories | 370 kcal |
| Protein | 11 g |
| Carbohydrates | 55 g |
| Fat | 9 g |
Frequently asked questions (FAQ)
What is the difference between glutamic acid and glutamate?
Glutamic acid refers to the protonated molecular form; glutamate denotes the deprotonated anion that predominates at physiological pH. The body primarily handles the molecule as glutamate for signaling and metabolic use.
Is monosodium glutamate the same as naturally occurring glutamate?
Monosodium glutamate is the sodium salt of glutamic acid and serves as a concentrated seasoning. Natural glutamates appear in foods like mushrooms, tomatoes, and cheeses and interact with taste receptors in the same way.
Can glutamate affect brain health positively?
Glutamate is essential for normal synaptic transmission and cognitive processes such as learning and memory. The brain also uses regulatory systems to prevent excessive extracellular glutamate and maintain neural health.
Which foods are highest in natural glutamates?
Mushrooms, aged cheeses, cured meats, fermented sauces, and seaweed contain elevated levels of free glutamates. Combining these ingredients strategically elevates umami without relying on added salt or fat.
Should I worry about MSG sensitivity?
Most people tolerate MSG without issues. A small subset report transient symptoms after large doses, and those individuals should moderate intake of concentrated glutamate sources. For clinical concerns consult a qualified healthcare professional.
Key takeaways and practical next steps
Glutamic acid connects flavor science and neuroscience through its role as a taste driver and a neurotransmitter precursor. You can apply this knowledge by selecting ingredient combinations that intensify umami while controlling sodium and texture.
Try the risotto as a practical experiment: choose high-umami mushrooms and a small amount of aged cheese to experience how glutamates enhance both flavor and satiety. For further reading consult foundational references on glutamic acid and umami.
See also: Glutamic Acid
]]>
- Fond is the caramelized base that powers pan sauces and stocks.
- The Maillard reaction produces the brown compounds you taste in fond.
- Deglazing captures fond and turns residue into a silky sauce base.
Overview: What Fond Is and Why It Matters
Fond comes from the French word for “base” or “foundation.” It is not dirt or waste; it is highly concentrated flavor formed by caramelized sugars and proteins on hot metal or enamel surfaces.
When you scrape and dissolve fond into a liquid, you convert those brown compounds into savory, balanced sauces and stock bases. This is an essential skill for consistent, layered flavor.
How Fond Forms
Fond forms when foods cook at medium-high to high heat and develop a brown crust. That crust contains hundreds of volatile compounds, amino acid derivatives, and caramelized sugars that deliver umami and aromatic complexity.
The dominant chemistry behind fond is the Maillard reaction, a set of reactions between amino acids and reducing sugars that yields color and flavor. Understanding this helps you control temperature and timing to create good fond rather than burned residue.
Chemical Basis and Flavor Components
The Maillard reaction produces melanoidins, pyrazines, and other aroma compounds that contribute roasted, nutty, and meaty notes. These compounds increase rapidly with heat and drop off if burning occurs.
Fond also concentrates umami — savory taste molecules such as glutamates — which is why fond-rich sauces taste so satisfying.
Making and Using Fond: Practical Technique
Begin with a dry, heavy-bottomed pan. Heat oil or clarified butter until it shimmers, then add protein or vegetables without overcrowding. Let surfaces brown undisturbed to build a concentrated crust.
After browning, remove the food and deglaze the pan with a small amount of liquid. Scrape the pan to dissolve the fond into the liquid, then reduce or incorporate it into a sauce or stock.
Stepwise Method for a Classic Pan Sauce
Sear protein until a dark brown crust forms, then transfer the protein to rest. Add aromatics like shallot or garlic and sweat briefly to lift additional flavor before deglazing.
Deglaze with wine, vinegar, or fortified broth; scrape until the fond dissolves. Add stock or cream, reduce to taste, and finish with butter or herbs for sheen and balance.
Ingredients and Equipment That Improve Fond
Use a heavy skillet, stainless-steel or cast-iron, which both encourage fond formation by holding even heat. Nonstick pans prevent fond from sticking and are less useful when the goal is concentrated fond.
Choose fats that tolerate your searing temperature: neutral oil for high-heat sears, clarified butter for medium-high heat, or a combination for flavor and smoke-point control. Fresh vegetables, mushrooms, and bones add layers when building stocks.
Extending Fond into Stocks and Sauces
To make a more substantial liquid, start by deglazing with wine or a small amount of stock, then add larger volumes of water or stock to extract additional flavor. Simmer gently to reduce and concentrate.
For foundational use in soups and sauces, combine fond with a proper simmered liquid such as a brown or vegetable stock. Strain and reduce to the desired intensity, then season carefully.
Tips for Success
Always avoid overcrowding the pan; too much food drops the surface temperature and causes steaming instead of browning. Work in batches for even, reliable fond development.
Manage heat: aim for a steady medium-high, not full blast. If pieces begin to blacken and smoke heavily, lower the heat and remove burning fragments to prevent bitterness.
Expert Insight
Finish sauces by mounting with cold butter or a splash of cream to give gloss and tame acidity. Taste at each stage: fond concentrates quickly, so adjust seasoning after reduction.
Pro-Caution
Vegetarian and Low-Fat Alternatives
Vegetarian fond relies on caramelized mushrooms, roasted root vegetables, and concentrated tomato paste. These ingredients produce Maillard-style browning and rich savory flavor without animal protein.
Roast vegetables at high heat to create deep browning, then deglaze and combine with reduced vegetable stock. Mushrooms, particularly cremini and shiitake, contribute concentrated glutamates similar to meat-based fond.
Serving Suggestions and Pairings
Use fond-based pan sauces over roasted meats, seared fish, or pan-sautéed vegetables to add immediate depth. A classic pairing method is to finish with chopped fresh herbs such as parsley or chives to add brightness.
For soups and risottos, replace part of the liquid with fond-infused stock to lift an otherwise flat profile. You can also use fond to deepen a jus, gravy, or compound butter.
Related Reading and Internal Resources
For techniques that expand on using bases and building layers of flavor, read our guide on Building Flavors with Classic Bases. That piece explains how fond integrates with other foundational elements.
If you want focused recipes for pan sauces, see our step-by-step collection at Pan Sauces: Basics and Variations. These pages include recipe templates you can apply to any seared protein.
Nutrition and Practical Storage
Fond itself contributes negligible calories when used as a flavoring. Nutritional impact depends on the liquids and fats used to transform fond into a sauce.
Store strained fond-infused stock in airtight containers for up to three days in the refrigerator, or freeze in portions for up to one month. Label containers with date and base ingredients for safe reuse.
FAQ
What is fond in plain terms?
Fond is the browned residue left in a pan after searing. You dissolve it into liquid to create a flavorful base for sauces and gravies.
How is fond different from stock or broth?
Fond is concentrated, pan-bound flavor created by browning. Stock is a simmered liquid produced by extracting collagen and flavor from bones or vegetables over time. Fond usually precedes and enhances stock-based sauces.
Can I make fond with vegetables?
Yes. Use mushrooms, onions, and root vegetables and roast or sear them until deeply caramelized. Deglaze as with meat-based fond to capture the flavor.
What liquids work best for deglazing?
Wine, vermouth, and vinegars add acidity and aromatic lift; stocks add body. Choose the deglazing liquid to complement the protein and final sauce profile.
How do I avoid bitter or burnt fond?
Control heat, avoid charring, and remove any blackened bits before deglazing. If a pan tastes bitter after scraping, discard the fond and begin again to avoid off-flavors.
For technical background on browning and practical sauce construction, consult authoritative culinary references and resources on Maillard reaction and sauce science.
Final note: Treat fond as a deliberate tool rather than an accidental byproduct. With consistent heat management, proper deglazing, and balanced finishing, fond will elevate everyday cooking into reliably deeper, more complex flavors.
See also: fond
]]>