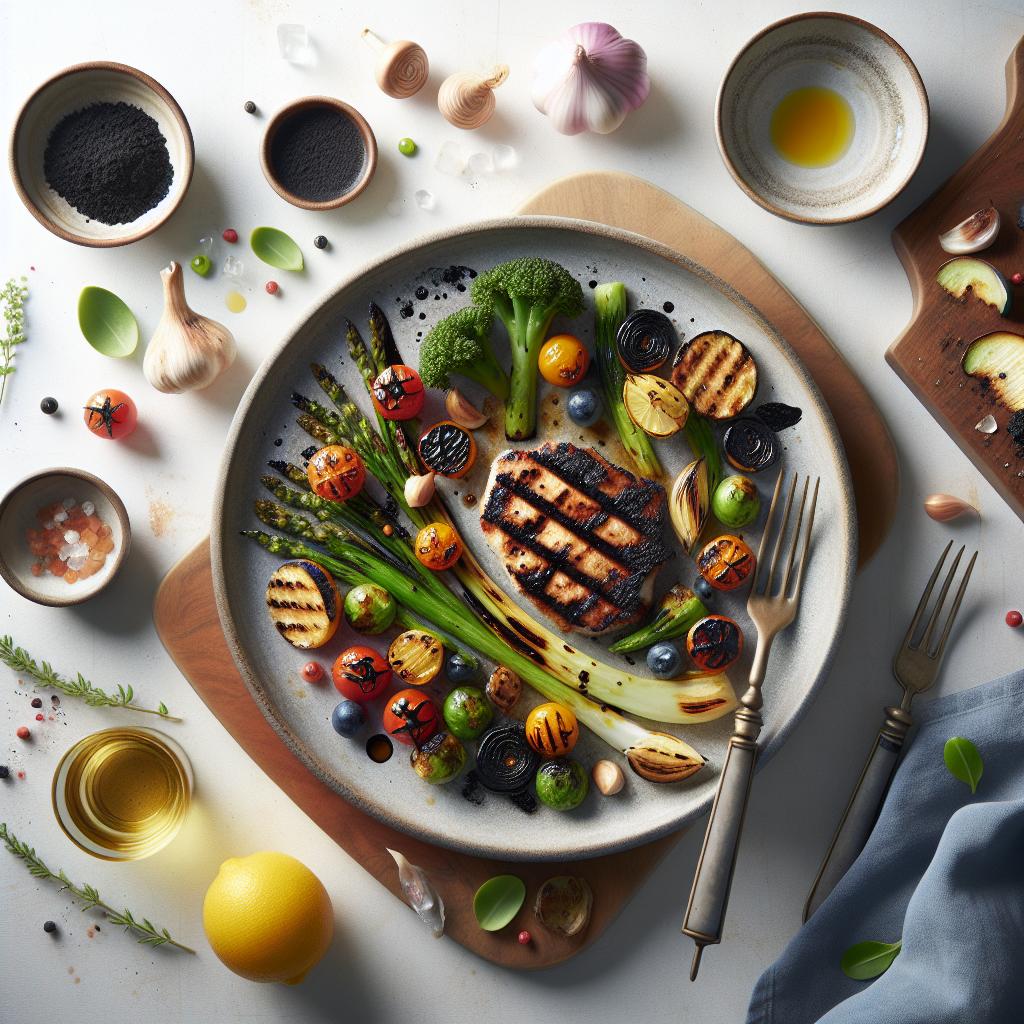
Flaming Flavor ignites culinary creativity by transforming ordinary dishes into extraordinary experiences through the artful use of a culinary torch. Harnessing the controlled flame to master searing perfect crusts elevates the taste and texture of foods, unveiling complex flavors that only fire can coax.
Prep and Cook Time
Preparation: 10 minutes
Cooking: 15 minutes
Total: 25 minutes
Yield
Serves 4 people
Difficulty Level
Medium – Perfect for adventurous home cooks eager to refine their torch skills
Ingredients
- 4 thick-cut ribeye steaks (1.5-inch thick, room temperature)
- 2 tablespoons olive oil
- 2 teaspoons kosher salt
- 1 teaspoon freshly cracked black pepper
- 4 sprigs fresh rosemary
- 4 cloves garlic, smashed
- 2 tablespoons unsalted butter
Instructions
- Season steaks generously with kosher salt and black pepper on both sides. Pat dry with paper towels to ensure your sear will be crisp and flavorful.
- Heat a heavy skillet (cast iron preferred) over high heat until smoking hot. Add olive oil and quickly place steaks in the pan. Sear each side for 2 minutes to develop an initial crust.
- Remove steaks from the pan and rest briefly on a cutting board. This pause helps juices redistribute before the finishing touch.
- Using your culinary torch, hold the flame about 3 inches from the steak surface, moving steadily to evenly sear. Focus on building a deep mahogany crust-avoid burning by controlling flame distance and movement.
- Flip steaks and repeat torch searing on the other side until your desired crust is achieved, approximately 2 to 3 minutes total.
- Return steaks to the skillet with butter, rosemary, and garlic. Spoon melted butter over the steaks to infuse flavor and moisture as they rest for 5 minutes.
- Slice against the grain and serve immediately with your preferred sides.
Tips for Success
- Ensure steaks are at room temperature before searing-this promotes even cooking and better crust formation.
- Use a dry surface for your meat; moisture creates steam and inhibits crust development.
- Control your flame intensity; a torch set too high can burn rather than sear, creating bitterness.
- If you don’t have a cast iron skillet, a stainless steel pan is a good second choice.
- Practice proper torch safety by keeping a safe distance and never pointing the flame at flammable objects.
- Make-ahead tip: Season and torch sear steaks, then refrigerate. Reheat with a quick torch sear just before serving for that perfect fresh crust.
Serving Suggestions
Present your perfectly seared steaks on a warm platter garnished with fresh rosemary sprigs and a light drizzle of garlic-infused butter. Pair with crispy roasted potatoes or a refreshing arugula salad tossed in lemon vinaigrette to balance the smoky richness. A bold red wine like Cabernet Sauvignon complements the flavor notes beautifully.
| Nutrient | Per Serving |
|---|---|
| Calories | 520 kcal |
| Protein | 45 g |
| Carbohydrates | 1 g |
| Fat | 38 g |
Recommended Culinary Torches for Mastering the Art
Investing in a quality culinary torch makes all the difference when exploring the Flaming Flavor technique. The Bernzomatic Gourmet Culinary Torch offers adjustable flame control and ergonomic design, ideal for detailed searing. For home enthusiasts starting their torch journey, the Iwatani PRO2 Butane Torch provides consistent powerful flames with user-friendly ignition. Always purchase from reputable sources to guarantee fuel quality and safety features.
Essential Safety and Maintenance
- Never leave your torch unattended while ignited.
- Keep a fire extinguisher or baking soda nearby when torching indoors.
- Store butane fuel canisters in a cool, dry place away from heat sources.
- Regularly clean the torch nozzle to prevent clogging and maintain steady flames.
- Follow manufacturer guidelines for refilling and usage to ensure longevity.
Discover more techniques to amplify your kitchen creativity in our Guide to Kitchen Flame Techniques, where you’ll find recipes and safety tips curated for culinary torch enthusiasts.

Q&A
Q&A: Flaming Flavor – Unlocking the Magic of a Culinary Torch
Q1: What exactly is a culinary torch, and why has it become a kitchen essential?
A1: A culinary torch is a handheld, flame-emitting tool traditionally used for caramelizing sugar on crème brûlée. Beyond its classic role, it has erupted onto the culinary scene as a versatile gadget that adds smoky, charred nuances and crispy textures, transforming ordinary dishes into extraordinary experiences. Essentially, it’s the kitchen’s little flame magician, sealing flavor and creating spectacle.
Q2: How does a culinary torch unlock new flavors in cooking?
A2: The torch introduces direct, intense heat in quick bursts, caramelizing sugars, melting cheeses, and charring edges without overcooking the underlying food. This method releases complex Maillard reactions and smoky aromas, enhancing depth and creating a layered flavor profile that’s both bold and nuanced. It’s like painting your plate with fire for a gourmet finish.
Q3: What dishes can benefit from a culinary torch besides crème brûlée?
A3: The possibilities are endless! Think searing sushi toppings like aburi-style salmon, crisping roasted vegetables, melting cheese on French onion soup, charring the skin of peppers or tomatoes for easy peeling, finishing meringue toppings, and even bringing a subtle toast to cocktails or marshmallows. The torch invites creativity, turning everyday ingredients into culinary fireworks.
Q4: Are culinary torches safe and easy to use?
A4: Absolutely, with a little respect, a culinary torch is a safe, user-friendly kitchen companion. Most have adjustable flame settings, safety locks, and ergonomic designs. The key is always to follow manufacturer instructions, keep a fire extinguisher handy, and never use the torch near flammable materials or directly at your hand. Once mastered, it’s like wielding a fiery wand with precision and delight.
Q5: How can beginners start experimenting with a culinary torch?
A5: Begin small-try caramelizing sugar on mini crème brûlées or crisping breadcrumbs atop mac and cheese. Observe how the flame changes the texture and aroma, then graduate to more adventurous dishes like torching fruit for desserts or adding charred highlights to meats and seafood. With each flicker, you’ll unlock new layers of flavor and confidence.
Q6: What tips can elevate your torching technique to chef-level?
A6: Keep the flame moving steadily to avoid burning one spot, hold the torch at a 45-degree angle for even caramelization, and adjust flame intensity depending on your target-higher for quick sear, lower for gentle toasting. Patience is key: let the flame do the work without rushing, and always taste as you go to perfect the magic balance between char, crisp, and caramel.
Q7: Where can one purchase a quality culinary torch, and what features should be prioritized?
A7: Culinary torches are widely available online and in kitchenware stores. Look for butane-fueled models with refillable tanks, adjustable flame control, safety locks, and an ergonomic grip. Brand reputation and user reviews can guide your choice. Investing in quality ensures reliability, safety, and the joyous flame-play your creative cooking demands.
Unlocking the magic of a culinary torch means unleashing a fiery artistry that elevates flavor, texture, and presentation. With just a flicker, you invite warmth, crunch, and caramelized bliss to your dishes-turning everyday cooking into a blazing passion.
Future Outlook
As the final flicker of the culinary torch’s flame dances away, it leaves behind more than just caramelized sugar or perfectly seared edges – it ignites a spark of creativity in every kitchen it graces. Unlocking the magic of this fiery tool transforms ordinary dishes into extraordinary experiences, where flavor and flair collide in a burst of warmth and wonder. Whether you’re a seasoned chef or an adventurous home cook, embracing the culinary torch invites you to explore a world where food is not only tasted but truly illuminated. So, light up your next meal with a touch of flame, and watch as ordinary ingredients blaze into unforgettable delights.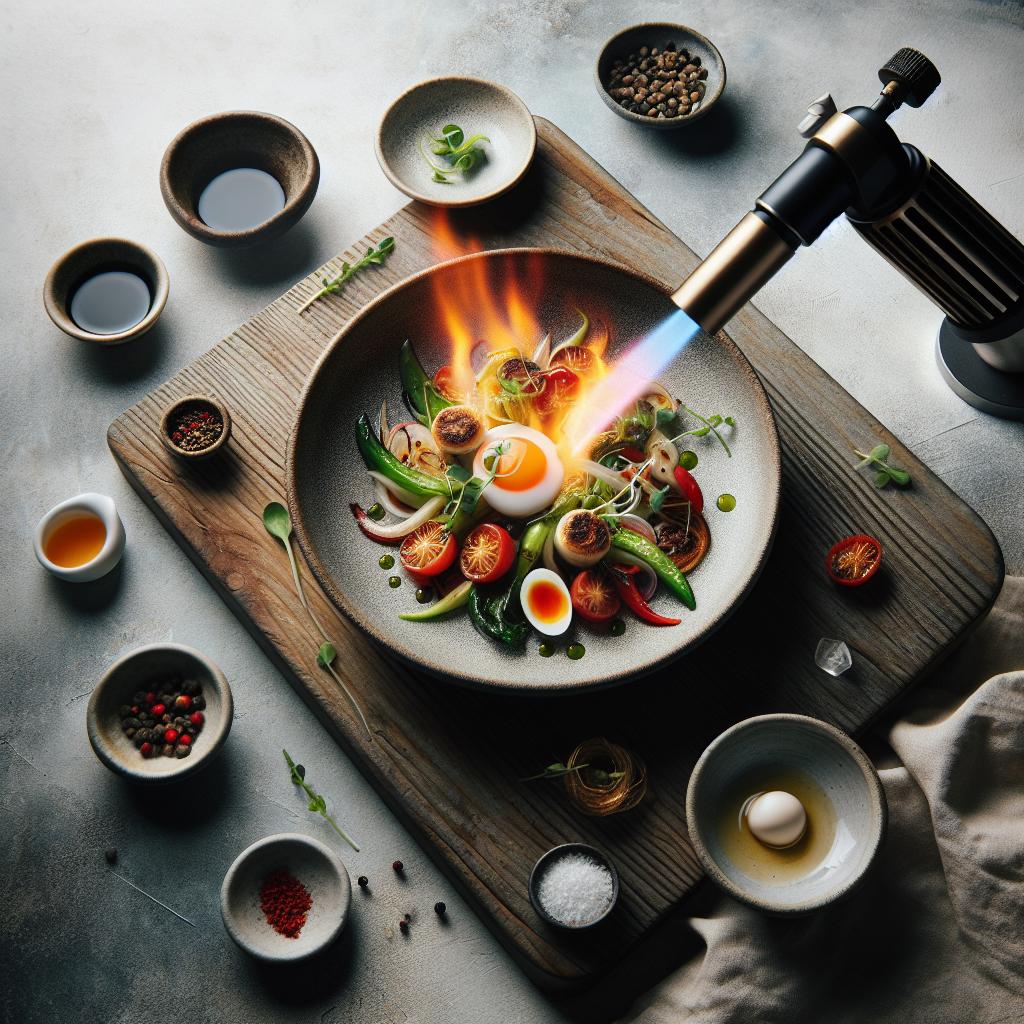
Unlocking the Magic of a Food Mill begins with appreciating its ingeniously simple yet multifunctional design, allowing you to transform fresh produce into silky smooth purees and velvety sauces effortlessly. As a culinary enthusiast, I’ve found that the food mill elevates even the humblest ingredients, turning them into sumptuous textures that no blender or sieve can quite mimic. Whether crafting rustic tomato sauce or delicate apple butter, this kitchen tool becomes an indispensable ally for the creative cook.
Prep and Cook Time
- Preparation: 10 minutes
- Cooking: 25 minutes
- Total: 35 minutes
Yield
Serves 4
Difficulty Level
Easy to Medium
Ingredients
- 3 cups ripe tomatoes, quartered
- 2 cloves garlic, minced
- 1 small onion, finely chopped
- 2 tbsp extra virgin olive oil
- 1 tsp sea salt
- 1 tsp fresh basil leaves, chopped
- 1/4 tsp freshly ground black pepper
- Optional: pinch of red chili flakes for heat
Instructions
- Sauté Aromatics: Heat the extra virgin olive oil in a medium skillet over medium heat. Add the minced garlic and chopped onion, sauté until fragrant and translucent, about 5 minutes, stirring regularly.
- Cook Tomatoes: Add the quartered tomatoes to the skillet. Cook for 15 minutes, stirring occasionally, until the tomatoes are soft and release their juices.
- Prepare the Food Mill: Set up your food mill with the medium disc in place. This size provides the perfect balance for a smooth sauce without losing texture.
- Mill the Tomato Mixture: Transfer the tomato mixture to the food mill. Using the hand crank, gently process the tomatoes, allowing the mill to separate skins and seeds, creating a silky puree.
- Season and Finish: Return the milled puree to the skillet. Stir in sea salt, chopped basil, black pepper, and red chili flakes if using. Simmer for another 5 minutes to meld flavors.
- Serve Warm: Pour the sauce over freshly cooked pasta or use as a base for your favorite dishes.
Tips for Success
- Selecting Your Food Mill: Choose a model with interchangeable discs to allow versatility-fine, medium, and coarse-to match your recipe’s texture needs.
- Ingredient Prep: Always cook fibrous or tougher produce until tender before milling; this ensures smoother purees.
- Cleaning Ease: Clean right after use. Soak the parts in warm soapy water to loosen stuck bits for effortless washing.
- Texture Control: Adjust processing speed. Slow, even turns of the crank prevent clogging and yield a finer puree.
- Creative Uses: Beyond sauces, try pureeing roasted vegetables, potatoes for gnocchi, or even fresh fruit for sorbets.
Serving Suggestions
Drizzle your fresh tomato puree over homemade pasta, garnish with a sprinkle of parmesan cheese and a few fresh basil leaves for a vibrant, elegant presentation. Alternatively, ladle it over grilled chicken or baked fish, finishing with a touch of extra virgin olive oil and cracked black pepper. For a rustic twist, serve alongside crusty warm bread for dipping-each bite bursting with garden-fresh flavor.

| Nutrient | Amount per Serving |
|---|---|
| Calories | 90 kcal |
| Protein | 2 g |
| Carbohydrates | 12 g |
| Fat | 4.5 g |
Curious to explore more culinary magic with versatile kitchen tools? Check out our Best Kitchen Toys for Home Chefs post for deeper insights. For further inspiration on perfect sauce textures, visit Serious Eats’ guide to tomato sauce.
Q&A
Q&A: Unlocking the Magic of a Food Mill – Your Kitchen’s Secret Tool
Q1: What exactly is a food mill, and why is it considered magical in the kitchen?
A: A food mill is a classic, hand-cranked kitchen gadget designed to puree and strain foods effortlessly. Its magic lies in its simplicity and versatility-turning chunky fruits, vegetables, and cooked ingredients into smooth sauces, soups, and baby food, all while effortlessly separating seeds, skins, and fibers. It’s like having a culinary wizard that transforms your ingredients with just a spin!
Q2: How does a food mill differ from a blender or food processor?
A: While blenders and food processors rely on sharp blades and electricity to chop and puree, a food mill uses a rotating blade pressed against a perforated disk to manually mash and sieve food. This means it gently preserves texture, removes unwanted bits (like tomato skins or seeds), and avoids over-processing, giving you a silky, refined texture without the fuss or noise of machines.
Q3: What types of foods can I prepare with a food mill?
A: The possibilities are vast! Use it to make luscious applesauce, silky tomato sauce, velvety mashed potatoes, smooth pumpkin puree, or even fresh baby food. It’s ideal for any cooked food that needs mashing and straining-think soups, jams, and pie fillings, where smoothness and texture matter.
Q4: Is the food mill difficult to use or clean?
A: Not at all! Using a food mill is as simple as placing it over a bowl, adding your cooked ingredients, and cranking the handle. The pureed food passes through the holes, leaving skins and seeds behind. Most food mills come apart easily for thorough cleaning, and many parts are dishwasher-safe-making the magic quick and tidy.
Q5: Can a food mill help improve my cooking results?
A: Absolutely. By removing seeds and skins naturally, your sauces and purees become silkier and more flavorful, without bitterness or texture issues. Plus, the gentle mashing keeps delicate flavors intact, making your homemade favorites taste like they came from a high-end kitchen.
Q6: Are there different sizes or types of food mills? How do I choose one?
A: Yes! Food mills come in various sizes-small (for baby food), medium (perfect for everyday use), and large (for big batches). They also feature interchangeable disks with different hole sizes, allowing you to control the texture. Choose based on your cooking habits: a medium size with multiple disks is a great all-rounder for a busy kitchen.
Q7: Can a food mill replace other kitchen tools, or is it best used alongside them?
A: A food mill complements rather than replaces other tools. It excels at creating smooth purees and removing fibers, while blenders and food processors are better for chopping or mixing raw ingredients. Incorporate it into your cooking toolkit to add finesse and texture control to your culinary creations.
Unlocking the magic of a food mill means embracing a timeless tool that elevates your cooking with minimal effort. Spin your way to smoother sauces, richer purees, and kitchen creations that taste like a warm hug-no wizardry required.
Future Outlook
As you welcome the humble food mill into your kitchen arsenal, you unlock a world where texture, flavor, and tradition converge effortlessly. This unassuming tool transforms humble ingredients into silky sauces, velvety purees, and delightful jams-all while preserving the essence of natural goodness. Whether you’re a seasoned chef or an enthusiastic home cook, the food mill is your secret to culinary magic, bridging the gap between rustic charm and refined technique. So next time you prepare a meal, let your food mill work its subtle wonders and watch as ordinary dishes become extraordinary creations with just a turn of the handle.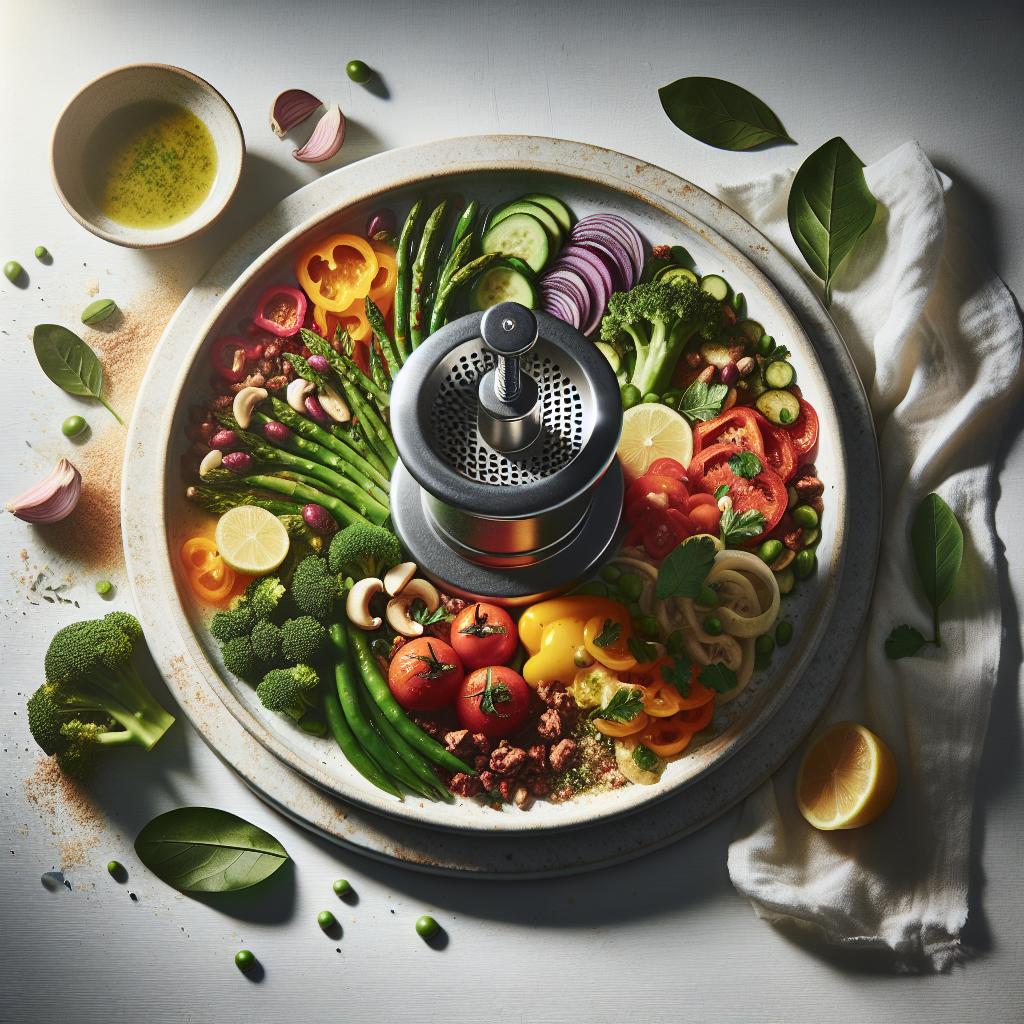
Unlocking flavor with cedar planks brings a deeply aromatic dimension to grilled salmon that simply cannot be replicated by any other cooking method. Beyond imparting the unmistakable essence of wood smoke, cedar plank grilling wraps the fish in gentle heat, keeping it moist while infusing it with subtle herbal and resinous notes unique to the cedar. This technique, rooted in Indigenous North American cooking traditions, has become a beloved choice among culinary enthusiasts seeking to elevate their salmon to an extraordinary sensory experience.
Prep and Cook Time
Preparation: 30 minutes (including plank soaking) | Cook Time: 20-25 minutes | Total: 50-55 minutes
Yield
Serves 4 generously
Difficulty Level
Medium – Requires preparation and attentive grilling
Ingredients
- 1 cedar plank (approximately 12″ x 7″, untreated and food-grade)
- 4 salmon fillets (6 oz each, skin on)
- 2 tablespoons olive oil
- 1 lemon (zested and juiced)
- 2 cloves garlic, minced
- 1 tablespoon fresh dill, chopped
- 1 teaspoon sea salt
- ½ teaspoon freshly ground black pepper
- Optional: 1 teaspoon honey for a touch of sweetness
Instructions
- Choosing the Perfect Cedar Plank: Select a cedar plank labeled for food use-untreated and free of chemicals. Look for one about 12 inches by 7 inches to comfortably fit each salmon fillet. Thicker planks (about ½ inch) offer better heat retention and more aromatic smoke.
- Preparing and Soaking the Cedar Plank: Submerge the cedar plank in cold water for at least 30 minutes to prevent burning and promote a gentle steaming effect during grilling. For extra flavor, soak in a mix of water with a splash of white wine or lemon juice.
- Preheat the Grill: Lightly oil the grill grates and preheat to medium heat-approximately 350°F (175°C). Proper temperature ensures even cooking without flare-ups.
- Prepare the Salmon: Pat the salmon fillets dry with paper towels. In a bowl, whisk olive oil, lemon juice, garlic, dill, salt, pepper, lemon zest, and honey if using. Brush this mixture generously over the salmon.
- Ready the Cedar Plank on the Grill: Shake off excess water from the soaked plank and place it on the preheated grill. Wait about 2-3 minutes until the plank begins to emit fragrant cedar smoke.
- Place Salmon on the Plank: Arrange the salmon fillets skin-side down on the cedar plank. Close the grill lid and cook for 20 to 25 minutes, depending on thickness. The fish should flake easily with a fork but retain moistness.
- Finishing Touches: Remove the plank from the grill carefully (it will be very hot). Let salmon rest for 5 minutes on the plank to allow the juices to redistribute.
Tips for Success
- Plank Reuse: Cedar planks can be reused for a limited number of times (usually 2-3), but flavor intensity diminishes after each use.
- Wood Alternatives: If cedar is unavailable, try alder or maple planks for a different smoky profile.
- Checking Doneness: Use a meat thermometer-salmon is perfectly cooked at 125°F (52°C) for medium-rare, 145°F (63°C) for well done.
- Make-Ahead: Marinate salmon in the lemon-garlic mixture up to 2 hours ahead for deeper flavor penetration.
- Water Soak Variations: Adding herbs or citrus slices to soaking water enhances complexity in smoke aromas.
Serving Suggestions
Present your cedar plank grilled salmon directly on the wooden plank for a rustic, aromatic display. Garnish with sprigs of fresh dill, thin lemon wedges, and a drizzle of high-quality extra virgin olive oil. Pair it with a crisp cucumber dill salad or grilled asparagus to complement the smoky and citrusy notes. For a festive meal, serve alongside wild rice or roasted baby potatoes tossed in rosemary and thyme.

| Nutrient | Per Serving |
|---|---|
| Calories | 350 kcal |
| Protein | 34 g |
| Carbohydrates | 2 g |
| Fat | 20 g |
For further inspiration on grilling techniques and flavor layering, explore our Ultimate Grilling Guide. To deepen your understanding of cedar’s culinary role, visit the Smithsonian’s article on Indigenous Plank Cooking Traditions.
Q&A
Q: What is a cedar plank, and why is it used for grilling salmon?
A: A cedar plank is a thin, flat piece of aromatic cedar wood specifically designed for cooking. When soaked and placed on the grill, it imparts a subtle smoky sweetness to the salmon, infusing the fish with rich, natural flavors that elevate the dining experience beyond ordinary grilling.
Q: How does using a cedar plank change the taste of grilled salmon?
A: The cedar’s natural oils release a fragrant, earthy aroma as the plank heats up, which gently seeps into the salmon’s flesh. This process creates layers of flavor-smoky, slightly sweet, and woodsy-that harmonize perfectly with the fish’s delicate texture, turning each bite into a gourmet delight.
Q: Can I use any wood plank for grilling salmon, or is cedar special?
A: While many hardwoods can be used for grilling, cedar stands out because of its unique aromatic profile and the mild char it lends to fish. Unlike heavier woods like mesquite or hickory, which can overwhelm delicate flavors, cedar provides a balance that enhances rather than masks the salmon’s natural taste.
Q: What is the proper way to prepare a cedar plank before grilling?
A: Soak the cedar plank in water for at least an hour (sometimes up to three) before grilling. This prevents it from catching fire and allows the steam released during cooking to carry those coveted cedar-infused flavors into the salmon. Some chefs even soak their planks in wine, juice, or tea for a twist on the traditional scent.
Q: Does grilling salmon on a cedar plank affect its texture?
A: Absolutely! The plank acts as a gentle buffer between the fish and the grill’s high heat, promoting even cooking. This method helps the salmon retain moisture, resulting in a tender, flaky texture with a subtle crust that’s simply irresistible.
Q: Are cedar planks reusable, or are they a one-time use item?
A: Most cedar planks are intended for single use to ensure optimal flavor and safety. However, if taken care of properly-scrubbed clean and dried-they can sometimes be reused, though the aroma intensity diminishes. For the freshest flavor experience, new planks are recommended.
Q: Can cedar plank grilling be used for other types of food besides salmon?
A: Definitely! Cedar planks pair beautifully with other delicate proteins like trout, steelhead, or even chicken and vegetables. The wood’s signature flavor subtly enhances many dishes, making it a versatile tool for adventurous grillers aiming to unlock new layers of taste.
To Conclude
As the smoke curls gently around the tender salmon, infused with the rich, aromatic essence of cedar, it’s clear that this simple plank holds the key to a truly elevated grilling experience. Unlocking flavor with cedar planks isn’t just a cooking technique-it’s an invitation to connect with nature’s subtle artistry. Whether you’re a seasoned grill master or an adventurous home cook, embracing cedar planks transforms ordinary salmon into a memorable feast, where every bite tells a story of smoky sweetness and delicate warmth. So next time you fire up the grill, let the cedar plank guide your journey to flavor elevated beyond the flame.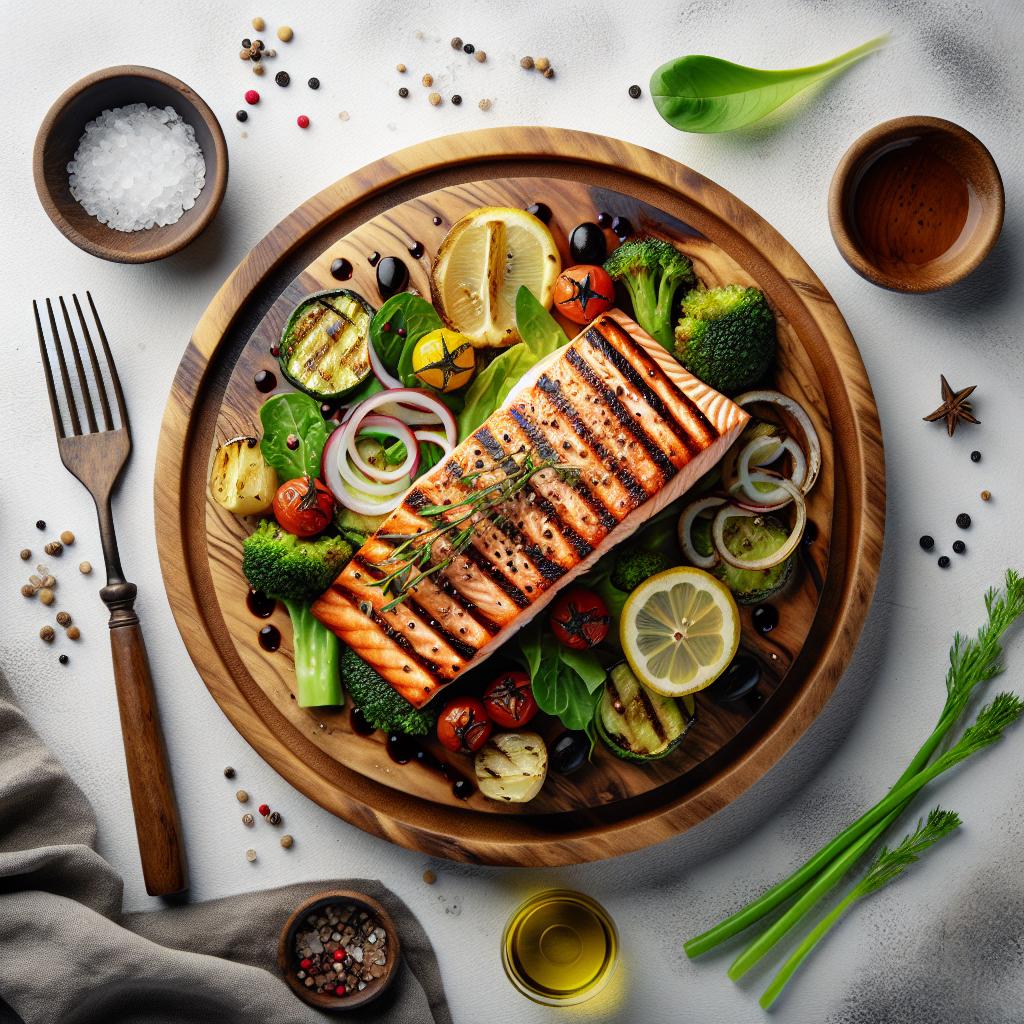
Unlocking Nature’s Scents: What Are Terpenes in Herbs?
Unlocking nature’s scents: what are terpenes in herbs? These aromatic powerhouses form the very essence of the fragrant gardens we cherish, infusing both flavor and wellness into our cooking and lifestyles. I first encountered the magic of terpenes while rustling through a vibrant Mediterranean herb patch, marveling at how subtle scent shifts transformed every dish and mood. Their impact stretches beyond mere fragrance-terpenes deeply influence how herbs taste and subtly support our wellbeing with their natural properties.
Prep and Cook Time
Prep Time: 10 minutes
Cook Time: 5 minutes (for herbal infusion or cooking applications)
Yield
Serves 4 as a fragrant herbal garnish or infusion base.
Difficulty Level
Easy – Perfect for herb lovers and culinary explorers alike.
Ingredients
- 1 cup fresh rosemary leaves, roughly chopped
- 1/2 cup fresh basil leaves, torn
- 1/2 cup fresh thyme sprigs
- 2 garlic cloves, crushed
- 1/4 cup extra virgin olive oil (for infusion)
- 1 tsp lemon zest, finely grated
- Salt and freshly ground black pepper, to taste
Instructions
- Prepare your herbs: Rinse fresh rosemary, basil, and thyme gently and pat dry. Roughly chop rosemary and tear basil to activate their terpenes, which release more aromatic oils.
- Create a terpene-rich infusion: In a small saucepan, warm olive oil over low heat. Add the herbs and crushed garlic, stirring gently. Keep the heat very low to preserve delicate terpene compounds; sauté until fragrant, about 3-5 minutes.
- Add zest and season: Remove from heat, stir in freshly grated lemon zest, salt, and pepper. Allow the mixture to cool while the terpenes settle into the oil.
- Strain and store: Strain the oil through a fine sieve, reserving the liquid. This vibrant herbal oil can elevate roasted vegetables, grilled meats, or fresh salads.
- Experience terpene flavor: Drizzle the infused oil over your favorite dishes just before serving, inhale its citrus-herbal scent, and savor how terpenes deepen the sensory complexity.
Chef’s Notes: Tips for Success
- For maximum fragrant impact, use herbs freshly picked from your garden or local market. Herb terpenes degrade rapidly after harvesting.
- To experiment, try substituting rosemary with other terpene-rich herbs like oregano or sage to explore unique flavor profiles.
- Keep the oil temperature low – overheating destroys fragile terpenes that give herbs their characteristic aroma.
- Make the infused oil ahead and refrigerate in a sealed jar for up to 5 days. Bring to room temperature before use to revive aromas.
- Use a clear glass bottle for storage and label with the date and ingredients to keep track of freshness and terpene potency.
Serving Suggestions
Enhance the sensory experience by drizzling the terpene-rich herbal oil over a warm soup or grilled vegetables, and pair it with a crusty artisan bread for dipping. Garnish plates with a small sprig of fresh thyme or basil to visually echo the aromas. This oil also shines as a finishing touch on grilled chicken or seafood, introducing subtle complexity through nature’s own aromatic compounds.
| Nutrient | Amount per tbsp |
|---|---|
| Calories | 120 |
| Protein | 0 g |
| Carbohydrates | 0 g |
| Fat | 14 g (mostly healthy monounsaturated) |
Discover more on botanical science and flavor by visiting the National Center for Biotechnology Information. Unlocking nature’s scents: what are terpenes in herbs? Knowing this enriches not only your cooking but your daily wellbeing.

Q&A
Q&A: Unlocking Nature’s Scents – What Are Terpenes in Herbs?
Q1: What exactly are terpenes, and why do they make herbs smell so amazing?
A1: Terpenes are the aromatic compounds produced by plants-tiny natural perfumes that give herbs their distinctive scents. Think of them as nature’s essential oil artists, painting herbal bouquets with hints of citrus, pine, mint, or floral notes. These fragrant molecules don’t just tantalize our noses; they also play crucial roles in plant defense and attraction.
Q2: How do terpenes work in herbs-are they just for smell?
A2: Terpenes are multitaskers! While their primary fame comes from their aroma, they serve vital functions in the plant’s survival toolkit. Terpenes can repel pests, attract pollinators, and even protect the plant from environmental stress. For humans, they contribute to the flavor, therapeutic benefits, and overall experience of herbs in cooking, aromatherapy, and natural remedies.
Q3: Can terpenes affect our mood or health when we use herbal products?
A3: Absolutely! Many terpenes have been studied for their potential effects on mood and well-being. For example, linalool (found in lavender) is known for its calming properties, while limonene (citrus aromas) may lift spirits and reduce stress. Terpenes interact with our body’s systems in subtle ways, contributing to the holistic impact of herbal teas, essential oils, and natural skincare.
Q4: Are terpenes unique to each herb? How can I identify them?
A4: Each herb boasts its own signature blend of terpenes, much like a musical chord composed of different notes. Rosemary may carry the fresh, woody tones of pinene; basil offers sweet, spicy eugenol; and mint delivers cooling menthol and menthone. Identifying terpenes typically requires specialized equipment, but your nose is a pretty good detector-try sniffing freshly crushed leaves or infused oils to savor their terpene profiles.
Q5: Why is unlocking the secrets of terpenes important for herbal enthusiasts and scientists?
A5: Understanding terpenes opens a window into the science of scent, flavor, and natural healing. For herbal enthusiasts, it deepens appreciation and guides better use-whether crafting a fragrance, enhancing recipes, or exploring natural remedies. For scientists, decoding terpene profiles paves the way for innovations in medicine, agriculture, and sustainable products, harnessing nature’s aromatic power for human benefit.
Q6: How can I explore and enjoy terpenes in my daily life?
A6: Start simple! Brew herbal teas with a focus on aromatic herbs like peppermint or chamomile, use fresh herbs in your cooking to awaken the senses, or experience essential oils through diffusers or gentle topical blends. Gardening with aromatic herbs lets you harvest fresh terpene-rich leaves straight from the soil, bringing the essence of nature’s scents right to your fingertips.
Unlocking the world of terpenes transforms every herb from a mere plant into a fragrant storyteller-nature’s vibrant language expressed in scent and flavor, waiting for you to listen, taste, and savor.
Concluding Remarks
As we unravel the fragrant mysteries woven into the leaves and blossoms around us, terpenes emerge as nature’s aromatic storytellers-each one a unique note in the vibrant symphony of herbs. These tiny molecules do far more than please our senses; they connect plant and person in a subtle dance of healing, flavor, and sensation. By unlocking the secrets of terpenes, we not only deepen our appreciation for the natural world but also open doors to harnessing their potential in wellness, cooking, and beyond. So next time you inhale the fresh scent of rosemary or basil, remember you’re experiencing an intricate chemical masterpiece-one that whispers the ancient language of life itself.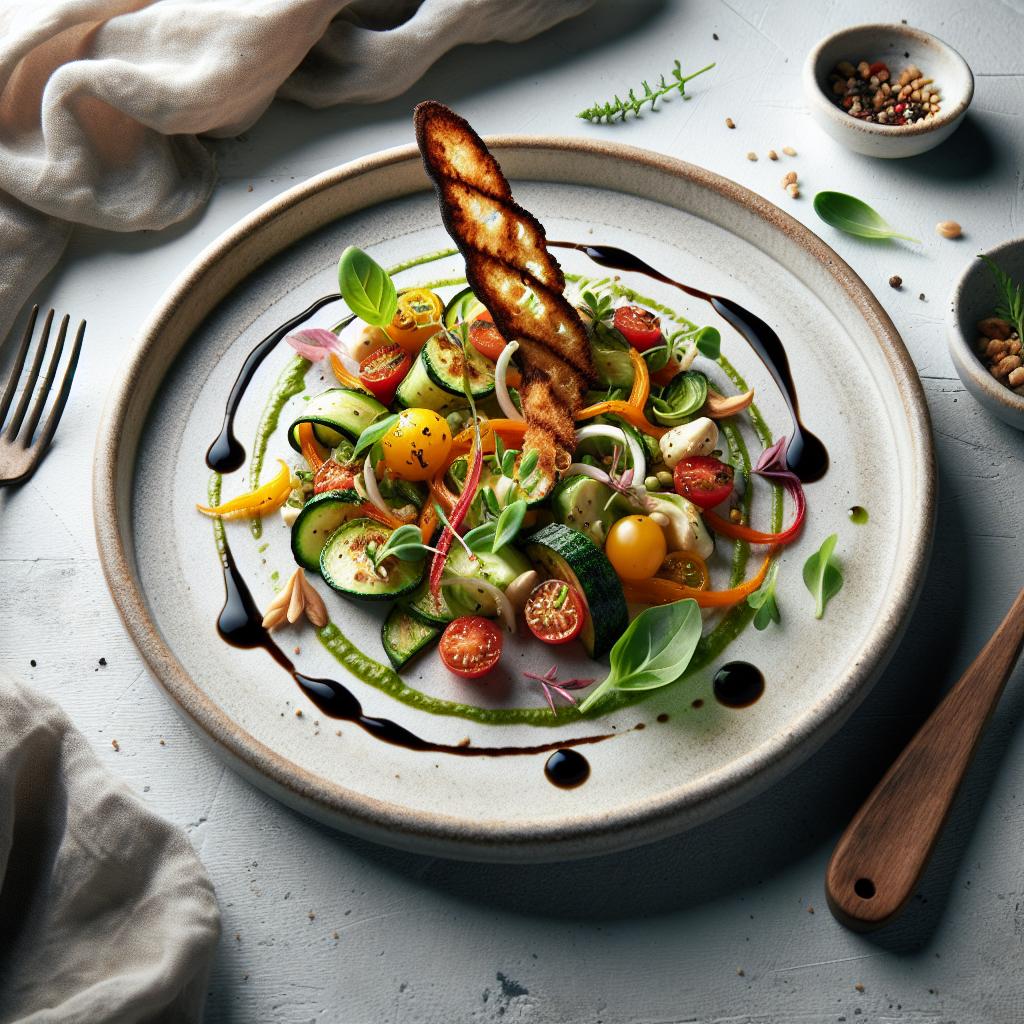
Unlocking Flavor: The Science Behind Evidence-Based Cooking
Unlocking flavor in your kitchen begins with understanding the chemistry of taste and aroma compounds that transform humble ingredients into remarkable dishes. This recipe highlights how the art of heat, time, and ingredient interaction converge to achieve exceptional flavor, illustrating the profound impact of science in everyday cooking. Whether you’re searing meat to induce the Maillard reaction or gently simmering spices to release essential oils, this method will inspire you to harness culinary science while delighting your palate.
Prep and Cook Time
Preparation: 15 minutes | Cooking: 45 minutes | Total Time: 1 hour
Yield
Serves 4
Difficulty Level
Medium
Ingredients
- 2 lbs bone-in chicken thighs, skin on
- 1 tbsp olive oil
- 1 tsp kosher salt
- ½ tsp freshly ground black pepper
- 1 medium yellow onion, finely chopped
- 3 cloves garlic, minced
- 1 tsp smoked paprika
- ½ tsp ground cumin
- 1 cup low-sodium chicken broth
- 1 tbsp tomato paste
- 1 tsp lemon zest
- 2 tbsp fresh parsley, chopped (for garnish)
- Juice of 1 lemon
Instructions
- Prep the chicken: Pat the chicken thighs dry with paper towels to ensure a crispy skin. Season both sides evenly with kosher salt and black pepper.
- Develop aroma through searing: Heat olive oil in a heavy-bottom skillet over medium-high heat. Add the chicken skin-side down, pressing gently to ensure contact with the pan. Sear until the skin is deep golden brown, about 6-8 minutes, then flip and sear the other side for 3 minutes.
- Sauté aromatics: Remove the chicken and set aside. Reduce heat to medium, add onions, and cook until translucent and fragrant, about 5 minutes. Stir in minced garlic, smoked paprika, and ground cumin, cooking until the spices bloom and release their aroma, about 1 minute.
- Build the cooking liquid: Stir in tomato paste and cook for 2 minutes, allowing Maillard-type reactions to deepen the flavor. Pour in chicken broth, scraping the bottom of the pan to release browned bits, which are packed with flavor.
- Simmer to meld tastes: Return chicken thighs to the pan, skin side up. Add lemon zest and reduce heat to a gentle simmer. Cover and cook for 30 minutes, allowing heat and time to tenderize the meat while infusing aromatic compounds into the sauce.
- Finish with acidity: Remove the lid, squeeze fresh lemon juice over the chicken, and increase heat to medium-high to reduce the sauce slightly, intensifying flavor without additional seasoning.
- Plate and garnish: Transfer chicken to serving plates, spoon pan sauce over the top, and sprinkle with fresh parsley for brightness and contrast.
Chef’s Notes: Tips for Success
- Dry your chicken thoroughly: Moisture inhibits browning and suppresses the Maillard reaction crucial for flavor development.
- Control your heat: High heat searing builds complex aroma compounds, but be vigilant to avoid burning spices – lower heat when sautéing after initial sear.
- Use bone-in cuts: Bones contribute minerals and depth in the cooking liquid, intensifying umami notes.
- Make ahead: This chicken improves when rested for a few hours or overnight in the fridge as flavors meld further; simply reheat gently to avoid drying.
- Ingredient swaps: For a vegetarian version, substitute chicken thighs with thick slices of roasted eggplant and use vegetable broth.
Serving Suggestions
Pair this dish with fragrant basmati rice or a creamy polenta that soaks up the rich sauce beautifully. A crisp green salad with a citrus vinaigrette balances the warmth of smoky spices. Garnish with freshly chopped parsley and a wedge of lemon for a vibrant finish that awakens the senses.

| Nutrient | Per Serving |
|---|---|
| Calories | 370 kcal |
| Protein | 32 g |
| Carbohydrates | 6 g |
| Fat | 24 g |
For more insights on food chemistry and flavor science, explore our guide to Flavor Chemistry in Cooking. To dive deeper into the role of aroma compounds in taste, visit the ScienceDaily article on Taste and Smell Chemistry.
Q&A
Q&A: Unlocking Flavor – The Science Behind Evidence-Based Cooking
Q1: What exactly is evidence-based cooking?
A1: Evidence-based cooking is the delicious fusion of science and culinary art. It’s about using well-researched techniques, proven reactions, and measurable results to elevate flavor and texture in every dish-moving beyond guesswork to cook with precision and confidence.
Q2: How can science improve my everyday cooking?
A2: Science demystifies cooking by explaining why certain methods work best. For example, knowing the Maillard reaction helps you sear meat to caramelized perfection, while understanding acid-base chemistry guides you in balancing flavors or tenderizing proteins. These insights lead to tastier meals that wow the palate every time.
Q3: Isn’t cooking more about intuition and creativity than science?
A3: Creativity definitely spices up cooking, but harnessing science ensures your culinary experiments don’t fall flat. Evidence-based cooking doesn’t replace intuition; it supports it with reliable techniques and predictable outcomes-so your creative flair can flourish on a solid foundation.
Q4: Can evidence-based cooking help with dieting or nutrition?
A4: Absolutely! Science-based methods let you optimize nutrient preservation, control portion sizes, and develop healthier recipes without sacrificing flavor. For instance, steaming vegetables to retain vitamins or using emulsifiers for creamy textures without excess fat are smart, tasty techniques grounded in research.
Q5: What role do temperature and timing play in unlocking flavor?
A5: They’re key players! Temperature influences chemical reactions like caramelization and denaturation, while timing controls these reactions’ extent. Overcooking can dull flavors or toughen meat, but precise temperature control and timing yield juicy, aromatic dishes bursting with freshness.
Q6: Are there any simple evidence-based tips for home cooks?
A6: Yes! Start with basics like salting meat ahead of cooking for better seasoning and moisture retention, resting cooked proteins before slicing to redistribute juices, or using acidic marinades to tenderize. These well-studied habits turn good meals into memorable feasts.
Q7: How does understanding food texture contribute to flavor?
A7: Texture shapes our eating experience as much as taste. Science explains how starch gelatinizes or how proteins coagulate, helping you achieve desired textures-from crispy crusts to silky sauces-that amplify overall flavor perception.
Q8: What tools or resources can help me practice evidence-based cooking?
A8: Plenty of resources exist, from scientific cookbooks like Harold McGee’s On Food and Cooking to food science blogs and cooking apps with precise temperature guidance. Kitchen gadgets like sous vide machines offer exact control for replicable, perfect results.
Q9: Is evidence-based cooking only for professional chefs?
A9: Not at all! While pros benefit greatly, home cooks can also harness science to improve their skills, reduce mistakes, and discover new flavors. It’s about empowering anyone with curiosity and a willingness to learn the “why” behind the “how.”
Q10: What is the ultimate takeaway from the science of flavor?
A10: The secret to unlocking flavor lies in curiosity and knowledge. Understanding the science transforms cooking from a routine task into an experimental adventure-where every bite tells a story of meticulous technique, intentional choices, and the joy of truly mastering your craft.
Key Takeaways
As we’ve journeyed through the fascinating world where art meets science, it becomes clear that unlocking flavor is far more than a stroke of luck or tradition-it’s a delicious dance choreographed by evidence and experimentation. By embracing the principles behind evidence-based cooking, we empower ourselves to transform ingredients into sensory experiences, marrying precision with creativity. So next time you step into your kitchen, remember: every sizzle, every stir, and every sprinkle holds the potential to unlock new dimensions of taste-if only you know the science behind the flavor. Happy cooking, and may your culinary adventures be as flavorful as they are informed!
Unlocking the Sear offers a captivating journey into the transformative power of heat that elevates ordinary cuts of meat to culinary masterpieces. The alchemy behind the perfect sear reveals how Maillard reactions and temperature control work harmoniously to develop deep flavors and enviable textures that delight both the eye and palate. Whether you’re wielding a favorite cast iron skillet or an ultra-slick stainless steel pan, the key lies in understanding your tools and timing.
Prep and Cook Time
- Preparation: 10 minutes
- Cooking: 8-12 minutes
- Resting: 5 minutes
- Total Time: Approximately 25-30 minutes
Yield
- Serves 2-3 people
Difficulty Level
- Intermediate
Ingredients
- 2 thick-cut ribeye steaks (1.5-inch thick, about 12 oz each)
- 2 tbsp high smoke point oil (grapeseed, avocado, or refined sunflower oil)
- 1 tbsp unsalted butter
- 3 cloves garlic, crushed
- 2 sprigs fresh thyme
- Freshly ground black pepper, to taste
- Coarse sea salt, to taste
Instructions
- Bring the steaks to room temperature. Remove steaks from the fridge 30-45 minutes before cooking to ensure even cooking and optimal crust development.
- Season liberally. Pat the steaks dry with paper towels, then generously season all sides with coarse sea salt and freshly ground black pepper. The salt draws moisture to the surface, which evaporates during searing, promoting a beautiful crust.
- Preheat your pan. Place your cast iron or heavy stainless steel skillet on medium-high heat for 5 minutes until it’s shimmering hot-this ensures immediate sizzle and seals in flavors.
- Add the oil. Pour in 2 tablespoons of your chosen high smoke point oil and swirl to coat the pan evenly. Heat until it shimmers but does not smoke.
- Sear the steaks. Place the steaks in the pan without crowding. You should hear an unmistakable sizzle immediately. Sear undisturbed for 3-4 minutes, until the edges show a deep, mahogany crust.
- Flip and flavor. Turn the steaks with tongs to sear the other side. After 2 minutes, add the butter, garlic, and thyme. Tilt the pan and spoon the melted butter over the steaks repeatedly to deepen flavor complexity-known as “arroser.”
- Check doneness carefully. Use an instant-read thermometer-125°F (52°C) for rare, 135°F (57°C) for medium-rare-to achieve your preferred temperature. Cooking times may vary slightly depending on steak thickness.
- Rest the steaks. Transfer to a warm plate, tent loosely with foil, and rest for 5-7 minutes. This step allows juices to redistribute, ensuring every bite is tender and succulent.
- Serve with flair. Slice against the grain and garnish with a sprinkle of flaky sea salt and a sprig of fresh thyme for a visually stunning presentation.
Tips for Success: Maximizing the Perfect Sear
- Choosing the Right Pan and Oil: Cast iron is ideal for retaining consistent high heat, while stainless steel offers excellent control-avoid non-stick pans that don’t handle high temperatures well. Opt for oils with smoke points above 400°F to prevent off-flavors and smoke.
- Temperature Mastery: A hot pan is essential; test by flicking a drop of water-it should dance and evaporate instantly. Don’t overcrowd the pan to avoid steaming; if cooking multiple steaks, work in batches.
- Resting Ritual: Resist the urge to slice immediately. Resting preserves the steak’s juices, preventing dryness and enhancing that melt-in-the-mouth texture.
- Variations: For added depth, marinate steaks in a mixture of soy sauce, garlic, and a touch of brown sugar before searing or finish with a pat of compound butter infused with herbs.
- Troubleshooting: If your crust isn’t forming, your pan isn’t hot enough. If the oil smokes excessively, lower the heat and choose a different oil.
Serving Suggestions
Pair your perfectly seared steak with vibrant sides like garlic roasted asparagus, creamy mashed potatoes, or a bright chimichurri sauce to contrast the rich, savory crust. A sprinkle of flaky Maldon salt and freshly cracked black pepper on top enhances the final flavor explosion. For an elegant touch, garnish with microgreens or edible flowers.
| Nutrient | Per Serving (1 steak) |
|---|---|
| Calories | 600 kcal |
| Protein | 55 g |
| Carbohydrates | 1 g |
| Fat | 44 g |
Explore more techniques on perfect pan-searing
For deeper scientific insights, check this authoritative source on the Maillard Reaction and Meat Flavor Development.

Q&A
Q&A: Unlocking the Sear: The Science Behind the Perfect Sizzle
Q1: What exactly is the “sear” that chefs rave about?
A1: The sear is that glorious, caramelized crust you find on the surface of meats, fish, or even vegetables when cooked at high heat. It’s more than just a brown surface; it’s a flavor-packed barrier that locks in juices and creates a sensational texture.
Q2: Why does searing create such an irresistible aroma and taste?
A2: The secret is the Maillard reaction-a complex chemical dance between amino acids and sugars that happens at temperatures typically above 300°F (150°C). This reaction generates hundreds of new flavor compounds and that signature golden-brown hue, which tantalizes your nose and taste buds.
Q3: Does searing actually seal in juices?
A3: Ah, the age-old myth! While searing doesn’t exactly “seal” juices, it does create a crust that enhances texture and flavor. Interestingly, the crust slows down moisture loss during further cooking, making your meat juicier overall.
Q4: How important is the temperature?
A4: Crucial! The pan must be hot enough to trigger the Maillard reaction but not so hot that it burns the food. Aim for a surface temperature between 300°F and 500°F for that perfect sizzle. Using a heavy-bottomed pan helps maintain consistent heat.
Q5: Can I use any oil or fat for searing?
A5: Not quite. Choose oils with high smoke points-like avocado oil, grapeseed oil, or clarified butter-to prevent burning. These oils withstand the high temperatures needed for searing without breaking down and imparting off-flavors.
Q6: What tips will help me achieve a perfect sear every time?
A6: Start with dry food-pat it down to remove excess moisture, as water reduces the pan temperature and hampers browning. Don’t overcrowd the pan, allowing each piece enough space to contact the heat. Finally, resist the urge to flip repeatedly; give the sear time to develop undisturbed.
Q7: Is searing only for meats?
A7: Absolutely not! Vegetables like zucchini, mushrooms, and eggplant benefit hugely from searing, developing sweet, smoky notes. Even tofu and cheeses like halloumi love a golden crust.
Q8: How does searing fit into different cooking methods?
A8: Think of searing as the flavorful prologue to your cooking story. For braising or roasting, searing adds depth of flavor and attractive color before slow cooking. For steaks and seafood, it’s the starring moment, providing texture contrast and intense aroma.
Q9: Can searing be done on other heat sources besides stovetops?
A9: Indeed! Grills, broilers, and even cast-iron skillets over open flames are excellent for searing. Each imparts subtle differences, but the principle remains: high, dry heat stimulating the Maillard magic.
Q10: Any science-backed hacks for squeezing extra flavor from the sear?
A10: Yes! After searing, deglaze the pan with wine, stock, or even coffee to dissolve the flavorful browned bits stuck to the surface-these “fond” bits are liquid gold for sauces and gravies, amplifying the gourmet punch of your dish.
Dive into the sizzling science, and transform your cooking with every sear!
To Conclude
As the final sizzle fades and the aroma lingers, it’s clear that unlocking the perfect sear is more than just heat and timing-it’s a delicate dance of science and sensation. From the Maillard reaction’s complex chemistry to the precise control of moisture and temperature, every element plays a starring role in crafting that irresistible crust. So next time you hear that satisfying crackle in your pan, remember: you’re not just cooking, you’re orchestrating a flavorful masterpiece, one perfect sear at a time.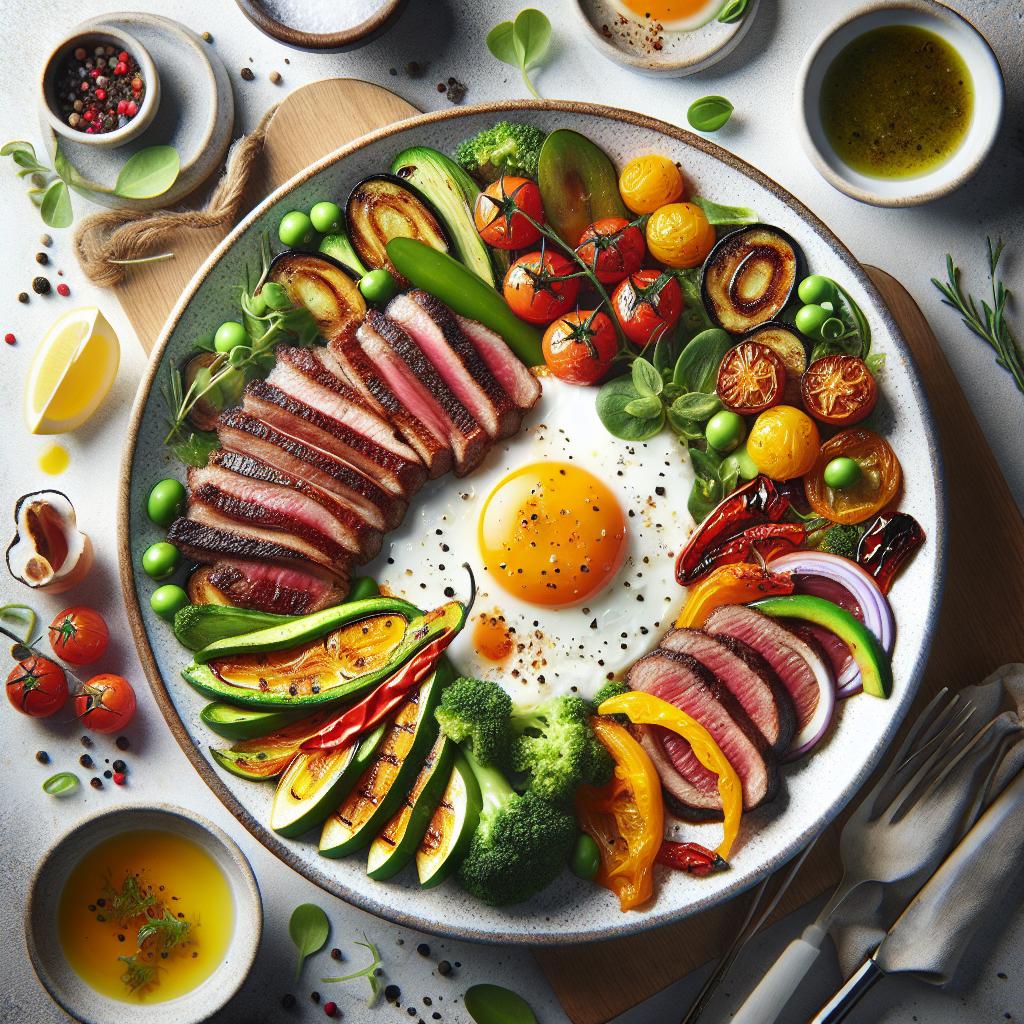
The chemistry behind caramelization is a mesmerizing dance of heat and sugar molecules transforming into a symphony of complex flavors and golden hues. Mastering temperature control is the secret to coaxing out the perfect caramel-its smoky, nutty, and rich undertones elevate countless dishes from humble to extraordinary. By understanding how ingredients interact during this transformation, you can deepen sweetness and add layers of flavor that capture the true sweet science of caramelization.
Prep and Cook Time
- Preparation: 5 minutes
- Cooking: 15-20 minutes
- Total Time: 20-25 minutes
Yield
Serves 6 generous portions
Difficulty Level
Medium – Requires attentive temperature control and timing
Ingredients
- 1 cup granulated sugar
- 1/4 cup water
- 2 tbsp unsalted butter, cut into cubes, softened
- 1/2 cup heavy cream, warmed
- 1/4 tsp fine sea salt
- 1 tsp pure vanilla extract
Instructions
- In a medium, heavy-bottomed saucepan, combine sugar and water over medium heat. Stir gently to dissolve the sugar, then stop stirring once the mixture comes to a simmer. This prevents crystallization.
- Allow the syrup to cook undisturbed, gently swirling the pan occasionally to ensure even caramelization. Watch carefully for the color to shift from clear to a deep amber-this usually happens around 320°F (160°C).
- As soon as the syrup reaches the golden-amber stage, remove it from heat immediately to avoid burning, which lends a bitter flavor.
- Carefully whisk in the butter cubes, stirring until fully melted and incorporated. The butter enriches the caramel with luscious creaminess.
- Slowly pour in the warm heavy cream while whisking vigorously. The mixture will bubble up dramatically-this is the alchemy in action.
- Add the sea salt and vanilla extract, stirring well to harmonize flavors and develop complexity.
- Let the caramel cool slightly in the pan, then transfer to a heat-safe container. Use immediately or store at room temperature for up to a week.
Tips for Success
- Control your heat: Use moderate heat to achieve gradual caramelization-high heat may burn sugar too quickly.
- Prevent crystallization: Avoid stirring the syrup once heated. If crystals form on the pan edges, brush them down with a wet pastry brush.
- Ingredient temperature matters: Adding cold cream directly can cause the caramel to seize. Warm cream blends more smoothly.
- Flavor variations: Infuse cream with cinnamon sticks or star anise for an aromatic twist.
- Make ahead: Caramel sauce can be refrigerated and gently reheated before use.
Serving Suggestions
This velvety caramel sauce is an exquisite companion to vanilla ice cream, drizzled over warm apple crumble, or swirled into coffee for a touch of indulgence. Garnish with flaky sea salt or toasted nuts to add texture and heighten the flavor experience. For a stunning visual, serve in a clear glass jar showcasing its rich amber glow.
| Nutrient | Amount per Serving |
|---|---|
| Calories | 180 kcal |
| Protein | 1 g |
| Carbohydrates | 22 g |
| Fat | 9 g |

For further exploration of sugar chemistry, visit the Science of Cooking. Also, check out our related guide on molecular cooking techniques to expand your culinary repertoire.
Q&A
Q&A: The Sweet Science: Unlocking the Magic of Caramelization
Q1: What exactly is caramelization?
A1: Caramelization is the magical process where sugar transforms under heat, turning from simple sweetness into a complex symphony of flavors and colors. When sugar molecules break down at high temperatures (usually above 320°F or 160°C), they create a cascade of compounds that taste nutty, buttery, and richly deep-anything but just sweet.
Q2: How does caramelization differ from Maillard reaction?
A2: While both create delicious browning and flavor, caramelization involves the direct breakdown of sugars, purely by heat. The Maillard reaction, on the other hand, is a chemical dance between amino acids and reducing sugars, often responsible for the savory flavors in roasted meat and bread crusts. Caramelization is the star in candy-making, Maillard steals the show in baking and grilling.
Q3: What sugars caramelize best?
A3: Not all sugars are created equal in the caramel game. Sucrose (table sugar) caramelizes beautifully and cleanly, making it the caramel king. Fructose caramelizes at a lower temperature and gives a slightly different flavor profile-fruitier and more intense. Glucose is a bit tricky since it tends to burn faster, so it’s often blended for balance.
Q4: Why does caramel sometimes turn bitter or burn?
A4: Timing and temperature are caramel’s delicate dance partners. Too low heat, and it won’t brown; too high or for too long, and the sugars break down beyond caramelization into bitter, burnt compounds. Stirring too aggressively or adding water late can cause crystallization or uneven heating, ruining the smooth texture.
Q5: How can I master caramelization in my kitchen?
A5: Patience is key. Use a heavy-bottomed pan for even heat, and monitor temperature closely, preferably with a candy thermometer. Start with dry heat or add a little water to dissolve sugar evenly, then watch the color change-golden to deep amber signals caramel’s perfect moment. Don’t walk away, because caramel waits for no one!
Q6: What are some creative uses of caramelization beyond candy?
A6: Caramelization isn’t just for sweets-it adds depth wherever sugar is involved. Think caramelized onions transforming simple dishes into savory wonders, roasted vegetables with a natural sweetness boost, or even caramelized fruit toppings that elevate desserts. That golden crust on crème brûlée? Pure caramelized magic.
Q7: Can caramelization happen at home without specialized tools?
A7: Absolutely! While candy thermometers help, caramelization can be achieved with just steady eyes, good quality sugar, and a dependable stove. Many home cooks master caramel sauces, brûlée toppings, and caramelized veggies using simple techniques and careful attention.
Q8: What’s the science behind caramel’s aroma and flavor?
A8: When sugar molecules heat up, they break apart and recombine into hundreds of new compounds. These molecules create the rich bouquet of aromas-from butterscotch and toffee to subtle smoky hints. It’s a molecular orchestra that turns basic sugar into a tantalizing sensory experience.
Unlocking caramelization is like discovering a sweet alchemy-it’s part art, part science, and 100% delicious. Dig in and let the magic caramelize your kitchen creations!
The Conclusion
As the golden hues of caramelization dance across your culinary creations, you begin to see that this is more than just a chemical reaction-it’s a secret language spoken by sugar and heat. Unlocking the magic of caramelization invites you to explore new depths of flavor, texture, and aroma, transforming everyday ingredients into extraordinary delights. So next time you watch that simple syrup darken or hear the gentle crackle of sugar melting, remember: you’re not just cooking-you’re practicing the sweet science that turns the ordinary into pure magic.
Unlocking Juicy Secrets: Why Your Grilled Chicken’s Dry
Unlocking juicy secrets: why your grilled chicken’s dry is the burning question for many home cooks passionate about perfecting outdoor cuisine. Grilling chicken is an art passed down through generations, celebrated for its smoky flavors and satisfying textures. However, nothing dims the joy of a barbecue more than dry, crumbly bites. Understanding the science behind moisture retention transforms this ordeal into triumph, empowering you to create tender, succulent chicken that steals the show at any gathering.
Prep and Cook Time
- Marinating: 30 minutes to 4 hours (depending on marinade choice)
- Grilling: 15-25 minutes
- Total Time: Approximately 45 minutes to 5 hours
Yield
Serves 4 people generously
Difficulty Level
Medium – A rewarding process that balances careful preparation with attentive grilling.
Ingredients
- 4 boneless, skinless chicken breasts (about 6 oz each)
- 1/4 cup olive oil
- 1/4 cup plain yogurt (for tenderizing; optional)
- 3 tbsp lemon juice (freshly squeezed)
- 3 garlic cloves, minced
- 1 tbsp honey or maple syrup (for a hint of sweetness)
- 1 tsp smoked paprika
- 1 tsp dried oregano
- 1/2 tsp salt
- 1/4 tsp freshly ground black pepper
- Optional: fresh herbs like thyme or rosemary
Instructions
- Prepare the marinade: In a medium bowl, whisk together olive oil, plain yogurt, lemon juice, minced garlic, honey, smoked paprika, oregano, salt, and black pepper. This blend combines acidity, fat, and aromatics to deeply flavor and retain moisture in the chicken.
- Marinate the chicken: Submerge the chicken breasts in the marinade, coating each piece evenly. Cover and refrigerate for at least 30 minutes or up to 4 hours for maximum juice retention. The acids gently break down proteins, tenderizing the meat without turning it mushy.
- Preheat your grill: Aim for medium-high heat, around 375-400°F (190-205°C). Create a two-zone fire by pushing coals to one side or adjusting burners if using gas-this allows searing then gentle finishing.
- Sear the chicken: Place the chicken breasts directly over the hot zone. Sear for 2-3 minutes on each side to develop a flavorful crust that locks moisture in.
- Finish cooking: Move the chicken to the cooler side of the grill to cook through gently, about 8-12 minutes, flipping halfway. Use a meat thermometer to check for an internal temperature of 165°F (74°C). This controlled cooking prevents drying.
- Rest the chicken: Remove from the grill, tent loosely with foil, and rest for at least 5 minutes. This crucial step allows juices to redistribute evenly, making each bite tender and flavorful.
- Slice and serve: Cut against the grain for extra tenderness and present on a platter garnished with fresh herbs.
Tips for Success
- Choosing the right marinade is a game changer. Opt for one containing fat (like olive oil) to coat the chicken and acid (citrus, yogurt, or vinegar) in moderation to avoid a dry, stringy texture.
- Avoid over-marinating-too long in acidic mixes can “cook” the meat prematurely and cause dryness.
- Preheating the grill ensures an instant sear, which is critical to sealing the meat’s juices inside.
- Always use a reliable meat thermometer for precision; guessing internal temperature is the biggest error leading to dryness.
- Resting is non-negotiable-skip it at your chicken’s peril.
- Try brining the chicken for a few hours before marinating; saltwater soaks increase moisture retention significantly.
Serving Suggestions
Present your grilled chicken with a burst of color and freshness: serve alongside grilled seasonal vegetables, a crisp green salad, or a zesty chimichurri sauce. Garnish with freshly chopped parsley, lemon wedges, or a sprinkle of smoked paprika for visual pop. For a comforting meal, pair with fluffy couscous or garlic mashed potatoes. Each addition complements the juicy, smoky profile and makes every bite memorable.

| Nutrient | Amount per Serving |
|---|---|
| Calories | 280 kcal |
| Protein | 35 g |
| Carbohydrates | 3 g |
| Fat | 12 g |
For further inspiration on grilling techniques, check out our Ultimate Guide to Grilling Techniques. Discover expert tips and recipes that complement your mastery of juicy chicken.
For scientific insights on meat cooking temperatures, visit the USDA Food Safety and Inspection Service official guidelines.
Q&A
Q&A: Unlocking Juicy Secrets – Why Your Grilled Chicken’s Dry
Q1: Why does my grilled chicken often end up dry and tough?
A1: Chicken is a lean meat-it has very little fat to keep it moist during cooking. Overcooking dries it out because the water inside evaporates and muscle fibers tighten. Grilling at too high a heat or cooking for too long are prime culprits behind that dreaded dryness.
Q2: Is the cut of chicken important for juicy grilling?
A2: Absolutely! Dark meat like thighs and drumsticks have more fat and connective tissue, staying juicy longer than lean breast meat. If you crave tender breast meat, you’ll need to go the extra mile with marination, brining, or precise cooking techniques.
Q3: How does marinating help in keeping grilled chicken juicy?
A3: Think of a marinade as a flavor-packed soak that also tenderizes and hydrates your chicken. Ingredients like acid (lemon juice, vinegar) break down muscle fibers slightly, while oils and spices lock in moisture and add that mouthwatering zing.
Q4: What’s the secret grilling technique to avoid dryness?
A4: Master indirect heat grilling and the art of “low and slow.” Start with searing over high heat for flavor and grill marks, then move your chicken to a cooler spot on the grill to finish cooking gently. Using a meat thermometer to hit the perfect internal temp (165°F or 74°C) prevents overcooking.
Q5: How does brining fit into the juicy chicken puzzle?
A5: Brining is a game-changer. Soaking your chicken in a saltwater solution pre-grill allows the meat to absorb and retain water during cooking. This extra hydration means even grilled breast meat stays succulent and tender.
Q6: Can resting grilled chicken really make a difference?
A6: Yes! Resting lets juices redistribute inside the meat rather than spilling out when you slice too soon. Give your chicken about 5-10 minutes off the grill under foil-this small wait earns big rewards in juicy bites.
Q7: Are there any grill-friendly recipes or hacks for super juicy chicken?
A7: Besides marinades and brines, try basting with butter, herb-infused oils, or even fruit juices while grilling. Wrapping chicken in foil “packets” traps steam and locks moisture. Also, cutting chicken into smaller pieces cooks evenly and reduces drying risks.
Unlock the juicy secrets, and your grilled chicken will never be dry or boring again! With a sprinkle of technique and a dash of patience, every bite will sing with flavor and succulence.
Closing Remarks
As you fire up the grill next time, remember: the secret to juicy grilled chicken isn’t just in the marinade or the spices-it’s in mastering the balance of heat, timing, and a little culinary intuition. Unlocking these juicy secrets transforms your everyday chicken from dry disappointment to smoky, tender perfection. So grab your tongs, trust your instincts, and get ready to savor every mouthwatering bite. Happy grilling!
Unlocking Flavor: How Aging Beef Intensifies Taste Richness elevates your understanding of beef’s transformation through time, revealing the subtle science that unlocks deep, complex flavors. This journey enhances the natural richness of beef by carefully controlled aging processes that melt connective tissue, break down proteins, and amplify umami notes, making each bite a celebration of culinary mastery.
Prep and Cook Time
- Preparation: 10 minutes
- Aging: 14-45 days (dependent on method)
- Cooking: 15-20 minutes (depending on cut and doneness)
Yield
Serves 4 confident carnivores
Difficulty Level
Medium – Requires attention to detail and patience during aging and cooking
Ingredients
- 2 lbs beef ribeye or striploin (bone-in preferred for dry aging)
- Sea salt, kosher (to taste)
- Freshly ground black pepper (to taste)
- 2 tbsp olive oil (for searing)
- Fresh rosemary and thyme sprigs (optional, for aroma)
- 2 cloves garlic, crushed (optional)
Instructions
- Selecting the Perfect Cut for Optimal Flavor Enhancement: Choose well-marbled cuts rich in intramuscular fat for the best aging results-cut like ribeye or striploin offer flavorful, tender textures post-aging.
- Exploring Dry Aging: Wrap the beef loosely with cheesecloth, place it on a wire rack in a dedicated fridge at 34°F (1°C) with 80-85% humidity. Rotate and inspect every 3 days, aging for 21-45 days to deepen flavor and develop a crust.
- Exploring Wet Aging: Seal beef cuts in vacuum bags, refrigerate at 34°F (1°C) for 7-14 days. This method preserves moisture and enhances tenderness without the intense dry aging funk.
- Preparing to Cook Aged Beef: Bring the steak to room temperature-this ensures even cooking and a better sear.
- Season with sea salt and freshly ground black pepper generously. Allow salt to penetrate for 20 minutes if time permits.
- Heat a heavy skillet over high heat. Add olive oil, then sear steaks for 3-4 minutes per side for medium-rare, adjusting based on thickness.
- Add aromatic herbs and garlic during the last minute of cooking for infused, layered complexity.
- Rest the steak: Let it rest for 5-10 minutes tented loosely with foil to reabsorb juices.
- Slice against the grain and serve immediately, appreciating the beautiful dark crust and intensely flavorful interior.
Tips for Success
- Dry Aging: It requires specific fridge conditions; a DIY aging fridge may need a humidifier and fan. The crust can be trimmed before cooking.
- Wet Aging: Easier for beginners, with consistent moisture-great for quick flavor boosts without specialized equipment.
- Choosing the Cut: Opt for prime-grade beef with good marbling; less marbled cuts won’t benefit as much.
- Storage: Always store aged beef properly-dry-aged steaks in the fridge wrapped loosely, wet-aged steaks sealed airtight.
- Serving: Serve aged beef with simple sides like roasted root vegetables or a fresh chimichurri to complement the intense flavors without overpowering them.
Serving Suggestions
Present your perfectly aged beef steak sliced on a rustic wooden board, garnished with sprigs of rosemary and thyme. Add a drizzle of herb-infused olive oil or a dash of finishing sea salt flakes for a visual and taste accent. Pair with roasted baby potatoes, sautéed mushrooms, or a crisp arugula salad to balance the savory depth.
| Nutritional Information | Per Serving (approx.) |
|---|---|
| Calories | 550 kcal |
| Protein | 48 g |
| Carbohydrates | 2 g |
| Fat | 40 g |

For a deeper dive into beef aging, visit the North American Meat Institute’s guide. Also explore our article on the best cuts for steak to master your selection technique.
Q&A
Q&A: Unlocking Flavor – How Aging Beef Intensifies Taste Richness
Q1: What exactly is beef aging, and why is it important?
A1: Beef aging is a carefully controlled process where meat is stored under specific conditions to enhance its flavor and tenderness. Think of it as letting the beef “marinate” in time, unlocking deeper, richer taste notes that fresh cuts simply can’t offer.
Q2: How does aging transform the flavor of beef?
A2: Aging beef allows natural enzymes to break down muscle fibers, which not only tenderizes the meat but also intensifies its flavor. Over time, chemical changes develop complex savory compounds and subtle nutty or buttery undertones, turning each bite into a gourmet experience.
Q3: Are there different methods of aging beef?
A3: Absolutely! The two primary methods are dry aging and wet aging. Dry aging hangs beef in a controlled, refrigerated environment, concentrating flavor as moisture evaporates. Wet aging, by contrast, involves vacuum-sealing the meat in its own juices, which enhances tenderness but yields a milder taste.
Q4: How long does beef usually need to age to reach peak flavor?
A4: Generally, aging beef between 14 to 28 days strikes a balance between tenderness and flavor. However, some connoisseurs age it even longer – up to 60 days or more – for an intensely robust, sometimes funky flavor profile that’s a true delicacy.
Q5: Does aging beef make a noticeable difference for the everyday eater?
A5: Without a doubt! While it might sound like a subtle change, aging beef can transform a simple steak into a luxurious, flavor-packed meal. The meat becomes juicier, tenderer, and richer, making it well worth trying if you’re craving a next-level dining experience.
Q6: Can you age beef at home?
A6: Aging beef at home is possible but requires precise control of temperature, humidity, and air flow to prevent spoilage. Many prefer to buy aged beef from trusted butchers or specialty stores to enjoy the perfected flavor without the hassle or risk.
Q7: What should consumers look for when buying aged beef?
A7: Look for beef labeled with aging time and method. Dry-aged beef often has a darker, firmer exterior-sometimes trimmed off before sale-while wet-aged beef comes vacuum-packed with a fresher color. Don’t be shy to ask your butcher about the aging process to pick the best option for your taste.
Q8: Why has aging beef become such a celebrated practice in culinary circles?
A8: Aging beef is both art and science. It celebrates patience and craftsmanship, transforming humble cuts into indulgent delights. Chefs love it because it elevates flavor depth and offers diners a sophisticated taste adventure, proving that sometimes, good things truly do come to those who wait.
To Wrap It Up
In the world of beef, patience is more than a virtue-it’s the secret ingredient that transforms ordinary cuts into extraordinary culinary experiences. Aging beef is a delicate dance where time and science intertwine, unlocking layers of flavor and deepening richness in ways that fresh meat simply cannot achieve. Whether you’re a chef, a food enthusiast, or an adventurous eater, understanding the aging process invites you to savor not just a meal, but a story-a journey of craftsmanship, temperature, and time culminating in every tender, flavorful bite. So next time you indulge in aged beef, remember: you’re tasting the mastery of a process that turns meat into magic, unlocking a world of flavor that’s well worth the wait.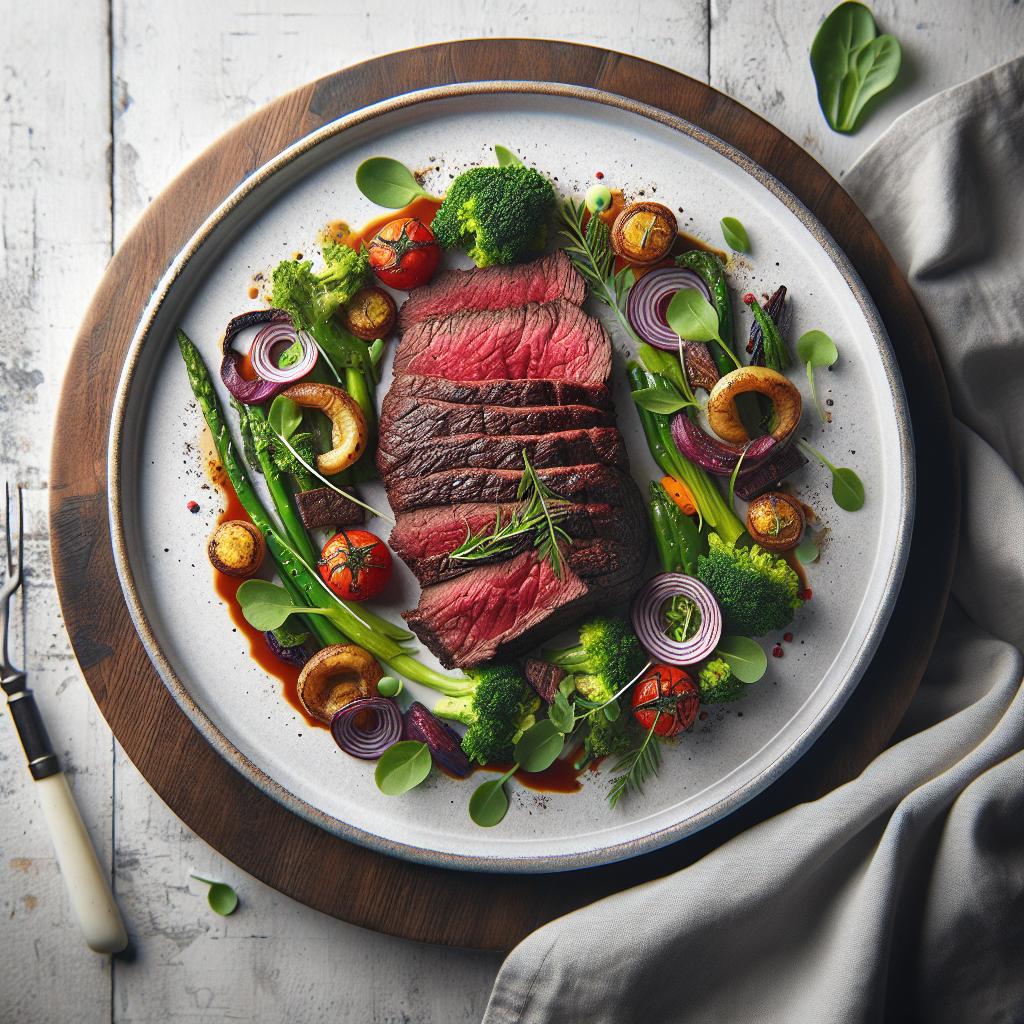
Unlocking blackening is an art that combines precise heat control with the perfect melange of spices, creating that coveted charred crust teeming with smoky complexity. Born from Cajun culinary tradition, this method transforms simple proteins into vibrant flavor experiences that captivate the senses with every bite. Understanding the chemistry behind blackening lets you master this technique effortlessly, turning your kitchen into a stage for culinary magic.
Prep and Cook Time
Preparation: 15 minutes | Cooking: 10 minutes | Total: 25 minutes
Yield
Serves 4
Difficulty Level
Medium
Ingredients
- 2 lbs fresh fish fillets (redfish, snapper, or catfish), skin removed and patted dry
- 2 tbsp paprika (preferably smoked for enhanced aroma)
- 1 tbsp dried thyme
- 1 tbsp dried oregano
- 1 tbsp garlic powder
- 1 tbsp onion powder
- 1 tsp cayenne pepper (adjust for heat tolerance)
- 1 tsp black pepper, freshly ground
- 1 tsp salt
- 4 tbsp unsalted butter, melted
- 2 tbsp vegetable oil or clarified butter for pan-searing
Instructions
- Prepare the spice mix: In a small bowl, combine paprika, thyme, oregano, garlic powder, onion powder, cayenne, black pepper, and salt. Mix evenly to create the perfect blackening seasoning.
- Coat the protein: Brush the fish fillets lightly with melted butter to ensure spices adhere well, then generously rub both sides with the spice mixture, pressing gently into the flesh.
- Preheat your pan: Place a heavy cast-iron skillet over medium-high heat. Add vegetable oil, heating until it shimmers but is not smoking. This precise heat level triggers the Maillard reaction that forms the signature crust without burning.
- Sear the fillets: Place fillets into the hot skillet. Cook for approximately 3-4 minutes on each side, flipping carefully with a spatula to avoid breaking the crust. You want a deep mahogany char, not black charcoal.
- Rest briefly: Once cooked, transfer the fillets to a warm plate and allow to rest for 2-3 minutes. This helps juices redistribute, maintaining moistness beneath the robust crust.
Tips for Success
- Heat mastery: Control pan temperature carefully-too hot, and spices will burn releasing bitterness; too low, and you won’t develop that signature sear.
- Spice balance: Use smoked paprika for a richer smoky note, and adjust cayenne to suit your heat preference. Add a pinch of sugar to your spice mix for subtle caramelization without sweetness overpowering.
- Butter vs. oil: Butter enriches flavor and aids crust formation but burns quickly, so pair it with oil to raise the smoke point.
- Variations: Try blackening chicken or even vegetables like okra or cauliflower for versatile smoky flavor.
- Preparation tip: Mix your spices in advance and store in an airtight container for ready-to-use convenience.
Serving Suggestions
Present your perfectly blackened fillets atop a bed of creamy garlic mashed potatoes or beside a fresh citrus-avocado salad dressed with lime vinaigrette. Garnish with bright chopped parsley and a wedge of lemon to brighten the smoky richness. To elevate, drizzle a light cajun compound butter over the hot fish just before serving.
| Nutritional Info (per serving) | Calories | Protein | Carbs | Fat |
|---|---|---|---|---|
| Blackened Fish | 280 | 34g | 2g | 14g |
Discover more Cajun cooking techniques in our comprehensive guide to Cajun cuisine. To deepen your understanding of how spice compounds interact at high heat, check out this detailed article from Science of Cooking.

Q&A
Q&A: Unlocking Blackening – The Science Behind Charred Flavor
Q1: What exactly is “blackening” in cooking?
A1: Blackening is a culinary technique where food-often fish or chicken-is coated in a blend of spices and cooked at very high heat until the exterior crisps and darkens, forming a dramatic, flavorful crust. The result is a complex interplay of smoky, spicy, and slightly charred sensations that elevate the ingredient beneath.
Q2: Why is the flavor called “charred” rather than simply “burnt”?
A2: While “burnt” implies an unpleasant, bitter taste from overcooked food, “charred” in blackening is a controlled, desirable form of caramelization and Maillard reaction. It develops deep, savory notes without crossing into bitterness, striking a perfect balance between smoky richness and vibrant seasoning.
Q3: What science is at work during the blackening process?
A3: At the heart of blackening are two chemical phenomena: the Maillard reaction and caramelization. The Maillard reaction happens when proteins react with sugars at high temperatures, creating complex flavor molecules and that signature golden-brown crust. Simultaneously, caramelization breaks down sugars, adding sweetness and depth. Combined, these reactions transform spices and the food itself into a symphony of taste and aroma.
Q4: How do spices contribute to the blackening flavor?
A4: Spices aren’t just seasoning; they’re flavor architects. Blackening blends typically include smoked paprika, cayenne, thyme, oregano, and garlic powder-all of which have compounds that survive or even intensify with heat. As the spices toast and char slightly, they release essential oils and flavor molecules that heighten the smoky, earthy, and piquant notes, creating that addictive punch.
Q5: Does the type of oil or fat affect the blackening outcome?
A5: Absolutely. The fat chosen must withstand intense heat without breaking down or smoking excessively. Clarified butter, vegetable oil, or grapeseed oil are popular because of their high smoke points. They help sear the food evenly and facilitate the Maillard reaction, resulting in a vibrant crust without unwanted bitterness.
Q6: Can blackening be applied to foods beyond fish and chicken?
A6: Yes! While traditional blackening shines in seafood and poultry, adventurous chefs have applied the technique to vegetables, tofu, and even steak. Each ingredient interacts differently with high heat and spices, inviting unique textures and flavors from smoky greens to boldly crusted plant-based proteins.
Q7: How can home cooks master blackening without burning their food?
A7: Precision is key. Use a hot cast-iron skillet, preheat it well, and don’t overcrowd the pan to ensure even cooking. Pat food dry, apply a thin but generous spice coat, and keep a close eye on timing-usually 2-3 minutes per side. Remember, the goal is an enticing dark crust, not ash-controlled heat and quick cooking make all the difference.
Q8: What cultural roots does blackening have?
A8: Blackening emerged from Cajun cuisine in Louisiana, a culinary tradition rooted in French, African, and Native American influences. It reflects the resourceful and bold spirit of Cajun cooks, who embraced intense spices and robust flavors to make simple ingredients unforgettable. Today, blackening is a celebrated technique bringing fiery southern comfort to tables worldwide.
Unlock the magic of blackening and savor the science behind every smoky, spicy bite-a technique where heat meets artistry to transform ordinary food into an extraordinary experience.
In Conclusion
As the final wisps of smoke drift away and the sizzle fades, the mystery of blackening reveals itself not just as a culinary technique but as a symphony of science and flavor. From the transformative dance of heat and spice to the intricate Maillard reactions painting each morsel with smoky complexity, blackening invites us to appreciate the art behind the char. By unlocking this science, we gain more than a recipe-we embrace a deeper understanding of how fire and flavor fuse to create unforgettable meals that tantalize the senses. So next time you watch those spices darken and crackle, remember: within that char lies a world of chemistry and craft, patiently waiting to ignite your palate.