- Cold fats and minimal handling are the two fastest fixes for toughness.
- Flour type and hydration control gluten development; choose wisely.
- Chill and rest the dough to relax gluten and firm fats before rolling.
Why Pie Crusts Turn Tough
Tough pie crusts result from excess gluten formation, lost fat barriers, or moisture imbalance. Each factor interacts during mixing, resting, and baking to change texture.
Flour protein content and temperature play large roles. For background on gluten chemistry, see gluten.
Overworking the Dough
Mechanical action develops gluten. The more you mix, knead, or press, the firmer those networks become, which produces chew instead of flake.
Use a pastry cutter, two knives, or quick pulses in a food processor to limit development. Stop when the dough barely holds together.
Warm Ingredients and Melted Fats
Warm butter blends too smoothly into flour, removing the chunks that steam and create layers. That means fewer laminated pockets and a denser crumb.
Keep butter and shortening cold until baking. For context on fats and texture, read about butter.
Wrong Flour and Excess Protein
High-protein flours like strong or bread flours form stronger gluten. That strength works for bread, not pastry.
Use all-purpose or pastry flour for crusts. For general background, see the flour article.
Practical Fixes You Can Use Today
The following steps address the common failure points directly. Each item focuses on controlling gluten, preserving fat, or correcting moisture.
Apply these fixes in order during your next bake to test improvement and learn what matters most for your oven and ingredients.
1) Keep Everything Cold
Chill your fat, equipment, and work surface when possible. Cold fats stay solid and create distinct pockets that steam into flakes during baking.
Splash only a tablespoon of very cold water at a time to bring dough together. If you want a scientific context for heat and cooking, see baking.
2) Measure and Choose Flour Wisely
Use the correct flour and measure by weight when possible. Excess flour will increase gluten; too little gives a sticky mess and potential overworking while correcting it.
Swap to pastry flour if you find consistent toughness with all-purpose. Pastry flour reduces protein content and limits gluten strength.
3) Limit Handling and Mixing Time
Combine until the dough just holds. Stop mixing the moment pea-sized fat pieces remain visible—those pockets make flake.
When rolling, lift and chill the dough rather than kneading. Gentle handling preserves the layer structure you want.
4) Rest and Chill Properly
Rest dough at least 1 hour in the refrigerator so gluten relaxes and fats firm up. Resting prevents shrinkage and improves flake.
If you make dough ahead, wrap discs tightly and let them rest for 24–48 hours or freeze for longer storage. Thaw slowly in the refrigerator before rolling.
[having separated blocks — see below for expert tips and cautions]
After chilling, handle the dough only enough to roll and fit into the pan. Stretching causes spring-back during baking and a tougher edge.
 Expert Insight
Use floured parchment or silicone surface to roll with minimal extra flour. That reduces the tendency to overwork the dough while preventing sticking.
Baking Techniques That Prevent Toughness
Baking method influences final texture. Uneven heat or overbaking can dry the crust into chew instead of crisp break.
Start at a moderate temperature and watch for golden color. Use a preheated baking sheet to help the bottom set quickly and form flaky layers.
Shielding and Timing
Use a shield or foil on edges to prevent overbrowning while the center finishes. Rotate the pie halfway through for even color and doneness.
Remove the foil in the last 10–15 minutes if you want a deep golden finish. Avoid overbaking; crumb moisture retention matters for tenderness.
 Pro-Caution
Allow the pie to rest briefly after baking; short rest improves slicing without compressing layers. Serve while warm for best textural contrast with cold accompaniments.
Recipe Notes and Chef’s Tips
Use a fat blend—about 50/50 butter and shortening—for taste and reliable structure. Butter gives flavor; shortening offers a higher melting point for stable flake.
Acid like a teaspoon of vinegar or lemon juice slightly weakens gluten and can improve tenderness without changing flavor. Add it with the cold water.
For troubleshooting, keep a baking log: note flour brand, butter temperature, water amount, chill times, and oven behavior. Small changes often reveal the core issue.
For more technique pieces on dough and pastry, reference your site’s internal resources: pie crust ingredients guide and pie baking basics.
Serving and Salvage Strategies
If a crust comes out slightly tough, present it with a soft component: ice cream, custard, or a sauce. That contrast improves perceived texture.
For future bakes, apply one change at a time—cold fat, less mixing, or different flour—so you can identify the effective adjustment.

| Nutrient | Per Serving |
|---|---|
| Calories | 320 |
| Protein | 4g |
| Carbohydrates | 28g |
| Fat | 22g |
FAQ
Why does overworking make crust tough?
Mechanical action aligns gluten proteins and forms a network. The stronger that network becomes, the more chew you will taste rather than flake.
Limit handling and stop mixing when the dough just holds together to retain a tender crumb.
Can I fix a crust after it is already tough?
If the crust is already baked and tough, you cannot fully reverse the structure. Use moist or fatty accompaniments to soften each bite and improve enjoyment.
For future bakes, change one variable at a time—temperature or flour—to isolate the cause.
Does butter really make a better tasting crust than shortening?
Butter provides superior flavor because of milk solids and water. Shortening can improve lift and flake due to its higher melting point.
Combine fats to get both flavor and structure: many professionals use a mix for consistent results.
How important is chilling time?
Chilling relaxes gluten and firms fat, which reduces shrinkage and improves lamination. At least one hour is a practical minimum for most doughs.
Longer chill times—up to 48 hours—can improve handling and flavor. Freeze for longer storage and thaw in the refrigerator.
What flour should I use to avoid toughness?
All-purpose or pastry flour gives a balanced protein level that limits strong gluten development while providing structure. Avoid bread or high-gluten flours for pie crust.
Measure flour by weight for consistency, and adjust water in small increments to avoid overhydration.
Apply these focused adjustments and you will correct most causes of a tough crust. Keep notes and test methodically to build reliable, flaky results every bake.
See also: pie crust
]]>
- Cook to temperature: Use a thermometer to stop guessing.
- Balance acid and fat: Marinade composition matters for texture.
- Two-zone grilling: Sear then finish over indirect heat for even doneness.
Understanding why chicken dries out
Chicken breasts are lean muscle with low intramuscular fat, so they lose moisture quickly as proteins tighten under heat. Overcooking or using only high direct heat squeezes juices out and makes the muscle fibers stringy.
Beyond physiology, preparation choices—brine, marinade, or lack of rest—alter how water and proteins behave during cooking. For context on poultry as food and muscle characteristics, see chicken as food.
Prep and cook time: realistic planning
Good timing prevents rushed decisions that lead to dry chicken. Plan for brining or marinating time, a quick sear, and a gentle finish so the internal temperature rises steadily instead of spiking.
Typical windows: 30 minutes to 4 hours marinade, 15–25 minutes on the grill, and 5–10 minutes rest. Use these ranges to schedule prep and avoid temperature surprises.
Ingredients
Choosing ingredients that promote moisture retention matters more than exotic spices. A simple combination of oil, acid in moderation, and aromatics gives both flavor and functional benefits.
Essential items: 4 boneless chicken breasts (~6 oz each), 1/4 cup olive oil, 1/4 cup plain yogurt (optional), 3 tbsp lemon juice, 3 garlic cloves, 1 tbsp honey, smoked paprika, dried oregano, salt, and pepper. For saltwater solutions, read about brine basics.
- 4 boneless, skinless chicken breasts (about 6 oz each)
- 1/4 cup olive oil
- 1/4 cup plain yogurt (optional, tenderizer)
- 3 tbsp lemon juice (fresh)
- 3 garlic cloves, minced
- 1 tbsp honey or maple syrup
- 1 tsp smoked paprika, 1 tsp dried oregano, 1/2 tsp salt, 1/4 tsp black pepper
Instructions
Follow a stepwise approach: prepare, control heat, monitor temperature, rest, and slice. Each action affects moisture retention and final texture.
Use an internal meat thermometer and a two-zone grill setup to execute the plan without guesswork. For tool specifics, check the entry on meat thermometers.
Marinating and brining
Combine olive oil, yogurt (if using), lemon juice, garlic, honey, paprika, oregano, salt, and pepper. Oil coats muscle fibers and slows evaporation; acid tenderizes but should remain moderate to avoid a mushy surface.
Submerge breasts in the mix for 30 minutes to 4 hours. Alternatively, a basic brine (water with 1-2% salt by weight) for 1–4 hours increases water retention; dilute and rinse before seasoning.
Searing and finishing on the grill
Preheat the grill to medium-high (around 375–400°F / 190–205°C). Create two zones: direct heat for a short sear and indirect heat for gentle finishing so the temperature rise is controlled.
Sear 2–3 minutes per side to develop flavor and color, then move to indirect heat and cook another 8–12 minutes, flipping once. Avoid continuous flipping; let thermal conductivity do its work.
Temperature target and resting
Remove chicken when the thickest point reads 160–162°F (71–72°C) and tent with foil for 5–10 minutes. Carryover cooking typically reaches the USDA target without forcing the meat past 165°F, which often causes dryness.
Resting allows juices to redistribute into the muscle, so slicing later yields a moist texture. Slice against the grain for the most tender mouthfeel.
Tips for success
Small, consistent habits create reliable outcomes: calibrate your thermometer, keep marinade times moderate, and control flare-ups to avoid hot spots. Each choice has a mechanical effect on moisture loss.
Prefer indirect finishing over high heat-only grilling. Indirect heat reduces surface temperature extremes and preserves tenderness while allowing the internal temperature to climb gently.
Expert Insight
If you use yogurt in the marinade, keep marination under four hours to avoid excessive protein denaturation. For brining, maintain salt concentration and time limits to balance flavor and texture.
Common mistakes that dry chicken
Typical errors include over-reliance on direct high heat, skipping rest, and neglecting to use a thermometer. Each of these increases the odds of a dry result.
Another mistake is over-acidifying the marinade. High acid levels break down proteins too aggressively, causing a mealy or dry surface once cooked.
Pro-Caution
Let the chicken come slightly toward room temperature before grilling so the surface and interior heat more uniformly. This step shortens cooking time and reduces moisture loss.
Serving suggestions
Pair grilled chicken with high-moisture sides to emphasize juiciness, such as a cucumber-tomato salad, chimichurri, or lemon-herb yogurt sauce. Bright accompaniments complement the savory crust.
Garnish with chopped parsley and lemon wedges and slice just before plating. For more technique and recipe combinations, see our internal guides on grilling and brining: Ultimate Guide to Grilling Techniques and Brining for Beginners.
Safety and quality considerations
Safe cooking practices protect both texture and health. Target the correct internal temperature and follow basic food-safety handling to minimize risk while maximizing quality.
For background on safety standards and recommendations, consult the general resource on food safety. Proper handling also preserves flavor by preventing spoilage-related off-flavors.
FAQ
Why is my chicken dry even when it looks done?
Often you are letting the internal temperature climb too high during final minutes. Remove the chicken at 160–162°F and rest under tented foil so carryover hits the safe 165°F without overcooking.
Does brining always help?
Yes, when done correctly. A balanced brine increases moisture content and helps proteins bind water during cooking. Keep brine concentration and time appropriate to avoid a salty interior.
Can I salvage slightly overcooked chicken?
Slice thinly, serve with a moist sauce, or shred and fold into a dressing or broth. Reintroducing moisture by sauce or liquid will improve mouthfeel and perceived juiciness.
Is a meat thermometer essential?
Absolutely. A reliable thermometer eliminates guesswork, reduces overcooking, and improves repeatability. Digital instant-read models provide fast, accurate readings for safe, juicy results.
Which cut stays juiciest on the grill?
Dark meat, like thighs and drumsticks, retains moisture better because of higher fat and connective tissue. If you choose breasts, apply the techniques above to achieve comparable tenderness.
Closing remarks
Controlling heat, timing, and salinity transforms grilled chicken from dry to succulent. The combination of brine or balanced marinade, a short sear followed by indirect heat, and precise temperature control produces consistent success.
Build these habits into each cook session and your grilled chicken will reliably turn out juicy and flavorful. Happy grilling and refine your process one cook at a time.
See also: grilled chicken
]]>There is a clear difference between a velvety, clingy risotto and a gluey, sticky pot of rice. As a chef with decades of restaurant and teaching experience, I diagnose texture problems by isolating three variables: rice variety, starch behavior, and cooking technique.
- Use the right rice: grains that hold structure deliver creaminess without glue.
- Control starch release: add liquid slowly and stir with purpose.
- Temperature matters: keep broth hot and cook over steady heat.
- Finish correctly: butter and cheese at the end round texture and flavor.
Prep and Cook Time
Preparation: 10 minutes. Preparation covers mise en place: chopping aromatics and measuring broth so you can cook without pauses.
Cooking: 30–35 minutes. Expect active attention; risotto requires steady stirring and gradual liquid addition to achieve ideal viscosity.
- Total Time: 40–45 minutes
Yield
Serves 4 hearty portions. This yield assumes a standard first-course portion or a modest main alongside a salad or protein.
Scale linearly by 1.5–2x for larger gatherings, but maintain broth temperature and stirring technique to preserve texture.
Difficulty Level
Medium. Risotto is technique-driven rather than ingredient-driven, so it rewards focus and consistency during cooking.
With practice you will internalize timing and the correct mouthfeel for al dente rice enveloped in a glossy sauce.
Ingredients
Below are typical amounts for a classic risotto base. Adjust salt and finish ingredients to taste.
Core ingredients:
- 1 ½ cups Arborio rice (or Carnaroli/Vialone Nano for more forgiving texture)
- 4 cups low-sodium chicken or vegetable broth, kept warm
- 1 small onion, finely chopped
- 2 cloves garlic, minced
- 2 tablespoons unsalted butter
- 2 tablespoons extra virgin olive oil
- ½ cup dry white wine (optional)
- ½ cup freshly grated Parmigiano-Reggiano
- Salt and freshly ground black pepper, to taste
- Fresh parsley or basil, for garnish
Ingredients Notes (Rice & Dairy)
Choose medium- or short-grain rices with high amylopectin content; they release starch in a controllable way and build creaminess without collapsing.
For finishing, use aged Parmigiano-Reggiano; its lower moisture and concentrated proteins help stabilize the emulsion and enrich mouthfeel.
Instructions
Follow these steps while keeping broth hot on a separate burner. Controlled temperature and measured liquid additions are the backbone of good risotto.
Work deliberately: each small action affects starch release and the final texture.
- Warm the broth: Keep the stock at a gentle simmer. Hot stock minimizes temperature shocks and preserves steady absorption.
- Sauté aromatics: In a heavy-bottomed pan, heat oil and half the butter over medium. Sweat onions and garlic until translucent; avoid browning to keep flavors clean.
- Toast the rice: Add the rice and stir for 1–2 minutes until edges look translucent. Toasting coats grains and helps them retain structure.
- Deglaze with wine: Pour in wine and stir until mostly evaporated; this adds acidity and balances richness.
- Add warm broth gradually: Ladle about ½ cup at a time. Stir gently between additions and wait until liquid mostly absorbs before adding more.
- Mind your stirring: Use a loose wrist motion and fold rather than mash. Aim for a gentle agitation that promotes even starch release.
- Check doneness: After 18–20 minutes taste a grain. It should be tender with a slight white core—al dente but creamy.
- Finish off heat: Remove from heat and stir in remaining butter and cheese. Rest 1–2 minutes before plating to let the sauce settle.
Technique Detail: Stirring Method
Stir consistently but calmly. Vigorous motion damages grain structure and liberates excess amylopectin, which creates gluey texture.
Instead, use a steady back-and-forth or circular motion to move the rice and integrate broth without breaking kernels.
Why Risotto Becomes Sticky
Sticky risotto usually results from over-released starch combined with broken grains. Starch becomes gluey when the granule structure ruptures and amylopectin floods the liquid phase.
Two common triggers are excessive heat and aggressive stirring; either action accelerates granule rupture and produces a pasty sauce rather than an emulsion.
Rice and Starch Science
Risotto rice relies on a balance between amylose and amylopectin. Amylopectin gives creaminess, while retained amylose keeps grains distinct and springy.
For more context on starch chemistry, see the general principles described on Starch.
Common Mistakes and How to Fix Them
Many cooks add all the liquid at once that turns simmering into a rapid boil. Rapid boiling releases starch unevenly and cooks the grain too fast.
Instead, add warm broth incrementally and restore a steady simmer to keep starch release controlled.
Fix a Sticky Batch
If your risotto is already gluey, gently fold in a few tablespoons of warm broth and a knob of cold butter. The fat re-emulsifies the sauce and softens the gluey mouthfeel.
Alternatively, spread the risotto on a shallow tray to cool briefly and then reheat with a splash of broth while stirring gently to rebuild emulsion.
Tips for Success: Chef’s Notes
Rice selection: Carnaroli resists overcooking better than Arborio; Vialone Nano yields a silkier, looser finish. Choose based on the texture you prefer.
Broth temperature: Hot stock keeps cooking even. Cold additions force the pan temperature down and encourage more vigorous stirring, which risks breaking grains.
Expert Insight
Rotate heat instead of stirring harder. When the surface looks glossy and the rice moves like slow traffic, you are close to ideal doneness.
Serving Suggestions
Serve risotto in shallow bowls so the sauce spreads evenly and cools at the right rate. Garnish with chopped parsley, cracked pepper, and a final shaving of Parmigiano-Reggiano.
Risotto pairs well with roasted vegetables or grilled proteins. Keep accompaniments simple to let the risotto’s texture and flavor shine.
Nutritional Info (per serving)
Estimates vary with ingredients and portion size. A classic risotto portion provides moderate calories and a mix of carbohydrates and fat from butter and cheese.
| Item | Calories | Protein | Carbs | Fat |
|---|---|---|---|---|
| Classic Risotto | 350 kcal | 9 g | 50 g | 10 g |
Q&A
The questions below address common, practical issues and provide concise corrective actions to improve texture.
Each answer points to technique adjustments you can test in the next cook.
Why does my risotto turn out sticky instead of creamy?
Sticky risotto signals over-released starch and broken grain structure. Reduce stirring intensity and lower heat so starch releases gradually.
Also, use warm stock and add it in increments; rapid liquid addition forces erratic starch release.
What rice should I use to avoid stickiness?
Choose Arborio, Carnaroli, or Vialone Nano. Carnaroli tolerates longer cooking and helps prevent collapse, while Vialone Nano yields a silkier, lighter cream.
For general grain behavior reference see Rice, which explains varietal differences and grain composition.
How much stirring is too much?
A steady, rhythmic stir is ideal. If you need to stir aggressively to prevent sticking, you likely have the heat too high or the pan too small.
Use a wide, heavy-bottomed pan to distribute heat and minimize the need for vigorous agitation.
Can cold broth cause stickiness?
Yes. Cold broth lowers the pan temperature and forces more stirring and longer cooking, which increases starch liberation and causes a gluey result.
Keep your stock on a low simmer alongside the pan so each ladle keeps the rice near its cooking temperature.
How do I rescue a gluey risotto?
Gently fold in warm broth and a small amount of cold butter off the heat to re-emulsify the sauce. Avoid boiling; treat the dish like an emulsion rather than a stew.
If needed, serve immediately in smaller portions; the texture will seem less sticky when plated and aerated.
For deeper reading on risotto technique, consult the culinary basics summarized on the Risotto page and the cheese regulations covered at Parmigiano-Reggiano.
Pro-Caution
Practice yields muscle memory for the rhythm of ladling and stirring. After 5–10 cooks you will recognize the sound, look, and mouthfeel that signal perfection.
Images: keep your plating simple to highlight texture. Photographing risotto works best in shallow bowls with a light drizzle of oil to catch highlights.
See also: risotto
]]>
- Dry the surface immediately before cooking to enable the Maillard reaction.
- Use heavy cookware and a high smoke-point oil for steady heat transfer.
- Time your salt to season without wetting the exterior and loosened juices.
- Baste late and rest briefly to preserve gloss and texture.
Understanding the Maillard Reaction for a Perfect Steak Crust
The visible brown layer on meat forms from the Maillard reaction, a chemical process between amino acids and reducing sugars that occurs at high heat.
That reaction creates complex aroma and taste compounds that define a real steak crust. For a technical primer, see Maillard reaction.
How surface chemistry matters
Proteins and surface sugars must reach roughly 140–165°C to form desirable Maillard products. Any surface moisture will convert to steam and keep the meat below that window.
A slightly higher pH speeds browning, which explains why small, controlled alkalinity changes affect the crust. Use these adjustments sparingly on thin cuts to avoid chemical flavors.
Why Your Meat Comes Out Pale: Fixes for a Steak Crust
Pale results typically trace to excess moisture or insufficient pan temperature. Steam prevents the surface from entering the Maillard temperature range and yields a steamed appearance instead of a crust.
Thin, lightweight pans drop temperature when meat is added and encourage steaming. A heavy pan retains heat and promotes immediate searing contact.
Moisture: the invisible saboteur
Even small droplets on the surface convert to steam at searing temperatures. Pat steaks dry with paper towels right before seasoning and cooking to remove surface water.
Avoid rinsing or wet brines immediately before searing. If you brine, dry thoroughly and allow time for the surface to set before heat contact.
Temperature and pan choice
Choose a pan that holds heat when food hits it, such as cast iron or heavy stainless steel. Cast iron stores energy and provides even contact for an efficient sear; see cast-iron skillet for heat capacity details.
If your pan cools dramatically, it will steam rather than sear. Preheat properly until the surface oil shimmers for direct heat transfer without pooling.
Preparation Steps That Make the Difference for a Steak Crust
Preparation narrows to three priorities: surface dryness, even thickness, and appropriate salt timing. Address all three and you dramatically raise the odds of a consistent steak crust.
Trim excessive surface fat and, if needed, score thick fat caps to encourage even contact. For thicker cuts, let them approach room temperature so heat penetrates predictably.
Salt timing and seasoning strategy
Salt first pulls moisture out, then reabsorbs it and seasons internally. A short rest of 15–30 minutes after salting typically dries the surface enough for a good crust without excessive juice loss.
Salt thin cuts immediately before searing. For thicker cuts, pre-salt and rest to achieve internal seasoning while keeping the exterior ready for browning. For deeper guidance, read our internal steak salting guide.
Expert Insight
Choose a high smoke-point oil—avocado or grapeseed works well—to transfer heat quickly. Add butter only near the end of the sear to avoid burning milk solids and spoiling the crust.
When the meat hits the pan, resist moving it. Undisturbed contact allows the Maillard reaction to proceed and build that visible crust reliably.
Heat Management and Technique for a Steak Crust
Heat control separates a strong sear from a scorched exterior. Begin on high heat to initiate browning, then adjust to maintain color without charring.
An infrared thermometer helps verify surface temperature and remove guesswork. Reliable measurement improves repeatability across different cookware and stovetops.
Basting and butter timing
Butter offers depth but burns at high temperatures. Add butter with aromatics like garlic and thyme only after the initial sear; baste briefly to coat the crust without degrading it.
Basting transfers flavor and creates a glossy finish while reducing direct butter contact with an extremely hot surface. Use tongs and a spoon to control the flow.
Flip strategy
Limit flips to once or twice; frequent turning interrupts the continuous contact time needed for browning. Allow each side an uninterrupted searing window to develop an even crust.
Use tongs rather than a fork to avoid piercing the meat and releasing juices. Gentle handling preserves internal moisture and the external texture.
Finishing, Resting, and Serving a Steak Crust
Remove the steak at target internal temperature and rest it to redistribute juices. Resting prevents interior liquids from rewetting and softening the crust.
Tent loosely with foil to allow vapor to escape while retaining heat. Tight wrapping traps steam and leads to a soggy exterior instead of a crisp steak crust.
Slicing and final touches
Slice against the grain to shorten muscle fibers and improve perceived tenderness. Finish with a light scatter of coarse salt or a quick pan sauce to complement the crust.
Different meats brown differently based on fat and sugar content. For reference on species-specific characteristics, see beef and poultry profiles.
Pro-Caution
After a rest, serve promptly to retain contrast between the crisp crust and tender interior. Time the plating so guests get peak texture and heat.
At-Home Equipment and Safety for Producing a Steak Crust
Match your technique to your tools. Heavy pans, a reliable digital thermometer, and a solid pair of tongs make consistent results realistic and repeatable.
Replace or re-season pans that no longer hold heat well. When searing at extreme temperatures, use ventilation to manage smoke and protect indoor air quality.
Recommended gear and setup
A cast-iron or heavy stainless pan provides the mass needed for steady searing. Learn more about searing mechanics at searing.
Keep a small heat-proof tray or rack to rest finished steaks. This prevents trapped steam beneath the meat and helps maintain the crust while you finish additional pieces.
For equipment suggestions, consult our internal roundup of the best cast iron skillet for searing, which lists pans that retain temperature and deliver a consistent steak crust.
FAQ
Why does my steak steam instead of sear?
Steam forms when surface moisture turns to vapor on a hot pan. Pat the steak dry, preheat a heavy pan, and avoid overcrowding to prevent steaming.
Also confirm your oil is shimmering but not smoking strongly; that window encourages direct heat transfer rather than steam buildup.
When should I add butter for flavor without burning the crust?
Add butter after the initial sear and once you flip to finish the second side. Baste briefly and keep the butter moving to avoid burning milk solids.
Alternatively, finish with cold butter off-heat to enrich pan juices and gloss the crust without exposure to extreme direct heat.
How long should I rest a steak to preserve the crust?
Rest most steaks 5–10 minutes depending on thickness. Tent loosely to keep heat while allowing vapor to escape so the crust stays crisp.
Longer resting times can soften crusts due to condensation; monitor timing to keep texture intact.
Does salting well in advance ruin the crust?
Salting hours ahead can draw moisture then reabsorb it, which seasons deeply. If you salt more than 60 minutes before cooking, pat the surface dry before searing to ensure a crust.
Short rests of 15–30 minutes often hit the sweet spot for thicker cuts: they season while still allowing a dry surface for browning.
What’s the single biggest change I can make to improve my steak crust?
The most impactful change is to remove surface moisture immediately before searing. Pat dry, preheat a heavy pan, and sear with minimal movement to produce a reliable steak crust.
Combine that with correct salt timing and steady heat management and you will see consistent, restaurant-quality results at home.
See also: steak crust
]]>
- Control gluten by minimal mixing and cold ingredients.
- Chill thoroughly to relax gluten and solidify fat.
- Choose fats smartly—butter for flavor, shortening or lard to soften texture.
- Bake hot and fast enough to steam layers before gluten firms.
Why Is My Pie Crust Tough?
Pie crust toughness stems from a few predictable causes: excess gluten, melted fat, and rushed or rough handling. Those factors change dough structure and rob the crust of flakiness and tenderness.
Understanding the mechanics makes troubleshooting simple. Treat dough like fragile architecture: keep elements cold, move slowly, and let time do the finishing work.
Gluten development: the mechanical cause
Gluten forms when water hydrates flour proteins and movement aligns them into stretchy strands. Excess hydration or vigorous mixing increases gluten, which tightens the dough and yields chewiness instead of flake.
Read about the protein chemistry behind this process on Gluten. The practical takeaway is simple: mix only until the dough just holds together.
Fat behavior and temperature
Fat creates layers. When pieces of cold fat remain intact through rolling, they melt in the oven and create steam pockets that lift the dough into flakes. If fat melts early, the dough becomes uniform and dense.
The role of common fats is explained at Butter and related entries. Keep fat cold and measured; that preserves layers and tenderness.
Ingredients
Use reliable components: all-purpose flour for structure, cold unsalted butter for flavor, and a small amount of ice water to bring dough together. A touch of acid—vinegar or lemon juice—can slightly weaken gluten for a softer crumb.
Optional substitutes help tweak texture: blending a portion of cake flour or using some shortening will reduce protein content and soften the final crust. For background on milling and flour types, see Flour.
Measured ingredient list
2 1/2 cups all-purpose flour, sifted
1 tsp salt, 1 tbsp sugar (optional), 1 cup unsalted butter, cold and cubed. 1/4–1/2 cup ice water and 1 tsp vinegar or lemon juice.
Fat choices and their effects
Butter gives flavor and crisp flake. Shortening or lard gives more tender, less intensely flavored results. A 50/50 blend often balances flavor and tenderness.
Adjust fat type to match the pastry: use more butter when flavor is priority, more shortening when you need tenderness for delicate fillings.
Step-by-Step Instructions
Work quickly and deliberately. Toss dry ingredients, cut in cold butter until you see pea-size lumps, then add ice water sparingly until the dough barely comes together.
Form two disks, wrap tight, and chill at least one hour. Chill both before rolling to keep fat solid and gluten relaxed.
- Combine dry ingredients: Whisk flour, salt, and sugar evenly to ensure consistent seasoning.
- Cut in cold fat: Add cold cubed butter and cut with a pastry cutter or fingertips until the mix looks like coarse crumbs with pea-size pieces of fat.
- Mix acid and water: Stir vinegar or lemon into ice water. The acid helps relax proteins and improves tenderness.
- Add liquid a tablespoon at a time: Drizzle half first, then add more until dough clumps. Stop when the dough holds when pinched.
- Form into discs: Gather without kneading and flatten gently. Overworking tightens the dough.
- Chill: Wrap tightly and refrigerate at least 1 hour. Proper chilling firms fat and calms gluten.
- Roll and assemble: Roll from the center outward on a lightly floured surface. Rotate to keep an even circle and avoid pressing too hard.
- Bake: Follow the filling recipe’s temperature. Aim for a starting oven temperature in the 190–220°C range (375–425°F) to set layers quickly.
Rewrap and chill any warm dough immediately. If the dough resists rolling or springs back, let it rest again in the fridge to relax.
Pro-Caution
For troubleshooting, keep a simple log: temperature, mixing time, and oven behavior. Small adjustments produce big texture changes.
Chef’s Notes
Gluten balance: Aim for minimal hydration and gentle mixing. The dough should be cohesive but not smooth like bread dough.
Resting time: Allowing the dough to rest hydrates flour uniformly and relaxes gluten. Never skip the chill step if you want a tender finish.
Expert Insight
Prevent overworking: Use a bench scraper to lift and fold rather than vigorous kneading. Press and patch rather than reworking a torn edge.
Freeze for convenience: Dough discs freeze well for up to a month. Thaw overnight in the refrigerator before rolling to preserve texture.
Serving Suggestions
For sweet pies, serve short after cooling to avoid soggy bottoms. A scoop of vanilla ice cream or lightly whipped cream complements a tender crust.
For savory pies, add fresh herbs or a light sauce. Present on a warming board or a classic ceramic plate to showcase the golden layers. For more technique notes, see our internal guide on How to Make Flaky Pie Crust and practical pie baking tips.
Nutrition
| Nutrient | Per Serving |
|---|---|
| Calories | 280 kcal |
| Protein | 3 g |
| Carbohydrates | 28 g |
| Fat | 18 g |

For reference on related pastry techniques, consult general pastry information at Pastry and context on pies at Pie (food).
FAQ
Why does my pie crust turn out tough instead of flaky and tender?
Tough crust most often means overdeveloped gluten or melted fat. Mix only until the dough binds and keep ingredients and hands cold to prevent fat from smearing into the flour.
Does the type of fat matter for texture?
Yes. Butter gives the best flavor and good flake when handled cold. Shortening and lard produce a more tender, less flavorful crust. Blending fats balances flavor and tenderness.
Is water temperature really important when making pie dough?
Absolutely. Cold water keeps fat intact and slows gluten formation. Use ice water and add it gradually so you only use what the dough needs.
How long should I chill the dough?
Chill at least one hour for best results. Longer chilling (several hours or overnight) improves handling and final texture by fully relaxing gluten and firming fat.
Any quick fixes for a dough that feels tough before baking?
If the dough is springy or resists rolling, stop working it and rest it in the fridge for 30–60 minutes. If baked already and tough, serve thinly sliced with moist toppings to mask chewiness.
Apply these steps consistently and you will convert troublesome crusts into reliably tender, flaky pastry. Precision and restraint in handling deliver repeatable results.
See also: pie crust
]]>
- Balance acidity and salt to activate flavors.
- Use technique (browning, toasting) to build depth.
- Add umami or bitterness to round a single-note profile.
- Finish with fresh elements for lift and clarity.
Prep and Cook Time
Prep Time: 15 minutes. I recommend mise en place: measure and ready everything before heat goes on. Prepared timing avoids under-seasoning or rushed technique that flattens flavor.
Cook Time: 30 minutes. Use controlled heat and staging to develop aromatics and brownings; fast, uneven cooking often yields a single muted note.
Yield
Serves 4. This estimate assumes standard portions and moderate seasoning levels to preserve balance across servings. When scaling, taste at each step because salt and acid do not scale linearly.
For larger batches, reduce initial salt and acid by 10-15% and season incrementally. Reheat gently; resting can harmonize components and deepen integration.
Difficulty Level
Medium. The techniques here demand attention to timing and seasoning rather than specialized equipment. You need to practice tasting and adjusting through the process.
Focus on heat control, proper browning, and finishing touches like acid and fresh herbs. Those small moves separate flat dishes from layered ones.
Ingredients
Use quality basic ingredients and treat them intentionally. Small upgrades—fresh citrus, ripe tomatoes, correctly toasted spices—amplify each layer of taste.
- 2 tbsp olive oil, extra virgin for finishing and gentle flavor depth
- 1 medium onion, finely chopped
- 3 cloves garlic, minced
- 1 tsp smoked paprika, adds warmth and aroma
- 1 tsp ground cumin, for earthy undertones
- 1/2 tsp sea salt, balances and amplifies
- 1/4 tsp freshly ground black pepper, for mild heat
- 1 cup crushed tomatoes, ripe acidity to cut richness
- 1 cup vegetable broth, low sodium gives control
- 1 tbsp fresh lemon juice, brightens and lifts
- 1 tbsp fresh chopped parsley, fresh herbaceous finish
If you want more body, add a splash of soy or miso for umami; add sparingly and taste. Fresh herbs belong at the finish to preserve vibrancy.
Instructions
Good technique converts simple components into layered flavor. Move deliberately: heat, aromatics, seasoning, liquid, simmer, finish.
- Heat the olive oil in a heavy skillet over medium until shimmering but not smoking.
- Add the finely chopped onion and sauté until translucent and slightly golden, about 7 minutes. Proper caramelization releases sugars and builds savory backbone.
- Incorporate the minced garlic and cook 1 minute until fragrant; avoid burning to prevent bitterness.
- Sprinkle smoked paprika, cumin, salt, and black pepper and toast 30 seconds to bloom the spices and increase aroma.
- Pour in crushed tomatoes and vegetable broth and stir. Simmer uncovered on low for 15 minutes until the sauce reduces and flavors concentrate.
- Stir in fresh lemon juice at the end to brighten and balance richness just before serving.
- Taste and adjust with salt, acid, or a pinch of sugar. Small, deliberate tweaks correct flatness faster than large, late additions.
- Remove from heat and garnish with fresh parsley and a light drizzle of olive oil for aroma and color.
Always sample at stages: after browning, after spices, mid-simmer, and before plating. That habit trains your palate and prevents a flat final result.
Why Dishes Taste Flat
A flat dish lacks contrast and layered stimuli. When a recipe presents only one dominant note—salty, sweet, or spicy—the brain perceives monotony rather than complexity.
Flavor depends on a combination of taste, aroma, and texture. If an element like acid, salt, or umami is missing, the ensemble feels incomplete.
Core Taste Elements
Balance involves the five basic tastes: sweet, sour, salty, bitter, and umami. A missing pole makes the dish swing toward one-dimensionality.
Study the five and practice adding small doses of the absent taste. Use taste perception concepts when you assess a dish.
Building Aroma and Texture
Aroma drives much of flavor. Toasting spices, browning aromatics, and using fresh herbs create multi-layered smells that the brain interprets as complexity.
Textural contrast—crisp elements against creamy bases—keeps the palate engaged. Add toasted seeds, quick-pickled vegetables, or fresh crunch at the finish.
Chef-Proven Fixes to Rescue Flat Dishes
When a plate reads flat, use targeted interventions rather than more of the same. A single corrective move often restores balance without overpowering the dish.
Here are seven practical fixes you can apply quickly during cooking or at the last minute to revive lackluster flavor.
1. Add Controlled Acid
A burst of acid brightens flavors and separates muddled notes. Use lemon, vinegar, or a citrus-based finishing element to lift the overall profile.
Add acid gradually and taste. A final touch of acid can transform a heavy sauce into a lively one without altering its body.
2. Layer Salt Strategically
Salt does more than make food salty; it enhances perception of other tastes and binds flavors. Salt early and in stages to help ingredients develop fully.
Prefer finishing salt for contrast and texture. If the dish tastes flat, add a very small pinch, stir, and taste again.
3. Unlock Umami
Umami adds savory roundness and depth. Ingredients like aged cheeses, mushrooms, soy, or a spoonful of miso provide concentrated umami when used sparingly.
Use umami to fill gaps where a dish lacks body. Read about the specific concept of umami to understand its role in savory balance.
4. Use Browning and Maillard Reaction
Proper browning yields complex, roasted notes that lift flatness. Sear proteins and caramelize vegetables to create new aromatic compounds through the Maillard reaction.
Control heat to avoid burning; char tastes bitter and can counter the desired depth. Toast spices briefly to renew their aromatic oils.
5. Introduce Bitterness and Herbaceous Notes
Bitterness and green notes add tension and intrigue. Charred greens, radicchio, or a scattering of fresh herbs give contrast to fatty or sweet elements.
Use sparingly. A measured bitterness or herbaceous burst makes other flavors pop instead of dominating them.
[having-space-for-tip]
Apply the next fix only after tasting; random additions can create imbalance instead of rescue.
Expert Insight
6. Adjust Texture and Temperature
Temperature and mouthfeel shape flavor perception. A colder element or a hot sauce can shift how tastes register on the tongue.
Add textural contrast—crunchy garnishes, creamy swirls, or acidic slaws—to refresh the palate and prevent monotony.
Pro-Caution
7. Finish with Freshness
Fresh herbs, citrus zest, or a finishing oil restore brightness and aromatic lift. Add them at the end to preserve volatile flavors and scents.
A final herbaceous or acidic note tells the palate that the dish is intentional and complete. That perception alone raises the eating experience.
Tips for Success
Layer your seasoning: Apply salt and spices at different stages to let flavors develop fully. Immediate seasoning and a final taste-and-fix create depth.
Heat control matters: Use medium heat for caramelization and high heat for quick sears. Wrong heat often yields bitterness or underdeveloped sugars.
- Use fresh herbs and acids at the finish: Bright notes fade with long cooking.
- Avoid over-salting early: Salt can mask subtle layers if added too soon.
- Add crunch: Toasted nuts, seeds, or fried shallots create exciting textural contrast.
- Make-ahead benefit: Many sauces taste better after a day; resting harmonizes flavors.
Serving Suggestions
This versatile sauce pairs with grains, roasted vegetables, or grilled proteins. Presentation matters: contrast a rich base with a bright, fresh garnish.
Consider toasted seeds for crunch, a citrus wedge for on-plate finishing, and a simple green salad to cleanse the palate between bites.
Nutritional Snapshot
Per serving values vary with exact ingredients and portion size. The table below provides a rough caloric and macronutrient guide.
| Nutrient | Per Serving |
|---|---|
| Calories | 180 kcal |
| Protein | 3 g |
| Carbohydrates | 15 g |
| Fat | 12 g |
FAQ
Why does my dish taste flat even if I followed the recipe?
Followed recipes assume ingredient quality and technique. If you skip stages like browning or under-season early, the dish can lack layered development and thus taste flat.
Taste at key points and correct with small amounts of acid, salt, or umami. That practice fixes most shortcomings.
What does one-dimensional mean in cooking terms?
One-dimensional cooking highlights a single dominant taste while lacking counterpoints. Without contrast—sweet vs. sour, soft vs. crunchy—the overall impression becomes monotonous.
Introduce at least two contrasting elements; even a small acidic note or crunchy garnish adds perceived complexity.
Can technique really change flavor that much?
Yes. Techniques like searing, roasting, and toasting create new aromatic compounds through chemical processes such as the Maillard reaction. Those compounds deliver roasted, savory, and caramelized notes that raw ingredients lack.
Apply heat intentionally to transform base ingredients into richer flavor carriers.
How do I train my palate to detect missing elements?
Taste components individually: plain cooked salt, acid, and a pure umami ingredient like soy. Compare them to a mixed dish and learn which quality it lacks.
Practice with small, controlled adjustments to build sensitivity and confidence in quick fixes.
What’s the fastest last-minute fix for a flat dish?
A splash of acid—lemon juice or a mild vinegar—usually revives a flat plate instantly. Add in increments and re-taste to avoid over-brightening the dish.
Finish with a small amount of fresh herb or a crunchy element to restore aromatic lift and textural interest.
Final note: Flavor is a system. Apply technique, balance tastes, and finish smartly to move a dish from flat to memorable.
See also: Flavor
]]>
- Key takeaways: Temperature, minerals, and regular feeding drive grain multiplication.
- Use filtered or spring water and mineral-rich salt to support microbial balance.
- Short, consistent ferment cycles prevent grain stress and over-fermentation.
- Revival steps often work: fresh sugar water, correct temp, and patient feeding.
How Water Kefir Grains Grow
Water kefir grains are a symbiotic community of bacteria and yeast that metabolize sugars into acids, CO2, and ethanol. Their structure and growth dynamics differ from milk kefir and are documented for reference on water kefir.
Growth depends on nutrient availability, mineral content, temperature stability, and microbial balance. For background on the underlying biological processes see fermentation.
Common Reasons Grains Fail to Multiply
Temperature outside the optimal range slows metabolism or damages cells. Consistent swings between cold nights and warm days often produce sluggish grains rather than active, multiplying ones.
Poor water mineral content and the wrong sugar type starve the culture of trace elements they need. Chlorinated or fluoridated tap water, and artificial sweeteners, also impair microbial activity.
Recipe Snapshot
Preparation: 10 minutes. Fermentation: 24–48 hours. These timeframes give grains regular, predictable feeding to encourage growth.
Yield: About 1 quart (4 cups) of water kefir, typically 4 servings. Split larger grain masses into multiple jars so each portion gets enough food and room to grow.
Ingredients
3–4 tablespoons active water kefir grains. Use translucent, firm grains whenever possible; soft, discolored grains signal stress or contamination.
1 quart filtered or spring water, 1/4 cup organic cane sugar (or evaporated coconut sugar), and 1 tablespoon mineral-rich sea salt or Himalayan salt. Optionally add a dried fig or 2 tablespoons raisins to supply trace minerals.
Step-by-Step Instructions
1. Dissolve sugar and salt in room-temperature filtered water. Stir until fully dissolved to avoid undissolved particles that stress the culture.
2. Add optional dried fruit for minerals, then gently introduce the grains. Avoid prolonged contact with metal; use a glass jar and plastic or wooden utensils when possible.
3. Cover with a breathable cloth secured with a band and place in a stable warm spot at 68–78°F (20–26°C). Ferment for 24–48 hours and monitor grain appearance and fizz.
4. Strain grains using a plastic mesh strainer, then transfer the liquid for secondary fermentation or chill for immediate drinking. Return grains to fresh sugar water promptly to keep them fed.
Chef’s Notes: Optimization and Troubleshooting
Mineral balance matters: Grains need trace minerals (calcium, magnesium, potassium) to rebuild cell walls and reproduce. If you use very soft water, add a pinch of mineral salt or a small piece of dried fruit to each batch.
Water quality: Chlorine and high fluoride can harm cultures. If your municipal water has additives, dechlorinate by leaving it uncovered 24 hours, or use filtered/spring water to avoid inhibition.
Feeding cadence: Regular refreshes—every 24–48 hours—prevent starvation and keep the community reproducing. Long, single ferments exhaust sugars and create acidic conditions that shrink grains.
Expert Insight
Over-fermentation signs include mushiness, odd colors, or sour off-odors. If you see these, reduce the cycle length and perform frequent swaps to dilute harmful byproducts.
Pro-Caution
If contamination is likely, sanitize jars and start with a fresh, healthy grain source. For persistent issues, send images to a fermentation community or consult a trusted supplier.
Revival Protocol for Sluggish Grains
Start a recovery series: three to five sequential 24-hour ferments at a stable 72°F (22°C) in fresh sugar water with a pinch of mineral salt. Keep jars away from strong sunlight and drafts.
If grains remain inactive after multiple recovery attempts, give one cycle with a teaspoon of unsulphured molasses to supply complex minerals and micronutrients. Watch for improved texture and CO2 production.
Serving Suggestions
Chill the finished water kefir and serve over ice with citrus slices or fresh mint for a refreshing probiotic beverage. For flavor variety, add ginger, berries, or hibiscus during secondary fermenting to infuse aroma and color.
Remember that added fruits will change sugar content and fermentation speed; bottle carefully and refrigerate to control carbonation and avoid over-pressurization.
Nutrition (Per 1 cup)
| Nutrient | Per 1 cup Serving |
|---|---|
| Calories | 40 kcal |
| Protein | 0.5 g |
| Carbohydrates | 10 g |
| Fat | 0 g |
Further Reading and Resources
For practical care tips, see our internal guides: Fermentation Basics Guide and Kefir Grain Care. These pages cover routine maintenance, storage, and sanitation protocols that support multiplication.
For microbiology context, review pages on probiotics and the role of yeasts in mixed cultures. These references explain why diverse microbes help maintain grain stability and growth.
FAQ
How fast should healthy grains multiply?
Healthy grains can increase noticeably within a few weeks under optimal conditions. Expect gradual mass gains; doubling time varies with temperature, food, and mineral availability.
Can I use tap water?
Use filtered or dechlorinated water whenever possible. If tap water is your only option, let it sit uncovered 24 hours to off-gas chlorine or use a basic carbon filter to protect the culture.
Is sugar type important?
Yes. Sucrose from organic cane sugar supports typical water kefir communities. Molasses or unrefined sugars add minerals but use in moderation. Avoid artificial sweeteners and honey for long-term grain health.
When should I replace grains?
Replace grains if they remain inactive after repeated recovery attempts, or if they develop bad odors, off colors, or slime. Healthy grains are firm, translucent, and mildly yeasty-smelling.
Where can I get reliable help?
Start with our internal troubleshooting pages and community forums dedicated to fermented beverages. If needed, consult experienced suppliers or fermentation experts who can review photos and advise on next steps.
See also: kefir grains
]]>
- Ultra-fine particle size improves rollability and translucence.
- Balanced protein supports elasticity without chewiness.
- Faster, even hydration reduces mixing time and tearing.
- Versatile use across pasta and thin-crust pizza applications.
What is 00 flour?
00 flour is a grading used in Italian milling that denotes a very fine grind of the endosperm. The label signals particle size and refinement rather than a single wheat variety.
The milling approach behind 00 flour focuses on sifting and reduction of bran fragments. For technical background on flour and milling, consult flour composition and milling methods to understand how particle size affects dough behavior.
How 00 is produced
Mills grind the endosperm to an ultra-fine consistency, then separate larger particles and bran. The result is a powdery flour that looks and feels almost silky.
Because the bran and large fragments are removed, liquids absorb into 00 flour differently than into coarser mixes. This fine particle profile shortens the time needed to obtain a uniform, smooth dough surface.
Why fineness matters for pasta
Fine particles hydrate more uniformly, creating a cohesive dough matrix that stretches without tearing. That matrix supports thin rolling and good pasta structure when cooked.
Also, 00 flour requires less dusting during shaping, so the pasta retains moisture and produces a tender bite. For the science behind elastic networks and cooking performance, review gluten formation and its interaction with particle size.
Protein content and texture
00 flours marketed specifically for pasta typically list moderate protein values. They sit below high-gluten bread flours but high enough to form a stable, extensible network.
That balance yields strength with suppleness, so cooked fresh pasta holds shape, resists overexpansion, and delivers a classic al dente mouthfeel without excessive chew.
Step-by-step: Making pasta with 00 flour
Using 00 flour streamlines several stages of pasta making: mixing, kneading, resting, and rolling. Follow weight measures and a consistent workflow to get predictable outcomes.
Always use room-temperature eggs and measure flour by weight when possible. For a tested reference, try an internal homemade pasta recipe that lists grams for each ingredient.
Ingredients
2 cups 00 flour, 3 large eggs, 1/2 tsp salt, 1 tbsp olive oil, and a splash of water if needed. Weighing gives better accuracy than cups for repeatable results.
Optional: blend 10–20% semolina for added bite and grip. For background on coarse durum products that contrast with 00, consult semolina.
Instructions
1. Mound the flour and form a well. Add eggs, salt, and olive oil to the center. Gradually fold the flour into the liquid until a shaggy mass forms.
2. Knead 8–10 minutes until smooth and slightly tacky. Rest 30–45 minutes wrapped at room temperature to relax the gluten and improve rollability.
Kneading, resting and shaping
After resting, divide the dough and roll thinly with a machine or pin. With 00 flour, you can reach nearly translucent sheets with less effort than coarser flours.
Cut shapes and cook fresh pasta 2–5 minutes in rapidly boiling salted water until al dente. Fresh pasta cooks faster than dried varieties, so test small samples to time the ideal bite.
Expert Insight
Chef’s Notes and practical variations
Choose a 00 labeled for pasta or pizza when possible because mills sometimes tailor blends for specific uses. Read the miller’s protein specification if you want a precise texture.
Try ratios: pure 00 for silky sheets; 80/20 00 to semolina for firmer strands. Use slightly less dusting flour during shaping; excess makes pasta heavier and drier.
Pro considerations: Handling and troubleshooting
If the dough feels dry, add water one teaspoon at a time while kneading. If sticky, rest it longer or dust lightly and sparingly when shaping.
Humidity and egg size change hydration needs. Adjust by feel and small trials rather than strict cup volumes to maintain consistent results across seasons and kitchens.
Pro-Caution
Common issues and fixes
Tear-prone sheets usually indicate insufficient rest or uneven rolling. Let the dough relax and check the roller spacing for consistent thickness.
Gummy pasta often signals undercooking or excess hydration. Cook small samples and adjust boiling time and dough hydration in small increments.
Serving suggestions and pairings
00 flour’s subtle flavor partners well with light, high-quality ingredients that showcase texture rather than mask it. Opt for sauces that highlight the pasta’s mouthfeel.
Consider brown butter and sage, a fresh tomato pomodoro, or a delicate seafood sauce. Finish with freshly grated aged cheese and a drizzle of olive oil to balance richness.
Nutrition (per serving)
Nutrition varies by recipe, but a typical serving of fresh egg pasta made with 00 flour provides calories from carbohydrate and moderate protein. Adjust portions based on sauce and add-ins.
| Nutrient | Per Serving |
|---|---|
| Calories | ~350 kcal |
| Protein | ~11 g |
| Carbohydrates | ~60 g |
| Fat | ~8 g |
Practical context and application
Understanding why 00 flour performs well requires looking at particle size and protein together. Those factors control hydration, gluten network formation, and final mouthfeel.
Use small tests when switching brands; mills vary blends and protein levels. Sample a 500 g bag before committing to large quantities if you depend on very specific texture outcomes in production.
FAQ
What exactly is 00 flour?
00 is an Italian grade referring to a very fine grind of wheat endosperm. It usually contains fewer bran particles and therefore hydrates and rolls differently than coarser flours.
The fine texture helps produce a smooth dough surface and delicate pasta sheets when handled correctly.
How does 00 flour differ from all-purpose or bread flour?
00 typically has a finer particle size and moderate protein compared with bread flour. Bread flour emphasizes higher protein for maximum gluten strength and volume.
That difference makes 00 better for pasta and thin-crust pizza where extensibility and tenderness matter more than maximum chew.
Can I use 00 flour for other recipes?
Yes. Bakers use 00 for pizza dough, some pastries, and recipes that benefit from a fine crumb. However, use higher-protein flours for crusty artisan breads.
For broader context on pasta techniques and related doughs, see pasta methods.
Where should I source authentic 00 flour?
Buy from reputable mills and specialty sellers that provide origin and intended use. Look for “Tipo 00” and the miller’s protein percentage when you need a specific performance.
Test a small bag to learn its performance; different brands vary slightly and will affect hydration and rolling characteristics.
Should I ever mix 00 with other flours?
Yes. Mixing a portion of semolina or whole-grain flour adds flavor and bite. A common blend is 80% 00 to 20% semolina for shaped pastas that need more grip.
Always adjust hydration when blending flours because coarser particles absorb water at different rates.
Final note: When used with careful technique—accurate measurement, controlled kneading, and adequate rest—00 flour is a practical tool that consistently produces tender, elastic fresh pasta.
See also: 00 flour resources and pasta kneading guide
See also: 00 flour
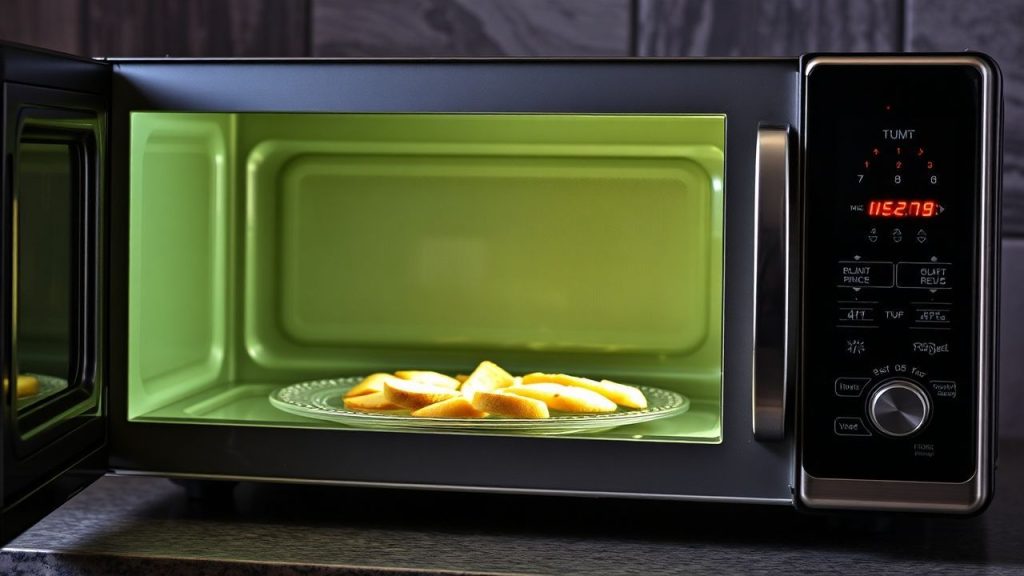
]]>Microwave Explosion: Why Did My Food Suddenly Explode?
A routine reheating can turn dangerous when a microwave explosion throws hot food or liquid. Understanding why a microwave explosion happens helps you prevent burns and messy cleanups.
- Key cause: trapped steam and uneven heating often trigger a microwave explosion.
- Common offenders: sealed containers, whole eggs and dense foods are frequent causes.
- Simple fixes: venting, short bursts and stirring greatly reduce microwave explosion risk.
How Microwave Explosion Heating Actually Works
Microwave ovens heat food by exciting water and fat molecules, which produces heat internally. This rapid internal heating creates pressure and hot spots that can lead to a microwave explosion if steam cannot escape.
Microwave energy deposits inside foods rather than only at the surface. When liquid pockets superheat, they can vaporize suddenly and force a rapid volume change — the physical event behind many microwave explosions.
At the Source: Why Microwave Explosion Occurs
Most microwave explosions start with trapped steam. Moist or dense foods form internal vapor pockets beneath skins or lids; without a vent, pressure builds until something fails suddenly.
Think of a sealed jar or an intact egg as a small pressure vessel. When internal pressure exceeds the strength of the container or skin, it ruptures, producing the characteristic pop and spray of a microwave explosion.
Hotspots and Microwave Explosion Risk
Microwave fields produce uneven energy patterns. Certain shapes and compositions concentrate energy into localized hotspots that can superheat a small region.
Disturbing a superheated pocket — by stirring or cutting into it — can nucleate boiling or rapid vaporization. That sudden phase change creates the mechanical force seen in a microwave explosion.
Seven Common Culprits
1. Sealed Containers: Lids, plastic wrap or sealed bags trap steam and convert the vessel into a pressure chamber. The sudden release causes a microwave explosion.
2. Intact Eggs: Eggs in shells have no escape for expanding steam. They commonly rupture and create a dramatic microwave explosion.
3. Dense Foods: Whole potatoes, sausages and tomatoes build internal steam pockets unless pierced. These pockets can cause a microwave explosion on venting.
4. Thick Sauces: High-viscosity sauces trap steam and develop localized superheated zones, which can erupt when disturbed and trigger a microwave explosion.
5. Uneven Food Distribution: Crowded or irregularly shaped dishes create uneven heating and localized boiling that can lead to a microwave explosion.
6. Non-Microwave-Safe Plastics: Some plastics warp or obstruct vents as they deform, increasing internal pressure and the chance of a microwave explosion.
7. Residue and Splatter Spots: Food buildup on the cavity creates hotspots that raise local temperatures and can contribute to small eruptions or a microwave explosion.
Prep, Timing and Yield: Practical Guidelines to Prevent Microwave Explosion
Prep: Choose a vented, microwave-safe container, pierce skins of dense items and arrange food evenly. These steps reduce trapped steam and lower microwave explosion risk.
Timing: Heat in short intervals (20–45 seconds) and stir between bursts. Short cycles let you test temperature and avoid sudden vaporization that causes microwave explosion.
Yield: Use one batch per container and avoid overcrowding. Overfilling worsens uneven heating and increases the probability of a microwave explosion.
How to Choose Containers and Covers
Select glass or ceramic labeled microwave-safe to avoid warping and uneven heat transfer. Proper materials help vent steam predictably and reduce microwave explosion incidents.
Use vented lids or a loosely placed paper towel to trap splatter but allow steam to escape. Avoid tight seals and do not use metal objects that reflect energy and create arcing.
Container Choices and Heat Distribution
Shallow, wide vessels increase surface area and reduce depth; that lowers the chance of internal steam pockets that produce a microwave explosion. Stirring regularly evens temperature.
When reheating soups or gravies, transfer to a broad dish and heat at medium power. That reduces hotspot intensity and the abrupt vaporization that causes a microwave explosion.
Step-by-Step Instructions to Prevent Explosions
1. Pierce dense skins once or twice with a fork to provide steam vents. A small hole controls pressure and prevents a microwave explosion.
2. Cover with a vented lid or loose paper towel. This contains splatter while allowing gas flow; tight seals can provoke a microwave explosion.
3. Heat in short intervals and stir between cycles. Stirring redistributes heat and collapses steam pockets gradually, avoiding microwave explosion triggers.
4. Use medium power for dense items. Lower power produces gentler heating and reduces the formation of hotspots that can cause a microwave explosion.
Expert Insight
Cleaning and Maintenance to Reduce Risk
Keep the interior clean. Baked-on food creates thermal hotspots that raise local temperatures and increase the chance of ignition or a microwave explosion.
Run a short steam-clean cycle with water and lemon in a safe bowl to loosen residue, or wipe the cavity after use. Regular maintenance preserves predictable heat patterns and reduces microwave explosion occurrences.
Pro-Caution
Serving Suggestions and Safe Handling
Allow heated foods to rest for a minute before serving. Standing time equalizes temperature and lets residual steam dissipate, lowering the chance of a microwave explosion when opened.
Use oven mitts and tilt lids away from your face to vent escaping steam safely. Open lids slowly and stir carefully to release any remaining pockets gradually.
Common Myths Versus Facts
Myth: Microwaves explode food randomly. Fact: Explosions follow specific physical causes — trapped steam and hotspots — both of which you can control to prevent a microwave explosion.
Myth: Microwaving is inherently unsafe. Fact: With proper containers, power settings and technique, microwave cooking is efficient and safe and rarely leads to a microwave explosion.
Technical Note: Heat Transfer and Phase Change
Phase change from liquid to vapor absorbs and redistributes energy. When that change happens rapidly, it does mechanical work that can eject food and cause a microwave explosion.
Superheating can occur in smooth containers where bubbles do not form until disturbed. Sudden nucleation throws liquid out in a boil-over event similar to a microwave explosion.
For further technical background, see the appliance entry on microwave oven and the physics of steam. Also review pressure cooker dynamics and thermal conduction for related concepts.
Visuals, Nutrients and Practical Notes
Microwave heating preserves nutrients well because of reduced cook times. Short, even heating maintains texture and decreases the conditions that produce a microwave explosion.
When reheating soups or sauces, use a broader vessel and stir before serving. That yields consistent temperatures and avoids pockets that might erupt when pierced.
Prep Checklist Before You Hit Start
1. Choose a microwave-safe dish and a vented cover. 2. Pierce dense skins. 3. Arrange food evenly and avoid overfilling.
Follow this checklist to reduce trapped steam and improve results. Small prep work prevents large cleanups and minimizes the chance of a microwave explosion.
FAQ
Why does an egg explode in the microwave?
Eggs in shells lack vents for steam. Heating converts liquid interior to pressurized vapor and the unyielding shell ruptures, producing a messy microwave explosion.
Can plastic containers cause explosions?
Unsafe plastics can deform and obstruct vents. Use containers labeled microwave-safe to prevent warping that could trap steam and lead to a microwave explosion.
Are microwave explosions dangerous?
Explosions usually cause messy splatter and potential burns from hot liquid. They rarely damage the appliance, but scalding steam and fluids can injure you.
How do I safely open a hot container that was microwaved?
Wear heat protection, tilt the lid away from your face to vent steam, and allow a short standing time. Stir carefully to release any remaining pressurized pockets slowly and avoid a microwave explosion.
Where can I learn more about safe microwave operation?
Refer to your appliance manual for safety specs and to the Wikipedia entry on microwave oven for general principles. Manufacturer guides provide model-specific precautions to avoid a microwave explosion.
See also: Microwave Safety
Recommended Reading:
]]>
- Key takeaway 1: Umami anchors flavor and increases perceived satisfaction.
- Key takeaway 2: Simple techniques—caramelizing, roasting, deglazing—amplify taste rapidly.
- Key takeaway 3: Fermented and aged plant ingredients can replace animal-based savoriness.
- Key takeaway 4: Balance acidity, salt, fat, and texture to finish a dish with impact.
Understanding Umami and Savory Chemistry
Umami gives dishes a rounded, lingering savory sensation. Scientifically, umami receptors respond to free glutamate and certain nucleotides; these compounds communicate richness to the palate. See umami for background on the taste and its perception.
Vegetarian kitchens often underdeliver on umami because whole vegetables contain bound forms of flavor precursors. Techniques that concentrate or convert those precursors release more sensory impact. For a primer on the underlying molecules, consult glutamate.
Savory Mushroom & Lentil Recipe (Practical Example)
This mushroom-and-lentil mixture demonstrates how layered umami, texture, and acid deliver completeness. It works as a main, a grain topper, or a filling, and it scales easily for meal prep.
The recipe relies on rehydrated dried shiitake, fermented miso, nutritional yeast, and a low-sodium condiment to build depth without excess salt. For context on the mushroom variety, see shiitake mushroom.
Prep and Time
Preparation: 15 minutes. Keep ingredients organized to allow uninterrupted caramelization and deglazing.
Cooking: 25 minutes. Monitor heat so vegetables brown but do not burn.
Yield and Difficulty
Yield: Serves 4. The mixture stores well and improves overnight.
Difficulty: Easy to medium. Techniques are basic but require attention to timing.
Ingredients
1 cup dried shiitake mushrooms, soaked and sliced; 2 tablespoons miso paste; 1 tablespoon tamari; 1 tablespoon nutritional yeast; 1 cup cooked lentils; 1 medium onion, finely chopped; 3 cloves garlic, minced; 1 tablespoon olive oil; 1 teaspoon smoked paprika; 1/2 cup vegetable broth; salt and freshly ground black pepper; chopped parsley to garnish.
Choose low-sodium broth and tamari to control total sodium while preserving depth. For more plant-based ingredient ideas, visit Vegetarian Umami Boosters.
Instructions
1. Prepare mushrooms: Soak dried shiitake in warm water for 20 minutes. Reserve the soaking liquid; it concentrates savory solubles and can replace part of the broth.
2. Sauté aromatics: Warm olive oil in a large skillet over medium heat. Add onion and garlic; sauté until golden and fragrant, about 5 minutes. Browning these builds Maillard compounds that add complexity.
3. Add mushrooms and spices: Add sliced shiitake and smoked paprika. Cook until mushrooms soften and edges brown, 7–8 minutes. Browning intensifies savory perception.
4. Combine lentils and umami elements: Stir in cooked lentils, miso paste, nutritional yeast, and tamari. Heat gently for 2–3 minutes so the miso dissolves and flavors meld.
5. Deglaze and simmer: Pour in vegetable broth and reserved mushroom soaking liquid if desired. Scrape browned bits from the pan and simmer until slightly reduced, about 5 minutes. This concentrates flavor without added salt.
6. Final seasoning: Taste and adjust with small amounts of salt and pepper. Finish with a squeeze of acid—lemon or vinegar—to lift the palate and reveal hidden layers.
Techniques That Add ‘Completeness’
Caramelization and roasting break down sugars and form savory Maillard products. These reactions add both aroma and perceived richness. Use medium-high heat and avoid overcrowding the pan so browning occurs efficiently.
Deglazing with a flavorful liquid recovers browned fond and reincorporates it into the dish. Similarly, fermenting or aging ingredients concentrates free amino acids and nucleotides that stimulate umami receptors.
Why Texture Matters
Texture signals satisfaction as much as flavor does. Contrast creamy lentils with chewy mushrooms and crisp toasted seeds to create interest in every bite. A varied mouthfeel increases satiety and perceived value of the meal.
For meal-builders, include at least two contrasting textures per plate: soft (grains or legumes) and crisp (roasted vegetables, seeds, or toasted bread). Texture amplifies the impression that a dish is complete.
[h2]Health-Conscious Seasoning and Ingredients[/h2]
Use low-sodium condiments and homemade broth to control salt while keeping flavor. Fermented ingredients—like miso—deliver concentrated umami in small amounts, making them efficient and health-friendly.
Nutritional yeast provides savory, cheese-like notes with added B vitamins. Add it late in cooking to maintain flavor. If shiitake are unavailable, dried porcini or cremini are solid substitutes.
Expert Insight
Fat carries aroma molecules and rounds mouthfeel. A tablespoon of olive oil, a drizzle of tahini, or a sprinkle of toasted nuts can resolve any flatness. Do not remove fat entirely; instead, prefer healthy unsaturated sources for balance.
Pro-Caution
Tips for Success
Elevate umami naturally: Use fermented or aged plant ingredients—miso, tamari, sundried tomatoes, and aged soy products add depth without artificial enhancers.
Optimize texture: Caramelize mushrooms and onions to unlock savory compounds. Add toasted seeds or nuts just before serving for crunch.
Control sodium smartly: Prefer low-sodium tamari and homemade broth. Add salt at the end to avoid over-seasoning during reduction steps.
Make-ahead benefits: Many umami-rich dishes improve after a day as flavors blend. Store in airtight containers and reheat gently to preserve texture.
Serving Suggestions
Serve the mushroom-lentil mix over warm quinoa or brown rice to create a complete protein profile and a satisfying bowl. Add roasted root vegetables for seasonal depth.
Use the mixture as a filling for whole-grain tacos, stuffed peppers, or savory pies. Finish with fresh acid (lemon or vinegar) and a crunchy topping like toasted pine nuts or pumpkin seeds.
Nutrition Facts
| Nutrient | Per Serving |
|---|---|
| Calories | 280 kcal |
| Protein | 18 g |
| Carbohydrates | 32 g |
| Fat | 6 g |
Related Resources
For further reading on the science and practical techniques that enhance plant-based savoriness, see the following internal and reference pages. These links point to tested approaches and additional recipes on our site.
Vegetarian Umami Boosters and Lentil Recipes offer practical variations, meal plans, and make-ahead strategies to increase kitchen efficiency.
FAQ
Why do some vegetarian meals feel like they’re missing something?
Often they lack concentrated savory compounds and contrasting textures. Without umami and textural interest, dishes can taste one-dimensional and unsatisfying.
To fix this, layer flavors: caramelize aromatics, add fermented elements, and finish with acid or fat to balance the profile.
What exactly is umami, and why does it matter in vegetarian cooking?
Umami is a basic taste that signals protein-rich or aged foods. It makes dishes feel richer and more sustaining by activating specific taste receptors.
Plant-based kitchens can use glutamate-rich vegetables and fermented ingredients to mimic that savory depth without animal products. Learn more at umami.
How can I make my vegetarian meals more satisfying right now?
Add a small amount of a fermented or aged ingredient (miso, tamari, nutritional yeast), balance with acid, and include at least one crunchy element. These moves transform a flat plate into a layered one.
Also, cook components separately to allow proper browning, then combine at the end for maximum contrast.
Are there simple ingredient swaps that boost flavor quickly?
Yes. Swap regular soy sauce for low-sodium tamari, use miso in place of plain salt in many sauces, and substitute dried mushrooms for fresh to intensify aroma. Toast seeds or nuts before use to add warm, toasty notes.
For seasoning theory and taste receptor basics, consult taste.
Can plant-based proteins make a meal feel complete?
Absolutely. Tempeh, seitan, tofu, and legumes provide texture and substance. Marinate, season, and apply high-heat techniques to maximize their flavor-carrying potential.
Combine these proteins with grains and seeds to build balanced meals that satisfy both hunger and palate.
Final Notes
Completeness in vegetarian cooking is intentional. Focus on concentrated savory ingredients, purposeful heat application, and textural contrasts to convert wholesome components into crave-worthy dishes.
Practice these methods regularly; the more you apply them, the quicker you will recognize and fix flatness in any plant-based meal.
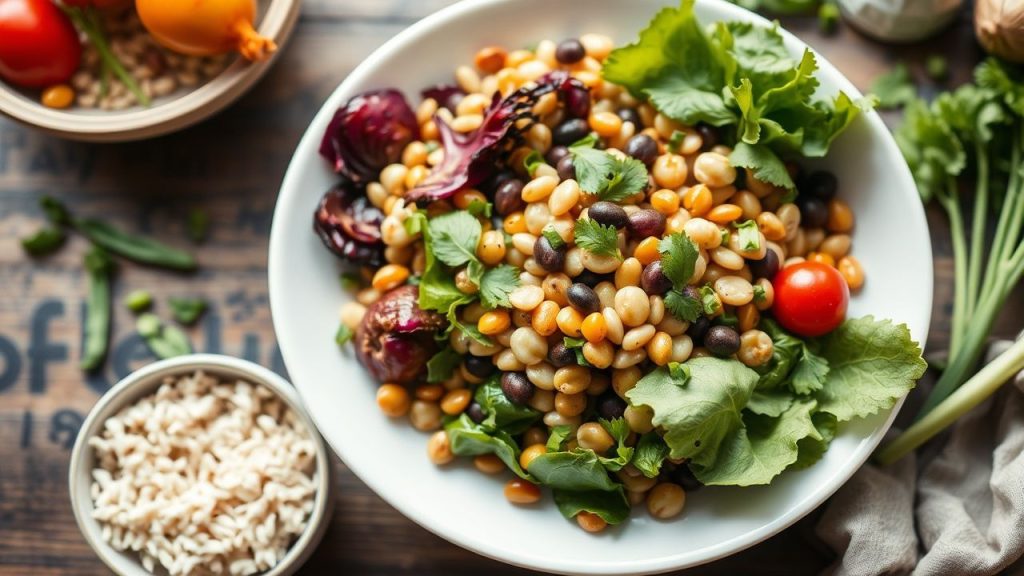
See also: umami
]]>