

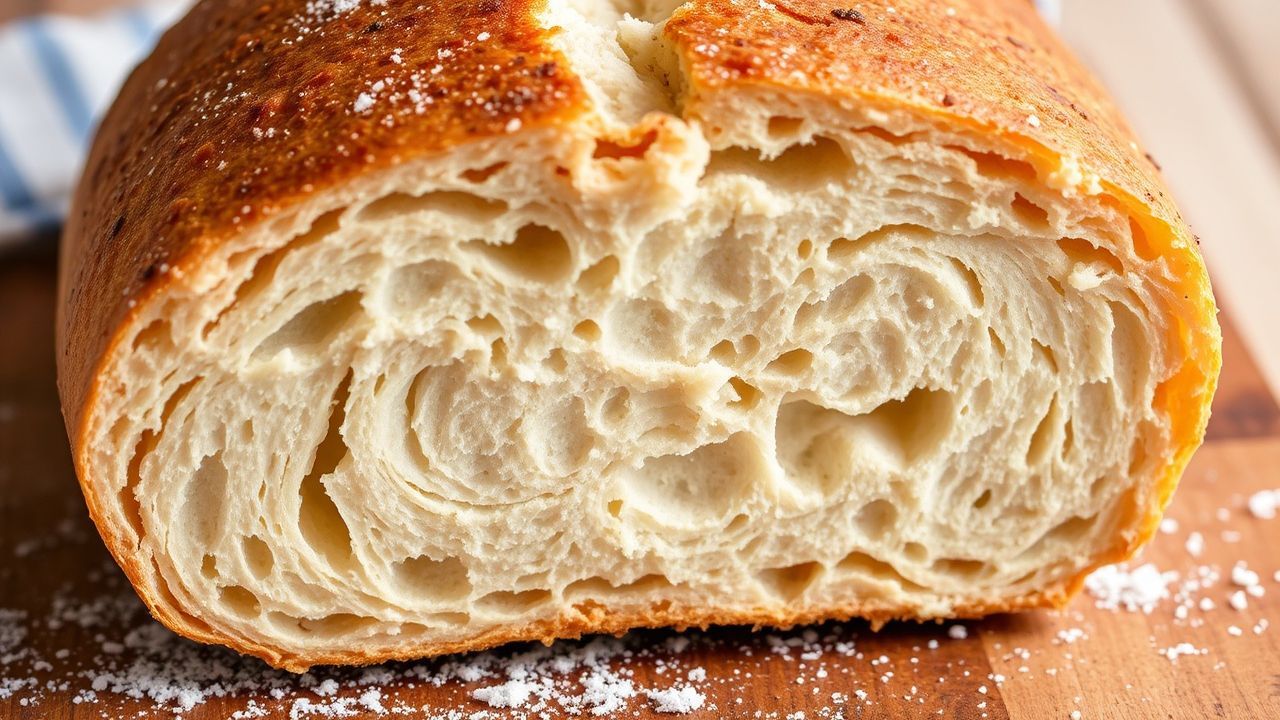
The warm, golden crust on freshly baked bread signals more than texture; it signals a set of chemical reactions that produce aroma and flavor. As a professional baker and food chemist, I will explain how heat, sugars and proteins collaborate to make that crust sing.
- Bread browning forms when heat transforms sugars and amino acids into dozens of flavorful compounds.
- Temperature, moisture, and ingredient mix determine the balance between caramelization and the Maillard reaction.
- Simple technique changes—steam, scoring, small amounts of sugar or honey—sharply alter crust color and taste.
- Controlling fermentation and flour protein improves both crumb and browning potential.
The chemistry behind bread browning
Bread browning stems from two main reactions: the Maillard reaction and sugar caramelization. The Maillard reaction requires amino acids and reducing sugars and produces a wide set of aroma compounds that bakers prize for toasty and nutty notes.
The Maillard reaction is well described in scientific literature. For technical background, see Maillard reaction. Caramelization, a separate thermal breakdown of sugars, also contributes to darker color and sweet-toasty tones; details appear on Caramelization.
Key factors that control browning
Four variables govern browning intensity: temperature, surface moisture, sugar availability, and protein content. Bakers adjust these to reach preferred crust color without burning.
Temperature speeds up chemical reactions, while moisture slows them until surface water evaporates. Protein level (gluten-forming proteins) supplies amino acids for Maillard pathways; learn more about gluten chemistry at Gluten.
Recipe, timing and ingredient roles
Preparation-active time and ingredient ratios influence the bread’s browning potential. A well-planned timeline yields consistent color and flavor.
Below are practical details for a standard loaf that highlights browning techniques while maintaining good crumb structure.
Prep and Cook Time
Preparation: 20 minutes. Keep hands efficient when mixing and kneading to retain temperature control.
Rising: 1 hour 30 minutes. Fermentation creates sugars and gases that shape flavor and surface reactions.
Baking: 30–35 minutes. Use an initial burst of steam, then finish in dry heat for crust development.
Total: About 2 hours 25 minutes depending on room temperature and dough strength.
Yield and Difficulty
Yield: 1 large loaf, serves 8–10. This scale produces a single surface area suited for controlled browning.
Difficulty: Medium. The methods require attention to fermentation and oven management, but they are reproducible with practice.
Ingredients
- 3 ½ cups bread flour, sifted
- 1 ¼ cups warm water (≈110°F)
- 2 tsp active dry yeast
- 1 tbsp granulated sugar
- 2 tsp fine sea salt
- 2 tbsp olive oil, plus extra for greasing
- 1 tbsp honey (adds fermentable sugars for better crust color)
Instructions
- Activate the yeast: Combine warm water, yeast and sugar. Wait 5–7 minutes until frothy; this confirms active fermentation.
- Mix dough: Combine flour and salt, then add the yeast mix, oil and honey. Stir until a rough mass forms; the honey boosts surface sugars that help caramelize.
- Knead: On a lightly floured board, knead 8–10 minutes until elastic and smooth. Kneading develops the gluten network so the crumb supports even browning.
- First rise: Oil a bowl and place dough inside. Cover and let rise in a warm spot about 1 hour, until doubled. Fermentation creates flavor precursors for Maillard chemistry.
- Shape and second rise: Punch down gently, shape into a boule, and place on parchment. Cover and rest 30–45 minutes for final proofing; avoid overproofing to keep surface sugars available.
- Preheat and prepare: Heat oven to 450°F (230°C). Place a pan on the lower rack to create steam during the first 15 minutes of baking.
- Score and bake: Slash the top to control expansion. Add hot water to the lower pan to generate steam, bake 15 minutes with steam, then remove pan and bake 15–20 minutes until deep golden.
- Cool: Transfer to a wire rack and cool at least 30 minutes before slicing; cooling completes interior setting and allows flavors to stabilize.
How technique alters chemistry
Steam delays crust setting and keeps the surface moist long enough for internal expansion. After steam ends, the surface dries and undergoes browning reactions more rapidly.
Scoring increases surface area and directs where the crust will expand, which affects heat exposure and browning patterns. Small changes in oven placement change localized temperatures and color development.
Techniques to enhance browning
Use honey or a small sugar addition in the dough to increase reducing sugar content. Brushing with egg wash or milk before baking adds proteins and fats that encourage more intense browning.
High initial heat followed by a slight drop can create a crisp, dark crust without burning the crumb. Monitor the oven and rotate the loaf if your oven has hot spots.
Experiment with flour blends. Adding 5–10% whole wheat or rye increases soluble sugars after fermentation and can deepen crust tone. However, whole grains absorb more water; adjust hydration accordingly.
Chef’s notes and troubleshooting
Temperature control: Use an oven thermometer to verify real temperature. Many home ovens run 10–25°F off the dial, which alters browning rates significantly.
Moisture balance: If you get pale crusts, reduce hydration slightly on the surface or shorten initial steam time. If crusts burn before crumb finishes, lower the rack or reduce initial temperature.
For longer flavor development, try a cold overnight proof. Extended refrigeration increases enzymatic sugar release and improves browning potential when baked. Read our in-depth guide on bread baking chemistry for lab-style explanations and practice protocols.
For technique primers, see our starter guide at basic bread techniques, which covers kneading, shaping and scoring drills useful for consistent crusts.
Serving suggestions and presentation
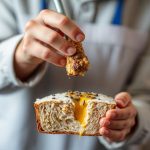
Slice warm for the best aroma and mouthfeel. A pat of butter highlights Maillard-derived savory notes, while herb oils pair well with toasty flavors.
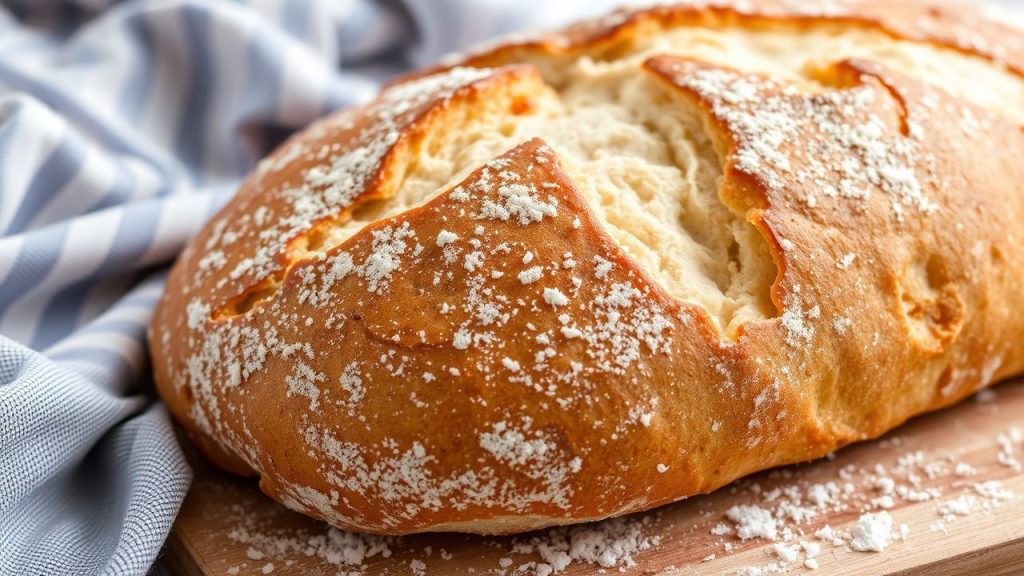
For a rustic finish, dust lightly with flour before baking and sprinkle few grains of coarse sea salt immediately on removal. Those small finishing touches increase sensory contrast and visual appeal.
| Nutrient | Per Serving (1 slice) |
|---|---|
| Calories | 140 kcal |
| Protein | 4 g |
| Carbohydrates | 28 g |
| Fat | 2 g |
Further reading and science links
For foundational context on bread as a cultural and chemical staple, consult the general overview at Bread. To explore fermentation mechanics that produce fermentable sugars, see Fermentation.
These sources clarify the basic science behind the processes discussed here and help you plan controlled experiments at home or in a test kitchen.
FAQ
What exactly causes the golden-brown crust?
The golden-brown crust results mainly from the Maillard reaction, where amino acids and reducing sugars react under heat to form browning pigments and dozens of flavor molecules. Caramelization of sugars also adds sweet, toasty notes at higher surface temperatures.
Does adding sugar always make bread browner?
Adding small amounts of sugar increases reducing sugars available for browning, which often darkens the crust. However, too much sugar raises the risk of burning, so use modest additions and adjust oven time and temperature accordingly.
How does moisture affect browning?
Moisture delays browning because water must evaporate before surface temperatures rise enough to trigger Maillard and caramelization pathways. Steam initially helps the loaf expand, then removing steam allows rapid browning.
Will different flours change crust color?
Yes. Higher-protein flours supply more amino acids for Maillard reactions, often producing richer crusts. Whole grains contribute additional sugars and phenolic components that can deepen color and add complexity.
How do I avoid a burnt crust while still getting good color?
Use high heat for a short initial period with steam, then lower or remove direct heat and continue in dry conditions. Monitor visually and rotate the loaf if your oven heats unevenly; keep a thermometer handy to ensure consistent results.
Mastering bread browning lets you control both appearance and layered flavor. With practice you will predict how small changes in ingredients and technique alter the chemistry and produce reliably delicious crusts.
See also: bread browning

